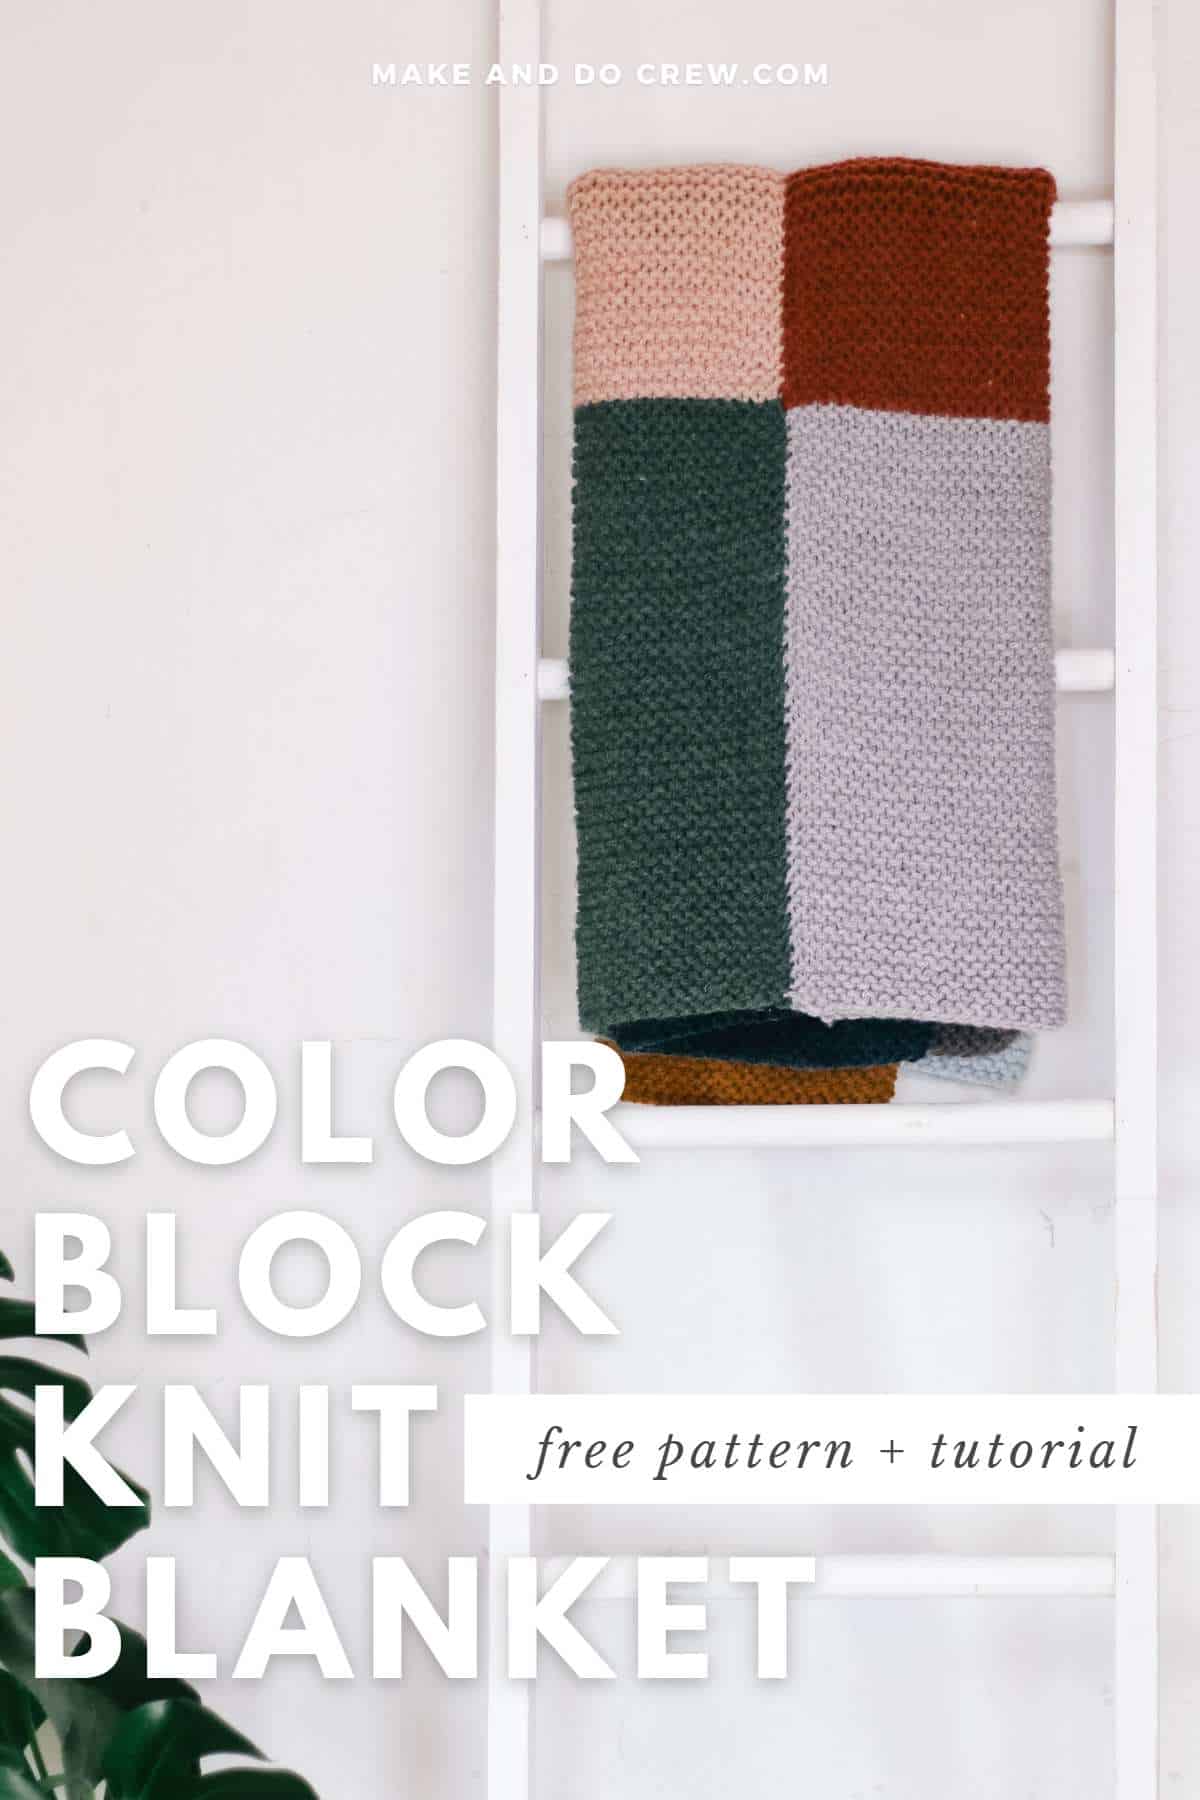
Learning how to knit a blanket might sound ambitious for a beginner, but it can actually be an easy and satisfying project.
Using straight knitting needles and basic stitches, you'll soon have a cozy, handmade knit throw blanket to wrap yourself in.
Follow our free beginner knit blanket pattern and tutorial below! Or, if you prefer a hard copy, you can purchase the ad-free, printable PDF.
This beginner throw blanket knit pattern is part of a collaboration with Lion Brand Yarns. This post contains affiliate links.
Jump to:
- What Kind of Knitting Needles For a Blanket?
- How To Knit a Large Blanket on Straight Needles
- Step 1. Choosing or Designing a Pattern
- Step 2. Choosing Materials
- Step 3. Knitting Your Blanket
- Step 4. Finishing The Blanket
- Nove Knit Blanket - Free Pattern
- How to Knit a Blanket With Circular Needles
- Blanket Variations and Stitches
- Beginner Knit Blanket FAQs
- Invitation to our Facebook group
- How to Knit a Blanket - Pattern Overview
What Kind of Knitting Needles For a Blanket?
Ready to dive into your first knit blanket project? Great! But first, let's chat about knitting needles. You've got options: straight or circular. Both are wonderful, but each shines in its own way.
Personal Tip: I've knitted blankets using both straight and circular needles, and I enjoy both experiences. Your choice should choose based on your pattern and what feels comfy in your hands.
Benefits of Circular Needles
Thinking of knitting a big cozy blanket? Circular needles might be your new best friend! Let's explore why:
- Space for Stitches: Circular needles have two tips joined by a flexible cable, making it a breeze to handle loads of stitches for those bigger projects like blankets and afghans.
- Comfort Matters:
- Less Strain: Many knitters (including me!) find that these needles ease wrist strain. How? The weight spreads out, usually resting across your lap. No more tired wrists!
- Versatility:
- Don't be fooled by the name. "Circular" doesn't mean you're stuck knitting in circles. You can knit just as you would with straight needles, working back and forth in rows.
Benefits of Straight Needles
You can also knit a blanket on straight needles. Here's how:
- Knitting in Bits:
- Divide & Conquer: Think of your blanket as a collection of parts instead of one big piece. Create smaller sections or strips and make a plan to join them together.
- Why I Love Straight Needles for Beginners in Particular:
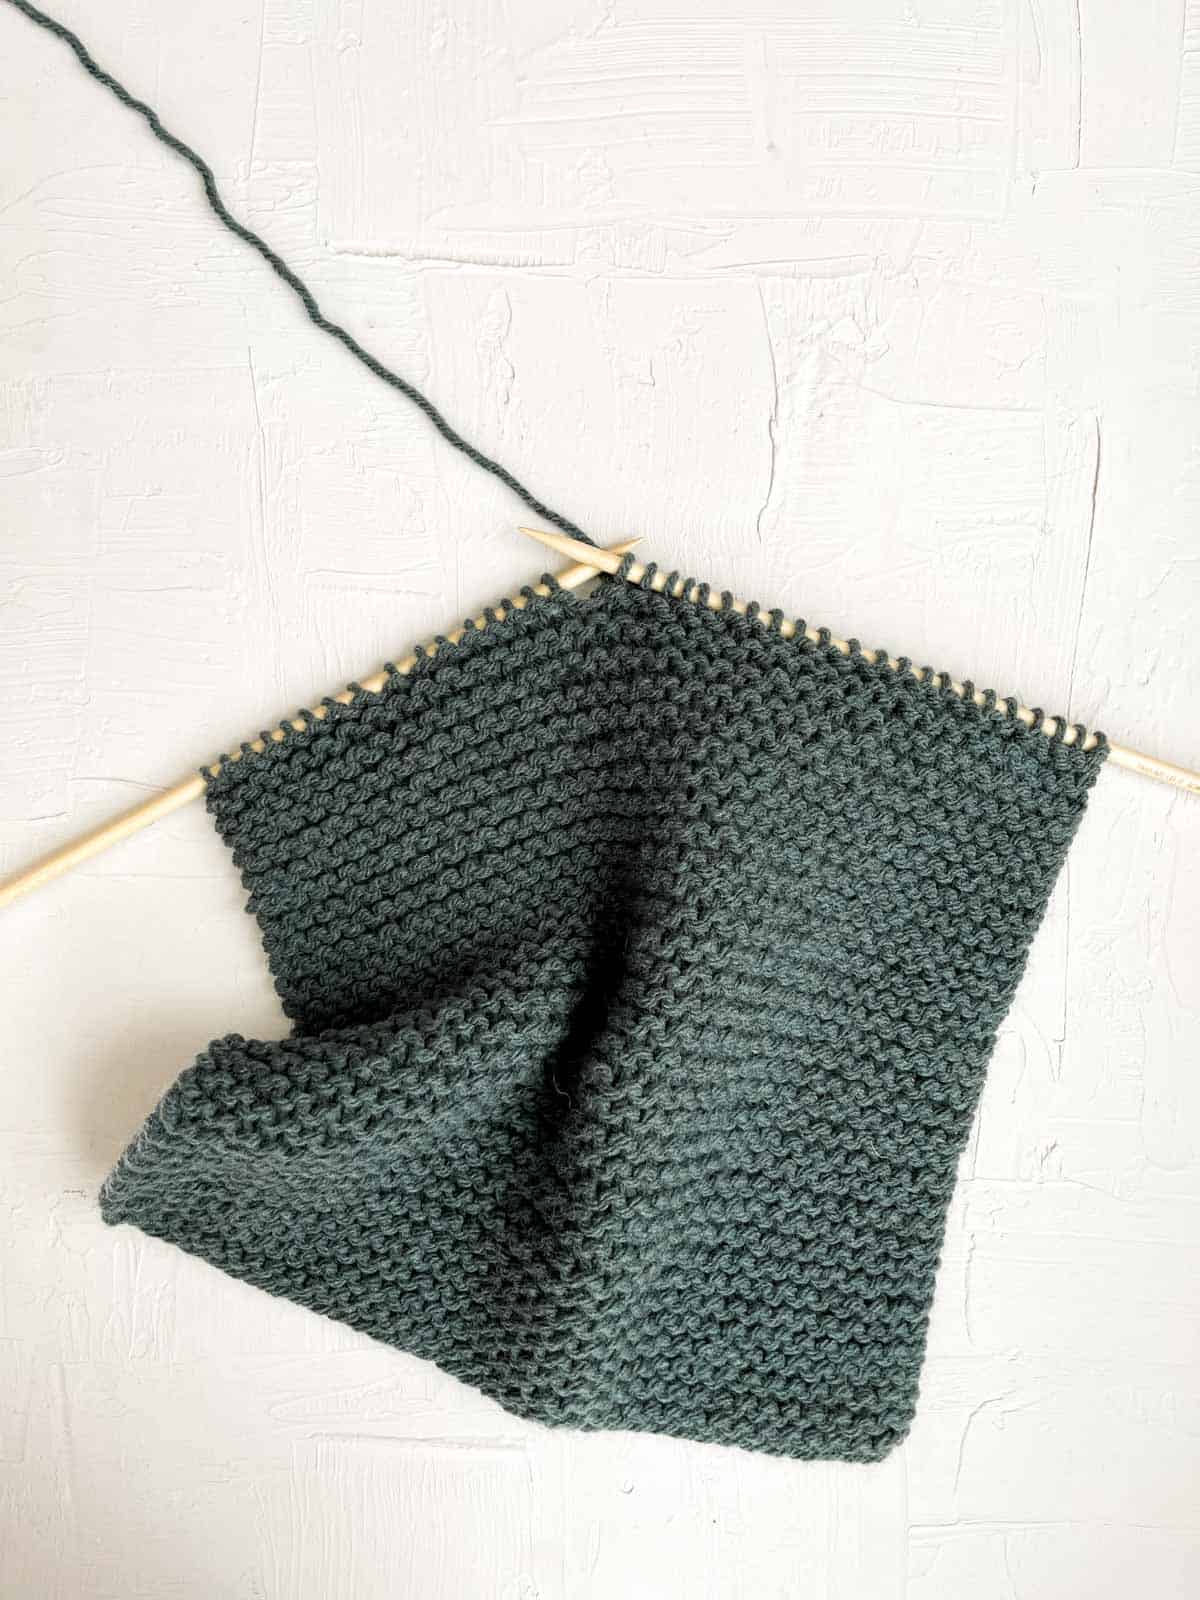
- Using straight needles to knit a blanket gives you a simpler, more piecemeal approach to afghan-making.
- Your needles won't feel overwhelmed by too many stitches. Plus, you'll get a little burst of joy with every strip you complete. It's like crossing things off a to-do list!
Related: How to knit an easy infinity scarf using straight needles
Why I Suggest Straight Needles For Beginners
Thinking of dashing off to buy some circular needles? Hold on to your yarn! Here's why I recommend starting with straight needles for your first blanket:
- Straight needles often feel less scary for beginners. They're straightforward and easy to handle.
- Your blanket is crafted in smaller sections. It's like knitting mini-projects!
- After completing each section, you'll bask in a lovely feeling of accomplishment. No staring at an endless sea of stitches!
- It's a step-by-step journey. No need to take on a big blanket project all at once.
How To Knit a Large Blanket on Straight Needles
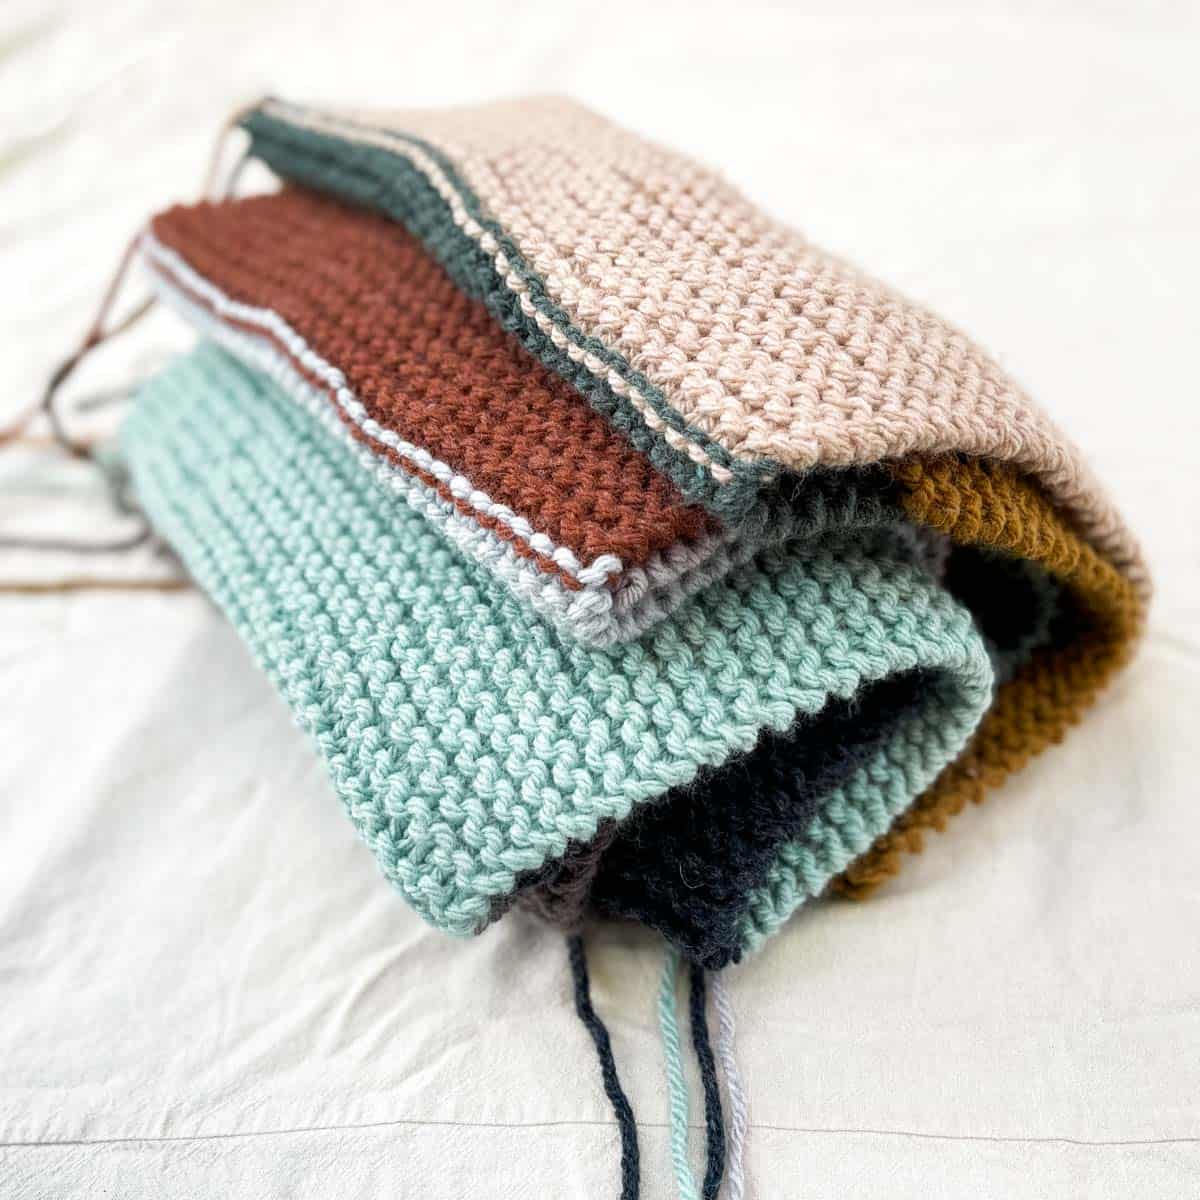
If you're thinking of creating a grand blanket using straight needles, here's a nifty trick to minimize those seams: knit your blanket in long, patchwork strips. By doing this, you craft separate pieces that reveal a beautiful, full-sized blanket when joined.
Here are the basic steps of knitting a blanket with straight needles.
Step 1. Choosing or Designing a Pattern
Start by seeking out designs labeled "easy" or "beginner."
Tip: Always glance through the pattern. Just to be sure it aligns with your comfort zone.
Before diving into your blanket-making journey, let's talk about some cozy considerations:
Blanket Size:
Afghans can range from petite lap blankets to majestic king-sized bedspreads. For your first project, how about a small throw blanket? It's the perfect snuggle size, and you'll see results quicker!
Blanket Construction:
Patterns knit as a single piece usually call for circular needles.
Bonus: No seams at the end, but each row takes a tad longer.
Opt for individual patches or strips to make use of straight needles. It's beginner-friendly and feels less overwhelming. This method is your buddy if you fancy knitting during commutes or travels.
Yarn Weight:
A pattern with thicker yarn zips by, crafting a chunky and snuggly blanket. But for a delicate baby blanket, this might feel a tad too heavy.
For beginner knitters, I recommend following the yarn weight specified in the pattern. It's a safe and sure way to ensure your blanket turns out just as you imagine!
Step 2. Choosing Materials
Before diving into your project, let's make sure you've got the right tools in hand. Here's a friendly guide to help you pick the perfect yarn and needles for your cozy creation:
Selecting Yarn
Choosing the right yarn is like choosing the heart and soul of your blanket.
- Texture & Thickness: Think about how you want your blanket to feel.
- Thinner DK weight yarn: Creates a flowing, drapey fabric. Perfect if you love gentle, light blankets!
- Thicker yarn: My top suggestion for beginners. It crafts a snug, warm blanket and guess what? You'll see your work grow faster, and there's nothing like that boost of motivation!
- Fiber:
- Look for choices like acrylic, cotton, or wool blends. They're not just soft and cozy but also a breeze to care for.
Here are some of my favorite yarns for knit blankets:
| Blanket Yarn | Weight | Why Knitters Love It |
|---|---|---|
| Lion Brand Mandala | DK - CYC #3 | Color changes with fewer ends to weave in |
| Basic Stitch Anti-Pilling | Worsted Weight - CYC #4 | Washable, wears well without pilling |
| Hue + Me | Bulky / Chunky - CYC #5 | Gorgeous mix-and-match color palette |
| Wool-Ease Thick & Quick | Super Bulky - CYC #6 | Visible stitch definition and quick progress |
Picking Needles
Straight or Circular?: We covered this in more detail above. Both have benefits. Pick what feels right for your blanket journey.
Wondering how to pair your needle with your yarn? Peek at the yarn label or consult your pattern.
Remember, we're all unique knitters with our own personal tension. That's why gauge (that's just a fancy word for knitting tension) varies. If you're struggling to meet the pattern gauge, don't feel tied to the needle size recommended in the pattern. Adjust your needle size up or down.
Additional Supplies:
Here are some nifty tools to keep in your knitting bag:
- Stitch Markers: Think of them as your knitting bookmarks! They'll help you keep tabs on your rows and stitches. A tip for newbies? Pop one every ten rows. This little trick will be a lifesaver if you need a quick row recount.
- Tape Measure: Keep this close! You'll want to check your gauge and see how your blanket is shaping up. It's all about getting the size just right.
- Yarn or Tapestry Needle: It's the chunkier, yarn-friendly cousin of the regular sewing needle. Perfect for joining blanket sections and tucking in those yarn ends.
Step 3. Knitting Your Blanket
You've got your pattern and all your cuddly yarn ready. So, let's dive into the real fun: casting on and starting your blanket journey!
I'm a fan of the long-tail method. If you're whipping up a big, cuddly blanket with lots of stitches, here's a tip: Leave a super-long tail. Think about making it around four times the width of your planned blanket. It ensures you don't run out of yarn before you've cast on all your stitches.
Step 4. Finishing The Blanket
Now, as we approach the finish line, let's tie up those loose ends (literally) and wrap up your beautiful blanket. Here's how:
Casting Off:
- Straight Needles: Every strip you knit will need casting off. A little tip from me: Leave a generous tail. Why? It can be super handy for joining strips later on, and it means one less tail to tuck away later!
- Circular Needles: Hang tight until your blanket reaches your dream size. Then, cast off just once, and voila!
Joining Pieces:
So you've got these lovely strips or panels ready? Let's join them into one larger knit blanket. Here's are a few joining techniques I recommend:
- Blanket Stitch: A great go-to method. This stitch not only secures your pieces tightly but looks neat too.
- Exploring Other Techniques:
- Mattress Stitch: Another tidy way to join.
- Whip Stitch: Quick and easy!
Remember, your pattern might have a preferred method listed. If one technique isn’t giving you the look you love, don't be afraid to explore others.
Weaving in Loose Ends:
Grab your yarn needle and thread in any loose yarn tails. Gently weave them through the garter stitches, moving along with your stitch pattern.
After several back-and-forths, snip off the extra bit with scissors. You'll do this for every loose end you find.
Blocking:
If you've used acrylic yarn, your knit blanket may not need to be blocked. But for some blankets, it can be a magical touch! It helps to lay everything nice and flat, straightening edges and making seams nearly invisible.
Nove Knit Blanket - Free Pattern
Pattern Introduction
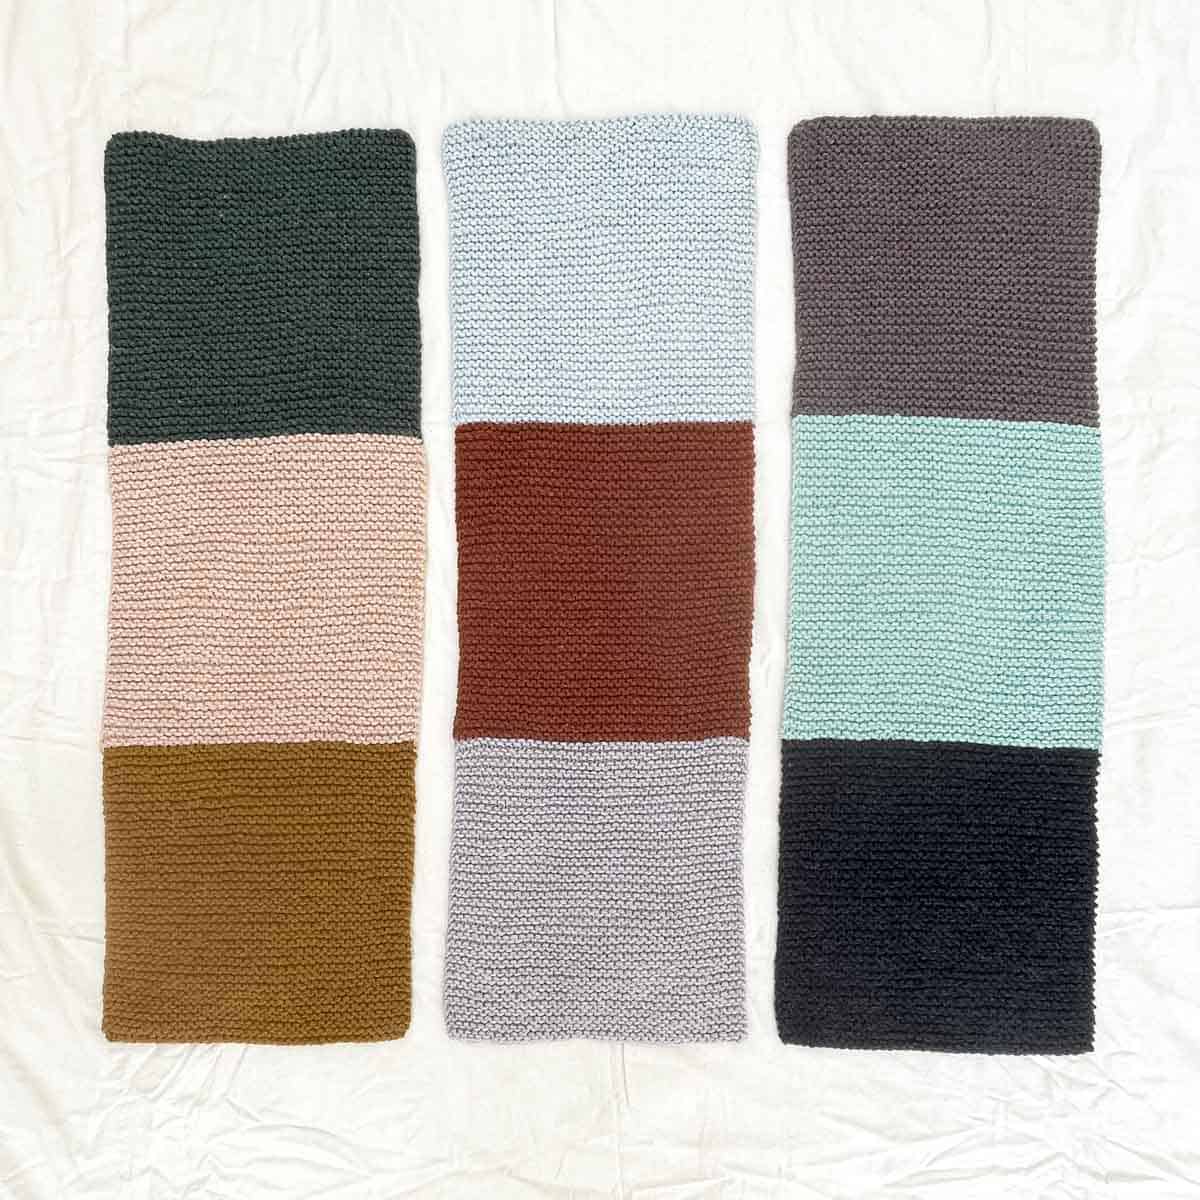
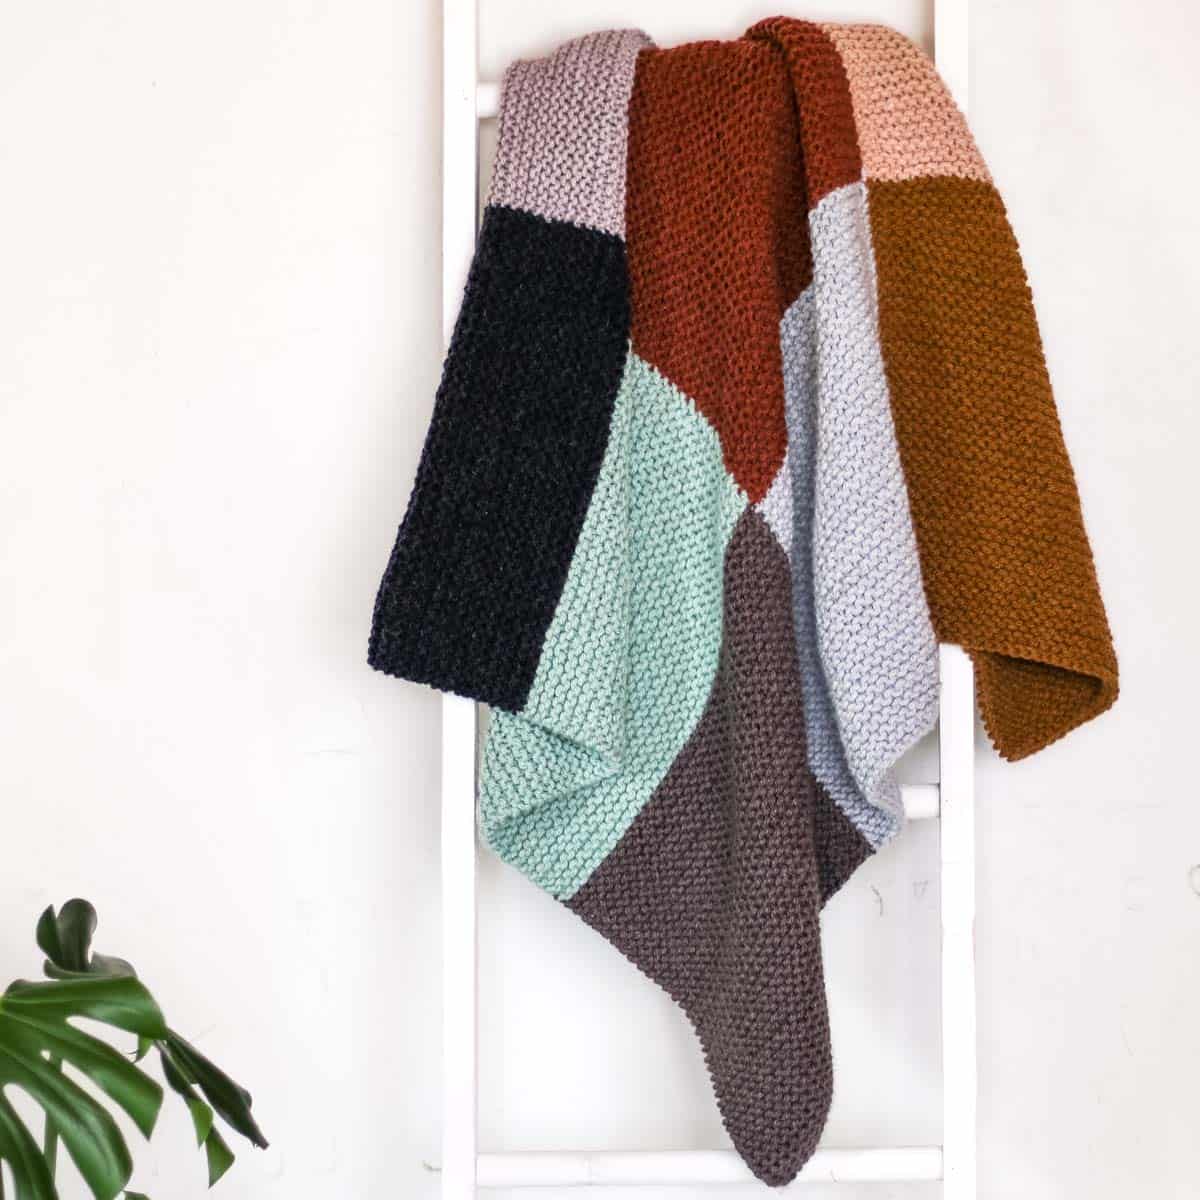
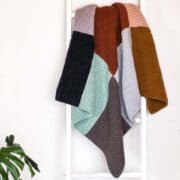
Nine bold color block squares make this beginner knit blanket a modern statement piece. The patchwork pattern is created in three strips, allowing you to comfortably knit a blanket with straight needles while eliminating much of the seaming.
You’ll practice garter stitch, changing colors, and basic seaming techniques in this beginner pattern.
Skill Level
Dive into this easy knit blanket pattern, tailor-made for those budding knitters ready to take their next confident step.
All-in-One Knitting Kit
If you don't live near amazing yarn stores or if you just like to get fun packages in the mail, the all-in-one kit is a perfect way to knit your Nove Blanket. This bundle from Lion Brand includes all the Hue and Me yarn you'll need, plus a bonus printable PDF of the pattern (delivered digitally).
Supplies + Materials
Order an all-in-one kit from Lion Brand here.
• Lion Brand Hue and Me (Weight: 5/Bulky - 137 yds, 4.4 oz/125 g)
- Color A: Juniper [617-178AA] - 1 skein (approx 92g)
- Color B: Desert [617-099U] - 1 skein (approx 92g)
- Color C: Arrowwood (617-132AA) - 1 skein (approx 92g)
- Color D: Ozone [617-105AQ] - 1 skein (approx 92g)
- Color E: Spicy (617-134) - 1 skein (approx 92g)
- Color F: Haze [617-144AH] - 1 skein (approx 92g)
- Color G: Shadow [617-150AZ] - 1 skein (approx 92g)
- Color H: Sea Glass [617-172S] - 1 skein (approx 92g)
- Color I: Peacoat (617-110AU) – 1 skein [(approx. 92g)]
• Size 11 (8 mm) straight knitting needles or size needed to obtain gauge
Measurements
48 x 48”
Gauge
9 sts x 18 rows = 4” as worked garter stitch (knit every stitch)
Abbreviations + Glossary
k - knit
RS - right side
sts - stitches
Print This Pattern
Prefer to crochet on the couch? Need a portable, printable pattern? You'll love the premium PDF! The instantly downloadable, ad-free file is formatted for easy printing and includes the complete pattern, all the photo tutorials, and the color planning chart.
Permissions + Copyright:
Please do not publish or share this pattern as your own. You may make items to sell with this pattern. In exchange, please link back this post. Do NOT use our photos as your own sales photos.
Overall Pattern Notes
- Whether you love your straight needles or fancy circular ones, both will do the trick for this pattern.
- Stitch the blanket in exciting strips and then join them at the finish line. And hey, why not play with colors? Mix it up to create a dazzling display of stripes, both thick and thin.
- If you find yourself scratching your head over counting those garter stitch rows, don’t worry! Check out this helpful video for a clear walkthrough.
Print This Pattern: purchase the ad-free, printable PDF
!! Gauge Check !!
This step is important because it will ensure you can knit a complete square without running out of yarn.
Leave a 20” length of yarn, then create a slip knot and place it on the shaft of one needle. The slip knot counts as one stitch.
Wanna save this pattern?
Using the long-tail technique, loosely add 15 more stitches. This should leave you with a total of 16 stitches (sts).
Row 1: Simply knit every stitch.
Rows 2-24: Continue knitting each stitch.
After you're done, take a moment to measure the middle four inches of your swatch both vertically and horizontally. Then, match it up with the pattern gauge mentioned above.
- If there are too many stitches or rows in those 4 inches, go up a needle size and test again.
- If you're falling short on stitches or rows in the same space, opt for a smaller needle and give it another whirl.
Want some company while you knit?
Get support (and camaraderie!) in the Make & Do Crew Facebook Group.
Premium PDF
easier and faster with fewer mistakes.
- Complete pattern + photo tutorials
- Instant download
- Formatted for easy printing
Blanket Strips
Notes:
- Each block of color contains an even number of rows. Therefore fastening off always takes place on the same edge of the strip.
- To recreate the look of the knitted blanket pictured, use colors A-I in the order outlined below.
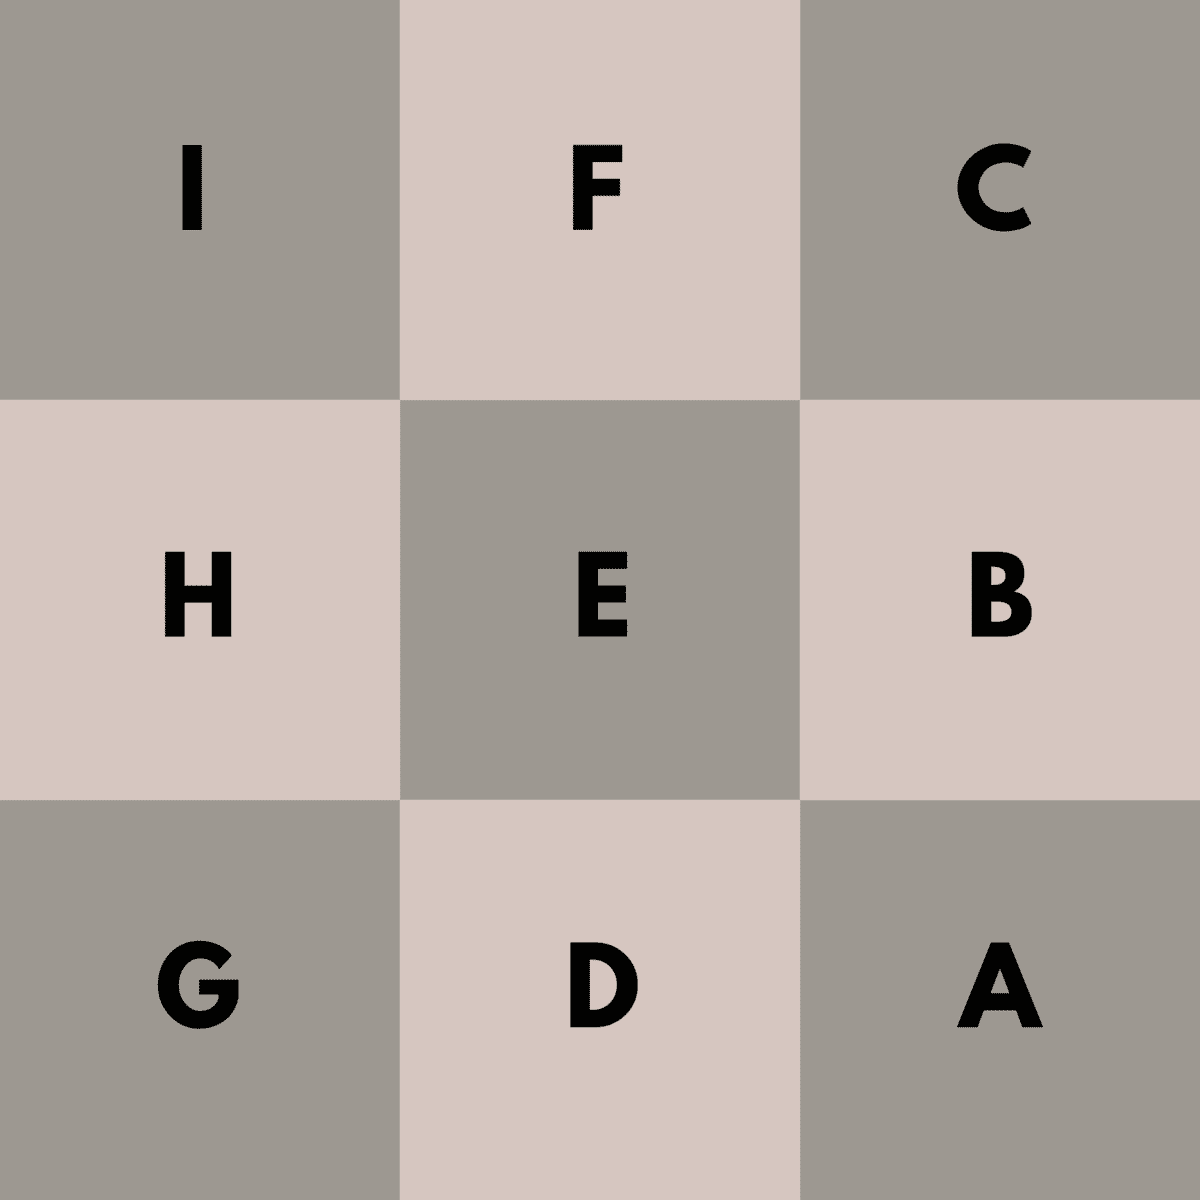
To Knit Strip #1:
With Color A: Leave a 45” yarn tail. Make a slip knot and slide it onto your needle. This counts as your first stitch.
Using the long-tail cast on method, add 37 more stitches. You'll have a total of 38 sts.
Row 1: Knit each stitch.
Rows 2-70: Knit each stitch.
Rather than counting individual rows of garter stitch, you will probably find it easier to count the “ridge” made by two rows. When the piece has 34 “ridges,” knit one more row before switching to the next color. On the right side, each finished color block should include 35 “ridges.”
Cut Color A leaving a 36” yarn tail for joining.
Pick up Color B. Repeat Rows 1-70.
Cut Color B leaving a 36” yarn tail for joining.
Pick up Color C. Repeat Rows 1-69.
Final Row: Cast off knit-wise. Cut Color C leaving a 36” yarn tail for joining.
To Knit Strip #2:
Repeat as with Strip #1 using colors: D, E, and then F.
To Knit Strip #3:
Repeat as with Strip #1 using colors: G, H, and then I.

Joining Blanket Strips Together
Notes:
- Existing yarn tails left from fastening off are used for seaming. Use tail that matches one of the two colors of the blocks being joined. For example, when joining blocks A and D, use Color D tail.
Arrange strips as desired with RS facing.
To Join Strips #1 and #2: Use stitch markers to pin edge of Color A block to edge of Color D block. Take care to line up each garter stitch ridge when pinning. With existing yarn tail and tapestry needle, seam edges together.
The edge of each garter stitch ridge includes two loops: one is slightly below and one is slightly above. By working into the alternate top and bottom stitch loops, the seam is nearly invisible. It's like a fun knitting camouflage trick.
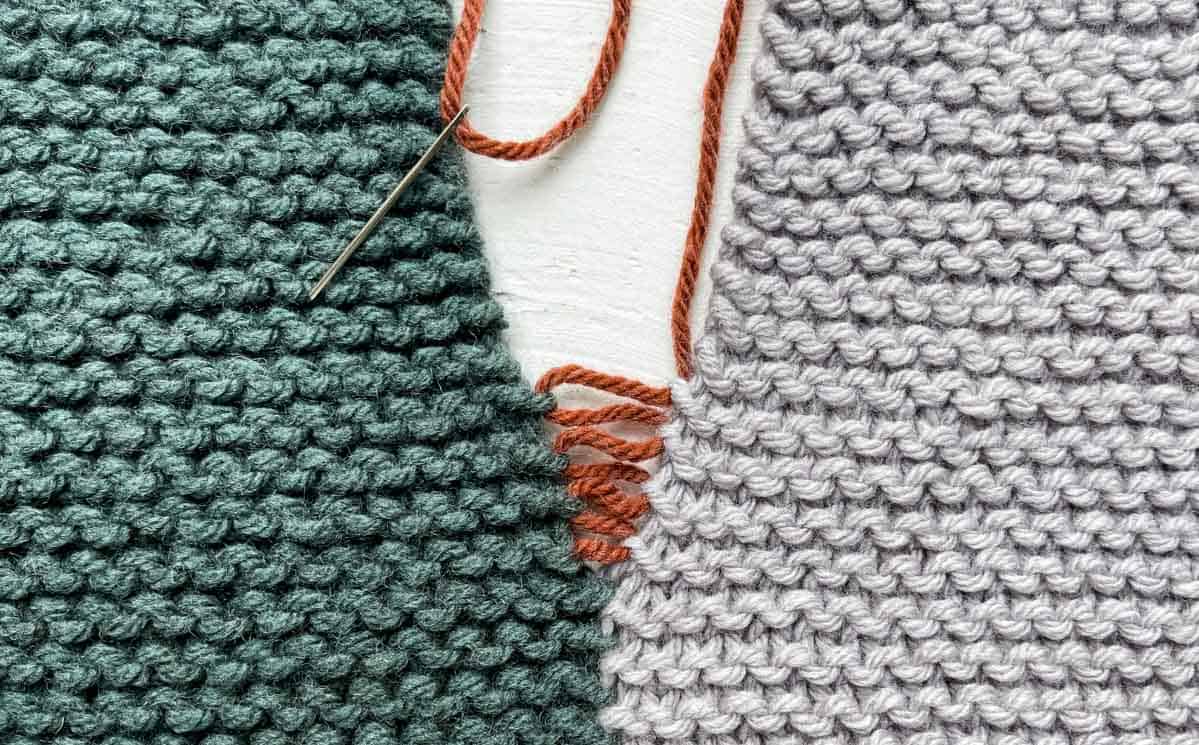
To Seam:
Insert yarn needle into the bottom edge loop on one side, then into the top edge loop of the corresponding stitch on the other side.
Continue to alternate this way until these color sections only are joined. While yarn is threaded on needle, weave in end thoroughly and cut off remaining tail.
Pin edge of Color B block to edge of Color E block. Repeat seaming process.
Pin edge of Color C block to edge of Color E block. Repeat seaming process.
Join Strip #3 to edge of Strip #2 using same process.
Weave in any remaining yarn tails.
That’s all there is to knitting a blanket! Pretty easy, huh? Now we’ll cover a few ways to modify this basic beginner pattern.
How to Knit a Blanket With Circular Needles
Eager to knit a blanket but not a fan of straight needles? Or maybe seaming's not your cup of tea? Well, here's some good news! You can also knit this beginner blanket using 32” circular knitting needles.
This approach involves keeping three balls of yarn attached at once.
Here’s how to knit this afghan pattern using circular needles:
- Casting on: Because you’ll be working all three strips at once, cast on the total number of stitches for the entire blanket width. In this case, you’ll cast on 38 stitches in the first color, then 38 stitches in the next color, and finish with 38 stitches in the third color.
- Beginning the blanket: Knit each stitch across the row, using the appropriate color for that section. Do not fasten off each color as you finish that section of the row. Instead, keep it attached for when you pick it up again in the next row.
- Continuing knitting: When your color blocks measure the same width and height, you’re ready to switch to three new colors. Cut the first three balls of yarn, leaving 15” tails for weaving in. Begin knitting the next row using a new color in each section.
Blanket Variations and Stitches
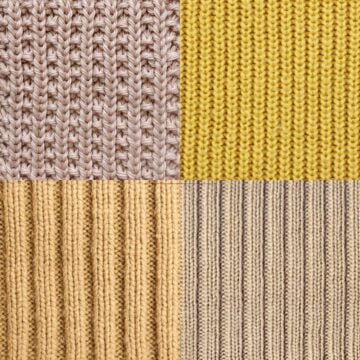
Mastered the basics of knitting a blanket? Awesome! Now let's get creative. The beauty of this basic blanket formula is its flexibility. Whether you're dreaming of king size afghan or a small baby blanket, you've got options.
Stockinette Blanket
Stockinette gives you that classic, smooth fabric look on one side (we call this the "right" side) and a textured, bumpy feel on the other (yep, that's the "wrong" side).
Because stockinette stitch tends to curl, it works well to alternate one “square” of right side texture and a square of wrong side texture. Try using a solid color throughout to make a classic blanket with the look of a quilt.
The corners of a stockinette blanket will still curl, even when worked in a patchwork pattern. Blocking your blanket or adding a crochet border can help it lay flat.
Seed Stitch Blanket
Seed Stitch is like the playful cousin in the simple knit stitches family. It's all about texture and fun!
This easy, textured pattern is created by alternating knits and purls within the same row, and then reversing the order on the next row.
Play with the frequency of changing colors to create a “scrappy,” modern-looking pattern. By knitting strips of seed stitch in alternating colors, you can make an easy knit blanket using straight needles.
Chunky Knit Blanket
To create a chunky knit blanket with straight needles, use bulky or super bulky yarn and large needles to follow the basic garter stitch blanket pattern shared above. I suggest Wool-Ease Thick & Quick with size #13 (9.0 mm) knitting needles.
Because thicker yarn will create an even larger blanket, reduce the number of stitches you cast on for each strip if you want to make a smaller lapghan or baby blanket.
Don’t have any thick yarn in your stash? Try holding multiple strands of yarn together. One of my favorite yarns to use for this faux-chunky-yarn technique is Lion Brand’s Pound of Love. It’s economical, even when holding two or three strands together.
Common Blanket + Afghan Sizes
Here is a guide to the most common knit blanket sizes. (Keep in mind these are general guidelines and most afghans will fall somewhere between these measurements.)
If you’re new to knitting, I recommend starting with a smaller-sized blanket, no larger than a throw.
Note: These are general guidelines. Real-life afghans might vary slightly, finding their cozy spot between these measurements.
Beginner Knit Blanket FAQs
To knit a blanket with straight needles, the key is to knit thinner strips or pieces of your blanket. These strips will come together like pieces of a puzzle to form your snuggly creation.
By using an invisible seaming method, you'll seamlessly (pun intended!) join the strips. This approach is especially fantastic for beginners. It simplifies the process and lets you focus on the joy of knitting.
The amount of yarn you need depends on the size of your blanket and the knit pattern you're following. For a snugly throw blanket, which is the average size, you'll generally require around seven to ten skeins of worsted weight or aran yarn.
If you're diving into blanket making as a beginner, the garter stitch is your trusty companion. This stitch is as easy as a warm hug! All you need to do is knit every single row of your blanket.
As you knit along, you'll create a charmingly textured fabric that's wonderfully reversible – no "right" or "wrong" side.
That was so fun! Now what?
Invitation to our Facebook group
Share your journey learning how to knit blankets and any other knitting projects and techniques in our Make & Do Crew Facebook group. Here thousands of helpful crafters answer each other's questions and share their stitches. Join us!
How to Knit a Blanket - Pattern Overview
Materials
Yarn
- Lion Brand Hue and Me Weight: 5/Bulky - 137 yds 4.4 oz/125 g
- Color A: Juniper [617-178AA] approx 92g - 1 skein
- Color B: Desert [617-099U] approx 92g- 1 skein
- Color C: Arrowwood [617-132AA] approx 92g - 1 skein
- Color D: Ozone [617-105AQ] approx 92g - 1 skein
- Color E: Spicy [617-134] approx 92g- 1 skein
- Color F: Haze [617-144AH] approx 92g - 1 skein
- Color G: Shadow [617-150AZ] approx 92g - 1 skein
- Color H: Sea Glass [617-172S] approx 92g - 1 skein
- Color I: Peacoat [617-110AU] – 1 skein [approx. 92g]
Additional Supplies
- Size 11 8 mm straight knitting needles or size needed to obtain gauge
- Tapestry needle
- 10 stitch markers
Abbreviations + Glossary (US Terms)
- K – knit
- RS – right side
- st(s) – stitch(es)
Abbreviations and Glossary (US Terms):
Want some company while you crochet?
Get support (and camaraderie!) in the Make & Do Crochet Crew Facebook Group. Search “Make and Do Crochet Crew” on Facebook.com.
Permissions + Copyright
Please do not publish or share this pattern as your own. You may make items to sell with this pattern. In exchange, please link back to this page. Do NOT use my photos as your own sales photos.
Overall Pattern Notes
Instructions
How to Knit an Easy Beginner Blanket Pattern
- Choose your yarn and needles: Think about how big and warm you want your blanket to be. That'll help you decide on the right yarn weight. Your needles should match your yarn's weight. Thicker yarn, bigger needles; thinner yarn, smaller needles. This harmony ensures your stitches look just right.
- Cast on your stitches: With your yarn and needles in hand, it's time to cast on! This is like creating the first thread of your adventure. Think about how wide you want your blanket strips to be. Each strip is like a colorful brick in your cozy creation. The number of stitches you cast on decides the width of your strip and, ultimately, the size of your whole blanket.
- Knit garter stitch for each strip: Garter stitch is like your trusty friend – just knit every single row. As you knit away, you'll notice the fabric forming a charming texture that's soft and reversible. Your garter stitch masterpiece will have a fantastic drape, making it just perfect for snuggling up.
- Track your progress: Introducing your trusty sidekicks – stitch markers! Place them at the end of each section or wherever you want to keep count. Use stitch markers or a row counter for each strip, making sure they all have the same number of rows.
- Cast off your stitches: Just as you've woven tales into every stitch, now it's time to let them take a bow. Start by knitting the first two stitches. Repeat this process until only one stitch remains. Give it a gentle tug to secure.
- Join the strips: You've knit all your strips. Now, it's like putting together the pieces of a puzzle. Mattress Stitch: This method gives you an almost invisible seam. It's especially fantastic for garter stitch pieces, blending stitches seamlessly side by side.Whip Stitch: The whip stitch is straightforward and gets the job done in a jiffy. Great for beginners and perfect when you're eager to see your blanket come together.Three-Needle Bind Off: This technique is like magic! It binds off and joins strips at the same time. A tiny ridge appears on the front, adding a lovely textured detail.
Overall Pattern Notes
- Whether you love your straight needles or fancy circular ones, both will do the trick for this pattern.
- Stitch the blanket in exciting strips and then join them at the finish line. And hey, why not play with colors? Mix it up to create a dazzling display of stripes, both thick and thin.
- If you find yourself scratching your head over counting those garter stitch rows, don’t worry! Check out this helpful video for a clear walkthrough. https://youtu.be/fhAdP8bvcCU


Leave a Reply