 When my parents were visiting, my mom and I dropped into a fabric store “just to see if we could find any inspiration.” (The place we went is called Quilting Adventures. Don’t you love that name? Makes me picture good-natured, rosy-cheeked grandma just having a heck of a good time sewing up a storm.)
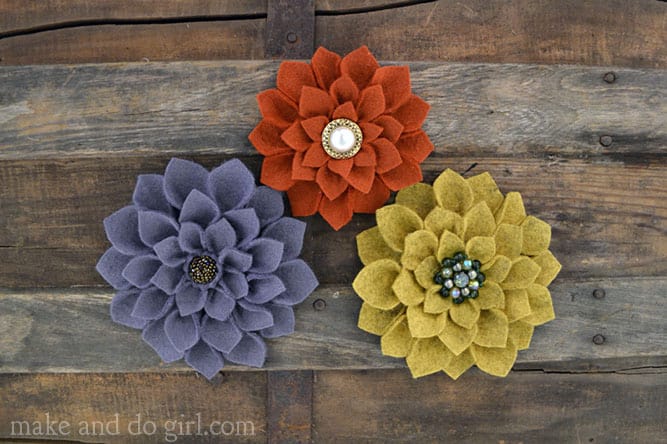
Well, who enters a place called Quilting Adventures and doesn’t find any inspiration? Not these girls. We happened upon this awesome wool felt in colors that had fall written all over them.
I had seen some DIY felt flowers around the internets for a while now and always wanted to try to make some. They are adorable and seemed perfect to pin to a sweater, a purse, a cowl a headband, a toaster. Okay maybe not a toaster, but you get the idea. They’re cute EVERYWHERE!
I explained how I thought we’d go about making them to my mom (which was really more of a formality—she’s not one to turn down a project, familiar or foreign.) And there in the middle of Quilting Adventures, we decided it was time for our felt-y garden to begin to grow.
Related: How to Crochet an Easy Flower Granny Square
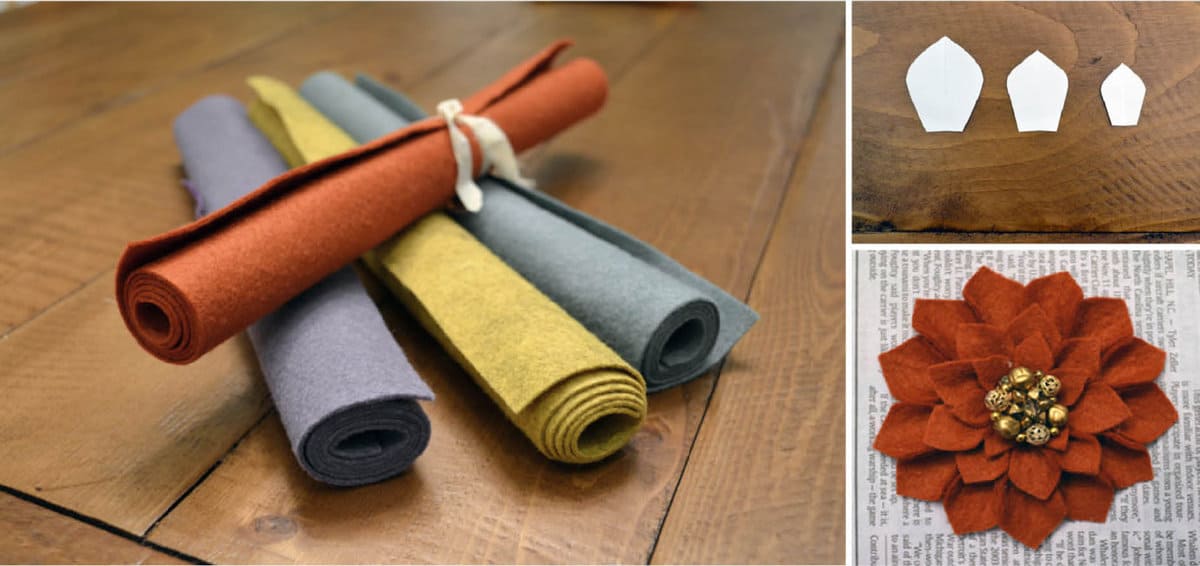 Here are the ingredients you need to get your own DIY felt flowers blooming:
1. This Make and Do Girl template for the petals and flower foundation (DIY_Felt_Flower_Template)
2. Felt (Ours came in 12”x18” pieces and there’s more than enough to make a few flowers out of one piece. We used 100% wool felt, but you could use any kind of felt depending on how flexible or stiff you want your petals to be.)
3. Scissors
4. Hot glue gun and glue
5. Paintbrush or something with a similar tip at the end (a pen or screwdriver would work)
6. Thin cardboard (from a cereal or shoe box)
7. Button, clip-on earring or bead for the center of the flower
8. Pin, barrette or comb for the back of the flower
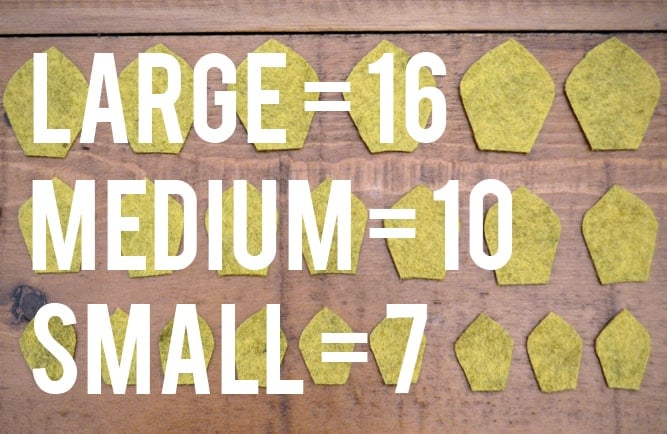
Begin by printing the DIY_Felt_Flower_Template. Print it at 100% if you want to make flowers the same scale I did (about 4.5-5” wide petal-to-petal) or resize it if you want your flower to be bigger or smaller. If you resize it, you may have to adjust how many petals you cut of each size.
Here are the number of petals of each size I needed for the largest yellow flower.
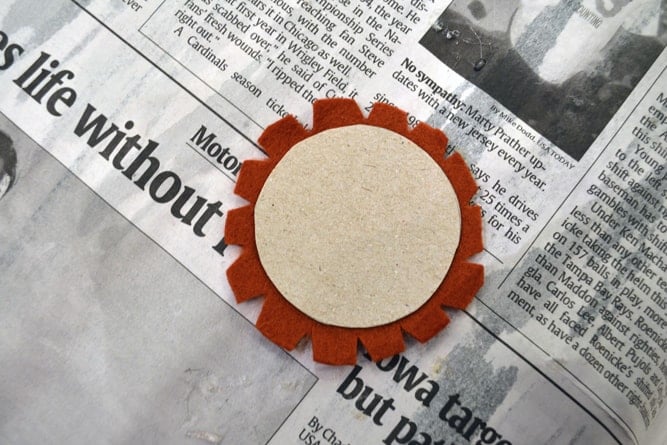
Use the circle template to cut the cardboard for the back of the flower as well as the two circles of felt. Snip the felt backing for it as pictured and glue it to the cardboard and then glue down the little tabs of felt around the edges.
Wanna save this pattern?
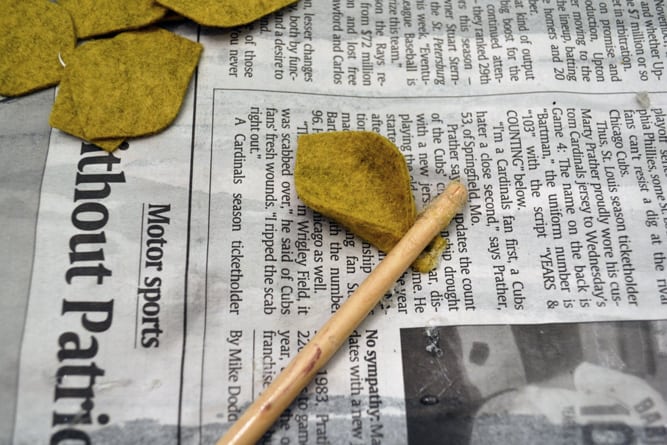
Use a very small amount of hot glue to secure pleats in all the felt petals. We used the end of a paintbrush to hold the pleat while it was cooling. Anything but your finger will work!
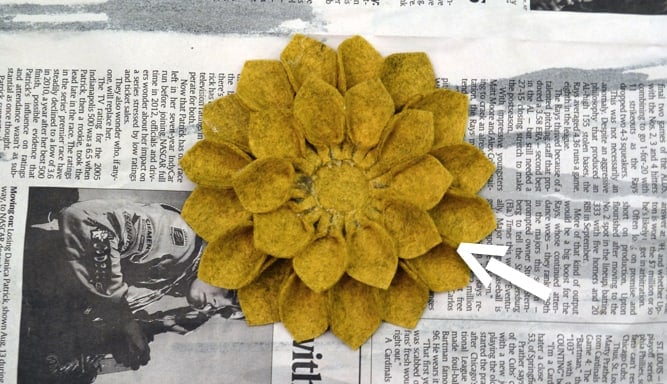
Once you have all your petals glued, it’s time to start adhering the largest ones to the circle base. Apply a bit of glue to the circle and press the petal down about ¼” from the circle’s edge. Continue this way, making sure there are no gaps between your petals.
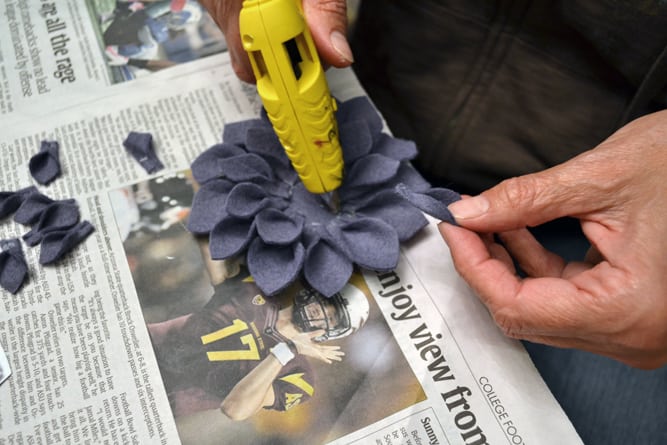
Now it’s time to finish off the back of your pin/hair piece/etc. Either sew or glue your barrette, pin or comb onto the circle of felt you cut previously. Then glue that circle onto the back of your flower.
Turn that puppy back around. Now it’s time to accessorize! We tried several centers for our flowers until we found just the perfect accents.
In the purple flower, my mom used a beaded button she picked up at a knitting store. I think it actually looks a lot like the center of a real flower, minus all the allergy-inducing pollen. For the yellow one, I used a clip-on earring I bought at a street festival this summer. I just peeled off the clip-on part and was left with this beautiful beaded fanciness. The center of the orange flower is pearl button. It’s interesting how the style of the center really transforms the look of the flower.
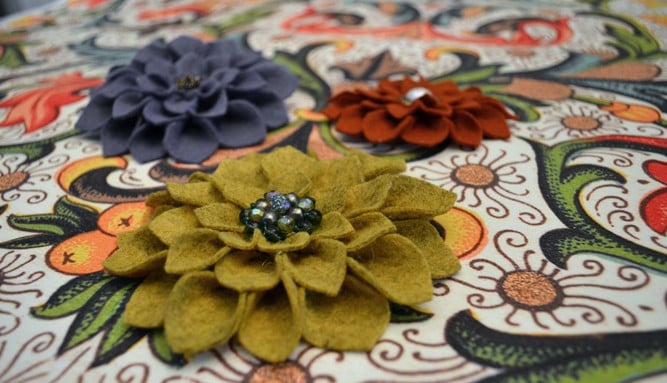
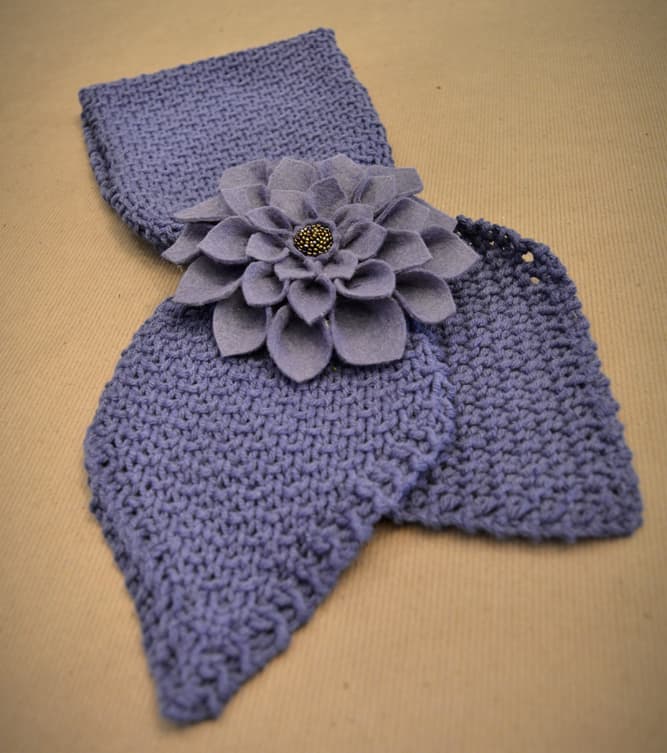
My mom used her purple felt flower as a cute little accent on her Anthro-Inspired Scarflet.
I think these would also make awesome adornments to headbands or even as the foundation of a fascinator like this.
There are so many ways to wear these little felt flowers! They’d make perfect DIY Christmas presents. Or bridesmaids gifts. Or What-The-Heck-It’s-Tuesday treats.
I found awesome inspiration for this project here. If you use this felt flower tutorial, leave me a comment and I’ll link to your photos!


Kat says
These are so cute and I love your felt colors! Where did you find them? I’m going to attempt them today for a family photo shoot coming up! I’m hoping this cute flowers will mask the not-so-cute dress my daughter has to wear! Thanks for the tutorial!
Make and Do Girl says
Hey Kat! I think these flowers could mask a lot of things, but I’m sure you’re daughter’s dress isn’t that bad. I got my felt at a local store in Richmond called Quilting Adventures. Any fabric store should have some felt options though. I used 100% wool, but polyester felt would also work. Hope you enjoy and good luck with the photo shoot!
Make and Do Girl says
Awesome! Thanks, Dee!
Kias Gockman says
Hi! where do you get your felt? I love the colors! Great tutorial!
Make and Do Girl says
Thanks Kias! I got the felt at a store in Richmond called “Quilting Adventures.” I have seen similar felt at Joann’s and Hancock Fabrics though. This felt was 100% wool. It worked beautifully and I think it’ll be more durable than polyester felt, although I’ve seen that look pretty good also. Good luck!
Lauren says
LOVE this tutorial! I must admit though – I gave up on using an apparatus and went with my fingers instead. I actually have blisters. But they were worth it! Perhaps I should invest in a low-temp glue gun?
Make and Do Girl says
Glad you found it helpful! In the moment, those burns seem so worth it, don’t they? It’s only when I’m trying to fall asleep later and my fingers are throbbing that I second guess myself.
Nita says
Adorable felt flower and great tutorial.
Thanks for sharing.
Make and Do Girl says
Thanks Maureen! I’ll swing by.
Susan says
These are beautiful. Thank you for sharing your template. I am excited to make some of these for my girls as gifts for Christmas. Thank you again!
Make and Do Girl says
These would make a great Christmas gift. I admire your early planning!
Mandy says
I think I will try to supersize your template and see if I can transform these head-turners into a decorative pillow for my bed… Thank you sooooo much for the inspiration!
Tracey says
Thanks very much for this, I have been looking for the template for ages as I want to make some with stems for the table centepieces at my wedding. I have just made one and the first try was not bad! Thanks
Anne @ Domesblissity says
Just popping over from Whipperberry. Just beautiful. I’ve got a thing going for felt and fabric flowers and these are some of the best I’ve seen.
Anne xx
Make and Do Girl says
Thanks Anne! These were surprisingly easy to whip up. I think there will definitely be a few under the Christmas tree this year.
Kate says
Wow those are gorgeous! Thanks for sharing!
Frankie says
These came out so great. The mustard yellow one is really fabulous! I have seen these types of tutorials floating around the internet. I keep planning to make one. Perhaps I’ll give it a go this weekend 🙂
Make and Do Girl says
You should! Send me a pic if you do!