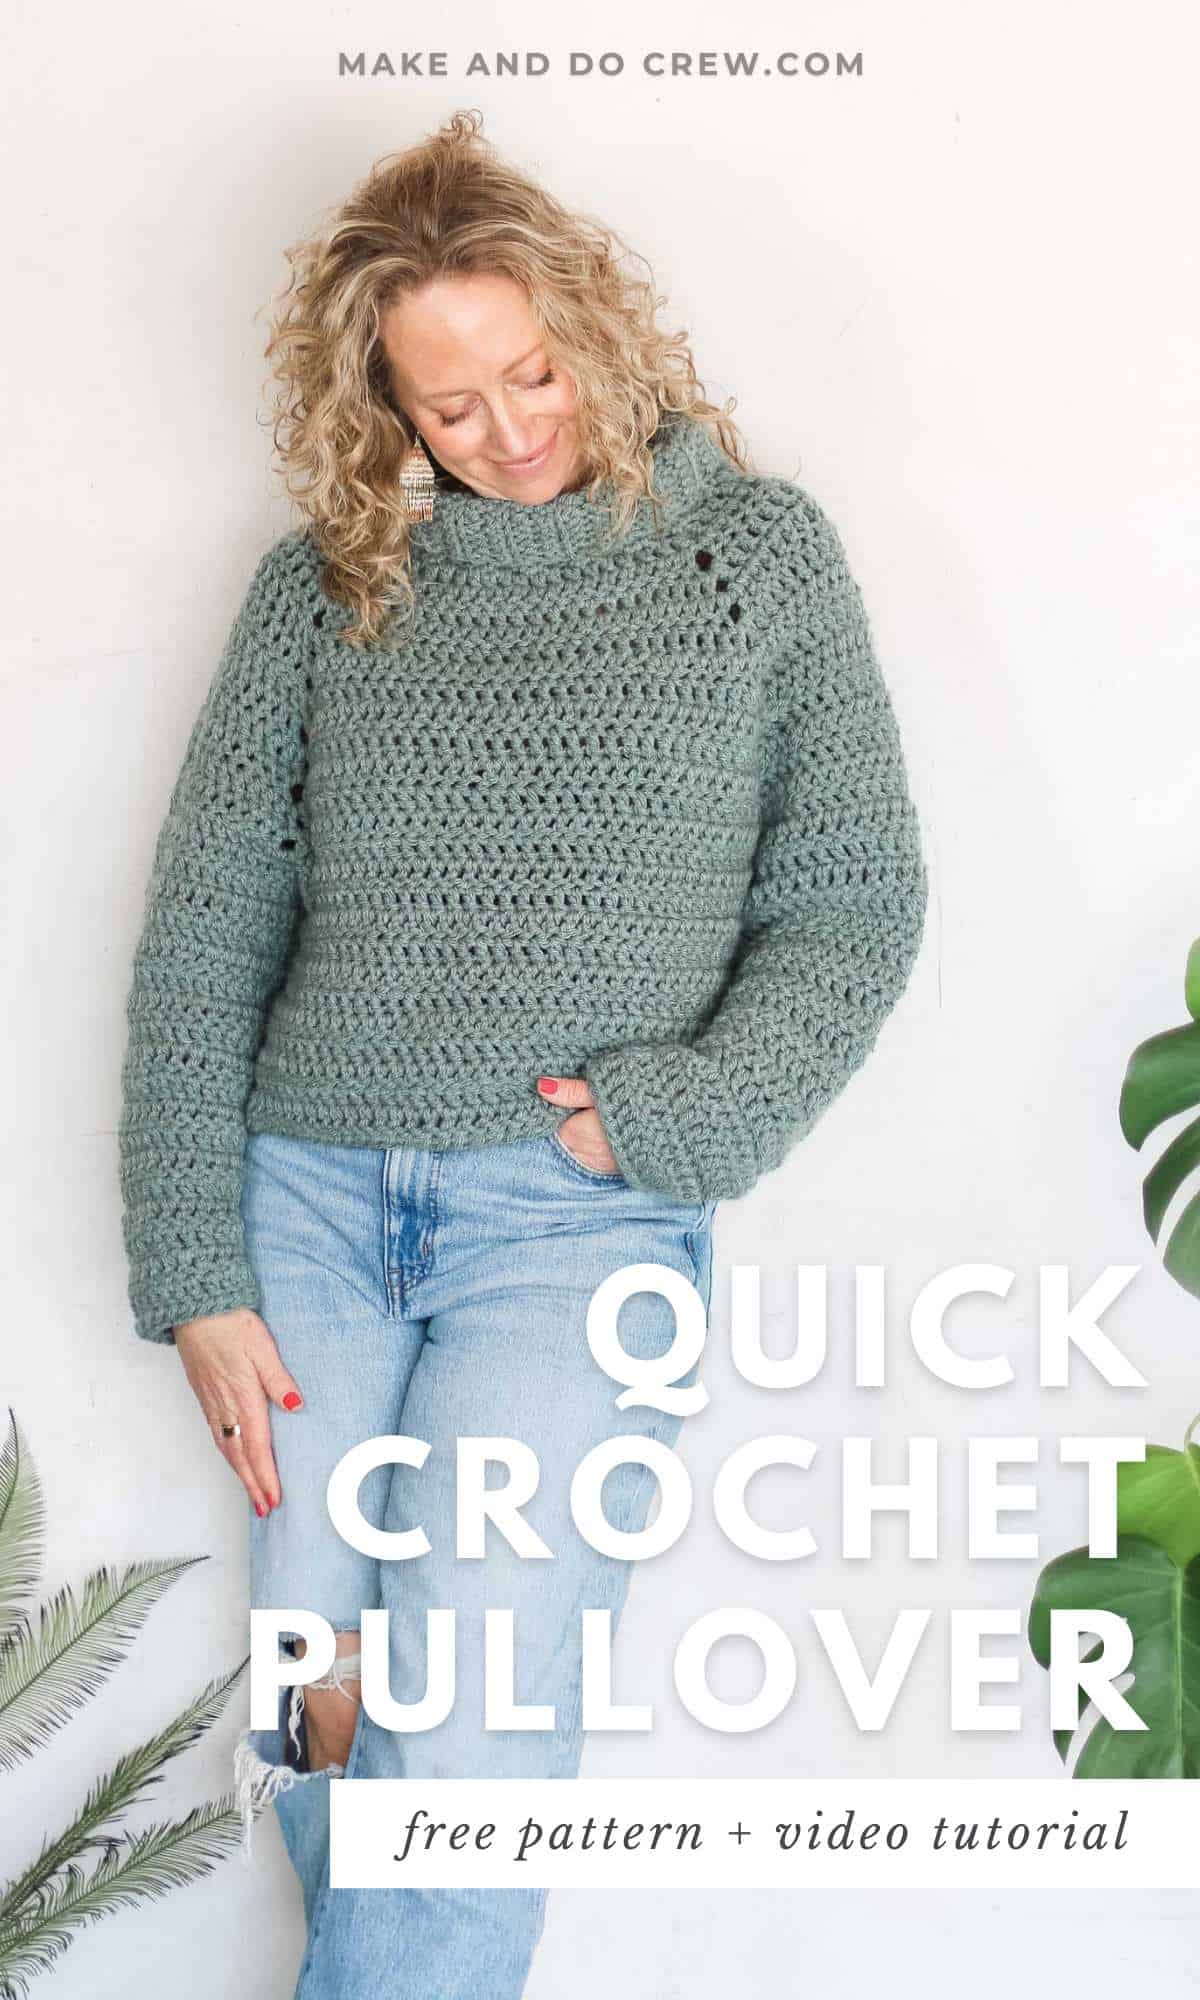
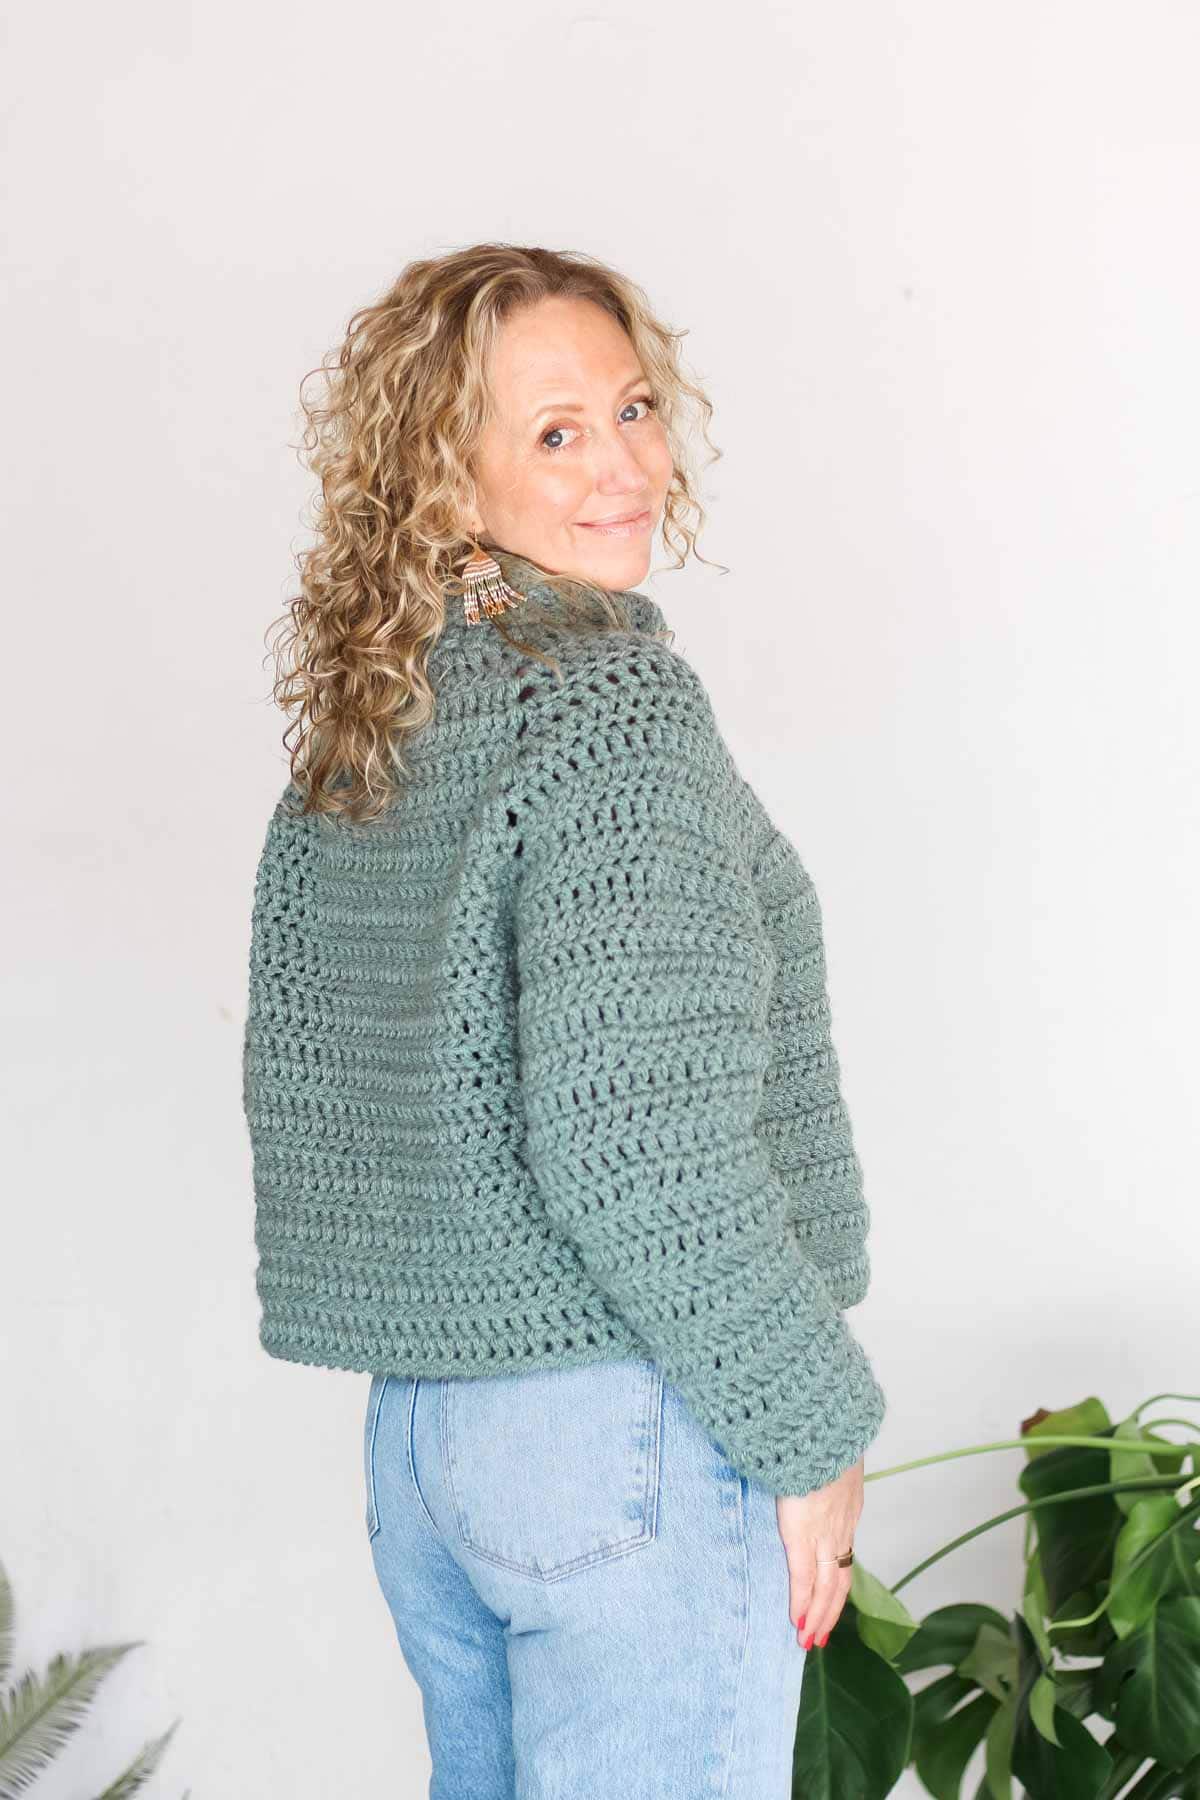
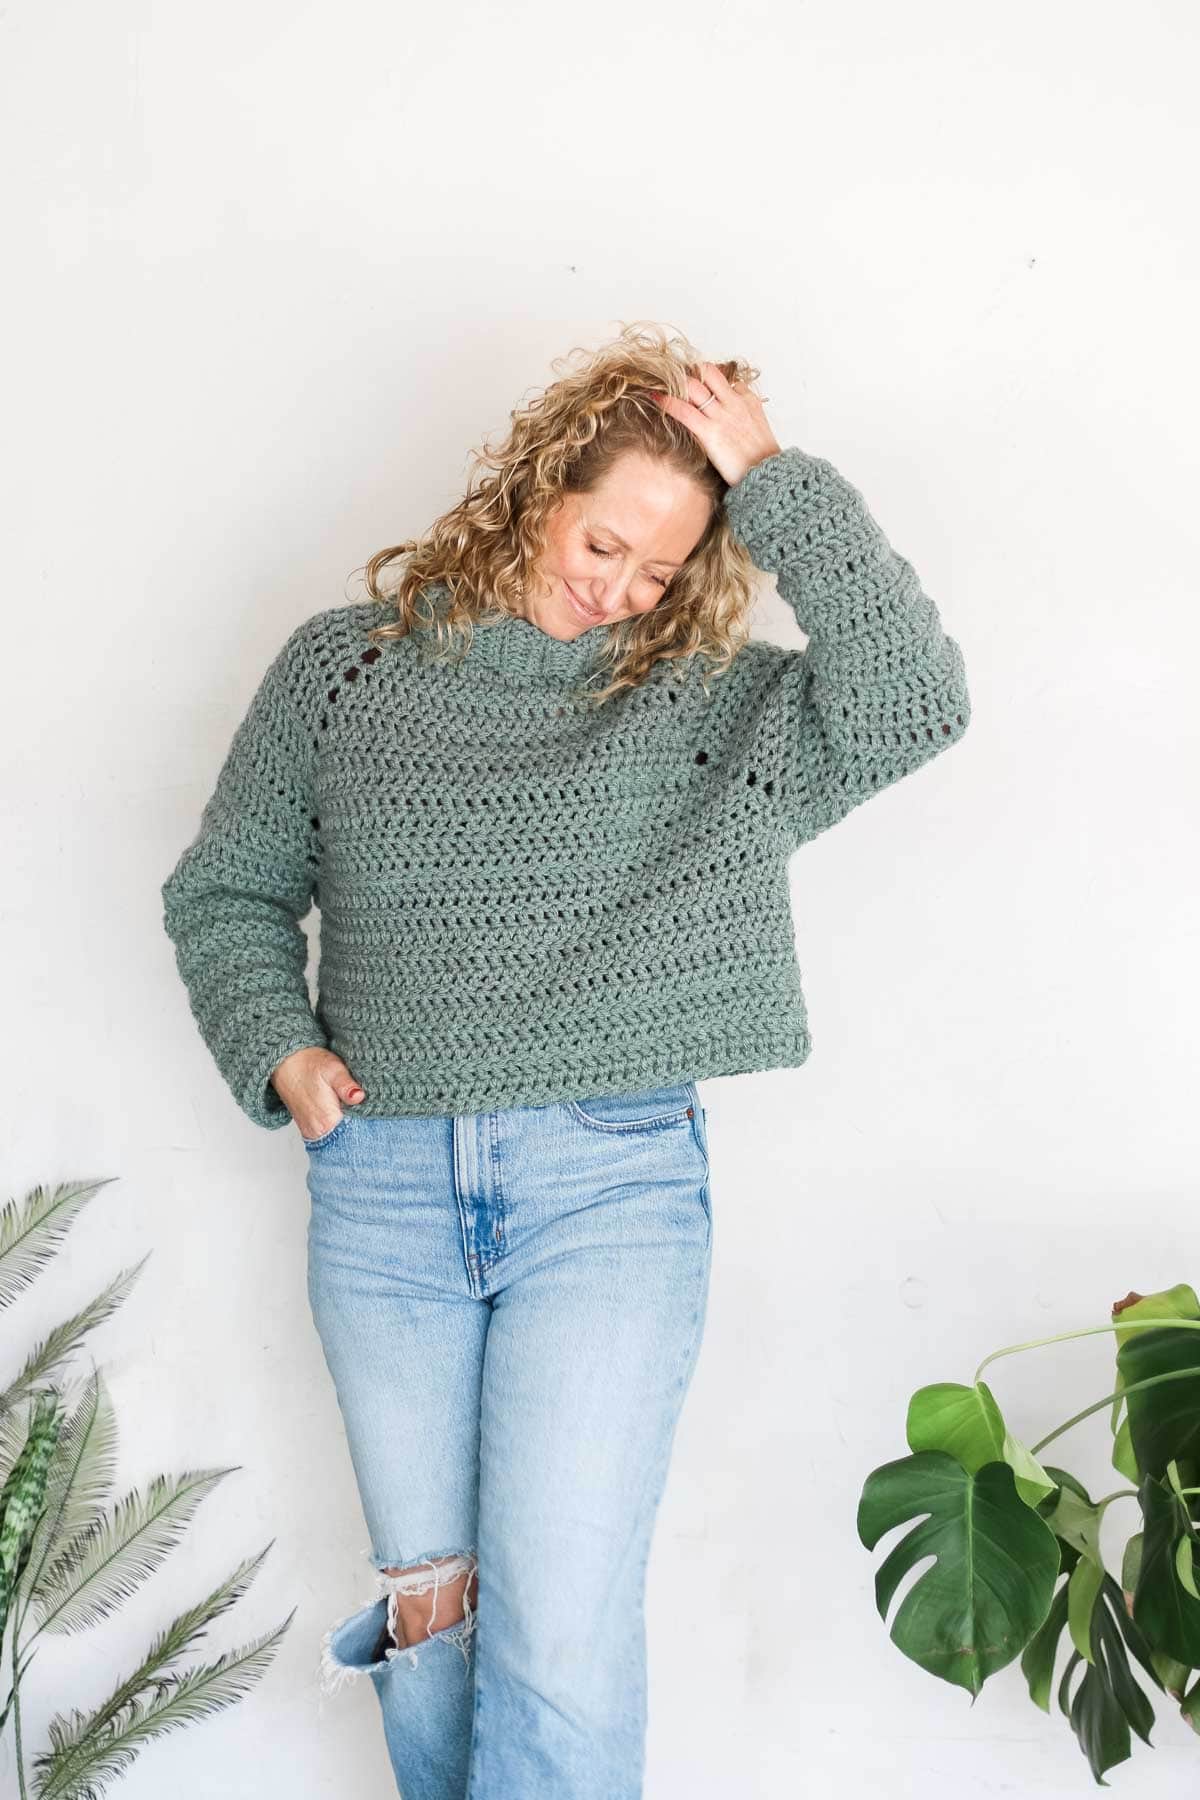
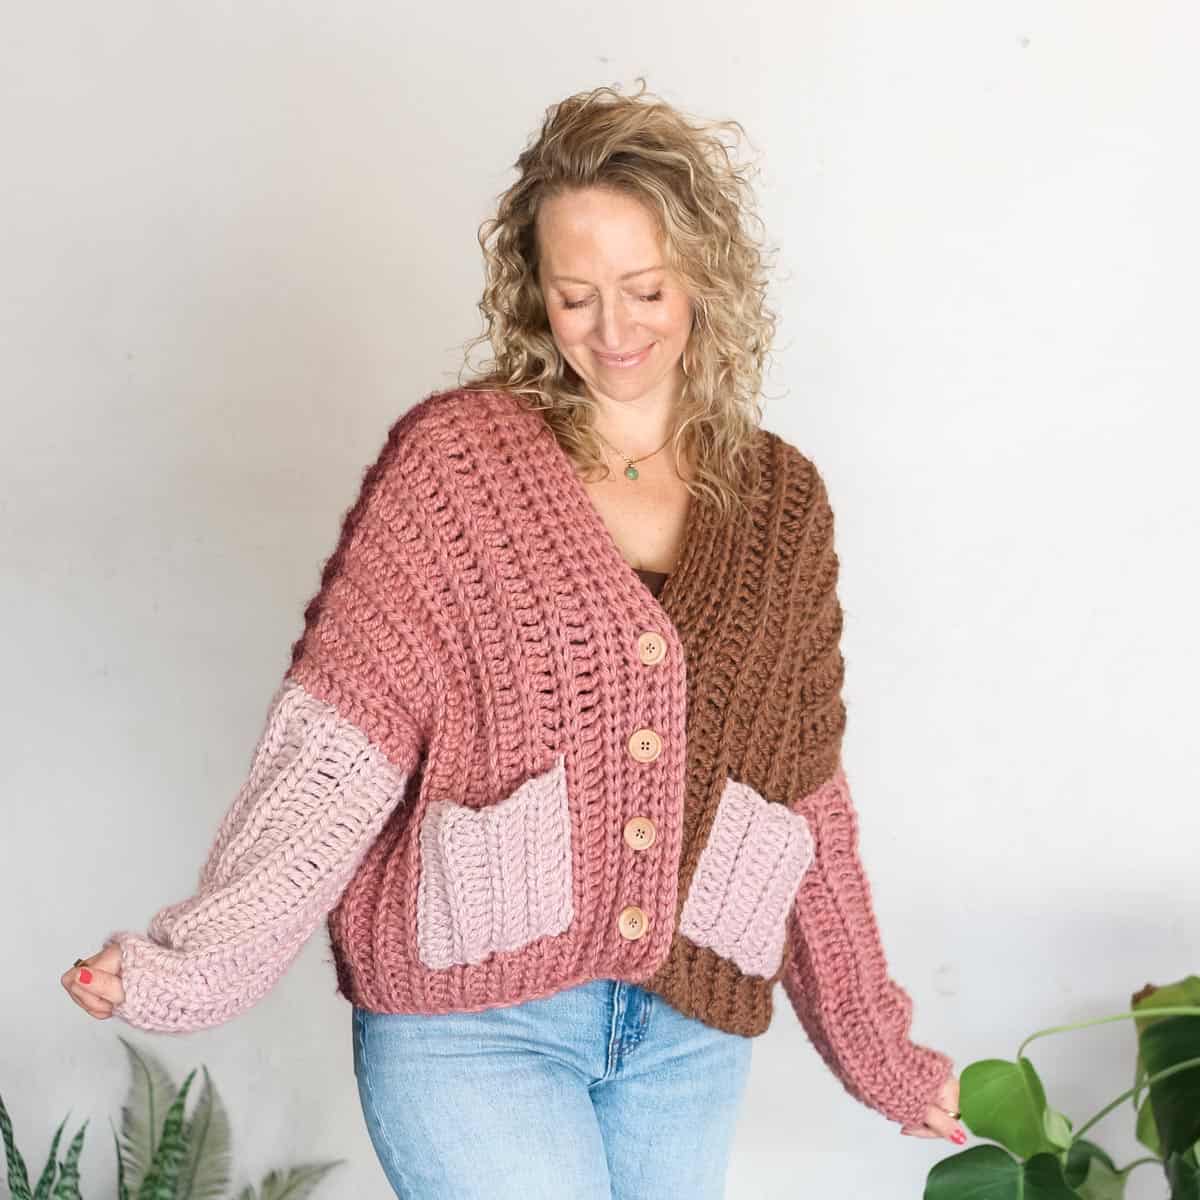
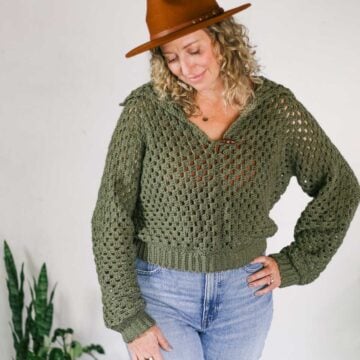
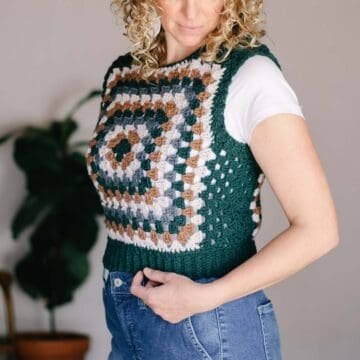
Meet your new favorite beginner crochet raglan! This chunky turtleneck sweater is warm, stylish, and—best of all—you can crochet it in just three days.
The free sweater pattern and video tutorial are below, or purchase the ad-free, printable PDF.
This easy sweater pattern is part of a collaboration with Lion Brand Yarns. This post contains affiliate links.
Jump to:
- Three Days to Done Raglan - Free Pattern
- All-in-One Crochet Kit
- Print this Pattern
- Supplies + Materials
- Measurements + Sizing
- Gauge
- Abbreviations + Glossary (US Terms)
- Video Tutorial
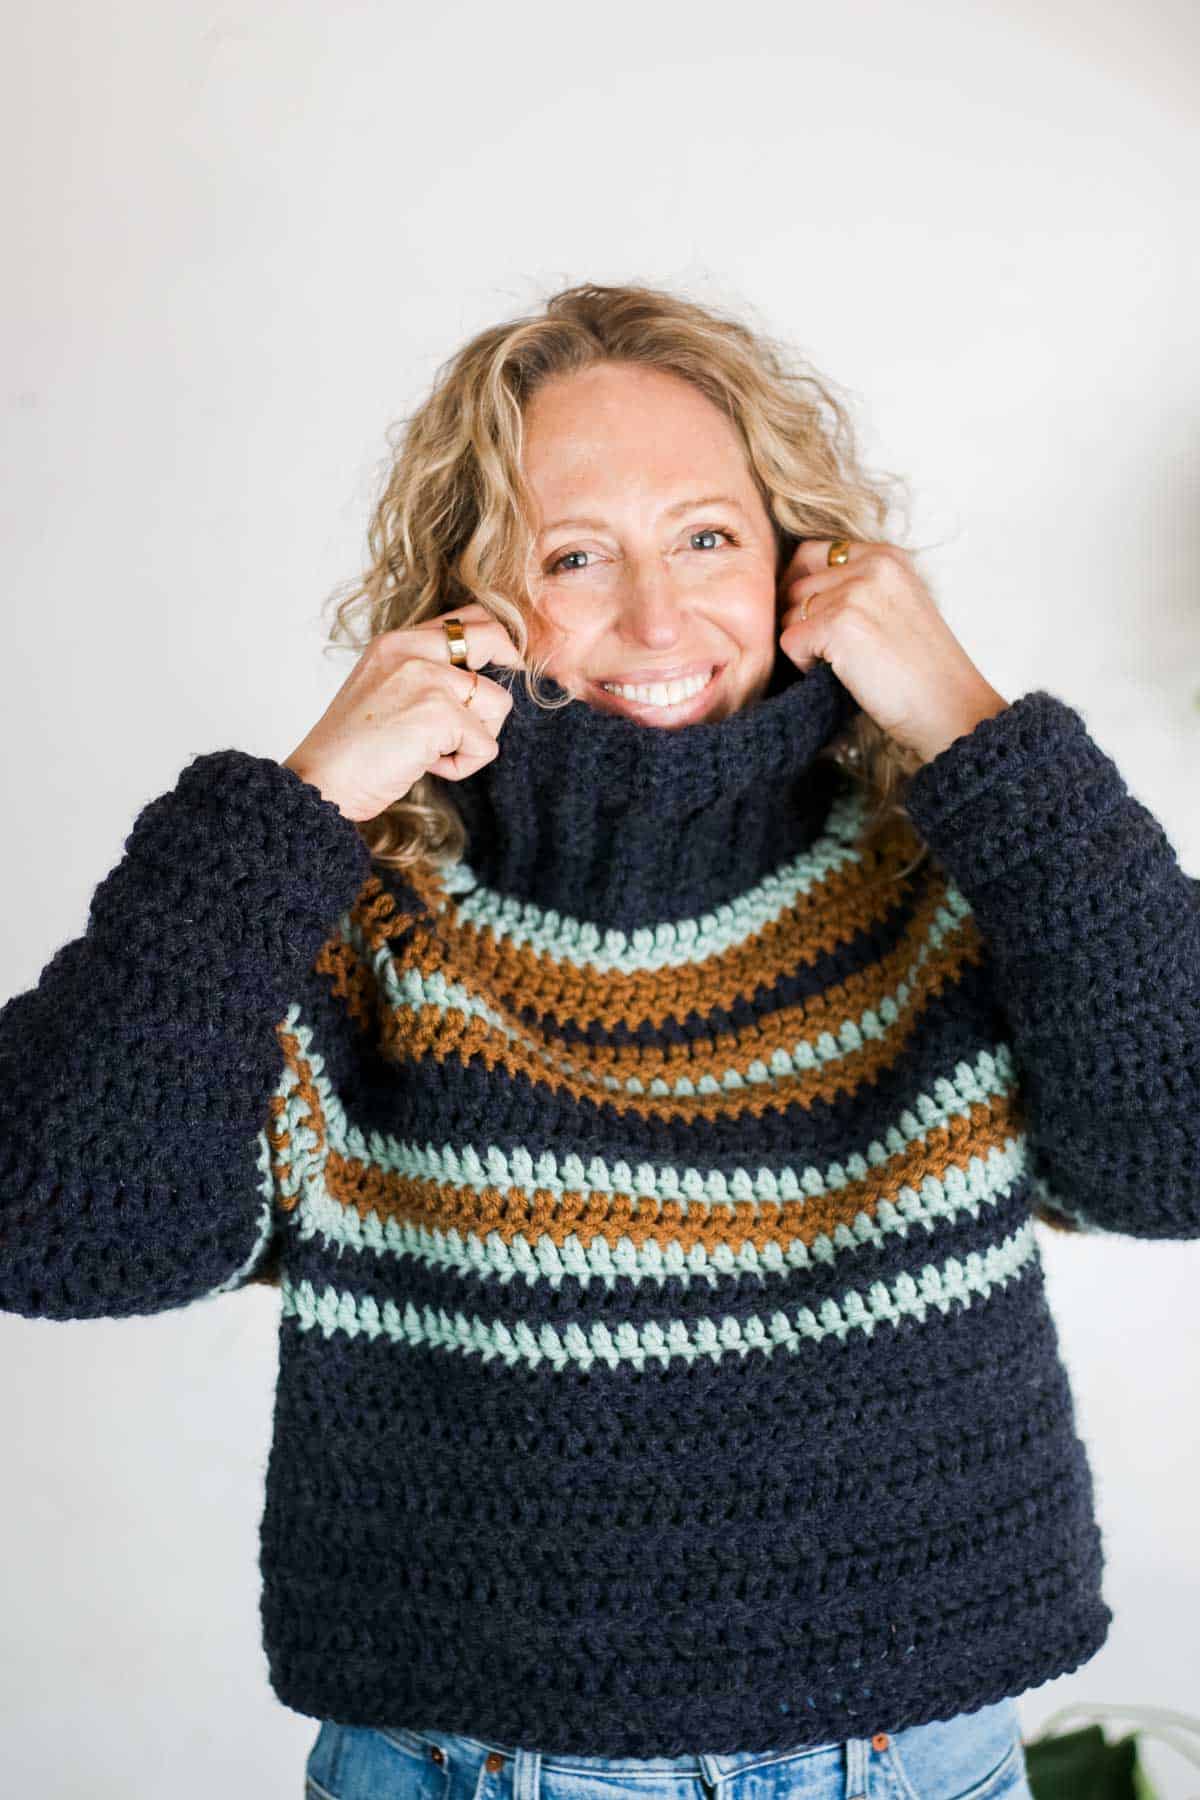
- Notes About Creating a Striped Sweater
- Overall Pattern Notes
- Turtleneck
- Yoke
- Continuing Extending Body
- Adding Sleeves
- Finishing
- Invitation to our Private Community
Three Days to Done Raglan - Free Pattern
Even if you're completely new to crocheting garments, you're going to love this top-down raglan pattern!
The classic design makes it easy to wear, while the option for color blocking or stripes lets you add your own twist. Simple stitches and a relaxed fit make the process smooth, satisfying and incredibly quick.
Grab your hook and get ready to stitch up something you can wear next week!
All-in-One Crochet Kit
If you don't live near amazing yarn stores or if you just like to get fun packages in the mail, the all-in-one kit is a perfect way to make your Three Days to Done Raglan. This bundle from Lion Brand includes all the Hue + Me yarn you'll need, plus a bonus printable PDF of the pattern (delivered digitally).
Print this Pattern
If you prefer an ad-free crochet experience, you'll love the premium PDF! The instantly downloadable, ad-free file is formatted for easy printing and includes the complete pattern, all the photo tutorials and a link to the video tutorial.
Premium PDF
easier and faster with fewer mistakes.
- Complete pattern + photo tutorials
- Instant download
- Formatted for easy printing
Supplies + Materials
Order an all-in-one kit from Lion Brand.
Yarn for Single Color Sweater:
• Lion Brand Hue and Me (Weight: 5/Bulky - 137 yds, 4.4 oz/125 g)
- Agave [617-173Z] – 6 (6, 7, 7, 8, 8, 9, 10, 10) skeins
(approx. 675 (740, 770, 865, 900, 965, 1075, 1170, 1220) g)
Yarn for Multi-Color Sweater:
• Lion Brand Hue and Me (Weight: 5/Bulky - 137 yds, 4.4 oz/125 g)
- Peacoat (617-110AU) – 5 (5, 6, 6, 7, 7, 8, 8, 9) skeins
(approx. 570 (625, 645, 730, 755, 805, 905, 985, 1030) g) - Sea Glass [617-172S] - 1 (1, 2, 2, 2, 2, 2, 2, 2) skein(s)
(approx 105 (120, 130, 140, 150, 160, 175, 185, 195) g) - Arrowwood (617-132AA) - 1 (1, 2, 2, 2, 2, 2, 2, 2) skein(s)
(approx 105 (120, 130, 140, 150, 160, 175, 185, 195) g)
Additional Supplies:
• Tapestry needle
• Size M (9.0 mm) crochet hook or size needed to obtain main body gauge
• Size L (8.0 mm) crochet hook or one size smaller than hook used to obtain main body gauge
• Stitch markers
Measurements + Sizing
Look at the chart below to determine the ideal size for your body. There are notes in the pattern that explain how to modify the length if desired.
| Size | Fits Actual Bust | Sweater Length* | Chest Width* |
|---|---|---|---|
| XS | 30” | 18.5” | 18” |
| S | 34” | 19.25” | 20” |
| M | 38” | 20” | 22” |
| L | 42” | 20” | 24” |
| 1X | 46” | 20.75” | 26” |
| 2X | 50” | 20.75” | 28” |
| 3X | 54” | 20.75” | 30” |
| 4X | 58” | 21.75” | 32” |
| 5X | 62 | 21.75 | 33.5 |
*when laid flat.
Gauge
8 double crochet = 4”
5 double crochet rounds = 4”
Abbreviations + Glossary (US Terms)
ch – chain
dc – double crochet
hdc - half double crochet
hdcblo - half double crochet back loop only
PM – place marker
rep – repeat
RS – right side
sk – skip
slst – slip stitch
st(s) – stitch(es)
WS – wrong side
yo – yarn over
yoslst – yarn over slip stitch
Video Tutorial
Follow along with the video tutorial below to learn how to crochet your first raglan step-by-step.
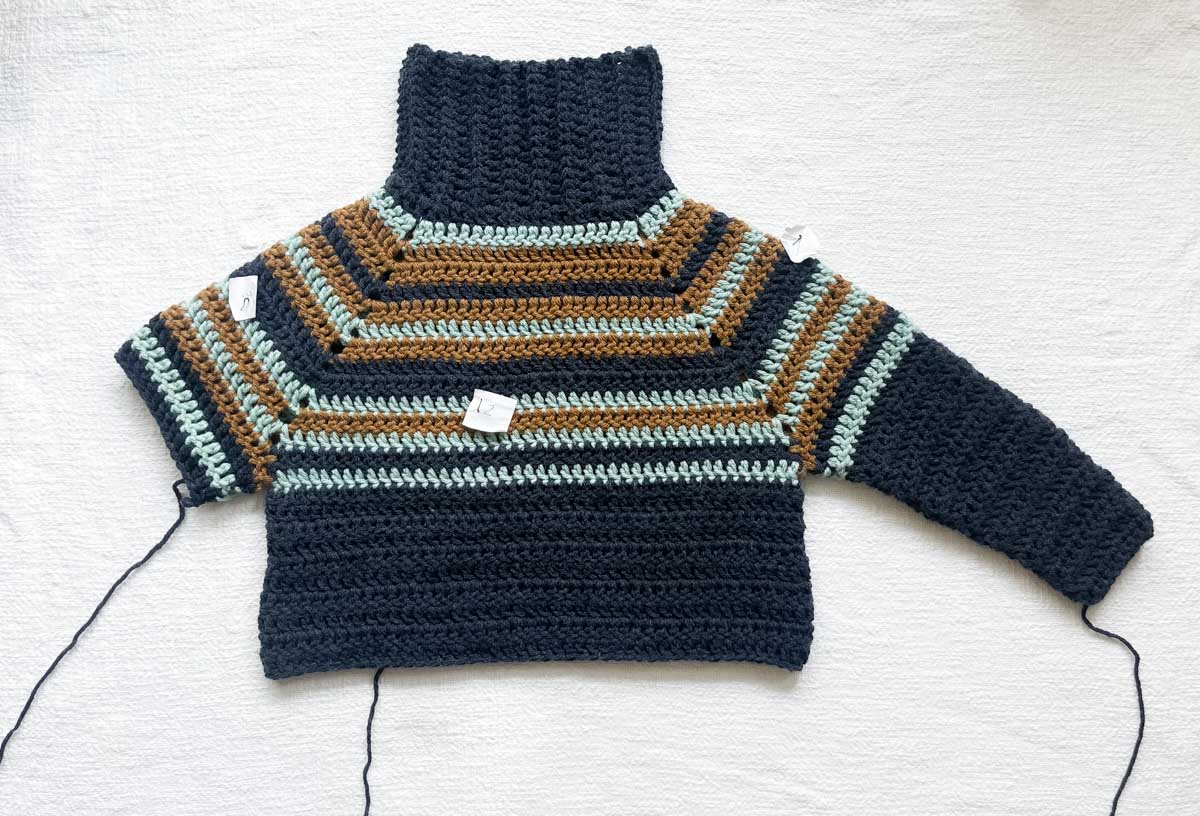
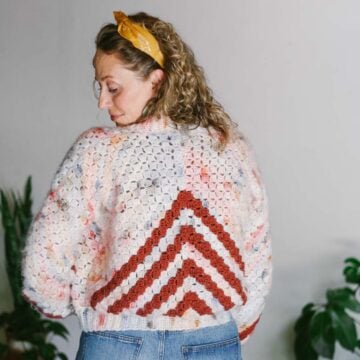
Notes About Creating a Striped Sweater
Stripes are a fun way to add interest to this easy pullover. When planning a stripe repeat, consider a sequence that feels organic (random). The two back extension rows will disrupt the stripe repeat because they won’t be visible on the sweater front.
If you prefer the look of routine stripes, consider adding stripes in the yoke only, and therefore ending the stripe repeat before the back extension.
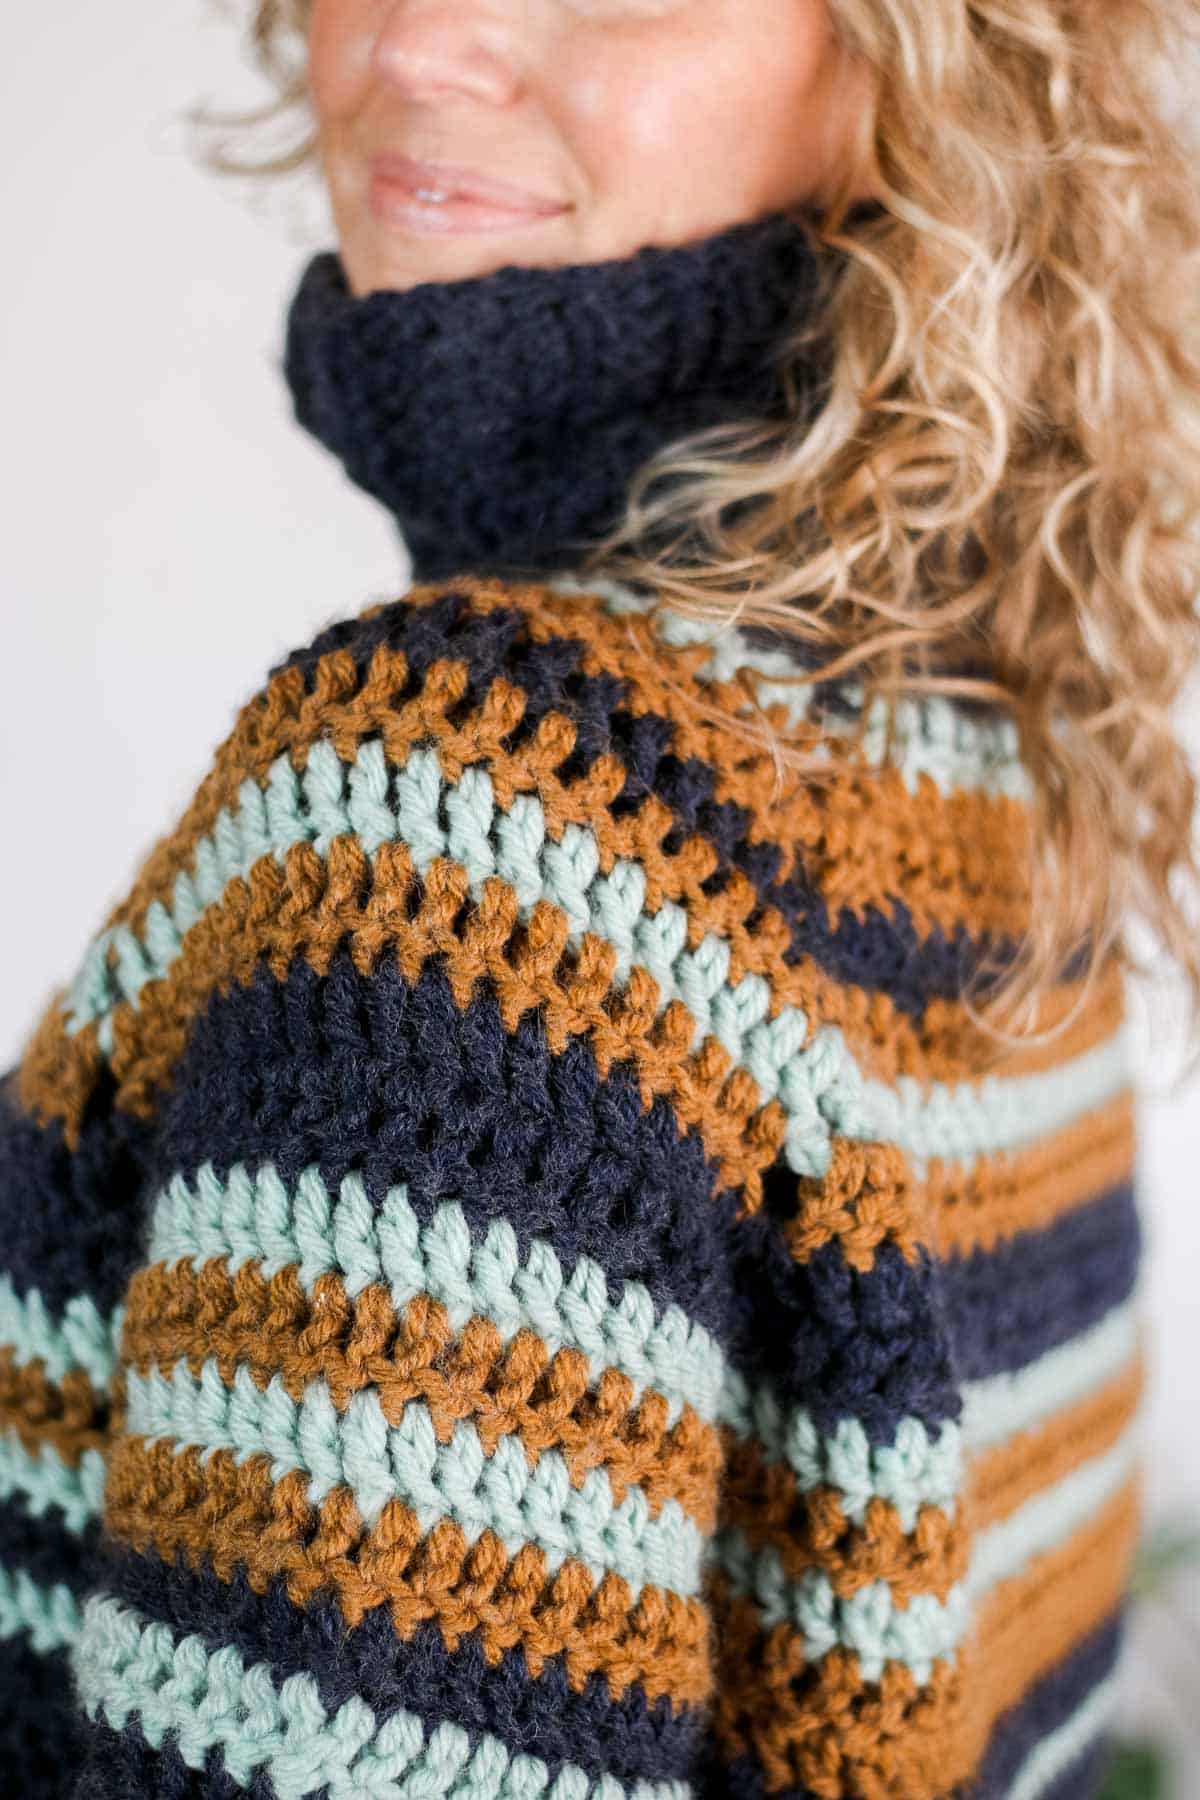
How To Change Colors Without Fastening Off
When creating stripes, two or more colors can be alternated without necessarily fastening off between rounds.
For the cleanest color transitions, complete the final slip stitch of round with the color that will be used in the next round. Drop color that’s not being used to the wrong side of the project so it can be picked up again in the following round. If it won’t be used for two or more rounds, consider cutting.
See video tutorial above for demonstration of this technique.
Skill Level
This easy, top down raglan pattern is appropriate for advanced beginners. You'll practice following your size within a written pattern, crocheting in the round and some simple increasing and decreasing.
Print This Pattern: purchase the ad-free, printable PDF
Overall Pattern Notes
- If you’re new to reading crochet patterns, check out more info here.
- Instructions are written with the stitch count for the smallest size first and each larger size following in parentheses, for example: XS (S, M, L, 1X, 2X, 3X, 4X and 5X). It can be very helpful to highlight the numbers for your size before beginning the project. When only one number is given, it pertains to all sizes. Stitch counts at the end of each round are for given sizes.
- Chain 3 at beginning of rounds/rows counts as one double crochet throughout pattern. Chain two at beginning of rounds/rows does not count as a stitch.
!! Gauge Check !!
Please don’t skip this step or you will risk your sweater not fitting as expected.
With larger hook:
Foundation Row: Ch 15.
Row 1 (RS): Dc in third ch from hook and each chain to end of row; turn. (14)
Row 2 (WS): Ch 2, dc in each dc across; turn.
Repeat Row 2 five more times.
Measure center four inches of swatch vertically and horizontally. Compare to pattern gauge listed above.
- If there are too many stitches in 4” horizontally, increase your hook size and re-swatch.
- If there aren’t enough stitches in 4” horizontally, decrease your hook size and re-swatch.
- If swatch is measuring too small vertically, make a deliberate effort to pull loops up a bit higher before completing each double crochet.
- If swatch is measuring too large vertically, make an effort to work the loops of each double crochet a little tighter.
- This video is incredibly helpful if you’re having trouble achieving the correct vertical gauge.
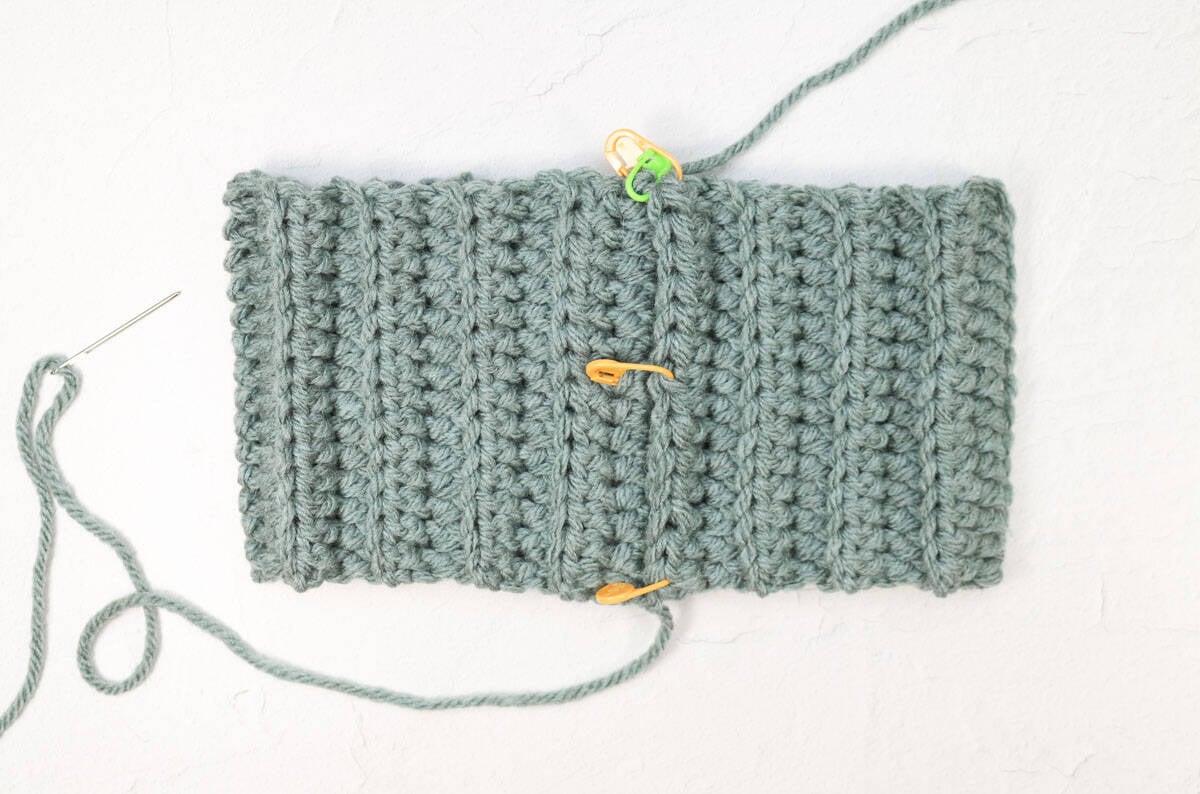
Turtleneck
With smaller hook and color desired for turtleneck:
Foundation: Leaving a 24” starting tail at slip knot, ch 16. (16 ch)
Row 1: Hdc in third ch from hook and each ch across; turn. (14 hdc)
Rows 2-30 (32, 34, 35, 36, 38, 40, 40, 42): Ch 2, hdcblo in each st; turn. (14 hdc)
Keep yarn attached and place a stitch marker in the live loop.
Fold rectangle so that last row is on top of foundation row. Thread tapestry needle with tail from slip knot. Seam using a running stitch.
Premium PDF
easier and faster with fewer mistakes.
- Complete pattern + photo tutorials
- Instant download
- Formatted for easy printing
Yoke
- Yoke is worked in turned rounds. Round 1 is worked into the long edge of the turtleneck tube. In Round 2, we begin increasing to create four distinct corners. Increases in future rounds always take place in the chain-2-space corners.
- Chain 3 at beginning of round counts as one double crochet. Work these chains fairly tightly to ensure they’re the same height as your double crochet stitches.
You will be working along the edge of the turtleneck where the live loop with the stitch marker is. Orient the marked live loop so that Round 1 of Yoke can be worked along the edge. Remove stitch marker and place loop on hook.

Don't spend hours for a "meh" result!
Tired of crocheting garments that don't fit? Learn our C.R.A.F.T. Framework to make sweaters that fit and feel amazing!
Using attached yarn and larger hook:
Round 1 (RS): Ch 3 (counts as a dc), 45 (47, 49, 51, 53, 57, 59, 59, 63) dc around turtleneck edge, slst to third ch to join; turn. (46 (48, 50, 52, 54, 58, 60, 60, 63) dc)
To spread the stitches in Round 1 evenly, aim for placing approximately one stitch in each row edge and each visual set of “V” ridges. This works out to approximately 3 stitches per 2 rows of turtleneck ribbing.
Place Markers:
Place marker between turning chain and first double crochet of Round 1. Counting clockwise (left-handed: counter-clockwise), PM marker after 18 (18, 18, 20, 20, 22, 24, 22, 25) stitches, count 5 (6, 7, 6, 7, 7, 6, 8, 7) more stitches and place marker, count 18 (18, 18, 20, 20, 22, 24, 22, 25) additional stitches and place last marker.
You should now have four sides, two with 5 (6, 7, 6, 7, 7, 6, 8, 7) sts and two with 18 (18, 18, 20, 20, 22, 24, 22, 25) sts.
These markers indicate where ch2sp corners will be created in the next round.
- Note: While it may seem like an error that some larger sizes begin with fewer stitches in the front and back, it's indeed correct. This allows each size to achieve the desired ease at the bust.
Round 2 (WS sleeve + body inc): Ch 3, *dc in each st until 1 st remains before marker, 2 dc in next st, ch 2, 2 dc in st after marker; rep from * twice more, dc in each st until 1 st remains before final marker, 2 dc in next st, ch 2 (sk over marker), dc in base of ch 3 tch from beginning of round, slst to top of tch to join; turn. (54 (56, 58, 60, 62, 66, 68, 68, 72) dc)
At this point, you should have four distinct sides:
The short sides of the rectangle should contain 7 (8, 9, 8, 9, 9, 8, 10, 9) stitches and the longer sides should contain 20 (20, 20, 22, 22, 24, 26, 24, 27) stitches.
Round 3 (RS sleeve + body inc): Ch 3, dc in next st, *(dc, ch 2, dc) in next ch2sp corner, dc in each st to next corner; rep from * twice, (dc, ch 2, dc) in next ch2sp, dc in each remaining st, slst to join; turn. (62 (64, 66, 68, 70, 74, 76, 76, 80) dc)
Round 4 (WS sleeve + body inc): Ch 3, *dc in each st to next ch2sp, (dc, ch 2, dc) in ch2sp; rep from * three more times, dc to end of round, slst to join; turn. (70 (72, 74, 76, 78, 82, 84, 84, 88) dc)
Rounds 5-7 (sleeve + body inc): Rep Rounds 3 and 4 ending on a Round 3 rep. (94 (96, 98, 100, 102, 106, 108, 108, 112) dc)
At this point, the short sides of the rectangle should contain 17 (18, 19, 18, 19, 19, 18, 20, 19) stitches and the longer sides should contain 30 (30, 30, 32, 32, 34, 36, 34, 37) stitches.
Continue with instructions for your size only.
Want some company while you crochet?
Get support (and camaraderie!) in the Make & Do Crew community. Join for free here.
Size XS
Rounds 8-9 (sleeve + body inc): Rep Round 4 and Round 3. (110 dc)
At this point, the short sides of the rectangle should contain 21 stitches and the longer sides should contain 34 stitches. Fasten off.
Proceed to “Label Rectangle Sides”
Size S
Rounds 8-9 (sleeve + body inc): Rep Round 4 and Round 3. (112 dc)
Round 10 (WS body inc): Ch 3, *dc to next ch2sp, (ch 2, dc) in ch2sp, dc to next ch2sp, (dc, ch 2) in ch2sp; rep from * once more, dc to end of round, slst to join; turn. (116 dc)
Round 11 (RS sleeve + body inc): Rep Round 3. (124 dc)
At this point, the shorter sides of the rectangle should contain 24 stitches and the longer sides should contain 38 stitches. Fasten off.
Proceed to “Label Rectangle Sides.”
Size M
Round 8 (WS body inc): Ch 3, *dc to next ch2sp, (ch 2, dc) in ch2sp, dc to next ch2sp, (dc, ch 2) in ch2sp; rep from * once more, dc to end of round, slst to join; turn. (102 dc)
Round 9 (RS sleeve + body inc): Rep Round 3. (110 dc)
Round 10 (WS body inc): Rep Round 8. (114 dc)
Round 11 (RS sleeve + body inc): Rep Round 3. (122 dc)
Round 12 (WS body inc): Rep Round 8. (126 dc)
Round 13 (RS sleeve + body inc): Rep Round 3. (134 dc)
At this point, the shorter sides of the rectangle should contain 25 stitches and the longer sides should contain 42 stitches. Fasten off.
Proceed to “Label Rectangle Sides.”
Size L
Rounds 8-9 (sleeve + body inc): Rep Round 4 and Round 3. (116 dc)
Round 10 (WS body inc): Ch 3, *dc to next ch2sp, (ch 2, dc) in ch2sp, dc to next ch2sp, (dc, ch 2) in ch2sp; rep from * once more, dc to end of round, slst to join; turn. (120 dc)
Round 11 (RS sleeve + body inc): Rep Round 3. (128 dc)
Round 12 (WS body inc): Rep Round 10. (132 dc)
Round 13 (RS sleeve + body inc): Rep Round 3. (140 dc)
At this point, the shorter sides of the rectangle should contain 26 stitches and the longer sides should contain 44 stitches. Fasten off.
Proceed to “Label Rectangle Sides.”
Size 1X / 2X
Round 8 (WS body inc): Ch 3, *dc to next ch2sp, (ch 2, dc) in ch2sp, dc to next ch2sp, (dc, ch 2) in ch2sp; rep from * once more, dc to end of round, slst to join; turn. (106, 110 dc)
Round 9 (RS sleeve + body inc): Rep Round 3. (114, 118 dc)
Round 10 (WS body inc): Rep Round 8. (118, 122 dc)
Round 11 (RS sleeve + body inc): Rep Round 3. (126, 130 dc)
Round 12 (WS body inc): Rep Round 8. (130, 134 dc)
Round 13 (RS sleeve + body inc): Rep Round 3. (138, 142 dc)
Round 14 (WS body inc): Rep Round 8. (142, 146 dc)
Round 15 (RS sleeve + body inc): Rep Round 3. (150, 154 dc)
At this point, the shorter sides of the rectangle should contain (27, 27) stitches and the longer sides should contain (48, 50) stitches. Fasten off.
Proceed to “Label Rectangle Sides.”
Size 3X
Rounds 8-11 (sleeve + body inc): Rep Round 4 and Round 3. (140 dc)
Round 12 (WS body inc): Ch 3, *dc to next ch2sp, (ch 2, dc) in ch2sp, dc to next ch2sp, (dc, ch 2) in ch2sp; rep from * once more, dc to end of round, slst to join; turn. (144 dc)
Round 13 (RS sleeve + body inc): Rep Round 3. (152 dc)
Round 14 (WS body inc): Rep Round 12. (156 dc)
Round 15 (RS sleeve + body inc): Rep Round 3. (164 dc)
At this point, the shorter sides of the rectangle should contain 30 stitches and the longer sides should contain 52 stitches. Fasten off.
Proceed to “Label Rectangle Sides.”
Size 4X
Rounds 8-9 (sleeve + body inc): Rep Round 4 and Round 3. (124 dc)
Round 10 (WS body inc): Ch 3, *dc to next ch2sp, (ch 2, dc) in ch2sp, dc to next ch2sp, (dc, ch 2) in ch2sp; rep from * once more, dc to end of round, slst to join; turn. (128 dc)
Round 11 (RS sleeve + body inc): Rep Round 3. (136 dc)
Round 12 (WS body inc): Rep Round 10. (140 dc)
Round 13 (RS sleeve + body inc): Rep Round 3. (148 dc)
Round 14 (WS body inc): Rep Round 10. (152 dc)
Round 15 (RS sleeve + body inc): Rep Round 3. (160 dc)
Round 16 (WS body inc): Rep Round 10. (164 dc)
Round 17 (RS sleeve + body inc): Rep Round 3. (172 dc)
At this point, the short sides of the rectangle should contain 32 stitches and the longer sides should contain 54 stitches. Fasten off.
Proceed to “Label Rectangle Sides.”
Size 5X
Rounds 8-13 (sleeve + body inc): Rep Round 4 and Round 3. (160 dc)
Round 14 (WS body inc): Ch 3, *dc to next ch2sp, (ch 2, dc) in ch2sp, dc to next ch2sp, (dc, ch 2) in ch2sp; rep from * once more, dc to end of round, slst to join; turn. (164 dc)
Round 15 (RS sleeve + body inc): Rep Round 3. (172 dc)
Round 16 (WS body inc): Rep Round 14. (176 dc)
Round 17 (RS sleeve + body inc): Rep Round 3. (184 dc)
At this point, the shorter sides of the rectangle should contain 35 stitches and the longer sides should contain 57 stitches. Fasten off.
Proceed to “Label Rectangle Sides.”
Grab the entire Three Days to Done Collection
The 3 Days to Done Raglan is one of four "big" patterns designed to be finished lightning fast.
Get the entire collection of e-books so you can whip up sweaters and blankets in days instead of weeks!
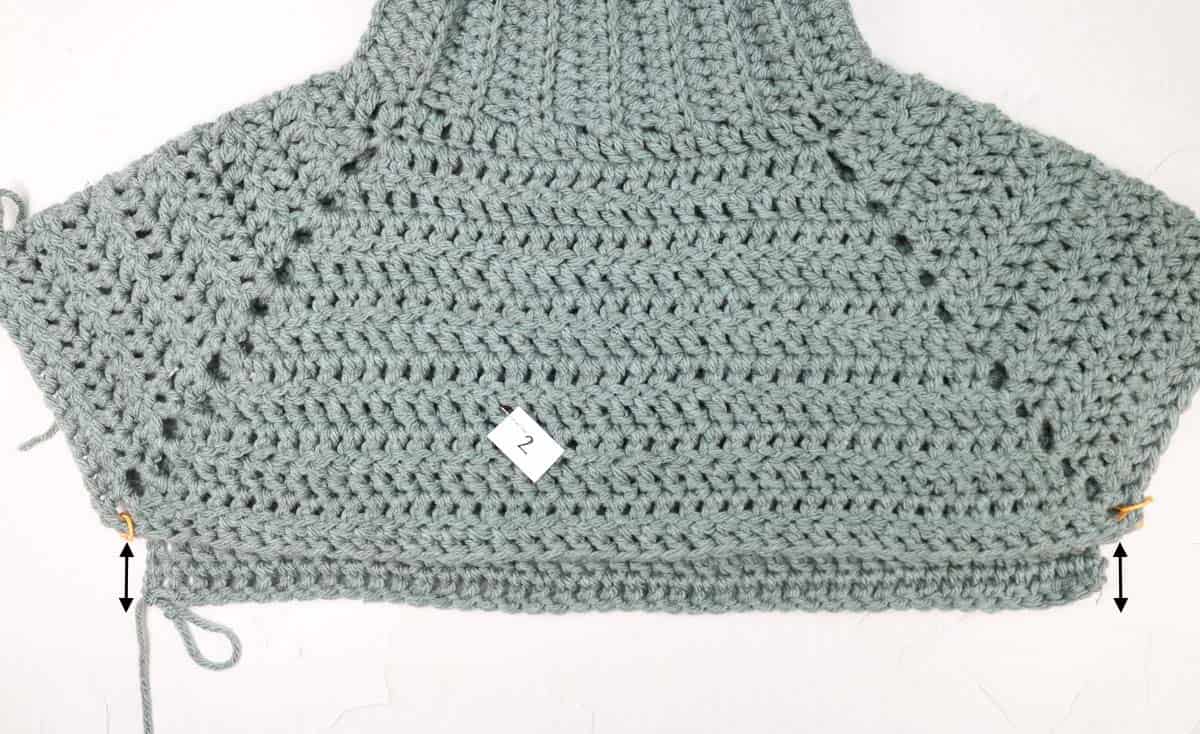
Label Rectangle Sides
We label the sides of the rectangle at this point because the pattern will begin to refer to them by number. Print the labels at back of pattern PDF or write 1-4 on small pieces of paper and pin them to your rectangle clockwise around as follows (same for right and left-handed):
Side 1: first short side where round begins/ends (left shoulder)
Wanna save this pattern?
Side 2: first full long side (front)
Side 3: second short side (right shoulder)
Side 4: second long side (back)
See video tutorial for visual explanation.
Back Extension
Now, two rows are added to the back of the sweater (side #4) only to help the neckline fit more comfortably.
Right-handed crocheters: Attach yarn in first stitch on side #4 (near side #3.)
Left-handed crocheters: Attach yarn in first stitch on side #4 (near side #1.)
With WS facing:
Row 1 (WS): Ch 3, sk first dc, dc across side #4 only ending in last stitch of side #4; turn. (34 (38, 42, 44, 48, 50, 52, 54, 57)
Row 2 (RS): Ch 2 (doesn’t count as a dc), dc in first st and each st across side #4 ending in tch from Row 1; turn.
Keep yarn attached (or switch colors if a new color stripe is desired.)
Creating Armholes
The following round is worked into sides #2 and #4 only. Chains are added between each side; these will become the underarms later on.
Round 1 (WS): Ch 2 (doesn’t count as a dc), dc in first st and each dc across side #4, ch 2 (2, 2, 4, 4, 6, 8, 10, 10) (underarm created)...
…Fold rectangle in half so long sides are together…
…dc in next corner ch2sp, dc in first st of side #2 and each dc across side #2 only, dc in next corner ch2sp, ch 2 (2, 2, 4, 4, 6, 8, 10, 10) (underarm created), slst to first dc from beginning of round to join; turn.
Continuing Extending Body
Round 2 (RS): Ch 3 (counts as first dc in underarm), dc in next 1 (1, 1, 3, 3, 5, 7, 9, 9) underarm ch(s), dc in each st to next underarm, dc in each underarm chain, dc in each st to end of round, slst to top of ch 3 to join; turn. (72 (80, 88, 96, 104, 112, 120, 128, 134) dc)
Round 3 (WS): Ch 3, dc in next st and each st around, slst to top of ch 3 to join; turn.
Repeat Round 3 (11 (10, 9, 9, 8, 8, 8, 7, 7) more times. At this point, Body section should contain (14 (13, 12, 12, 11, 11, 11, 10, 10) rounds. Add or eliminate rounds here to adjust sweater length.
Final Round: With WS facing, ch 1, yoslst in each st, slst to join. Fasten off.
Adding Sleeves
With WS facing, attach yarn in edge of underarm chain on the side of your dominant hand.
Left Sleeve (with #1 label):
(Left-handed crocheters, follow these instructions to create Right Sleeve with #3 label.)
Round 1 (WS): Ch 3 (counts as first underarm ch), dc in next 1 (1, 1, 3, 3, 5, 7, 9, 9) underarm ch(s), 5 dc over next 3 row edges, dc in corner ch2sp, dc in each dc, dc in next corner ch2sp, dc in next row edge, slst to top of ch 3 to join; turn. (31 (34, 35, 38, 39, 41, 46, 50, 53) dc)
Right Sleeve (with #3 label):
(Left-handed crocheters, follow these instructions to create Left Sleeve with #1 label.)
Round 1 (WS): Ch 3, dc in next underarm chain, dc in next row edge, dc in next corner ch2sp, dc in each dc, dc in corner ch2sp, 5 dc over next 3 row edges, slst to top of ch 3 to join; turn. (31 (34, 35, 38, 39, 41, 46, 50, 53) dc)
Right and Left Sleeves:
Sizes (XS, M, XL, 2X 5X) only
Round 2 (RS dec): Ch 3, dc in next dc and each st until two remain; dc2tog, slst to top of ch 3 to join; turn. (30 (x, 34, x, 38, 40, x, x, 52)dc)
Sizes (S, L, 3X, 4X) only
Round 2 (RS): Ch 3, dc in next dc and each st, slst to top of ch 3 to join; turn. (x (34, x, 38, x, x, 46, 50, x) dc)
All Sizes
In Round 3 and subsequent rounds that begin the same way, the chain 2 and double crochet at the beginning of the round combine to count as a dc2tog decrease. Therefore, when slip stitching to join at the end of the round, hook should be inserted into top of first double crochet (skip over the chain 2.) Accidentally slip stitching into the to of the chain 2 will add one extra stitch to the round.
Round 3 (WS dec top + bottom): Ch 2, dc in next dc (counts as a dc2tog), dc in next 13 (15, 15, 17, 17, 18, 21, 23, 24) sts, dc2tog, dc in next 13 (15, 15, 17, 17, 18, 21, 23, 24) sts, slst to first dc to join; turn. (28 (32, 32, 36, 36, 38, 44, 48, 50) sts)
Round 4 (RS): Ch 3, dc in next dc and each st, slst to top of ch 3 to join; turn. (28 (32, 32, 36, 36, 38, 44, 48, 50) dc )
Proceed with instructions for your size only.
Size XS
Rounds 5-6: Rep Round 4.
Round 7: (WS dec on sides): Ch 3, dc in next 5 sts, dc2tog, dc in next 12 sts, dc2tog, dc in next 6 sts, slst to top of ch 3 to join; turn. (26 sts)
Rounds 8-10: Rep Round 4.
Round 11: (WS dec top + bottom): Ch 2, dc in next dc (counts as a dc2tog), dc in next 11 sts, dc2tog, dc in next 11 sts, slst to first dc to join; turn. (24 sts)
Rounds 12-14: Rep Round 4.
Round 15: (WS dec on sides): Ch 3, dc in next 4 sts, dc2tog, dc in next 10 sts, dc2tog, dc in next 5 sts, slst to top of ch 3 to join; turn. (22 sts)
Rounds 16-18: Rep Round 4.
Round 19: (WS dec top + bottom): Ch 2, dc in next dc (counts as a dc2tog), dc in next 9 sts, dc2tog, dc in next 9 sts, slst to first dc to join; turn. (20 sts)
Round 20: Rep Round 4.
Round 21: (WS dec on sides): Ch 3, dc in next 3 sts, dc2tog, dc in next 8 sts, dc2tog, dc in next 4 sts, slst to top of ch 3 to join; turn. (18 sts)
(To lengthen sleeves, work additional repeats of Round 4.)
Proceed to “Final Round”.
Size S
Round 5: Rep Round 4.
Round 6: (RS dec on sides): Ch 3, dc in next 6 sts, dc2tog, dc in next 14 sts, dc2tog, dc in next 7 sts, slst to top of ch 3 to join; turn. (30 sts)
Rounds 7-8: Rep Round 4.
Round 9: (WS dec top + bottom): Ch 2, dc in next dc (counts as a dc2tog), dc in next 13 sts, dc2tog, dc in next 13 sts, slst to first dc to join; turn. (28 sts)
Rounds 10-11: Rep Round 4.
Round 12: (RS dec on sides): Ch 3, dc in next 5 sts, dc2tog, dc in next 12 sts, dc2tog, dc in next 6 sts, slst to top of ch 3 to join; turn. (26 sts)
Rounds 13-14: Rep Round 4.
Round 15: (WS dec top + bottom): Ch 2, dc in next dc (counts as a dc2tog), dc in next 11 sts, dc2tog, dc in next 11 sts, slst to first dc to join; turn. (24 sts)
Rounds 16: Rep Round 4.
Round 17: (WS dec on sides): Ch 3, dc in next 4 sts, dc2tog, dc in next 10 sts, dc2tog, dc in next 5 sts, slst to top of ch 3 to join; turn. (22 sts)
Rounds 18: Rep Round 4.
Round 19: (WS dec top + bottom): Ch 2, dc in next dc (counts as a dc2tog), dc in next 9 sts, dc2tog, dc in next 9 sts, slst to first dc to join; turn. (20 sts)
(To lengthen sleeves, work additional repeats of Round 4.)
Proceed to “Final Round”.
Size M
Round 5 (WS dec on sides): Ch 3, dc in next 6 sts, dc2tog, dc in next 14 sts, dc2tog, dc in next 7 sts, slst to top of ch 3 to join; turn. (30 sts)
Round 6 (RS): Rep Round 4.
Round 7 (WS dec top + bottom): Ch 2, dc in next dc (counts as a dc2tog), dc in next 13 sts, dc2tog, dc in next 13 sts, slst to first dc to join; turn. (28 sts)
Rounds 8-9: Rep Round 4.
Round 10 (RS dec on sides): Ch 3, dc in next 5 sts, dc2tog, dc in next 12 sts, dc2tog, dc in next 6 sts, slst to top of ch 3 to join; turn. (26 sts)
Rounds 11-12: Rep Round 4.
Round 13 (WS dec top + bottom): Ch 2, dc in next dc (counts as a dc2tog), dc in next 11 sts, dc2tog, dc in next 11 sts, slst to first dc to join; turn. (24 sts)
Rounds 14-15: Rep Round 4.
Round 16 (RS dec on sides): Ch 3, dc in next 4 sts, dc2tog, dc in next 10 sts, dc2tog, dc in next 5 sts, slst to top of ch 3 to join; turn. (22 sts)
(To create a shorter sleeves, eliminate Rounds 17-18.)
Rounds 17-18: Rep Round 4.
Round 19 (WS dec top + bottom): Ch 2, dc in next dc (counts as a dc2tog), dc in next 9 sts, dc2tog, dc in next 9 sts, slst to first dc to join; turn. (20 sts)
(To lengthen sleeves, work additional repeats of Round 4.)
Proceed to “Final Round”.
Size L
Round 5 (WS dec on sides): Ch 3, dc in next 7 sts, dc2tog, dc in next 16 sts, dc2tog, dc in next 8 sts, slst to top of ch 3 to join; turn. (34 sts)
Round 6 (RS): Rep Round 4.
Round 7 (WS dec top + bottom): Ch 2, dc in next dc (counts as a dc2tog), dc in next 15 sts, dc2tog, dc in next 15 sts, slst to first dc to join; turn. (32 sts)
Round 8: Rep Round 4.
Round 9 (WS dec on sides): Ch 3, dc in next 6 sts, dc2tog, dc in next 14 sts, dc2tog, dc in next 7 sts, slst to top of ch 3 to join; turn. (30 sts)
Round 10 (RS): Rep Round 4.
Round 11 (WS dec top + bottom): Ch 2, dc in next dc (counts as a dc2tog), dc in next 13 sts, dc2tog, dc in next 13 sts, slst to first dc to join; turn. (28 sts)
Round 12: Rep Round 4.
Round 13 (WS dec on sides): Ch 3, dc in next 5 sts, dc2tog, dc in next 12 sts, dc2tog, dc in next 6 sts, slst to top of ch 3 to join; turn. (26 sts)
Round 14 (RS): Rep Round 4.
Round 15 (WS dec top + bottom): Ch 2, dc in next dc (counts as a dc2tog), dc in next 11 sts, dc2tog, dc in next 11 sts, slst to first dc to join; turn. (24 sts)
Round 16: Rep Round 4.
Round 17 (WS dec on sides): Ch 3, dc in next 4 sts, dc2tog, dc in next 10 sts, dc2tog, dc in next 5 sts, slst to top of ch 3 to join; turn. (22 sts)
Round 18 (WS dec top + bottom): Ch 2, dc in next dc (counts as a dc2tog), dc in next 9 sts, dc2tog, dc in next 9 sts, slst to first dc to join; turn. (20 sts)
(To lengthen sleeves, work additional repeats of Round 4.)
Proceed to “Final Round”.
Size XL / 2X
Round 5 (WS dec on sides): Ch 3, dc in next (7, 7) sts, dc2tog, dc in next (16, 17) sts, dc2tog, dc in next (8, 9) sts, slst to top of ch 3 to join; turn. ((34, 36) sts)
Round 6 (RS): Rep Round 4.
Round 7 (WS dec top + bottom): Ch 2, dc in next dc (counts as a dc2tog), dc in next (15, 16) sts, dc2tog, dc in next (15, 16) sts, slst to first dc to join; turn. ((32, 34) sts)
Round 8: Rep Round 4.
Round 9 (WS dec on sides): Ch 3, dc in next (6, 7) sts, dc2tog, dc in next (14, 15) sts, dc2tog, dc in next (7, 7) sts, slst to top of ch 3 to join; turn. ((30, 32) sts)
Round 10 (RS): Rep Round 4.
Round 11 (WS dec top + bottom): Ch 2, dc in next dc (counts as a dc2tog), dc in next (13, 14) sts, dc2tog, dc in next (13, 14) sts, slst to first dc to join; turn. ((28, 30) sts)
Round 12: Rep Round 4.
Round 13 (WS dec on sides): Ch 3, dc in next (5, 6) sts, dc2tog, dc in next (12, 13) sts, dc2tog, dc in next (6, 6) sts, slst to top of ch 3 to join; turn. ((26, 28) sts)
Round 14 (RS dec top + bottom): Ch 2, dc in next dc (ccounts as a dc2tog), dc in next (11, 12) sts, dc2tog, dc in next (11, 12) sts, slst to first dc to join; turn. ((24, 26) sts)
Round 15 (WS dec on sides): Ch 3, dc in next (4, 5) sts, dc2tog, dc in next (10, 11) sts, dc2tog, dc in next (5, 5) sts, slst to top of ch 3 to join; turn. ((22, 24) sts)
Round 16 (RS dec top + bottom): Ch 2, dc in next dc (counts as a dc2tog), dc in next (9, 10) sts, dc2tog, dc in next (9, 10) sts, slst to first dc to join; turn. ((20, 22) sts)
(To lengthen sleeves, work additional repeats of Round 4.)
Proceed to “Final Round”.
Size 3X
Round 5 (WS dec on sides): Ch 3, dc in next 9 sts, dc2tog, dc in next 20 sts, dc2tog, dc in next 10 sts, slst to top of ch 3 to join; turn. (42 sts)
Round 6 (RS): Rep Round 4.
Round 7 (WS dec top + bottom): Ch 2, dc in next dc (counts as a dc2tog), dc in next 19 sts, dc2tog, dc in next 19 sts, slst to first dc to join; turn. (40 sts)
Round 8 (RS dec on sides): Ch 3, dc in next 8 sts, dc2tog, dc in next 18 sts, dc2tog, dc in next 9 sts, slst to top of ch 3 to join; turn. (38 sts)
Round 9 (WS dec top + bottom): Ch 2, dc in next dc (counts as a dc2tog), dc in next 17 sts, dc2tog, dc in next 17 sts, slst to first dc to join; turn. (36 sts)
Round 10 (RS): Rep Round 4.
Round 11 (WS dec on sides): Ch 3, dc in next 7 sts, dc2tog, dc in next 16 sts, dc2tog, dc in next 8 sts, slst to top of ch 3 to join; turn. (34 sts)
Round 12 (RS dec top + bottom): Ch 2, dc in next dc (counts as a dc2tog), dc in next 15 sts, dc2tog, dc in next 15 sts, slst to first dc to join; turn. (32 sts)
Round 13 (WS dec on sides): Ch 3, dc in next 6 sts, dc2tog, dc in next 14 sts, dc2tog, dc in next 7 sts, slst to top of ch 3 to join; turn. (30 sts)
Round 14 (RS dec top + bottom): Ch 2, dc in next dc (counts as a dc2tog), dc in next 13 sts, dc2tog, dc in next 13 sts, slst to first dc to join; turn. (28 sts)
Round 15 (WS dec on sides): Ch 3, dc in next 6 sts, dc2tog, dc in next 12 sts, dc2tog, dc in next 7 sts, slst to top of ch 3 to join; turn. (26 sts)
Round 16 (RS dec top + bottom): Ch 2, dc in next dc (counts as a dc2tog), dc in next 11 sts, dc2tog, dc in next 11 sts, slst to first dc to join; turn. (24 sts)
Round 17 (WS dec on sides): Ch 3, dc in next 4 sts, dc2tog, dc in next 10 sts, dc2tog, dc in next 5 sts, slst to top of ch 3 to join; turn. (22 sts)
(To lengthen sleeves, work additional repeats of Round 4.)
Proceed to “Final Round”.
Size 4X / 5X
Round 5 (WS dec on sides): Ch 3, dc in next (10, 11) sts, dc2tog, dc in next (22, 23 sts, dc2tog, dc in next (11, 11) sts, slst to top of ch 3 to join; turn. ((46, 48) sts)
Round 6 (RS dec top + bottom): Ch 2, dc in next dc (counts as a dc2tog), dc in next (21, 23) sts, dc2tog, dc in next (21, 23) sts, slst to first dc to join; turn. ((44, 46) sts)
Round 7 (WS dec on sides): Ch 3, dc in next (9, 10) sts, dc2tog, dc in next (20, 21 sts, dc2tog, dc in next (10, 10) sts, slst to top of ch 3 to join; turn. ((42, 44) sts)
Round 8 (RS dec top + bottom): Ch 2, dc in next dc (counts as a dc2tog), dc in next (19, 20) sts, dc2tog, dc in next (19, 20) sts, slst to first dc to join; turn. ((40, 42) sts)
Round 9 (WS dec on sides): Ch 3, dc in next (8, 9) sts, dc2tog, dc in next (18, 19 sts, dc2tog, dc in next (9, 9) sts, slst to top of ch 3 to join; turn. ((38, 40) sts)
Round 10 (RS dec top + bottom): Ch 2, dc in next dc (counts as a dc2tog), dc in next (17, 18) sts, dc2tog, dc in next (17, 18) sts, slst to first dc to join; turn. ((36, 38) sts)
Round 11 (WS dec on sides): Ch 3, dc in next (7, 8) sts, dc2tog, dc in next (16, 17 sts, dc2tog, dc in next (8, 8) sts, slst to top of ch 3 to join; turn. ((34, 36) sts)
Round 12 (RS dec top + bottom): Ch 2, dc in next dc (counts as a dc2tog), dc in next (15, 16) sts, dc2tog, dc in next (15, 16) sts, slst to first dc to join; turn. ((32, 34) sts)
Round 13 (WS dec on sides): Ch 3, dc in next (6, 7) sts, dc2tog, dc in next (14, 15 sts, dc2tog, dc in next (7, 7) sts, slst to top of ch 3 to join; turn. ((30, 32) sts)
Round 14 (RS dec top + bottom): Ch 2, dc in next dc (counts as a dc2tog), dc in next (13, 14) sts, dc2tog, dc in next (13, 14) sts, slst to first dc to join; turn. ((28, 30) sts)
Round 15 (WS dec on sides): Ch 3, dc in next (5, 6) sts, dc2tog, dc in next (12, 13 sts, dc2tog, dc in next (6, 6) sts, slst to top of ch 3 to join; turn. ((26, 28) sts)
Round 16 (RS dec top + bottom): Ch 2, dc in next dc (counts as a dc2tog), dc in next (11, 12) sts, dc2tog, dc in next (11, 12) sts, slst to first dc to join; turn. ((24, 26) sts)
(To lengthen sleeves, work additional repeats of Round 4.)
Proceed to “Final Round”.
All Sizes
Final Round: With WS facing, ch 1, yoslst in each st, slst to join. Fasten off.
Finishing
Weave in remaining ends: Learn more about how to snuggly hide away your yarn tails.
Blocking: Once all ends are woven in, you may do a light steam blocking using either a steamer or iron with steam setting. Focus on any areas that aren’t laying as flat as you’d like, such as the sleeve decreases. Do not touch steamer or iron directly to yarn.
Toss on your new Three Days to Done Raglan—who knew looking this good could be that fast?
Permissions + Copyright:
Please do not publish or share this pattern as your own. You may make items to sell with this pattern. In exchange, please link back this post. Do NOT use our photos as your own sales photos.
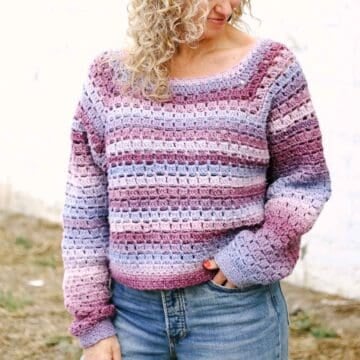
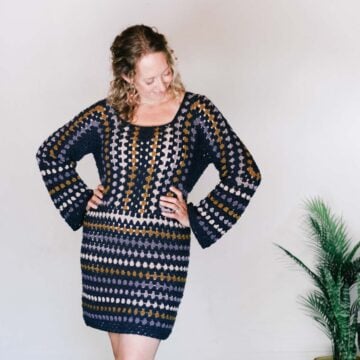
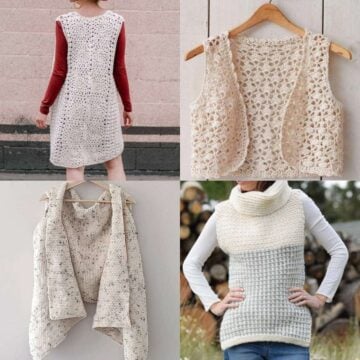
More Crochet Sweater Free Patterns
We've got tons of easy free crochet garment patterns I think you'll enjoy. What do you want to make next?
- Simple Crochet Raglan Sweater Free Pattern + Video
- Cropped Hexagon Sweater - Free Crochet Pattern
- Nearly Seamless Crochet Cardigan - Easy Free Pattern
- Marika Swancho | A Lacy Crochet Sweater Poncho
- Easy C2C Crochet Cardigan Pattern Made From Rectangles
- Taylor Swift Crochet Dress Pattern | Made From Granny Stitch Hexagons


That was so fun! Now what?
Invitation to our Private Community
Come discuss crocheting your own yoke sweater and lots of other projects and techniques in our Make & Do Crew community. Here thousands of helpful crocheters answer each other's questions and share their stitches. Join us!


Leave a Reply