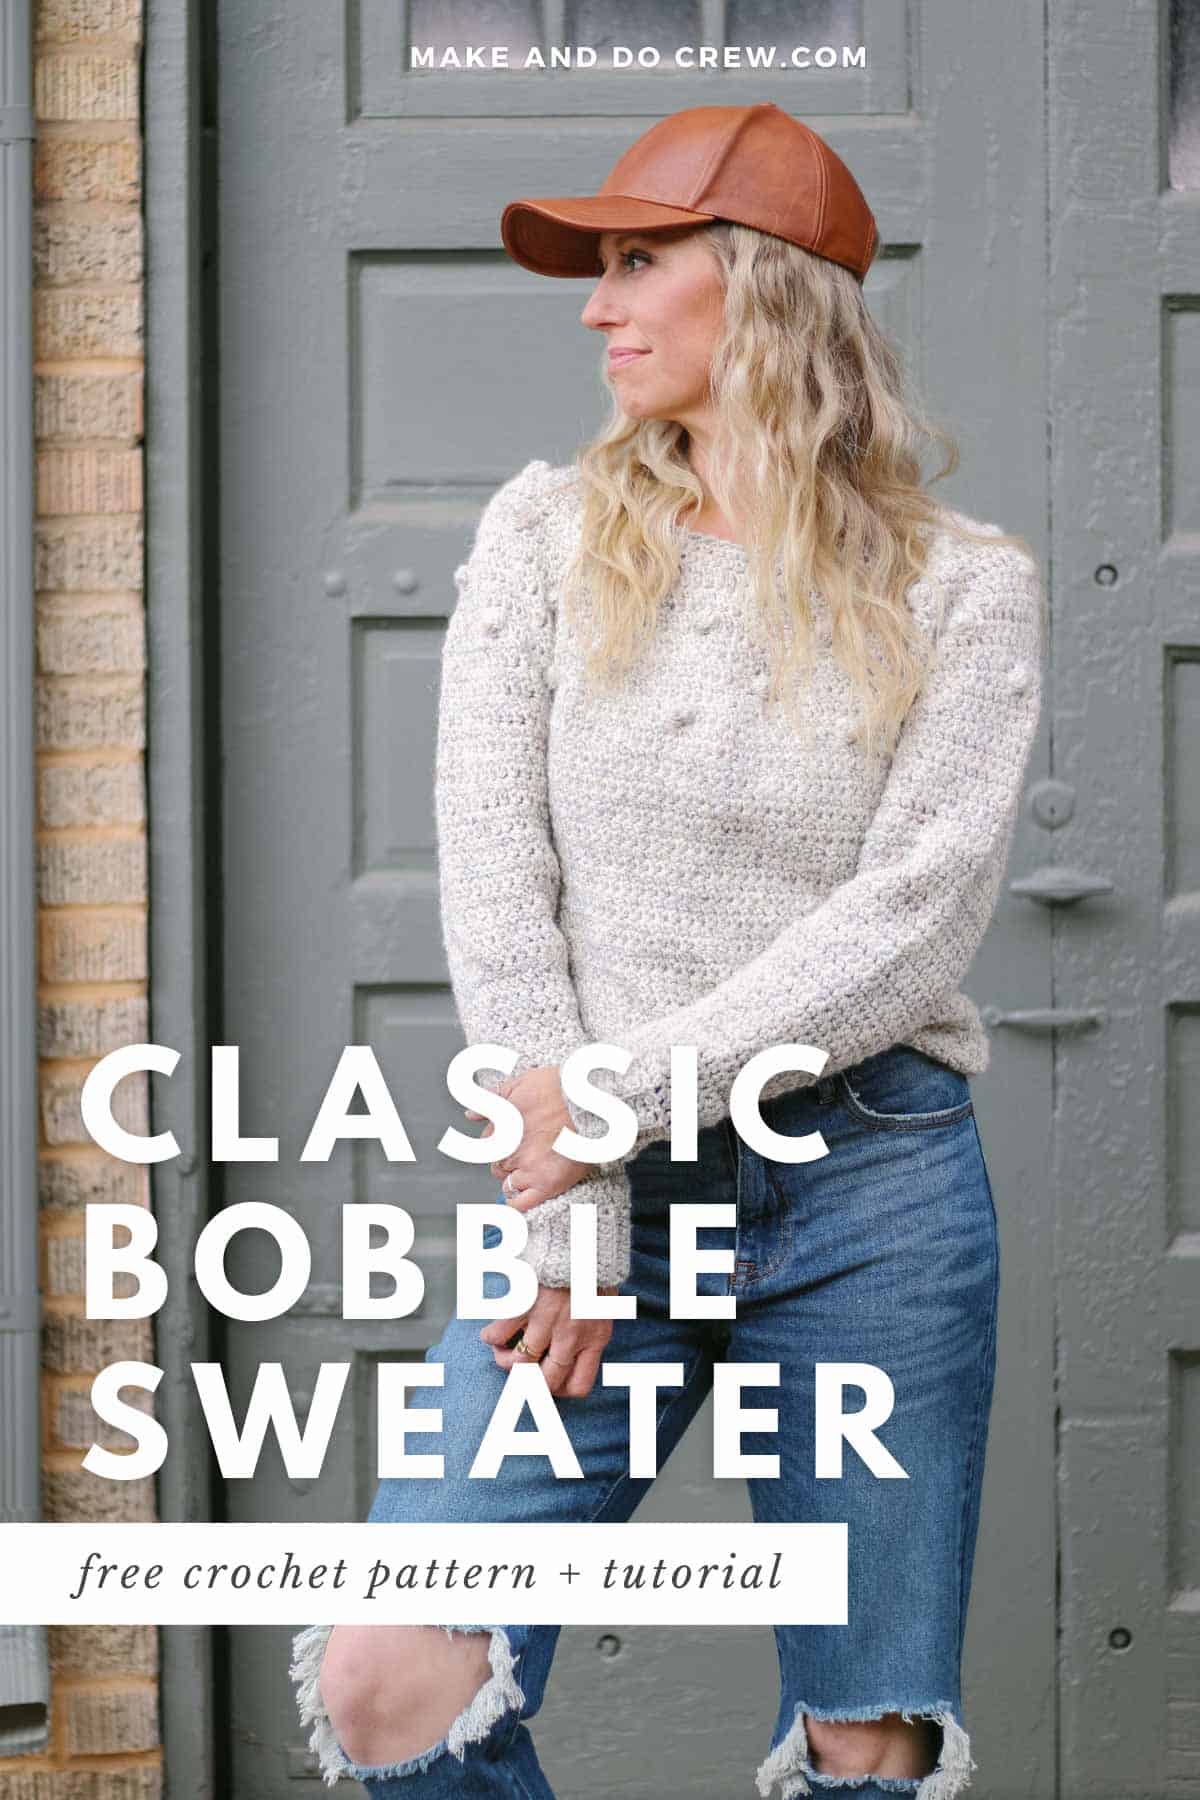
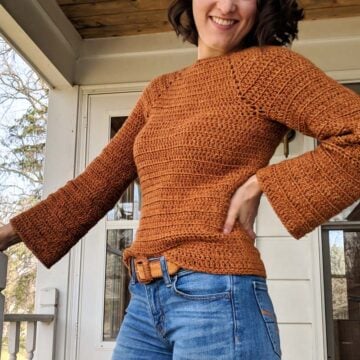
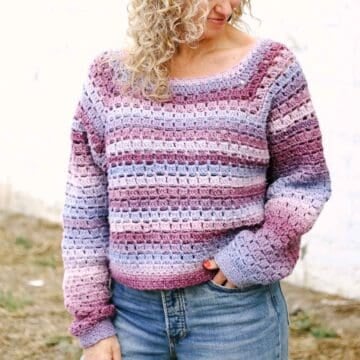
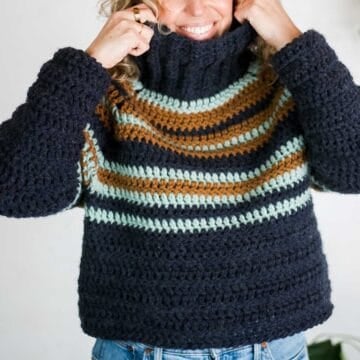
This easy crochet crew neck sweater pattern is simple, seamless, and adorned with delicate bobbles. Because this yoke pattern is worked in the round from the top down, you can try it on as you go and adjust the fit to suit your vision of a perfect pullover!
Get the free sweater pattern below or purchase the ad-free, printable PDF download.
This crochet crew neck sweater pattern is part of a collaboration with Lion Brand Yarns. This post contains affiliate links.
Adult Crew Neck Pullover Sweater
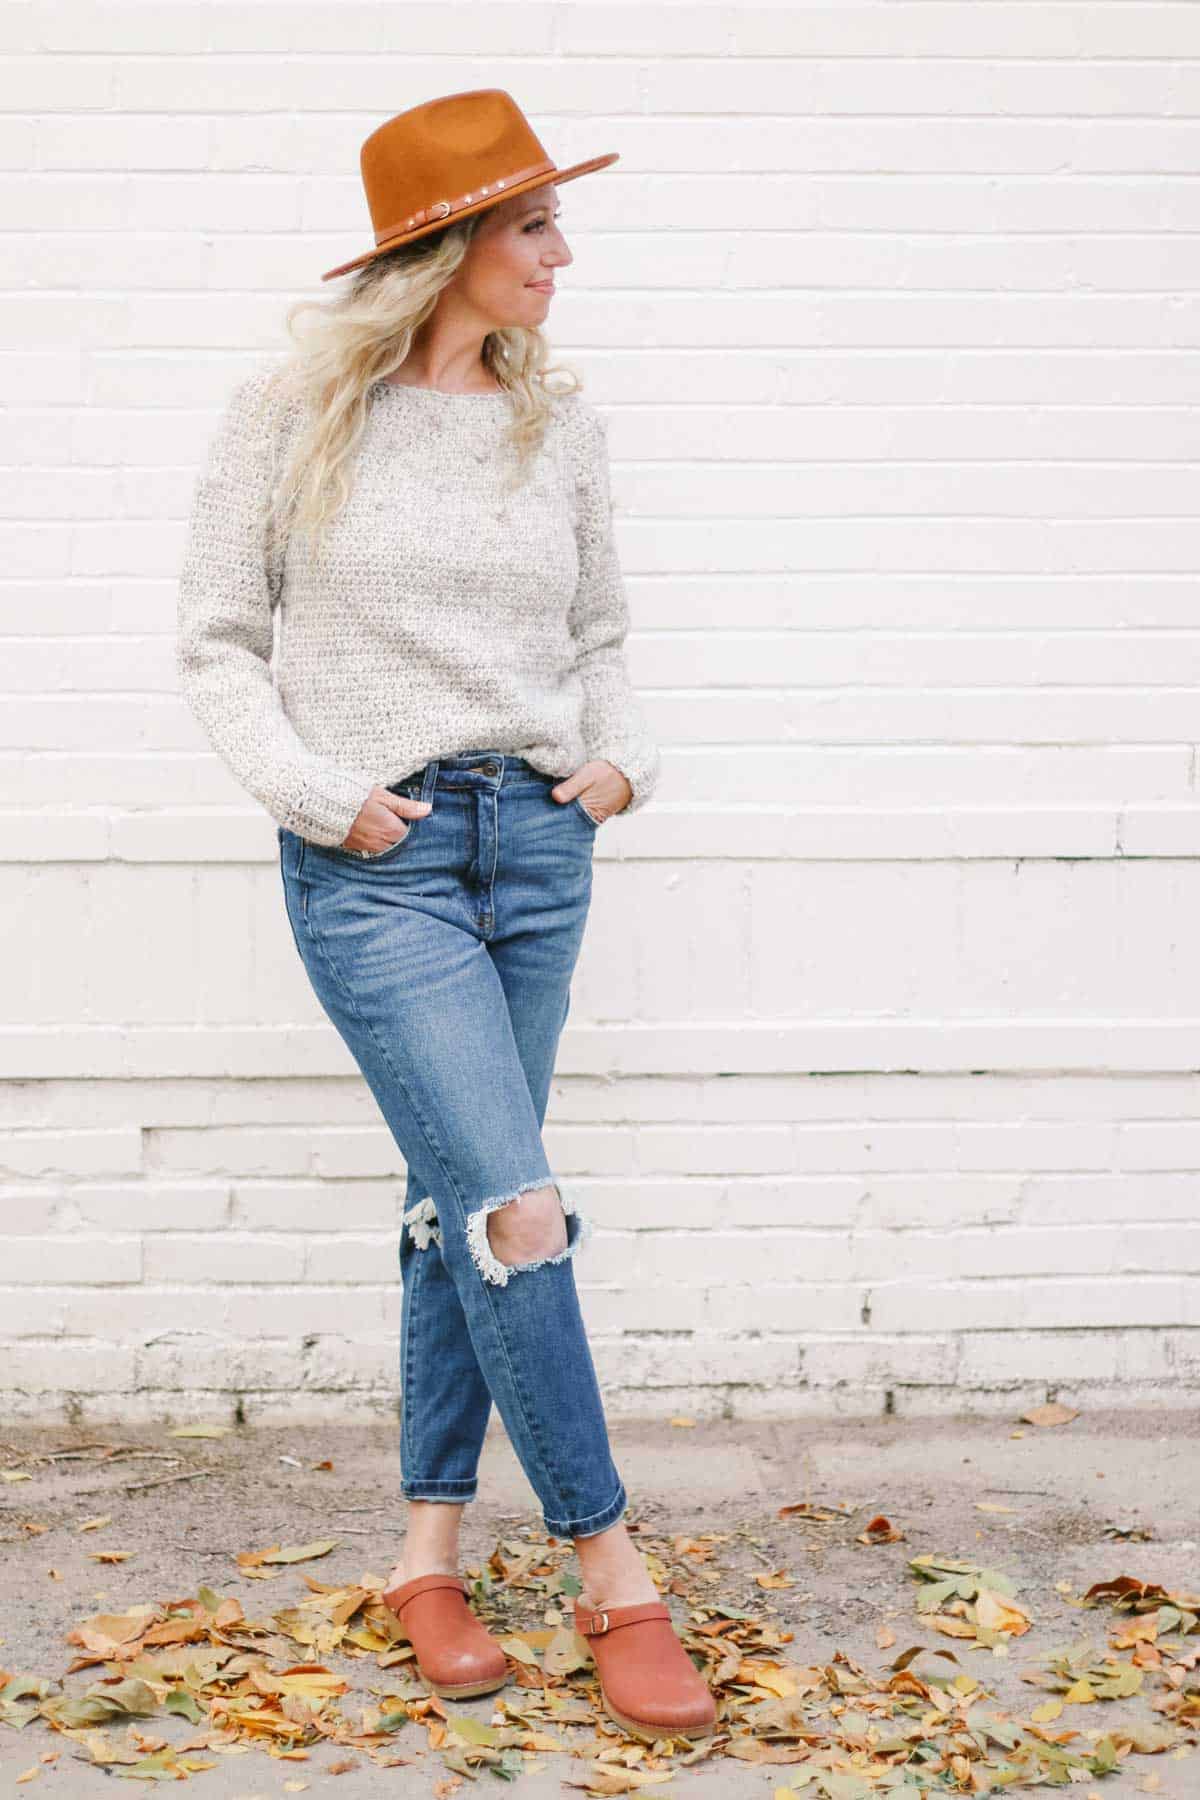
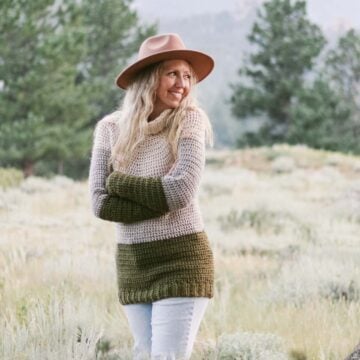
You’ll find this pullover as easy to style as it is to crochet. Wear it over a dress or with a pair of jeans for an effortlessly cool, handmade look. Whether you prefer a longer tunic-length top or three-quarter-length sleeves, there are endless ways to make this sweater your own.
While this crochet pattern was designed with women in mind, its classic design works for all genders.
Jump to:
- Adult Crew Neck Pullover Sweater
- How to Crochet a Top-Down Sweater
- Video Walk Through
- Customizing Your Crew Neck Top
- The Best Sweater Yarn
- Tips for Crocheting a Pullover
- Print this Pattern
- All-in-One kit
- More Easy Top-Down Patterns
- Sonnet Yoke Sweater - Free Pattern
- Final Thoughts on the Sonnet Sweater
- That was so fun! Now what?
- Invitation to our Facebook group
- How to Crochet a Crew Neck Pullover - An Overview
Why you’ll love this seamless sweater!
How to Crochet a Top-Down Sweater
I love crocheting yoke sweaters and raglans because you are able to watch them take shape as you work in the round. There are very few surprises when you crochet a top down sweater because you can evaluate it during each step of the pattern.
Related: Our favorite free crochet sweater patterns
Pattern Overview
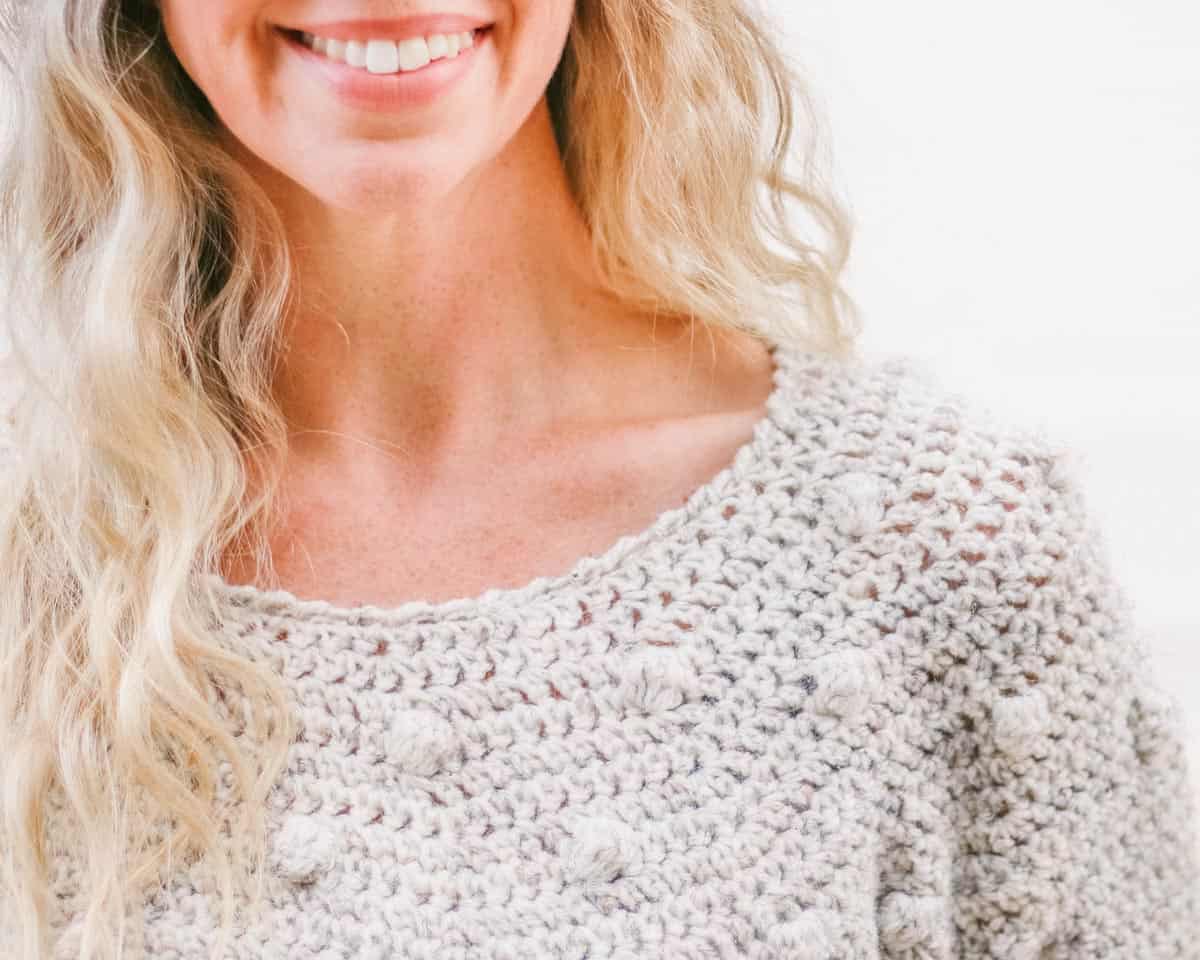
The Sonnet Sweater starts at the neckline using extended single crochet stitches. You’ll sprinkle in bobble stitches and increase quickly to the bust.
For an extra beginner-friendly sweater, eliminate the bobble stitches and work entirely in extended single crochet stitches.
After the bust section is complete, you’ll divide for the armholes. This step can feel intimidating, but it’s easier than you think.
When the main body is complete, you’ll use single crochet stitches to add ribbing around the crew neckline, the wrists and sweater bottom.
Pro Tip: During the yoke section of the pattern, use stitch markers to keep track of where to increase. This reduces the amount of counting you need to do and makes the whole project more meditative.
Video Walk Through
If you prefer to watch instead of read, let me walk you through the Sonnet Sweater pattern and explain what to expect.
(If you have an ad-blocker running, you'll need to disable it to view the video.)
Customizing Your Crew Neck Top
You will adore this pattern if you prefer to be in control when crocheting a sweater! To make the perfect crochet top, you can adjust it in a variety of ways to flatter and fit your specific body.
The Best Sweater Yarn
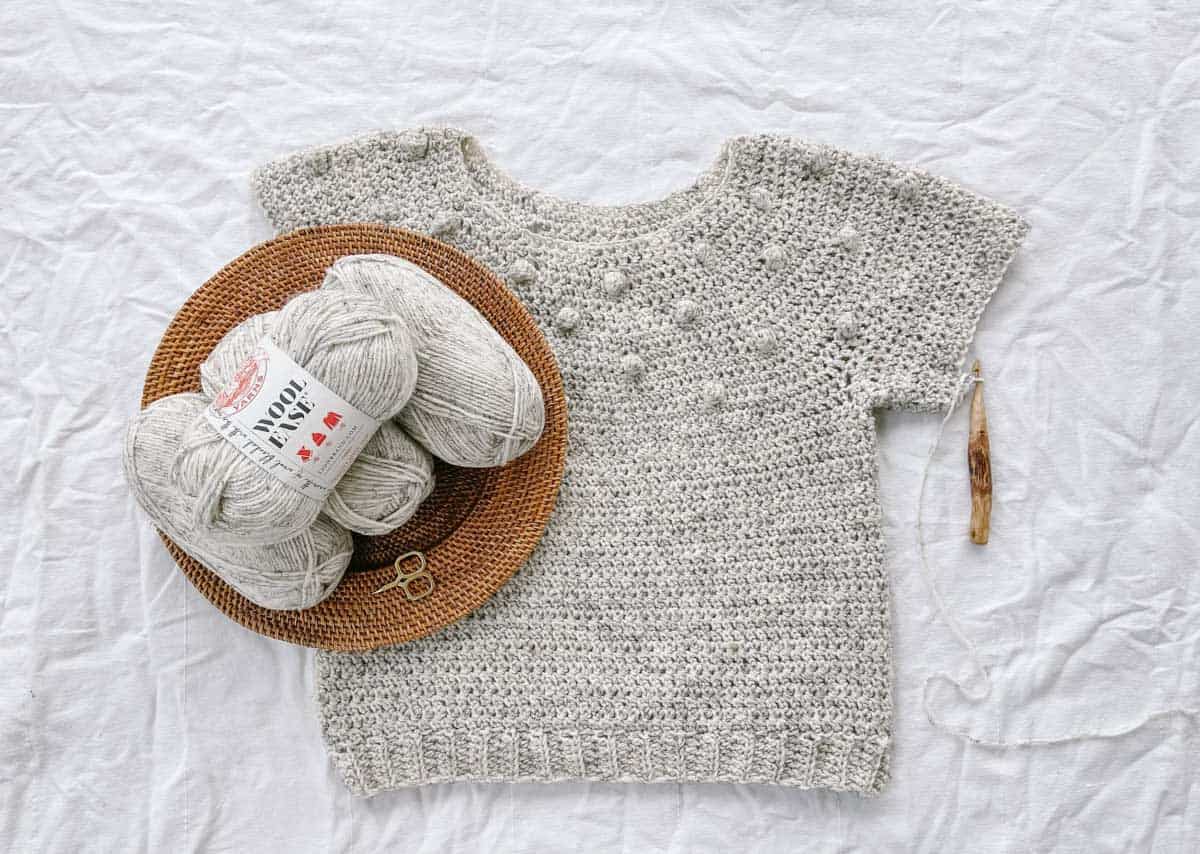
For this crew neck pullover, we used a long-time favorite yarn–Lion Brand Wool-Ease. (I remember using this same colorway to knit a sweater in high school!)
We love Wool-Ease because it has a luxe matte texture, washes really well, and is readily available in stores and online. I also find that it drapes well in crochet tops, despite being a medium-weight yarn. Check out all the colors.
Substitutions
If you can’t track down Wool-Ease or are allergic to animal fibers, don’t despair. This pullover can be crocheted in most worsted weight (category 4) yarns.
Just be sure to check your gauge and adjust your hook size to meet what’s listed in the pattern. A few non-wool worsted weight yarn alternatives:
Related: How to Shop Your Stash: The Best Patterns for Using the Yarn You Have
Tips for Crocheting a Pullover
When crocheting garments, it’s essential to check your gauge before getting started. This will ensure your sweater fits how you expect it to.
Try on your sweater as you go. With seamless cardigans and sweaters, you have the luxury of making adjustments as you go. Take advantage.
Related: 30+ Free Poncho Patterns - for winter and beyond
Print this Pattern
Prefer to crochet on the couch? Need a portable, printable pattern? You'll love the premium Sonnet Sweater PDF! The instantly downloadable, ad-free file is formatted for easy printing and includes the complete pattern and several photos.
Print it! Purchase the ad-free PDF for easy printing
All-in-One kit
If you don't live near amazing yarn stores or if you just like to get fun packages in the mail, the all-in-one crochet kit is a perfect way to make your Sonnet Sweater. This bundle from Lion Brand includes all the Wool-Ease yarn you'll need, plus a bonus printable PDF of the pattern (delivered digitally).


Sonnet Yoke Sweater - Free Pattern
Explanation:
Cascading bobbles and delicate crochet stitches combine to create a pretty and polished pullover. Because this seamless sweater is worked from the top down, you can try it on as you go and customize the length to suit your personal style.

Don't spend hours for a "meh" result!
Tired of crocheting garments that don't fit? Learn our C.R.A.F.T. Framework to make sweaters that fit and feel amazing!
Pair it with jeans or a skirt or layer it over a dress for a cozy cold-weather outfit. You’ll practice crocheting in the round, increasing, and basic yoke skills to complete this advanced beginner pattern.
Supplies + Materials
• Lion Brand Wool-Ease (Weight: 4/Medium - 197 yds, 3.0 oz/85 g)
- Wheat (620-402) – 5 (5, 6, 6, 7, 8, 9, 9, 10) skeins [approx. 360 (388, 442, 474, 529, 595, 682, 731, 778) g]
• Tapestry needle
• Size L (8.0 mm) crochet hook (for main sweater)
• Size K (6.5 mm) crochet hook (for ribbing)
• Stitch markers or safety pins
Permissions + Copyright:
Please do not publish or share this pattern as your own. You may make items to sell with this pattern. In exchange, please link back this post. Do NOT use our photos as your own sales photos.
Measurements
| Size | Fits up to actual bust | Sweater length (neckline to bottom) |
|---|---|---|
| XS | 30” | 18” |
| S | 34” | 18” |
| M | 38” | 19” |
| L | 42” | 19” |
| 1X | 46” | 19” |
| 2X | 50” | 21” |
| 3X | 54” | 21” |
| 4X | 58” | 23” |
| 5X | 62” | 23” |
Sample pictured is a size M on a model with a 38” bust. Sweater is intended to be worn with a slight bit of positive ease. Size up for a more relaxed look.
Abbreviations + Glossary
(US Terms)
ch – chain
dc – double crochet
esc – extended single crochet
esc2tog – extended single crochet two together
hdc – half double crochet
hdcblo – half double through the back loop only
rep – repeat
RS – right side
Rsc-reverse single crochet (crab stitch)
sc – single crochet
sk – skip
slst – slip stitch
st(s) – stitch(es)
WS – wrong side
tch – turning chain
Special Stitches
Bobble Stitch: (Yo, insert hook in designated st, yo and draw up loop, yo and draw through 2 loops) 5 times, yo, draw through 6 loops on hook.
Gauge
10 sts x 10 rows = 4” as worked in main sweater pattern using larger hook
Our Latest Crochet Inspiration:
Here are a few more free crochet patterns and tutorials that are hot off the presses.


Overall Pattern Notes
• Sweater is worked from the top down, allowing you to try it on as you go.
• Pattern is written for smallest size, with stitch counts for larger sizes following in parentheses. XS (S, M, L, 1X, 2X, 3X, 4X, 5X) It can be helpful to highlight all numbers related to your size before beginning. When only one number is given, it pertains to all sizes.
Premium PDF
easier and faster with fewer mistakes.
- Complete pattern + photo tutorials
- Instant download
- Formatted for easy printing
!! Gauge Check !!
Please don’t skip this step or you will risk your sweater not fitting as expected.
With larger hook:
Foundation Row: Ch 19.
Row 1 (RS): Sk 1 ch, esc each ch to end; turn. (18)
Row 2 (RS): Ch 1, esc in each st to end; turn.
Rep Row 2 twelve times. Measure center four inches of swatch vertically and horizontally. Compare to pattern gauge listed above.
• If there are too many stitches in 4” horizontally, increase your hook size and re-swatch.
• If there aren’t enough stitches in 4” horizontally, decrease your hook size and re-swatch.
• If swatch is measuring too small vertically, make a deliberate effort to pull loops up a bit higher before completing each single crochet.
• If swatch is measuring too large vertically, make an effort to work the loops of each single crochet a little tighter.
• This video is incredibly helpful if you’re having trouble achieving the correct vertical gauge:
Want some company while you crochet?
Get support (and camaraderie!) in the Make & Do Crew community. Join for free here.
Main Sweater
Notes:
- Sweater is worked in turned rounds. Each round is joined with a slip stitch, which doesn’t count as a stitch in the stitch count given at the end of each round.
Print it! Buy the ad-free PDF and highlight the stitch counts for your size
Yoke:
With larger hook: Ch 64 (64, 66, 66, 72, 72, 84, 84, 84), join with slst to first ch. 64 (64, 66, 66, 72, 72, 84, 84, 84) sts
Foundation Round: Ch 1, esc in each ch to end of round, join with slst to first st; turn. 64 (64, 66, 66, 72, 72, 84, 84, 84) sts
Round 2 (WS inc): Ch 1, *2 esc, pm in first esc of inc, esc in next 7 (7, 5, 5, 5, 5, 6, 6, 6) sts; rep from * around; slst to first esc of round to join; turn. 72 (72, 77, 77, 84, 84, 96, 96, 96) sts
✨Unlock this free subscriber-exclusive pattern ✨
Follow these steps to view the full free pattern below
Round 12 (WS): Ch 1, *esc in next 13 (13, 11, 11, 10, 10, 11, 11, 12) sts, bobble in next st; rep from * to end of round; turn. 126 (126, 132, 132, 154, 154, 156, 156, 159) sts
Round 13 (RS inc): Ch 1, *2 esc, esc in next 6 (6, 9, 9, 9, 9, 8, 8, 7) sts; rep from * around; slst to first esc of round to join; turn. 144 (144, 145, 145, 169, 169, 173, 173, 190) sts
Size XS only: proceed to End Yoke section.
Wanna save this pattern?
Round 14 (WS): Rep Round 6. X (144, 145, 145, 169, 169, 173, 173, 190) sts
Round 15 (RS inc): Ch 1. Sizes 3X, 4X and 5X only: esc first 19, 19, 10 sts. All sizes: *2 esc, esc in next X (11, 6, 6, 12, 12, 6, 6, 9) sts; rep from * around and esc in any remaining sts; slst to first esc of round to join; turn. X (156, 165, 165, 182, 182, 195, 195, 208) sts
Size S only: proceed to End Yoke section.
Round 16 (WS): Ch 1, esc in next X (X, 7, 7, 6, 6, 7, 7, 8) sts, bobble in next st, *esc in next X (X, 14, 14, 12, 12, 14, 14, 15) sts, bobble in next st; rep from * around, esc in any remaining sts; slst to first esc of round to join; turn. X (X, 165, 165, 182, 182, 195, 195, 208) sts
Size M only: proceed to End Yoke section.
Round 17 (RS inc): Ch 1, *2 esc, esc in next X (X, X, 14, 21, 21, 12, 12, 15) sts; rep from * around and esc in any remaining sts; slst to first esc of round to join; turn. X (X, X, 176, 190, 190, 210, 210, 221) sts
Sizes L and 1X only: proceed to End Yoke section.
Round 18 (WS): Rep Round 6. X (X, X, X, X, 190, 210, 210, 221) sts
Round 19 (RS inc): Ch 1. Size 2X only: esc first 10 sts. All sizes: *2 esc, esc in next X (X, X, X, X, 8, 18, 18, 16) sts; rep from * around and esc in any remaining sts; slst to first esc of round to join; turn. X (X, X, X, X, 210, 221, 221, 234) sts
Round 20 (WS): Ch 1, *esc in next X (X, X, X, X, 14, 16, 16, 17) sts, bobble in next st, rep from * to end of round; turn. X (X, X, X, X, 210, 221, 221, 234) sts
Size 2X only: proceed to End Yoke section.
Round 21 (RS): Ch 1, *2 esc, esc in next X (X, X, X, X, X, 55, 12, 15) sts; rep from * around and esc in any remaining sts; slst to first esc of round to join; turn. X (X, X, X, X, X, 225, 238, 248) sts
Size 3X, 4X and 5X: proceed to End Yoke section.
End Yoke:
Work 2 (1, 2, 2, 3, 1, 2, 3, 4) additional rep of Round 6. 144 (156, 165, 176, 190, 210, 225, 238, 248) sts
All sizes: proceed to Back Extension section.
Back Extension:
Your yoke should now have 15 (16, 18, 19, 20, 21, 23, 24, 25) rounds with a total of 144 (156, 165, 176, 190, 210, 225, 238, 248) sts. The next rows are worked over only a portion of the stitches in order to create a slight extension for the back of the sweater. (See photo at end of pattern.)
Row 1: Ch 1, esc in next 36 (41, 45, 50, 54, 59, 63, 66, 70) sts; turn. 36 (41, 45, 50, 54, 59, 63, 66, 70) sts
Row 2: Ch 1, esc in next 36 (41, 45, 50, 54, 59, 63, 66, 70) sts; turn. 36 (41, 45, 50, 54, 59, 63, 66, 70) sts
Sizes XS, L, 2X, 3X and 5X only: rep Row 2. 36 (X, X, 50, X, 59, 63, X, 70) sts
Body Set-Up:
The next round is worked around entire yoke to divide for the sleeves and set up the body section.
Round 1 (RS): Ch 1, esc in next 36 (41, 45, 50, 54, 59, 63, 66, 70) sts (back), skip 35 (35, 36, 36, 39, 44, 48, 50, 50) esc (sleeve #1), ch 3 (3, 4, 4, 5, 5, 6, 6, 6) (underarm #1), esc in next 38 (45, 48, 54, 58, 63, 66, 72, 78) sts (front), skip 35 (35, 36, 36, 39, 44, 48, 50, 50) esc (sleeve #2), ch 3 (3, 4, 4, 5, 5, 6, 6, 6) (underarm #2), slst to first esc of round to join; turn.
Last round should now contain a total of 80 (92, 101, 112, 122, 132, 141, 150, 160) sts, broken down as follows:
Back: 36 (41, 45, 50, 54, 59, 63, 66, 70) esc
Sleeve #1: 35 (35, 36, 36, 39, 44, 48, 50, 50) skipped sts
Underarm #1: 3 (3, 4, 4, 5, 5, 6, 6, 6) ch
Front: 38 (45, 48, 54, 58, 63, 66, 72, 78) esc
Sleeve #2: 35 (35, 36, 36, 39, 44, 48, 50, 50) skipped sts
Underarm #2: 3 (3, 4, 4, 5, 5, 6, 6, 6) ch
Round 2 (WS): Ch 1, esc in each esc and ch around, slst to first esc of round to join; turn.
Rep Round 2, turning at the end of each round, until the Body measures 9.5 (9.5, 10, 10, 10, 11.5, 11.5, 11.5, 11.5)” from the armhole (approximately 23 (23, 27, 27, 27, 29, 29, 29, 29) total rounds). If extra length is desired, work additional repeats of Round 2 now. (Doing so will increase the yarn requirements). Do not fasten off.
Bottom Ribbing:
- Bottom ribbing is worked perpendicular to main sweater and joined as you go.
- Note that there is no chain 1 at the beginning of WS rows.
With smaller hook and yarn already attached:
Foundation Row: Ch 7.
Row 1 (RS): Sk first ch, hdc in each ch, slst to next available sweater st, slst in each of next 2 sweater sts; turn. (6)
Row 2 (WS): Hdcblo in each st; turn. (6)
Row 3 (RS): Ch 1, hdcblo in each st, slst to next available sweater st, slst in each of next 2 sweater sts; turn. (6)
Rep Rows 2 and 3 to end of sweater bottom, ending with a Row 2. This may require slip stitching only one stitch instead of two along sweater bottom on the final repeat. It’s fine to improvise here to ensure you end with a Row 2. Fasten off leaving a 15” tail for seaming.
Finishing Bottom Ribbing:
Stack final ribbing row on top ribbing Row 1. Using tapestry needle and existing yarn tail, whip stitch each corresponding stitch together.
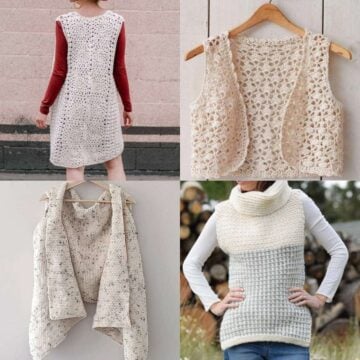
Can't get enough free crochet patterns?
Neither can we! Check out these collections of handpicked patterns to find your next project.

Sleeves
Begin with either armhole. With RS of sweater facing out, attach yarn at bottom of armhole.
With larger hook:
Round 1 (RS): Ch 1, place 46 (44, 46, 48, 50, 57, 62, 62, 64) esc around armhole (accomplish this by working 1 esc in each esc/ch, 2 esc in the side of the stitch from the body set-up round and 6 (4, 4, 6, 4, 4, 6, 6, 4, 6) esc in back extension raw row edges), slst to first esc of round to join; turn. 44 (44, 46, 46, 50, 55, 60, 62, 62) sts
Round 2 (dec): Ch 1, esc, esc2tog, esc in each st until 3 rem, esc2tog, esc; turn. 44 (42, 44, 46, 48, 55, 60, 60, 62) sts
Round 3: Ch 1, esc in each st around; turn. 44 (42, 44, 46, 48, 55, 60, 60, 62) sts
Round 4: Ch 1, esc in each st around; turn. 44 (42, 44, 46, 48, 55, 60, 60, 62) sts
Sizes XS, S, M and L: Rep Rounds 2-4 10 times.
Sizes 1X, 2X, 3X, 4X and 5X: Rep Rounds 2 and 3 (5, 6, 9, 12, 12) times, then rep Rounds 2-4 (6, 7, 6, 4, 4) times.
When these repeats are complete sleeve should contain 34 (34, 34, 34, 32, 37, 40, 40, 40) rounds and 24 (22, 24, 26, 26, 29, 30, 28, 30) stitches.
All Sizes: Rep Round 3 6 (7, 7, 8, 10, 7, 4, 5, 5) more times for a total of 40 (41, 41, 42, 42, 44, 44, 45, 45) rounds. For a longer or shorter sleeve, adjust this number, being sure to end with a RS round. (Ribbing will add additional 2.5” to sleeve length.)
Sleeve Ribbing:
- Just as with main sweater, ribbing is worked perpendicular to sleeve and joined as you go.
- Note that there is no chain 1 at the beginning of WS rows.
With smaller hook and yarn already attached:
Foundation Row: Ch 10.
Row 1 (RS): Sk first ch, hdc in each ch, slst to next available sweater st, slst in each of next 2 sleeve sts; turn. (9)
Row 2 (WS): Hdcblo in each st; turn. (9)
Row 3 (RS): Ch 1, hdcblo in each st, slst to next available sleeve st, slst in each of next 2 sweater sts; turn. (9)
Rep Rows 2 and 3 to end of sleeve edge, ending with a Row 2. This may require slip stitching only one stitch instead of two along sweater bottom on the final repeat. It’s fine to improvise here to ensure you end with a Row 2. Fasten off leaving a 15” tail for seaming.
Finishing Sleeve Ribbing:
Stack final ribbing row on top ribbing Row 1. Using tapestry needle and existing yarn tail, whip stitch each corresponding stitch together.
Repeat sleeve process on second armhole.
Finishing Crew Neckline:
With right side facing and smaller hook, attach yarn anywhere on neckline.
Neckline Border (RS): Ch 1, rsc in first st and in each st around neckline, join with slst to first rsc. Fasten off.
Weave in remaining ends. Steam block sweater if desired, taking care not to actually touch steamer/iron to yarn.
Toss on your new sweater to be-bop-bobble your way to a fantastic handmade outfit!
Final Thoughts on the Sonnet Sweater
Congrats, you've just added another piece to your handmade wardrobe! Whether you pair your new crewneck pullover with skirts or pajama pants, take pride knowing you made it yourself.

That was so fun! Now what?
Invitation to our Facebook group
Come discuss crocheting sweater patterns and lots of other crochet projects and techniques in our Make & Do Crew Facebook group. Here thousands of helpful crocheters answer each others questions and share their stitches. Come join us here.

How to Crochet a Crew Neck Pullover - An Overview
Materials
Yarn
- Color: Lion Brand Wool-Ease Weight: 4/Medium - 197 yds, 3.0 oz/85 g
- Wheat 620-402 – 5 (5, 6, 6, 7, 8, 9, 9, 10) skeins [approx. 360 (388, 442, 474, 529, 595, 682, 731, 778) g]
Additional Supplies
- Tapestry needle
- Size L 8.0 mm crochet hook (for main sweater)
- Size K 6.5 mm crochet hook (for ribbing)
- Stitch markers or safety pins
Abbreviations + Glossary (US Terms)
- ch – chain
- dc – double crochet
- esc – extended single crochet
- esc2tog – extended single crochet two together
- hdc – half double crochet
- hdcblo – half double through the back loop only
- rep – repeat
- RS – right side
- Rsc-reverse single crochet (crab stitch)
- sc – single crochet
- sk – skip
- slst – slip stitch
- st(s) – stitch(es)
- WS – wrong side
- tch – turning chain
Abbreviations and Glossary (US Terms):
Want some company while you crochet?
Get support (and camaraderie!) in the Make & Do Crochet Crew Facebook Group. Search “Make and Do Crochet Crew” on Facebook.com.
Permissions + Copyright
Please do not publish or share this pattern as your own. You may make items to sell with this pattern. In exchange, please link back to this page. Do NOT use my photos as your own sales photos.
Overall Pattern Notes
Instructions
Easy Crochet Sweater Pattern - Overview
- 1. Before starting, follow the instructions to check your gauge to make sure your sweater will fit.
Yoke
- 2. The yoke of the pullover is begins at the necklie and is worked in the round. This is a good time to try your sweater on as you go.
Body Set-up
- 3. The final yoke round includes extra chain stitches to create space for each armhole.
- 4. Several inches of the body are worked in the round. You can modify the length of the sweater at this point.
Bottom Ribbing
- 5. The bottom ribbing is worked perpendicular to main sweater and joined as you go.
Sleeves
- 6. Yarn is attached at the bottom of the armhole. The sleeves are worked in the round with periodic decreases to create a tapereedlook.
- 7. Sleeve ribbing is worked perpendicular to sleeve and joined as you go. Repeat process on second armhole.
Crew Neckline
- 8. Finish neckline using reverse single crochet stitches.
Finishing
- 9. Steam blocking sweater is optional.
- 10. Toss on your new sweater to be-bop-bobble your way to a fantastic handmade outfit!
Overall Pattern Notes
- Sweater is worked from the top down, allowing you to try it on as you go.
- Sweater is worked in turned rounds. Each round is joined with a slip stitch, which doesn’t count as a stitch in the stitch count given at the end of each round.


Leave a Reply