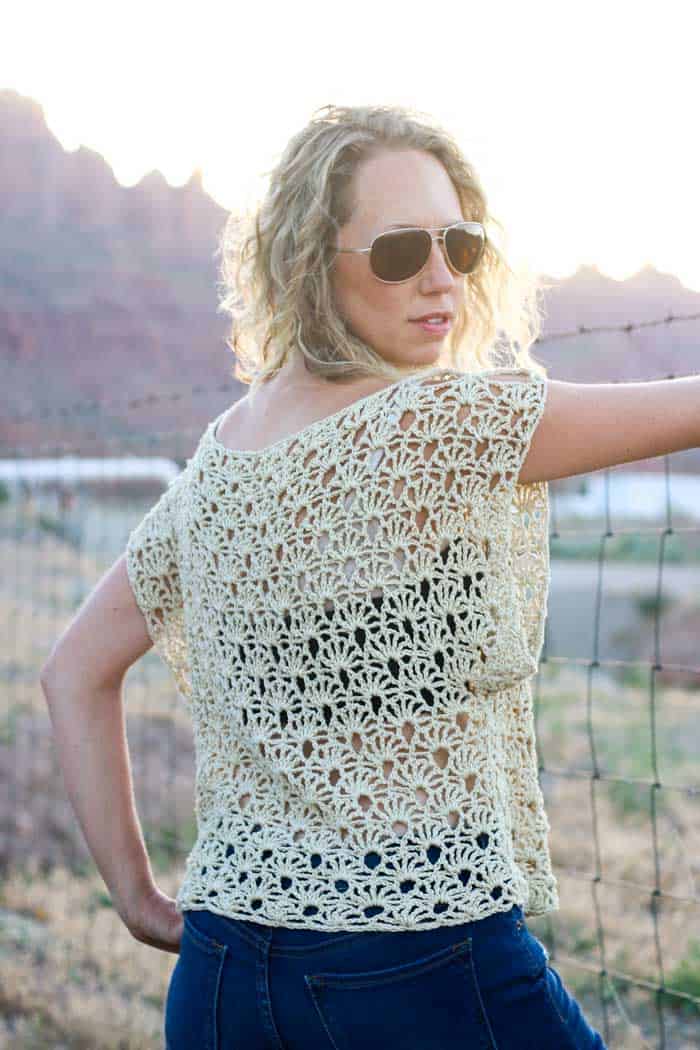
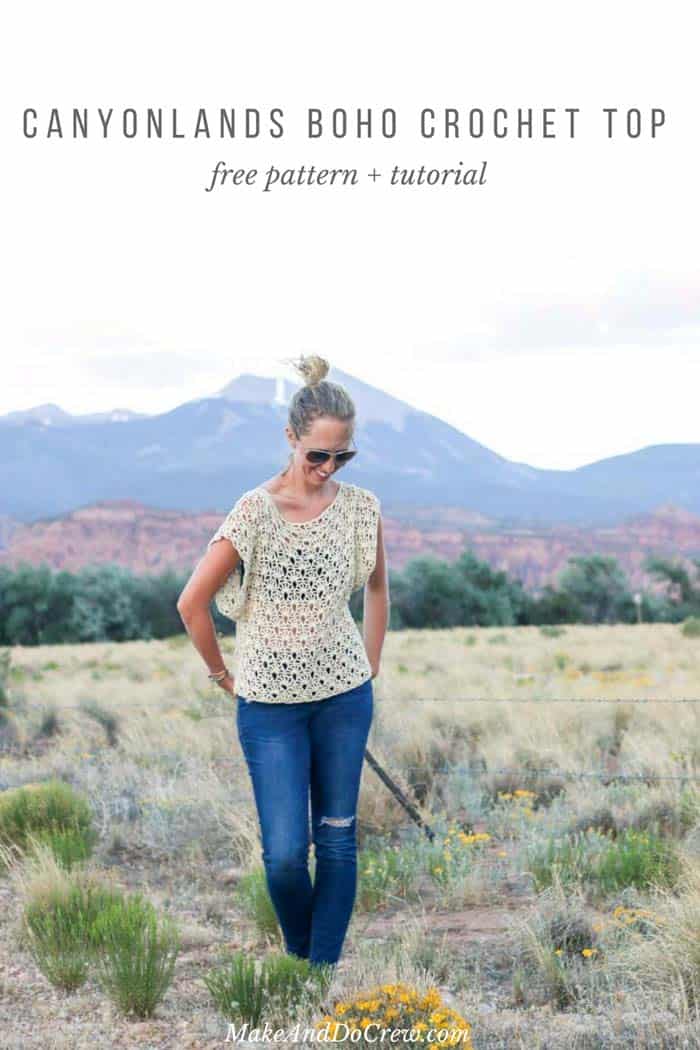
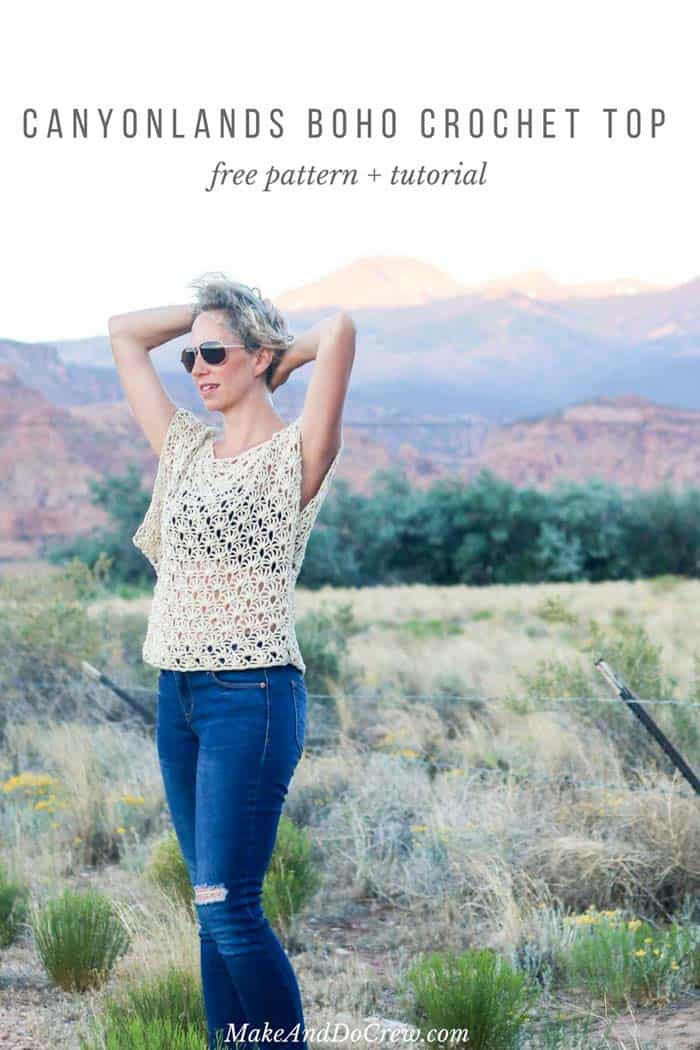
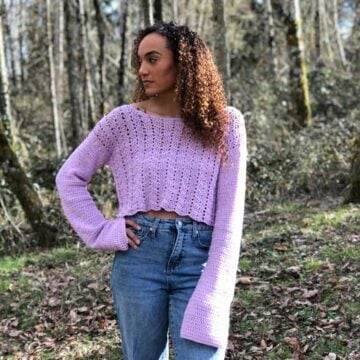
Combine the breezy Canyonlands boho crochet top with a bandeau or cami, a pair of well-worn jeans and a free spirit and you'll have yourself the perfect bohemian summer look! As always, the free pattern is below or you can purchase a printable PDF here.
This free boho crochet top pattern is part of an ongoing collaboration with my friends at Lion Brand. This post contains affiliate links.
Are you a swatcher? As in, someone who makes swatches to before a starting a project, either to check your gauge or try out a certain yarn.
I neeeeeever used to swatch anything. Delaying the gratification of starting a new project just to make something I'd inevitably tear out anyhow sounded like a pretty silly use of my precious crochet time.

But things have changed around here. Now I get obsessed with trying out new stitches and end up swatching and swatching until I have no idea which stitch to actually use for a design. (If you're wondering, this is one of my favorite stitch dictionaries to swatch from!
When I was on total swatch overload before beginning this boho crochet top pattern, many of you chimed in on Instagram about which stitch you preferred. The Open Fan stitch was the clear favorite. Honestly, I groaned.
I was intimidated. So lacy. So many unfamiliar shapes. I was scared I just would never get the hang of it this stitch for making more than a swatch.
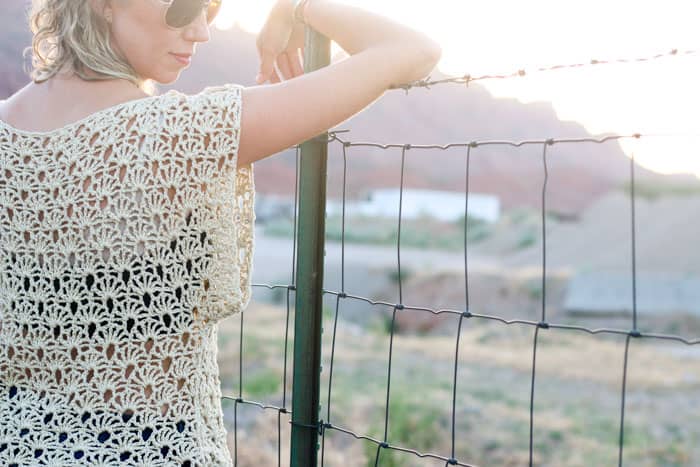
Well, let me say, to my brain, the Open Fan stitch is less straightforward than some other stitches. But it's only a four row repeat using basic stitches (ch, sc, dc, tr), so once you've worked 4-8 rows, it's smooth sailing. I've included a stitch chart in the printable pattern PDF which I think will be really helpful if you're a visual learner like me. You can purchase the printable, ad-free PDF here.
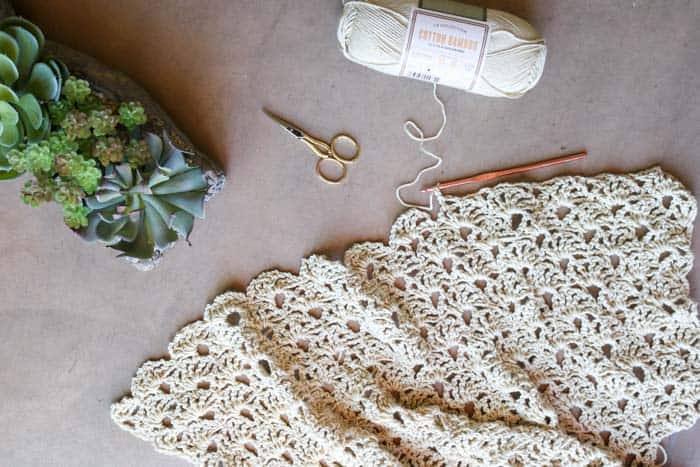
I really, really loved the Lion Brand LB Collection Cotton Bamboo yarn I used for this crochet top. The bamboo makes it smooth and flexible and the cotton makes it durable, creating the perfect combo for a garment you plan to wear over and over again (which I promise, you will!)
UPDATE: Lion Brand has put together a kit for this crochet top pattern! You can get all the yarn, plus a printed copy of the pattern sent straight to your doorstep. If you've never tried this Cotton Bamboo yarn before, this is a great way to get your hands on some. Check out the new kit here.
A Top For the Beach, Brunch or BBQs
Since crocheting this top, I've worn it with jeans, maxi skirts, and even as a swimsuit coverup top. My husband calls it my "rich lady shirt" because it makes any outfit look elegant and elevated. Ha.
Whether you're headed to a beach in Mexico (lucky you!) or lunch with friends, you can channel your inner rich lady too.
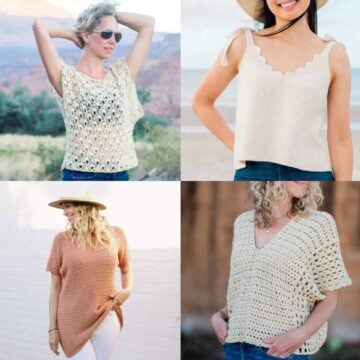
More Free Crochet Shirts + Tops Patterns
From peplum-style pullovers to easy, breezy lace blouses, crop tops and everything in between, you'll find your next wearable crochet project here.


See more free crochet shirts + tops patterns →
Please do not publish or share this pattern as your own. You may make items to sell with this pattern. In exchange, please link back to this post. Do NOT use my photos as your own sales photos. You can read my policies here. Now let’s make something awesome!
Canyonlands Boho Crochet Top - Free Pattern
Explanation:
This lacy boho crochet top has a slightly cropped look which makes it BBFs with warm nights under the stars and higher waisted jeans. Throw it on over a cami or a bandeau for a breezy summer vibe. It’s made from the bottom up using basic stitches (ch, sc, dc, tr) in a four row repeat. Once you have the basic repeat down, the shaping of the garment is extremely simple. Work additional rows before the sleeves to make a longer tunic-length top.
Supplies:
Purchase a kit with all the yarn needed to make this pattern here!
• LB Collection Cotton Bamboo by Lion Brand (Weight: 3/light - 245 yds, 3.5 oz)
- MC: Magnolia, 3 (5, 6) skeins
• Tapestry needle
• Size G (4 mm) crochet hook
• Size H (5 mm) crochet hook
• Stitch markers or safety pins
Sizes:
This crochet top is intended to be loose and flowy with quite a bit of positive ease. The pattern is fairly easy to customize and notes are included below on how to adjust sizing. Sample pictured is a size S/M.
S/M: Fits 32-36” bust. Length = approx. 19.5”
L/XL: Fits 37-41” bust. Length =approx. 21.5”
2XL/3XL: Fits 42-47” bust. Length =approx. 23.5”
Gauge:
2 fan clusters + single crochets on either side = 4”
8 rows (4 fan clusters) = 4”
Abbreviations and Glossary (US Terms):
ch – chain
sc – single crochet
dc – double crochet
tr – treble crochet
sk – skip
sp – space
tch – turning chain
RS – right side
WS – wrong side
rep – repeat
MC – main color
Overall Pattern Notes:
- When stitch counts are mentioned, size S/M is given first with L/XL and 2XL/3XL following in parenthesis. Like this: S/M (L/XL, 2XL/3XL).
- To customize this crochet top to make it wider or narrower, adjust your initial chain to be any multiple of 10 sts + 7. When working the rows, work fewer rows of the lower half of the shirt for a shorter shirt and more rows for a longer shirt. Similarly, you can adjust the overall length of the shirt and the openness of the armholes by working fewer or additional rows in the top half of the shirt.
Lower Half of Shirt
Notes:
• For visual learners, the chart in the ad-free PDF may be very helpful in understanding how the Open Fan stitch is worked.
• Special Stitch – Fan: 1 tr, [ch 2, 1 tr] 4 times
Make 2.
Foundation Row: Using smaller hook and MC, ch 97 (127,157).
Row 1 (RS): 1 sc in second ch from hook, *ch 1, sk 4 ch, 1 Fan in next ch, ch 1, sk 4 ch, 1 sc in next ch; rep from * to last 5 ch; ch 1, sk 4 ch, work [1 tr, ch 2, 1 tr, ch 2, 1 tr] all in last ch; turn.
Row 2 (WS): Ch 1, 1 sc in first tr, *ch 3, sk next ch2sp, 1 dc in next ch2sp**, ch 2, sk next [tr, sc, tr] and work 1 dc in first ch2sp of next Fan, ch-3, 1 sc in center (third) tc of Fan; rep from * ending last rep at **, ch 1, 1 tr in last sc; turn.
Row 3 (RS): Ch 6 (counts as 1 tr and 1 ch), sk first tr, work [1 tr, ch 2, 1 tr] in next ch1sp, ch 1, sk ch3sp, 1 sc in next sc, *ch 1, sk next ch3sp, 1 Fan in next ch2sp, ch 1, sk next ch3sp, 1 sc in next sc; rep from * to end; turn.
Row 4 (WS): Ch 6 (counts as 1 tr and 1 ch), sk first tr, 1 dc in next ch2sp, ch 3, 1 sc in center (third) tc of Fan, *ch 3, sk next ch2sp, 1 dc in next ch2sp, ch 2, sk next [tr, sc, tr] and work 1 dc in first ch2sp of next Fan, ch-3, 1 sc in center (third) tc of Fan; rep from * ending with a sc in fourth ch of tch; turn.
Row 5 (RS): Ch 1, *1 sc in next sc, ch 1, sk next ch3sp, 1 Fan in next ch2sp, ch 1, sk next ch3sp; rep from * to last sc and ch3sp, 1 sc in last sc, ch 1, sk ch3sp, work [1 tr, ch 2, 1 tr, ch 2, 1 tr] in tch; turn.
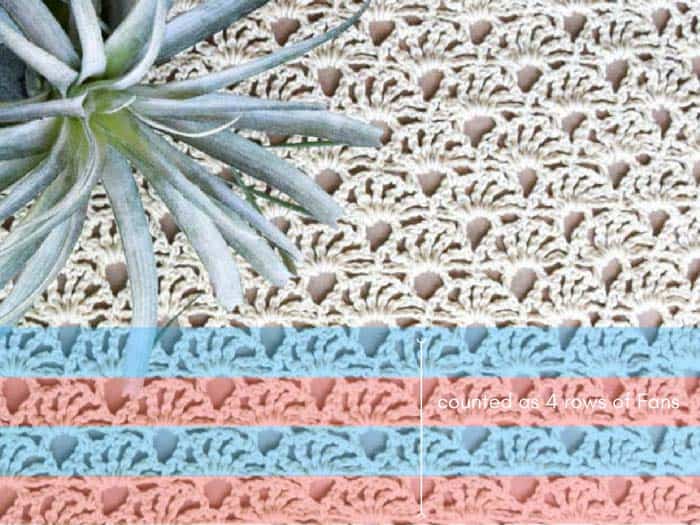
Repeat Rows 2-5 until piece has 7 (7,9) rows of fans, ending with a Row 2. (See photo below for how to count rows of fans.)
Find Your Next Crochet Cardigan Pattern
See more free crochet cardigan patterns →
Adding Sleeves + Working Top Half of Shirt
Notes:
• Rows 2-5 are identical to Rows 2-5 in the previous section. A few extra repeats will be worked to create the sleeves.
Set attached ball of yarn aside. Attach new ball of yarn on opposite side of shirt. With smaller hook and new ball of yarn, ch 15. Fasten off new ball of yarn and set aside. With original ball of yarn that’s still attached at the opposite side, ch 16. Work next row using original ball of yarn. You’ll work across newly created chains as well as the last Row 2 of previous section.
Row 1 (RS): 1 sc in second ch from hook, *ch 1, sk 4 ch, 1 Fan in next ch, ch 1, sk 4 ch, 1 sc in next ch, sk 4 ch, ch 1, 1 Fan into tch, ch 1, sk next 3-ch sp, 1 sc in next sc; *ch 1, sk next ch3sp, 1 Fan in next ch2sp, ch 1, sk next ch3sp, 1 sc in next sc; rep from * to end of Row 2 from previous section; sk 4 ch, ch 1, 1 Fan into next ch, sk 4 ch, sc in next ch, sk 4 ch, work [1 tr, ch 2, 1 tr, ch 2, 1 tr] all in last ch; turn.
Row 2 (WS): Ch 1, 1 sc in first tr, *ch 3, sk next ch2sp, 1 dc in next ch2sp**, ch 2, sk next [tr, sc, tr] and work 1 dc in first ch2sp of next Fan, ch-3, 1 sc in center (third) dc of Fan; rep from * ending last rep at **, ch 1, 1 tr in last sc; turn.
Row 3 (RS): Ch 6 (counts as 1 tr and 1 ch), sk first tr, work [1 tr, ch 2, 1 tr] in next ch1sp, ch 1, sk ch3sp, 1 sc in next sc, *ch 1, sk next ch3sp, 1 Fan in next ch2sp, ch 1, sk next ch3sp, 1 sc in next sc; rep from * to end; turn.
Row 4 (WS): Ch 6 (counts as 1 tr and 1 ch), sk first tr, 1 dc in next ch2sp, ch 3, 1 sc in center (third) dc of Fan, *ch 3, sk next ch2sp, 1 dc in next ch2sp, ch 2, sk next [tr, sc, tr] and work 1 dc in first ch2sp of next Fan, ch-3, 1 sc in center (third) dc of Fan; rep from * ending with a sc in fourth ch of tch; turn.
Row 5 (RS): Ch 1, *1 sc in next sc, ch 1, sk next ch3sp, 1 Fan in next ch2sp, ch 1, sk next ch3sp; rep from * to last sc and ch3sp, 1 sc in last sc, ch 1, sk ch3sp, work [1 tr, ch 2, 1 tr, ch 2, 1 tr] in tch; turn.
Wanna save this pattern?
Repeat Rows 2-5 until piece has 17 (19, 21) total rows of fans from the bottom of the shirt to the top, ending with a Row 4.
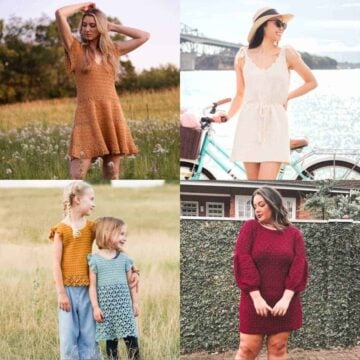
Related: 30+ Year-Round Free Crochet Dress Patterns
Find Your Next Crochet Pullover Sweater
See more free crochet pullovers patterns →
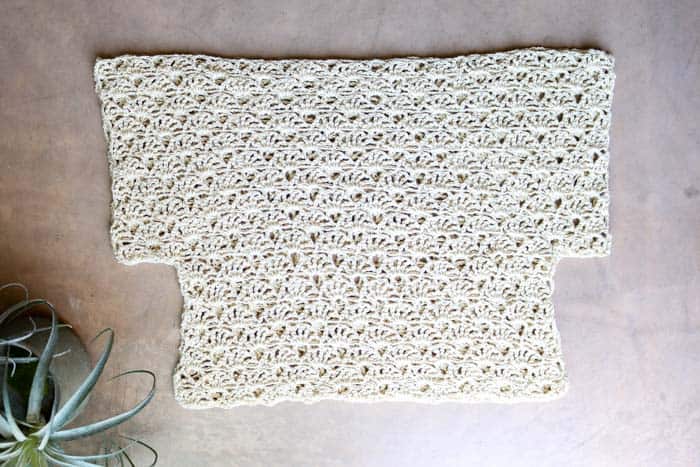
Seaming
Place wrong sides of shirt together. Using stitch markers or safety pins, pin side seam so that each row of shells lines up with the rows on the other piece. Pin shoulder seams as well.
With a tapestry needle and a doubled-over length of MC yarn, sew side and bottom of sleeve seams using the mattress stitch. (Moogly has a great mattress stitch tutorial.)
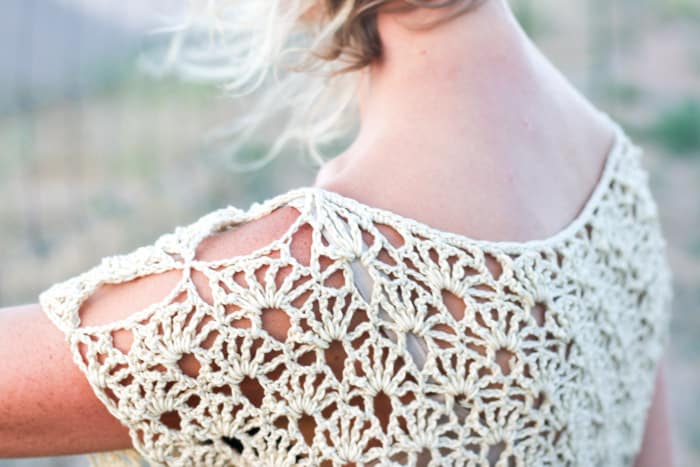
Using MC and a few tight knots, tie shoulder seams together at the far edge of the sleeve. Place a second knot 3.5” from the first knot. Place a third knot 3.5” from the second knot. (See Photo below.)
Note: The shoulder seams can be customized to your preference. Create the keyholes as pictured in the sample or use the mattress stitch to create an invisible seam. In either case, don’t be afraid to play around with the seam/knot placement to get a neck opening size that suits you.
Edging
BOTTOM: Using larger hook and MC, attach yarn at bottom of shirt near one of the side seams.
Round 1: Ch 1, work 4 sc in each ch4sp, sl st to first sc to join. Fasten off.
NECK: Using larger hook and MC, attach yarn near one of the neck seams.
Round 1: Ch 1, work 3 sc in each ch3sp and work 2 sc in each ch2sp, sl st to first sc to join. Fasten off.
Weave in all remaining ends.
Pop a flower in your hair, a canteen around your neck and head to the desert in your new completely handmade boho top!
That was so fun! Now what?
Invitation to our Facebook group
Come discuss crocheting boho top patterns and lots of other crochet projects and techniques in our Make & Do Crew Facebook group. Here thousands of helpful crocheters answer each others questions and share their stitches. Come join us here.
More Lacy Patterns to Crochet
- 30 Best Free Crochet Doily Patterns
- How to Patch Jeans With Crochet Lace
- Easy Lace Crochet Shawl Video Tutorial
- Entry Level Lace Crochet Scarf Pattern
- How to Crochet the Solomon's Knot Stitch
- Simple Puff + Lace Crochet Triangle Scarf
More Shirts + Tops Free Crochet Patterns
- Springtide Crochet Tunic Pattern
- Ballet Wrap Crochet Sweater Pattern
- Boho Crochet Dress Pattern
- Easy Crochet Summer Top Pattern
- Raglan Crochet Top Pattern
- Beginner Tunisian Crochet Top
- Lightweight Crochet Top Free Pattern
- Poncho-Style Crochet Top
Now that you've finished up your new Canyonlands boho crochet top, you might like these other free patterns from Make and Do Crew:
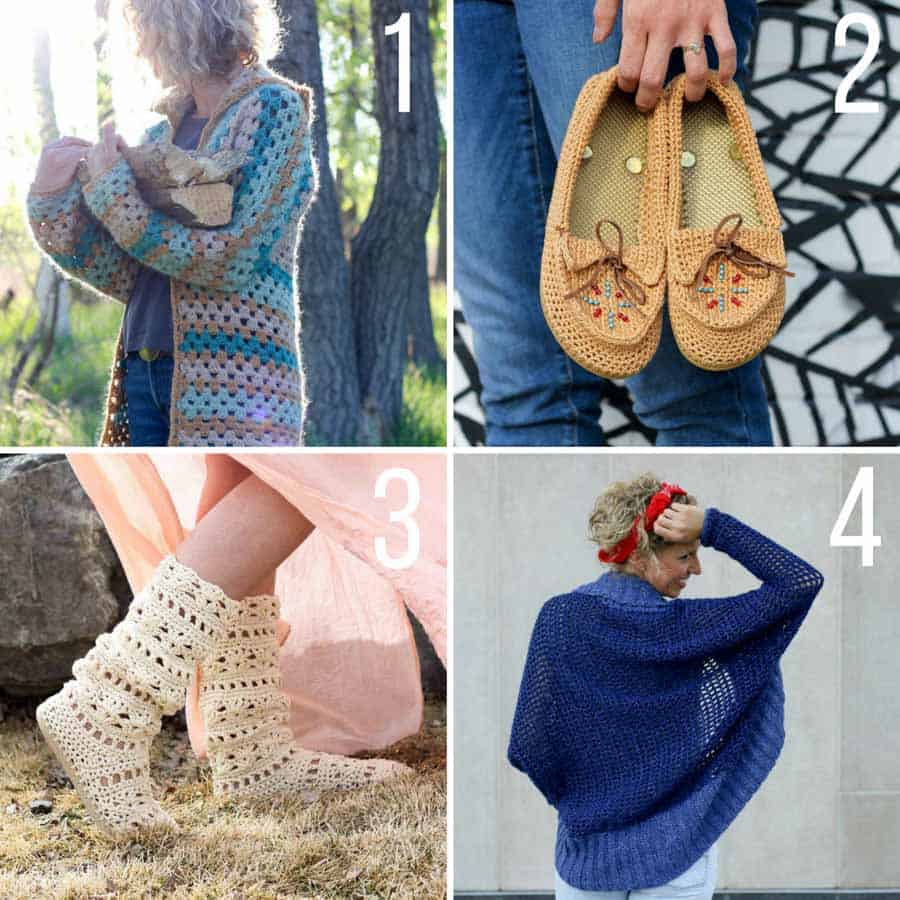
1. Campfire Cardigan free crochet hexagon jacket pattern
2. Crochet moccasins with flip flop soles

Sharon benson says
I love this
I have cotton/ acrylic yarn...weight 3
I'm hoping it's similar to the lion brand
I'm try it out
Phyllis Reyna says
Hi, I just recently found this pattern in your blog, I love it and my daughter will also. But I have a question on the lower half of shirt section, In Row 2 and forward it mentions 1 sc in center (third) tc of fan. What does the tc stand for? I am figuring it means top chain but I want to know for sure. I do want to thank you for your wonderful patterns. I have done a baby blanket with the c2c stitch and I used odds and ends of skeins of baby yarn that I had and I am so proud of it. I love it.. another ? On the flip flop sole items, you said don't use cheap flip flops. How expensive should they be? was just wondering.
Thanks again Phyllis
Ana says
Hi Jess
This is an amazing pattern and I really want to try. I’m having hard time following the written instructions. Please can you post a video?
Will be so grateful.
Thanks
Ana
Jessie says
Ana, if you want an easier way to work this pattern I suggest you order the ad-free printed pattern she offers that also contains a diagram of it. You'll actually see WHERE the stitches go. It's actually a VERY easy pattern to follow!
Good luck!
Jess @ Make and Do Crew says
I'm glad to hear you found the stitch chart helpful. I'm pretty visual and I find them by far the easiest way to learn. 🙂
Jess
Jessie says
FIRST: SUCH a lovely, light and airy top! Perfect for the warm and humid climate of El Salvador, even though the recipient of this particular model lives in the cooler coffee-growing regions. Thank you for not only designing such a pretty blouse, but sharing the pattern for FREE! That's quite gracious!
So, I know everyone else has probably just assumed the ending asterisk belonged after: "1 sc in next sc*, towards the end of Row 1 instructions. I'm just being kind of persnickety but I DON'T want to guess and make a mistake. I've made SO few garments and have such a limited supply of my cotton yarn that if I don't get it right and my friend doesn't like it, it will be as if I threw my yarn away.
I'll be doing a gauge swatch. A rarity for me! That's how important this top is for me to make. The FIRST she's requested of me!
But I'm writing out the pattern in the meantime because I'm in the boonies of El Salvador AND disabled, so getting a PDF printout from my phone, on a VERY limited income, isn't quite in the budget at the moment.
ANY help is appreciated. I'll be checking back on THIS blog as I've uninstalled my e-mail apps as well. Thanks in advance!
Jess @ Make and Do Crew says
Hey Jessie!
Thanks for your kind words about this pattern! I hope your friend enjoys it! 🙂
I think I'm understanding your question, but feel free to clarify if not. The part you repeat is: *ch 1, sk 4 ch, 1 Fan in next ch, ch 1, sk 4 ch, 1 sc in next ch. Then you just repeat that across until you have 5 ch left.
Does that make sense?
Jess
Jessie says
Thanks for your prompt reply! I've been without internet for about a month but I worked the repeats, crossing my fingers I was right. I was! Thanks for your GREAT pattern!
I've had to change it radically because I'm having to use worsted weight cotton (Peaches and Creme, actually) but knowing how the repeats work has been helpful.
I'm STILL working on it because I have to stop when memory isn't functioning. 🙁 In the meantime, it's fun having an interesting pattern to make.
Thanks, again.
Jess @ Make and Do Crew says
Oooh! I'm really interested to see it in that yarn. If you're on Instagram, I'd love for you to tag me in a pic when you finish (@makeanddocrew). It sounds like you've got an awesome little project on your hands. 🙂
Jess
Jessie says
I think I made a mistake by omission. Oops! The pattern repeat I mentioned was in Row 1 of the top half, where the sleeves are made. SO sorry! I didn't even catch that myself until I was hand copying the written pattern. Sigh.
Mo says
Hi there. I must be doing something wrong. I made sure I had 97 chains to start, then in row 1 alternated fans and sc. Here’s the problem: at the end of the first row, I have a fan stitch and then have 5 stitches left over. That seems wrong though. I should have ended up with a sc and then have 5 chains remaining right? Help! 🙂
Gayle says
I would like to use this pattern to make a poncho....as in maybe just a long rectangular and sew together. Is there anywhere this stich is used like that. Or maybe how I could adapt this pattern to do it that way. Love your videos and patterns!
Jess @ Make and Do Crew says
That would be beautiful! I def think you could adapt this pattern to make a large rectangle. I love that idea. 🙂
Jess
Gayle says
Thanks Jess. I've started it so hoping it will work as I envision!