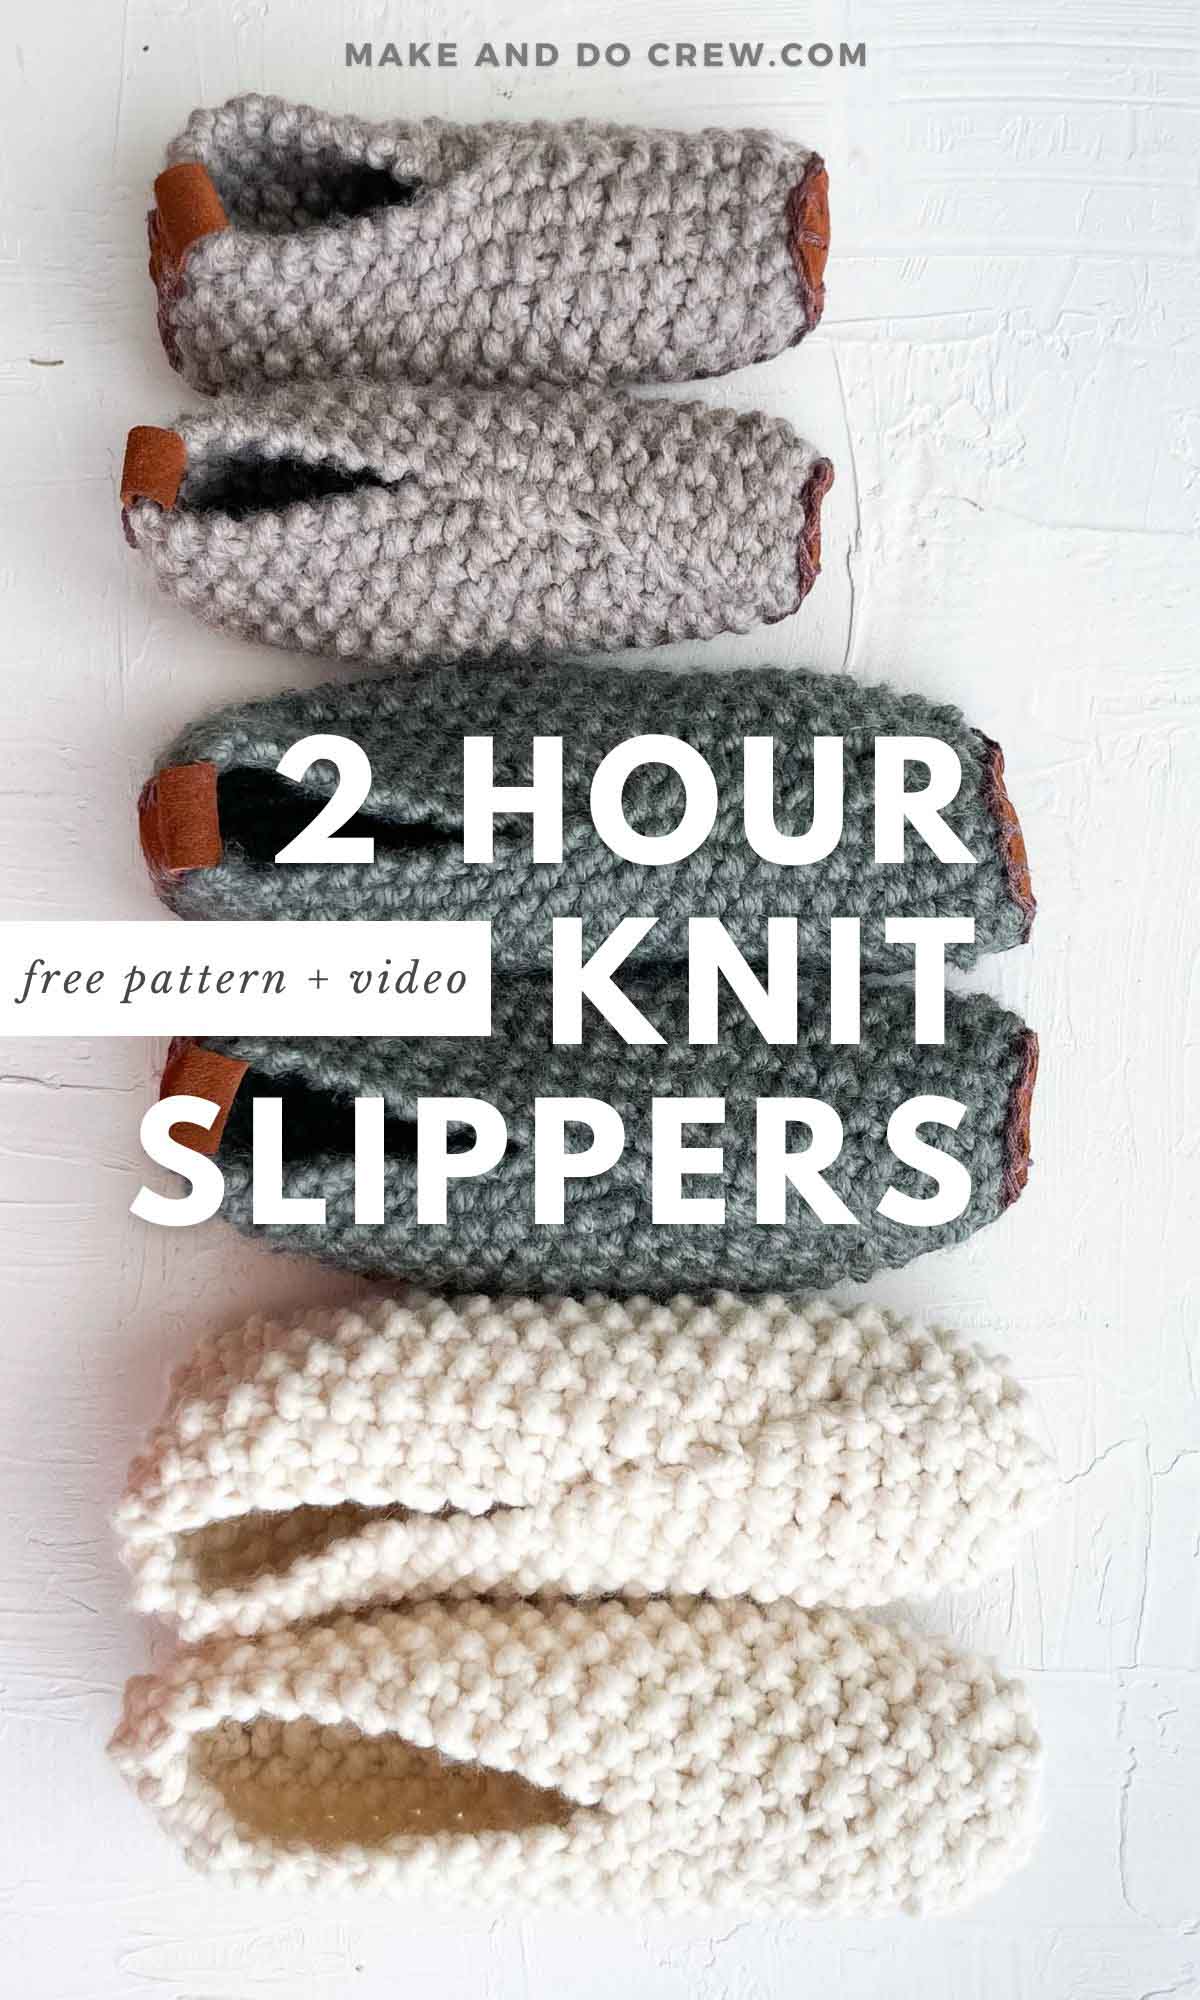
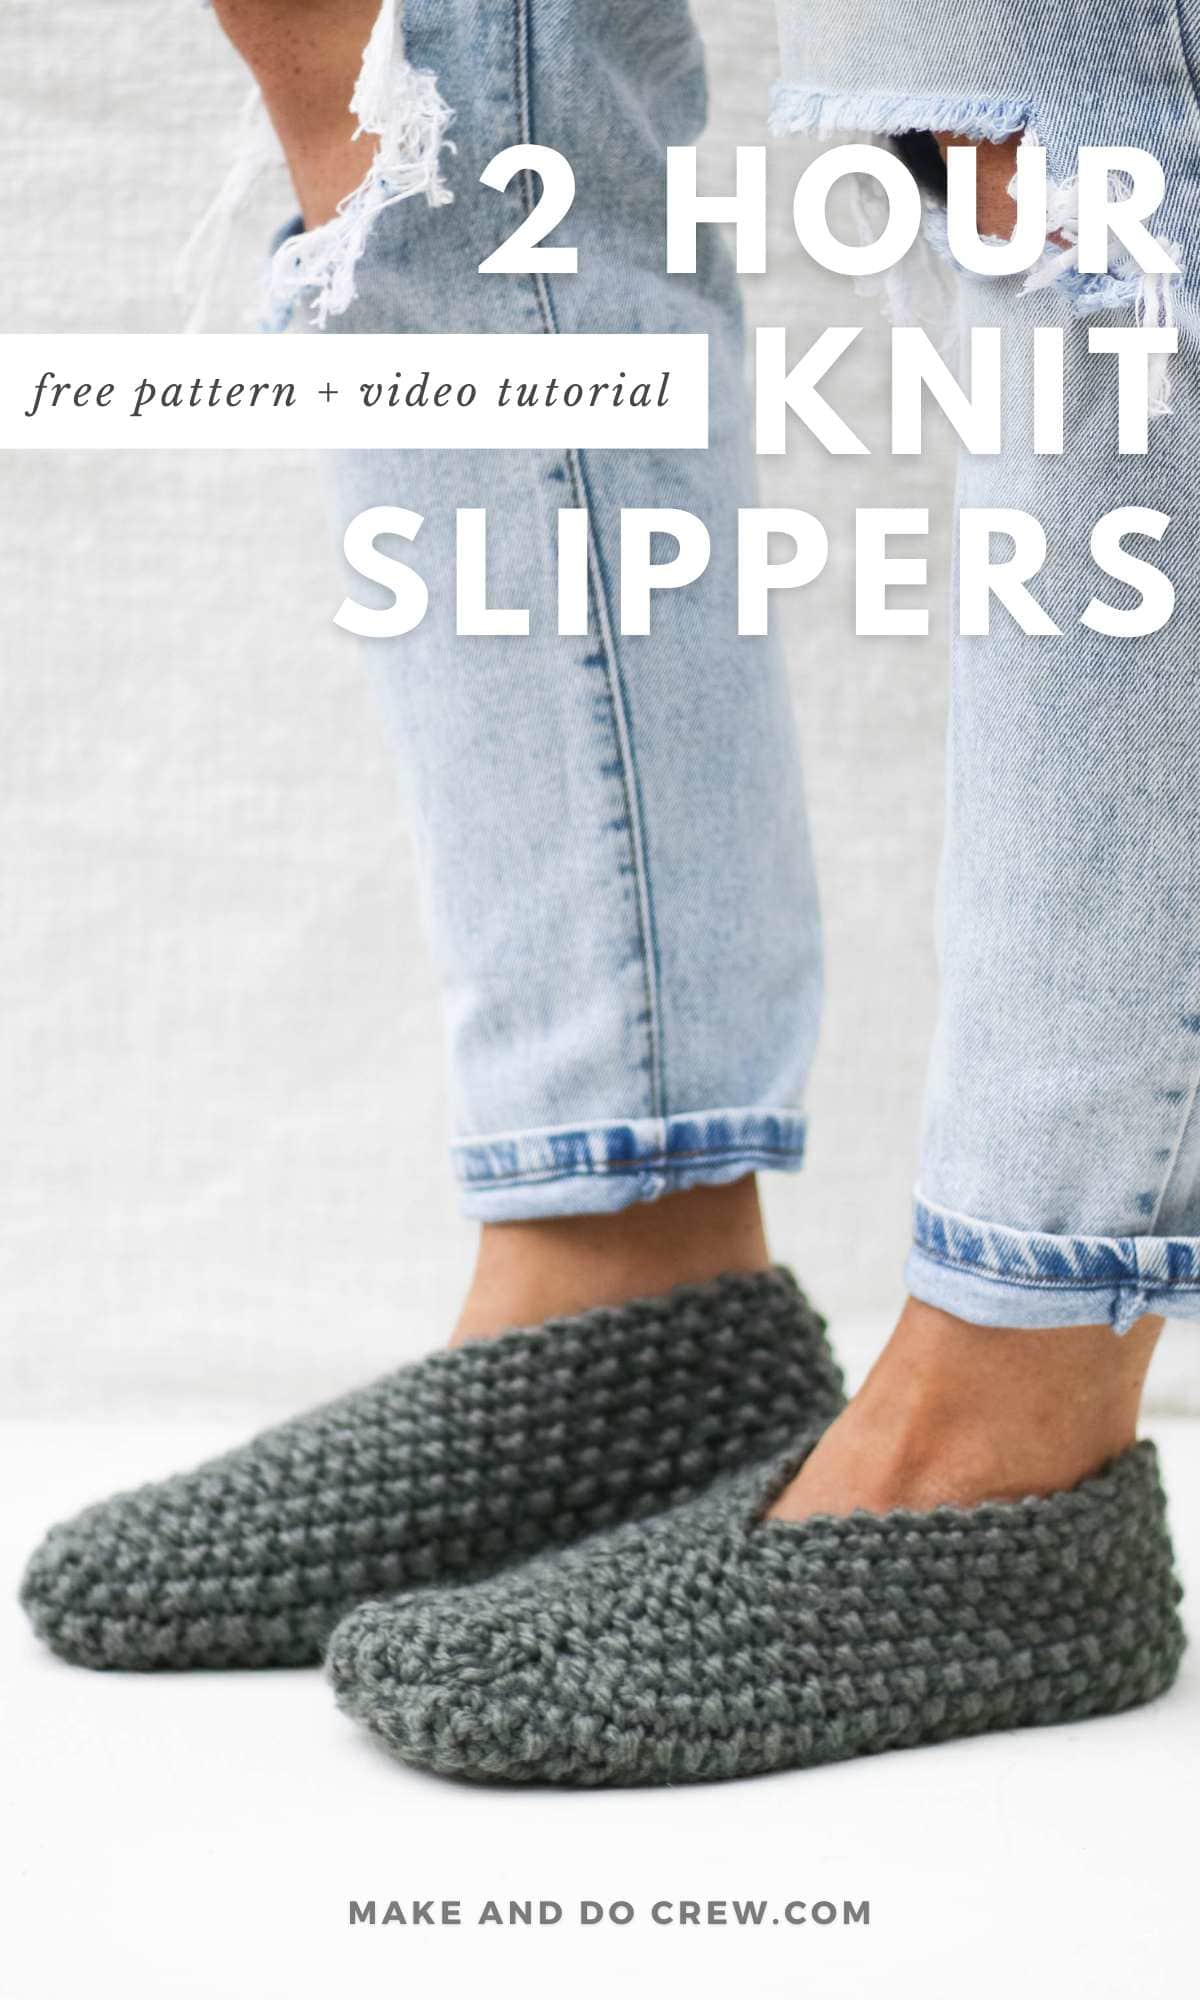
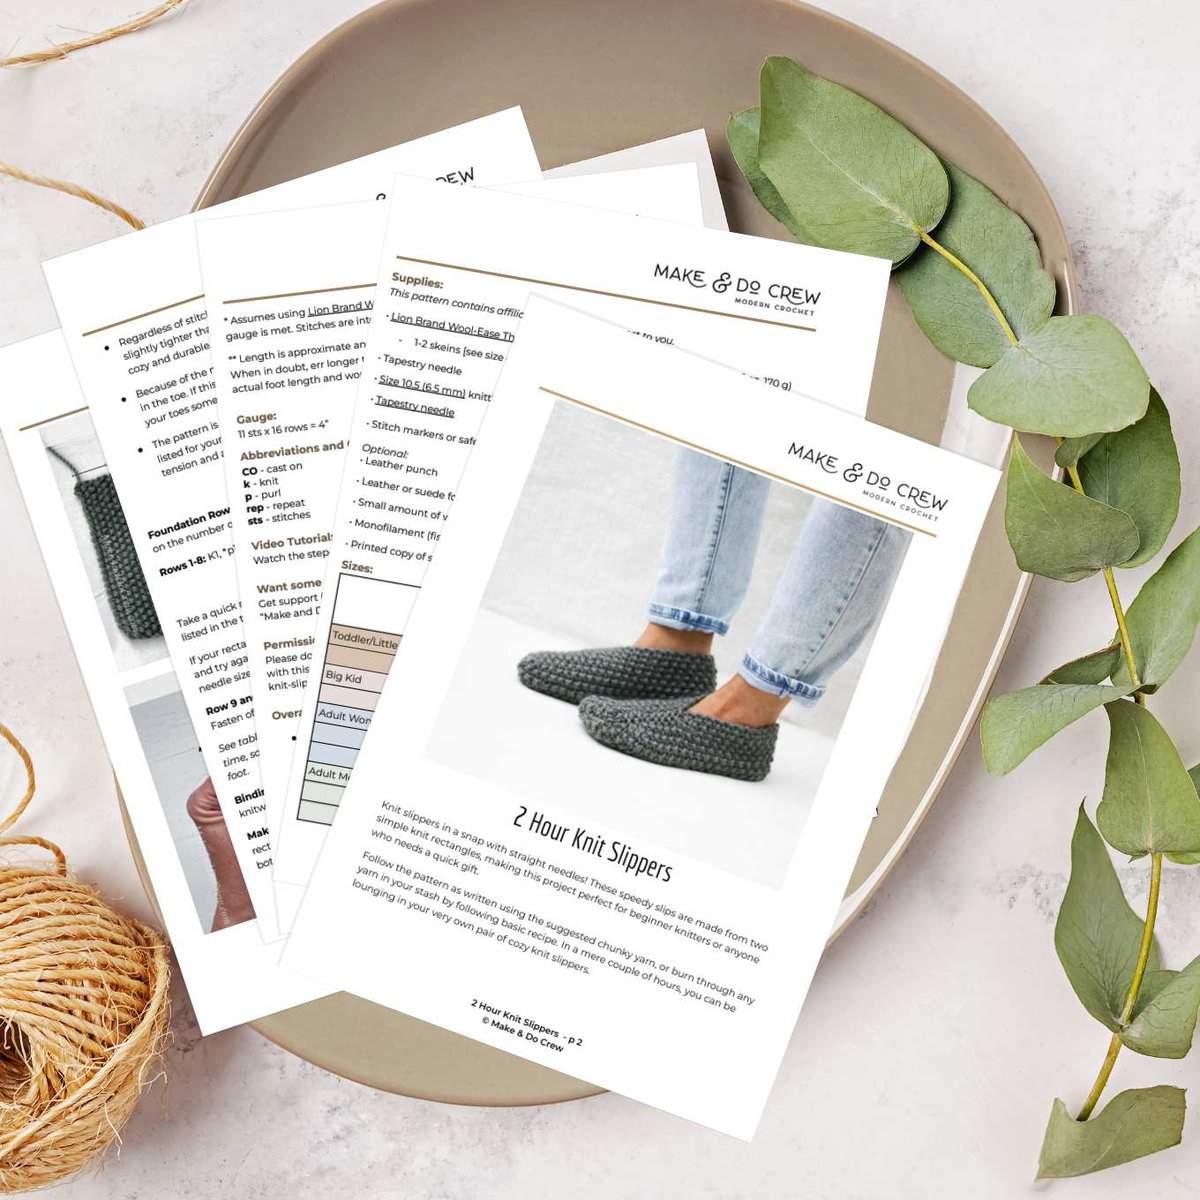
Calling all beginner knitters! Learn how to knit slippers with straight needles in this easy step-by-step tutorial. You'll find instructions for toddler, child, teen, and adult sizes so the whole fam can have toasty toes!
Get the free 2 Hour Slippers pattern below or purchase the ad-free, printable PDF.
This beginner knit slipper pattern is part of a collaboration with Lion Brand Yarns. This post contains affiliate links.
Jump to:
How to Knit Slippers With Straight Needles
Knit some slippers in a snap – with straight needles! These speedy slips are made from two simple rectangles that are knit flat, making this project perfect for beginner knitters or anytime you need a quick gift.
Follow the pattern as written using the suggested chunky yarn, or burn through any yarn in your stash by following the basic recipe. In a mere couple of hours, you can be lounging in your very own pair of cozy knit slippers.
Prefer to crochet? Follow our crochet rectangle slippers tutorial!
How to Adjust the Difficulty
This is a very beginner friendly knitting pattern, but there are ways to make it even easier.
Simplify for Complete Beginners
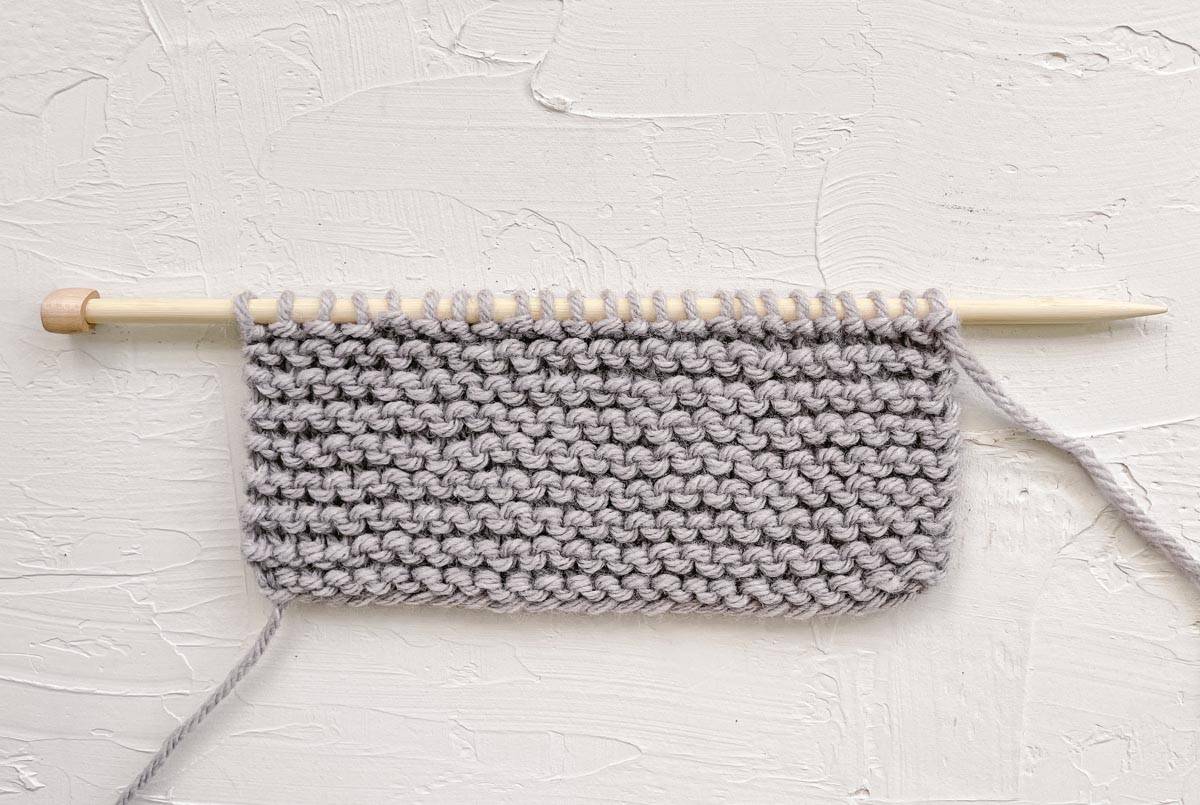
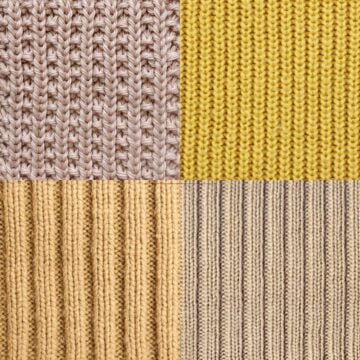
If this is one of your first knitting projects ever, you can make the pattern even simpler by knitting your rectangle in garter stitch. This means that you'll knit every stitch, instead of alternating knit and purl stitches.
Here's an example of what your slipper fabric will look like if you knit every stitch.
Keep It Interesting for Experienced Knitters
If you're a more advanced knitter and enjoy learning new stitches, this basic slipper recipe can still be a great way to stretch your skills.
Instead of using the seed stitch repeat, use the basic rectangle slipper recipe below to practice out new-to-you stitches.
All-in-One Knitting Kit
If you don't live near amazing yarn stores or if you just like to get fun packages in the mail, the all-in-one kit is a perfect way to make your 2 Hour Knit Slippers.
This bundle from Lion Brand includes all the Wool Ease Thick & Quick Recycled you'll need, plus a bonus printable PDF of the pattern (delivered digitally).
Print this Pattern
Pop on a movie and curl up on the couch with a printable version of this easy knit slipper pattern. The instantly downloadable, ad-free file is formatted for easy printing and includes the complete pattern, all the photo tutorials and bonus slipper sole template.
Video Tutorial:
Learn how to knit your rectangle slippers by following along with the step-by-step video tutorial.
(If you're using an ad-blocker, you must disable it in order to view the video player below.)
2 Hour Knit Slippers - Free Pattern
Supplies
Order an all-in-one kit from Lion Brand.
• Lion Brand Wool-Ease Thick & Quick (Weight: 6/Super Bulky- 106 yds, 6 oz, 170 g) - 1-2 skeins [see size chart below for exact amounts]
• Size 10.5 (6.5 mm) knitting needles or size needed to obtain gauge
• Stitch markers or safety pins
Optional Materials
• Leather or suede for soles
• Small amount of worsted weight yarn in color to match soles
• Monofilament (fishing line)
• Printed copy of slipper sole template
Measurements
The table below outlines the basic recipe for knitting slippers for toddlers, children, women and men.
| Shoe Size | Rectangle Width: (inches) | Rectangle Width: # of stitches* | Rectangle Length: (inches) | Approx number of rows | Approx yarn needed per pair* | |
|---|---|---|---|---|---|---|
| Toddler/ Little Kid | 6-9 | 6.5 | 17 | 4.75-6 | 19-24 | 66 g |
| 10-13 | 6.5 | 17 | 6.5-7.5 | 26-30 | 95 g | |
| Big Kid | 1-3 | 7 | 19 | 7.75-8.5 | 31-34 | 122 g |
| 4-6 | 7.5 | 21 | 8.75-9.5 | 35-38 | 137 g | |
| Adult Women's | 4-6.5 | 8 | 23 | 8-9 | 32-36 | 140 g |
| 7-9.5 | 8.5 | 25 | 9.25-10 | 37-40 | 206 g | |
| 10-12.5 | 9 | 27 | 10.25-11 | 41-44 | 198 g | |
| Adult Men's | 6-8.5 | 9 | 27 | 9.25-10 | 37-40 | 186 g |
| 9-11.5 | 9 | 27 | 10.25-11 | 41-44 | 206 g | |
| 12-14 | 9.5 | 29 | 11.25-12 | 45-48 | 242 g |
Assumes using Lion Brand Wool Ease Thick & Quick or similar and that pattern gauge is met. Stitches are intentionally tight.
** Length is approximate and will vary slightly depending on the height of each row. When in doubt, err longer to create a comfortable toe. If possible, simply measure actual foot length and work rectangle to that measurement as described below.
Gauge
11 sts x 16 rows = 4”
Abbreviations + Glossary
CO-cast on
k-knit
p-purl
rep- repeat
sts- stitches
Overall Pattern Notes
- Refer to size chart for the appropriate size. Sample is women’s size 7- 9.5.
Wanna save this pattern?
- Seed stitch is reversible so there is no right or wrong side.
- This pattern is extremely easy to customize for any yarn weight or stitch you prefer. So long as your rectangle measures the appropriate dimensions listed above, the technique will work the same. Use this pattern as an opportunity to practice different stitch swatches that you can then transform into something functional.
- Regardless of stitch or yarn used, use a smaller needles or work stitches slightly tighter than you typically would. This will ensure your slippers are extra cozy and durable.
- Because of the nature of a rectangle, your slippers will have a bit of extra fabric in the toe. If this is uncomfortable, try working one extra rectangle row to give your toes some extra space.
- The pattern is quite forgiving overall, even if you don’t hit the exact dimensions listed for your size in the chart above. Have fun and experiment with the tension and accessories that suit you.
Print This Pattern: purchase the ad-free, printable PDF
Main Rectangle
Foundation Row: Leaving a long tail on your initial slip knot for seaming later, cast on the number of stitches listed in the chart above for the size you’re making.
Rows1-8: K1, *p1, k1, rep from * to end of row.
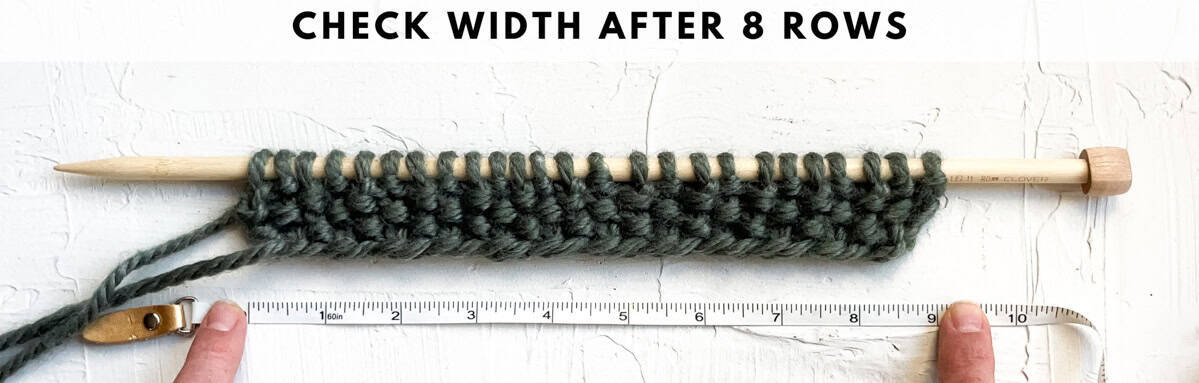
!! Gauge Check !!
Take a quick minute to measure your rectangle. It should be measuring the width listed in the table above for your size, and the height should be about two inches.
If your rectangle is significantly narrower than expected, increase your needle size and try again. If your rectangle is significantly wider than expected, reduce your needle size and try again.
Row 9 and Beyond: Repeat Row1 until piece measures the length of your foot. Fasten off leaving a long tail for seaming.
See table above for length recommendations per size. Yarn will stretch slightly over time, so resist the urge to extend your rectangle much beyond the length of your foot.
Binding Off: Bind off all sts in row (bind off all knit sts purlwise and all purl sts knitwise). Fasten off leaving a 24 inch tail for seaming.
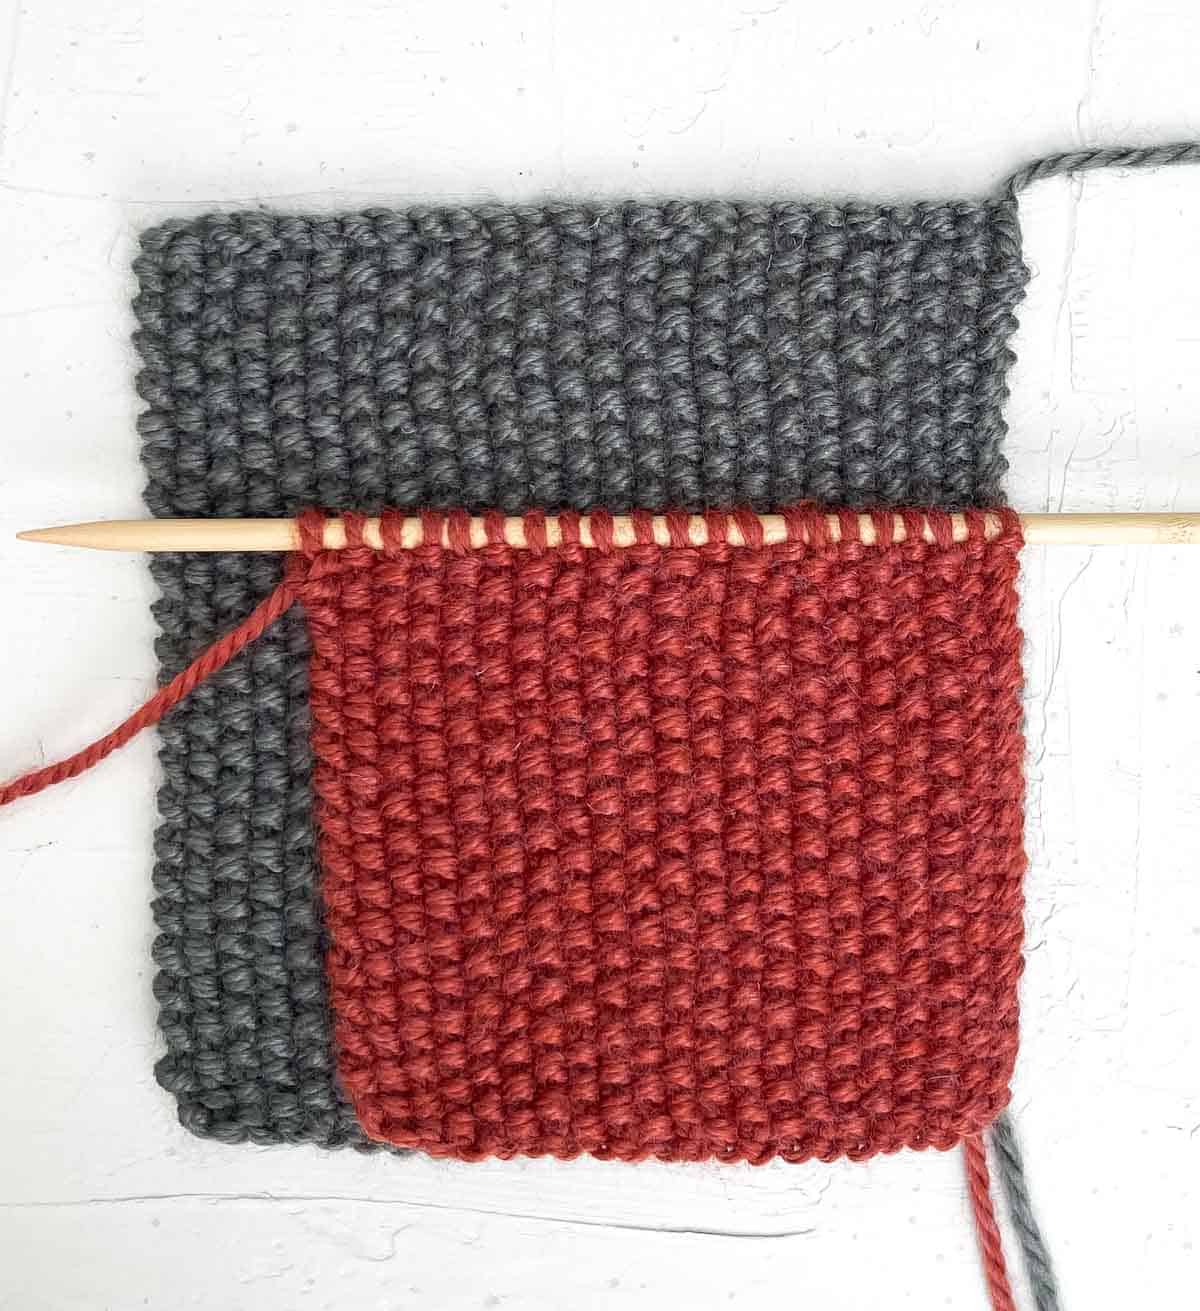
Make a Second Rectangle: Repeat the same steps to make a second identical rectangle. Line rectangles up next to each other and count the visible rows to ensure both rectangles have the same number of rows.
Want some company while you knit?
Get support (and camaraderie!) in the Make & Do Crew Facebook Group.
Premium PDF
easier and faster with fewer mistakes.
- Complete pattern + photo tutorials
- Instant download
- Formatted for easy printing
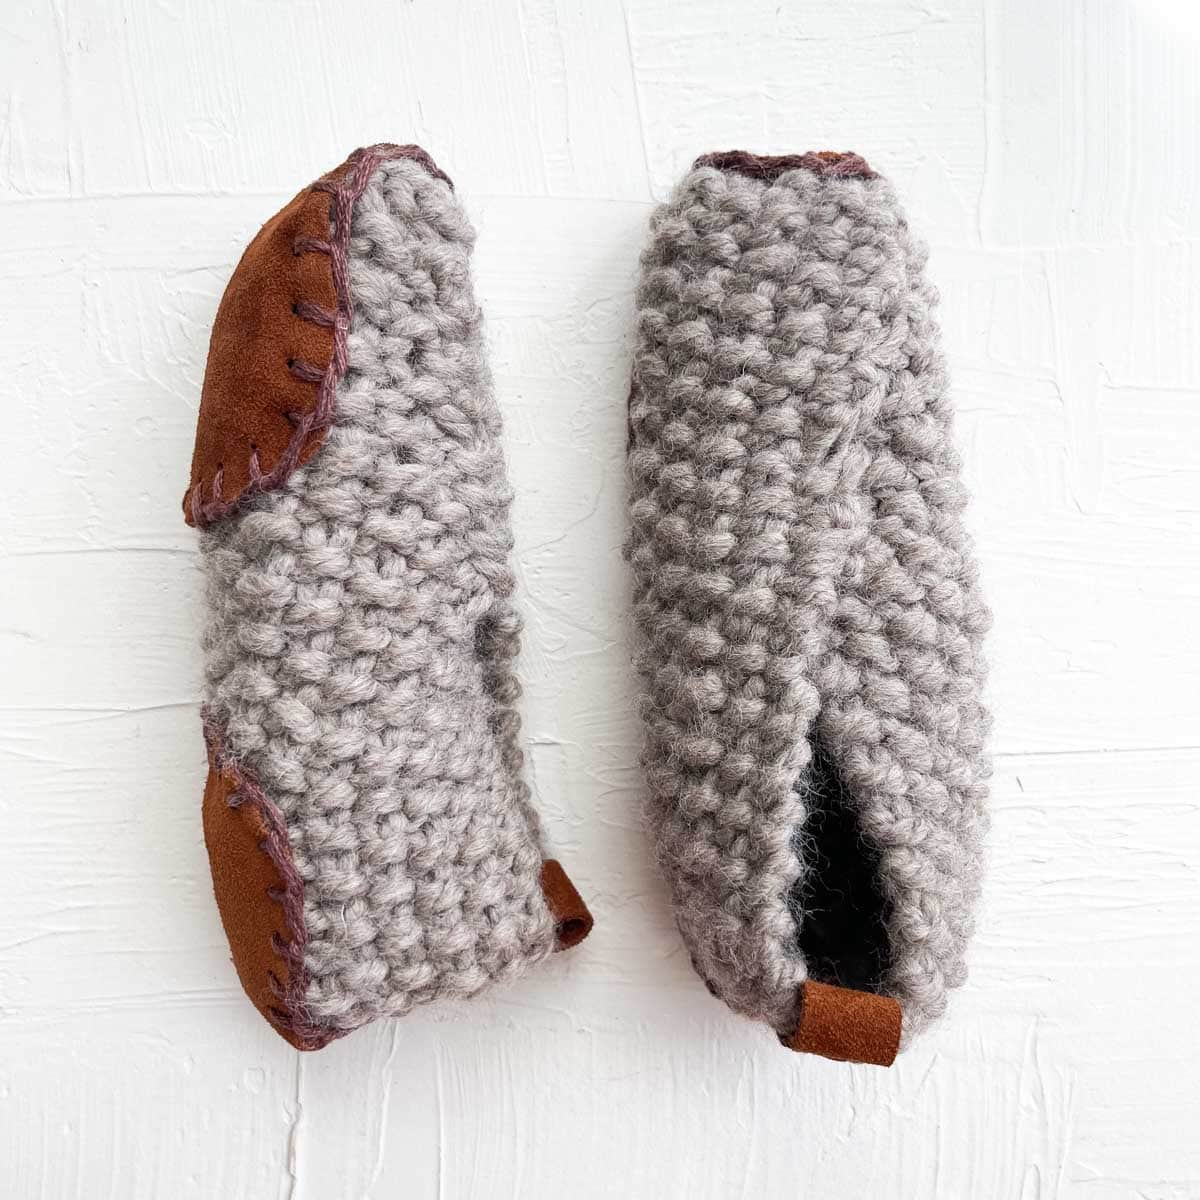
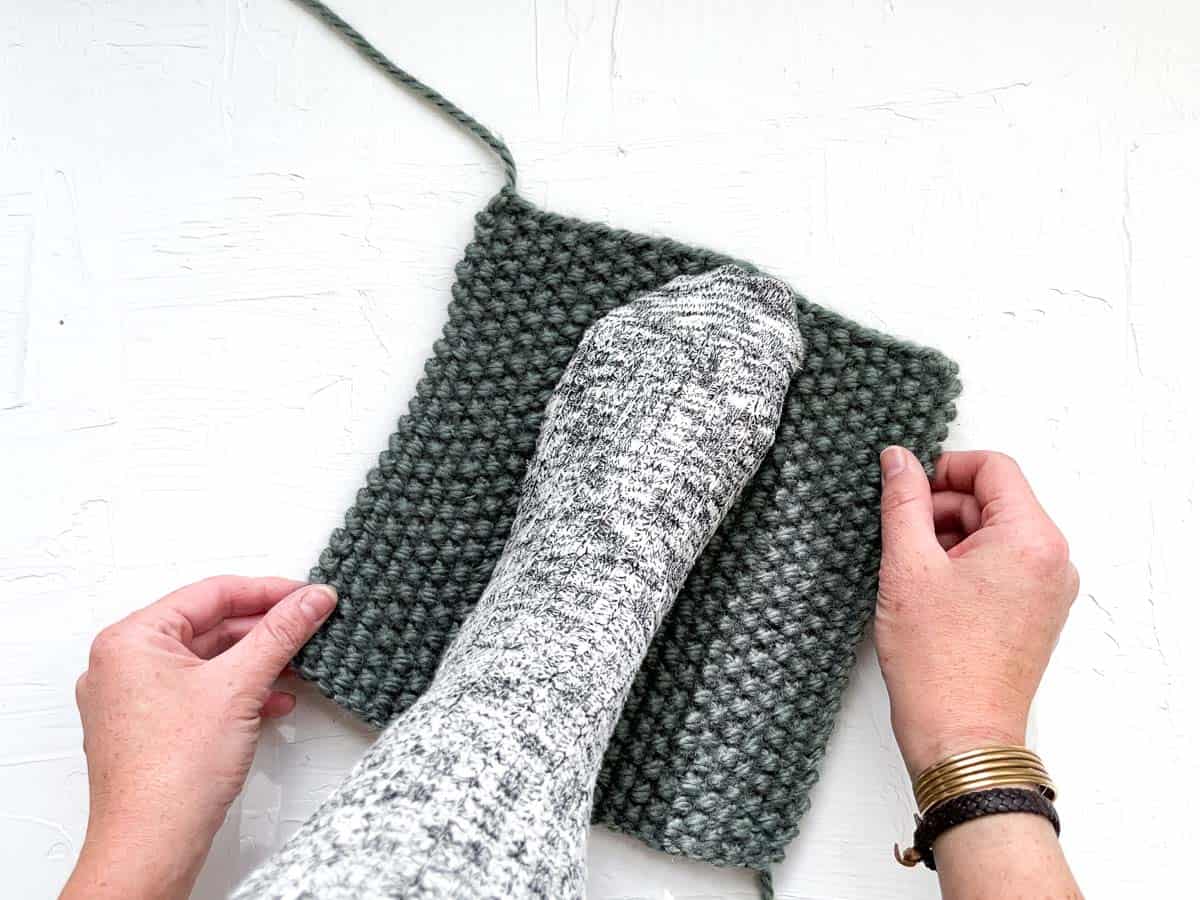
Transforming Rectangles Into Slippers
The finished slippers will be a mirror image of each other, with a distinct right and left slipper.
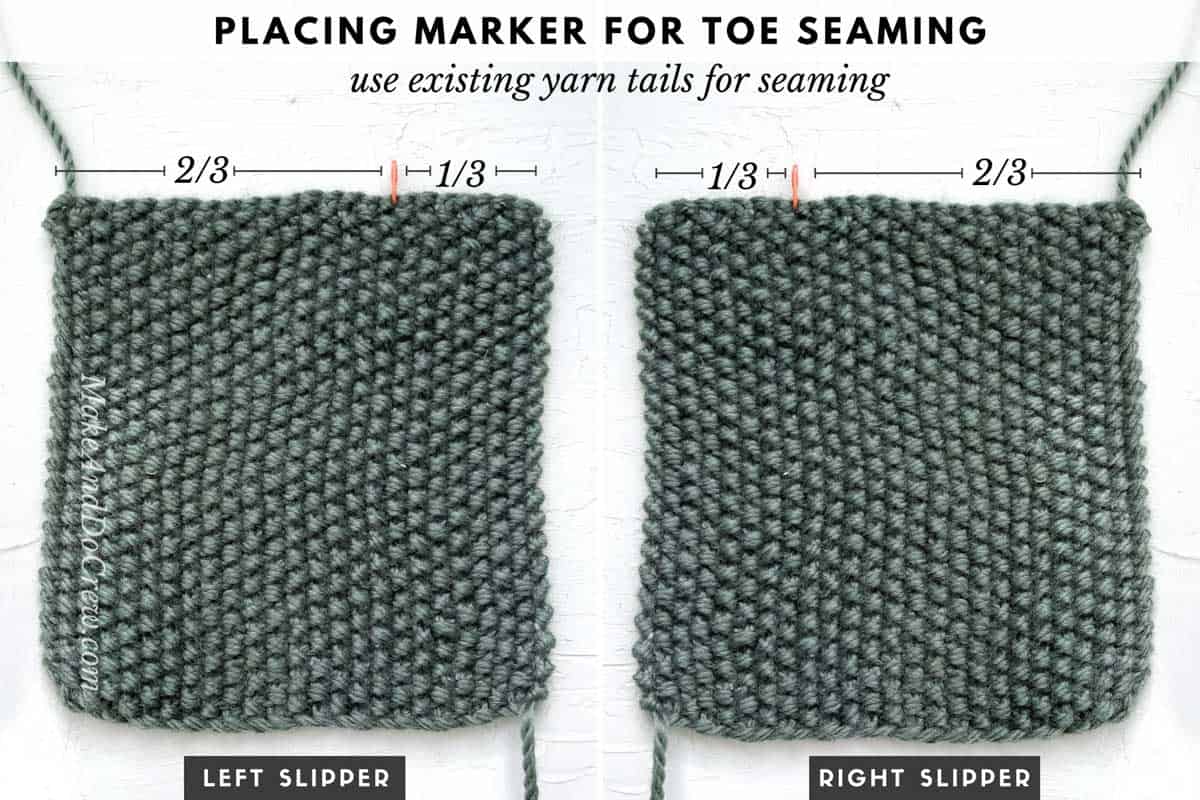
Toe - Right Slipper
- Lay rectangle with one tail at top right corner. Divide total number of stitches by 3. Place marker to divide total stitches into a section of ⅓ and ⅔. (See photo E.) If stitch count doesn’t cleanly divide by three, place one extra stitch in the shorter section, or one stitch in the shorter section and one in the longer.
- Using existing tail and tapestry needle, whip stitch in each stitch to marker. Carefully cinch stitches to pull toe closed. It’s okay if there is a small opening.
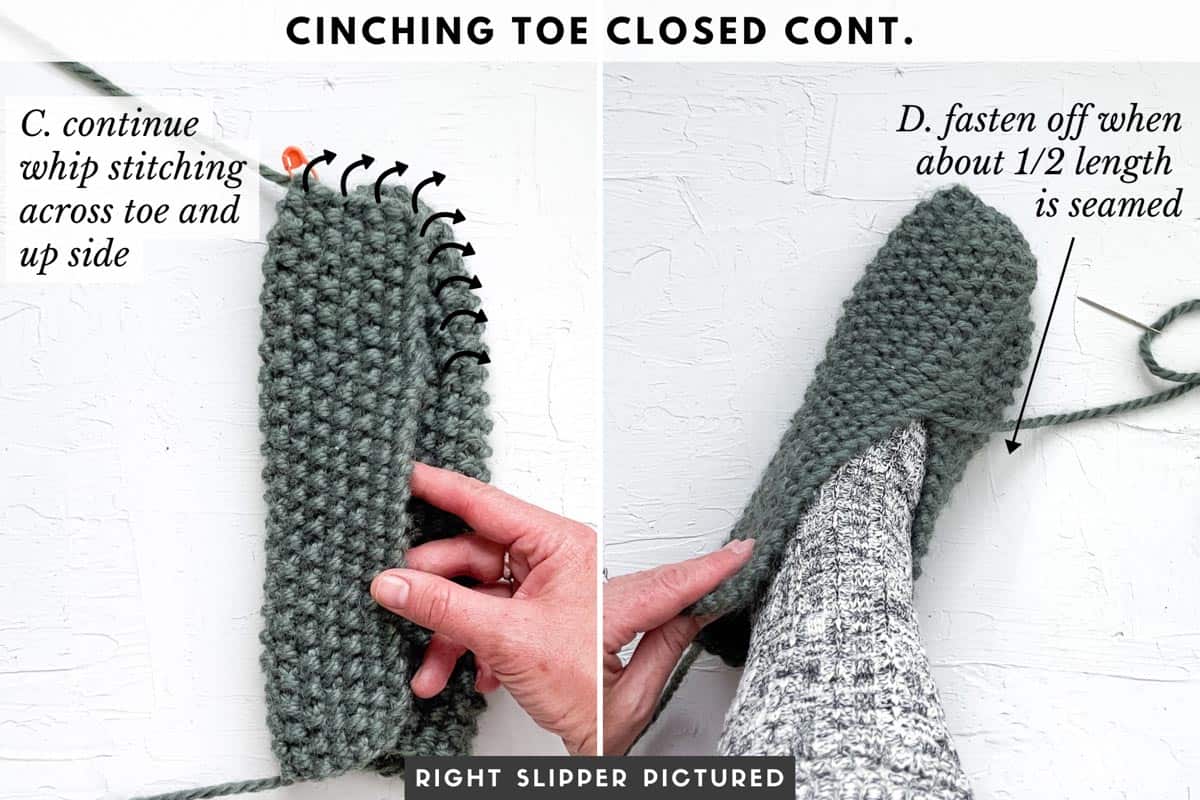
- Fold remaining ⅓ of rectangle over closed toe. Continuing with same yarn tail and needle, whip stitch across toe.
- Whip stitch stitch up side of rectangle until slightly less than ½ of edge is seamed down. This can be a good time to try on slipper as you go to achieve desired snugness. While stitching along side, take care to visually line up rows of stitches. Fasten off and weave in tail.
Toe - Left Slipper
- Lay rectangle with one tail at top right corner. Counting from the opposite edge you did with the right slipper, place marker to divide rectangle into two sections (⅓ and ⅔). (Left slipper marker placement should be a mirror image of right slipper marker placement.)
Repeat steps 2 through 4 as outlined above.
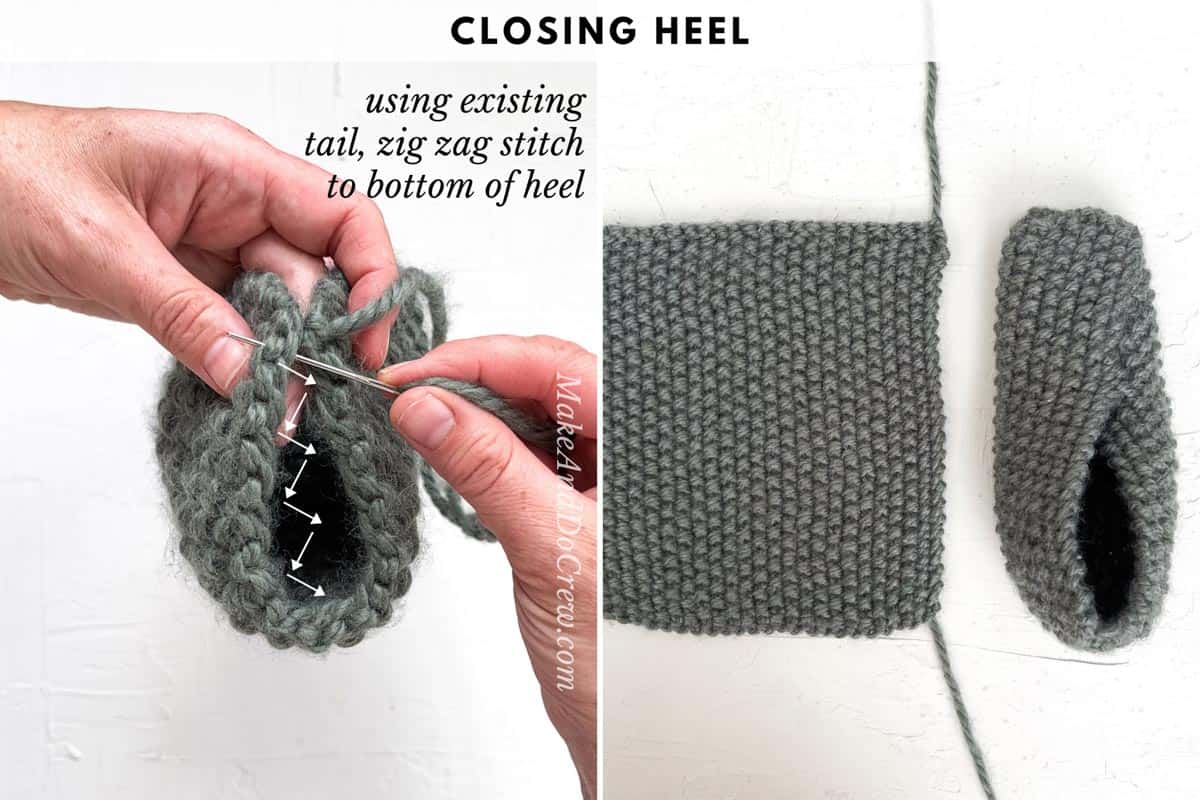
Heel - Both Slippers
Using existing yarn tail and tapestry needle, zig zag stitch from top of heel to bottom. Fasten off and weave in tail.
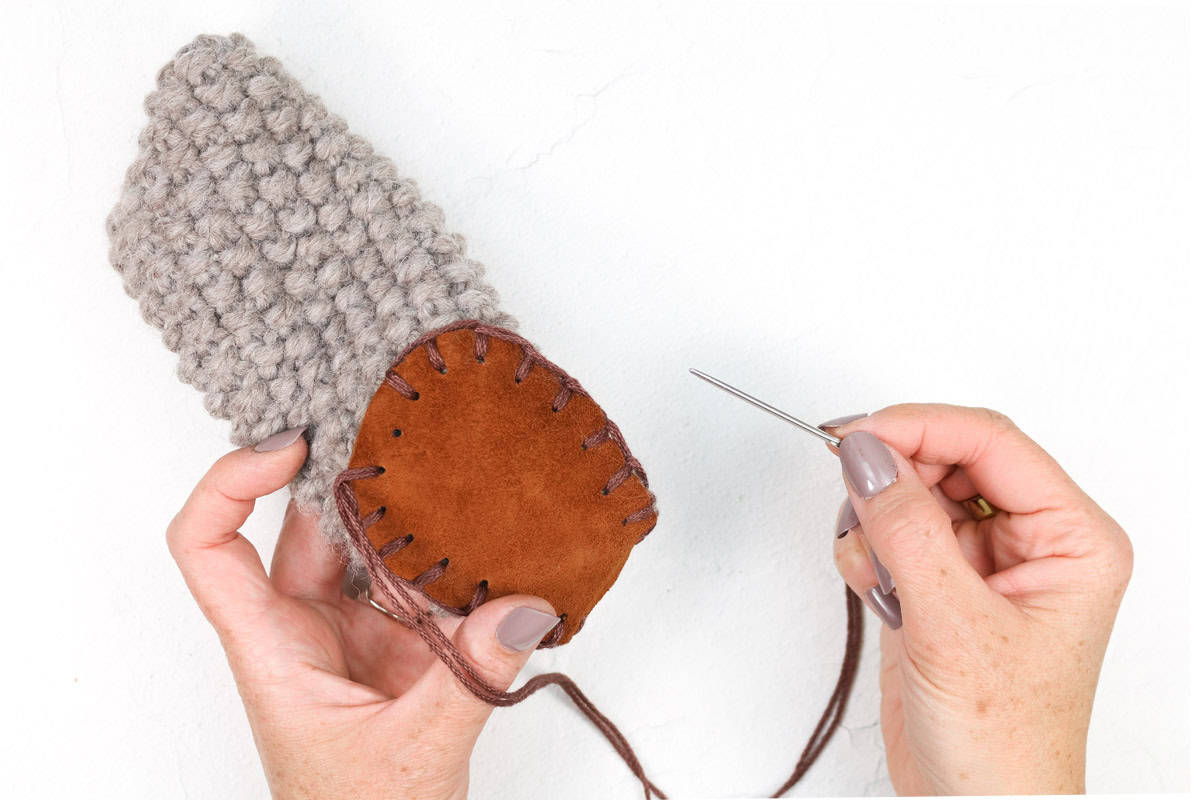
Adding Leather Soles
This step is optional, but can help your slippers be less slippy (any more style-y!)
Watch a video tutorial here:
Print our slipper sole template to cut leather soles. If unsure of which size sole to cut, simply cut paper template and measure it against your slippers until you’ve settled on a size. I suggest erring on the side of larger soles rather than smaller.
Use leather punch to punch holes around toe soles approximately ⅓” from edge of leather.
Repeat punching process on heel soles taking care to only punch the first 2” of the heel strip.
Use stitch markers to pin soles in place on slippers. Finish punching heel strip once it’s clear how far up holes need to be placed.
With a tapestry needle and yarn that matches sole color, use a blanket embroidery stitch to join soles to slipper. For extended durability, try sewing soles on with yarn and astrand of monofilament (fishing line).
Put on your new slips and do a little dance because you just knit your own cozy footwear from a couple of simple rectangles!
More Free Knitting Patterns
Add a few of our favorite free knitting patterns to your project queue!
That was so fun! Now what?
Invitation to our Facebook group
Come discuss knitting slippers with straight needles and lots of other fiber arts projects and techniques in our Make & Do Crew Facebook group. Here thousands of helpful crocheters and knitters answer each other's questions and share their stitches. Join us!


Leave a Reply