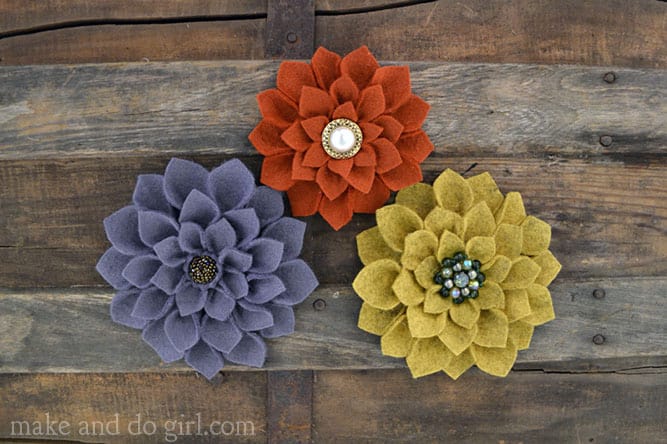
 When my parents were visiting, my mom and I dropped into a fabric store “just to see if we could find any inspiration.” (The place we went is called Quilting Adventures. Don’t you love that name? Makes me picture good-natured, rosy-cheeked grandma just having a heck of a good time sewing up a storm.)
Well, who enters a place called Quilting Adventures and doesn’t find any inspiration? Not these girls. We happened upon this awesome wool felt in colors that had fall written all over them.
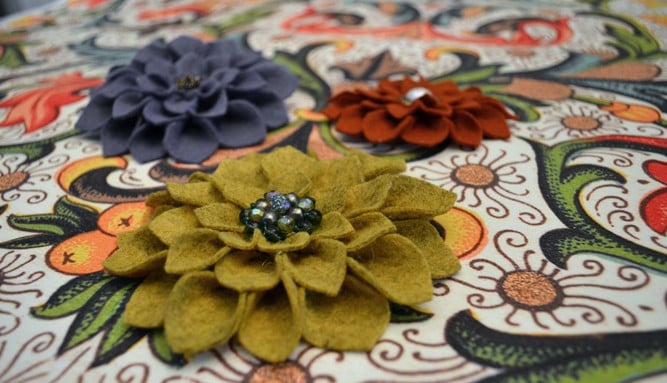
I had seen some DIY felt flowers around the internets for a while now and always wanted to try to make some. They are adorable and seemed perfect to pin to a sweater, a purse, a cowl a headband, a toaster. Okay maybe not a toaster, but you get the idea. They’re cute EVERYWHERE!
I explained how I thought we'd go about making them to my mom (which was really more of a formality—she’s not one to turn down a project, familiar or foreign.) And there in the middle of Quilting Adventures, we decided it was time for our felt-y garden to begin to grow.
Related: How to Crochet an Easy Flower Granny Square
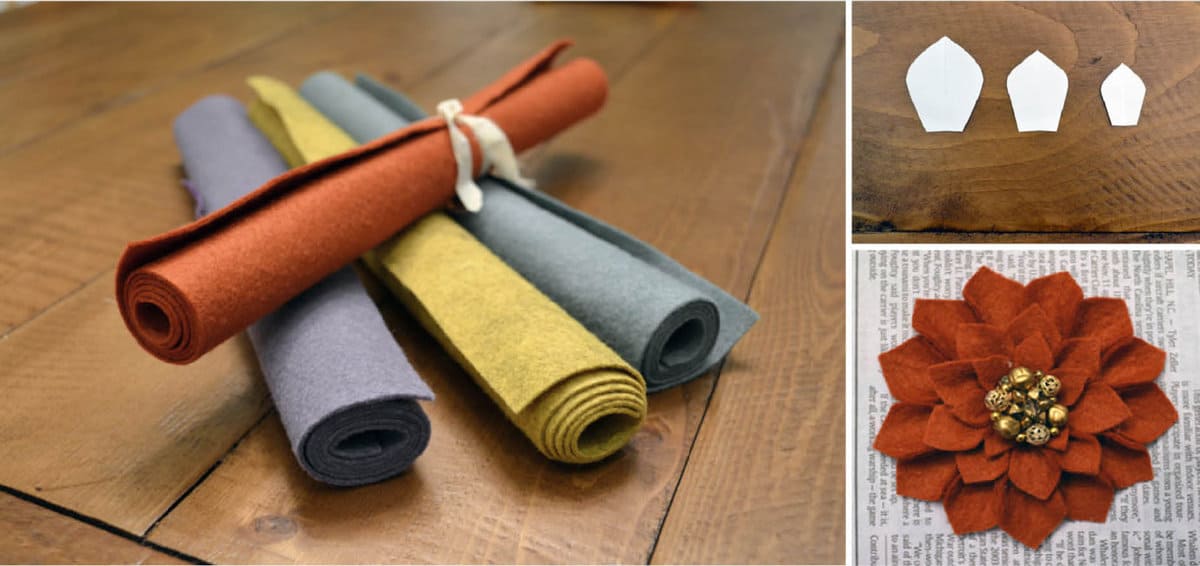 Here are the ingredients you need to get your own DIY felt flowers blooming:
1. This Make and Do Girl template for the petals and flower foundation (DIY_Felt_Flower_Template)
2. Felt (Ours came in 12”x18” pieces and there’s more than enough to make a few flowers out of one piece. We used 100% wool felt, but you could use any kind of felt depending on how flexible or stiff you want your petals to be.)
3. Scissors
4. Hot glue gun and glue
5. Paintbrush or something with a similar tip at the end (a pen or screwdriver would work)
6. Thin cardboard (from a cereal or shoe box)
7. Button, clip-on earring or bead for the center of the flower
8. Pin, barrette or comb for the back of the flower
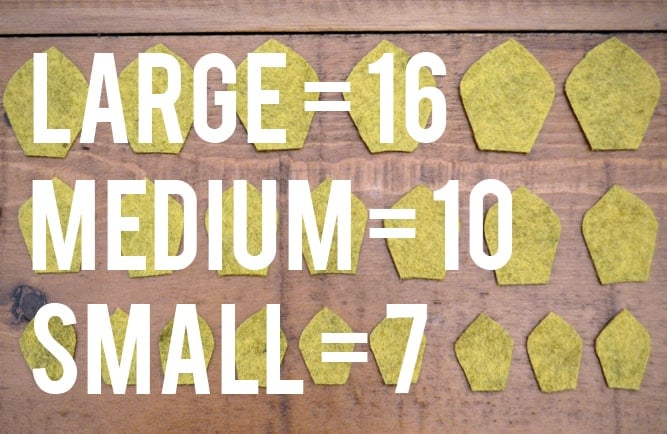
Begin by printing the DIY_Felt_Flower_Template. Print it at 100% if you want to make flowers the same scale I did (about 4.5-5” wide petal-to-petal) or resize it if you want your flower to be bigger or smaller. If you resize it, you may have to adjust how many petals you cut of each size.
Here are the number of petals of each size I needed for the largest yellow flower.
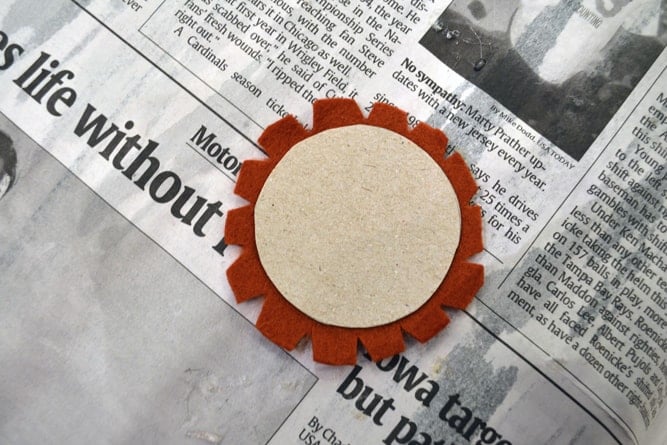
Use the circle template to cut the cardboard for the back of the flower as well as the two circles of felt. Snip the felt backing for it as pictured and glue it to the cardboard and then glue down the little tabs of felt around the edges.
Wanna save this pattern?
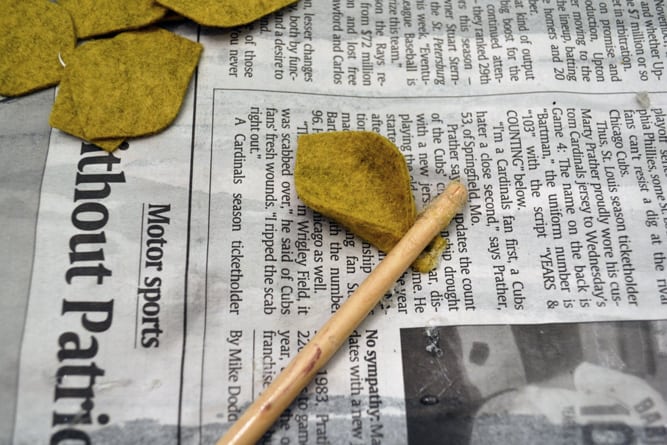
Use a very small amount of hot glue to secure pleats in all the felt petals. We used the end of a paintbrush to hold the pleat while it was cooling. Anything but your finger will work!
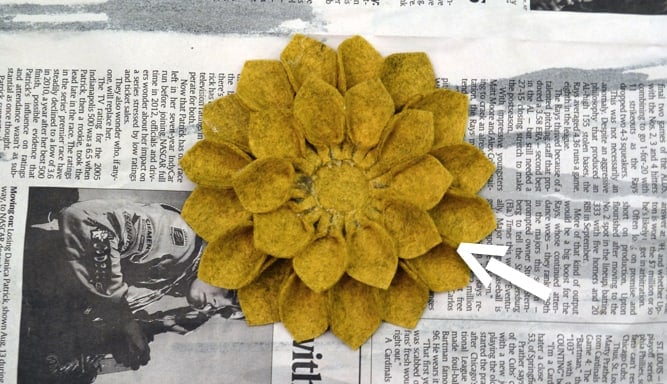
Once you have all your petals glued, it’s time to start adhering the largest ones to the circle base. Apply a bit of glue to the circle and press the petal down about ¼” from the circle’s edge. Continue this way, making sure there are no gaps between your petals.
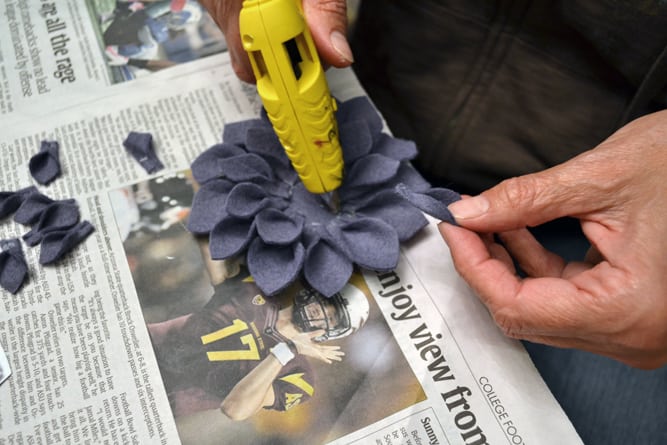
Now it’s time to finish off the back of your pin/hair piece/etc. Either sew or glue your barrette, pin or comb onto the circle of felt you cut previously. Then glue that circle onto the back of your flower.
Turn that puppy back around. Now it’s time to accessorize! We tried several centers for our flowers until we found just the perfect accents.

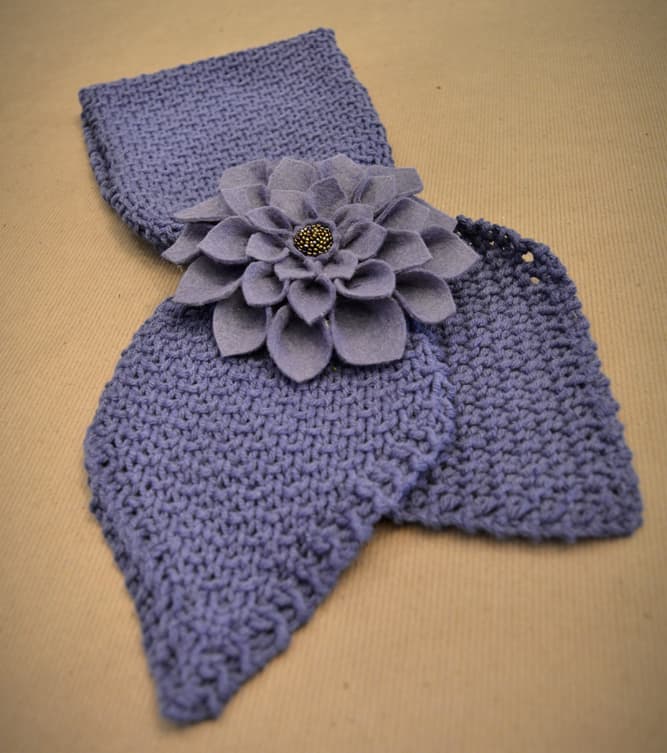
In the purple flower, my mom used a beaded button she picked up at a knitting store. I think it actually looks a lot like the center of a real flower, minus all the allergy-inducing pollen. For the yellow one, I used a clip-on earring I bought at a street festival this summer. I just peeled off the clip-on part and was left with this beautiful beaded fanciness. The center of the orange flower is pearl button. It’s interesting how the style of the center really transforms the look of the flower.
My mom used her purple felt flower as a cute little accent on her Anthro-Inspired Scarflet.
I think these would also make awesome adornments to headbands or even as the foundation of a fascinator like this.
There are so many ways to wear these little felt flowers! They’d make perfect DIY Christmas presents. Or bridesmaids gifts. Or What-The-Heck-It’s-Tuesday treats.
I found awesome inspiration for this project here. If you use this felt flower tutorial, leave me a comment and I’ll link to your photos!


Dana says
I know I'm a bit late coming to the party, but I just got my first glue gun and I'm eager to make some flowers for my daughter. She has gorgeous long hair and loves wearing flower barrettes! Can't wait! Thanks for the tutorial!
Make and Do Girl says
Well, welcome to the party, Dana! Your life will never be the same!
Happy glueing.
j
Emily says
Could you email me the enlarged template? (Crafty but not on the computer!!) I'd love the finished dimensions to be about 10" across. Going to glue them to a painted wooden plaque and put it up in my daughters big girl room! Thanks!!
Vittoria says
Hi You dont happen to be able to send me a copy of the enlarged flowers? 10x10 I am in love with these !
Cin Huffman says
Hey!! Thank you sooo much for your helpful tutorial!! I made one for my daughters crochet headband that I made. It really dressed it up! How do I post a pic so you can see it? I can't wait to check out the rest of your site.
Major xoxoxoxox!!!
Cin 😉
Make and Do Girl says
Cin,
Aweeeesooome! I'd love to see it. Please send it to me at jessicacoppom (at) gmail.com!
Can't wait!
j
pallaso says
super ces fleurs!!!!! a-t-elle bien que nous allons organiser un après midi feutrine à l atelier avec les copines pour en fabriquer de toutes les couleurs merci
Make and Do Girl says
Awesome! I love that you have a board completely devoted to felt. How fuzzy and fun.
j
candice m says
Thank you for this tutorial!! Made my 2 year old a lovely flower bow with cream felt and teal glitter vented (just poured a puddle of hot glue in the vented and dumped on glitter).
ange says
Thank you for this awesome tutorial, complete with the link for printing it out. I printed the template out on cardstock to make it a little sturdier. Love all your beautiful flowers with the different centers! I facebooked this and will be sharing the link in my post for my fall wreath.
Melissa says
Found you on pintrest. Thanks to your tutorial my seven year old has a beautiful hairclip!
Dotti H says
I woudl love the enlarged apttern to make a pillow. I just ran across this and think it is reallly neat.
Susan Smith says
Hi
Have just finished one I'll upload onto my blog during the week. Thanks for the tute! Can't do any more until I get some more glue sticks.
Michelle McGee says
I just found your site. I absolutely love the flowers and can't wait to make them. Those colors are to die for. Thanks for sharing.
Alanna says
This tutorial is great! I was thinking about making a pillow of it. Would you mind sending me the enlarged template? Also, could I sew the petals instead of gluing them? I'm not sure how to do this though...
Make and Do Girl says
Hey Alanna, I'd be happy to send you an enlarged template. Do you know about how big you want the flower to be? I think you could definitely sew the petals instead of glue them. That would probably be a preferable way to go for a pillow. I think you could simple do a couple of whip stitches on the right and left side of each petal to hold the curled edge down (just replacing the glue with a stitch instead). Does that make sense? If not, let me know and I'll try to explain it differently. I'll send you the template shortly!