Calling all Gutenberg fans! I’ve got a DIY art idea for you!
As I kid, I would study typefaces on everything from book covers to cereal boxes and then attempt to etch them out by hand. With my tongue hanging out in concentration, I found it extremely soothing to get each serif “just so” and it’s probably where my love of vintage typography was born.
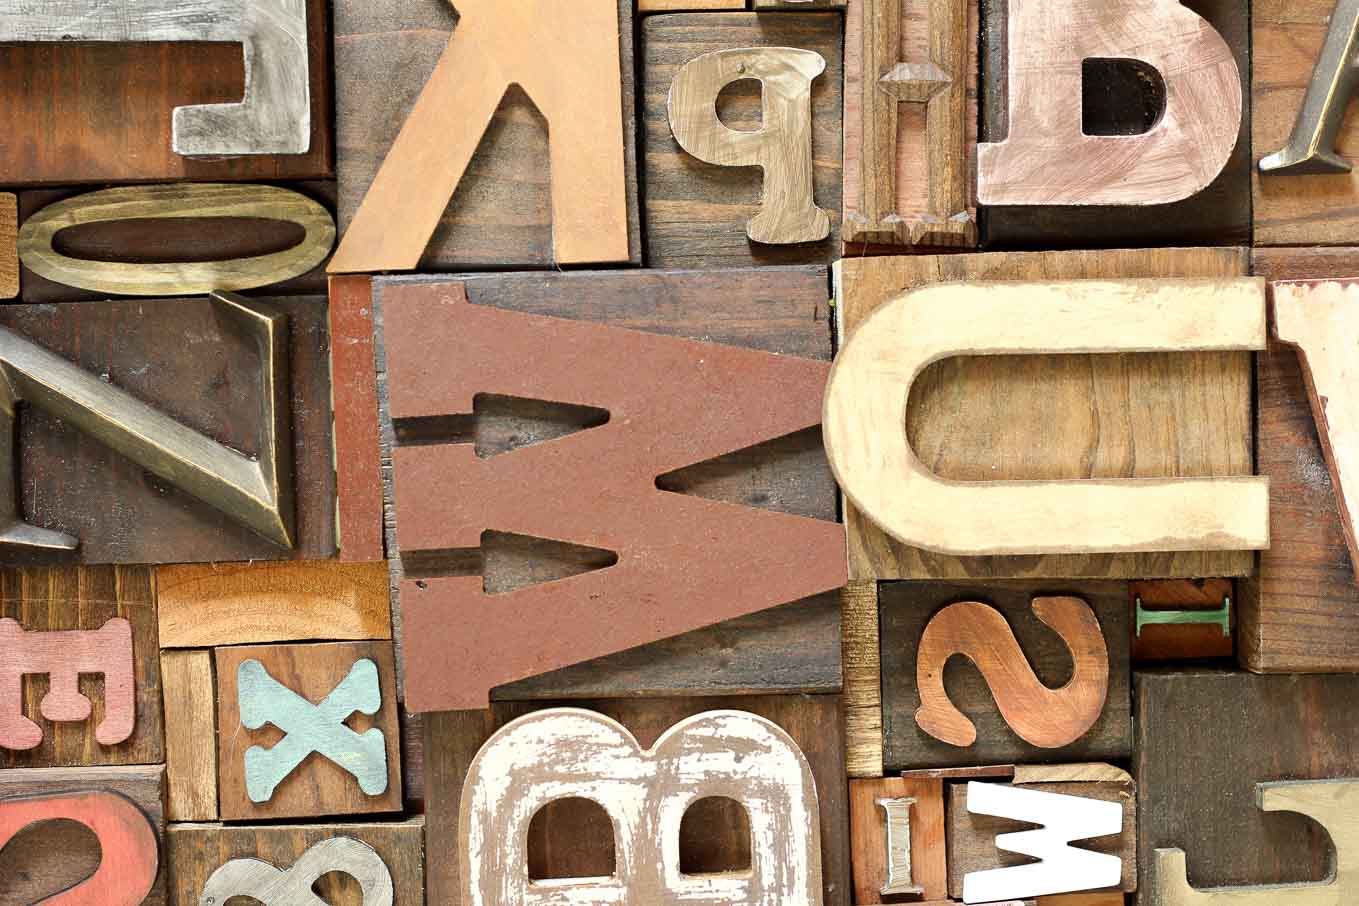
Since those tongue-hanging, serif-drawing days, I’ve lovingly stroked my fair share of letterpress print blocks at flea markets and vintage stores. There’s something just so immediately charming about their perfect curves and and intentional lines and how they become beautifully distressed with use and age.
I’ve always had a lot of DIY art ideas that involved vintage letterpress blocks buzzing around my head, but I haven’t yet shelled out the cash to buy enough of them to create the handmade art I had in mind.

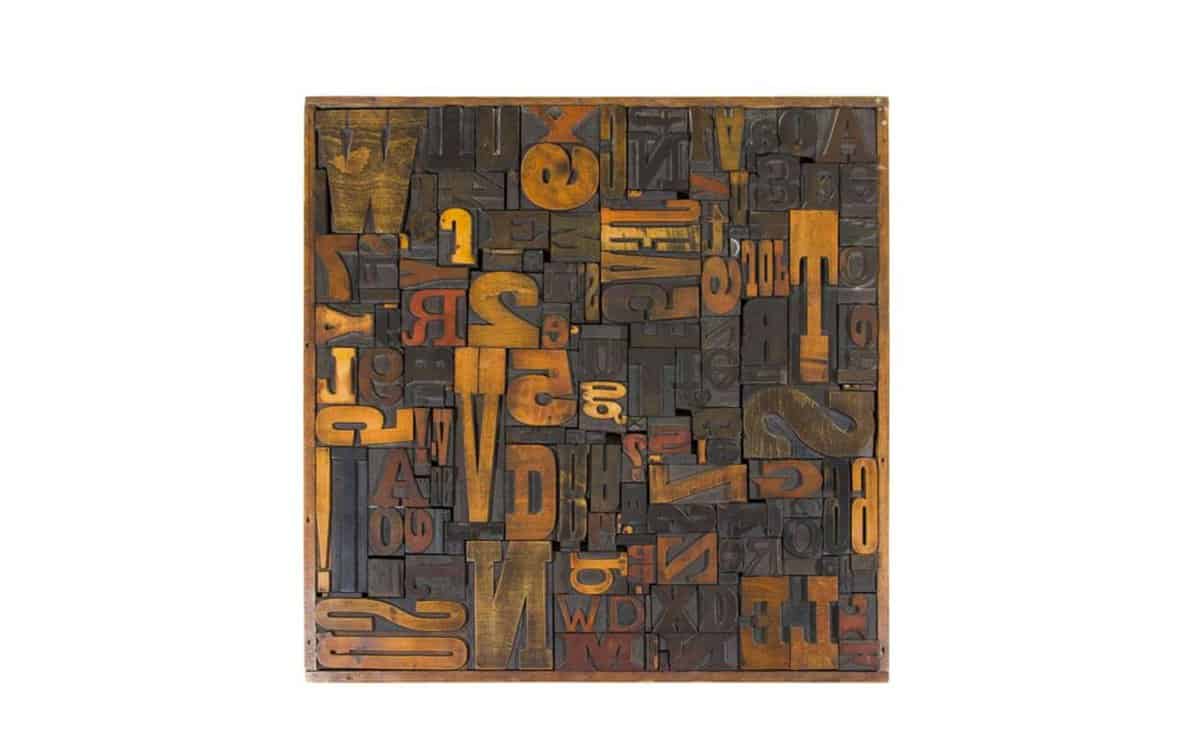
A couple of months ago though, I happened upon this gorgeous ($1200!!) vintage letterpress wall decor from 1st Dibs and it dawned on me that I didn’t need letterpress print blocks to create my DIY art idea--I could make them!
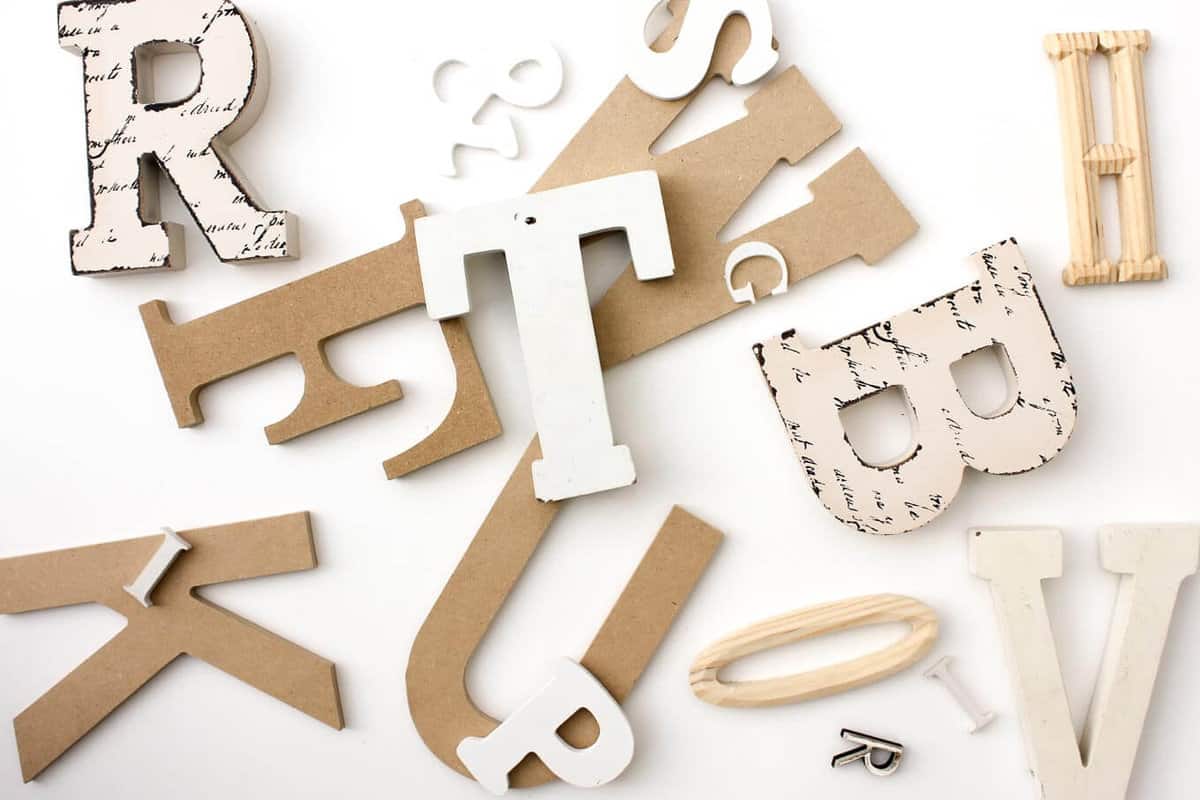
 If you spend anytime at craft stores (please tell me you do!), you know there is no shortage of inexpensive wood letters in all sizes and styles these days. When you combine these letters with small blocks of wood--voila--you have letterpress print blocks.
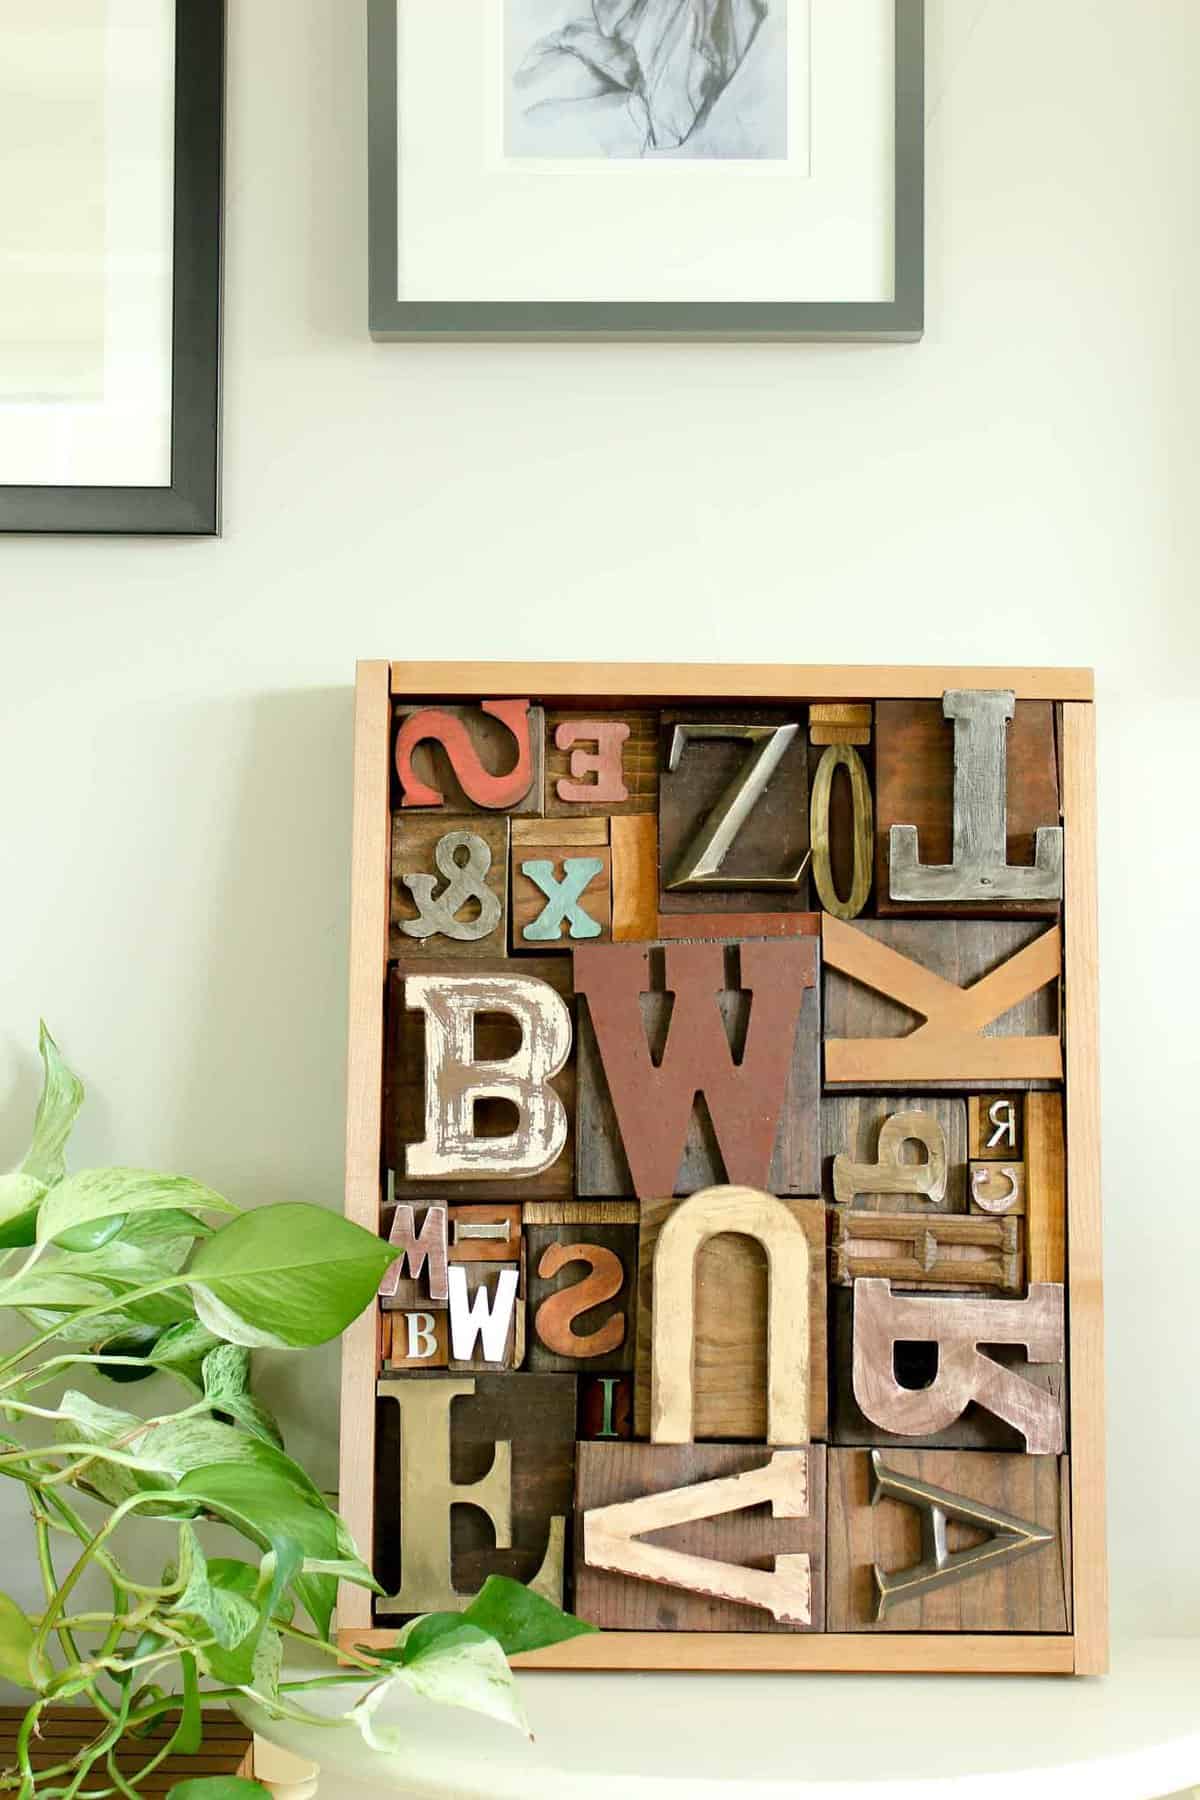
 Adding a couple handmade, vintage-inspired touches can do so much to add character and warmth to an otherwise basic space. If you haven’t made much DIY art, I really encourage you to give it a try. It’s incredibly satisfying to add something to your home that feels personal, handmade and looks fantastic, too. Who needs another bland photo of a leaf from Bed Bath & Beyond, anyhow? 🙂
The following tutorial will give you all the details necessary to create your own letterpress art. Since your dimensions will vary based on which letters you choose, you’ll need to figure out how your own “puzzle” of print blocks fits together. Honestly, this is part of the fun!
LETTERPRESS DIY WALL ART IDEA SUPPLIES
So you can spend more time crafting and less time shopping, this post contains affiliate links at no extra cost to you. Thank you for supporting this little site of mine!
• various wooden letters![]() (Check Michael’s, Joann’s and Hobby Lobby. There are different sized letters in different departments of the stores, so do a little searching for the widest variety.)
(Check Michael’s, Joann’s and Hobby Lobby. There are different sized letters in different departments of the stores, so do a little searching for the widest variety.)
• wood scraps
• ¼” plywood or similar for the backing
• wood stain and/or acrylic paint![]()
• sandpaper
• paintbrush
• electric saw
• wood glue
• measuring tape
• ruler and pencil
• strong picture hanging hooks and wire
• 1x2” wood to create a frame (optional)
• screws for frame (optional)
• drill for the frame![]() (optional)
(optional)
• clamps for the frame (optional--an extra set of helper hands is more ideal)
Instructions
1. After you’ve collected a bunch of cool letters in various sizes and styles, decide if any need to be sanded or roughed up to look a little more vintage.
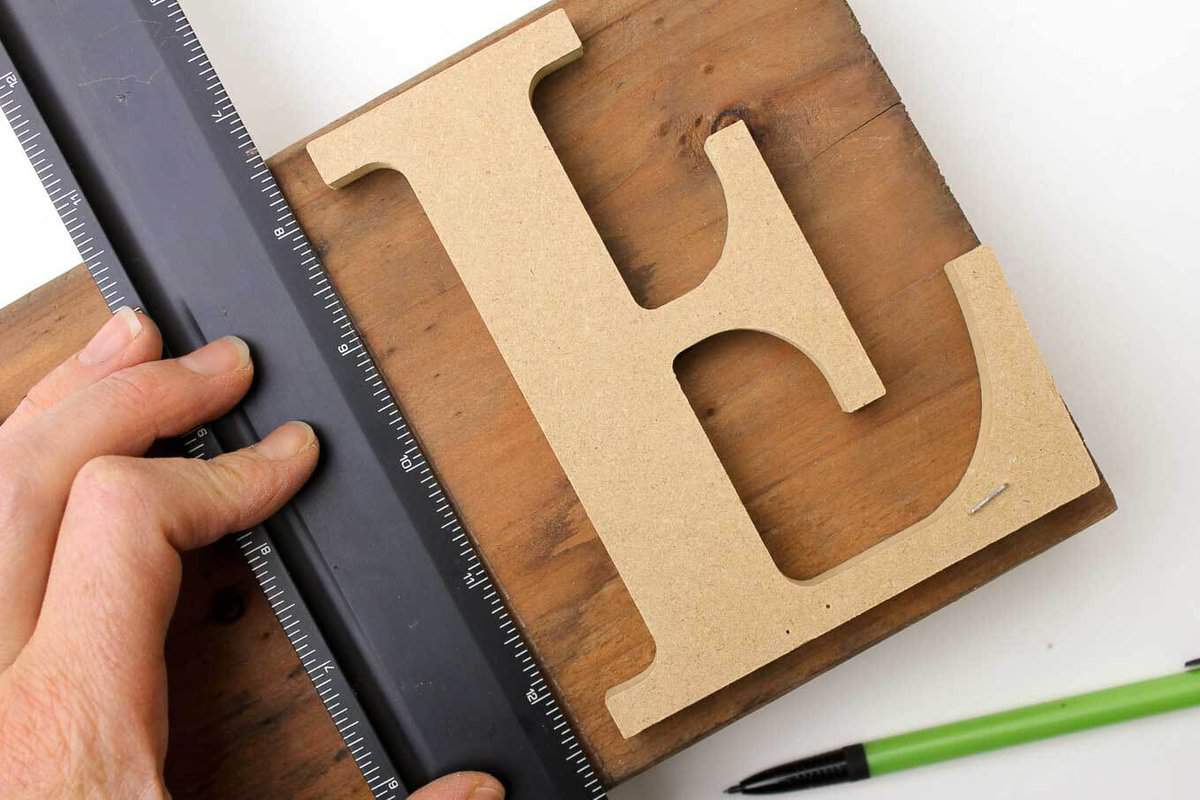
2. Find/cut wood scraps to match the size of each letter. To achieve the most realistic print block look, trim each wood block to be right about the same size as the letter. (I didn’t do this perfectly and I think it still looks fine.)
 3. Paint your letters and blocks using wood stain or acrylic paint diluted with water. Your intention here is to add some muted color and depth to make it look like your print blocks have been hard at work on the press for 50 years. I used paint and stain on my letters and a couple colors of stain on my blocks.
Wanna save this pattern?
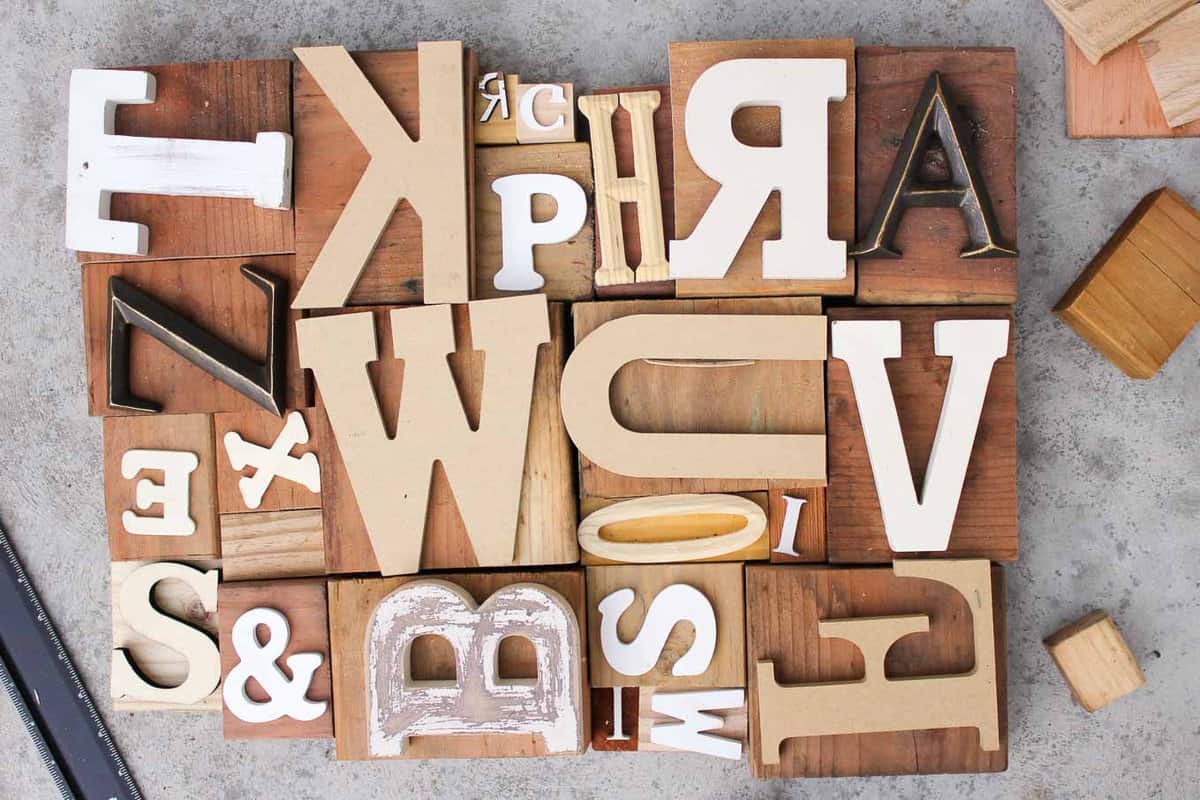
 4. This part takes the most creative vision. Rearrange your letters and blocks until they are creating the shape you want your final piece to be. (I hadn't painted my letters yet when I did this, which meant I had to remember which letters went with which blocks. I suggest just painting all the pieces before you do any arranging!) You may find that you have to fill in small gaps with blank pieces of wood in order to make your art an even rectangle or square.
 5. Glue all the letters to the blocks.
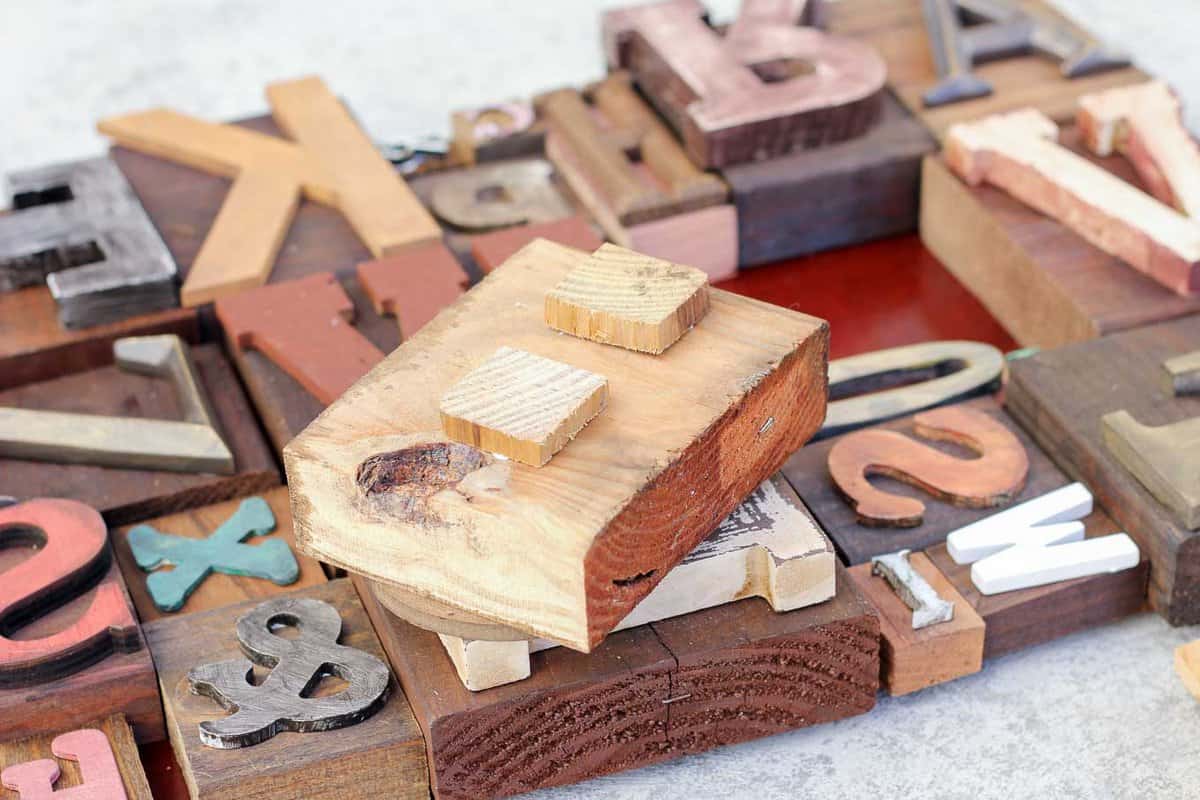
 6. If most of your wood scraps are the same depth, trim the back off of some of them so that they vary in height and add extra dimension to your art. I also added some little boosters to some pieces to create more variation.
 7. Measure your overall piece and cut your wood backing to the same dimension.
8. Glue all the blocks to the backing. Where possible, add a bit of glue to the sides of the blocks to anchor them to each other as well. Take care to try to keep all the blocks lined up at right angles so it’ll be easier to add trim.
9. Trimming your piece is optional. I wanted mine to look a bit more finished, so I gave it a shot. I think it looks great without it though too. If you’d like to add trim, remeasure your piece, just to double check its exact dimensions post-gluing. Add 1” to each measurement and cut four pieces of trim accordingly.
10. Line up your trim around your art so that each piece overhangs by 1” on one side. See the first photo in this post to see how I arranged the trim. Use a clamp (or better yet, a friend!) to hold the trim together so you can drill holes at each corner.
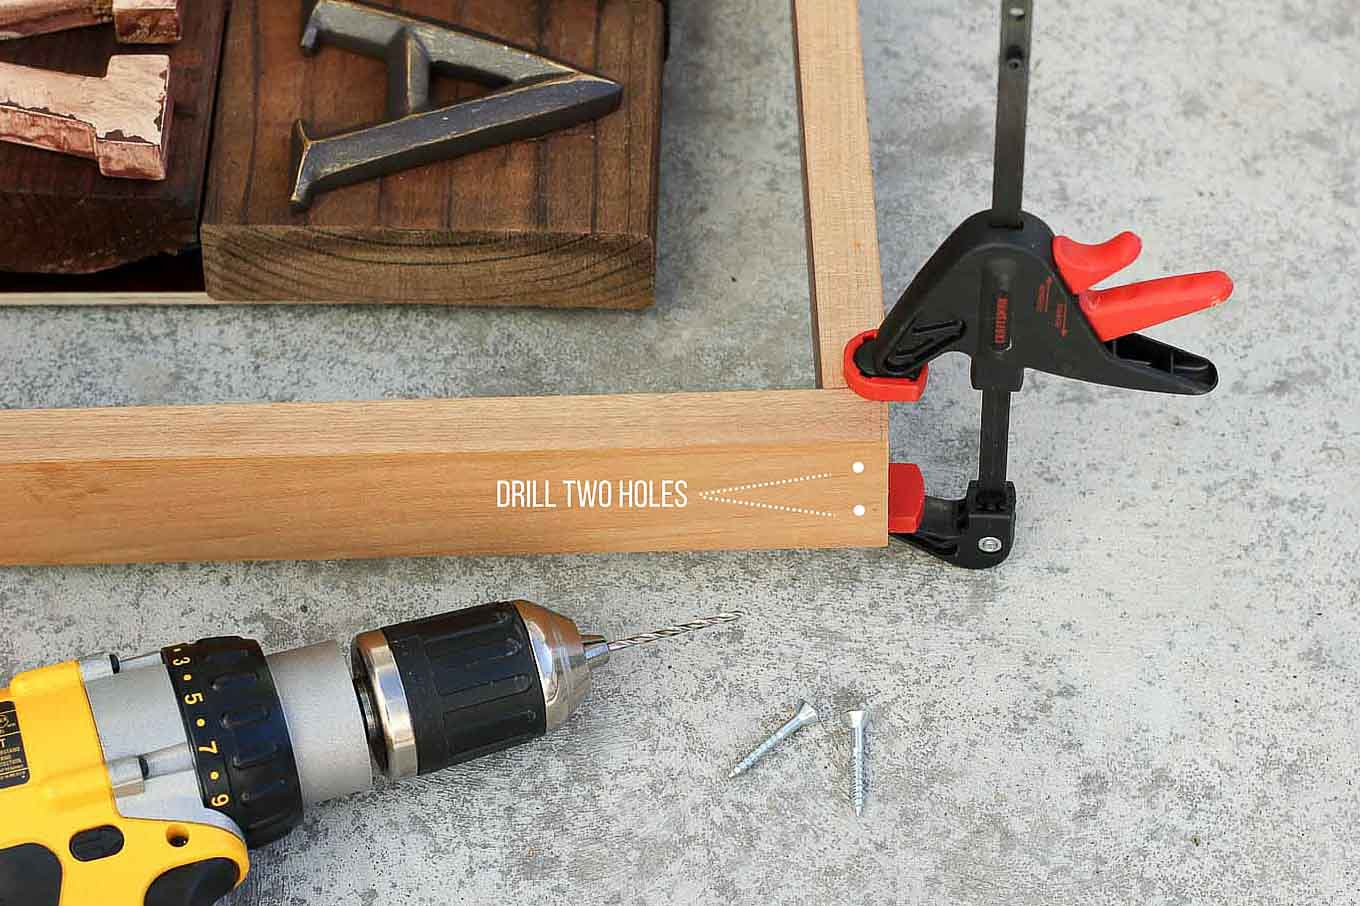 11. Add some glue to the side of each piece of trim that hugs your art and screw the pieces together. (Honestly, I really struggled to do this part alone and Mike had to help. It’s tough to do with only two hands and I had some super hard cherry wood scraps that were impossible to drill through. If you’re having a hard time, ask for some helper hands with this part!)
12. Attach picture hanging hooks and wire to the back of your brand new old school letterpress art.

Snazzy blog photos can make it look like some people are doing it all (effortlessly!) while others of us (me!) are barely holding it together. So whenever I can, I like to introduce a little reality check in the form of a very un-Pinterest-worthy detail from my perfectly imperfect real life. My hope is that it’s a helpful reminder all of us that NO ONE is nailing it all the time.
If you have little kids around (or Facebook alerts set up on your phone), you know what it's like to DIY with interruptions. Sometimes I think my projects come together in dozens of 2-3 minute increments.
This project was no different. It sat outside on our patio, enduring at least three snow storms. The first two times, we covered it in plastic before the snow. The third time though, we were too busy caring for our little "interrupters" to also babysit my art project.
After spending a day covered in snow, it completely fell apart the next time I tried to pick it up. I had to put the whole thing back together again, Humpty-Dumpty style.
Luckily, the I was going for a distressed look, so a little wear and was acceptable...
Good grief. 🙂
Have you used wooden letters to make anything lately? Please tell me about it in the comments!


Carrie says
I love this project! It definitely appeals to the bookworm, puzzle loving nerd inside me. And I also love the reality check you shared. It is always nice to have a reminder that most DIY projects go through at least a few 'failing' stages before reaching success. Or at least mine do!
Jess @ Make and Do Crew says
Oh yes, the "failing stages." I think the only reason I have quite a few wins is because I take a lot of at bats because there sure are some fails sprinkled in there. I'm glad I'm not alone in that. It's funny, I didn't originally think of this project as having a "literary" tone, but now that you mention it, perhaps that's why I'm so attracted to letterpress blocks in the first place. It feeds the writer and reader (and "nerd!") in me.
Thanks so much for reading, Carrie.
jess