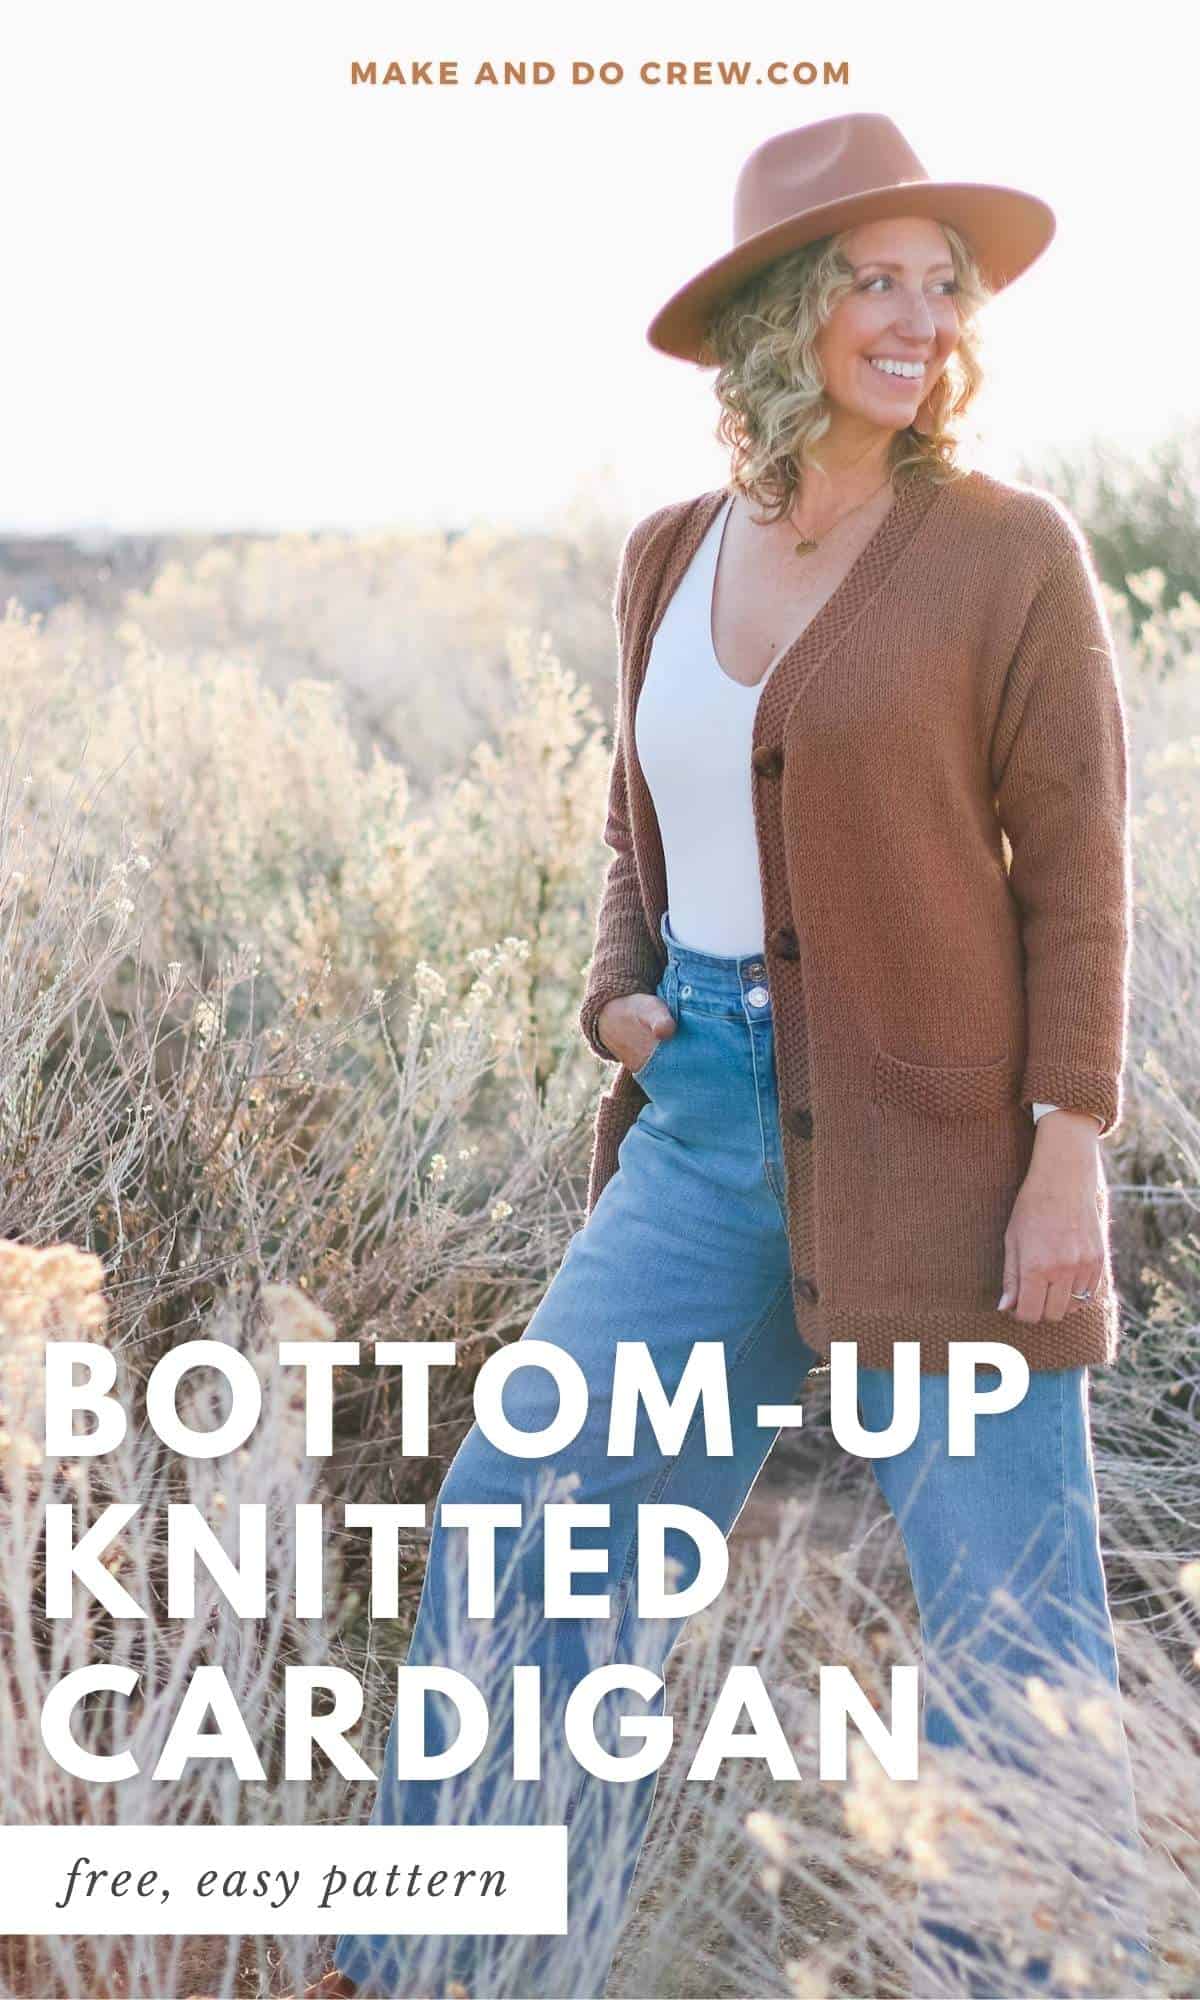
Looking for a knit cardigan pattern you'll make once and wear forever? The classic silhouette and lightweight, drapey fabric will make this sweater a wardrobe staple for years to come.
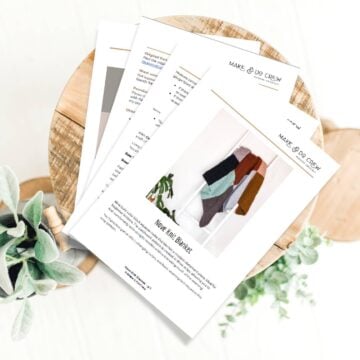
Get the free knitting pattern in sizes extra small - 5X below or purchase the ad-free, printable PDF here.
This cardigan pattern is part of a collaboration with Lion Brand Yarns. This post contains affiliate links.
Jump to:
How To Knit an Easy Cardigan
This main body of this cardigan is knit flat in stockinette stitch. Here's an overview of the sweater-making process:
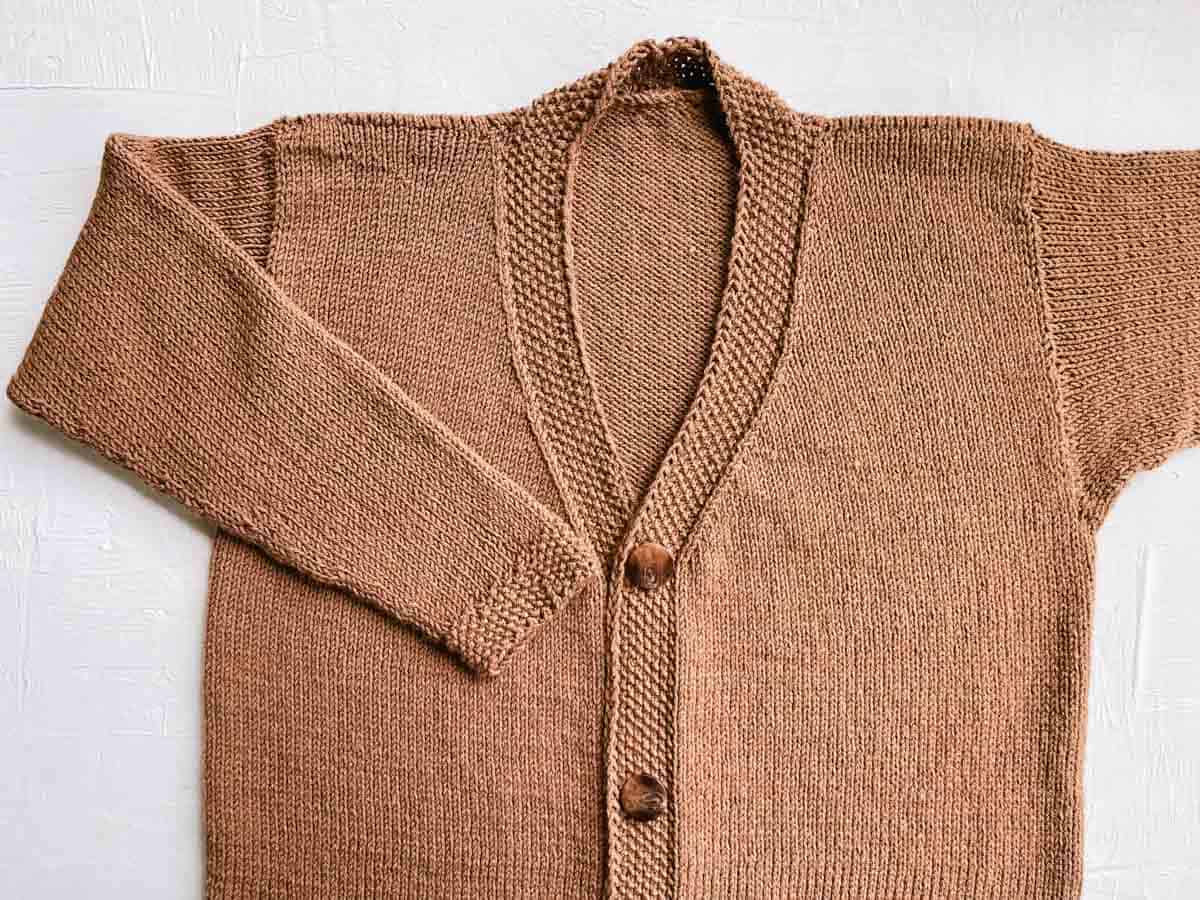
Step 1: You'll work from the bottom up to make the front and back panels at once. Circular knitting needles make it easy to accommodate all the stitches. This construction eliminates nearly all the seaming!
Step 2: When you reach the armholes, you'll separate your long row into three sections: two front panels and one back panel.
Step 3: After joining the fronts and back at the shoulders, you'll pick up stitches around the armholes to knit the sleeves.
At the end of this project, you will have mastered the seed stitch, creating inset pockets and working sleeves in the round.

Print this Pattern
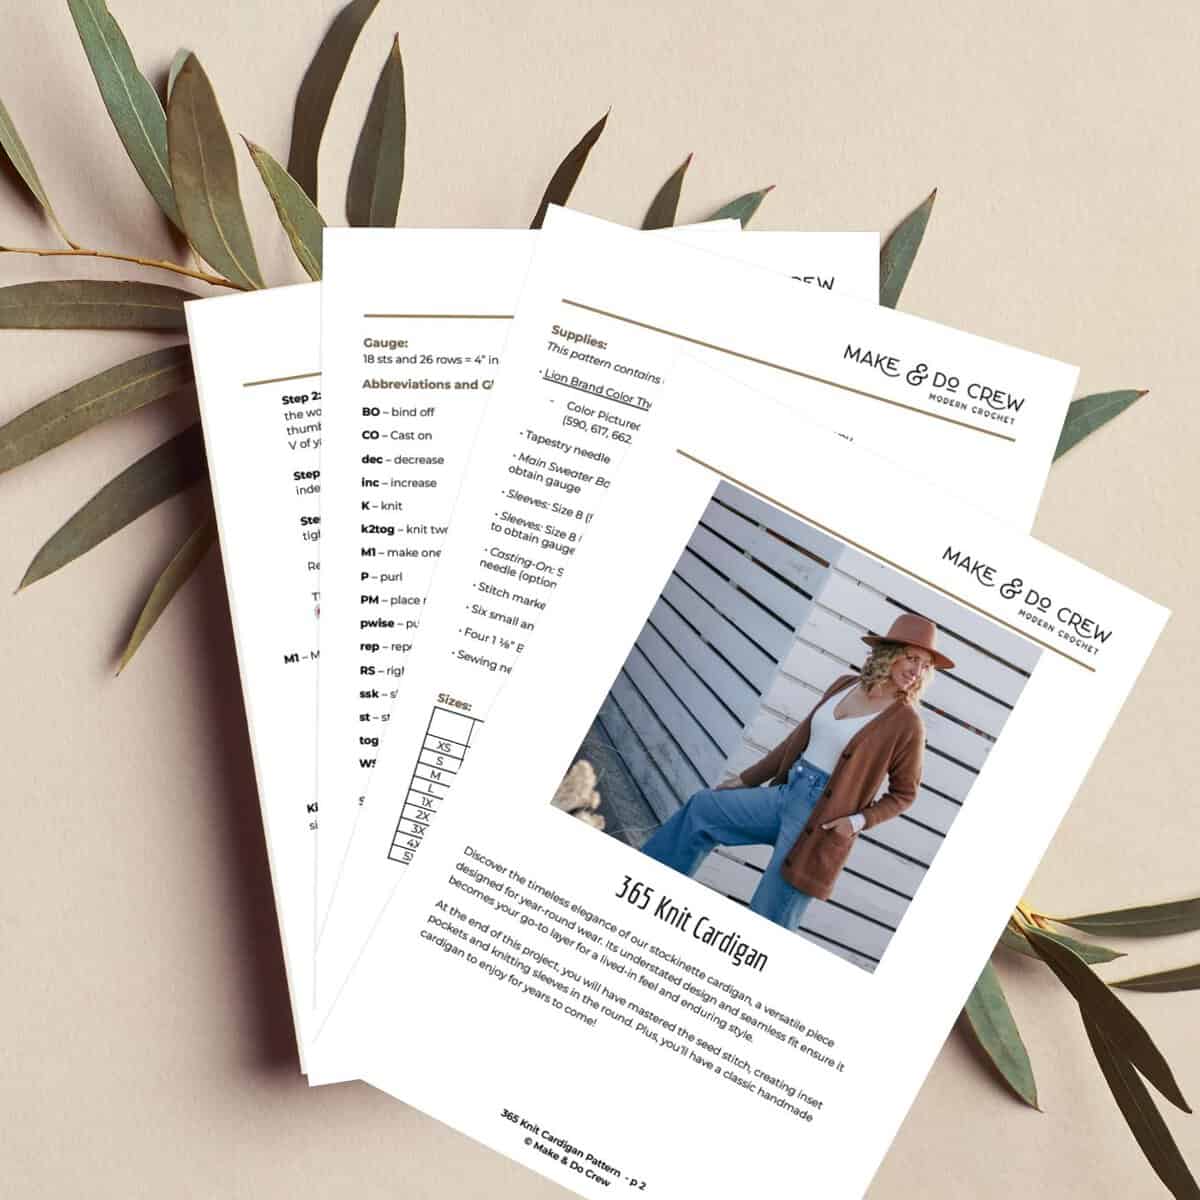
Prefer to knit on the couch? Need a portable, printable pattern? You'll love the premium PDF! The instantly downloadable, ad-free file is formatted for easy printing and includes the complete pattern and several detailed photos.
365 Knit Cardigan Free Pattern
Explanation: Discover the timeless elegance of our stockinette cardigan, a versatile piece designed for year-round wear. Its understated design and seamless fit ensure it becomes your go-to layer for a lived-in feel and enduring style.
Skill Level
This project is appropriate if you've already mastered beginner basics and are ready to practice some useful, intermediate-level techniques.
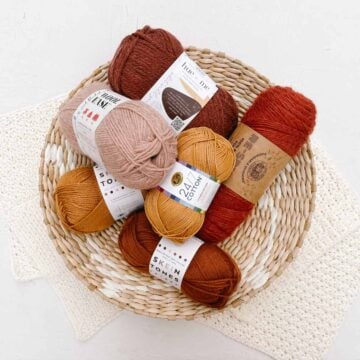
What Yarn Should I Use?
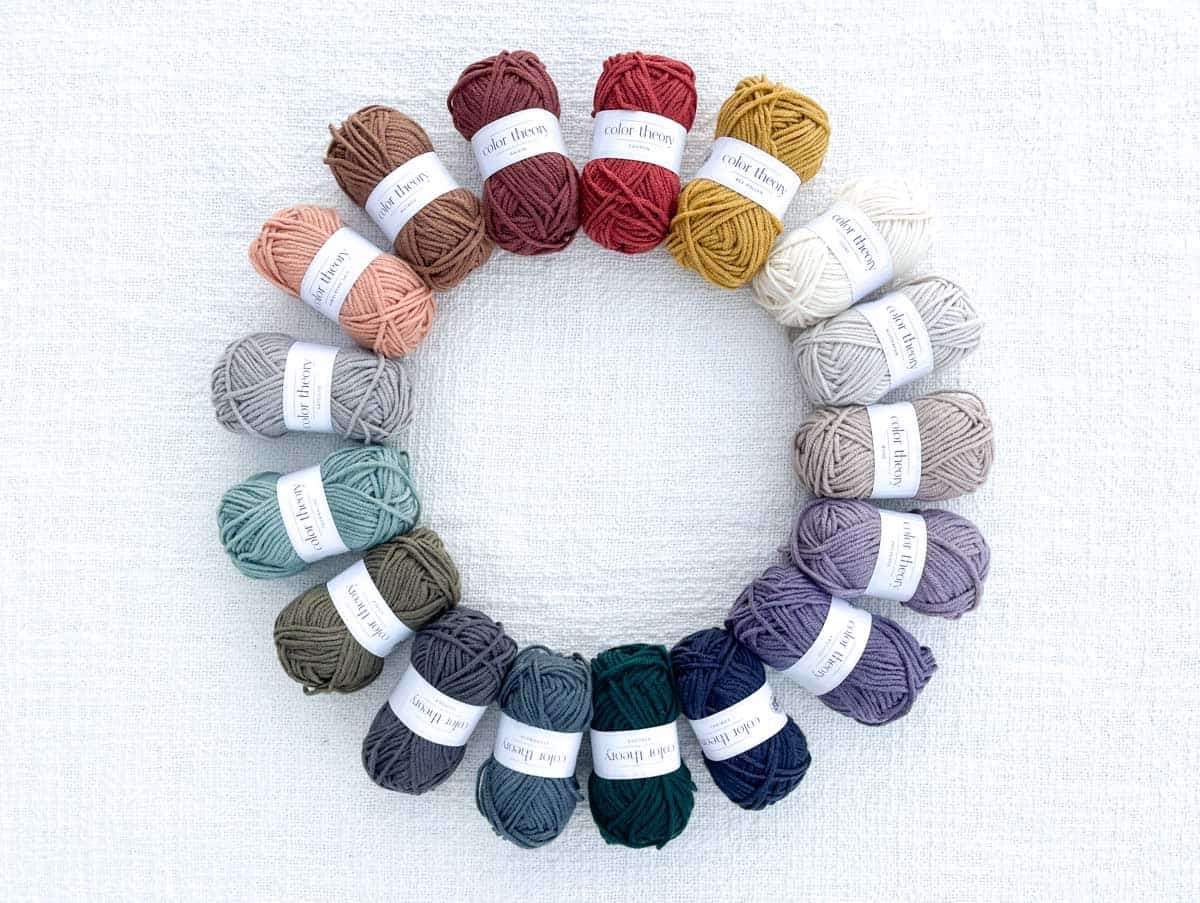
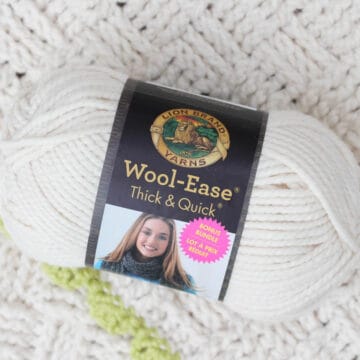
To knit this cardigan, you'll need a worsted weight yarn, ideally that's machine washable. We used Lion Brand Color Theory for the sample in the color "Nutmeg." Color Theory a 100% acrylic yarn with a nice matte finish. We love this yarn for it's drape and ease to work with.
Here are the technical details and yardage you'll need:
Lion Brand Color Theory (Weight: 4/ Medium - 246 yds, 3.5 oz, 100 g)
- Color Pictured: Nutmeg (619-124D) – 6 (6, 7, 7, 8)(8, 8, 9, 9) skeins [approx. 559 (590, 617, 662, 715)(756, 796, 850, 890) grams]
All-in-One Knitting Kit
The all-in-one kit is a perfect way to make your 365 Cardigan. This bundle from Lion Brand includes all the Color Theory you'll need, plus a bonus printable PDF of the pattern (delivered digitally).
Yarn Substitution Suggestions
You can substitute most worsted weight yarns as long as you meet the pattern gauge. (Gauge swatch instructions are included below.) Don't be afraid to increase or decrease the size of your needles to achieve the correct tension.
Here are a few more yarns that would sub well in this pattern:
Additional Materials
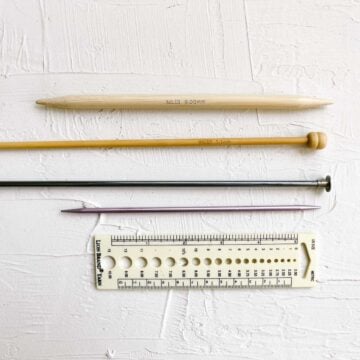
Here are the knitting needles and other supplies you'll use:
• Main Sweater Body: Size 8 (5.0 mm) 32” circular knitting needle or size needed to obtain gauge
• Sleeves: Size 8 (5.0 mm) 16” circular knitting needle or size needed to obtain gauge
• Sleeves: Size 8 (5.0 mm) double pointed knitting needles (one set of 4 needles) or size to obtain gauge
• Casting-On: Size 2 (2.25 mm) straight knitting needle held together with larger needle (optional)
• Tapestry needle
• Stitch markers
• Six small and 4 large stitch holders
• Four 1 ⅛” Buttons (I bought mine at Joann's)
• Sewing needle and thread that matches button color
• Scissors

Sizes
Choose your sweater size based on your actual bust circumference. For a more oversized sweater, size up.
| Size | Fits Actual Bust (inches) | Sweater Length (inches) |
|---|---|---|
| XS | 30 | 29 |
| S | 34 | 30 |
| M | 38 | 30 |
| L | 42 | 30 |
| 1X | 46 | 31 |
| 2X | 50 | 31 |
| 3X | 54 | 31 |
| 4X | 58 | 32 |
| 5X | 62 | 32 |
Gauge
18 sts and 26 rows = 4” in stockinette knit flat
Abbreviations and Glossary
BO – bind off
CO – Cast on
dec – decrease
inc – increase
K – knit
k2tog – knit two stitches together
M1 – make one (increase)
P – purl
PM – place marker
pwise – purlwise
rep – repeat
RS – right side
ssk – slip 1 knitwise, slip 1 knitwise, knit 2 slipped stitches together (decrease)
st – stitch
tog – together
WS – wrong side
Special Stitches and Techniques
Follow the step by step instructions and video tutorials below if any of these knitting techniques are new to you.
Long Tail Cast On
Step 1: Leaving a long tail (about ½-1” per stitch), make a slip knot and place on right needle. Overestimate the amount of yarn needed for your tail so that you don’t run out before all the stitches are cast on.
Step 2: Place thumb and index finger of left hand between yarn ends so that the working yarn is around index finger of left hand and tail end is around thumb. Secure ends with your other fingers and hold palm upwards, making a V of yarn.
Step 3: Bring needle up through loop on thumb, grab first strand around index finger and go back down through the loop on thumb.
Step 4: Drop loop off thumb and, placing thumb back in the V configuration, tighten resulting stitch on needle.
Repeat Steps 2-4 until you have the correct number of stitches on the needle.
This YouTube video from Sheep & Stitch may be helpful:
M1 – Make one (knit stitch increase)
Step 1: With left needle tip, lift strand between needles from front to back. Step 2: Knit lifted loop through the back.
This YouTube video by Christy Hills may be helpful:
How to knit M1L (Make 1 Left) - Increasing 1 stitch
How Do I Seam My Knit Sweater?
The pattern below offers two options for seaming your cardigan pieces together. The kitchner stitch joins live stitches, which means you don't bind off before seaming. The mattress stitch is commonly used to join knit pieces and is done after casting off.
In my experience, the kitchner stitch creates a more invisible seam and is our recommendation in this pattern.
How to Do the Kitchener Stitch
Transfer stitches onto 2 double pointed needles. Holding wrong sides together:
Step 1: Bring threaded tapestry needle through front stitch as if to purl and leave on needle.
Step 2: Bring threaded needle through back stitch as if to knit and leave st on needle.
Step 3: Bring threaded needle through same front stitch as if to knit and slip stitch off needle. Bring threaded needle through next front stitch as if to purl and leave stitch on needle.
Step 4: Bring threaded needle through first back stitch as if to purl, slip this stitch off and bring needle through next back stitch as if to knit, leave this stitch on needle.
Repeat steps 3 and 4 until no stitches remain.
This YouTube video by WEBS may be helpful:
How to Do the Mattress Stitch
Holding right sides together and using threaded tapestry needle:
Step 1: Pick up one bar between first two stitches on one piece, then corresponding bar on the other piece.
Step 2: Pick up next bar on first piece, then next bar on the opposite piece. Repeat step 2. Finish by picking up last bar at the top of first piece.
This YouTube video from Berroco may be helpful:
Overall Pattern Notes
Instructions are written with the stitch count for the smallest size first and each larger size following in parentheses, for example: XS (S, M, L, 1X)(2X, 3X, 4X, 5X).
It can be very helpful to highlight the numbers for your size before beginning the project. When only one number is given, it pertains to all sizes.
Check out our guide to reading knitting patterns if you have further questions.
Pocket Lining and Gauge Check
This step is essential to make sure your sweater ends up the expected size. It’s also how you’ll knit the pocket linings.
With the needle size you’ll use for the main sweater body:
Foundation Row: Cast on 22 sts.
Row 1 (RS): K1 in each st across. (22 sts)
Row 2 (WS): Purl 1 in each st across. (22 sts)
Repeat Rows 1 and 2 until piece measures 6”, ending with a WS (purl) row.
Do not bind off. Place stitches on a stitch holder so they are able to spread out and the swatch can lay flat. Block the swatch using the same method you plan to block the finished sweater. (See notes at end of pattern.)
Measure number of stitches and rows in four inches. Repeat two or three times on different areas of swatch to confirm measurement. Compare to pattern gauge listed above. If you have more stitches and rows than called for, use larger needles and reswatch. If you have fewer stitches and rows than called for, use smaller needles and reswatch.
Once you’ve confirmed the correct needle size to use for your cardigan, repeat these instructions to make a second pocket lining. It’s helpful to leave a long enough tail on both ends of pocket lining to seam pocket in place.
Want some company while you knit?
Get support (and camaraderie!) in the Make & Do Crew Facebook Group.
Main Body of the Sweater
- The back and front panels of the sweater are worked in one piece until you reach the armholes. The first and last 9 stitches of each row are the seed stitch collar border. Stitch markers are used to visually designate the collar borders from the main sweater. Move the markers up with each row as you work.
- The first stitch of each row is a slip stitch worked purlwise to create a more even edge.
- Pocket lining was knit separately so it can be joined to the fronts as you knit. You will place 20 sts on a stitch holder and insert pocket lining to replace the stitches on the stitch holder.
This video tutorial by West Yorkshore Spinners may be helpful.
- That said, button holes and pockets are optional. If you do not desire buttons or pockets, disregard the directions and work row as normal row. (Do not skip the step of checking your gauge though!)
Premium PDF
easier and faster with fewer mistakes.
- Complete pattern + photos
- Instant download
- Formatted for easy printing
Tip: If you tend to cast on too tightly, hold a thinner needle beside your main needle while casting on. Once you have the correct number of stitches, slide the extra needle out. Now you have more room between the loops and your needle, making the first row easier to work.
Using long tail cast on method and 32” circular needle:
Foundation Row: Cast on 171 (189, 209, 225, 243)(261, 279, 297, 309) stitches (Tip: place a stitch marker every 25 sts to make counting easier).
Bottom Ribbing Row 1 (RS): Sl first st pwise, *p1, k1, rep from * to end of row. (171 (189, 209, 225, 243)(261, 279, 297, 309) sts)
Repeat Row 1 fifteen more times for a total of sixteen rows.
Row 17 (RS bottom of buttonhole): Sl first st purlwise, p1, k1, p1, bind off next two sts, k1, p1, k1, PM for the border, k1 in each st until 9 stitches remain, PM for the border, k1, *p1, k1 rep from * to end of row.
Row 18 (WS top of buttonhole): K1, *p1, k1, rep from * to border marker, p1 in each st to border marker, k1, p1, k1, cast on 2 sts, p1, k1, p1, k1.
Row 19 (RS): Sl first st pwise, *p1, k1,, rep from * to border marker, k1 in each st to border marker, k1, *p1, k1, rep from * to end of row.
Row 20 (WS): Sl first st pwise, *p1, k1, rep from * to border marker, p1 in each st to next marker, k1, *p1, k1, rep from * to end of row.
Repeat Rows 19 and 20 until piece measures 5” from last buttonhole. Repeat Rows 17 and 18 to make next buttonhole.

Have Pocket Linings handy, as you will knit them into the sweater now.
Set up for pocket, with RS facing. (Stitch markers are placed after the last stitch counted.)
Step 1: Count 19 stitches from right front edge, PM after stitch 19… Step 2: Skip 20 stitches, PM after stitch…
Step 3: Count 19 stitches from left front edge, PM after st 19…
Step 4: Skip 20 stitches, PM after stitch.
Wanna save this pattern?
You should now have two pocket openings marked, each containing 20 stitches.
Row 1 (RS): Sl first st pwise, *p1,k1, rep from * to border marker, k1 in each st to marker, slip 20 sts between pocket markers onto large stitch holder, knit 20 sts of pocket lining, k1 in each st until next pocket marker, slip 20 stitches between pocket markers on large stitch holder, knit 20 sts of pocket lining, k1 in each st to border marker, k1, *p1, k1, rep from * to end of row.
Row 2 (WS): Sl first st pwise, *p1, k1, Rep from * to border marker, p1 in each st, removing pocket markers as you go, until the border marker, k1, *p1, k1, rep from * to end of row.
Repeat Rows 19 and 20 until piece measures 20” working a buttonhole (Rows 17 and 18) on right front every 5” to create 4 total buttonholes.
Decreasing for Neckline
Row 1 (RS dec): Sl first st pwise, *p1, k1, rep from * to border marker, ssk, k1 in each st across until 2 sts remain before border marker, k2tog, k1, *p1, k1, rep from * to end of row. (169 (187, 207, 223, 241)(259, 277, 295, 307) sts)
Row 2 (WS): Sl first st pwise, *p1, k1, rep from * to border marker, p1 in each st to border marker, k1, *p1, k1, rep from * to end of row.
Repeat Rows 1 and 2 once more. At this point you should have 167 (185, 205, 221, 239)(257, 275, 293, 305) sts.
Dividing Right and Left Fronts and Back
Now we’re going to transfer stitches from the needle to stitch holders to reserve them for later. From this point on, the fronts and back will be worked individually.
First front: Leave the first 42 (48, 53, 58, 63)(67, 72, 75, 79) sts on the needle. They will be worked first below.
Second front: Working from opposite end of needles, slip 42 (48, 53, 58, 63)(67, 72, 75, 79) sts onto a large stitch holder.
Armhole: Slip next 8 (8, 10, 10, 10)(12, 12, 14, 14) sts on small stitch holder. Back of sweater: Slip next 67 (73, 79, 85, 93)(99 107, 115, 119) sts on large stitch holder. Armhole: Slip next 8 (8, 10, 10, 10)(12, 12, 14, 14) sts on small stitch holder.
You should now have the stitches for one front, one back, and two armholes each on separate stitch holders. The stitches for the first front should remain on the needle to be worked in the next section.
First Front Panel
Note: all sizes except XS start with Row 1. Size XS proceed to “XS Start Here.”
Row 1 (RS): Slip first st pwise, *p1, k1, rep from * to border marker, ssk, k1 in each st to end of row. (- (48, 53, 58, 63)(67, 72, 75, 79) sts)
Row 2 (RS dec): P1 in each st to border marker, k1, *p1, k1, rep from * to end of row. (- (47, 52, 57, 62)(66, 71, 74, 78) sts)
Repeat Rows 1 and 2 - (2, 14, 17, 24)(33, 35, 37, 37) more times. (- (44, 38, 39, 37)(32, 35, 36, 40) sts)
Sizes 2X - 5X are finished, proceed to Bind Off.
XS Start Here (sizes S - 1X continue):
Continue working in pattern, but only decreasing one st every other RS row (every fourth row) until 28 (30, 30, 32, 32)(-, -, -, -) sts remain.
Sizes XS and 1X only: work 2 additional rows of stockinette flat with no decreasing.
You should now have 58 (62, 62, 64, 66)(68, 72, 76, 76) rows with a total of 28 (30, 30, 32, 32)(34, 35, 36, 40) sts.
Bind Off:
To seam with Kitchener Stitch (recommended): Place remaining stitches on large stitch holder. Cut yarn, leaving a 30” tail for seaming shoulders.
To seam with Mattress Stitch: Bind off all stitches except border sts. Place border sts on small stitch holder or large safety pin.
Second Front Panel
Slip stitches for second front to circular needle. With RS facing, attach yarn at marker, between last underarm stitch and first front stitch.
Note: all sizes except XS start with Row 1. Size XS proceed to “XS Start Here”
Row 1 (RS dec): K1 in each st until 2 sts remain before border marker, k2tog, k1, *p1, k1, rep from * to end of row. (- (47, 52, 57, 62)(66, 71, 74, 78) sts)
Row 2 (WS): Sl first st pwise, *p1, k1, rep from * to border marker, p1 in each st t end of row. (- (47, 52, 57, 62)(66, 71, 74, 78) sts)
Repeat Rows 2 and 3 - (2, 14, 17, 24)(33, 35, 37, 37) more times. (- (44, 38, 39, 37)(32, 35, 36, 40) sts)
Sizes 2X - 5X are finished, proceed to Bind Off.
XS Start Here (sizes S - 1X continue):
Continue working in pattern, but only decreasing every other RS row (every fourth row) until 28 (30, 30, 32, 32)(-, -, -, -) sts remain.
Sizes XS and 1X only: work 2 additional rows of stockinette flat with no decreasing.
You should now have 58 (62, 62, 64, 66)(68, 72, 76, 76) rows with a total of 28 (30, 30, 32, 32)(34, 35, 36, 40) sts.
Bind Off:
To seam with Kitchener Stitch (recommended): Place remaining stitches on large stitch holder. Cut yarn, leaving a 30” tail for seaming shoulders.
To seam with Mattress Stitch: Bind off all stitches except border sts. Place border sts on small stitch holder or large safety pin.
Back Panel
Slip Back 67 (73, 79, 85, 93)(99, 107, 115, 119) stitches to 16” circular needle. With RS facing, attach yarn at marker between last Right Front underarm stitch and first stitch of Back (Left-handed: With RS facing attach yarn at marker between last Left Front underarm stitch and first stitch of Back).
Row 1 (RS): K1 in each st to end of row.
Row 2 (WS): P1 in each st to end of row.
Repeat Rows 1 and 2 until you have worked 58 (62, 62, 64, 66)(68, 72, 76, 76) rows and the piece measures 10 ¼”, ending with a WS row.
To seam with Kitchener Stitch (recommended): Place 19 (21, 21, 23, 23)(25, 26, 27, 31) stitches from right edge of back on small stitch holder. Do the same for 19 (21, 21, 23, 23)(25, 26, 27, 31) stitches from left edge of back.
To seam with Mattress Stitch: Bind off the 19 (21, 21, 23, 23)(25, 26, 27, 31) stitches from right edge of back seaming with Mattress Stitch. Do the same for 19 (21, 21, 23, 23)(25, 26, 27, 31) stitches from left edge of back.
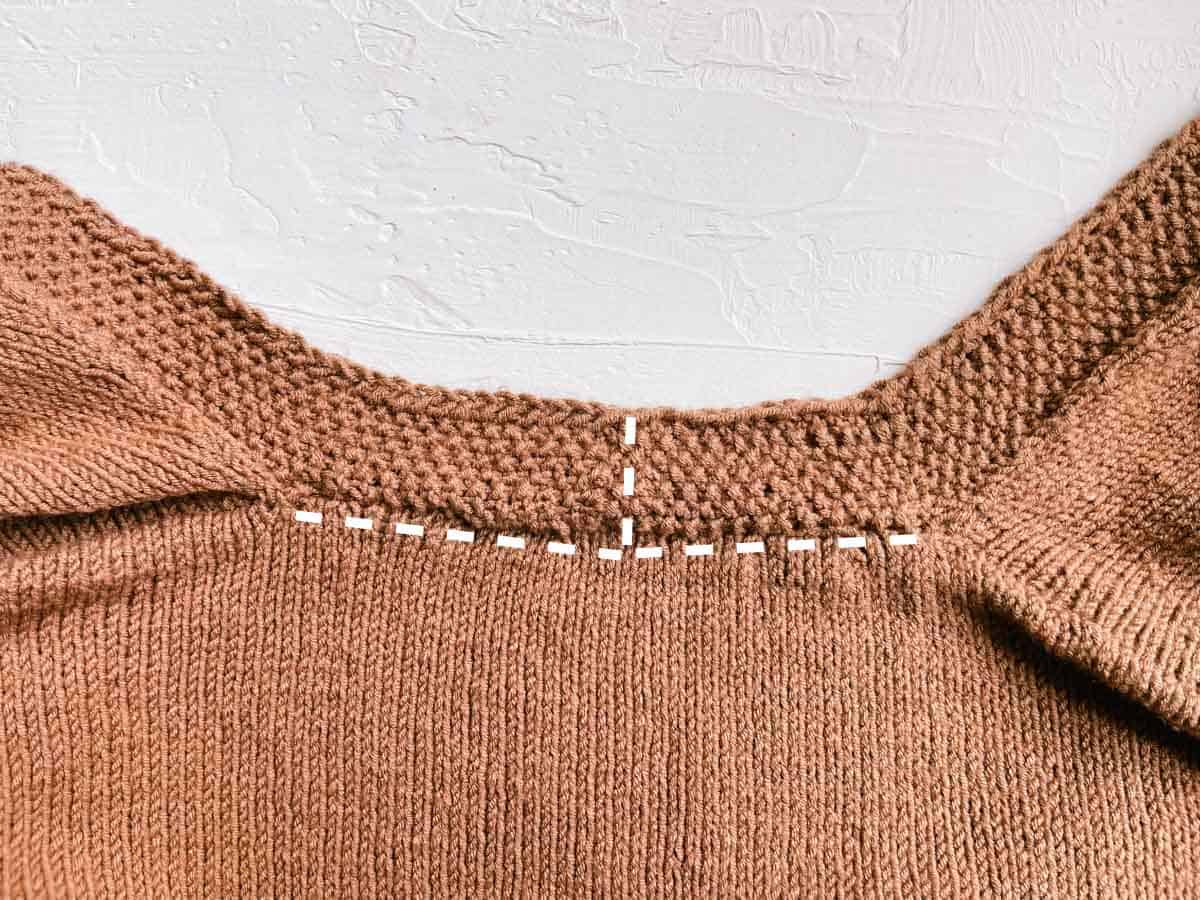
Remaining 29 (31, 37, 39, 47)(49, 55, 62, 57) stitches are back of neck.
Decrease Back Neck
Row 1 (RS dec): K2tog, *k1 in each of next 7 (5, 5, 4, 2)(2, 4, 3, 6) sts, k2tog, rep from * to end of row. (25 (26, 31, 32, 35)(36, 45, 48, 49) sts)
Row 2 (WS): P1 in each st to end of row.
Bind off back neck sts. Fasten off leaving 30” tail for seaming border to back neck edge.
Joining Shoulders
Choose one seaming option below to seam the fronts to the back at the shoulders.
Option 1: Kitchener Stitch Seaming Method
Fold the back in half and PM in center stitch of back of neck. Slide right front and back shoulder stitches onto double pointed needles. Holding wrong sides together, seam shoulder stitches using kitchener stitch. Fasten off. Repeat with left side front and back shoulder stitches.
Option 2: Mattress Stitch Seaming Method
Fold the back in half and PM in center stitch of back of neck. Use stitch markers to pin right sides together of Right Front and Right Back. Seam shoulder using mattress stitch.
Repeat for Left Front and Left Back shoulder stitches.
Back of Neck Border
Stitches on holders are used to complete the collar borders on right and left sides. These borders are then seamed together and the piece is joined to back neck edge.
Fold the back in half and PM in center stitch of back of neck. This marker indicates where border center seam should meet.
Right Back of Neck Border:
Slide stitches of right neck border onto double pointed needles.
**Attach yarn on the side closest to the sweater on the right neck border sts on needle.
Row 1 (WS): K1, *p1, k1, rep from * to end of row. (9 sts)
Row 2 (RS): Sl first st pwise, *p1, k1, rep from * to end of row.
Repeat Rows 1 and 2 until you have worked a total of 16 (17, 20, 21, 23)(23, 29, 31, 32) rows. Fasten off, but leave sts on needle if seaming with Kitchener Stitch.
Bind off all sts if seaming with Mattress Stitch.
Left Back of Neck Border:
Slide stitches of left neck border onto double pointed needles.
Follow instructions for Right Back of Neck Border starting at **.
Choose one seaming option below.
Option 1: Kitchener Stitch Seaming Method
Holding wrong sides together, seam right and left back neck borders together using Kitchener Stitch.
Option 2: Mattress Stitch Seaming Method
With right sides together seam right and left back neck borders together using mattress st.
Seaming Back Neck Border to Sweater
Position seam of back neck border to marked stitch in the center of the back of sweater. With attached yarn and right sides together, seam border to back of sweater using Mattress Stitch.
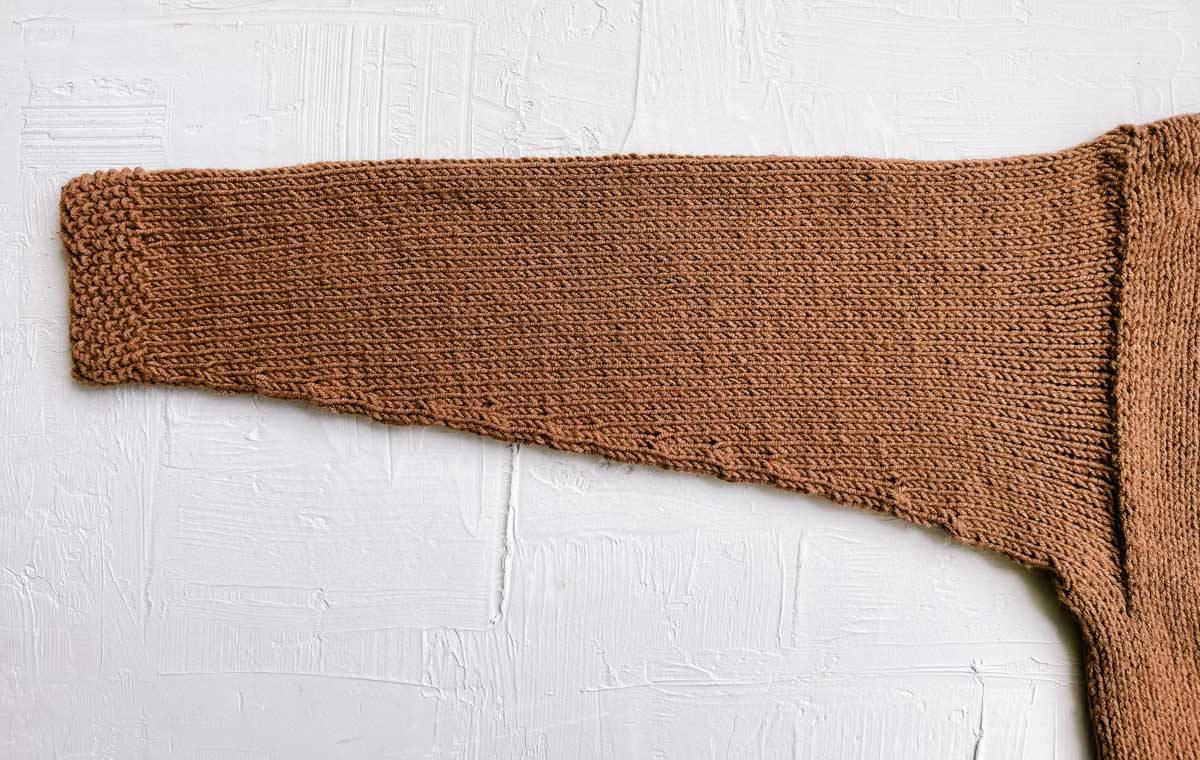
Sleeves
Notes:
- Sleeves are worked by picking up stitches around armhole and working in the round, decreasing as you work toward wrist. You will be working on the RS only. You may find this YouTube tutorial by Purl Soho helpful if you do not know how to pick up stitches along a vertical edge.
- Begin with 16” circular needle and change to double pointed needles when stitches become too few to work easily on circular needle.
- Place marker at the end of the round and move marker up as you work.
Make 2.
With RS facing, attach yarn in the middle of stitches on underarm stitch holder (5 sts on either side of yarn.) Slide 5 stitches onto 16” circular needle.
Foundation Round (RS): With attached yarn, knit first 5 sts on stitch holder. Pick up and knit 28 (31, 31, 32, 33)(34, 36, 38, 38) stitches on sleeve front (sts before shoulder seam). Pick up and knit 28 (31, 31, 32, 33)(34, 36, 38, 38) stitches on the back of sleeves (sts on the back side of shoulder seam). Knit last 5 sts on stitch holder. PM at end of round. (64 (70, 72, 74, 76)(80, 84, 90, 90) sts)
Continue knitting in the round, working a decrease round as detailed below every 7th (6th, 6th, 6th, 6th)(5th, 5th, 4th, 4th) round until you have 36 (36, 36, 40, 40)(40, 44, 44, 44) sts.
Decrease Round: K1, ssk, k1 in each st until 3 sts remain, k2tog, k1.
If you'd prefer longer sleeves, continue knitting in the round with no decreases until desired length is reached. Keep in mind that the cuff will add approximately 1.5” of length to the sleeve.
Ribbed Sleeve Cuff
Round 1: *K1, p1, rep from * to end of round. Round 2: *P1, k1, rep from * to end of round.
Repeat Rows 1 and 2 five more times for a total of 12 rounds. Bind off all stitches. Fasten off and weave in ends.
Finishing
Your classic knit cardigan is almost complete! There are a few steps left to finish it off.
Seaming Pocket Lining to Sweater
Making sure pocket is lying flat, seam pocket lining to sweater using Mattress Stitch.
Pocket Upper Border
Slip 20 stitches from stitch holder onto double pointed needles. Leaving 12” tail for seaming border, attach yarn to the right of the first st on needle. (Left handed: attach yarn to the left of first st on the needle.)
Row 1 (RS inc): *K1, p1, rep from * until 2 sts remain, M1, p1, k1. (21 sts) Row 2 (WS): K1, *p1, k1, rep from * to end of row.
Rows 3 – 10: K1, *p1, k1, rep from * to end of row.
Bind off all stitches in pattern. Fasten off leaving 12” tail for seaming border. Seam border to sweater using Mattress Stitch.
Blocking
Block your sweater by laying it flat and directing steam at it from an iron or steamer. Avoid touching the heat source to the yarn. Alternatively, spray with spray bottle and clean water.
Adding Buttons: Using thread that matches button color, sew buttons in place opposite from buttonholes. (I prefer to measure the space between the button holes and sew my buttons in place based on that rather than eyeballing it.)
Enjoy wearing your new cardi 356 days a year!
More Knitting Projects and Tutorials
What would you like to make next? We've got plenty of free knitting patterns to keep your needles busy!
If you're multi-crafty, check out our free crochet patterns too.
- How To Knit Slippers In 2 Hours With Straight Needles
- Easy Knit Infinity Scarf | Free Pattern Using Straight Needles
- Rib Stitches In Knitting: 6 Easy Ways to Create Ribbing
- How to Read Knitting Patterns | Stress-Free Beginners Guide
- Knitting Needle Sizes Explained + Printable Conversion Chart
- 1.5 Hour Free Chunky Hat Knitting Pattern

That was so fun! Now what?
Invitation to our Facebook group
Come discuss knitting easy sweaters and lots of other projects and techniques in our Make & Do Crew Facebook group. Here thousands of helpful crocheters and knitters answer each other's questions and share their stitches. Join us!

Leave a Reply