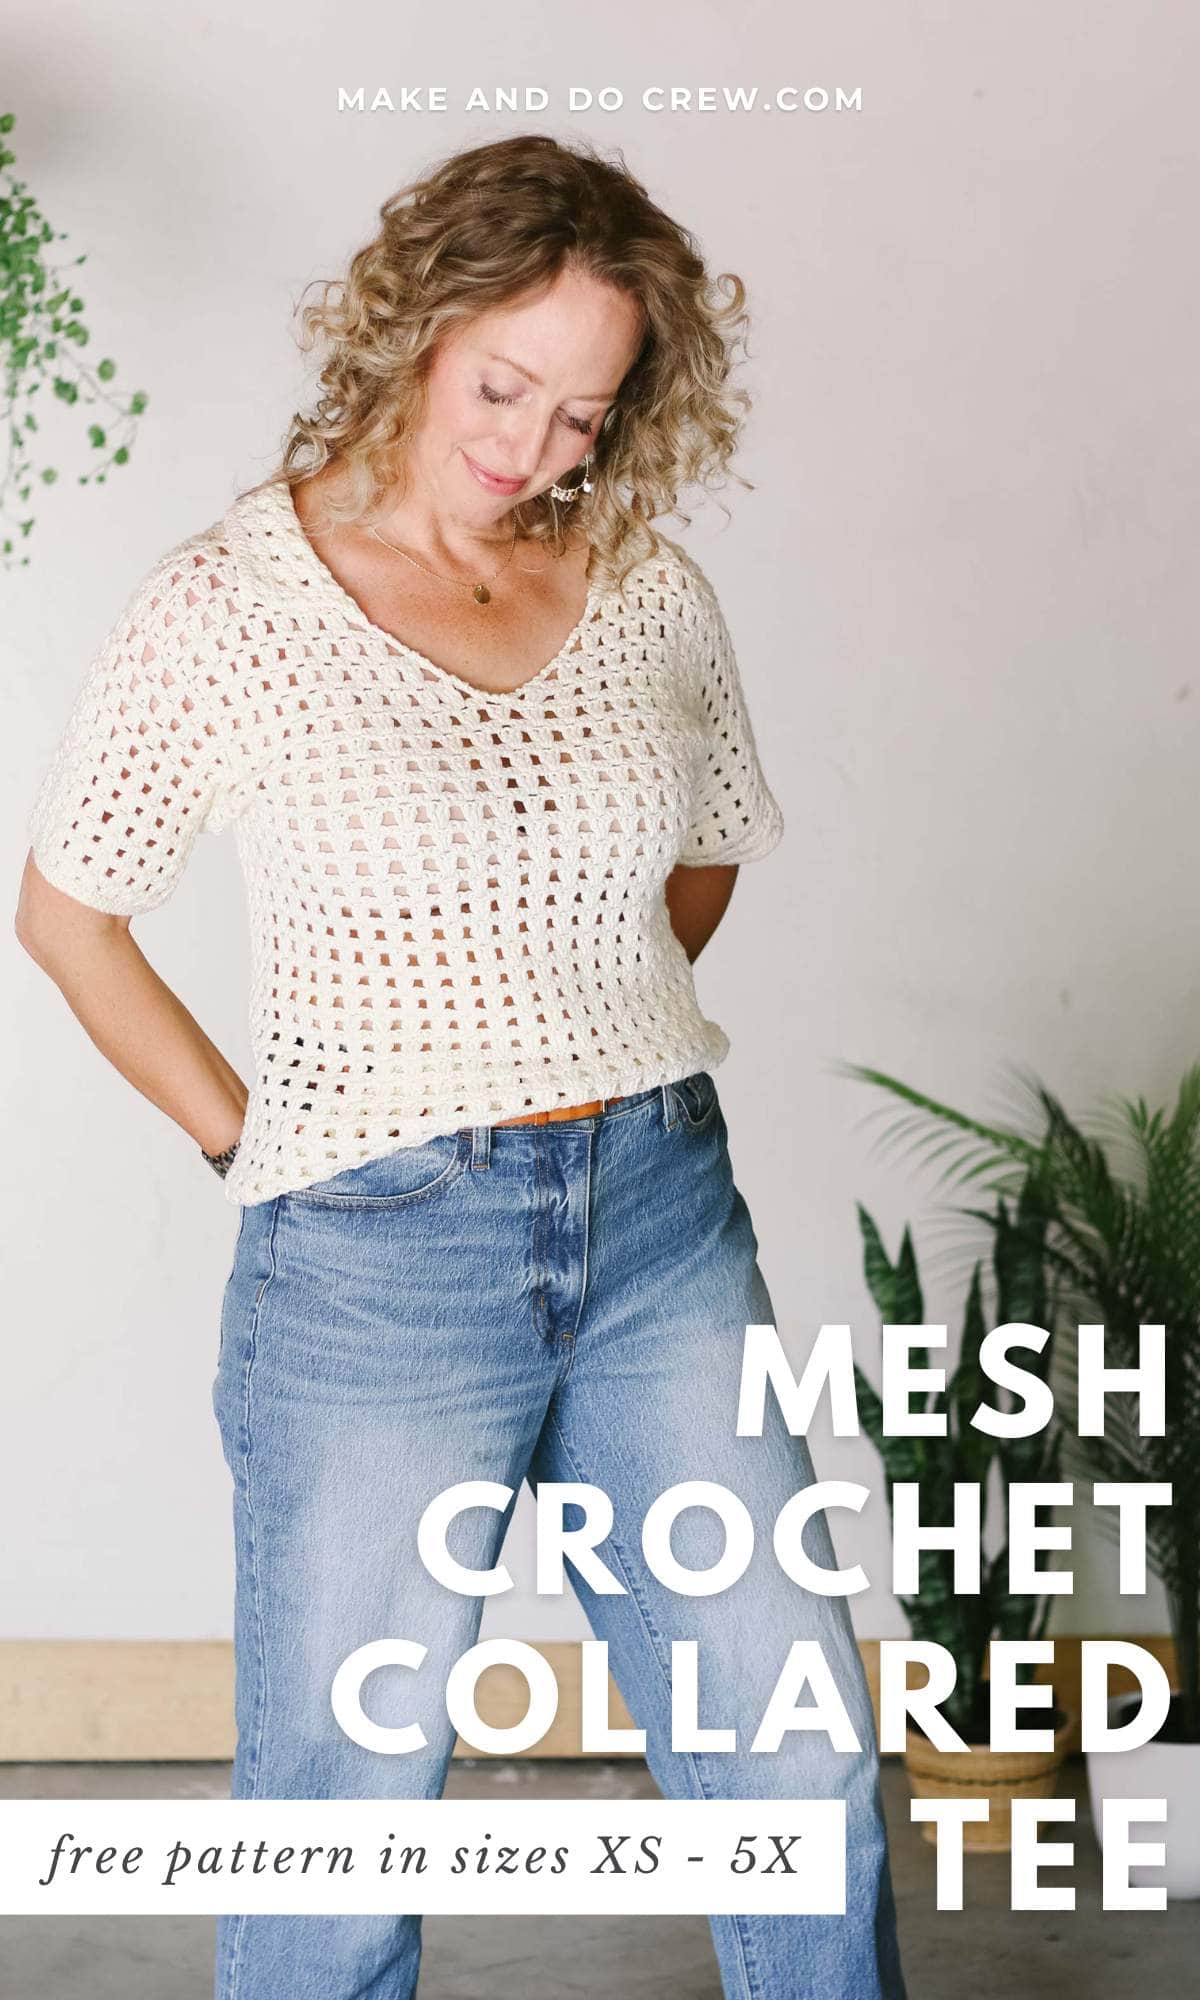
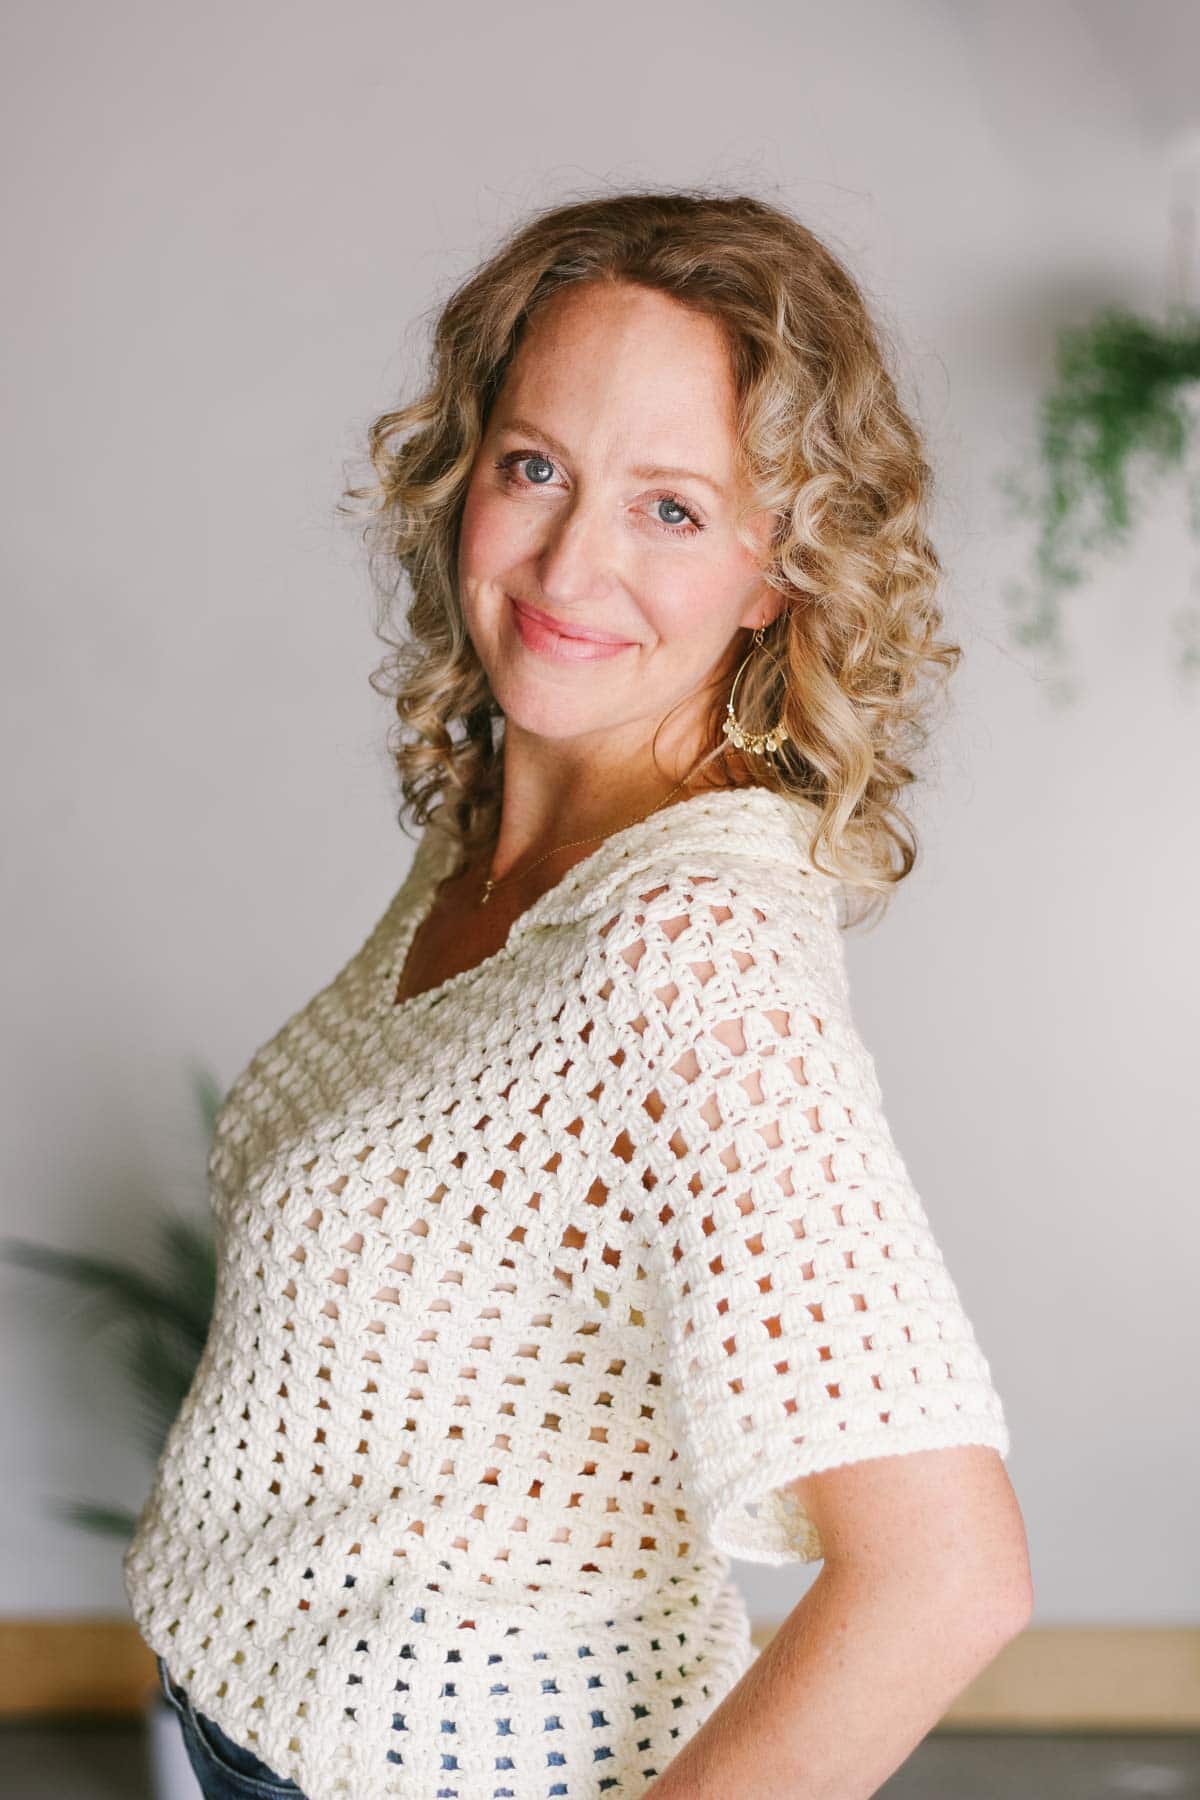
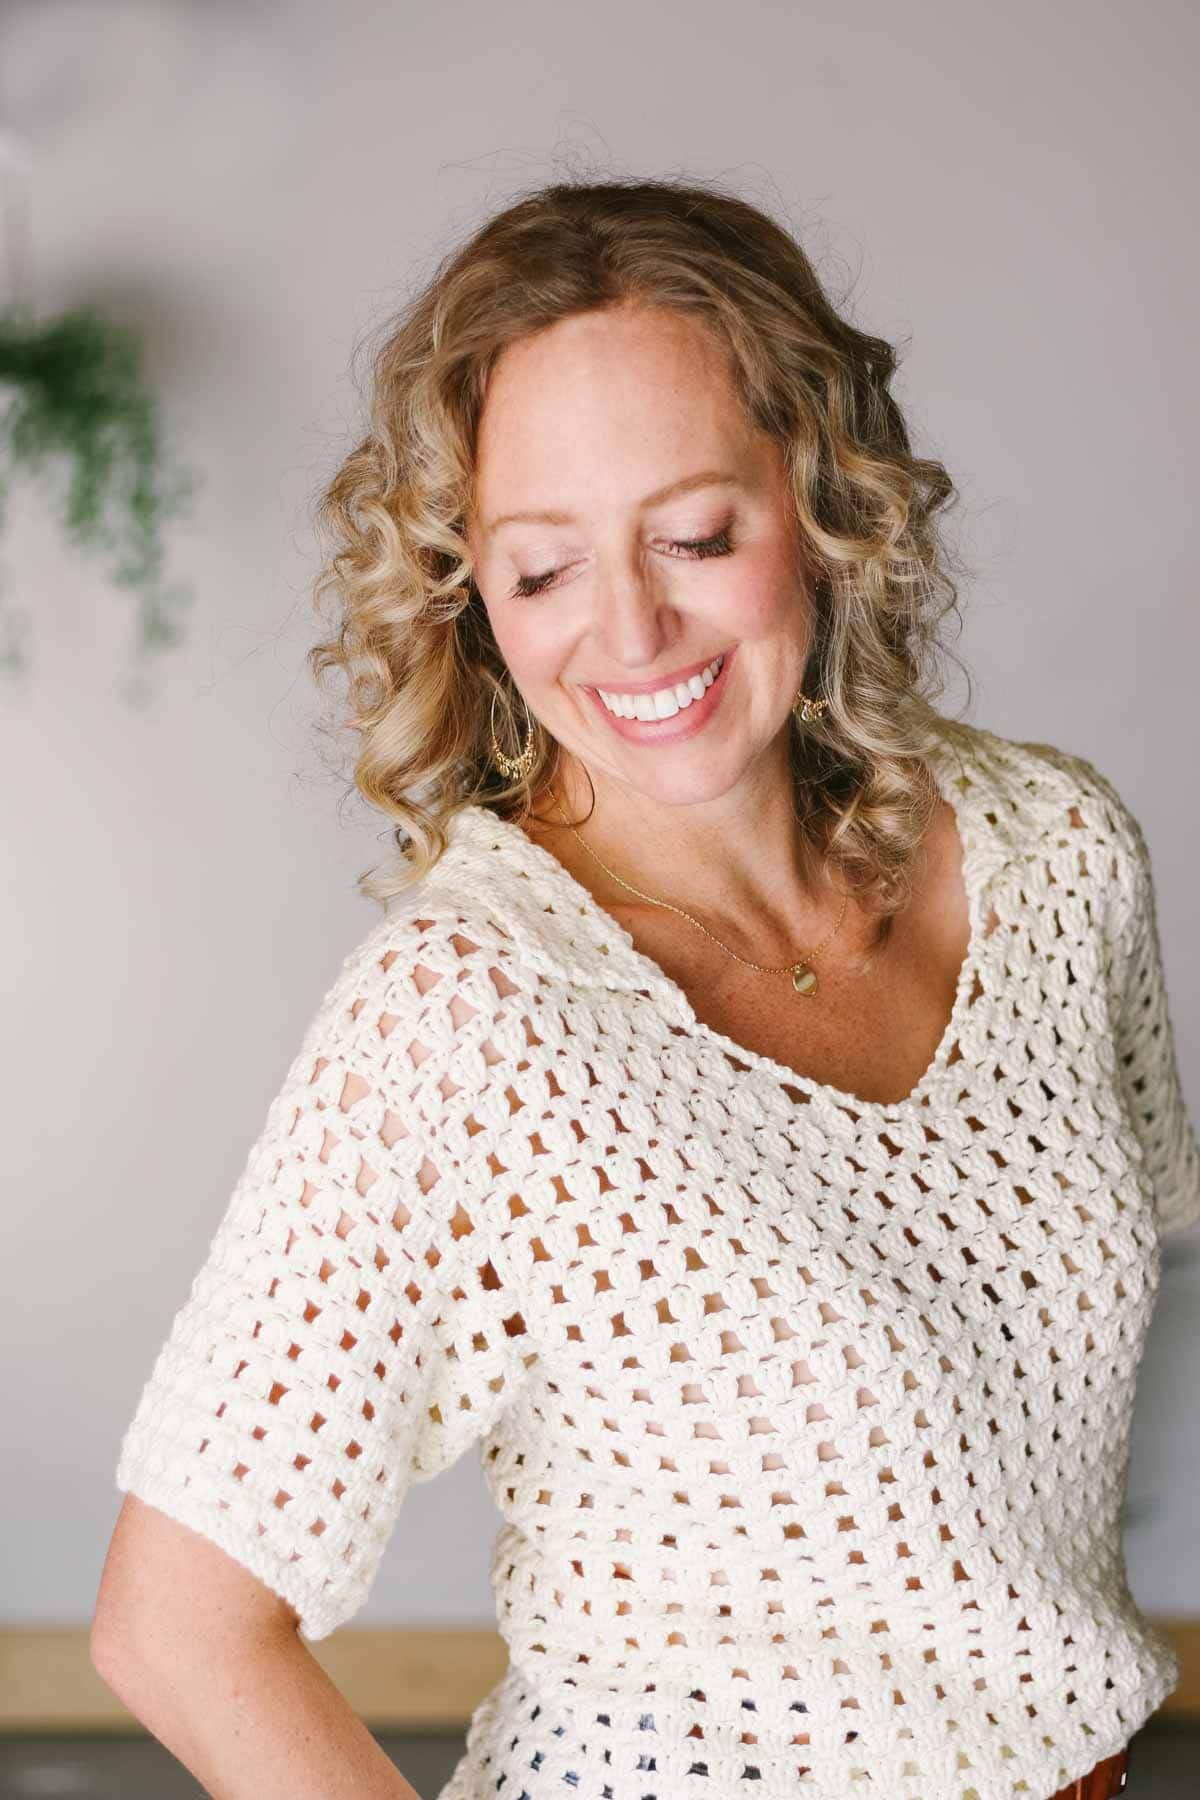
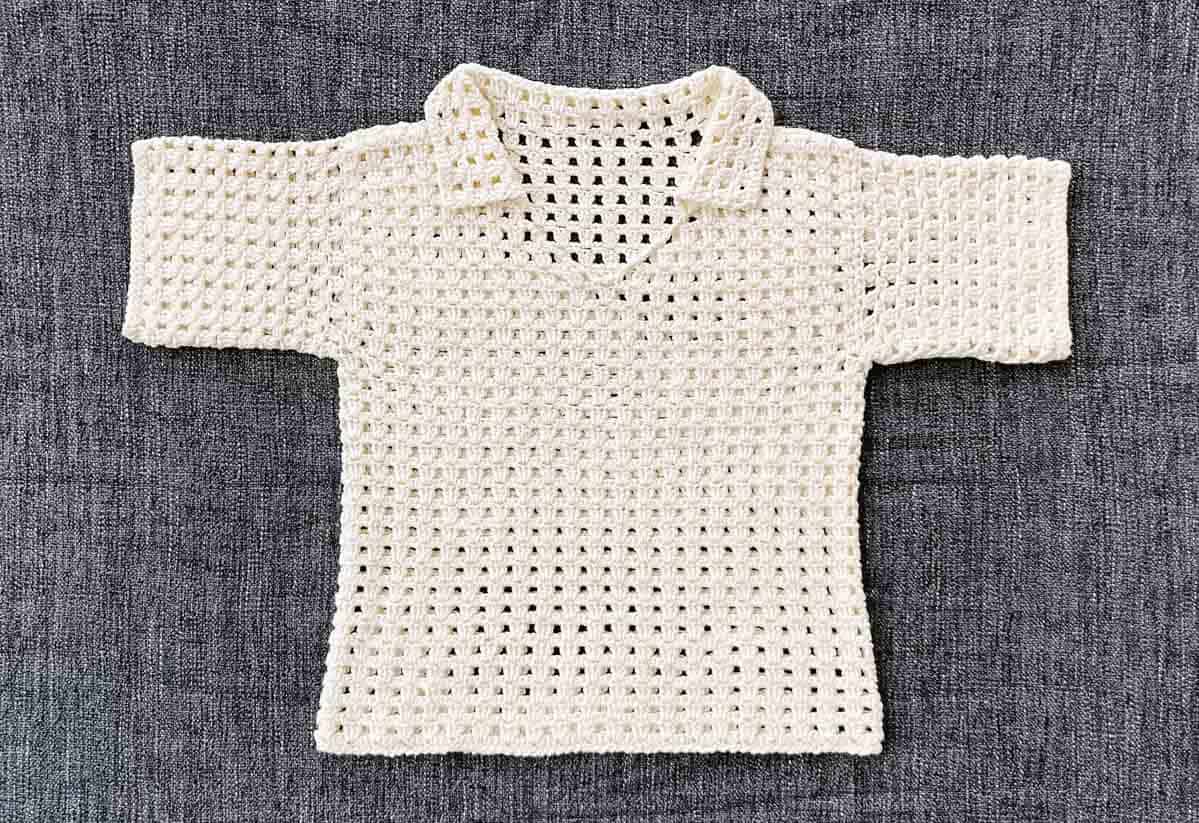
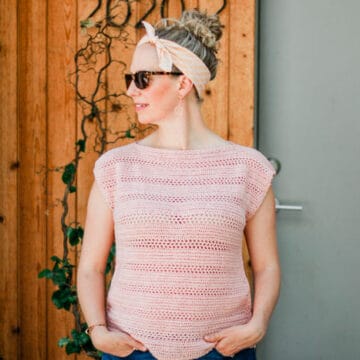
This mesh crochet shirt with collar is lightweight and perfect for those hot days when you still want to look put together.
The free tee pattern is below or purchase the ad-free, printable PDF with stitch chart.
This free crochet pattern is part of a collaboration with Lion Brand Yarns. This post contains affiliate links.
Jump to:
Monterey Tee - Free Pattern
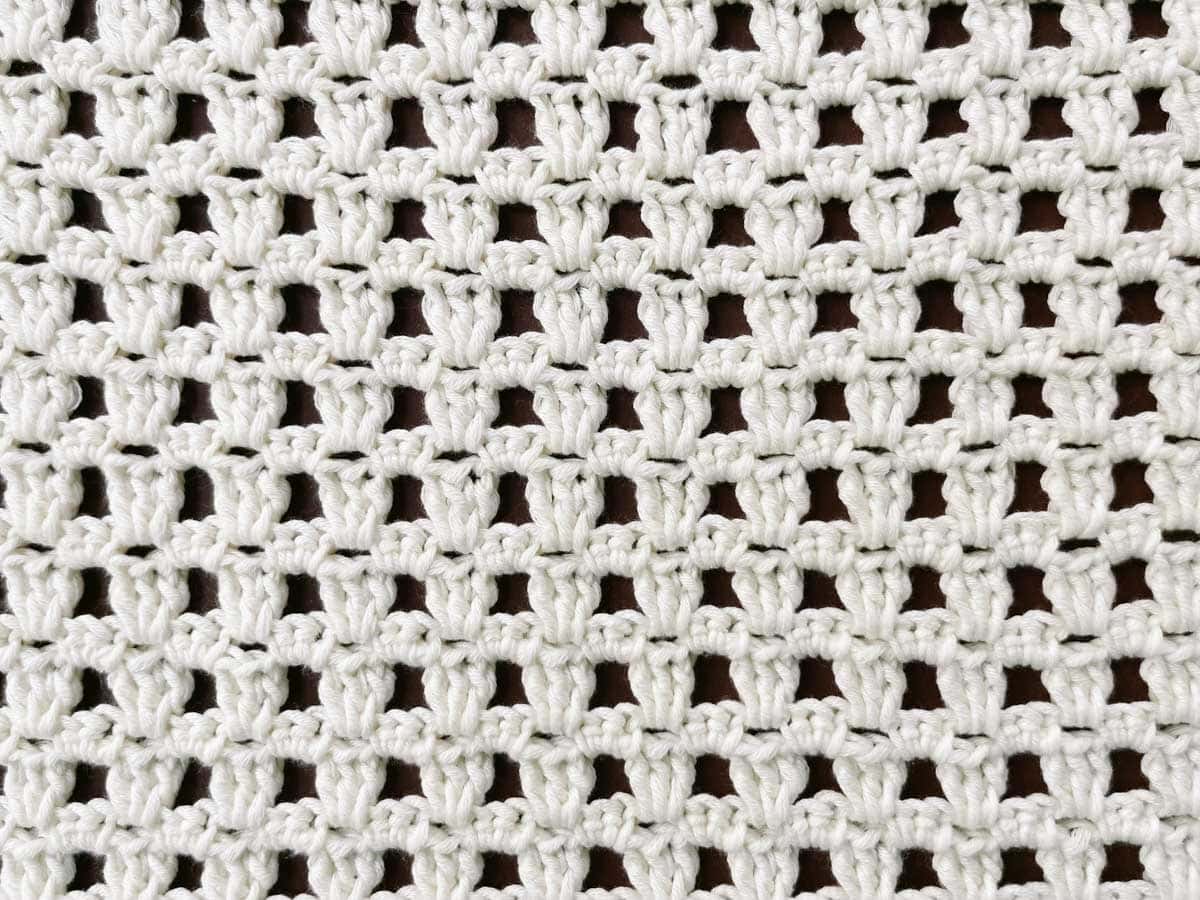
Crochet your way to effortless summer style! The grid-like stitch pattern in this crochet shirt is clean and modern, while the collar adds a hint of polish. With almost no seaming and simple stitches, this is the meditative poolside project you’ve been waiting for.
Skill Level
This is an advanced beginner crochet pattern. In this project, you'll practice:
- basic stitches and stitch combos
- working flat
- working in the round
- measuring gauge
- simple seaming
- reading a chart
- pattern reading
All-in-One Crochet Kit
If you love getting yarn happy mail, the all-in-one kit is a perfect way to make your Monterey Tee. This bundle from Lion Brand includes all the Coboo you'll need, plus a bonus printable PDF of the pattern (delivered digitally).
Print this Pattern
Prefer an analog crochet experience? You'll love the premium PDF! The instantly downloadable, ad-free file is formatted for easy printing and includes the complete pattern in nine sizes, lots of photos, and a stitch chart.
Premium PDF
easier and faster with fewer mistakes.
- Complete pattern + stitch chart
- Instant download
- Formatted for easy printing
Supplies + Materials
Order an all-in-one kit from Lion Brand.
• Lion Brand Coboo (Weight 3/Light - 232 yds, 3.5 oz, 100 g)
Color: Vanilla Blossom (835-099W) – 5 (5, 5, 6, 6)(7, 7, 8, 8) skeins [approx. 436 (462, 488, 514, 549)(612, 648, 706, 782) g]
• Tapestry needle
• Size H (5.0 mm) crochet hook or size needed to obtain gauge
• Stitch markers
• Blocking Board (optional)
• Steamer or iron with steam functionality
• T-pins for blocking
Measurements
| Size | Fits Actual Bust** | Shirt Length* | Chest Width* |
|---|---|---|---|
| XS | 30” | 20” | 15” |
| S | 34” | 21” | 17” |
| M | 38” | 21.5” | 19” |
| L | 42” | 22.5” | 21” |
| 1X | 46” | 23” | 23” |
| 2X | 50” | 23.5” | 25” |
| 3X | 54” | 24” | 27” |
| 4X | 58” | 25” | 29” |
| 5X | 62” | 25” | 31” |
Size pictured is a M on a 5’9” model with a 39” bust. For a looser, boxier fit, size up.
*Measurements when shirt is laid flat, after blocking.
Gauge
4 dc clusters + 4 spaces = 3.5”
10 rounds in pattern = 3.5” (start measurement on a single crochet cluster round)
Abbreviations + Glossary (US Terms)
ch – chain
chsp – chain space
dc – double crochet
dec – decrease
PM – place marker
rep – repeat
RS – right side
rsc - reverse single crochet (crab stitch)
sc – single crochet
sc2tog - single crochet 2 together (decrease)
sk – skip
slst – slip stitch
st(s) – stitch(es)
tch - turning chain
WS – wrong side
Special Stitches
sc cluster - 3 sc in same ch1sp
dc cluster - 3 dc in same ch1sp
Overall Pattern Notes
- If you’re new to reading crochet patterns, check out more info here.
- Instructions are written with the stitch count for the smallest size first and each larger size following in parentheses, for example: XS (S, M, L, 1X)(2X, 3X, 4X, 5X). It can be very helpful to highlight the numbers for your size before beginning the project. When only one number is given, it pertains to all sizes.
- Stitch counts at the end of each round are for given sizes.
- Ch 2 counts as 1 single crochet + chain 1 throughout.
- Ch 3 counts as 1 double crochet throughout.
- Ch 4 counts as 1 double crochet + chain 1 throughout.
!! Gauge Check !!
Please don’t skip this step or you will risk your tee not fitting as expected.
To make a gauge swatch:
Foundation Row: Ch 32.
Row 1 (WS): Sc in second ch from hook, sc in next 2 ch, ch 1, sk 1 ch, *1 sc in each of next 3 ch, ch 1, sk 1 ch, rep from * to end of row; turn. (8 sc clusters)
Row 2 (RS): Ch 4, *3 dc in next ch1sp, ch 1, rep from * to end of row, 1 dc in tch; turn. (7 dc clusters).
Row 3 (WS): Ch 1, 3 sc in first ch1sp, *ch 1, 3 sc in next ch1sp, rep from * to end of row; turn.
Repeat Rows 2 and 3 seven more times for a total of 17 rows.
Measure center four inches of swatch vertically and horizontally. Compare to pattern gauge listed above.
- If there are too many stitches in 4” horizontally, increase your hook size and re-swatch.
- If there aren’t enough stitches in 4” horizontally, decrease your hook size and re-swatch.
- If swatch is measuring too small vertically, make a deliberate effort to pull loops up a bit higher before completing each stitch.
- If swatch is measuring too large vertically, make an effort to work the loops of each stitch a little tighter.
- This video is incredibly helpful if you’re having trouble achieving the correct vertical gauge
Want some company while you crochet?
Get support (and camaraderie!) in the Make & Do Crew community. Join for free here.
Premium PDF
easier and faster with fewer mistakes.
- Complete pattern + photo tutorials
- Instant download
- Formatted for easy printing
Main Body of Shirt
Main body is worked in turned rounds to armholes.
Foundation Round: Ch 136 (156, 172, 192, 212)(232, 248, 264, 284). Join with slst to first ch making sure not to twist ch.
Round 1 (WS): Ch 1, sc in first 3 ch, ch 1, sk 1 ch, *sc in next 3 ch, ch 1, sk 1 ch, rep from * to the end of round, join with slst to first sc; turn. (34 39, 43, 48, 53)(58, 62, 66, 71) sc clusters)
Round 2 (RS): Ch 3, 2 dc in next ch1sp, ch 1, *3 dc in next ch1sp, ch 1, rep from to end of round, join with slst to top of tch; turn. (34 (39, 43, 48, 53)(58, 62, 66, 71) dc clusters)
Round 3 (WS): Ch 1, 2 sc in first ch1sp, ch 1, *3 sc in next ch1sp, ch 1, rep from * to end of round, join with slst to first sc; turn.
Repeat Rounds 2 and 3 eighteen more times for a total of 37 (37, 39, 39, 41)(41, 43, 43, 43) rounds. At this point, your piece should measure approximately 13 (13, 13.5, 13.5, 14.5)(14.5, 15, 15, 15)” tall.
🧶 For a longer top, work additional rounds, ending with a WS round. For a more cropped look, eliminate rounds, ending with a WS round. As with any time modifications are made, this will change the amount of yarn needed for your project.
Print This Pattern: purchase the ad-free, printable PDF
Dividing for Front and Back
Set up:
PM in slip stitch that joins round …
With RS facing and counting from right to left…
Back: Count 16 (17, 19, 20, 23)(26, 26, 28, 31) sc clusters from beginning of round marker, PM in next ch1sp…
Underarm: Skip 1 (2, 2, 3, 3)(3, 4, 4, 4) sc clusters, PM in next ch1sp…
Front: Count 16 (18, 20, 22, 24)(26, 28, 30, 32) sc clusters from last marked st, PM in next ch1sp…
Underarm: Skip remaining 1 (2, 2, 3, 3)(3, 4, 4, 4) sc clusters.
Piece should now contain four markers. Keep these markers in place until the sleeves are complete.
Back Panel
The back panel is worked between markers only.
Right-handed crocheters: Use attached yarn.
Left handed crocheters: Leave yarn attached for working Front Panel. Attach new yarn in marked ch1sp to the left side of back panel to work back panel.
Row 1 (RS): Ch 3, 2 dc in first ch1sp, *ch 1, 3 dc in ch1sp, rep from * to last ch1sp, 3 dc in last marked ch1sp; turn. (17 (18, 20, 21, 24)(27, 27, 29, 32) dc clusters)
Row 2 (WS): Ch 2, 3 sc in next ch1sp, ch 1, *3 sc in next ch1sp, ch 1, rep from * to end of row, sc in top of tch; turn. (16 (17, 19, 20, 23)(26, 26, 28, 31) sc clusters)
Repeat Row 1 and 2 eight (nine, nine, ten, ten)(eleven, eleven, twelve, twelve) more times for a total of 18 (20, 20, 22, 22)(24, 24, 26, 26) rows.
Dividing for Back of Neckline
First shoulder:
With attached yarn:
Row 1 (RS): Ch 3, 2 dc in first ch1sp, *ch 1, 3 dc in next ch1sp, rep from * 3 (3, 4, 5, 6)(6, 7, 8, 9) more times; turn. (5 (5, 6, 7, 8)(8, 9, 10, 11) dc clusters)
Row 2 (WS): Ch 2, 3 sc in first ch1sp, *ch 1, 3 sc in next ch1sp, rep from * to end of row; turn. (4 (4, 5, 6, 7)(7, 8, 9, 10) sc clusters)
Repeat Rows 1 and 2 once more. Fasten off leaving a 20” tail for seaming shoulders.
Second shoulder:
Skip center 8 (9, 9, 8, 9)(12, 10, 10, 11) sc clusters, attach yarn in the next ch1sp:
Row 1 (RS): Ch 3, 2 dc in first ch1sp, *ch 1, 3 dc in next ch1sp, rep from * to end of row; turn. (5 (5, 6, 7, 8)(8, 9, 10, 11) dc clusters)
Row 2 (WS): Ch 2, 3 sc in first ch1sp, *ch 1, 3 sc in next ch1sp, rep from * to end of row, ch 1, sc in tch; turn. (4 (4, 5, 6, 7)(7, 8, 9, 10) sc clusters)
Repeat Rows 1 and 2 once more. Counting from the armhole to the final row of the shoulders, the Back section should now have 22 (24, 24, 26, 26)(28, 28, 30, 30) rows total. Fasten off leaving a 20” tail for seaming shoulders.
Front Panel
Right handed crocheters: With RS facing, attach yarn at marked stitch after left underarm (as worn)
Left handed crocheters: Using attached yarn.
Row 1 (RS): Ch 3, 2 dc in first ch1sp, *ch 1, 3 dc in next ch1sp, rep from * to next marked ch1sp, 3 dc in last marked ch1sp; turn. (17 (19, 21, 23, 25)(27, 29, 31, 33) dc clusters)
Row 2 (WS): Ch 2, 3 sc in first ch1sp, *ch 1, 3 sc in next ch1sp, rep from * until 1 dc cluster remains, ch 1, sc in top of tch; turn. (16 (18, 20, 22, 24)(26, 28, 30, 32) sc clusters)
Repeat Rows 1 and 2 three (three, three, four, four)(four, four, five, five) more times for a total of 8 (8, 8, 10, 10)(10, 10, 12, 12) rows.
Dividing for Front Neckline
Set up: With RS facing, PM in the middle ch1sp to mark center of Front Panel. There should be 8 (9, 10, 11, 12)(13, 14, 15, 16) sc clusters on either side of the middle marker.
First Front:
With attached yarn:
Row 1 (RS dec): Ch 3, 2 dc in next ch1sp, *ch 1, 3 dc in next ch1sp, rep from * to marked st, ch 1, 1 dc in marked st (dec made); turn. (8 (9, 10, 11, 12)(13, 14, 15, 16) dc clusters + 1 dc)
Row 2 (WS dec): Ch 1, 1 sc in first ch1sp (dec made), ch 1, *3 sc in next ch1sp, ch 1, rep from * to end of row, sc in top of tch; turn. (7 (8, 9, 10, 11)(12, 13, 14, 15) sc clusters + 1sc)
Row 3 (RS dec): Ch 3, 2 dc in first ch1sp, ch 1, 3 dc in next ch1sp, ch 1, rep from * to last ch1sp, skip last dc cluster, 1 dc in last sc (dec made); turn. (7 (8, 9, 10, 11)(12, 13, 14, 15) dc clusters + 1 dc)
Row 4 (WS dec): Ch 1, 1 sc in first ch1sp (dec made) ch 1, *3 sc in next ch1sp, ch 1, rep from * to end of row, 1 sc in tch; turn. (6 (7, 8, 9, 10)(11, 12, 13, 14) sc clusters + 1 sc)
Repeat Rows 3 and 4 decreasing 1 dc cluster every RS row and working 1 sc in first ch1sp every WS row for 8 (10, 10, 10, 10)(12, 12, 12, 12) total rows. At this point, you should have 4 (4, 5, 6, 7)(7, 8, 9, 10) sc clusters.
Now we’ll work without decreasing for the final rows.
Row 1 (RS): Ch 3, 2 dc in first ch1sp, *ch 1, 3 dc in next ch1sp, rep from * to end of row, 3 dc in last ch1sp; turn. (5 (5, 6, 7, 8)(8, 9, 10, 11) dc clusters)
Row 2 (WS): Ch 2, 3 sc in first ch1sp, *ch 1, 3 sc in next ch1sp, rep from * until 1 dc cluster remains, ch 1, sc in top of tch; turn. (4 (4, 5, 6, 7)(7, 8, 9, 10) sc clusters)
Repeat Rows 1 and 2 one more time. Repeat Row 1 once more. Counting from the armhole, the Front section should now have 21 (23, 23, 25, 25)(27, 27, 29, 29) rows total.
Fasten off. Do not remove markers, as they’ll be used for the sleeves.
Second Front:
Attach yarn in marked center ch1sp.
Row 1 (RS dec): Ch 4, sk first sc cluster, 3 dc in next ch1sp, *ch 1, 3 dc in next ch1sp, rep from * to end of row; turn. (8 (9, 10, 11, 12)(13, 14, 15, 16) dc clusters + 1 dc)
Row 2 (WS dec): Ch 2, 3 sc in first ch1sp (dec made), ch 1, *3 sc in next ch1sp, ch 1, rep from * to end of row, 1 sc in top of ch 4; turn. (7 (8, 9, 10, 11)(12, 13, 14, 15) sc clusters + 1 sc)
Row 3 (RS dec): Ch 4, sk first sc cluster, 3 dc in next ch1sp, *ch 1, 3 dc in next ch1sp, rep from * to end of row; turn. (7 (8, 9, 10, 11)(12, 13, 14, 15) dc clusters + 1 dc)
Row 4 (WS dec): Ch 2, 3 sc in first ch1sp (dec made), *ch 1, 3 sc in next ch1sp, rep from * to end of row, 1 sc on top of ch 4; turn. (6 (7, 8, 9, 10)(11, 12, 13, 14) sc clusters + 1 sc)
Repeat Rows 3 and 4 decreasing 1 dc cluster every RS row and working 1 sc in first ch1sp every WS row for 8 (10, 10, 10, 10)(12, 12, 12, 12) total rows. At this point, you should have 4 (4, 5, 6, 7)(7, 8, 9, 10) sc clusters. Now we’ll work without decreasing for the final rows.
Row 1 (RS): Ch 3, 2 dc in first ch1sp, *ch 1, 3 dc in next ch1sp, rep from * to end of row, 3 dc in last ch1sp; turn. (5 (5, 6, 7, 8)(8, 9, 10, 11) dc clusters)
Row 2 (WS): Ch 2, 3 sc in first ch1sp, *ch 1, 3 sc in next ch1sp, rep from * until 1 dc cluster remains, ch 1, sc in top of tch; turn. (4 (4, 5, 6, 7)(7, 8, 9, 10) sc clusters)
Repeat Rows 1 and 2 one more time. Repeat Row 1 once more. Counting from the armhole, the Front section should now have 21 (23, 23, 25, 25)(27, 27, 29, 29) rows total.
Fasten off. Do not remove markers, as they’ll be used for the sleeves.
Joining Shoulders
With right sides together, pin shoulder seams so the stitches of the front and backs align and maintain the pattern. The single crochet cluster of the back shoulder should line up with the chain spaces on the front shoulder.
Using a tapestry needle and existing yarn tails, seam together with the mattress stitch. Weave in yarn tail.
Repeat on second shoulder.
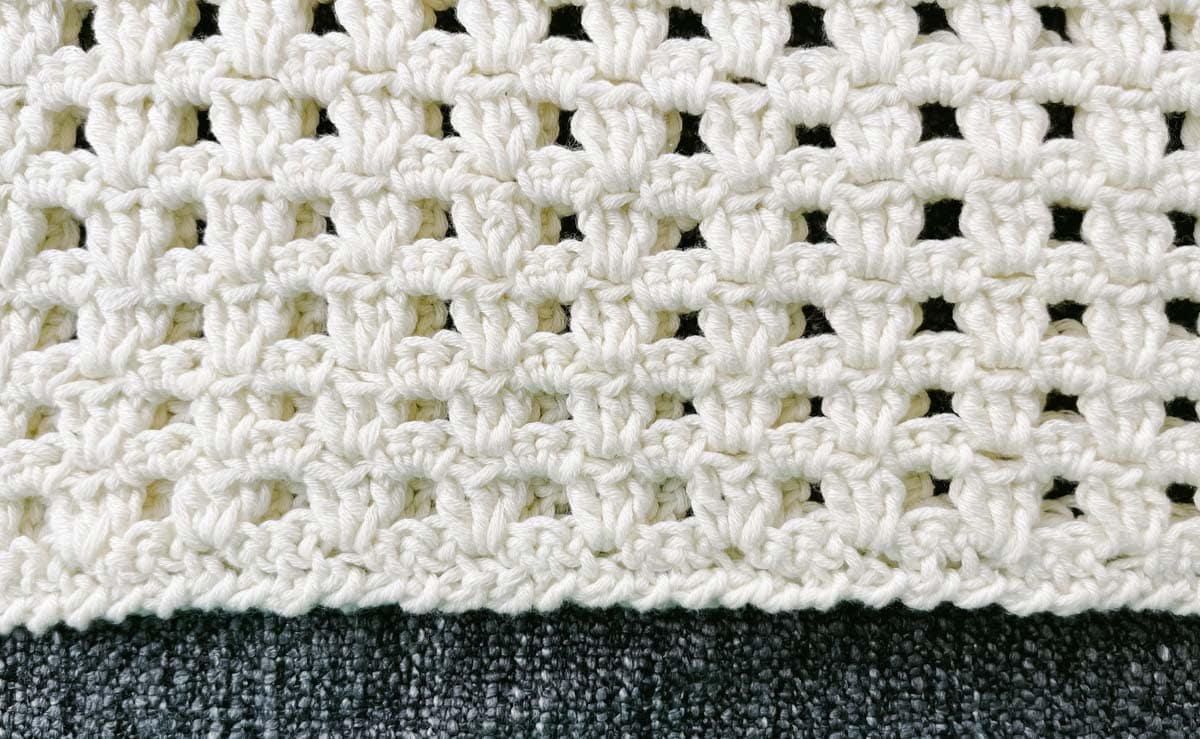
Bottom Edging
Now we’ll work a round of reverse single crochet (crab stitch) around the bottom edge. This stitch is worked in the opposite direction as usual, which might feel weird at first, but is indeed correct.
Right Handed Crocheters: Work counterclockwise.
Left-Handed Crocheters: Work clockwise.
Adjust tension as necessary to ensure the edging lies flat and does not become wavy.
With RS facing, attach yarn in first stitch of first round of Main Body:
Bottom Edging (RS): Ch 1, rsc in each st around bottom, skipping each ch1sp, join with slst to first rsc. Fasten off. Weave in ends.
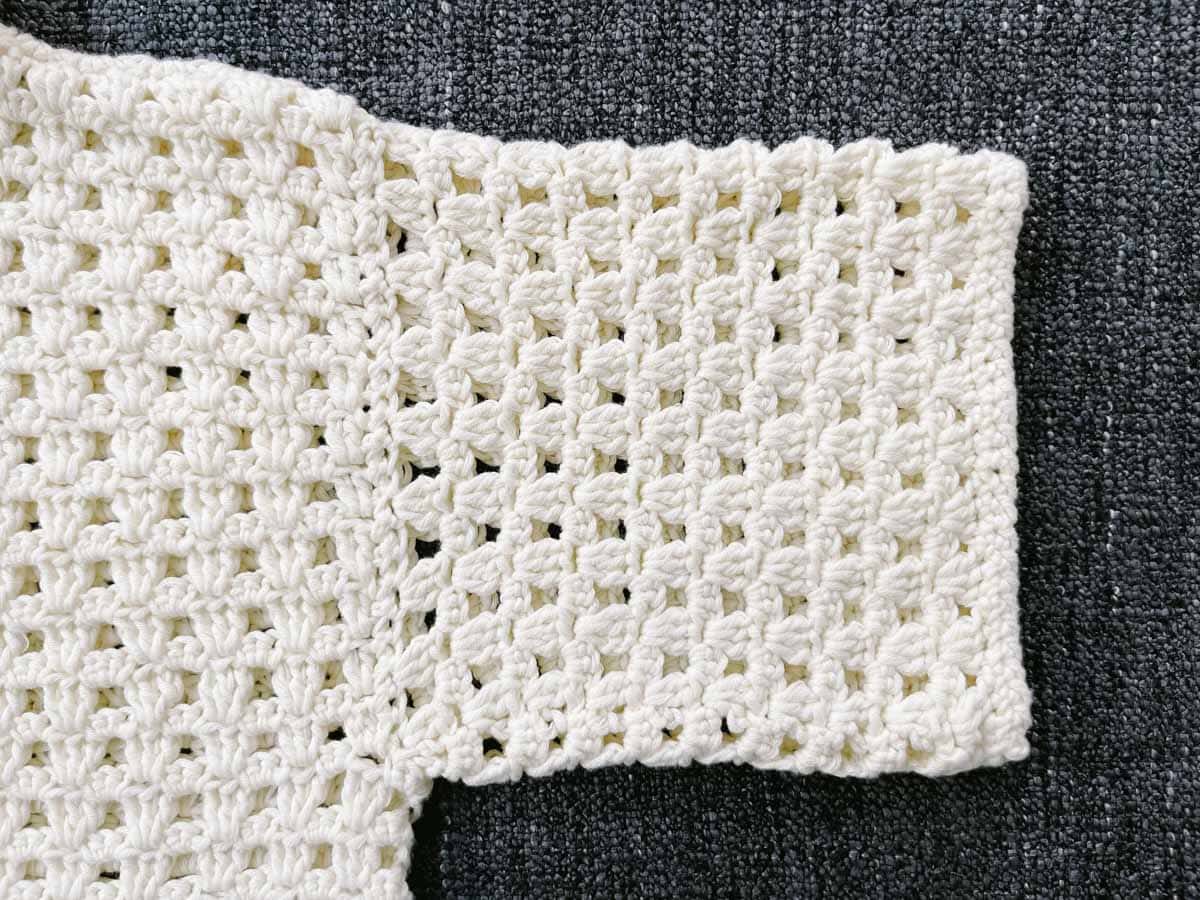
Sleeves
- Instructions are identical for right and left sleeves.
Wanna save this pattern?
- Sleeves are worked in turned rounds and joined with a slip stitch, just like the main body.
- A round of single crochet is worked around the armhole to set up for sleeves.
- 3 (7, 7, 11, 11)(11, 15, 15, 15) skipped single crochet stitches and ch1sps between the markers in the underarms are left unworked in Set up Round and picked up in the next round.
Right handed crocheters: With WS facing attach yarn in left marked stitch of underarm and work clockwise.
Left handed crocheters: With WS facing attach yarn in right marked stitch of underarm and work counterclockwise.
Set up Round (WS):
Size XS (-, -, L, 1X)(-, -, 4X, 5X) Only: Ch 1, working around entire armhole place 1 sc in each ch1sp and row edge and 1 sc in shoulder seam, until marked st remains, place 2 sc in marked st. Join with slst to first skipped sc; turn.
Sizes - (S, M, -, -)(2X, -, -, -) Only: Ch 1, working around entire armhole place 1 sc in each ch1sp and row edge and 1 sc in shoulder seam, join with slst to first skipped sc; turn.
Size 3X Only: Ch 1, working around entire armhole place 1 sc in each ch1sp and row edge and 1 sc in shoulder seam, until one st remains before marked st, sc2tog over next two sts, join with slst to first skipped sc; turn.
You should now have 47 (50, 50, 55, 55)(58, 57, 63, 63) sc and 3 (7, 7, 11, 11)(11, 15, 15, 15) skipped sc and ch1sps = 50 (57, 57, 66, 66)(69, 72, 78, 78) total sts)
It’s more important to get the correct stitch count than to have placed each single crochet in the perfect spot. Fudge the placement if necessary to get the number of stitches you need.
Round 1 is worked into the setup round as well as the skipped stitches of the underarm.
Round 1 (RS): Ch 3, 2 dc in same st, ch 1, sk 2 st, *3 dc in next st, ch 1, sk 2 sts, rep from * to end of round, join with slst to tch; turn. (17 (19, 19, 22, 22)(23, 24, 26, 26) dc clusters)
Round 2 (WS): Ch 1, *3 sc in first ch1sp, ch 1, rep from * to end of round, join with slst to first sc; turn. (17 (19, 19, 22, 22)(23, 24, 26, 26) sc clusters)
Round 3 (RS): Ch 3, 2 dc in first ch1sp, ch 1, *3 dc in next ch1sp, ch 1, rep from * to end of round, join with slst to tch; turn.
Repeat Rows 2 and 3 seven (seven, eight, eight, nine)(nine, ten, ten, ten) more times for a total of 17 (17, 19, 19, 21)(21, 23, 23, 23) rounds.
Set Up for Sleeve Edging (WS dec): Ch 1, sc in each dc, sk each ch1sp, join with slst to first sc; turn. (50 (57, 57, 66, 66)(69, 72, 78, 78) sc)
Sleeve Edging (RS): Ch 1, rsc in each st, join with slst to first st. Fasten off.
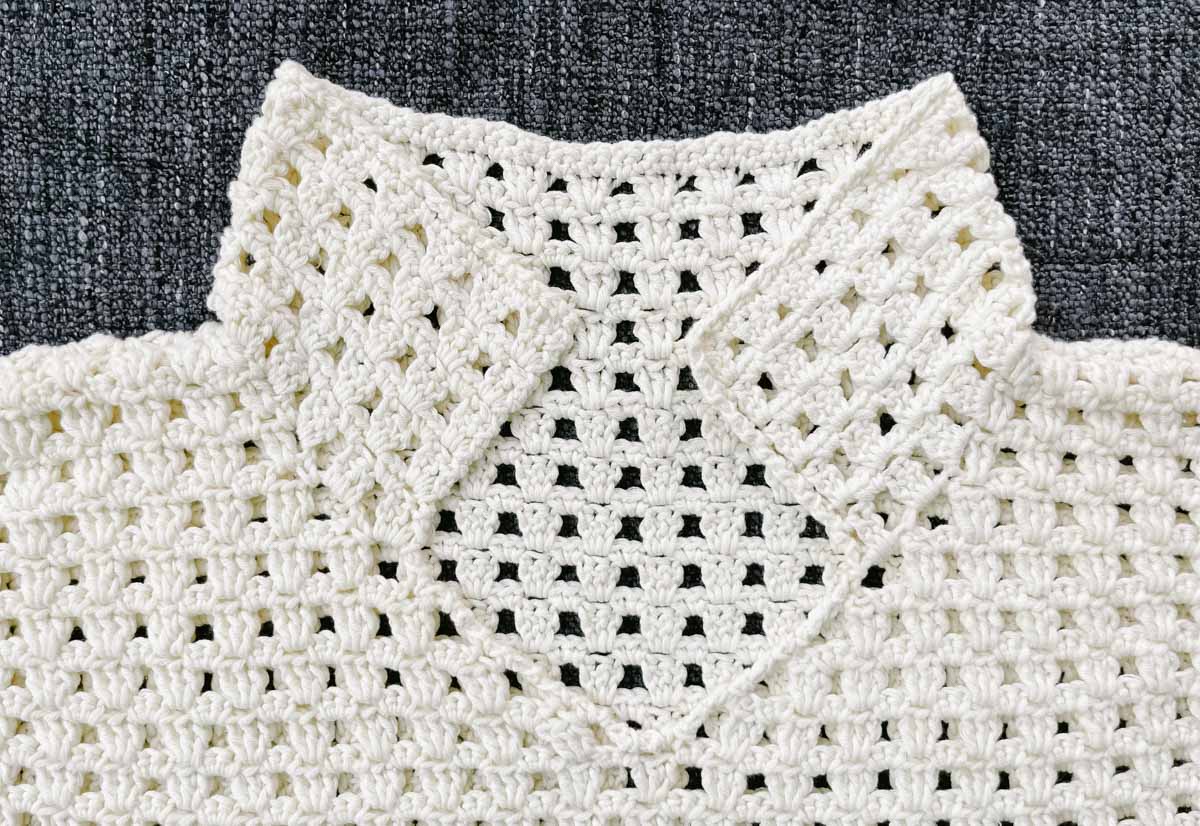
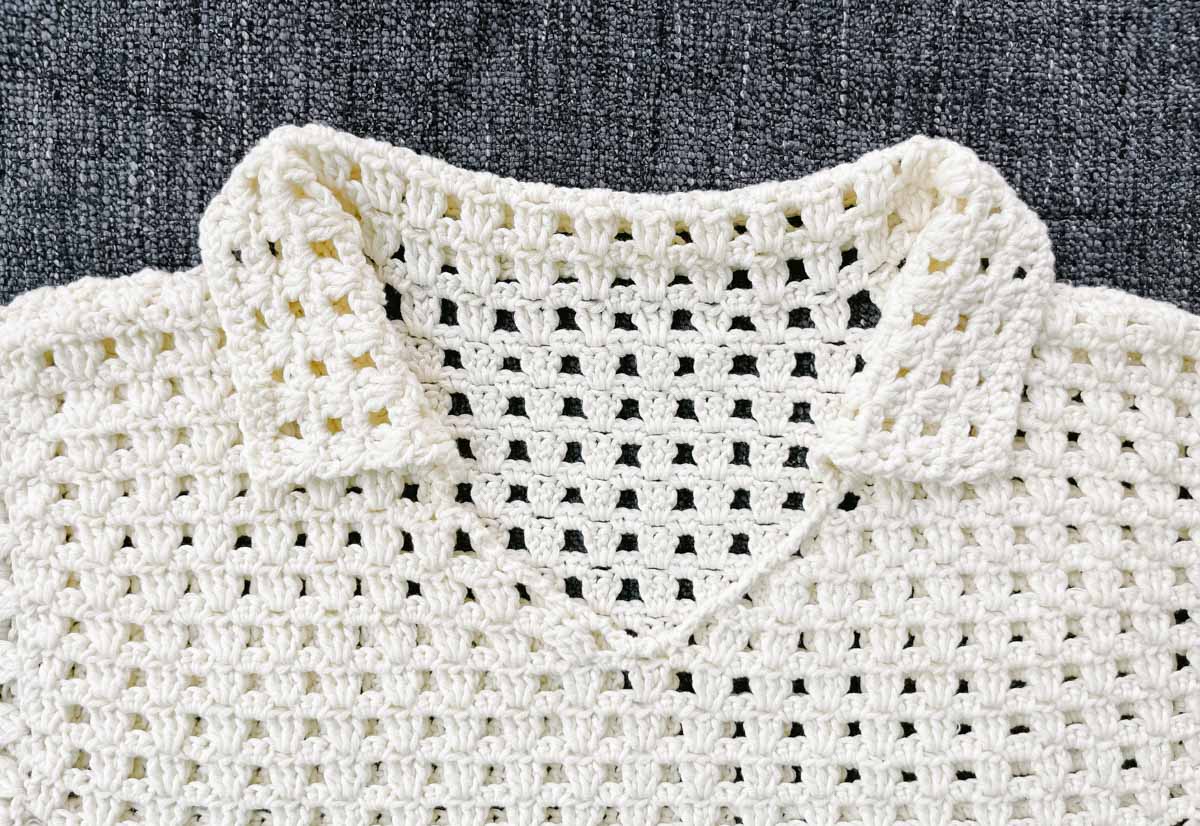
Collar
- Collar is optional. Leave off for a simple v-neck look.
- You will work into the row end on sides of neckline and into stitches on the back of neck.
Set Up:
With RS facing and counting from the center of the V-neck, PM in the third (fourth, fourth, fourth, fourth)(fifth, fifth, fifth, fifth) chain 3 spaces on either side of the neckline.
Right-handed crocheters: Attach yarn in marked stitch to the left of center as worn. Work clockwise.
Left-handed crocheters: Attach yarn in marked stitch to the right of center as worn. Work counterclockwise.
Row 1 (WS):
Up first side of neckline: Ch 3, 2 dc in same sp as attached yarn, *ch 1, 3 dc in next ch3sp row edge, repeat from * to back of neck (7 (8, 8, 8, 8)(8, 8, 8, 8) dc clusters) …
Back of neckline: *3 dc in next ch1sp, ch 1, rep from * across back of neck (7 (8, 8, 7, 8)(11, 9, 9, 10) dc clusters)...
Down second side of neckline: *3 dc in each row edge, ch 1, rep from * to last marked ch3sp, 3 dc in last marked space; turn. (7 (8, 8, 8, 8)(8, 8, 8, 8) dc clusters)
Row 2 (RS): Ch 2, 3 sc in next ch1sp, ch 1, *3 sc in next ch1sp, ch 1, rep from * to last ch1sp, ch 1, sc in tch; turn. (20 (23, 23, 22, 23)(26, 24, 24, 25) sc clusters)
Row 3 (WS): Ch 3, 2 dc in first ch1sp, *ch 1, 3 dc in next ch1sp, rep from * to end of row; turn. (21 (24, 24, 23, 24)(27, 25, 25, 26) dc clusters)
Row 4 (RS): Repeat Row 2.
Repeat Rows 3 and 4 three (three, three, three, three)(four, four, four, four) more times. Repeat Row 3 one more time for a total of 11 (11, 11, 11, 11)(13, 13, 13, 13) rows.
Set Up for Collar Edging (RS): Ch 1, sc in each st and in each ch1sp to end of row. Fasten off.
Edging:
- You will work a row of reverse single crochet from center of neckline up to start of collar, along side and length of collar and down the side of collar and neckline to end back at the center of the neckline.
- Stitch count is less important than making sure you have the same number of stitches on both sides of neckline and collar edges.
Attach yarn in marked center of neckline.
Right-handed crocheters: Work counterclockwise.
Left-handed crocheters: Work clockwise.
Edging Round (RS): Ch 1, 2 rsc in each edge of each dc row, 1 rsc in edge of each sc row along sides of collar and 1 rsc in each sc along length of collar, working around neckline and collar to end of round. Join with slst to first rcs. Fasten off.

Finishing
Weave in remaining ends: Learn more here.
Blocking: Weave in any remaining ends. Once all ends are woven in, you may do a light steam blocking using either a steamer or iron with steam setting. Focus on any areas that aren’t laying as flat as you’d like, such as the sleeve decreases or back panel granny squares. Do not touch steamer or iron directly to yarn. Detailed info here.
Pop your collar (or don’t) and head out with the swagger of someone who just made their own shirt by hand!
Permissions + Copyright:
Please do not publish or share this pattern as your own. You may make items to sell with this pattern. In exchange, please link back this post. Do NOT use our photos as your own sales photos.
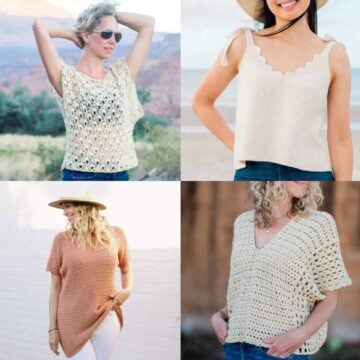
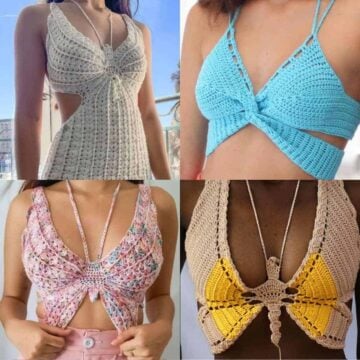
More Top Free Patterns
Love crocheting clothes, even when it's not sweater weather? We've got lots of lightweight tees and tops for you to make.


That was so fun! Now what?
Invitation to our Private Community
Come discuss crocheting the Monterey Tee pattern and lots of other projects and techniques in our Make & Do Crew community. Here thousands of helpful crocheters answer each other's questions and share their stitches.Join us!


Leave a Reply