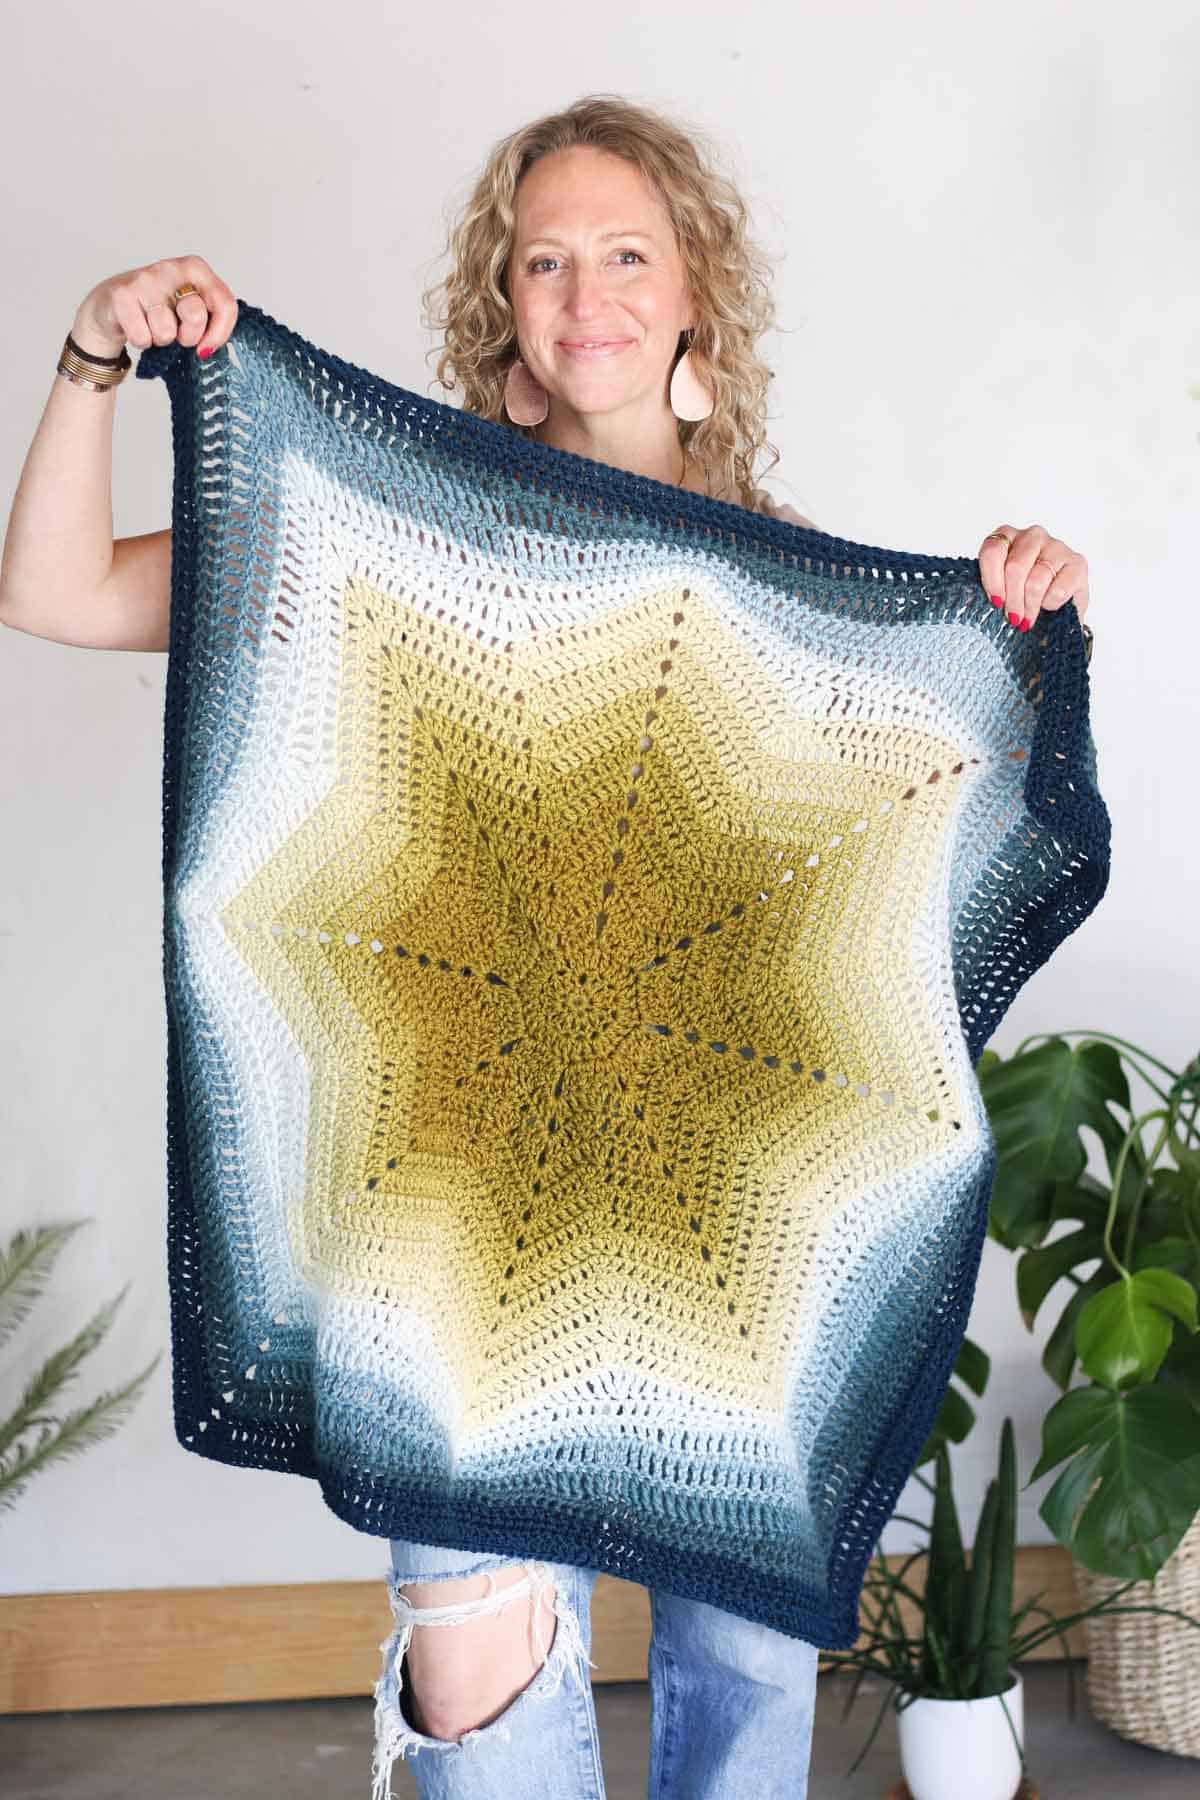
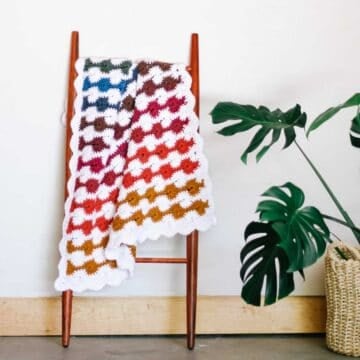
Crochet this square star baby blanket in a few days using just a couple balls of yarn. While the end result looks impressive, the pattern comes together quite magically and makes for a fun and fast project.
Follow along with the free Supernova Blanket pattern and step-by-step video tutorial below or purchase the ad-free, printable PDF.

This baby blanket pattern is part of a collaboration with Lion Brand Yarns. This post contains affiliate links.
Jump to:
The Supernova Free Crochet Blanket Pattern
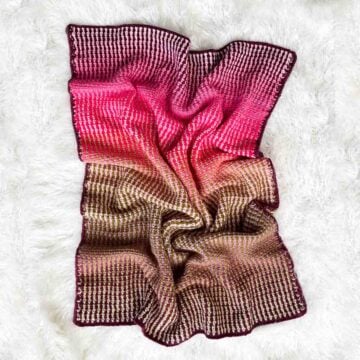
Light up your hook with this bold, starburst-inspired blanket! This squared off star pattern is worked from the center out, using a gradient of colors to create a striking look with just two to three balls of yarn.
The simple construction keeps things stress-free while delivering a seriously impressive result. Plus, you can finish a baby blanket in just three days, or spend a bit longer making yourself a larger luminous throw blanket.

All-in-One Crochet Kit
Since the Mandala Gradient yarn is key to the look of this star blanket pattern, the all-in-one kit is a perfect way to easily get your supplies. This bundle from Lion Brand includes all the Mandala Gradient and Basic Stitch yarn you'll need, plus a bonus printable PDF of the pattern (delivered digitally).
Print this Pattern
Prefer to crochet without ads? We designed the premium PDF just for you. The instantly downloadable, ad-free file is formatted for easy printing and includes the complete pattern, all the photo tutorials and a link to the video tutorial.
Premium PDF
easier and faster with fewer mistakes.
- Complete pattern + photo tutorials
- Instant download
- Formatted for easy printing
Supplies + Materials
Order an all-in-one kit from Lion Brand.
Green Version (larger blanket):
• Lion Brand Mandala Gradient (Weight 4/Medium - 295 yds, 5.29 oz, 150 g)
- Color A: Olive (558 - 208BN) - 1 skein [150 g]
- Color B: Dark Teal (558-211BE) - 1 skein [150 g]
• Lion Brand Basic Stitch (Weight 4/Medium - 185 yds, 3.5 oz, 100 g)
- Color C: Steel Blue (202-109T) - 1 skein [85 g]
Pink Version (smaller blanket):
• Lion Brand Mandala Gradient (Weight 4/Medium - 295 yds, 5.29 oz, 150 g)
- Color A: Burgundy (558-214AN) – 1 skein [150 g]
- Color B: Hot Pink (558 - 201DQ) - 1 skein [150 g]
Additional Supplies:
• Size L (8.0 mm) crochet hook or size needed to obtain gauge
• Tapestry needle for weaving in ends
• Stitch markers
• Blocking board
• T-pins
• Steamer or iron with steam functionality
Video Tutorial
In the video below, I walk you step-by-step through crocheting your square star blanket.
Sizes / Measurements
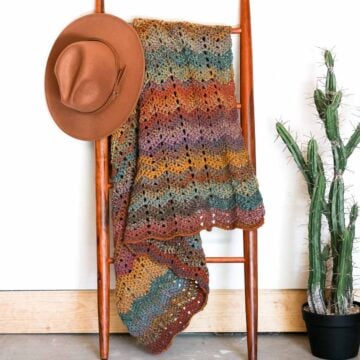
- Using two balls of Mandala Gradient creates a blanket that’s approximately 31” x 31” (pink version pictured).
- Using two balls of Mandala Gradient, plus adding three rounds of a third yarn creates a blanket that measures 34” x 34” (green version pictured).
- Follow instructions in the “Increasing the Blanket Size” section below to create a larger blanket.
Gauge
15 rounds of star measures approximately 27” across
Gauge is checked after Round 2 of star section to avoid making a separate gauge swatch.
Abbreviations + Glossary (US Terms)
ch – chain
chsp – chain space
dc – double crochet
dc2tog – double crochet two together
dc3tog – double crochet three together
hdc – half double crochet
PM – place marker
rep – repeat
RS – right side
sc – single crochet
sk – skip
slst – slip stitch
st(s) – stitch(es)
tr – treble (triple) crochet
tr2tog – treble crochet two together
tr3tog – treble crochet three together
WS – wrong side
Skill Level
This is an intermediate level crochet pattern. It's quite straightforward if you follow along with the video tutorial, but it does require some counting, increasing and decreasing. (I promise, it's worth it though!)
Print This Pattern: purchase the ad-free, printable PDF
Overall Pattern Notes
- If you’re new to reading crochet patterns, check out more info here.
- The number in parenthesis at the end of each round is the number of stitches per star or blanket side.
- Gauge is measured after Round 2 in the pattern.
- Blanket is worked in turned rounds.
- A chain 2, 3, or 4 at the beginning of a round counts as a stitch throughout.
- A chain 2 also counts as the first half of a dc2tog or dc3tog decrease. This is noted in instructions when relevant.
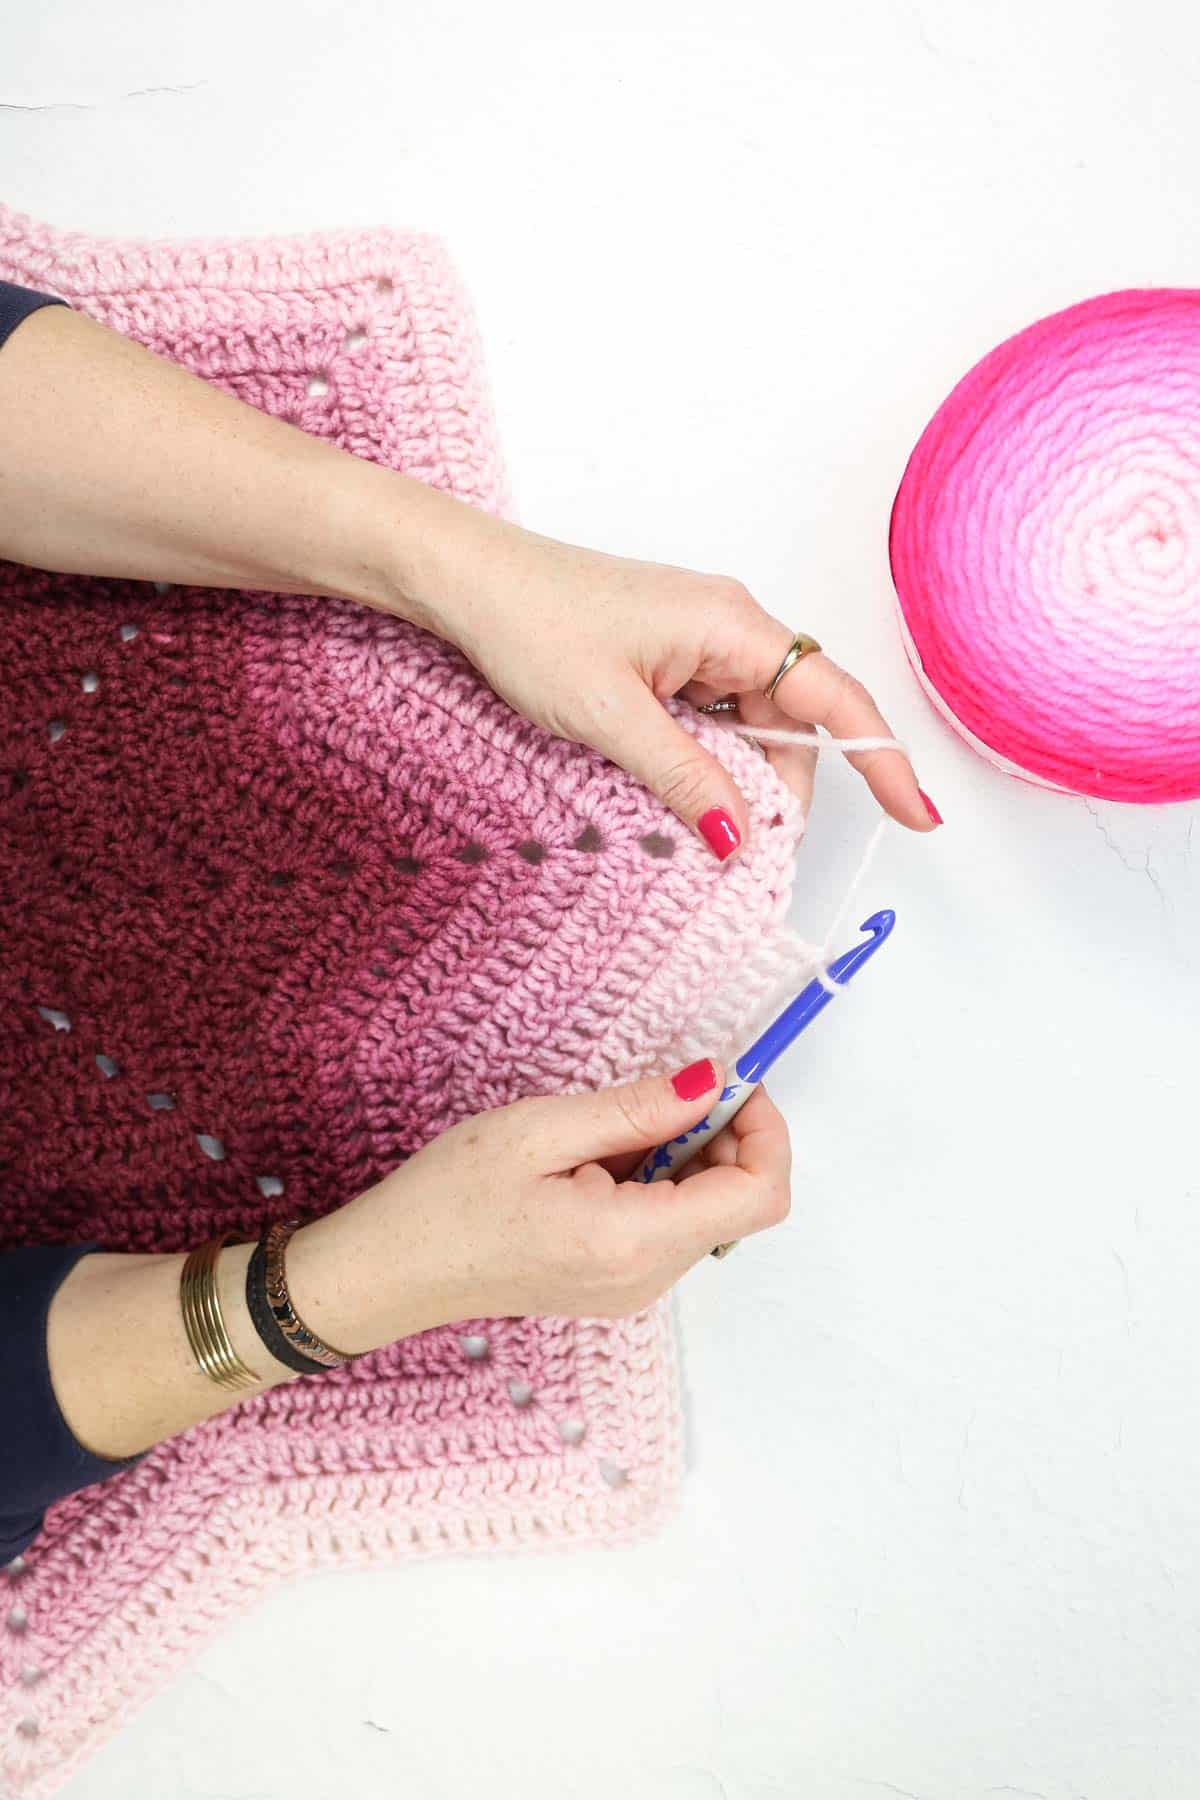
Center Star
Working from the darkest end of Color A yarn:
Preferred Foundation: Create a magic ring.Alternative Foundation: Ch 4, slst to first ch to create a loop.
Foundation Round (WS): Ch 1, sc 8 in magic ring or loop, slst to first st to join; turn. (8)
Round 1 (RS): Tightly ch 3, 2 dc in next sc, 2 dc in each remaining sc, dc in base of ch 3 from beginning of round, slst to first st to join; turn. (16)
Round 2 (WS): Tightly ch 3, 2 dc in next st, 2 dc in each remaining st, dc in base of ch 3 from beginning of round, slst to first st to join; turn. (32)
! Gauge Check !
Measure width and height of circle. It should measure 4” (10 cm) in each direction.
- If your circle is measuring less than 4”, increase your hook size and remake first few rounds.
Wanna save this pattern?
- If your circle is measuring more than 4”, decrease your hook size and remake first few rounds.
Premium PDF
easier and faster with fewer mistakes.
- Complete pattern + photo tutorials
- Instant download
- Formatted for easy printing
Important Notes From This Point in the Star Forward:
- It can be easy to accidentally add an extra stitch at the end of the round. The stitch the beginning chain 2 is worked into can look like the last stitch of the round, but it was actually the first stitch of the round. Do not mistake this for a fresh stitch to work into because it will add an extra stitch to each round.
- To join each round, make sure to slip stitch into the top of the decrease from the beginning of the round. (Do not accidentally slip stitch into the turning chain as done above.)
- There’s now an extra slip stitch at the end of each round in order to position the yarn for the upcoming round.
Round 3 (RS): Ch 2, dc in next dc (dc2tog made), 2 dc in next dc, ch 2, 2 dc in next dc, *dc2tog, 2 dc in next dc, ch 2, 2 dc in next dc; rep from * to end of round, slst to top of first dc2tog, slst into next dc; turn. (5 dc per side, 8 ch2sp corners created)
Round 4 (WS): Ch 2, dc2tog (dc3tog made), dc, (2 dc, ch 2, 2 dc) in corner ch2sp, *dc, dc3tog, dc, (2 dc, ch 2, 2 dc) in corner ch2sp; rep from * until 1 dc remains, dc in last dc, slst to top of first dc3tog, slst into next dc; turn. (7 dc/side)
Round 5 (RS): Ch 2, dc2tog (dc3tog made), dc in each dc to corner, (2 dc, ch 2, 2 dc) in corner space, *dc in each dc until 1 st before dec, dc3tog, dc in each dc to corner, (2 dc, ch 2, 2 dc) in corner space; rep from * through last corner, dc in each remaining dc, slst to top of first dc3tog, slst into next dc; turn. (9 dc/side)
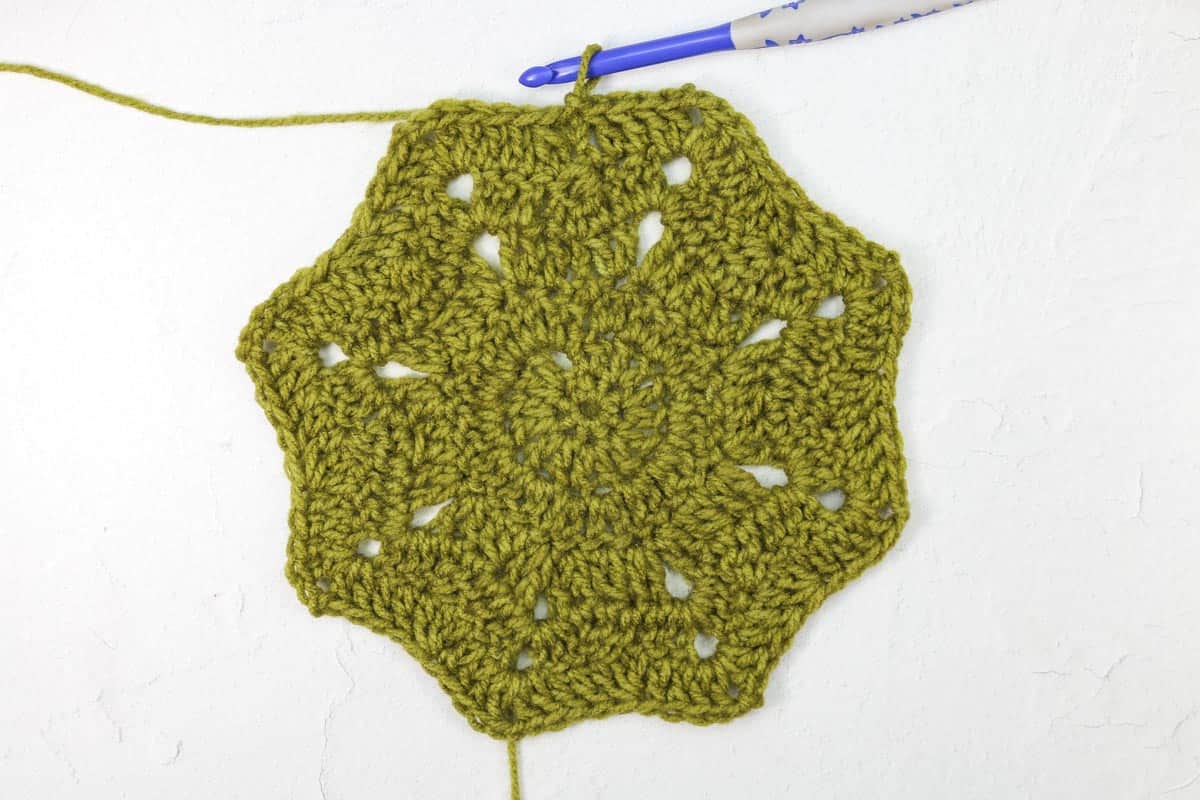
Rep Round 5 ten more times to create a total of 15 dc rounds. Each round should increase by 2 dc per side and 16 dc total per round. In the 15th round, you should have 29 dc/side.
You may run out of Color A yarn toward the end of your star. If so, join the lightest end of Color B yarn and continue.
Grab the entire Three Days to Done Collection
The Supernova Blanket is one of four "big" patterns designed to be finished lightening fast.
Get the entire collection of e-books so you can whip up sweaters and blankets in days instead of weeks!
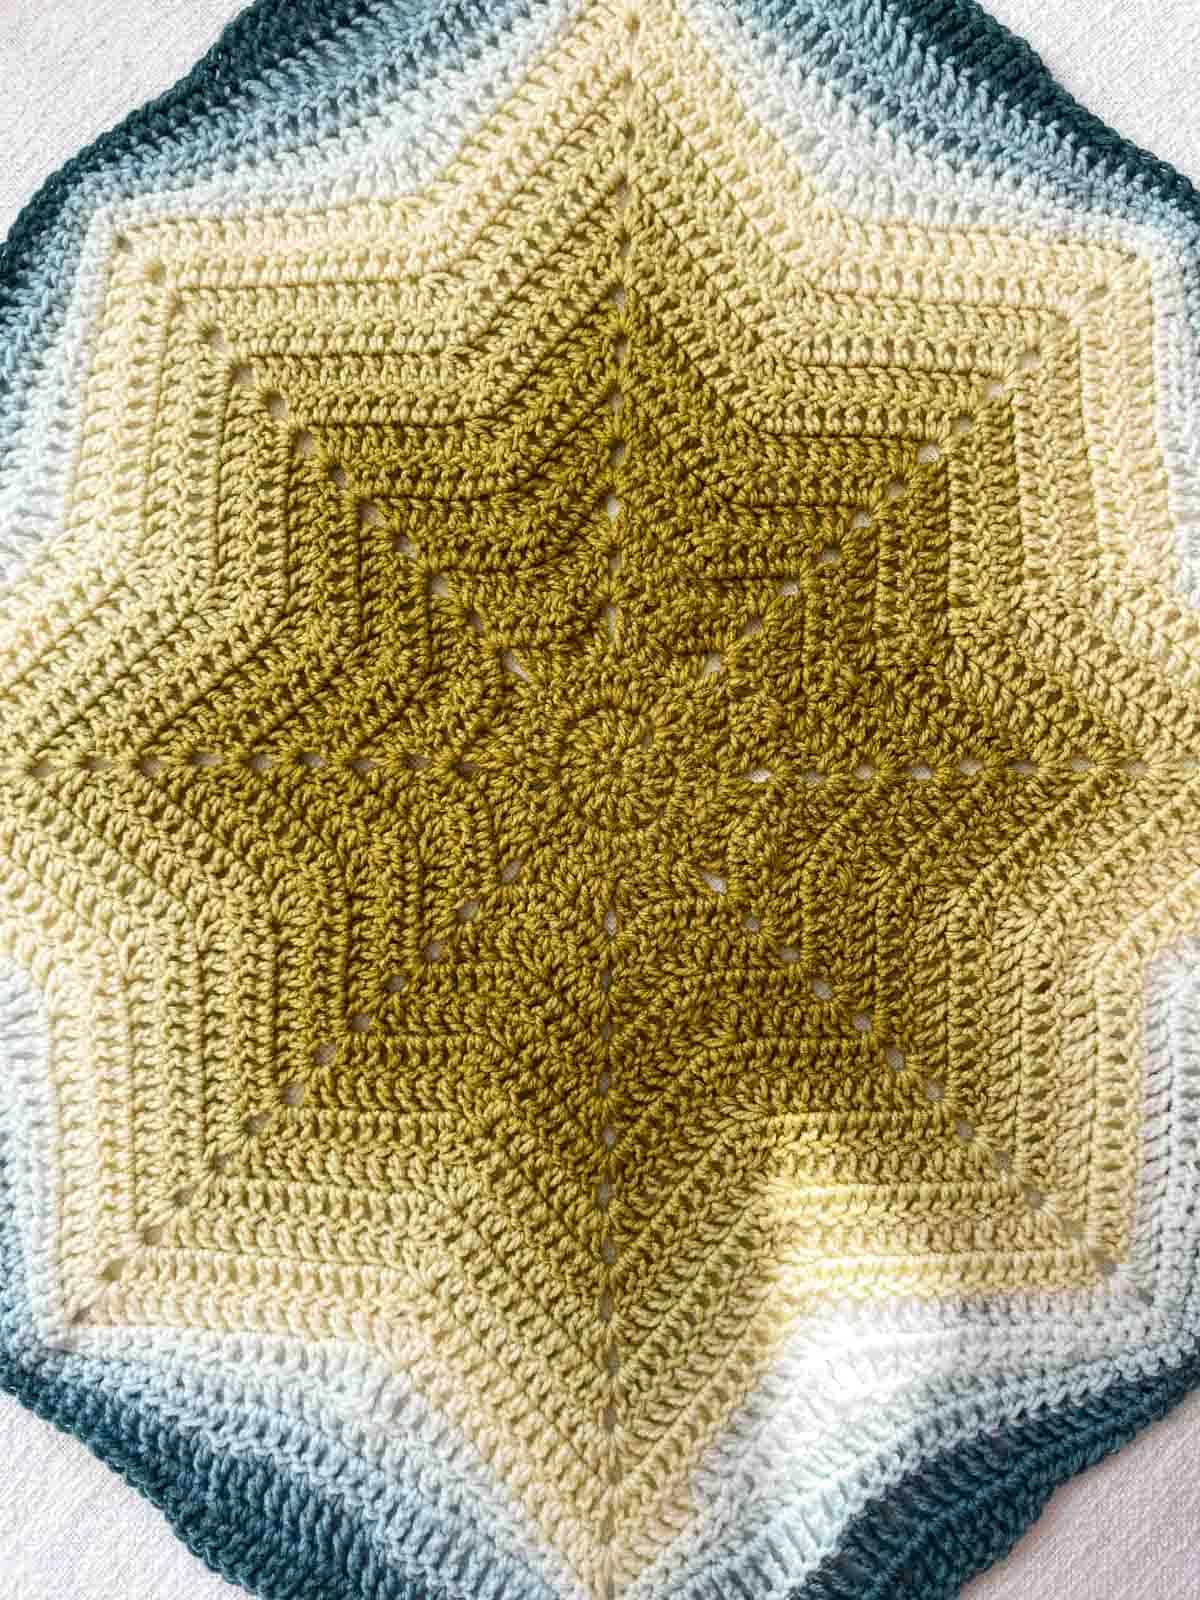
Squaring the Star
If you have not yet transitioned to using Color B yarn, do so wherever Color A is finished.
Place Markers:
The round you just finished was a RS round. With this round facing up:
Right Handed: Counting clockwise around star from the live loop, PM in 1st, 3rd, 5th and 7th corners.
Left Handed: Counting counter-clockwise around star from the live loop, PM in 1st, 3rd, 5th and 7th corners.
These four markers now indicate the blanket corners. In the following rounds, we’ll work to create a four-sided square. To do this, the four unmarked star corners will begin to be treated as regular stitches in order to be “absorbed” into the square.
Move markers up as each round is worked until the four blanket corners are well defined and there’s no risk of confusion.
Round 16 (WS):
First blanket side (to begin): …Ch 3, tr2tog (counts as a tr3tog), 1 tr, 4 dc, 4 hdc, 4 sc, (sc, ch 3, sc) in marked corner space…
Second, third, and fourth blanket sides: …4 sc, 4 hdc, 4 dc, 1 tr, tc3tog, 1 tr, 4 dc, 4 hdc, 4 sc, (sc, ch 1, sc) in corner space, 4 sc, 4 hdc, 4 dc, 1 tr, tc3tog, 1 tr, 4 dc, 4 hdc, 4 sc, (sc, ch 3, sc) in marked corner space…
First blanket side (to complete): …4 sc, 4 hdc, 4 dc, 1 tr, tc3tog, 1 tr, 4 dc, 4 hdc, 4 sc, (sc, ch 1, sc) in corner space, 4 sc, 4 hdc, 4 dc, 1 tr, slst to top of first tr3tog. (59 sts/blanket side, including the ch 1 in the center of each blanket side)
Round 17 (RS):
First blanket side (to begin): Ch 3 (counts as first dc), 4 dc, 4 hdc, 6 sc, 1 sc in ch1sp, 6 sc, 4 hdc, 9 dc, 4 hdc, 6 sc, (sc, ch 3, sc) in marked corner space…
Second, third, and fourth blanket sides: …6 sc, 4 hdc, 9 dc, 4 hdc, 6 sc, 1 sc in ch1sp, 6 sc, 4 hdc, 9 dc, 4 hdc, 6 sc, (sc, ch 3, sc) in marked corner space…
First blanket side (to complete):...6 sc, 4 hdc, 4 dc, slst to top of ch 3; turn. (61 sts/blanket side)
Round 18 (WS):
First blanket side (to begin): …Ch 3 (counts as first dc), 3 dc, 12 tr, (2 tr, ch 2, 2 tr) in marked corner space…
Second, third, and fourth blanket sides:...12 tr, 9 dc, 5 hdc, 9 sc, 5 hdc, 9 dc, 12 tr, (2 tr, ch 2, 2 tr) in marked corner space…
First blanket side (to complete):...12 tr, 9 dc, 5 hdc, 9 sc, 5 hdc, 5 dc, slst to top of ch 3; turn. (65 sts/blanket side)
Round 19 (RS):
First blanket side (to begin): Ch 4 (counts as first tr), 4 tr, 6 dc, 3 hdc, 3 sc, 3 hdc, 6 dc, 22 tr, (2 tr, ch 2, 2 tr) in marked corner space…
Second, third, and fourth blanket sides: …22 tr, 6 dc, 3 hdc, 3 sc, 3 hdc, 6 dc, 22 tr, (2 tr, ch 2, 2 tr) in marked corner space…
First blanket side (to complete): ...17 tr, slst to top of ch 4; turn. (69 sts/blanket side)
Want some company while you crochet?
Get support (and camaraderie!) in the Make & Do Crew community. Join for free here.
Round 20 (WS):
First blanket side (to begin): …Ch 4 (counts as first tr), 19 tr, (2 tr, ch 2, 2 tr) in marked corner space…
Second, third, and fourth blanket sides: ...24 tr, 2 dc, 4 hdc, 9 sc, 4 hdc, 2 dc, 24 tr, (2 tr, ch 2, 2 tr) in marked corner space…
First blanket side (to complete): ...24 tr, 2 dc, 4 hdc, 9 sc, 4 hdc, 2 dc, 4 tr, slst to top of ch 4; turn. (73 sts/blanket side)
Round 21 (RS):
First blanket side (to begin): …Ch 2 (counts as first hdc), 11 hdc, 7 sc, 12 hdc, 12 dc, 9 tr, (2 tr, ch 2, 2 tr) in marked corner space…
Second, third, and fourth blanket sides: ...9 tr, 12 dc, 12 hdc, 7 sc, 12 hdc, 12 dc, 9 tr, (2 tr, ch 2, 2 tr) in marked corner space…
First blanket side (to complete): ....9 tr, 12 dc, slst to top of ch 2; turn. (77 sts/blanket side)
Increasing Blanket Size (Optional)
The size of your blanket can now be easily increased by working additional rounds in double crochet as described in Round 22. You may either use a solid color category #4 yarn that’s similar in thickness to Mandala Gradient, or attach a new color of Mandala Gradient.
In the green sample blanket pictured, Lion Brand Basic Stitch was used to add three additional rounds.
With Color C:
Round 22 (WS): Ch 3 (counts as first dc), *dc to corner, (2 dc, ch 2, 2 dc) in corner; rep from * 3 more times, dc to end of round; slst to top of ch 3; turn. (81 sts/blanket side)
Repeat Round 22 until desired blanket size is reached.
Finishing
Blocking: Blocking is important to smooth out any waviness that remains from squaring off the star. Pin blanket edges first, using T-pins liberally to ensure the edges are straight. Next pin the star points so the star can “open up” as much as possible. This step is essential if your blanket has some waviness to smooth out. See video tutorial for demonstration.
Thoroughly steam blanket using a steamer or iron with steam setting, but do not touch heated surface directly to yarn.
Weave in remaining ends: Learn more about finishing your crochet projects.
Snuggle up under your starburst masterpiece!
Permissions + Copyright:
Please do not publish or share this pattern as your own. You may make items to sell with this pattern. In exchange, please link back this post. Do NOT use our photos as your own sales photos.
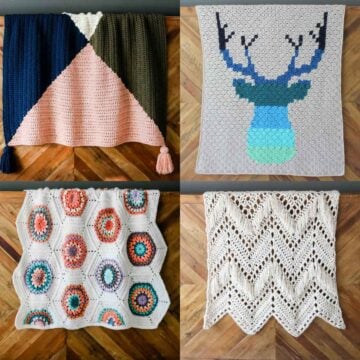
More Unique Blankets to Crochet
Why make something average when there are so many ways to crochet captivating, colorful afghans? Here are just a few of the blanket patterns we've designed.
- Ebb and Glow | Stunning Moss Stitch Blanket Pattern
- How to Add Beads to Crochet to Make a Weighted Blanket
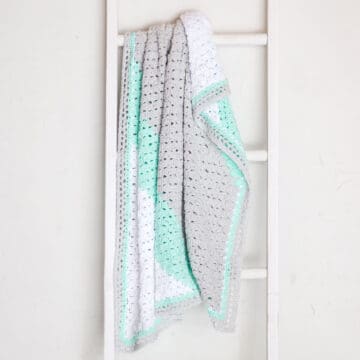
- 40+ Free Crochet Blanket + Afghan Patterns | Captivating Designs
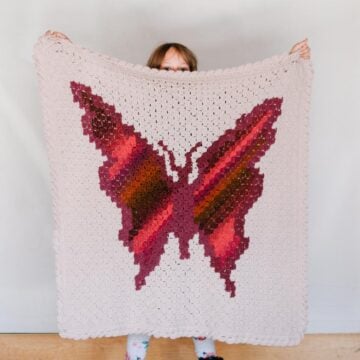
- C2C Crochet Butterfly Blanket | Whimsical Free Pattern
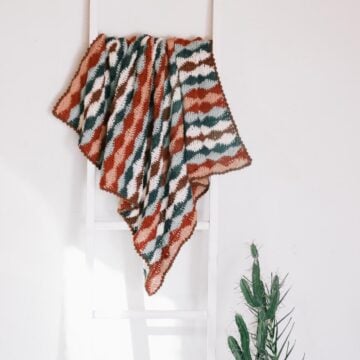
- Easy Waves Crochet Blanket Pattern | Modern + Meditative
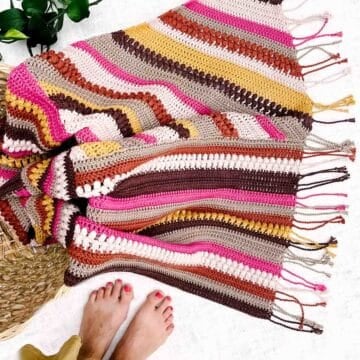
- Modern Patchwork Crochet Blanket Free Pattern
That was so fun! Now what?
Invitation to our Private Community
Come discuss crocheting your squared off star blanket and lots of other projects and techniques in our Make & Do Crew community. Here thousands of helpful crocheters answer each other's questions and share their stitches. Join us!
Leave a Reply