This easy crochet baby bonnet pattern is modern, gender-neutral and will become your go-to baby shower gift! Free pattern + tutorial in sizes newborn-6 yrs. Purchase the ad-free, printable PDF here.
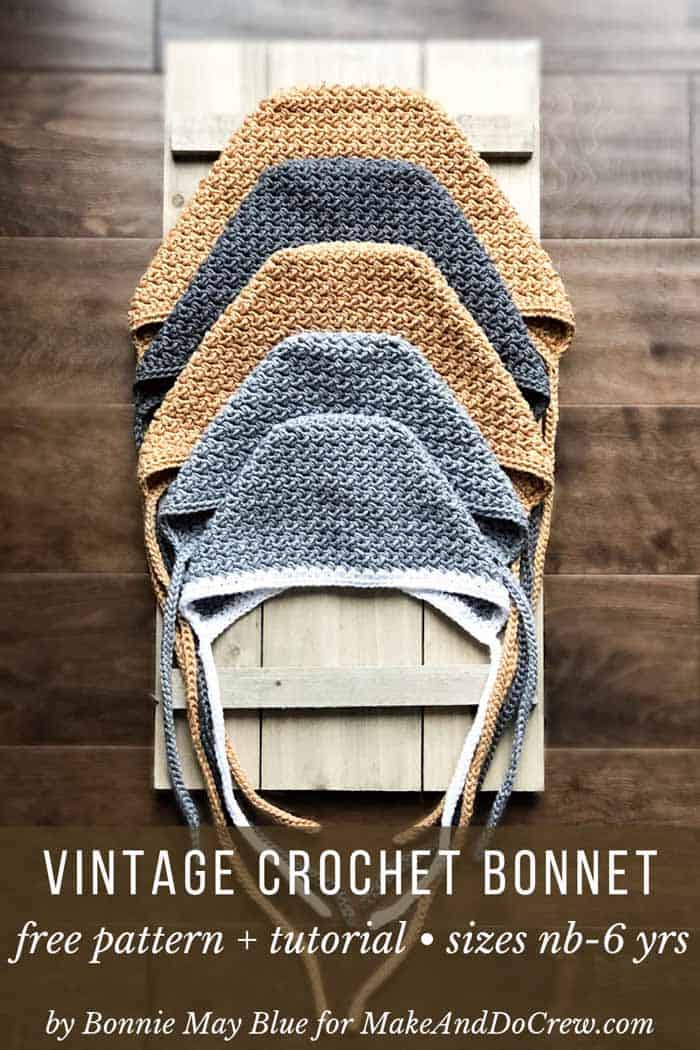
Thanks to Lion Brand Yarns for providing the yarn for this easy crochet baby bonnet pattern. This post contains affiliate links.
Welcome back to the Make & Do Crew guest designer series. While I'm getting to know the newest baby in our family, Ambrea from Bonnie May Blue is sharing her free easy crochet baby bonnet pattern with us today! You can see lots of of Ambrea's crochet patterns in her Etsy store, Bonnie May Blue. And be sure to check her out on social media too: Instagram, Pinterest, and Facebook. Ambrea, take it away!
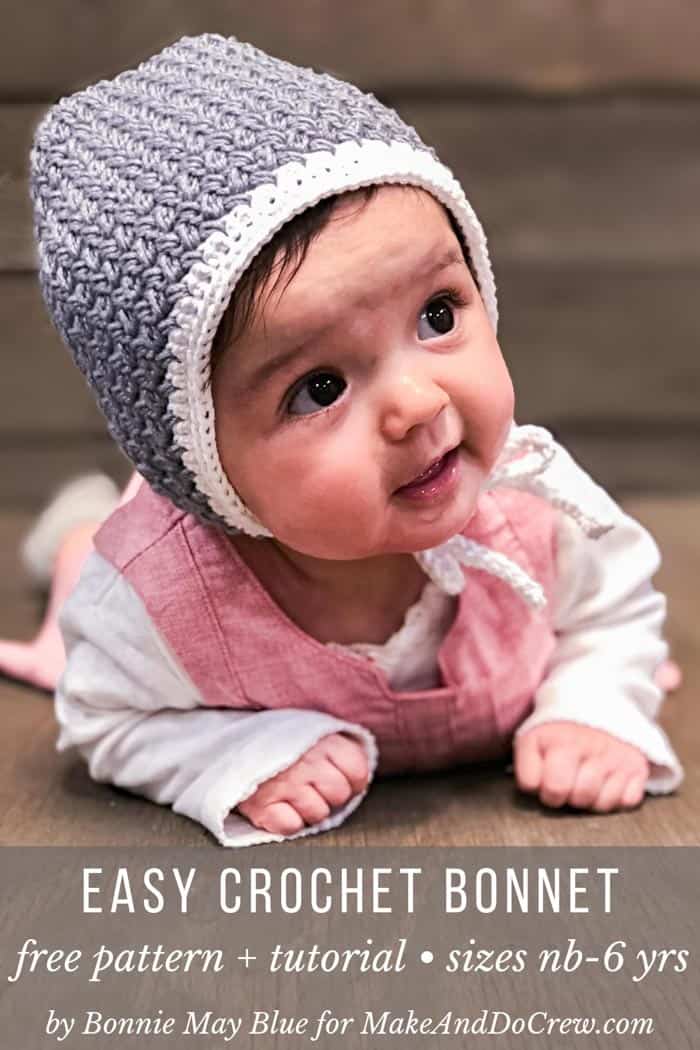
The Inspiration for My Easy Crochet Baby Bonnet
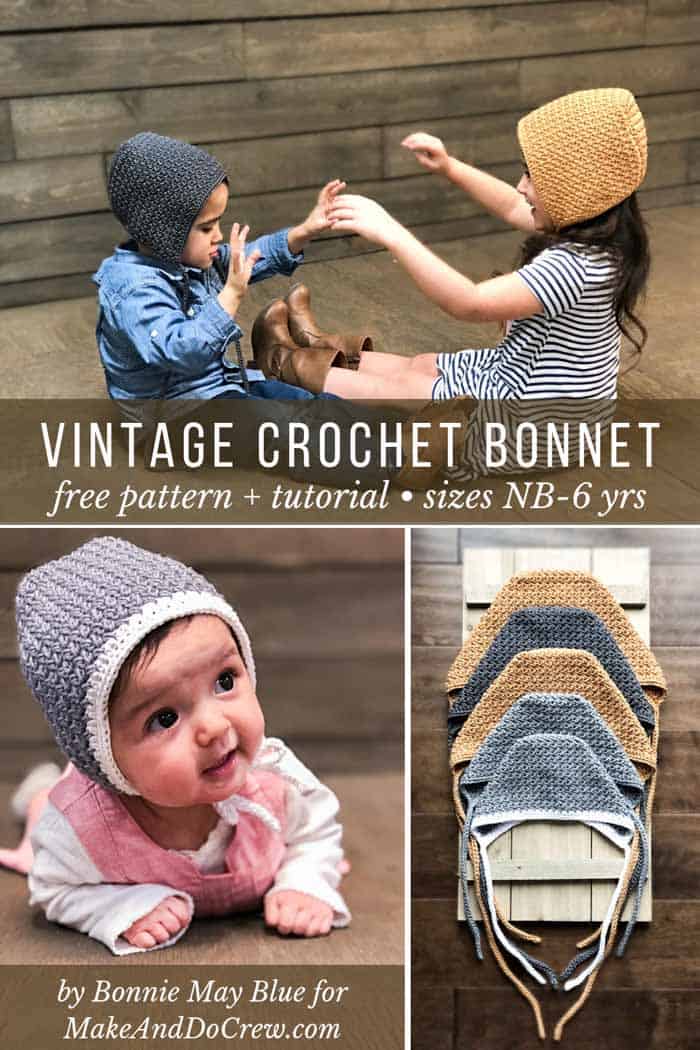
The enticing texture of the Dappled Willow Bonnet will have you crocheting a bonnet for all the little ones in your life.
With minimal effort, create an endearing accessory to amplify the sweetness of all the baby faces around you. This gender-neutral, crochet bonnet is ideal for gifts, family photos or walks in the park. Use a contrasting color around the edge for even more aesthetic appeal. Get the full free pattern below or purchase the ad-free, printable PDF here.
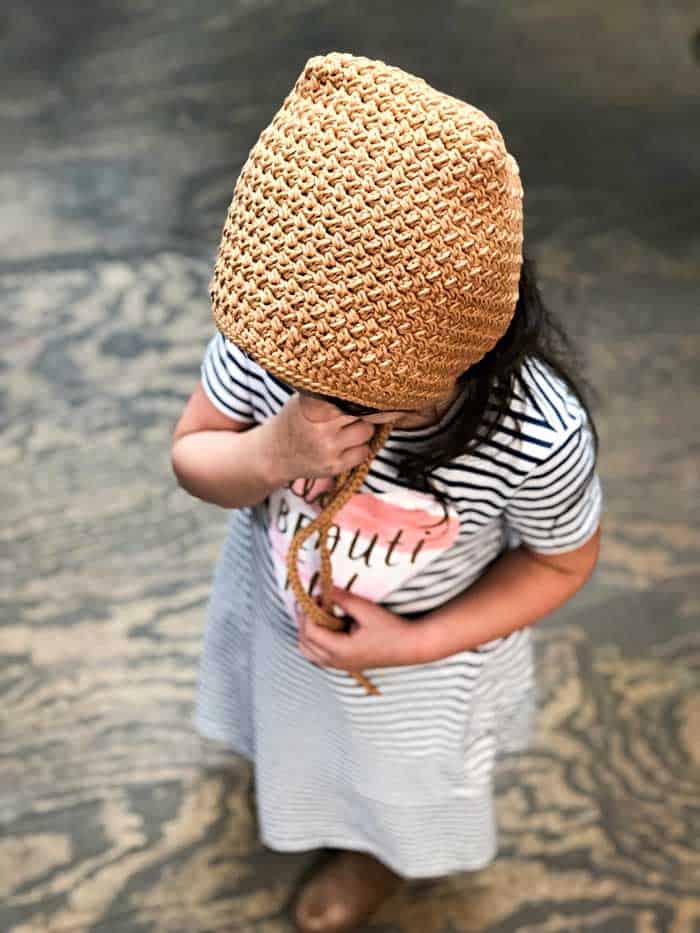
A bonnet’s silhouette offers a bit of nostalgia of times gone by. The history of the bonnet dates back to the Middle Ages. Bonnet styles have varied over the centuries, but the universal way to describe a bonnet is a head covering for the hair and ears only, not the forehead. Bonnets are versatile in that they are meant to be worn indoors as well as outdoors. Your guys and girls will be clad for every activity from play dates to nature walks. So grab your favorite hook and let’s choose the perfect yarn.
I truly wanted to capture the classic style of a sewn linen vintage baby bonnet in a crochet pattern. Chubby cheeks and all tied up with a bow tucked under a little one’s chin, make me swoon! Inspired by a dappled horse’s spots and the drape of a willow tree, the culmination of the bonnet’s simplistic, classic design was formed.
Beginner-Friendly Bonnet Pattern Made From a Rectangle
The dappled willow bonnet features a beginner friendly stitch pattern and easy construction, with the majority of the bonnet made in the shape of a rectangle. Such beautiful texture is created on the bonnet, using the Elizabeth stitch, also referred to as the mini bean stitch.
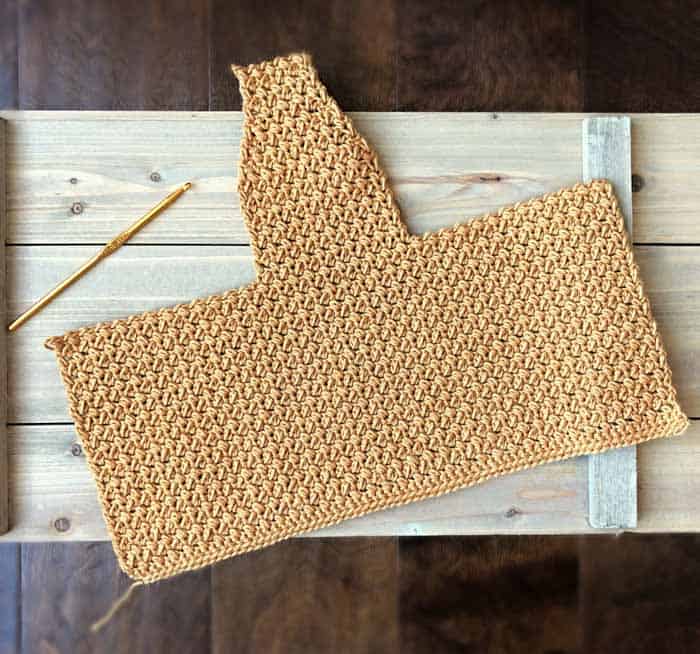
A few decrease stitches create a tapered panel for the back of the bonnet and with a little slip stitch seaming, it all comes together. Finally, the ties are worked back and forth around the bottom edge and the dappled willow bonnet is ready to go!
Related: 35+ Cozy Chunky Hats to Crochet
Create Modern Stitches With Mercerized Cotton
While perusing all the amazing yarn options from Lion Brand, 24/7 Cotton yarn stopped me in my tracks. When worked up, the stitch definition of this yarn is eye catching. There are 24 color options, including light, bright, neutral and warm tones. 24/7 Cotton’s versatility works with projects made for any season.
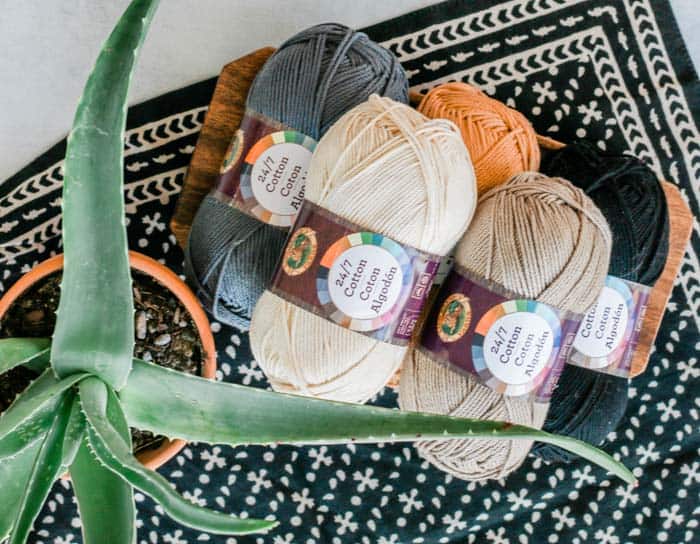
24/7 Cotton is soft, breathable and lightweight, making it a wonderful fiber option for the dappled willow bonnet. Cotton is comfortable, even when the temps rise. Also, 24/7 Cotton is machine washable, which, for me, is a huge plus for anything worn by my children. Makers and mommas alike need more time to take pleasure in their creations, the fiber kind and the human kind :). No need to add more to the “hand wash only” pile, yay!
Unique is a word to describe the makeup of 24/7 Cotton. The cotton goes through a mercerization process, giving the yarn a silk-like luster. Lion Brand’s 24/7 Cotton fashions pieces with a soft shine and beautiful drape. Pick up a skein or two of 24/7 Cotton and start creating an adorable dappled willow bonnet for all your little guys and girls.
More Free Crochet Hat & Headband Patterns for Babies & Kids
If you have a gaggle of kiddos to crochet for, you might also enjoy these other free crochet hat and headband patterns for children. You can always look through our free crochet patterns for babies and kids too.
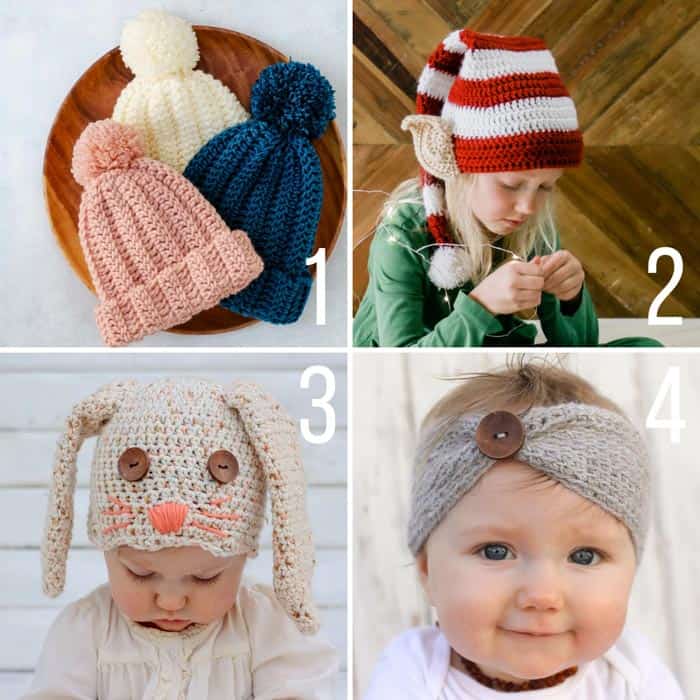
1. 1-Hour Beanie // 2. Santa's Helper Elf Hat // 3. Crochet Bunny Hat // 4. Aspen Socialite Headband
Dappled Willow Bonnet
Free Crochet Pattern
Purchase the ad-free, printable PDF here.
Pin this pattern for later here.
Save this to your Ravelry here.
Explanation:
We will really define the little “V” shaped knit-look stitches that make the front edge of the bonnet by working in the back loops of the foundation chains. After two rows of single crochet stitches, the main part of the bonnet is created using the Elizabeth stitch on repeat. The texture really begins to show as the Elizabeth stitch builds row after row. A foundation chain is worked and joined to the corner of the bonnet, followed by a series of single crochet and slip stitches to create I-cord style ties that allow for freedom of play without worry of your little ones losing their bonnets. (Tutorial included below).
Supplies:
• Lion Brand 24/7 Cotton (weight: 4/medium – 186 yds, 3.5oz)
- White (#761-100)
- Camel (#761-124)
- Silver (#761-149)
- Charcoal (#761-150) – ½, ½, ¾, ¾, 1, 1 ¼ skein
• Size G/6 (4 mm) crochet hook
• Tapestry needle
Sizes/Measurements (finished bonnet laying flat):
• 1-3 months: 6.5" tall along front edge x 6" deep from center back to front edge
• 3-6 months: 7" x 6.5"
• 6-12 months: 7.5" x 7"
• 12-24 months: 7.75" x 7.5"
• 2-3 years: 8" x 7.75"
• 4-6 years: 8.5" x 8"
Gauge:
• 9 Elizabeth sts x 9 rows = 2”
Abbreviations and Glossary (US Terms):
ch – chain
sc – single crochet
flo – front loop only
sl st – slip stitch
sk – skip
st(s) – stitch(es)
dec – crochet two stitches together
RS – right side
WS – wrong side
MC – main color
CC – contrasting color
Elizabeth st – *Insert hook into stitch, pull up a loop, yarn over, insert hook into same stitch, pull up a loop, yarn over, pull through all four loops on hook. Chain 1, skip next st; repeat from *
Overall Pattern Notes:
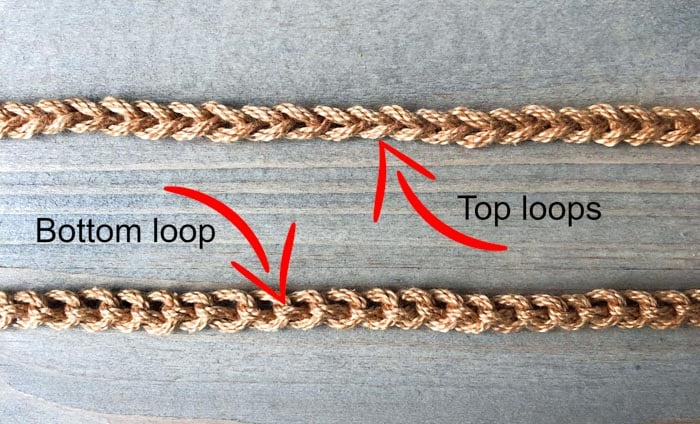
• Row one of the bonnet is worked in the bottom loops only of the foundation row chain stitches. This defines the little “V” shaped knit-look stitches that make the front edging of the bonnet. (See photo below.)
• Following the next two rows of single crochet stitches, the main part of the bonnet is created using the Elizabeth stitch on repeat. Easy as pie, right? Some decrease stitches will create a tapered panel for the back of the bonnet. (See photo above in blog post.)
• With a little slip stitch seaming, it all comes together. Finally, the ties are worked around the bottom edge and the dappled willow bonnet is ready to go!
• Samples pictured are sizes 3 – 6 months, 2 – 3 years and 4 – 6 years on a 4 month old, 3 year old, and 4 ½ year old.
Foundation Row: (MC or CC) Ch 55 (63, 65, 67, 71, 77).
Row 1 (RS): Beginning in 2nd ch from hook, sc to end of row; ch1, turn. (54 (62, 64, 66, 70, 76))
Row 2 (WS): Working in flo, sc to end of row; ch1, turn.
Row 3: (MC) Sk first st; Elizabeth st to end of row; turn.
Rows 4 – 18 (20, 22, 24, 26, 28): Elizabeth st to end of row; turn.
Break yarn.
Back Panel
Count over 22 (24, 24, 26, 26, 28) sts; join yarn in ch1 space, ch1. Continue below with your chosen size.
Row 1: Work 5 Elizabeth sts; turn. (10)
Rows 2 – 6: Elizabeth st to end of row; turn. (10)
✨Unlock this free subscriber-exclusive pattern ✨
Follow these steps to view the full free pattern below
(6 – 12 mos)
Row 1: Work 8 Elizabeth sts; turn. (16)
Rows 2 – 8: Elizabeth st to end of row; turn. (16)
Row 9: Dec, ch1, Elizabeth st to end of row; turn. (14)
Row 10: Dec, ch1, Elizabeth st to end of row; turn. (12)
Wanna save this pattern?
Row 11: Elizabeth st to end of row; turn. (12)
Row 12: Dec, ch1, Elizabeth st to end of row; turn. (10)
Row 13: Dec, ch1, Elizabeth st to end of row; turn. (8)
Row 14: Dec, ch1, Elizabeth st to end of row; turn. (6)
Rows 15 – 20: Elizabeth st to end of row; turn. (6)
(12 – 24 mos)
Row 1: Work 7 Elizabeth sts; turn. (14)
Rows 2 – 10: Elizabeth st to end of row; turn. (14)
Row 11: Dec, ch1, Elizabeth st to end of row; turn. (12)
Row 12: Dec, ch1, Elizabeth st to end of row; turn. (10)
Row 13: Elizabeth st to end of row; turn. (10)
Row 14: Dec, ch1, Elizabeth st to end of row; turn. (8)
Row 15: Dec, ch1, Elizabeth st to end of row; turn. (6)
Rows 16 – 21: Elizabeth st to end of row; turn. (6)
(2 – 3 yrs)
Row 1: Work 9 Elizabeth sts; turn. (18)
Rows 2 – 10: Elizabeth st to end of row; turn. (18)
Row 11: Dec, ch1, Elizabeth st to end of row; turn. (16)
Row 12: Dec, ch1, Elizabeth st to end of row; turn. (14)
Row 13: Elizabeth st to end of row; turn. (14)
Row 14: Dec, ch1, Elizabeth st to end of row; turn. (12)
Row 15: Dec, ch1, Elizabeth st to end of row; turn. (10)
Row 16: Dec, ch1, Elizabeth st to end of row; turn. (8)
Rows 17 – 21: Elizabeth st to end of row; turn. (8)
(4 – 6 yrs)
Row 1: Work 10 Elizabeth sts; turn. (20)
Rows 2 – 11: Elizabeth st to end or row; turn. (20)
Row 12: Dec, ch1, Elizabeth st to end of row; turn. (18)
Row 13: Dec, ch1, Elizabeth st to end of row; turn. (16)
Row 14: Elizabeth st to end of row; turn. (16)
Row 15: Dec, ch1, Elizabeth st to end of row; turn. (14)
Row 16: Dec, ch1, Elizabeth st to end of row; turn. (12)
Row 17: Dec, ch1, Elizabeth st to end of row; turn. (10)
Rows 18 – 24: Elizabeth st to end of row; turn. (10)
Break yarn.
Seaming
Fold your work (RS together) to bring one side of the rectangle and one side of the back panel together. Align the bottom edges, pin if needed to keep the sides even. Begin seaming at the top of the bonnet. With a slightly loose st, working in the inside loops; sl st to bottom edge. Break yarn. Repeat with the other side of the rectangle and back panel.
Related: 27+ Free Crochet Beanie Patterns
Bonnet Ties (MC or CC)
Row 1: Ch 44 (44, 54, 64, 74, 74)
Row 1 Cont: With the bonnet face down, join the row of ch sts to the bonnet by placing 1 sc in the right corner. Working 1 sc in the end of each row, sc around the bottom of the bonnet from corner to corner.
Row 1 Cont: Ch 45 (45, 55, 65, 75, 75); turn.
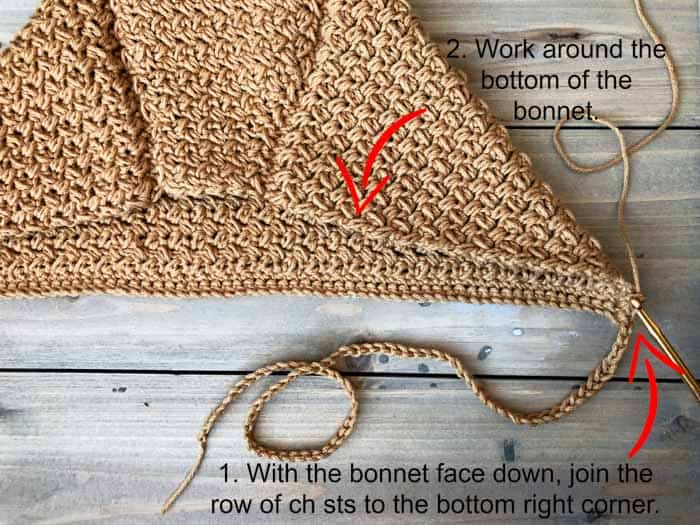
Row 2: Beginning in 2nd ch from hook, working in a single loop down one side of the ch sts, sc in each ch. Sc to first back panel seam, dec, sc to second seam, dec, sc to corner.
Working in a single loop down one side of the ch sts, sc in each ch to end of row; ch1, turn.
Row 3: *Insert hook into a single loop on one side of the ch sts and into the flo of the sc sts worked down the opposite side; yarn over and pull through all three loops on hook to sl st. Repeat from * down ch sts.
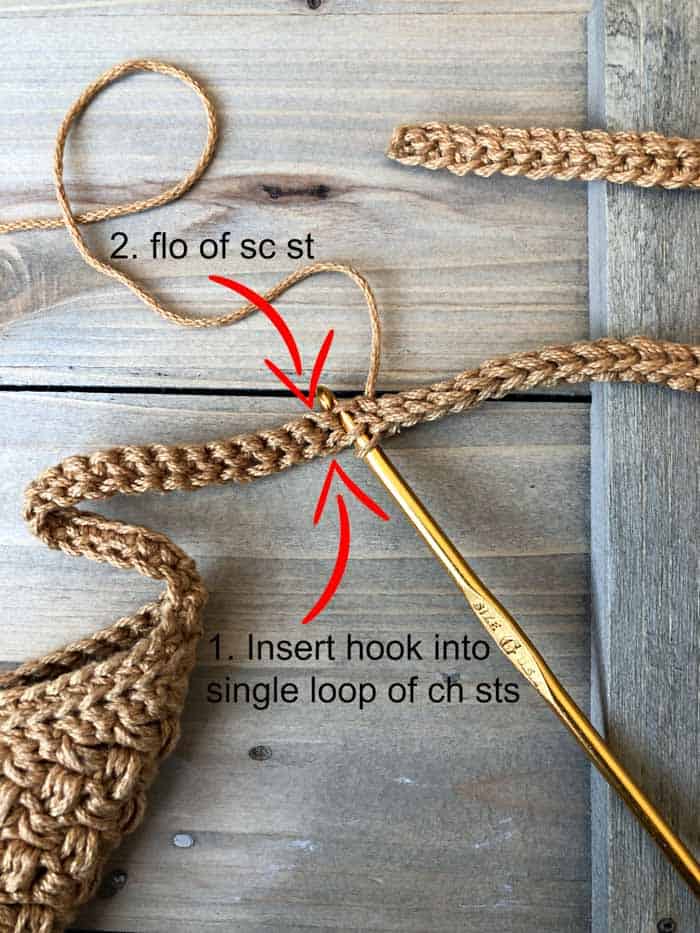
Working in flo, sl st from corner to corner.
*Insert hook into a single loop on one side of the ch sts and into the flo of the sc sts worked down the opposite side; yarn over and pull through all three loops on hook to sl st. Repeat from * down ch sts.
Weave in ends.
Thanks again to Ambrea of Bonnie May Blue for sharing this free easy crochet baby bonnet pattern! Be sure to check out Ambrea's Etsy for lots more modern crochet patterns!
More Free Modern Crochet Patterns for Babies and Kids
If you liked making this classic crochet baby bonnet, you might love some of these other free crochet patterns for little ones from Make & Do Crew! You can always find all our free patterns and tutorials here.
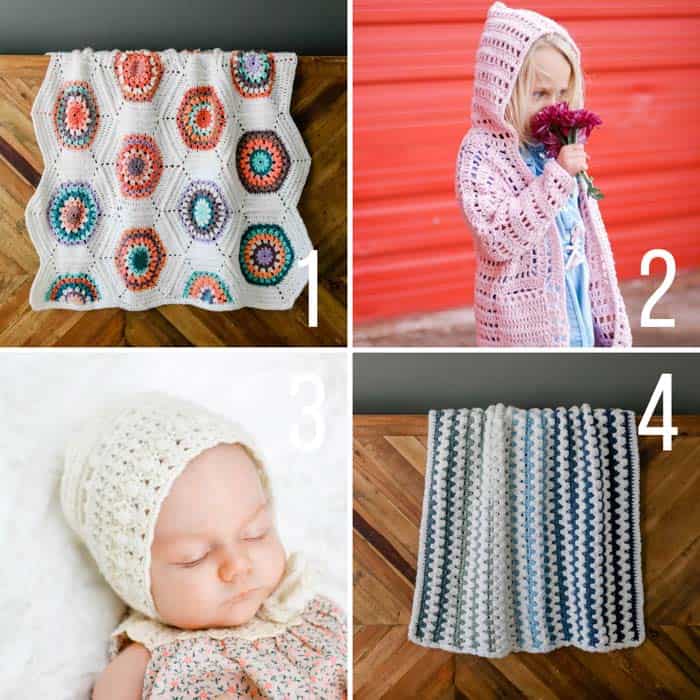
1. Grandmother's Flower Garden Crochet Blanket - Inspired by vintage quilt patterns, this Grandmother’s Flower Garden crochet blanket pattern is perfect to make from deconstructed yarn cakes or your scrap stash.
2. XO Child's Crochet Cardigan - Believe it or not, this four-season child’s crochet cardigan pattern is made from two simple hexagons!
3. Classic Crochet Baby Bonnet - This vintage-inspired, classic crochet baby bonnet pattern will quickly become a cherished family heirloom. Made from a simple T shape.
4. Tributary Beginner Crochet Baby Blanket - Learn how to make a beginner crochet baby blanket with this easy free pattern and tutorial. You’ll be left with very few ends to weave in and a blanket that’s as soft as a baby’s…well, you know.

Tiffany says
I love this bonnet! I’ve made about 5+ of them this year 😆 I’m finding that my sizing is consistently about an inch short (for height and width). I’m using a 4.0mm hook with medium weight yarn.
They don’t look too small on my daughter and they cover her ears, which is the important part. Just wondering what I could do to troubleshoot that inch.
Lucy says
I’ve just finished this!! And I absolutely love this. Thank you for the pattern. I made for my almost 3 month old girl. Now going to make it for my almost 6 year old daughter to match. Didn’t take too long either.
Gitte Strauss says
Love the stitch and the pattern, but I ran into a problem. I have reached row 6 of the back panel (smallest size) and can't figure out how to decrease from there. Do I crochet 2 Elizabeth stitches together? I did try that but then my row stitch count was off. Do you have a video tutorial to show how this is done?
Please help, I really would like to finish this beautiful pattern.
Sherry says
This is such a beautiful bonnet, but I cannot see how to work the decreases. Help!
Lorraine Pollachek says
I know just what you mean when you refer to Lion Brand 24/7 Cotton yarn stopping you in your tracks and the stitch definition. My favorite crochet projects are smaller ones, particularly kitchen accessories (potholders, trivets, etc.), which require the heat resistance of cotton yarn. Lion Brand 24/7 is my absolute favorite yarn. I'm definitely going to make this bonnet for a young girl and her new baby sister who live in a colder climate than mine (I live in South Florida).
JC says
I can't find where the Free Pattern is located. Please help!
Jess @ Make and Do Crew says
It's right above this comment area! 🙂
Victoria says
Love this pattern! Will one skein of yarn make any size bonnet?
Ambrea says
The largest size will use slightly more than one skein.
Heather Lucas says
Any ideas how much bigger to make it for an 8 year old?
Ambrea says
Hi Heather, I would add 4 to 8 sts to the beginning ch. Try to use the measurements and gauge provided to determine how much bigger to compensate for the age difference. Then use the same back panel as the age 4 - 6 years and just extend it a few rows so the back pieces line up. I hope this helps!
JoAnn Garrett says
I love this pattern. Thank you
Jess @ Make and Do Crew says
I'm so glad! I do too. 🙂
Anniem says
Nice to see the old fashioned bonnet get a face left and new appreciation! You have very impressive designing skills. Your pattern writing is exemplary! Thank you!!!!
Jess @ Make and Do Crew says
Bonnie May Blue deserves all the credit! She did a wonderful job. 🙂
Jess