 So you have a baby shower, birthday party or gift-exchange in an hour? No problem. You still have time to make this crochet headband before then so you can waltz into the party like your life is just one big, thoughtful DIY-fest.
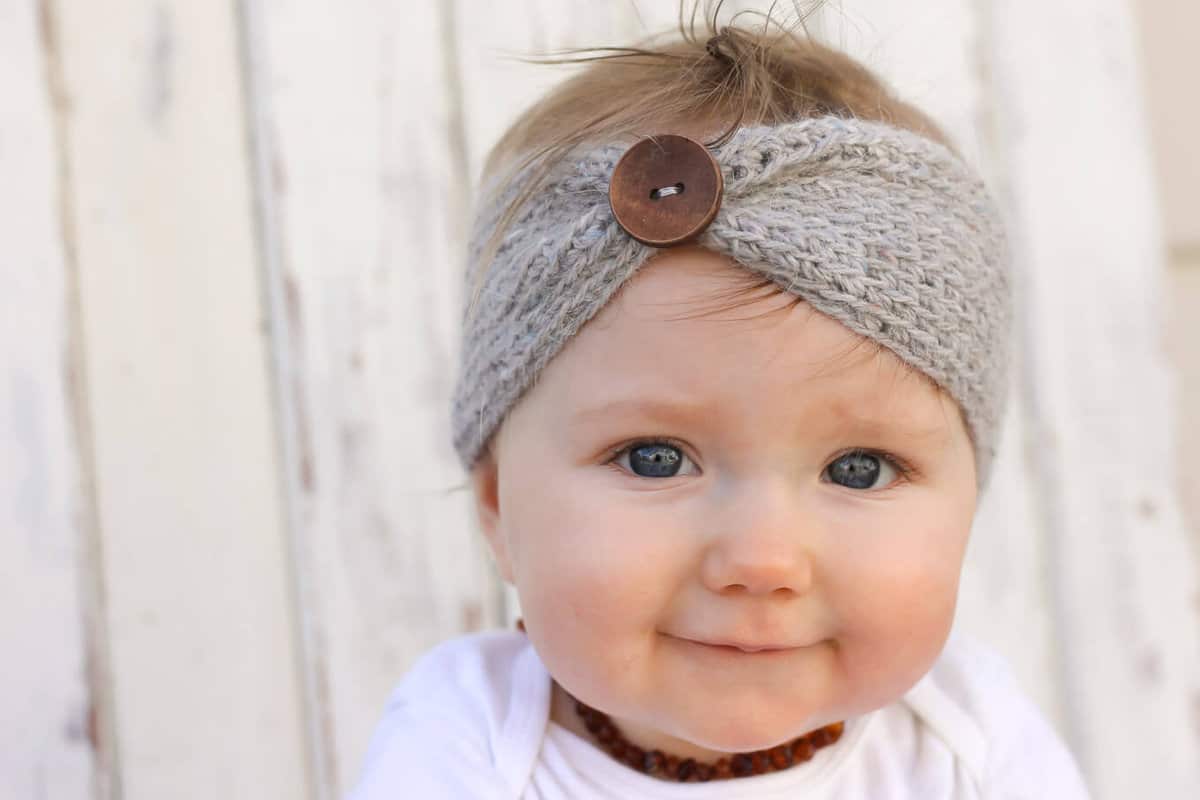
Seriously, this crochet headband (aka ear warmer) pattern is a quickie. It's got last-minute DIY gift written all over it.
 Although my daughters rock hats like nobody's business, neither have been big headband wearers. But we do live in Colorado, so naturally, it seems appropriate to periodically dress them like they're billionaires from Aspen. (I'd obviously be insufficiently preparing them for their future
 husbands presidencies if I didn't teach them how to play the part.)
 After I finished crocheting this headband, I looked at it and thought, "Man, I'd wear this." And no, not as the calf-garter-belt it would be in the six month size, but I'd wear a full-fledged adult version of this thing. So, I'm providing instructions for newborn - adult sizes, in case you too want to match your baby billionaires.
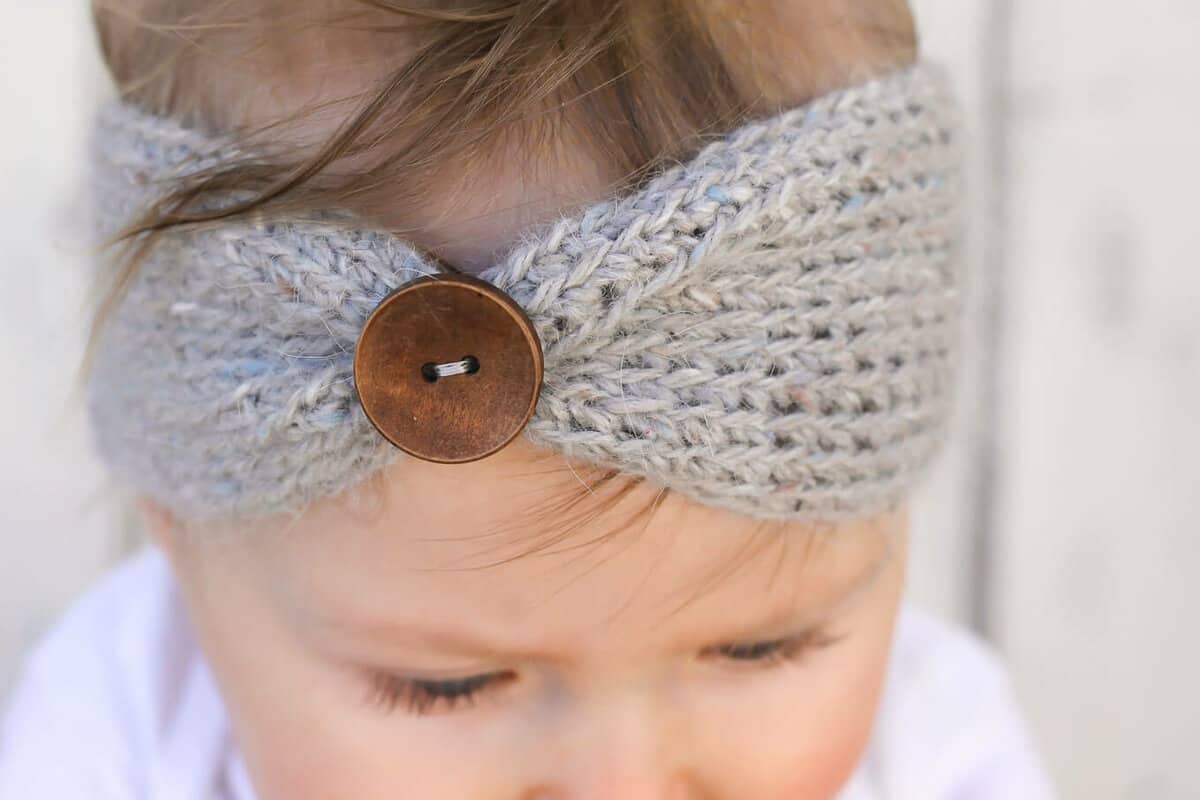
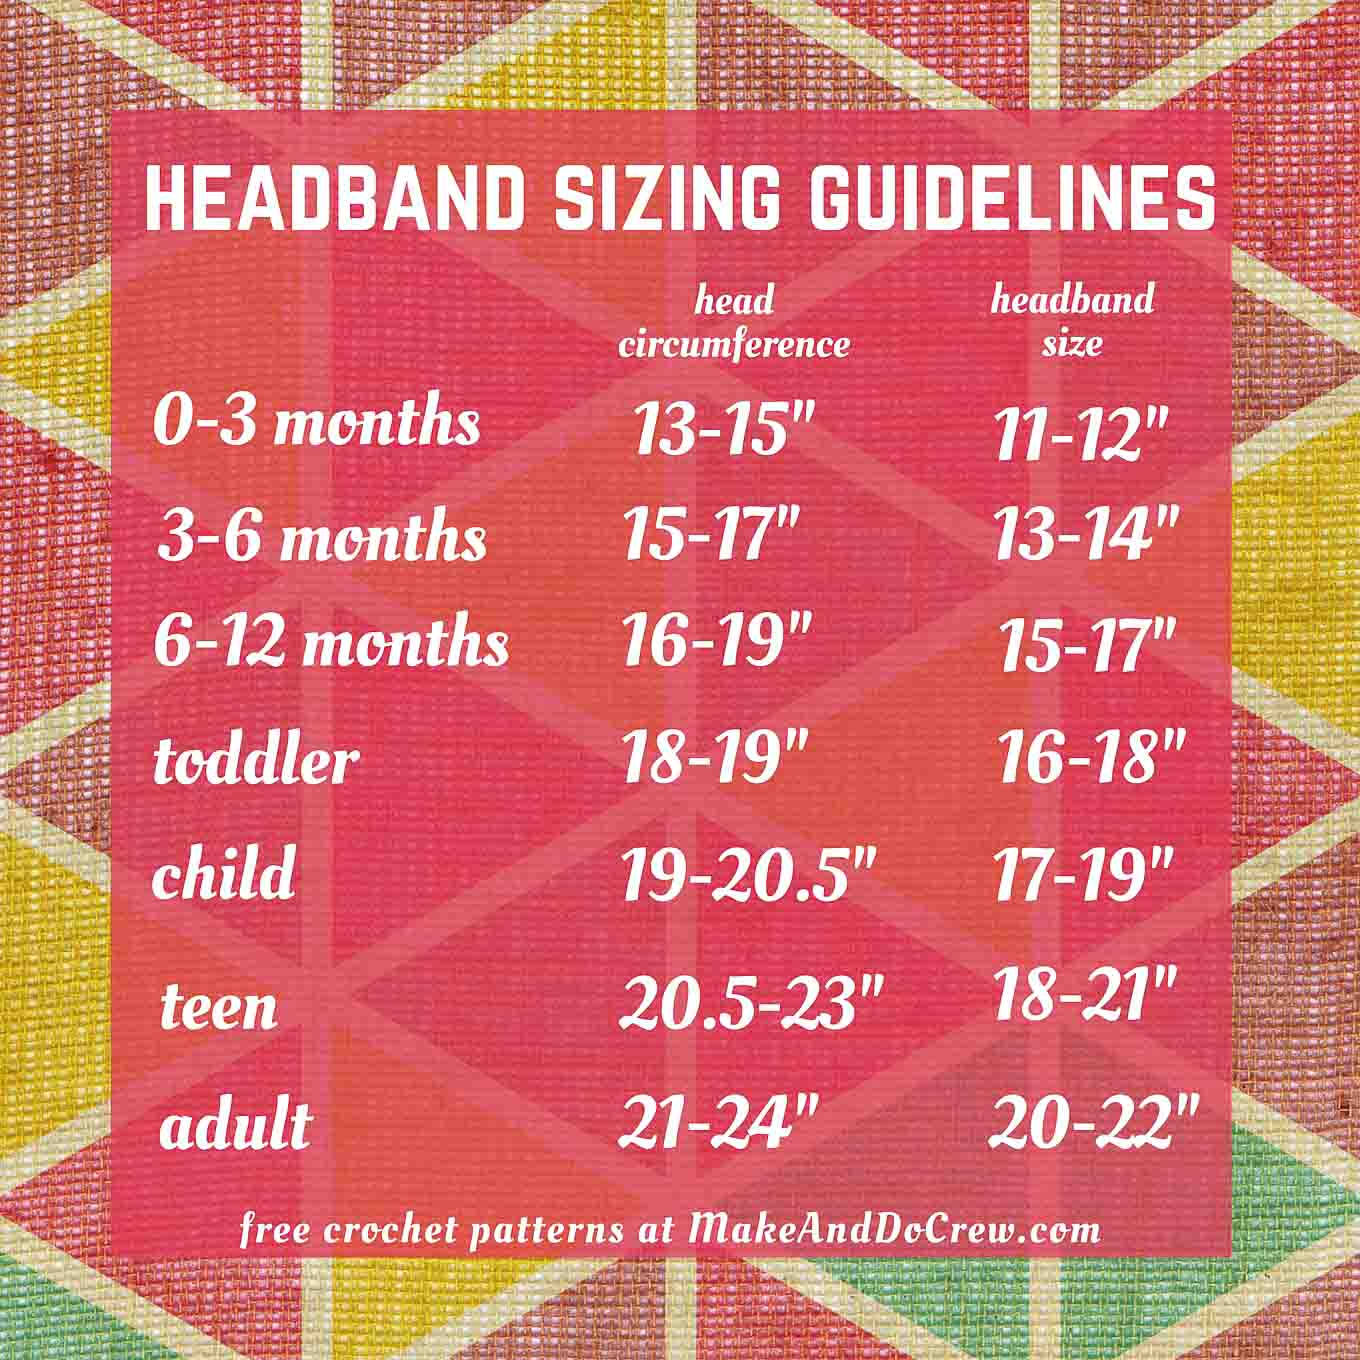
 This crochet pattern is a bit unusual because I'm not giving you exact stitch counts. Since a snug-fitting headband is pretty dependent on the wearer's head circumference, I'm providing instructions to customize the pattern based on the head size. If you can't get a head measurement because the headband is a gift or the recipient isn't born yet, I put this headband sizing chart together as a guideline.
Please note that you should still follow the pattern instructions to chain a bit shorter than the wearer's head circumference. When you do that, you should end up with a headband in the recommended headband size.
Seeing your finished projects brings me so much joy! I'd love for you to follow me on Instagram and use the hashtag #MakeAndDoCrew to show me your DIY successes (and even less-than-successes!)
You may make items to sell with this pattern. In exchange, please link back to MakeAndDoCrew.com and refrain from using my photos as your sales photos. Now, let's make something awesome!
If you're into adorable kids' winter-wear, you might also like these free patterns:
Santa's Helper Elf Hat
Frosty the Snowman Hat
Just Like Mommy Knit Cowl
Related: 35+ Easy Chunky Crochet Hat Patterns
Wanna save this pattern?
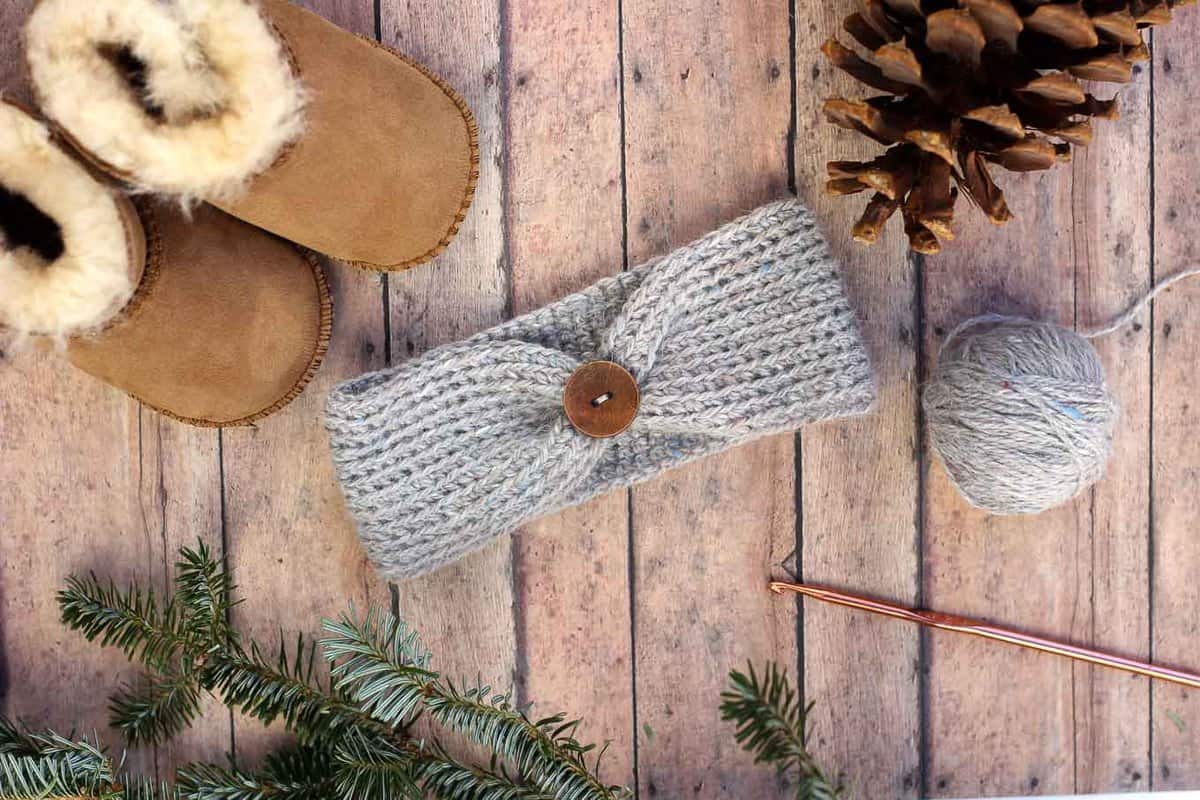
Aspen Socialite Crochet Headband Materials
So you can spend more time crocheting and less time shopping, this post contains affiliate links at no extra cost to you. Thank you for supporting this little site of mine!
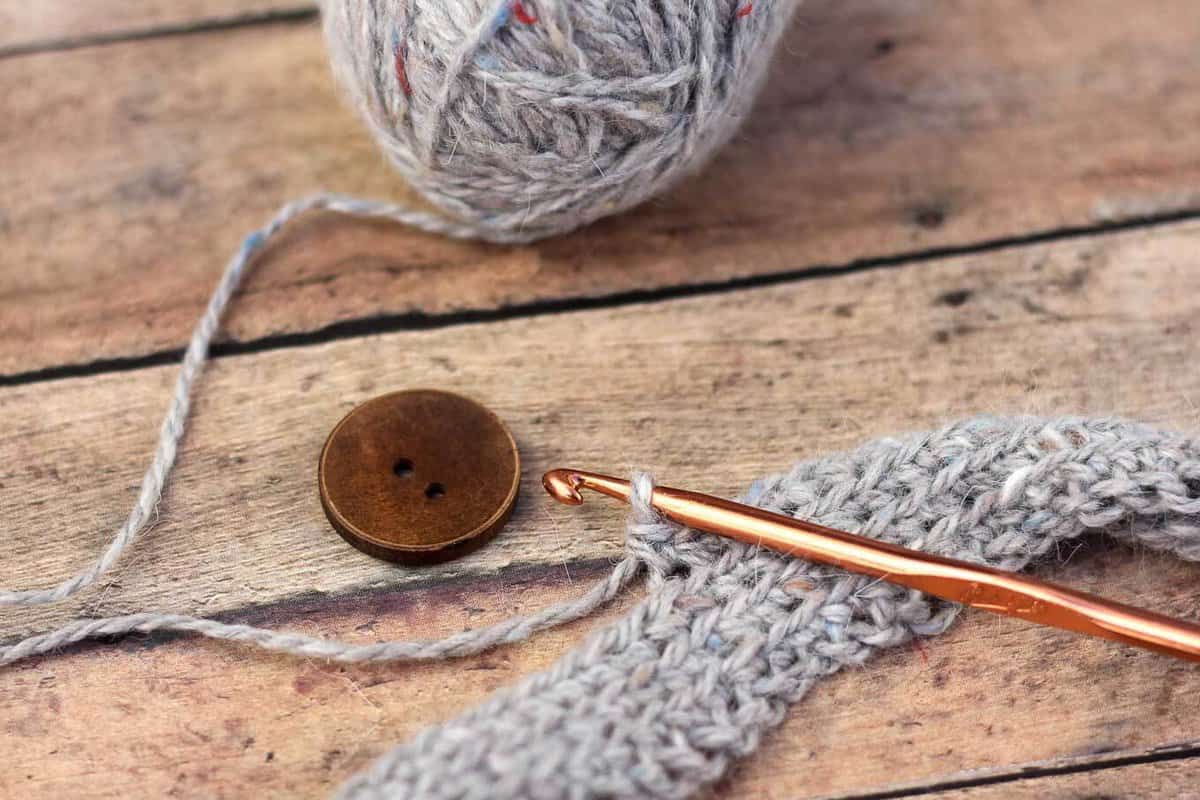
• DK or worsted weight yarn (I used some 8-year-old stash yarn that I bought in Half Moon Bay on a whimsical pre-children weekend getaway. I'd guess it's about a DK weight, but the label was lost about 9 moves ago.) Lion Brand Babysoft would work well.
• crochet hook to achieve gauge on yarn label (I used an F/5)
• wooden button
• needle and thread
Abbreviations
ch - chain
sc - single crochet
blsc - back loop single crochet
Notes: Lay your chain out flat, but not stretched to measure it. Once you start crocheting, the chain will tighten up a bit, resulting in a slightly smaller headband circumference.
Newborn:
Maintaining a 8" tail at your slipknot, ch enough stitches so that your chain measures .25" shorter than the head circumference, join, ch 1
Round 1: sc around, join with a sl st into the first sc of round, ch 1
Round 2-10: blsc around, join with a sl st into the first sc of round, ch 1
Fasten off, keeping a 8" tail.
3-6 Months:
Maintaining a 8" tail at your slipknot, ch enough stitches so that your chain measures .5" shorter than the head circumference, join, ch 1
Round 1: sc around, join with a sl st into the first sc of round, ch 1
Round 2-11: blsc around, join with a sl st into the first sc of round, ch 1
Fasten off, keeping a 8" tail.
✨Unlock this free subscriber-exclusive pattern ✨
Follow these steps to view the full free pattern below
Related: 27+ Best Crochet Hat Patterns for Winter
I believe the best patterns are free patterns! Check out more of my free crochet and knitting patterns and subscribe below if you'd like to receive my once weekly update of subscriber exclusive patterns and templates.


Lynn says
Thank you for sharing the pattern! So cute! Do you happen to have the width of the headband for the baby sizes? I'm afraid I would make it too wide. Thank you!
Jess @ Make and Do Crew says
I'm so sorry, I don't have access to the headband anymore because I gave it away. 🙁
Jess
Nicole Vriends says
Hi!
First thanks for the great pattern. It's really nice to make.
I'm putting together a blog about different headbands and I would like to use one photo and the link of this pattern, if that is oke.
Love to hear from you.
Greets Nicole
Jess @ Make and Do Crew says
Yes please! Thanks Nicole. I'm be honored. 🙂
Jess @ Make and Do Crew says
Thank you so much. This photo has sure made it's way around the internet. Thank you for letting me know!
Jess
Jess @ Make and Do Crew says
Thanks so much for letting me know, Wendy. For some reason, the photos of this pattern seem to be stolen far more than anything else I've posted. I'll track that seller down. 🙂
Jess
Jerri says
I appreciate the free patterns that are shared cause I love to crochet and I can't afford to purchase them to often so I want to THANK you so much for sharing. Right now I am crocheting baby things. Again! THANKS for sharing.
Jess @ Make and Do Crew says
I'm so glad you're enjoying them, Jerri. It's my pleasure.
Susan Z. says
At the end of each round, you slst into the first st of the previous round and then ch1. Does that ch1 count as the first sc in the next round (in which case I'd start my sc in the second st of the previous round), or do I sc in the very first st of the previous round (the one I did my slst in)?
Jess @ Make and Do Crew says
Great question! You sc into the same stitch you sl st into. Then when you get to the end of the round, sc in the last sc, but just skip over the sl st from the previous round. Then sl st into the first sc of the round you're working on.
Hope that makes sense?
Jess
Jess @ Make and Do Crew says
Thanks so much for letting me know. This photo seems to get stolen a lot. I appreciate you looking out for me! I will try to track these guys down.
Jess
Teri Colglazier says
Great project! I've made two so far and I'm so pleased with them. The sizig chart is a great help!!
Also, next time, before you post pics of your project, make sure your name or your site name or some other identifying information is on the photo. People are less apt to steal it.
Jess @ Make and Do Crew says
I'm so happy to hear you're enjoying the pattern.
It's always a tough decision for me to watermark my photos or not. I really like the clean look of un-watermarked photos and that's why I don't do it. It does irk me though when people steal them. I wish there was a silver bullet solution, but I'm afraid there may not be. 🙂
K says
Cute pattern. Did you know there are a bunch of shops on Amazon and Alibaba using your baby in the headband photo to sell their headbands. A facebook page called put up a link to one of them because they were so inexpensive. I hope they are paying you something for the use, but doubted it.
Jess @ Make and Do Crew says
Thanks so much for letting me know. I have, unfortunately, seen some of this going on. I alway try to squash it when it comes up, but I can hardly keep up with how many people have stolen these headband photos. It's a really crummy side of the internet. Thank you so much for looking out for me. If you ever see the photos being used and want to send me a screengrab, you can do so at jess (at) makeanddocrew (dot) com.