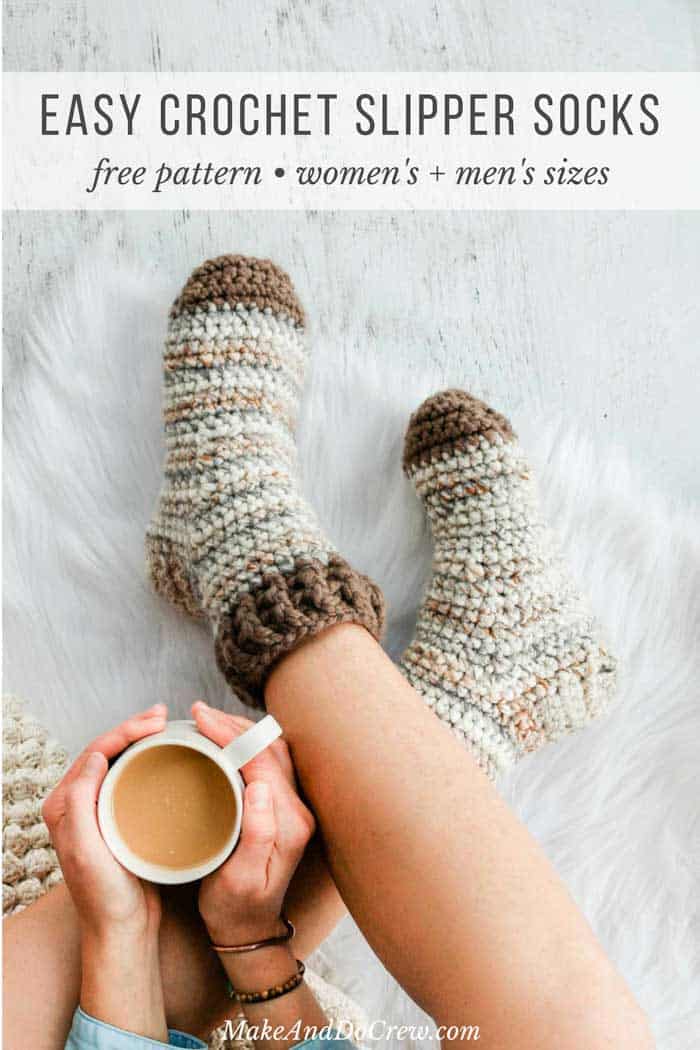
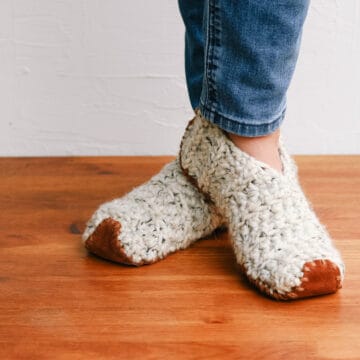
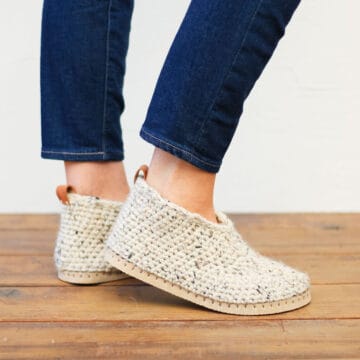
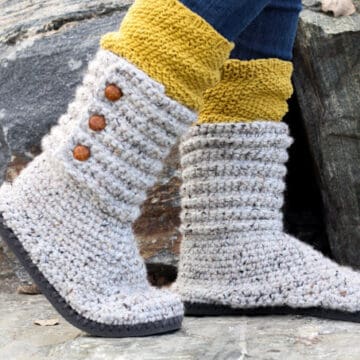
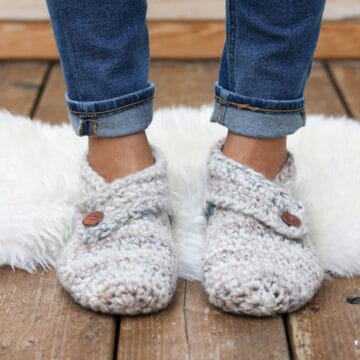
These simple crochet slipper socks for adults can be personalized to fit men and women of all sizes. The chunky yarn gives them plenty of warmth, squish, and durability and allows you to make a pair in 3-4 hours!
Get the free pattern with leather sole template below or purchase the ad-free, printable PDF.
This free slipper socks crochet pattern is part of a collaboration with Lion Brand Yarns. This post contains affiliate links.
Jump to:
- Crochet Slipper Socks For Men and Women
- Easy To Customize for Any Size Feet
- How to Make Crochet Slippers Non-Slip
- Video: Adding Soles to Slipper Socks
- Chunky Yarn Makes for Cozy Slippers
- Snuggly Crochet Slipper Socks Free Pattern
- That was so fun! Now what?
- Invitation to our Facebook group
- Find Your Next Crochet Slippers Pattern
- More Fast + Easy Crochet Gift Ideas
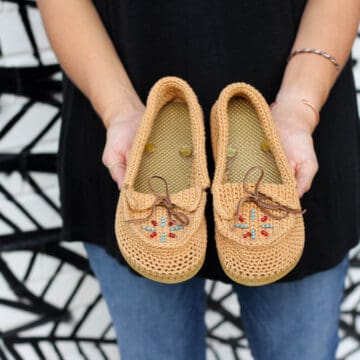
Crochet Slipper Socks For Men and Women
Got a case of cold feet?! We've got the answer! These cozy slipper socks make a useful handmade gift for the friends and family you want to show extra love to this holiday season.
(Just don't tell them the project only took you a few episodes of your favorite show to finish!)
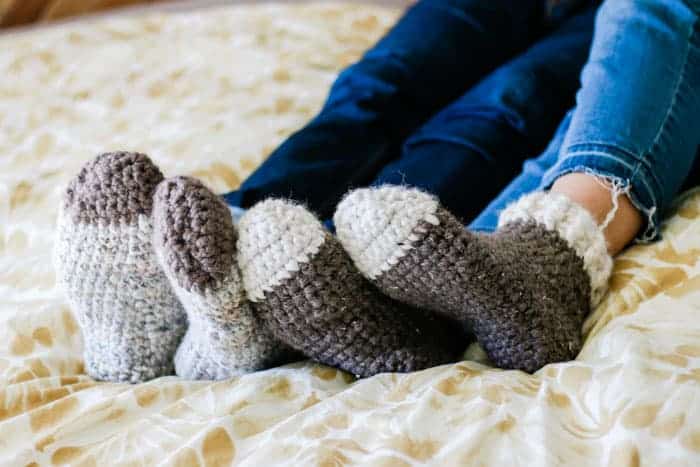
Easy To Customize for Any Size Feet
This slipper socks pattern is written a bit differently than you might expect.
Instead of offering a few slipper sizes for men and a few sizes for women, we decided to design this pattern with the width of your foot in mind. (The overall length of the slippers is easily adjusted in the foot section.)
So whether you're outfitting a wide-footed woman, a narrow-footed man or anyone in between, these slippers will fit snug as a bug in a...crochet slipper sock.
Related: How to Make Crochet Slippers in Any Size From a Rectangle
How to Make Crochet Slippers Non-Slip
While the idea of having soft, chunky yarn envelope your feet is pretty darn cozy, taking a nose dive on a slippery floor is not.
You might be wondering how to make these crochet fuzzy socks non-slip if you live in a home with a lot of tile or wood floors. (I love crocheting on flip-flop soles for this exact reason.)
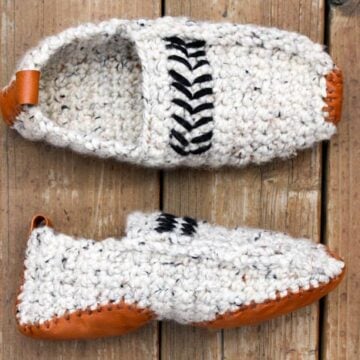
Adding Leather Soles
One of my favorite ways of making crochet slippers nonslip is to add leather soles to the bottom. I used to think this needed to be an expensive endeavor, but I've come to realize many higher-end fabric stores sell leather scraps that are perfect for this use.
Being the frugal gal I am though, last year I tried using a thrifted leather jacket to add leather soles to some pairs of crochet slippers and it worked beautifully! The slippers were far less slippery, lasted much longer and I was able to make several soles from one jacket.
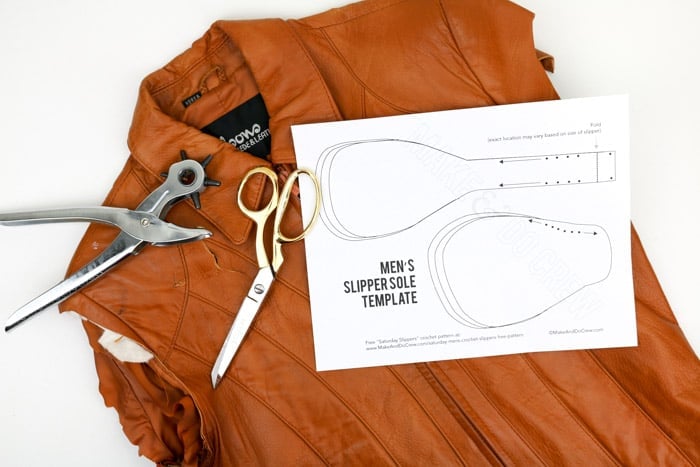
Download the Free Slipper Sole Template
Since I knew these crochet slipper socks could be the perfect candidates for some leather soles, I created a free template for you to print and trace onto your own leather if you choose to.
To download the template, subscribe in this box and you'll get immediate access to a sole template in child and adult sizes.
Video: Adding Soles to Slipper Socks
Take a look at the quick video below if you'd like to see in less than 60 seconds how the jacket-to-slipper-sole transformation takes place! Here is the free Saturday Slippers pattern featured in the video.

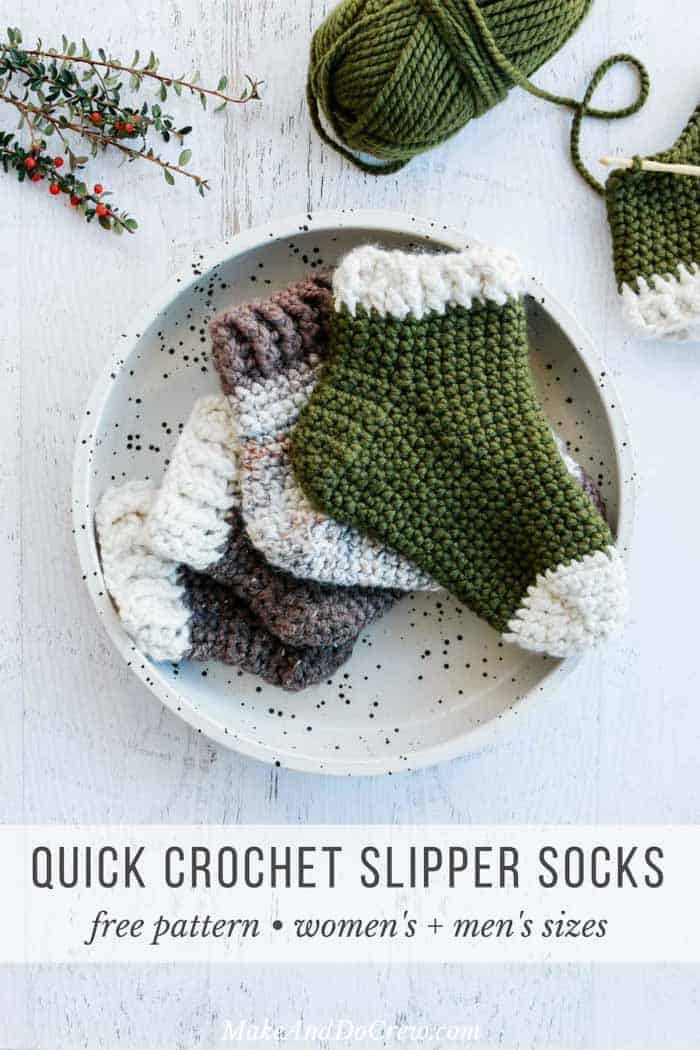
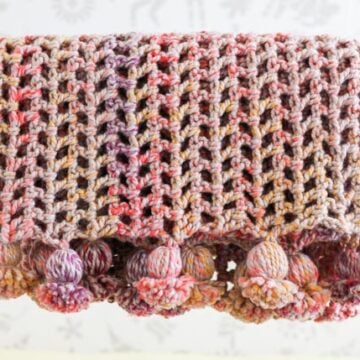
Chunky Yarn Makes for Cozy Slippers
Once again, Lion Brand's Wool-Ease Thick & Quick comes through to make a speedy, sophisticated-looking project. The thicker yarn and tighter gauge combine for a really comfy slipper sock that will keep your feet warm all winter long.
While the samples are made with a contrasting ankle and toe, you can work those in the same color as the slipper in order to make this a two-skein project. (If you plan to do that, there's a Bonus Bundle size of this yarn that is an even better deal for the yardage.)
When making more than one pair of slipper socks, I suggest choosing a versatile accent color, like Fisherman, and using it on a couple of pairs of slippers to make the most of the yarn you purchase.

Okay, let's learn how to crochet slipper socks! Find the full free pattern below.
Snuggly Crochet Slipper Socks Free Pattern
Supplies:
Here are the supplies you'll need to make your own pair of chunky crochet socks.
• Lion Brand Wool-Ease Thick & Quick (Weight: 6/super bulky - 106 yds, 6 oz)
- 3 skeins: 1 in Color A, 2 in Color B [approx. 240-300g total
- Colors pictured:
- Fossil (#640-536) + Barley (#640-124)
- Barley (#640-124) + Fisherman (#640-099)
- Cilantro (#640-178) + Fisherman (#640-099)
• Size K (6.5mm) crochet hook
• Size L (8.0mm) crochet hook
To add optional leather soles:
• Printed leather sole template in subscriber vault (enter your email in the box above)
• Leather for sole—try a thrifted leather jacket or purse!
• Leather punch or hammer and nail
• Fishing line to sew leather to slippers
Sizes:
This crochet sock pattern fits most sizes of women’s and men’s feet.
Choose the size based on the width sizing below, not shoe size. Slipper length will be adjusted in the Foot section for all sizes.
| Slipper Sock Size | Slipper Ankle Circumference (Inches) |
| Narrow | approx. 7¼” |
| Average | approx. 9½” |
| Wide | approx. 11¼” |
Gauge:
11 sc x 11.75 rows = 4”
Abbreviations and Glossary (US Terms):
bpdc – back post double crochet
ch – chain
dc – double crochet
fpdc - front post double crochet
PM – place marker
rep – repeat
RS – right side
sc – single crochet
sc2tog – single crochet two together (decrease)
sk – skip
sl st – slip stitch
sp – space
st(s) – stitch(es)
WS – wrong side
Helpful Resources + Tutorials:
If you're new to learning how to crochet, check out these beginner guides that will level-up your skills.
- Crochet Supplies - what to buy and what you can skip
- How to Read Crochet Patterns - tackle your next project with confidence
- How to Check Your Crochet Gauge - skipping this step is a common beginner mistake
- How to Weave in Your Ends - make this necessary evil less painful with these tips
- Blocking Your Crochet - why it matters and how to do it
Overall Pattern Notes:
• Stitches are intended to be worked quite tightly. If you’re finding your gauge to be loose, use a smaller hook.
• Right and left crocheted slippers are worked identically.
Wanna save this pattern?
Ankle:
Notes:
• Larger hook is used for initial chain to ensure it stays loose and stretchy. If you don’t have an 8.0mm hook, just make your foundation round intentionally loose.
• Ankle is worked in the round.
• Chain 3 at beginning of rounds always counts as a double crochet.
With Color A and larger hook:
Foundation Round: Ch 20 (26, 31), sl st to join, being careful not to twist chain. 20 (26, 31) stitches
With smaller hook:
Round 1: Ch 3, sk first ch, dc in each ch, sl st to join. 20 (26, 31) stitches
Rounds 2-3: Ch 3, fpdc around next dc, *bpdc around next dc, fpdc around next dc; rep from * to end of round, sl st to join, use Color B for sl st at end of Round 3. 20 (26, 31) stitches
Fasten off Color A. Crochet over yarn tails while working Round 4 so as to avoid weaving in.
✨Unlock this free subscriber-exclusive pattern ✨
Follow these steps to view the full free pattern below
Round 4: Ch 1, sc in each dc, do not sc in sl st, sl st to join. 20 (26, 31) stitches
Rounds 5-7: Repeat Round 4. 20 (26, 31) stitches
For extra tall slippers, repeat Round 5 (1-2) more times.
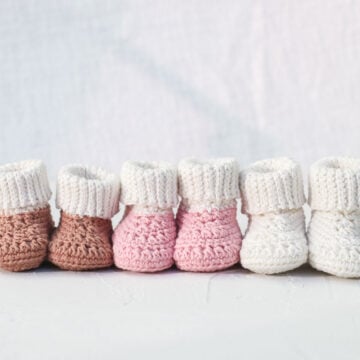
Related: Make a matching pair for your kiddo with our baby booties pattern!
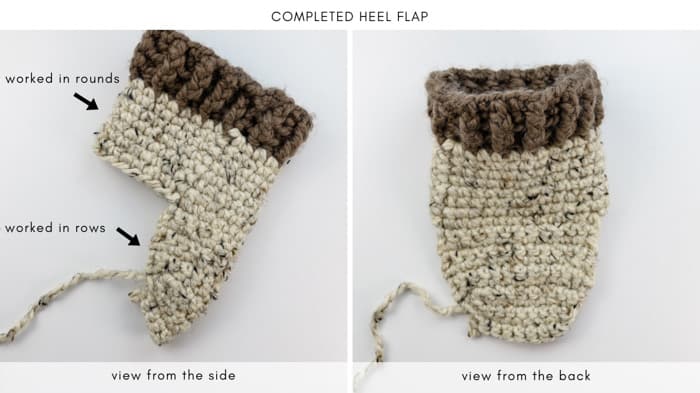
Heel:
Notes:
• Heel is worked back and forth in rows.
• See photo below for what heel flap will look like once finished.
Row 1 (RS): Ch 1, sc in next 8 (10, 14) sc; turn.
Rows 2-7: Repeat Row 1, ending with a RS row.
Turning the Heel:
Notes:
• Do not ch 1 at beginning of each row.
Row 1 (WS) : Sc in first 6 (8, 12) sc, leaving last 2 sc unworked; turn. 6 (8, 12) stitches
Row 2 (RS): Sc in first 2 (4, 8) sc, sc2tog, sc in next sc, leaving 1 sc unworked; turn. 4 (6, 10) stitches
Row 3 (WS): Sc in first 3 (5, 9) sc, sc2tog over last st from current row and first unworked st from last row of Heel section three rows below (1 sc remains unworked); turn. 4 (6, 10) stitches
Row 4 (RS): Sc in first 3 (5, 9) sc, sc2tog over last st from current row and 1 unworked st from three rows below; turn. 4 (6, 10) stitches
Row 5 (WS): Sc in first 3 (5, 9) sc, sc2tog over last st from current row and remaining unworked st from last row of Heel section 5 rows below; turn. 4 (6, 10) stitches
Do not fasten off.
The photo below shows what the completed heel flap should look like from the side and from the back.
Foot:
Notes:
• In this free crochet slipper socks pattern, the foot section is worked in the round with RS facing at all times.
Round 1 (RS): Ch 1, sc in 4 (6, 10) sc across heel, evenly place 8 sc along side of heel flap to last sp, sc2tog over last sp in heel flap and first sc of slipper top, sc in next 10 (14, 15) sc across top of foot, sc2tog over last sc of slipper top and first sp in heel flap, evenly place 8 sc along side of heel flap, sl st to join. 32 (38, 43) stitches
Round 2: Ch 1, sc in 4 (6, 10) sc across heel, sc2tog, sc in next 24 (28, 29) sc, sc2tog, sl st to join. 30 (36, 41) stitches
Round 3: Ch 1, sc in 4 (6, 10) sc across heel, sc in next 7 sc along side of heel flap, sc2tog, sc in next 8 (12, 13) sc across top of foot, sc2tog, sc in last 7 sc along side of heel flap, sl st to join. 28 (34, 39) stitches
Round 4: Ch 1, sc in 4 (6, 10) sc across heel, sc2tog, sc in next 20 (24, 25) sc, sc2tog, sl st to join. 26 (32, 37) stitches
Round 5: Ch 1, sc in each sc, sl st to join. 26 (32, 37) stitches
Round 6: Ch 1, sc in 4 (6, 10) sc across heel, sc in next 5 sc along side of heel flap, sc2tog, sc in next 8 (12, 13) sc across top of foot, sc2tog, sc in last 5 sc along side of heel flap, sl st to join. 24 (30, 35) stitches
Round 7: Ch 1, sc in each sc, sl st to join. 24 (30, 35) stitches
Round 8: Ch 1, sc in 4 (6, 10) sc across heel, sc in next 4 sc along side of heel flap, sc2tog, sc in next 8 (12, 13) sc across top of foot, sc2tog, sc in last 4 sc along side of heel flap, sl st to join. 22 (28, 33) stitches
Round 9: Ch 1, sc in each sc, sl st to join. 22 (28, 33) stitches
Round 10: Ch 1, sc in 4 (6, 10) sc across heel, sc in next 3 sc along side of heel flap, sc2tog, sc in next 8 (12, 13) sc across top of foot, sc2tog, sc in last 4 sc along side of heel flap, sl st to join. 20 (26, 31) stitches
Round 11: Ch 1, sc in 4 (6, 10) sc across heel, sc2tog, sc in next 12 (16, 17) sc, sc2tog, sl st to join. 18 (24, 29) stitches
Round 12: Ch 1, sc in each sc, sl st to join. 18 (24, 29) stitches
Repeat Round 12 approximately 7 (11, 16) more times or until slipper reaches first knuckle of big toe (bunion). Fasten off.
Toe:
Notes:
• Do not ch 1 at beginning of rows.
Try on slipper. PM between sts at both left and right side of slipper to differentiate top and bottom, making sure there are 9 (12, 15) sts between the markers on the top and 9 (12, 14) sts between the markers on the bottom.
Toe Top:
With RS facing out, join Color A in first st of toe top, leaving a 12” tail where joined.
Row 1: Sc in same st as join, sc in each sc; turn. 9 (12, 15) stitches
Row 2: Sc2tog, sc in next 5 (8, 11) sc, sc2tog; turn. 7 (10, 13) stitches
Row 3: Sc2tog, sc in next 3 (6, 9) sc, sc2tog; turn. 5 (8, 11) stitches
Fasten off here for Narrow size.
Row 4: Sc2tog, sc in next - (4, 7) sc, sc2tog; turn. - (6, 9) stitches
Row 5: Sc2tog, sc in next - (2, 5) sc, sc2tog; turn. - (4, 7) stitches
Fasten off here for Average size.
Row 6: Sc2tog, sc in next - (-, 3) sc, sc2tog; turn. - (-, 5) stitches
Fasten off here for Wide size
Toe Bottom:
With RS facing out, join Color A in first st of toe bottom, leaving a 12” tail where joined.
Repeat Rows 1-3 (5, 6) of Toe Top, working 1 less sc on each row for Wide size.
Finishing:
Turn crochet sock WS out. Thread one 12” tail from toe on tapestry needle and sew side of toe seam. Fasten off.
Repeat on second toe, but instead of fastening off, use same tail to whip stitch around tip of toe and cinch closed. Fasten off.
Turn slipper RS out.
Adding Leather Soles (optional):
Print the toe and heel pad templates and use them to cut leather pieces for both slippers. (Find leather at craft stores or look for thicker leather jackets and purses at thrift stores.)
Use a leather punch or a nail and hammer to make holes around each leather piece about ⅜” apart. Do not punch holes in the top section of leather that will be at the top of the slipper ankle until you know where the fold will fall.
Using a tapestry needle and a doubled over piece of yarn that matches your leather, sew soles to slipper bottoms using a whip stitch.
Pro Tip: I’ve noticed that even the strongest yarn can wear out fairly quickly when used to secure slipper soles, so I recommend using a doubled-over piece of monofilament (fishing line) instead or in addition to give your slipper soles a longer life.
That was so fun! Now what?
Invitation to our Facebook group
Come discuss crocheting slipper socks and lots of other projects and techniques in our Make & Do Crew Facebook group. Here thousands of helpful crocheters answer each others questions and share their stitches. Come join us here.
Find Your Next Crochet Slippers Pattern
Crochet slipper patterns can be the perfect blend of function, style and speed. Most of these slippers and slipper socks can be crocheted in a weekend or less and rank high in the cozy category. Whether you want to learn how to crochet on flip flop soles or add leather to the bottom of crochet slippers, we've got you covered!
See more free crochet slippers & socks patterns →
More Fast + Easy Crochet Gift Ideas
Need to whip up a quick gift? We've got you covered with some fast crochet gifts for everyone on your list.
See more fast crochet patterns →
Lori Proulx says
Your slippers look so cute and warm. How hard or easy would it be to change the pattern to a child size?
Jess @ Make and Do Crew says
Hey Lori,
I don't think it would be that hard. I'd use the gauge to decide how to big to make the ankle and then use approx half of the ankle stitches to make the heel flap section. Hope that helps!
Jess
Carol Yglesias says
I want to start out by saying thank you for this lovely pattern. ☺
I'm afraid I'm a little confused though. It says that color (A) would be 2 skeins of yarn, and color (B), one skein. If color (A) is used for the toe and the ankle cuff only, Why would it be the larger amount of yarn? Am I reading it wrong? ? lol
Jess @ Make and Do Crew says
Ah! No, you're totally right! Thanks for catching that. I've corrected it in the blog post above and I'll do the same in the PDF. Thanks again for your eagle eyes!
Jess
Yolanda says
Gacias por compartir sus conocimientos saludos desde Colombia
Joella Molson says
I want to thank you for another awesome pattern and this one surely does not disappoint! And I want to commend you for your pattern writing skills. So many people are throwing patterns online without posting the yarn gauge or finished item measurements. This can be so frustrating if you are hoping to make the pattern with another brand of yarn and cannot test the gauge. And with starting measurements it is infinitely easier to make adjustments if you require them. If I have any criticisms at all, it is that he print in this comment box is so small and so light that my old eyes have a serious problem reading what I have typed. LOL Thank you again, it is a much appreciated pattern!
Jess @ Make and Do Crew says
Ha, that's a helpful point about the comment box! Thank you for that feedback. 🙂
I'm so happy to hear that this pattern feels sufficient for you to start a the project. I try really hard to make that the case!
Jess