This easy kids craft is an awesome way to prepare older siblings for their new role as the “helper” in the family before a new baby arrives.
 Last year about this time, some wonderfully generous friends of ours threw Momo a “Big Sister Party” to inaugurate her into her soon-to-be big sister status. I hadn’t heard of these type of parties before, but the idea is that it’s essentially a baby shower for the new big sister or brother. The focus isn’t necessarily on gifts, but rather about commemorating and providing support for this epic transition in the older child’s life.
 So when my dear friend, McCall (who wrote the tutorial for these incredible felted sweater mittens!), found out she was pregnant with baby #2, I was hoping we’d get the chance to throw a big sister shower for her oldest daughter.
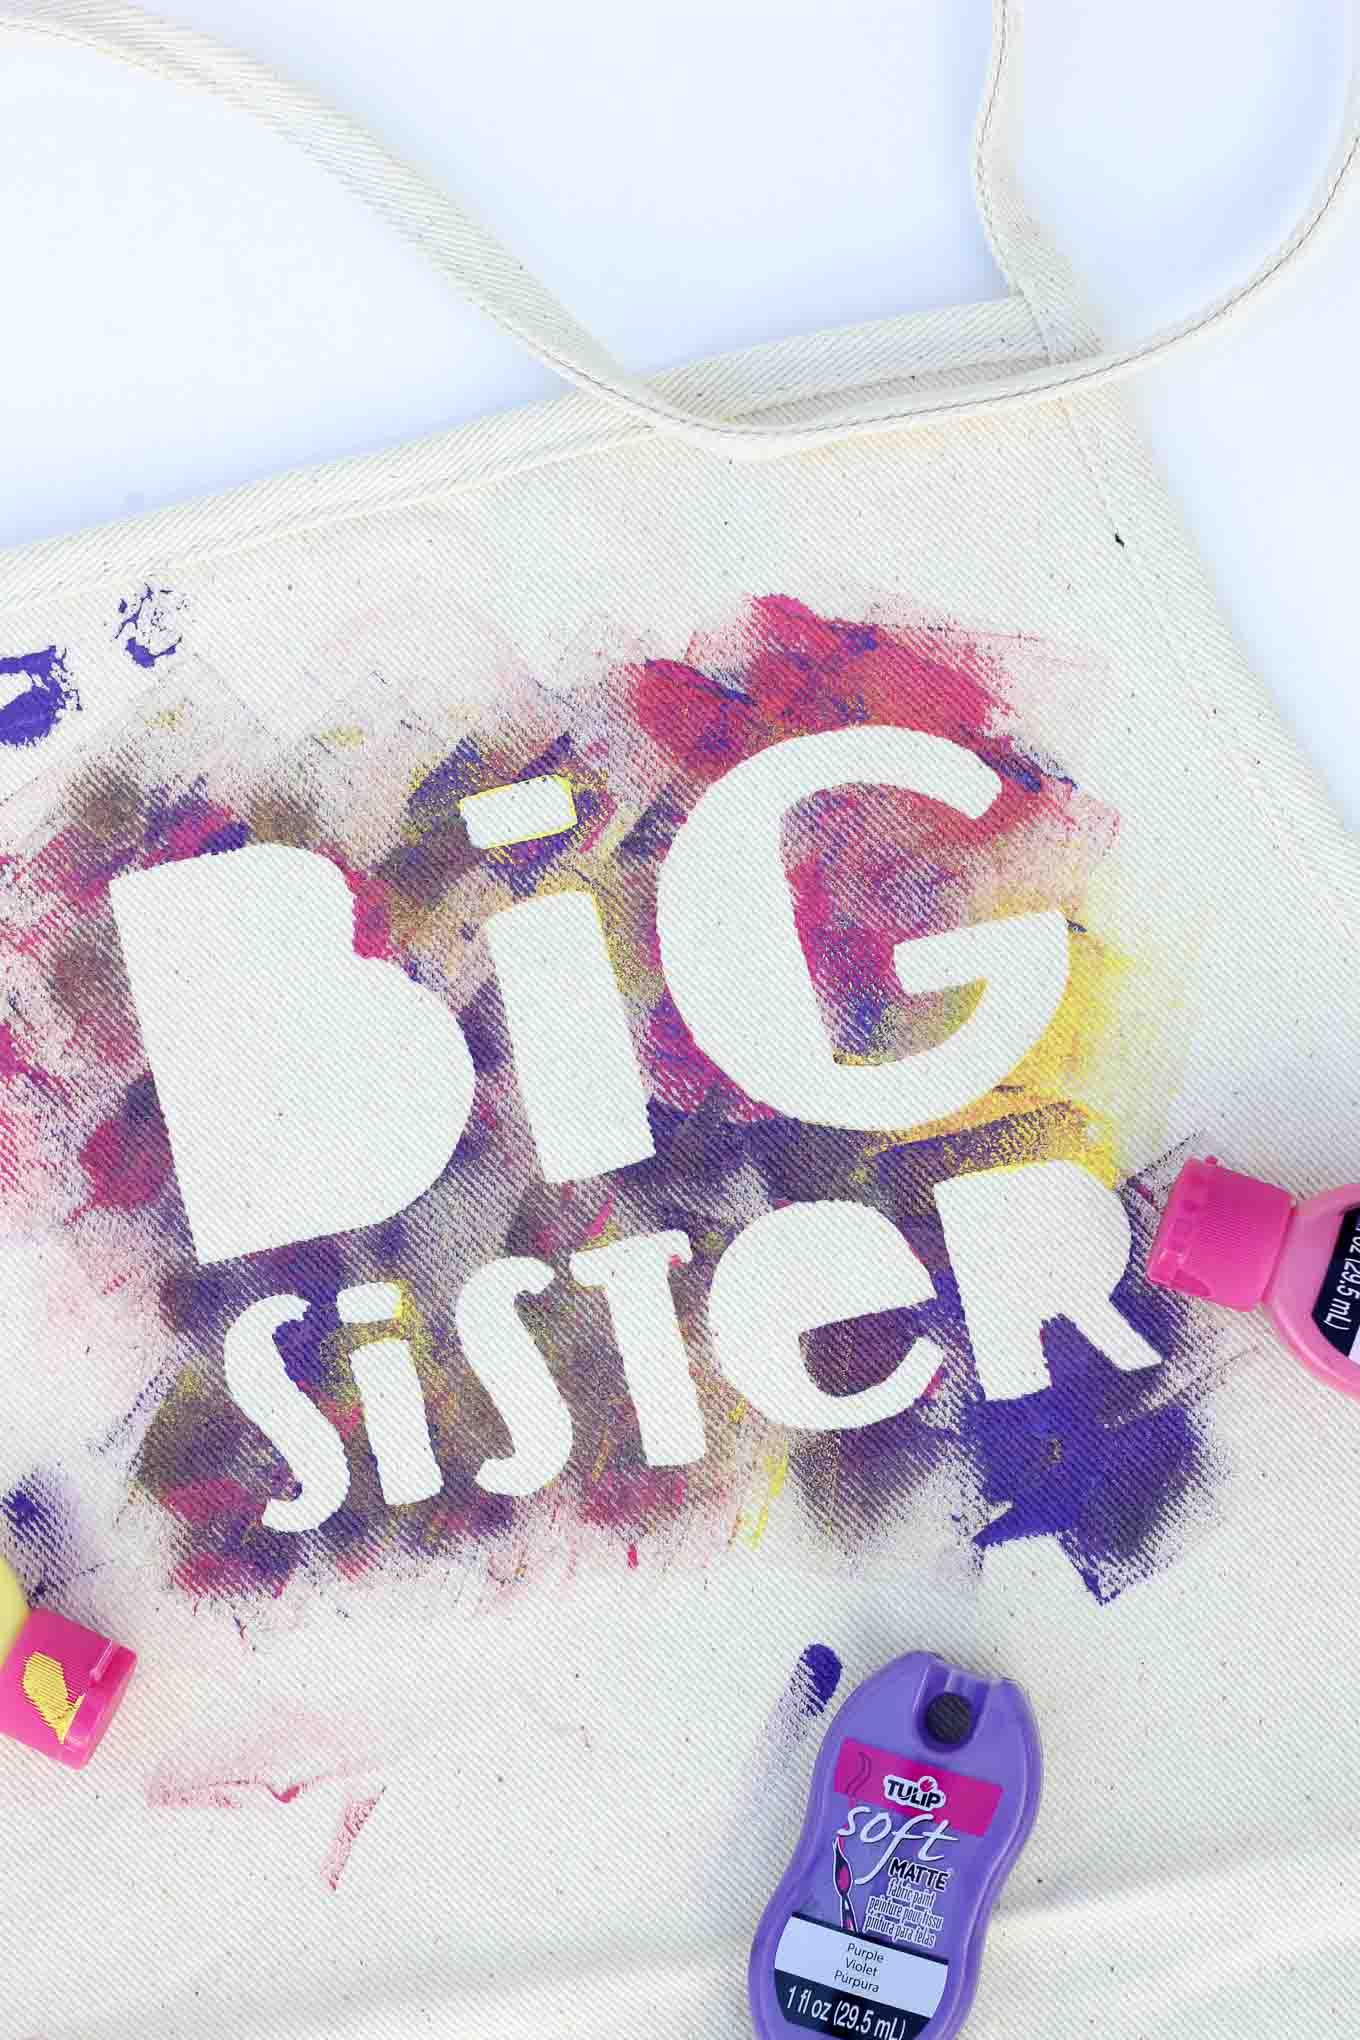
This week I’ll be sharing three ways we made the big sister party special, starting with these easy freezer paper stenciled aprons.
 These DIY aprons are a perfect art activity for kids ages 2+. I love that the kids can DIY their own party favor, which always makes it so much more meaningful. The hardest part of the project for the grown up--and it’s not even that hard--is cutting out the letters for the stencil.
You can design your apron stencil using any thick font, but I’m also tucking our template in the Make & Do Crew Subscriber’s Vault for your crafting enjoyment. Simply subscribe in the box at the bottom of this post and you’ll get immediate access to my printable template. (And yes, it includes the templates for “Big Sister” AND “Big Brother.” We’re equal opportunity party throwers around here.)
 I hadn’t stenciled with freezer paper until about a year ago and let me just say, don’t wait as long as I did to try it! It’s so great! And easy! And inexpensive! I spent my college years making legit silk screens with freaking light sensitive emulsion, only to figure out years later I could have cut up some freezer paper stencils for virtually the same effect!
 Big Brother / Big Sister Apron Supplies
 Big Brother / Big Sister Apron Supplies
So you can spend more time celebrating and less time shopping, this post contains affiliate links at no extra cost to you.
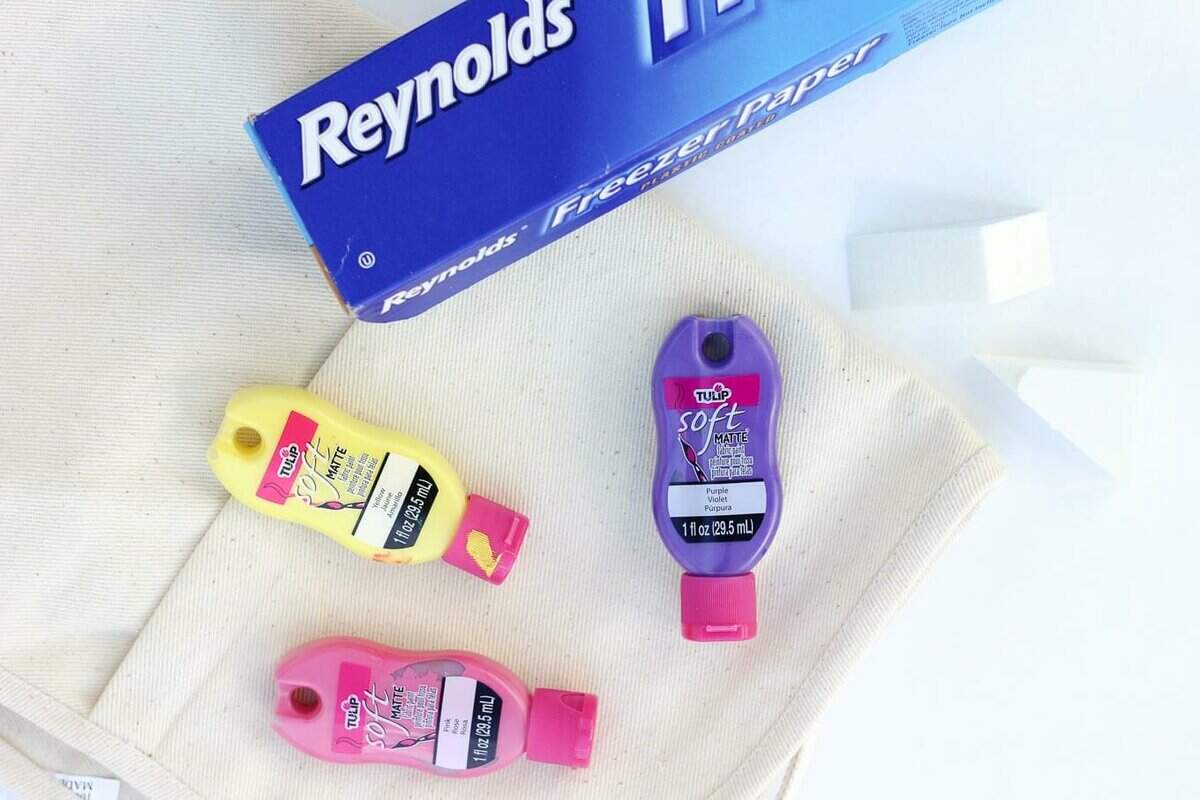
• plain canvas aprons
• fabric paint
• small makeup sponges
• iron
• scissors
• basic printer
• freezer paper
• pencil
Wanna save this pattern?
How to Make a DIY Kids Apron
(Steps 1-4 are obviously for grown-ups only. But you already knew that.)
1. Download and print my template or create your own. (Subscribe below to gain instant access.)
2. Cut a piece of freezer paper slightly bigger than the template. With the shiny side side of the freezer paper facing down, trace around the letters of the template onto the matte side of the freezer paper.
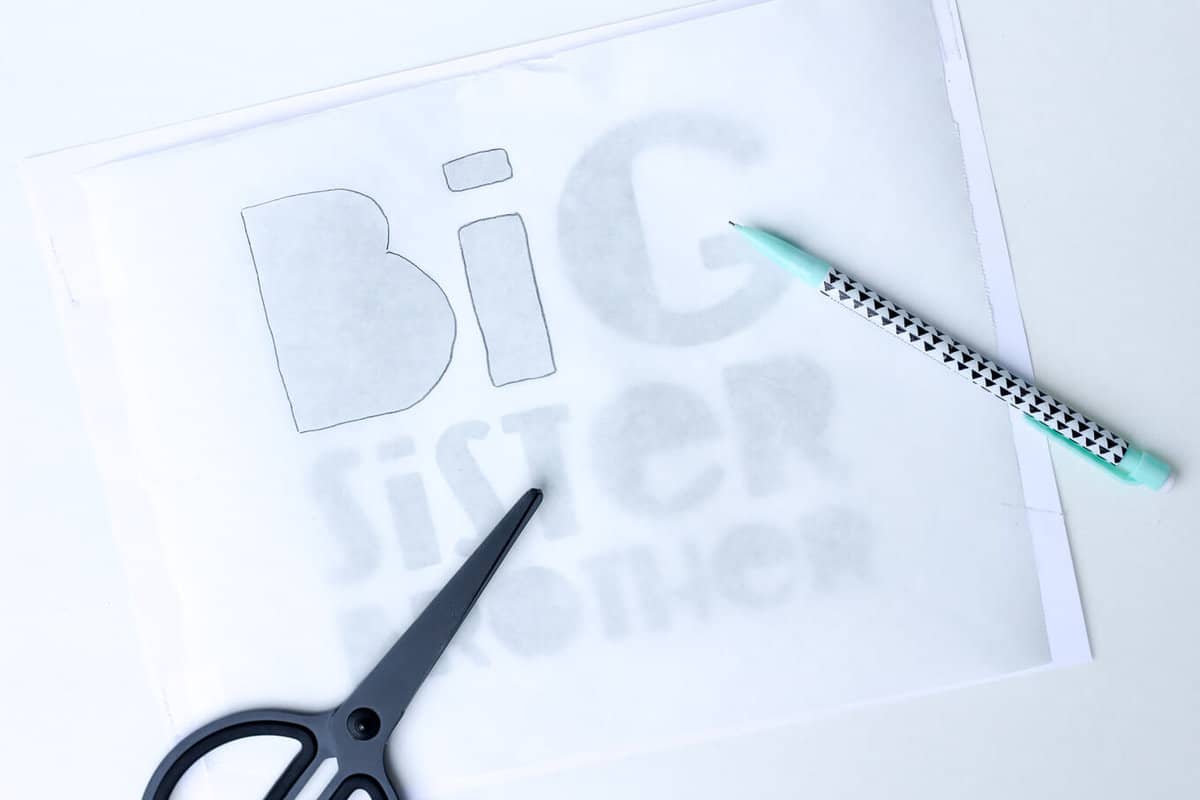 3. Cut out the letters.
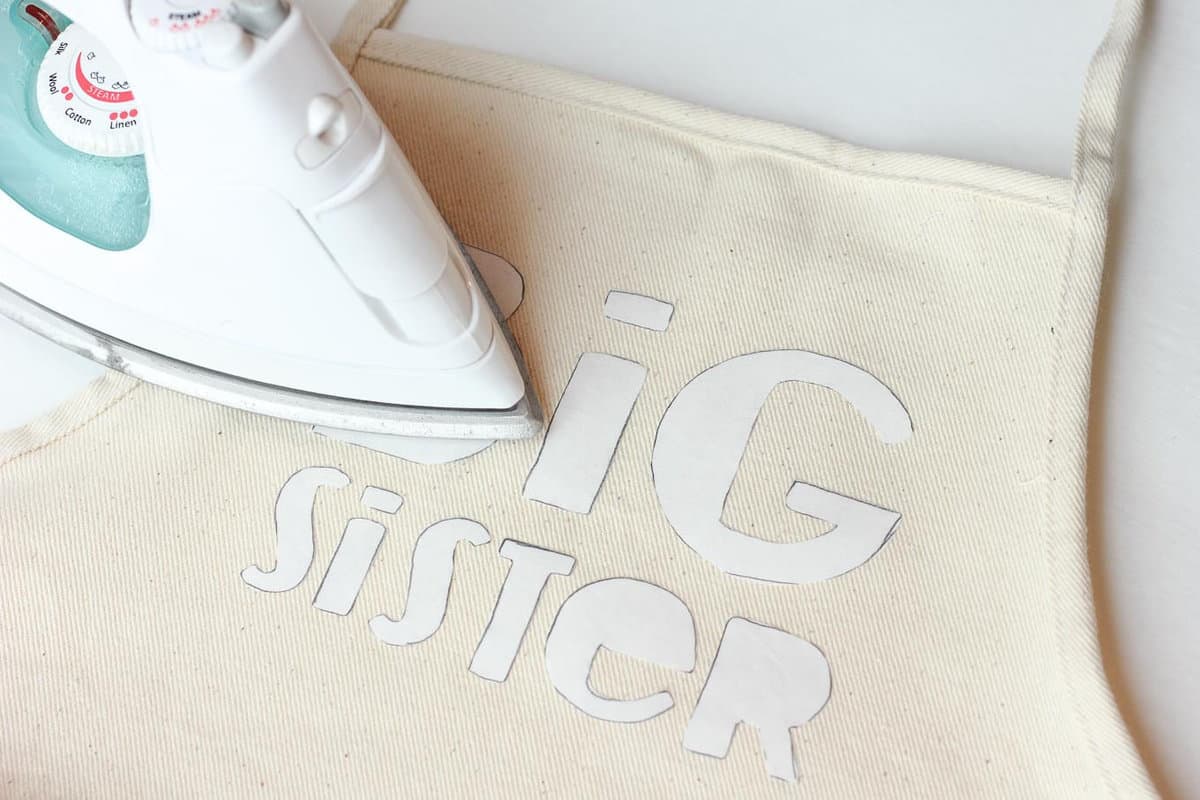
4. Using medium-high heat, iron the letters to the apron. Hold the iron to the freezer paper long enough to make sure it’s nice and stuck on.
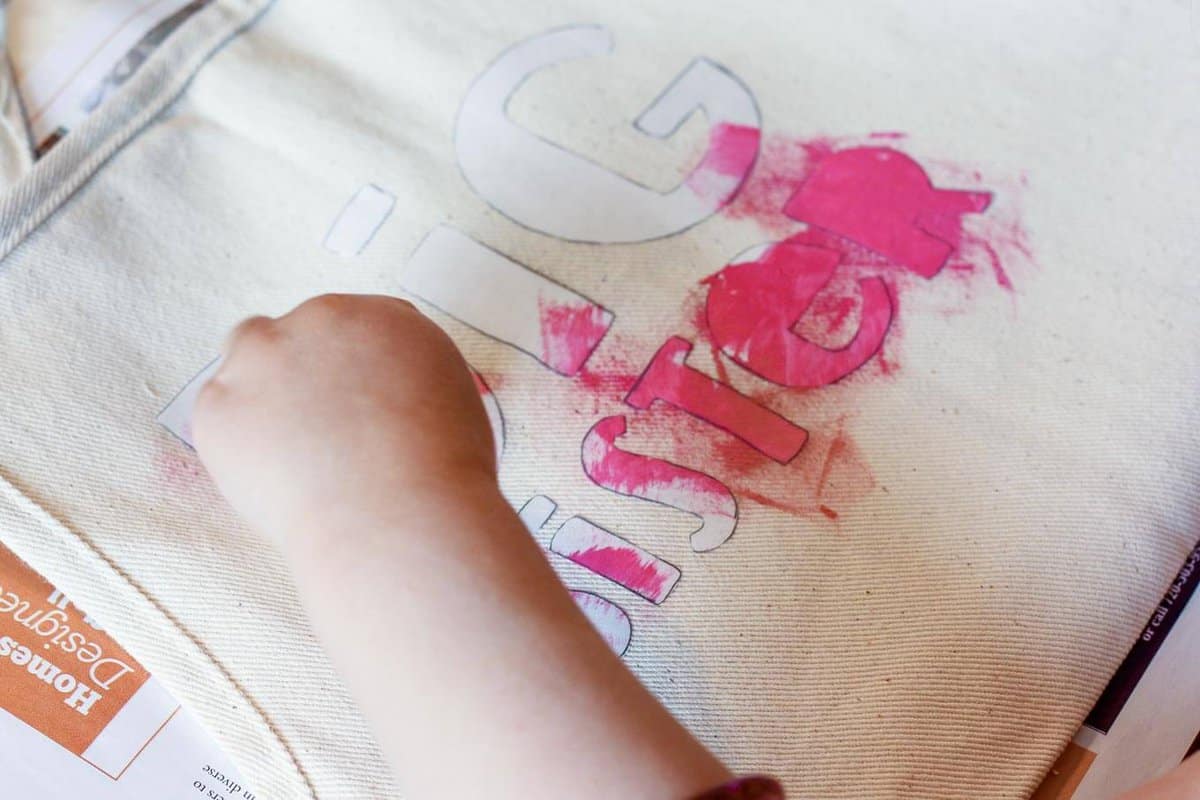
5. Since I was doing this project with 2-3-year-olds, I found it best to give them each one color of paint at a time. Any more and you can end up with apron that looks like it’s already lived in the kitchen for 25 years.
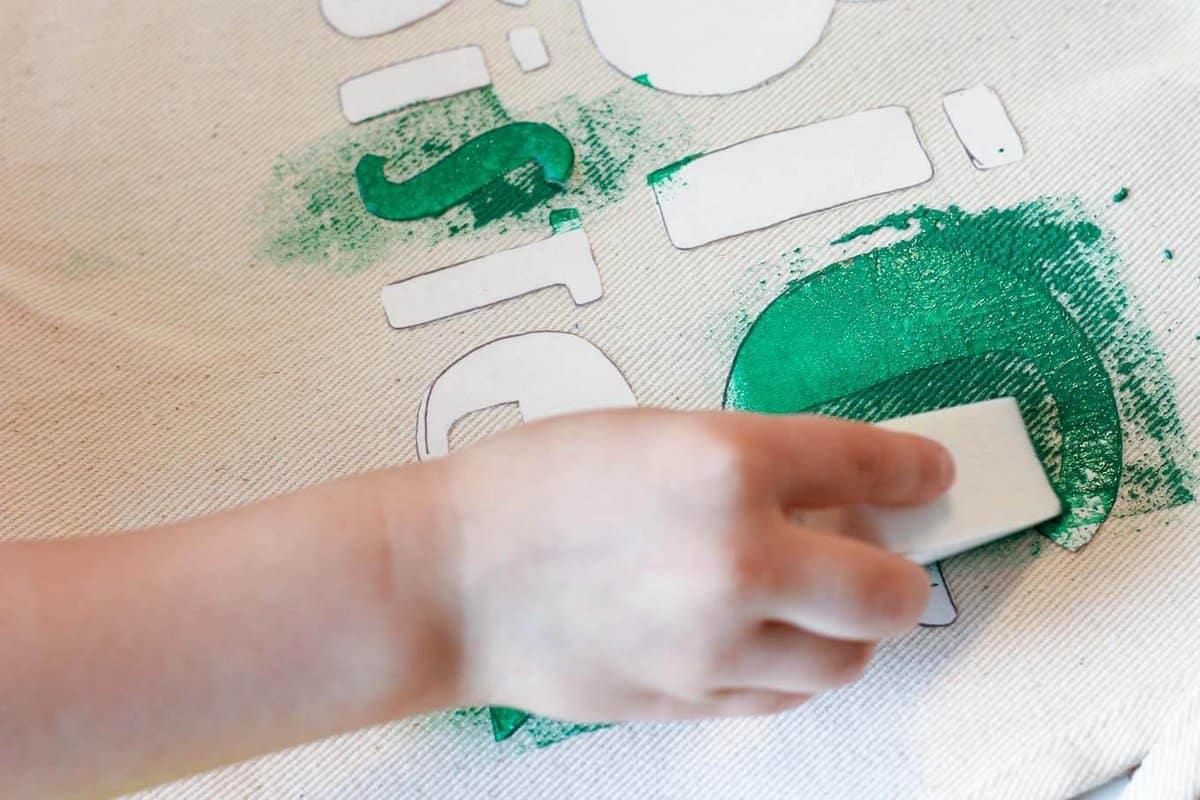
6. Have the kids dab the paint around the stencil until each letter is completely surrounded. (This was honestly one of the hardest things to explain to these littles. I hate to think they’ve already been conditioned to “color inside the lines” sorta say, but man, did they have a hard time painting anywhere but ON the freezer paper. :)) Try to avoid rubbing the sponge on the stencil too much as it can cause the freezer paper to peel away--dab, blot or pat instead.
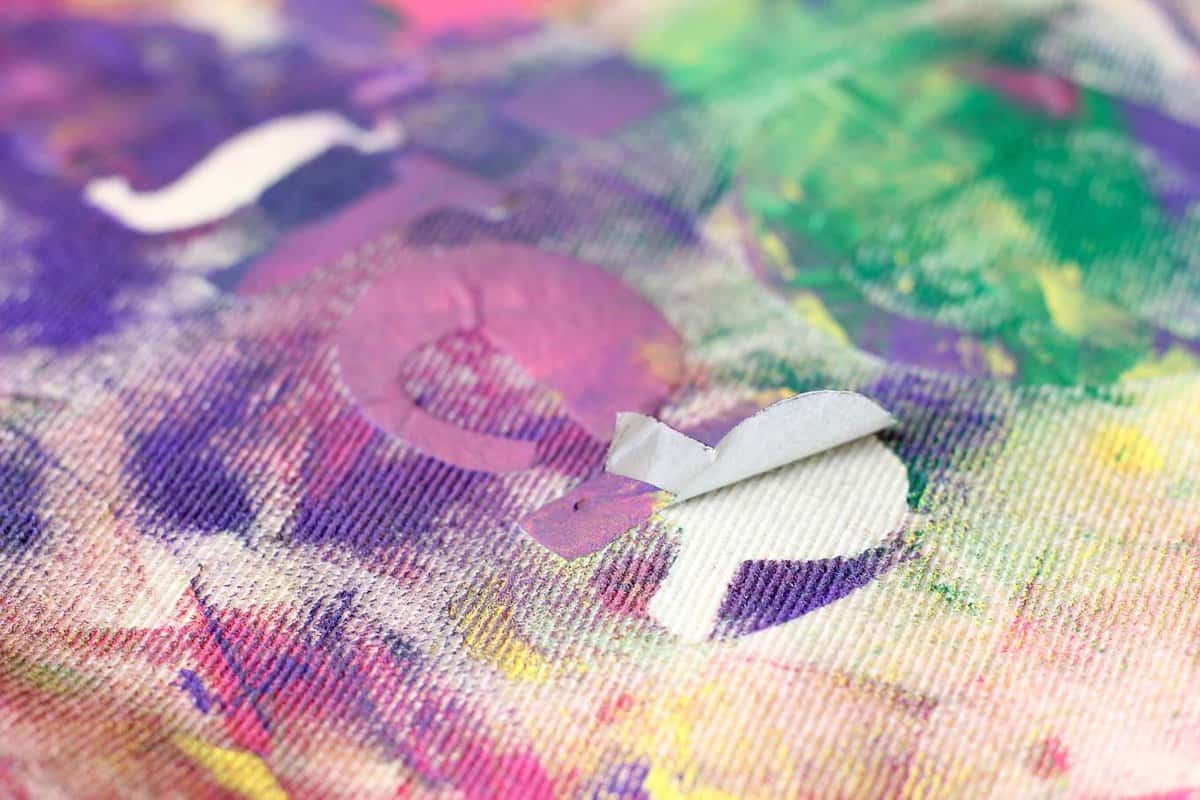
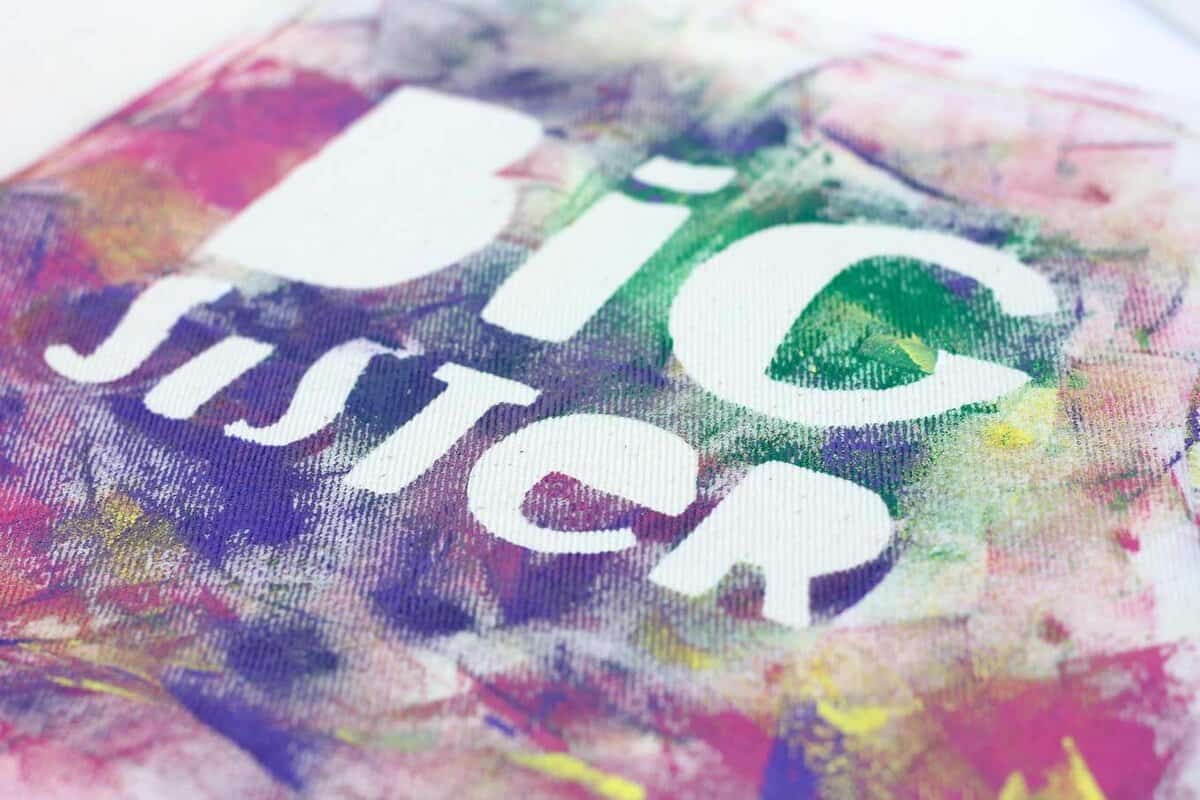
 7. When the paint is totally dry, have the kids peel off the freezer paper to reveal their “big sister” or “big brother” title underneath.
 I think it’d be fun to give the older sibling a few diapers and a small pack of wipes to tuck in the pockets of their new helper apron--anything that helps them feel excited about their new role in the family!
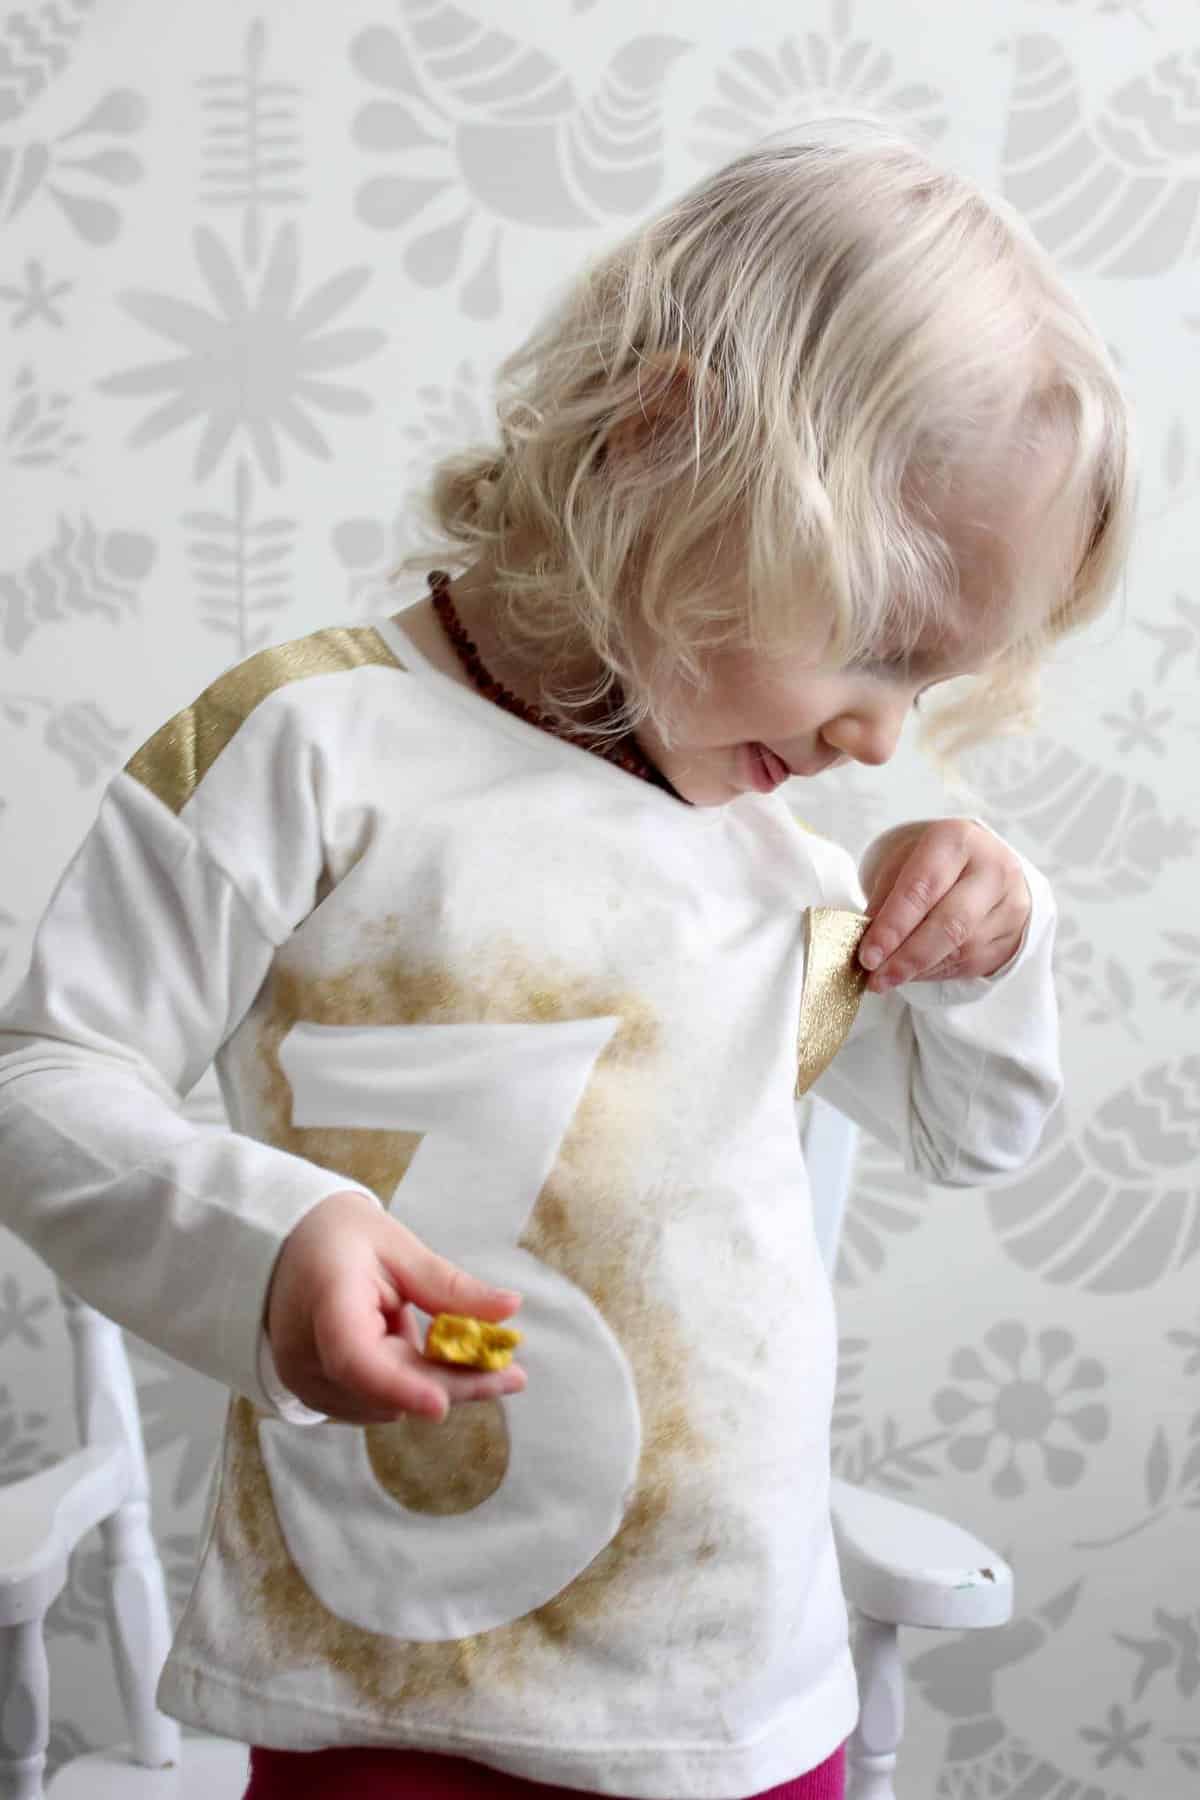
Now if you're as hooked on freezer paper stencils as I am, check out how Momo and I make a personalized shirt for her 3rd birthday using a very simple freezer paper stencil technique.
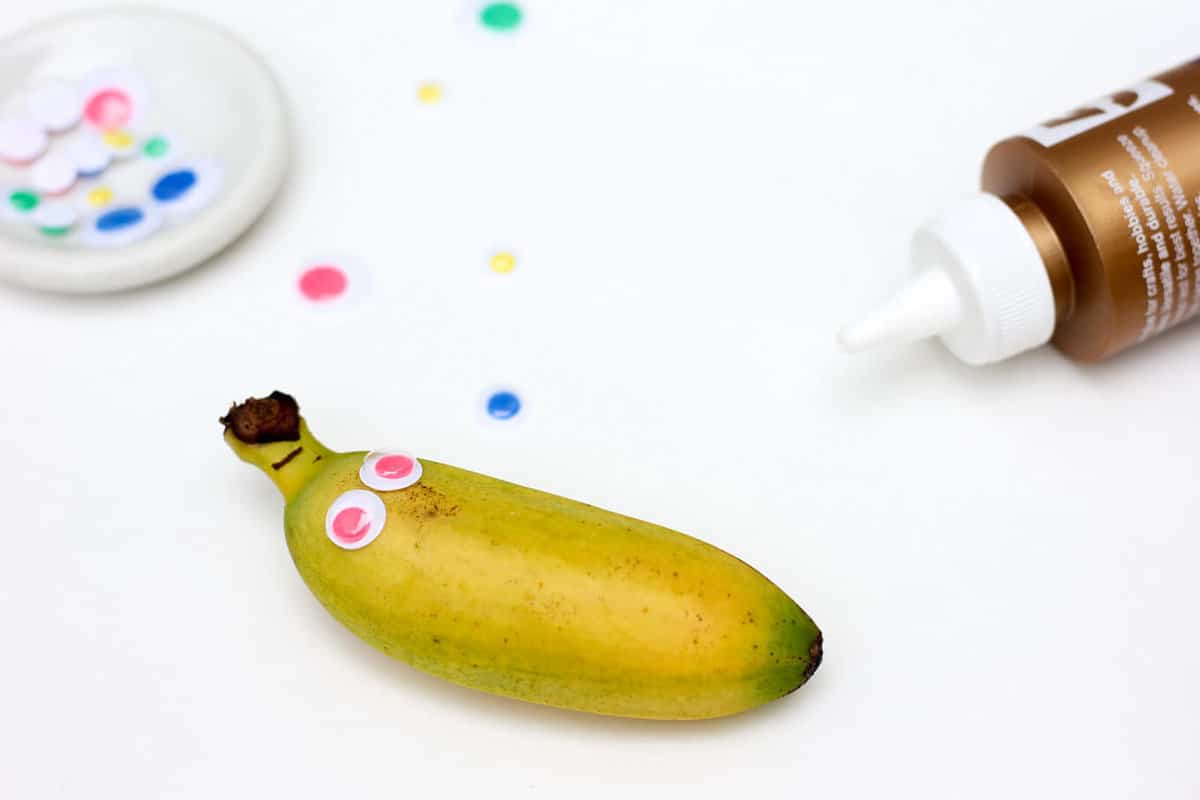
 Stay tuned later this week where I’ll show you the DIY party decorations we made as well as a really fun miniature banana craft to make for your own big sister/brother party. (What, you’ve never crafted with mini bananas before?! You are SO missing out!)
Casey Woods says
I'm doing this on t-shirts to announce to my husband that I'm expecting. I figure my little boy (4) can help paint his shirt and his sister (1) can help a little too! They are going to look so cute and be so proud!! And daddy will definitely be shocked to see their creations!
Jess @ Make and Do Crew says
Oh my gosh! What a fun idea! Congrats to all of you!!!
Kristin says
I've been looking for new activities for my kids. I love this idea so much!
Jess @ Make and Do Crew says
Awesome! I hope you guys have fun making these together, Kristin. We sure did!
Celeste says
This is so cute! I've never heard of having a celebration for the soon-to-be older sibling, but it's such a neat idea! It might help a bit with the transition, especially for younger kids who don't quite understand yet. Love the apron!
Jess @ Make and Do Crew says
Hey Celeste!
I hadn't heard of a big sibling celebration either, but now I think they're the best idea ever. Now if there was only a party I could throw that would teach my older daughter not to pull her baby sister's hair...
Thanks, as always, for reading, Celeste. I appreciate you!
Jess
charlse Brown says
Hie,Jess
Nice !!!!!1
Love to read your ideas .i am sure that It will enhance love between big brother and sister .
Thank you.
Jess @ Make and Do Crew says
Well, thanks, Charise. That is certainly my hope. It's not easy getting a new sibling, but in the long run, I think it's one of the best things that can happen to a kid. 🙂
Happy crafting!
Jess