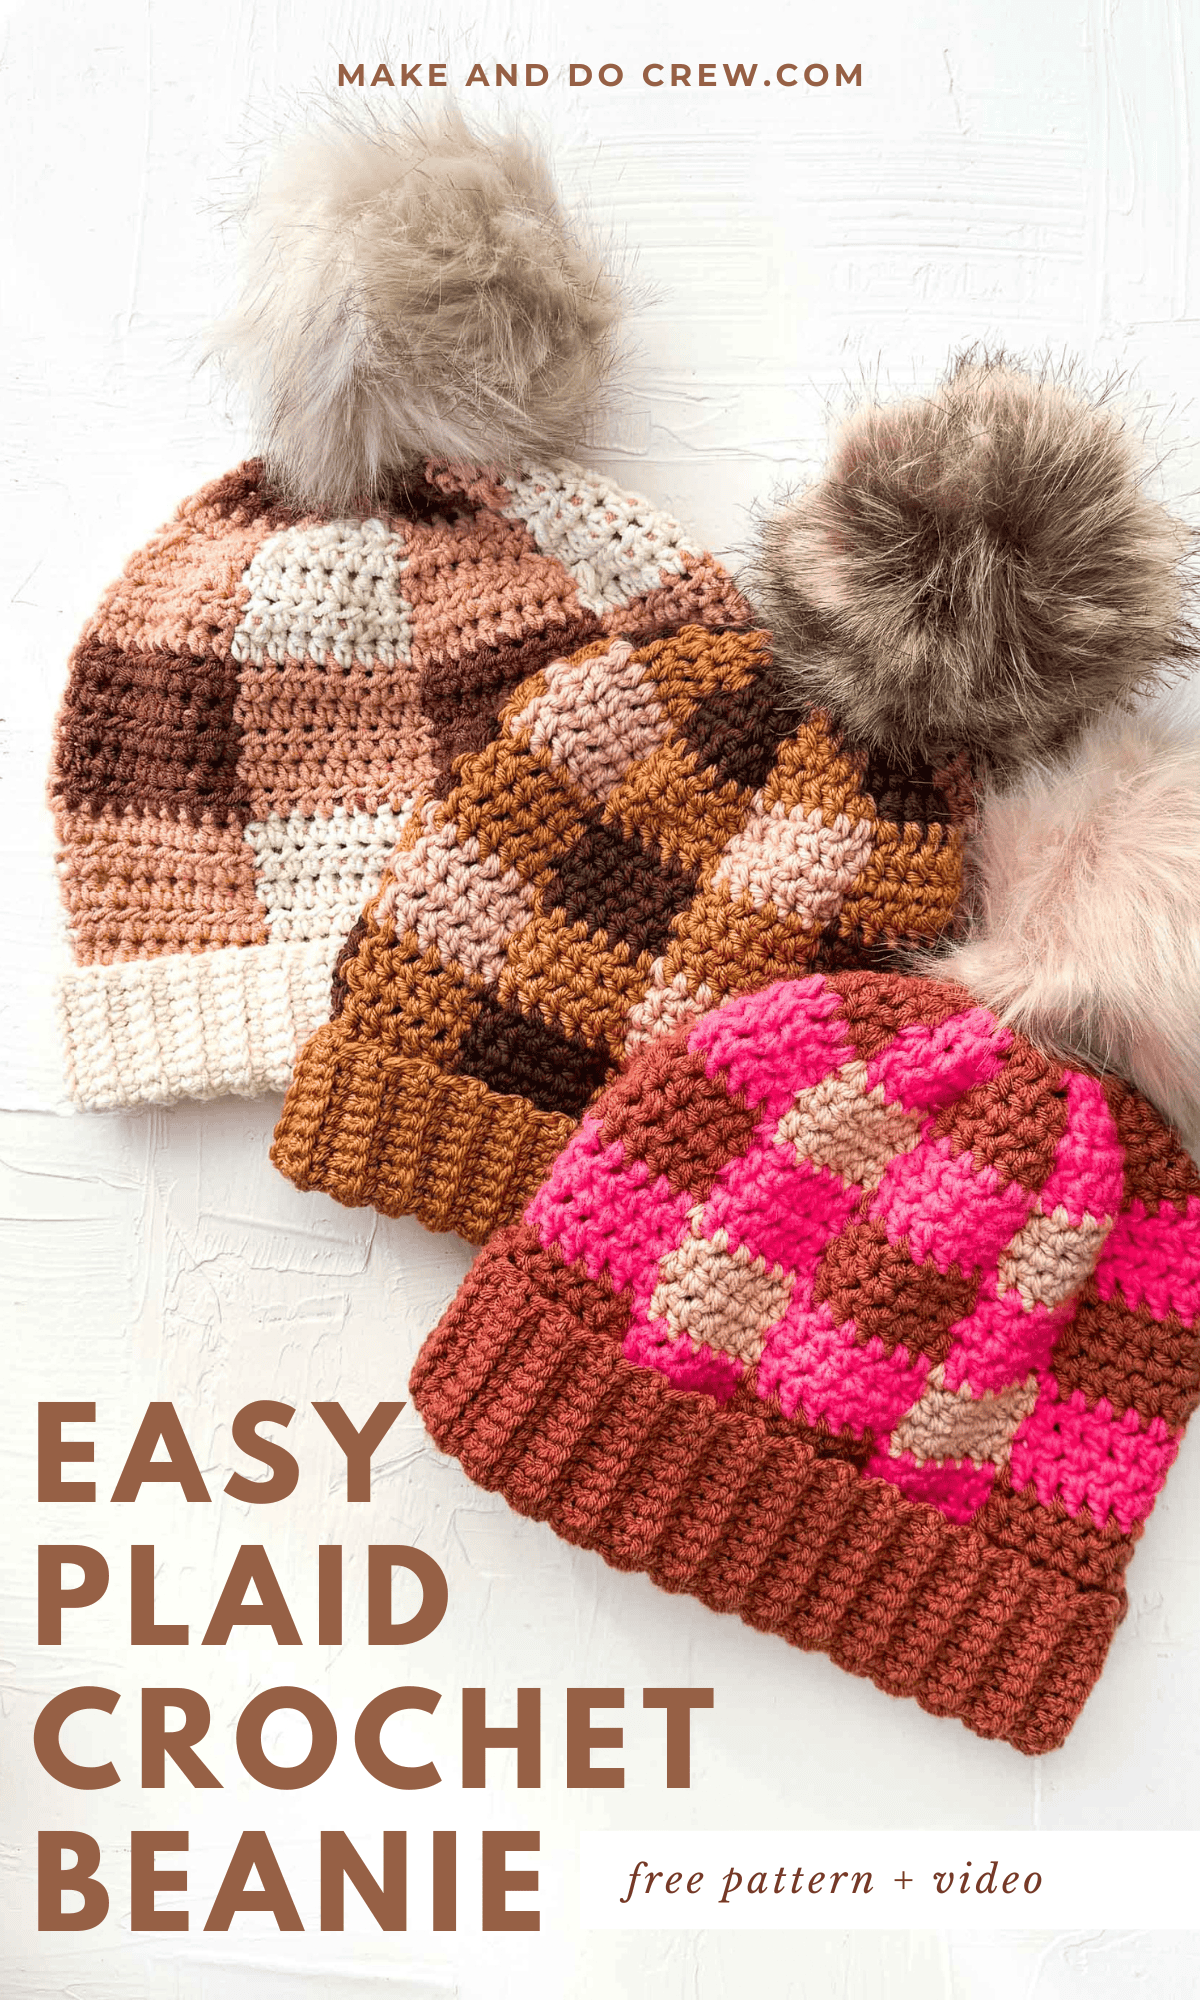
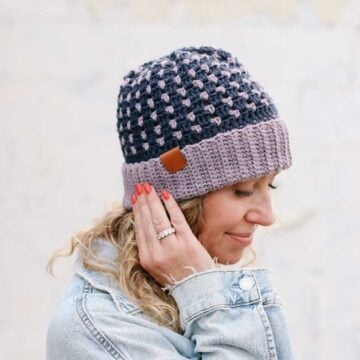
Meet Plaiditude, a bold, modern spin on the classic plaid crochet beanie pattern. Written in sizes preemie - adult, you can bust through your stash making a checked hat for everyone you love.
The free beanie pattern and video tutorial is below or purchase the ad-free, printable PDF.
This post contains affiliate links.
Jump to:
Plaiditude Beanie - Free Pattern + Tutorial
This easy plaid beanie trades traditional checks for oversized grids and fresh, tonal color combos that stand out. The result is a modern look with infinite color possibilities.
The pattern includes eight sizes from preemie to adult so you can make one for everyone. This is a simple, satisfying project that lets you play with color and stitch through your stash.
The best part? You’ll crochet from the top down in the round without fastening colors off, which means fewer ends to deal with!
Skill Level
This checkered hat pattern is perfect for an advanced beginner. I would not recommend it as your first crochet hat project because it requires combining a few skills at once. (Try this super easy beanie instead.)
In this pattern, you'll practice:
- half double crochet
- working in the round
- increasing (2 stitches in one space)
- changing colors mid-round
- keeping multiple strands of yarn attached
- pattern reading

Print this Pattern
Prefer to crochet on the couch? Need a portable, printable pattern? You'll love the premium PDF! The instantly downloadable, ad-free file is formatted for easy printing and includes the complete Platitude instructions, all the photo tutorials and a link to the video.
Premium PDF
easier and faster with fewer mistakes.
- Complete pattern + photo tutorials
- Instant download
- Formatted for easy printing
Supplies + Materials
• Lion Brand Basic Stitch or similar category #4/medium weight yarn
This pattern is ideal for using up partial skeins of worsted-weight yarn. When combining yarn brands, make sure the thickness of each yarn is similar and that the care instructions are compatible.
Additional Supplies:
• Size J (6.0 mm) crochet hook or size needed to obtain gauge
• Tapestry needle
• Fur pom pom (optional)
• Blocking board and steamer (optional)
Measurements
Choose a pattern size based on the head circumference of the person you're making it for.
| Size | Head Circumference | Hat Circumference | Total Yarn Needed* |
|---|---|---|---|
| Preemie | 9-12” | 11” | 25g |
| Baby | 14-16” | 14.5” | 45g |
| Toddler | 16-18” | 18.25” | 65g |
| Child | 18-20” | 20” | 80g |
| Tween | 20-22” | 21.75” | 105g |
| Adult Small | 21-22” | 21.75” | 110g |
| Adult Medium | 22-24” | 23.75” | 125g |
| Adult Large | 24-26” | 25.5” | 135g |
* Does not include yarn for optional pom pom
Gauge
Main Hat Gauge:
11 hdc = 4”
11.5 rounds = 4”
Ribbing Gauge:
15 sc = 4”
13 rows = 4”
How to Measure the Gauge:
Each pattern size includes a moment to pause and measure your gauge. To do this, measure across the hat top and measure the total number of rounds within the given distance.
Abbreviations + Glossary (US Terms)
ch – chain
chsp – chain space
dc – double crochet
hdc – half double crochet
rem - remain(ing)
rep – repeat
RS – right side
sc – single crochet
scblo – single crochet through the back loop only
sk – skip
slst – slip stitch
st(s) – stitch(es)
tch - turning chain
WS – wrong side
yo – yarn over
How to Crochet a Plaid Beanie Video Tutorial
In the video tutorial below, I walk you through each step of crocheting your plaid beanie, including increasing, switching colors and what to do with the yarn colors you're not using at the moment.
Print This Pattern: purchase the ad-free, printable PDF
Advice on Choosing Colors
This pattern requires three distinct colors of different values. My favorite way to assess this is to take a photo of the balls of yarn you’re considering. Use the built-in filters on your phone to make the photo black and white. Look for three colors of yarn that look distinctly lighter or darker than the others when viewed in black and white.
For simplicity, pattern refers to colors as follows:
Light / Medium / Dark

Tips on Keeping Yarn Organized
This pattern relies on keeping two to three colors of yarn attached at all times. To keep yarn from getting tangled, set two colors you’re working with in any given round off to one side of you and the third color to the other side.
At the end of the round, untwist the two colors if necessary before moving on to the next round. Whistle and Ivy shares a brief, helpful video on keeping yarn organized while working.
Unless you run into massive tangle trouble, there should be no need to cut yarn at end of round.

Main Hat
Notes:
- Hat is worked in turned rounds, which means you’ll slip stitch to the initial turning chain to join a round and then turn your work, similar to working in rows.
- The ch 2 at beginning of each round never counts as a hdc.
- Gauge is measured several rounds into pattern to avoid making a separate gauge swatch.
- See tutorial at end of pattern for details on how to seamlessly change colors if you’re unfamiliar. Pattern is written with the assumption that the skill of changing colors is already understood. This video tutorial also explains it well.
- Do not cut yarn after changing colors. Instead, choose one of the following options. Either crochet over “dormant” color with new color until next color change. Or, drop dormant color to the inside (WS) of hat and pick it up again for next color change. In either case, do not pull the dormant yarn too tight as this will prevent the hat from stretching.
- After Round 1, each half double crochet stitch is worked under all three loops of the stitch below. Another way to think of this is crocheting between the posts of the half double crochet stitches.
All Sizes
Foundation:
With Dark yarn:
Round 1 (WS): Make a magic ring; ch 2, 10 hdc in magic ring, slst to tch to join; turn. (10 hdc)
Round 2 (RS inc): Ch 2, 2 hdc in each st, slst to tch to join; turn. (20 hdc)
Medium yarn is introduced in Round 3. Round 3 should alternate 3 Dark sts followed by 3 Medium sts. When transitioning between colors, complete final yo of color section using the next color of yarn.
Proceed to instructions for your size.
Preemie Size
Stripe 1:
Round 3 (WS inc):
With Dark: Ch 2, *hdc in next st, 2 hdc in next st;
With Medium: hdc in next st, 2 hdc in next st;**
Repeat from * to ** around to create a total of 10 color sections (5 Dark, 5 Medium) with 3 sts in each section, slst to tch to join; turn. (3 sts per color section / 30 hdc total)
Increasing is now complete.
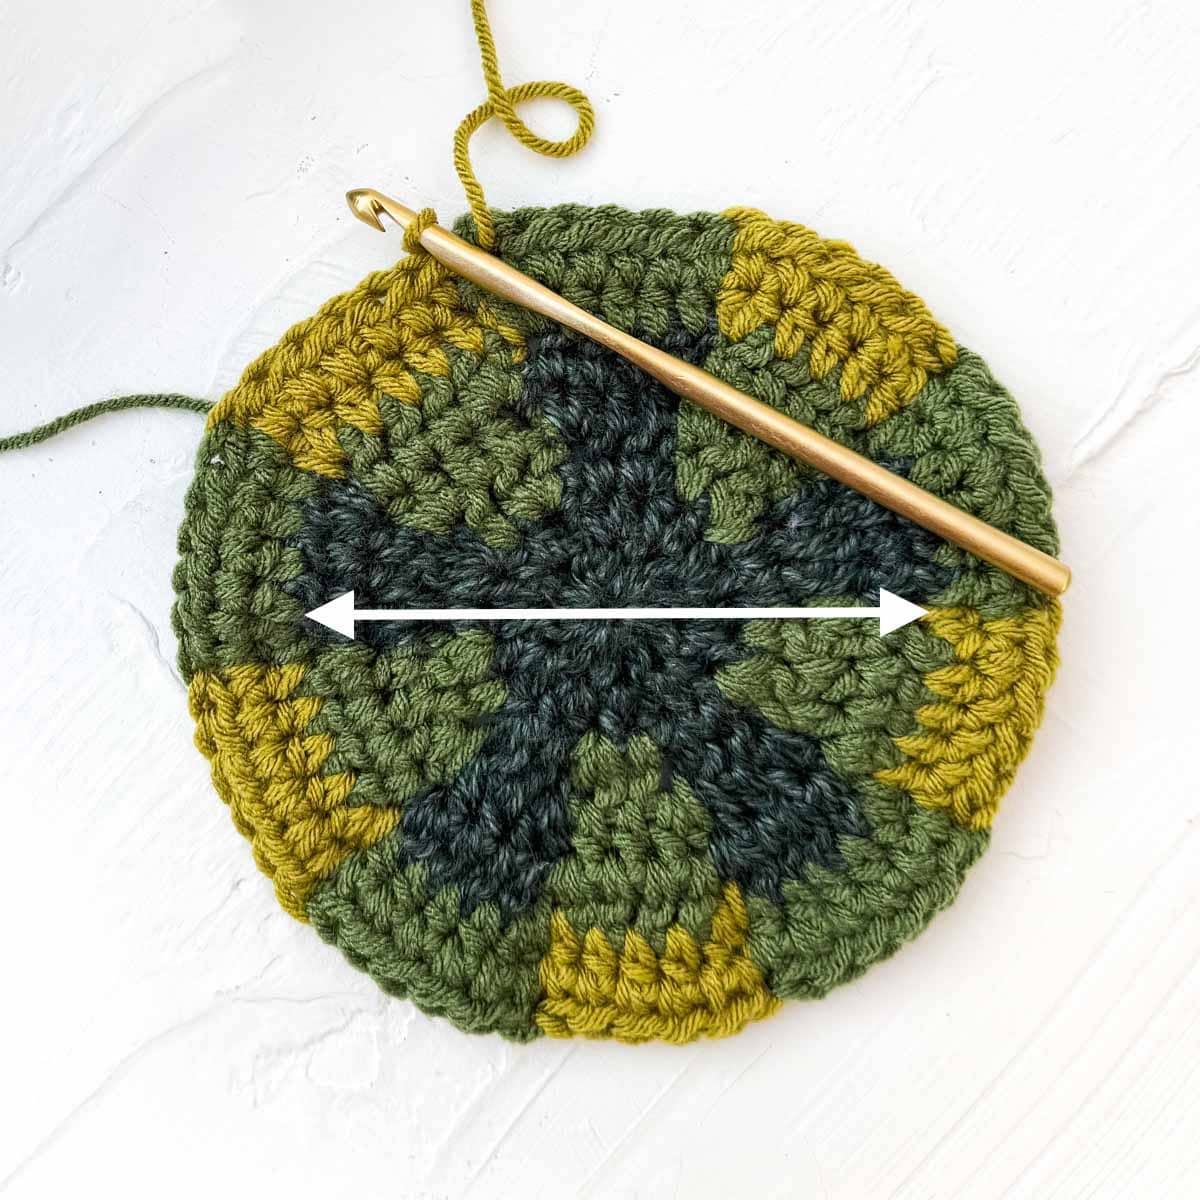
Gauge Check:
Measure from one edge of circle to the opposite edge (diameter). It should be 2.5”. If your circle is measuring significantly larger or smaller, remake with a different hook size. Achieving the correct tension with your stitches is what will help ensure your hat fits as expected.
Round 4 (RS):
With Medium: Ch 2, *hdc in each of 3 sts;
With Dark: hdc in each of 3 sts;**
Repeat from * to ** around, slst to tch to join; turn.
Proceed to instructions for your size.
Preemie Size
Stripe 1:
Round 3 (WS inc):
With Dark: Ch 2, *hdc in next st, 2 hdc in next st;
With Medium: hdc in next st, 2 hdc in next st;**
Repeat from * to ** around to create a total of 10 color sections (5 Dark, 5 Medium) with 3 sts in each section, slst to tch to join; turn. (3 sts per color section / 30 hdc total)
Increasing is now complete.
Gauge Check:
Measure from one edge of circle to the opposite edge (diameter). It should be 2.5”. If your circle is measuring significantly larger or smaller, remake with a different hook size. Achieving the correct tension with your stitches is what will help ensure your hat fits as expected.
Round 4 (RS):
With Medium: Ch 2, *hdc in each of 3 sts;
With Dark: hdc in each of 3 sts;**
Repeat from * to ** around, slst to tch to join; turn.
Stripe 2:
Light yarn is introduced in Round 5. Round 5 should alternate 3 Medium sts followed by 3 Light sts. Fasten off Dark yarn or drop it to WS for later.
Round 5 (WS):
With Medium: Ch 2, *hdc in each of 3 sts;
With Light: hdc in each of 3 sts;**
Repeat from * to ** around, slst to tch to join; turn.
Round 6 (RS):
With Light: Ch 2, *hdc in each of 3 sts;
With Medium: hdc in each of 3 sts;**
Repeat from * to ** around, slst to tch to join; turn.
Stripe 3:
Dark yarn is reintroduced in Round 7. Round 7 should alternate 3 Dark sts followed by 3 Medium sts. Fasten off Light yarn or drop it to WS for later.
Round 7 (WS):
With Dark: Ch 2, *hdc in each of 3 sts;
With Medium: hdc in each of 3 sts;**
Repeat from * to ** around, slst to tch to join; turn.
Round 8 (RS):
With Medium: Ch 2, *hdc in each of 3 sts;
With Dark: hdc in each of 3 sts;**
Repeat from * to ** around, slst to tch to join; turn.
Stripe 4:
Rounds 9-10: Rep Rounds 5-6 (Stripe 2). (2 rounds total)
Body of hat is complete. Fasten off the remaining colors, except for the yarn you want to use for the Brim. Proceed to Brim instructions.
Baby Size
Stripe 1:
Round 3 (WS inc):
With Dark: Ch 2, *hdc in next st, 2 hdc in next st;
With Medium: hdc in next st, 2 hdc in next st;**
Repeat from * to ** around to create a total of 10 color sections (5 Dark, 5 Medium) with 3 sts in each section, slst to tch to join; turn. (3 sts per color section / 30 hdc total)
Round 4 (RS inc):
With Medium: Ch 2, *hdc in each of next 2 sts, 2 hdc in next st;
With Dark: hdc in each of next 2 sts, 2 hdc in next st;**
Repeat from * to ** around, slst to tch to join; turn. (4 sts per color section / 40 hdc total) Increasing is now complete.
Gauge Check:
Measure from one edge of circle to the opposite edge (diameter). It should be 3.25”. If your circle is measuring significantly larger or smaller, remake with a different hook size. Achieving the correct tension with your stitches is what will help ensure your hat fits as expected.
Round 5 (WS):
With Dark: Ch 2, *hdc in each of 4 sts;
With Medium: hdc in each of 4 sts;**
Repeat from * to ** around, slst to tch to join; turn.
Stripe 2:
Light yarn is introduced in Round 6. Round 6 should alternate 4 Light sts followed by 4 Medium sts. Fasten off Dark yarn or drop it to WS for later.
Round 6 (RS):
With Light: Ch 2, *hdc in each of 4 sts;
With Medium: hdc in each of 4 sts;**
Repeat from * to ** around, slst to tch to join; turn.
Round 7 (WS):
With Medium: Ch 2, *hdc in each of 4 sts;
With Light: hdc in each of 4 sts;**
Repeat from * to ** around, slst to tch to join; turn.
Round 8 (RS):
With Light: Ch 2, *hdc in each of 4 sts;
With Medium: hdc in each of 4 sts;**
Repeat from * to ** around, slst to tch to join; turn.
Stripe 3:
Dark yarn is reintroduced in Round 9. Round 9 should alternate 4 Dark sts followed by 4 Medium sts. Fasten off Light yarn or drop it to WS for later.
Round 9 (WS):
With Dark: Ch 2, *hdc in each of 4 sts;
With Medium: hdc in each of 4 sts;**
Repeat from * to ** around, slst to tch to join; turn.
Round 10 (RS):
With Medium: Ch 2, *hdc in each of 4 sts;
With Dark: hdc in each of 4 sts;**
Repeat from * to ** around, slst to tch to join; turn.
Rounds 11-12: Rep Rounds 9-10. (2 rounds total)
Body of hat is complete. Fasten off the remaining colors, except for the yarn you want to use for the Brim. Proceed to Brim instructions.

Toddler Size
Stripe 1:
Round 3 (WS inc):
With Dark: Ch 2, *hdc in next st, 2 hdc in next st;
With Medium: hdc in next st, 2 hdc in next st;**
Repeat from * to ** around to create a total of 10 color sections (5 Dark, 5 Medium) with 3 sts in each section, slst to tch to join; turn. (3 sts per color section / 30 hdc total)
Round 4 (RS inc):
With Medium: Ch 2, *hdc in each of next 2 sts, 2 hdc in next st;
With Dark: hdc in each of next 2 sts, 2 hdc in next st;**
Repeat from * to ** around, slst to tch to join; turn. (4 sts per color section / 40 hdc total)
Round 5 (WS inc):
With Dark: Ch 2, *hdc in each of next 3 sts, 2 hdc in next st;
With Medium: hdc in each of next 3 sts, 2 hdc in next st;**
Repeat from * to ** around, slst to tch to join; turn. (5 sts per color section / 50 hdc total)
Increasing is now complete.
Gauge Check:
Measure from one edge of circle to the opposite edge (diameter). It should be 4.25”. If your circle is measuring significantly larger or smaller, remake with a different hook size. Achieving the correct tension with your stitches is what will help ensure your hat fits as expected.
Stripe 2:
Light yarn is introduced in Round 6. Round 6 should alternate 5 Light sts followed by 5 Medium sts. Fasten off Dark yarn or drop it to WS for later.
Round 6 (RS):
With Light: Ch 2, *hdc in each of 5 sts;
With Medium: hdc in each of 5 sts;**
Repeat from * to ** around, slst to tch to join; turn.
Round 7 (WS):
With Medium: Ch 2, *hdc in each of 5 sts;
With Light: hdc in each of 5 sts;**
Repeat from * to ** around, slst to tch to join; turn.
Round 8 (RS):
With Light: Ch 2, *hdc in each of 5 sts;
With Medium: hdc in each of 5 sts;**
Repeat from * to ** around, slst to tch to join; turn.
Stripe 3:
Dark yarn is re-introduced in Round 9. Round 9 should alternate 5 Dark sts followed by 5 Medium sts. Fasten off Light yarn or drop it to WS for later.
Round 9 (WS):
With Dark: Ch 2, *hdc in each of 5 sts;
With Medium: hdc in each of 5 sts;**
Repeat from * to ** around, slst to tch to join; turn.
Round 10 (RS):
With Medium: Ch 2, *hdc in each of 5 sts;
With Dark: hdc in each of 5 sts;**
Repeat from * to ** around, slst to tch to join; turn.
Round 11: Rep Round 9.
Stripe 4:
Rounds 12-14: Rep Rounds 6-8 (Stripe 2). (3 rounds total)
Body of hat is complete. Fasten off the remaining yarn, except for the color you want to use for the Brim. Proceed to Brim instructions.
Child Size
Stripe 1:
Round 3 (WS inc):
With Dark: Ch 2, *hdc in next st, 2 hdc in next st;
With Medium: hdc in next st, 2 hdc in next st;**
Repeat from * to ** around to create a total of 10 color sections (5 Dark, 5 Medium) with 3 sts in each section, slst to tch to join; turn. (3 sts per color section / 30 hdc total)
Round 4 (RS inc):
With Medium: Ch 2, *hdc in each of next 2 sts, 2 hdc in next st;
With Dark: hdc in each of next 2 sts, 2 hdc in next st;**
Repeat from * to ** around, slst to tch to join; turn. (4 sts per color section / 40 hdc total)
Round 5 (WS inc):
With Dark: Ch 2, *hdc in each of next 3 sts, 2 hdc in next st;
With Medium: hdc in each of next 3 sts, 2 hdc in next st;**
Repeat from * to ** around, slst to tch to join; turn. (5 sts per color section / 50 hdc total)
Gauge Check:
Measure from one edge of circle to the opposite edge (diameter). It should be 4.25”. If your circle is measuring significantly larger or smaller, remake with a different hook size. Achieving the correct tension with your stitches is what will help ensure your hat fits as expected.
Stripe 2:
Light yarn is introduced in Round 6. Round 6 should alternate 6 Light sts followed by 5 Medium sts. Fasten off Dark yarn or drop it to WS for later.
Round 6 (RS):
With Light: Ch 2, *hdc in each of 4 sts, 2 hdc in next st;
With Medium: hdc in each of 5 sts;**
Repeat from * to ** around, slst to tch to join; turn. 6 sts per Light color section, 5 sts per Medium color section / 55 hdc total)
Increasing is now complete.
Round 7 (WS):
With Medium: Ch 2, *hdc in each of 5 sts;
With Light: hdc in each of 6 sts;**
Repeat from * to ** around, slst to tch to join; turn.
Round 8 (RS):
With Light: Ch 2, *hdc in each of 6 sts;
With Medium: hdc in each of 5 sts;**
Repeat from * to ** around, slst to tch to join; turn.
Stripe 3:
Dark yarn is re-introduced in Round 9. Round 9 should alternate 5 Dark sts followed by 6 Medium sts. Fasten off Light yarn or drop it to WS for later.
Round 9 (WS):
With Dark: Ch 2, *hdc in each of 5 sts;
With Medium: hdc in each of 6 sts;**
Repeat from * to ** around, slst to tch to join; turn.
Round 10 (RS):
With Medium: Ch 2, *hdc in each of 6 sts;
With Dark: hdc in each of 5 sts;**
Repeat from * to ** around, slst to tch to join; turn.
Round 11: Rep Round 9.
Stripe 4:
Rounds 12-14: Rep Rounds 6-8 (Stripe 2). (3 rounds total)
Stripe 5:
Rounds 15-16: Rep Rounds 9-10 (Stripe 3). (2 rounds total)
Body of hat is complete. Fasten off the remaining colors, except for the yarn you want to use for the Brim. Proceed to Brim instructions.
Tween and Adult Small Size
Stripe 1:
Round 3 (WS inc):
With Dark: Ch 2, *hdc in next st, 2 hdc in next st;
With Medium: hdc in next st, 2 hdc in next st;**
Repeat from * to ** around to create a total of 10 color sections (5 Dark, 5 Medium) with 3 sts in each section, slst to tch to join; turn. (3 sts per color section / 30 hdc total)
Round 4 (RS inc):
With Medium: Ch 2, *hdc in each of next 2 sts, 2 hdc in next st;
With Dark: hdc in each of next 2 sts, 2 hdc in next st;**
Repeat from * to ** around, slst to tch to join; turn. (4 sts per color section / 40 hdc total)
Round 5 (WS inc):
With Dark: Ch 2, *hdc in each of next 3 sts, 2 hdc in next st;
With Medium: hdc in each of next 3 sts, 2 hdc in next st;**
Repeat from * to ** around, slst to tch to join; turn. (5 sts per color section / 50 hdc total)
Round 6 (RS inc):
With Medium: Ch 2, *hdc in each of next 4 sts, 2 hdc in next st;
With Dark: hdc in each of next 4 sts, 2 hdc in next st;**
Repeat from * to ** around, slst to tch to join; turn. (6 sts per color section / 60 hdc total)
Increasing is now complete.
Gauge Check:
Measure from one edge of circle to the opposite edge (diameter). It should be 5”. If your circle is measuring significantly larger or smaller, remake with a different hook size. Achieving the correct tension with your stitches is what will help ensure your hat fits as expected.
Stripe 2:
Light yarn is introduced in Round 7. Round 7 should alternate 6 Medium sts followed by 6 Light sts. Fasten off Dark yarn or drop it to WS for later.
Round 7 (WS):
With Medium: Ch 2, *hdc in each of 6 sts;
With Light: hdc in each of 6 sts;**
Repeat from * to ** around, slst to tch to join; turn. (6 sts per color section / 60 hdc total)
Round 8 (RS):
With Light: Ch 2, *hdc in each of 6 sts;
With Medium: hdc in each of 6 sts;**
Repeat from * to ** around, slst to tch to join; turn.
Rounds 9-10: Rep Rounds 7-8.
Stripe 3:
Dark yarn is reintroduced in Round 11. Round 11 should alternate 6 Dark sts followed by 6 Medium stitches. Fasten off Light yarn or drop it to WS for later.
Round 11 (WS):
With Dark: Ch 2, *hdc in each of 6 sts;
With Medium: hdc in each of 6 sts;**
Repeat from * to ** around, slst to tch to join; turn.
Round 12 (RS):
With Medium: Ch 2, *hdc in each of 6 sts;
With Dark: hdc in each of 6 sts;**
Repeat from * to ** around, slst to tch to join; turn.
Rounds 13-14: Rep Rounds 11-12.
Stripe 4:
Rounds 15-18: Rep Rounds 7-10 (Stripe 2). (4 rounds total)
Stripe 5:
Rounds 19-20: Rep Rounds 11-12 (Stripe 3). (2 rounds total)
Tween size: Body of hat is complete. Fasten off the remaining colors, except for the yarn you want to use for the Brim. Proceed to Brim instructions.
Adult Small Size: Continue with last 2 rounds.
Rounds 21-22: Rep Rounds 11-12 (Stripe 3). (2 rounds total)
Adult Small size: Body of hat is complete. Fasten off the remaining colors, except for the yarn you want to use for the Brim. Proceed to Brim instructions.
Adult Medium Size
Stripe 1:
Round 3 (WS inc):
With Dark: Ch 2, *hdc in next st, 2 hdc in next st;
With Medium: hdc in next st, 2 hdc in next st;**
Repeat from * to ** around to create a total of 10 color sections (5 Dark, 5 Medium) with 3 sts in each section, slst to tch to join; turn. (3 sts per color section / 30 hdc total)
Round 4 (RS inc):
With Medium: Ch 2, *hdc in each of next 2 sts, 2 hdc in next st;
With Dark: hdc in each of next 2 sts, 2 hdc in next st;**
Repeat from * to ** around, slst to tch to join; turn. (4 sts per color section / 40 hdc total)
Round 5 (WS inc):
With Dark: Ch 2, *hdc in each of next 3 sts, 2 hdc in next st;
With Medium: hdc in each of next 3 sts, 2 hdc in next st;**
Repeat from * to ** around, slst to tch to join; turn. (5 sts per color section / 50 hdc total)
Round 6 (RS inc):
With Medium: Ch 2, *hdc in each of next 4 sts, 2 hdc in next st;
With Dark: hdc in each of next 4 sts, 2 hdc in next st;**
Repeat from * to ** around, slst to tch to join; turn. (6 sts per color section / 60 hdc total)
Gauge Check:
Measure from one edge of circle to the opposite edge (diameter). It should be 5”. If your circle is measuring significantly larger or smaller, remake with a different hook size. Achieving the correct tension with your stitches is what will help ensure your hat fits as expected.
Stripe 2:
Light yarn is introduced in Round 7. Round 7 should alternate 7 Medium sts followed by 6 Light sts. Fasten off Dark yarn or drop it to WS for later.
Round 7 (WS inc):
With Medium: Ch 2, *hdc in each of next 5 sts, 2 hdc in next st;
With Light: hdc in each of 6 sts;**
Repeat from * to ** around, slst to tch to join; turn. (7 sts per Medium color section, 6 sts per Light color section / 65 hdc total)
Increasing is now complete.
Round 8 (RS):
With Light: Ch 2, *hdc in each of 6 sts;
With Medium: hdc in each of 7 sts;**
Repeat from * to ** around, slst to tch to join; turn.
Round 9 (WS):
With Medium: Ch 2, *hdc in each of 7 sts;
With Light: hdc in each of 6 sts;**
Repeat from * to ** around, slst to tch to join; turn.
Round 10:
With Light: Ch 2, *hdc in each of 6 sts;
With Medium: hdc in each of 7 sts;**
Repeat from * to ** around, slst to tch to join; turn.
Stripe 3:
Dark yarn is reintroduced in Round 11. Round 11 should alternate 7 Dark sts followed by 6 Medium stitches. Fasten off Light yarn or drop it to WS for later.
Round 11 (WS):
With Dark: Ch 2, *hdc in each of 7 sts;
With Medium: hdc in each of 6 sts;**
Repeat from * to ** around, slst to tch to join; turn.
Round 12 (RS):
With Medium: Ch 2, *hdc in each of 6 sts;
With Dark: hdc in each of 7 sts;**
Repeat from * to ** around, slst to tch to join; turn.
Rounds 13-14: Rep Rounds 11-12.
Stripe 4:
Rounds 15-18: Rep Rounds 9-10 (Stripe 2). (4 rounds total)
Stripe 5:
Rounds 19-22: Rep Rounds 11-14 (Stripe 3). (4 rounds total)
Rounds 23-24: Rep Rounds 9-10 (Stripe 2). (2 rounds total)
Body of hat is complete. Fasten off the remaining colors, except for the yarn you want to use for the Brim. Proceed to Brim instructions.
Adult Large Size
Stripe 1:
Round 3 (WS inc):
With Dark: Ch 2, *hdc in next st, 2 hdc in next st;
With Medium: hdc in next st, 2 hdc in next st;**
Repeat from * to ** around to create a total of 10 color sections (5 Dark, 5 Medium) with 3 sts in each section, slst to tch to join; turn. (3 sts per color section / 30 hdc total)
Round 4 (RS inc):
With Medium: Ch 2, *hdc in each of next 2 sts, 2 hdc in next st;
With Dark: hdc in each of next 2 sts, 2 hdc in next st;**
Repeat from * to ** around, slst to tch to join; turn. (4 sts per color section / 40 hdc total)
Round 5 (WS inc):
With Dark: Ch 2, *hdc in each of next 3 sts, 2 hdc in next st;
With Medium: hdc in each of next 3 sts, 2 hdc in next st;**
Repeat from * to ** around, slst to tch to join; turn. (5 sts per color section / 50 hdc total)
Round 6 (RS inc):
With Medium: Ch 2, *hdc in each of next 4 sts, 2 hdc in next st;
With Dark: hdc in each of next 4 sts, 2 hdc in next st;**
Repeat from * to ** around, slst to tch to join; turn. (6 sts per color section / 60 hdc total)
Gauge Check:
Measure from one edge of circle to the opposite edge (diameter). It should be 5”. If your circle is measuring significantly larger or smaller, remake with a different hook size. Achieving the correct tension with your stitches is what will help ensure your hat fits as expected.
Stripe 2:
Light yarn is introduced in Round 7. Round 7 should alternate 7 Medium sts followed by 7 Light sts. Fasten off Dark yarn or drop it to WS for later.
Round 7 (WS inc):
With Medium: Ch 2, *hdc in each of next 5 sts, 2 hdc in next st;
With Light: *hdc in each of next 5 sts, 2 hdc in next st;**
Repeat from * to ** around, slst to tch to join; turn. (7 sts per Medium color section, 7 sts per Light color section / 70 hdc total)
Increasing is now complete.
Round 8 (RS):
With Light: Ch 2, *hdc in each of 7 sts;
With Medium: hdc in each of 7 sts;**
Repeat from * to ** around, slst to tch to join; turn.
Round 9 (WS):
With Medium: Ch 2, *hdc in each of 7 sts;
With Light: hdc in each of 7 sts;**
Repeat from * to ** around, slst to tch to join; turn.
Round 10:
With Light: Ch 2, *hdc in each of 7 sts;
With Medium: hdc in each of 7 sts;**
Repeat from * to ** around, slst to tch to join; turn.
Stripe 3:
Dark yarn is re-introduced in Round 11. Round 11 should alternate 7 Dark sts followed by 7 Medium stitches. Fasten off Light yarn or drop it to WS for later.
Round 11 (WS):
With Dark: Ch 2, *hdc in each of 7 sts;
With Medium: hdc in each of 7 sts;**
Repeat from * to ** around, slst to tch to join; turn.
Round 12 (RS):
With Medium: Ch 2, *hdc in each of 7 sts;
With Dark: hdc in each of 7 sts;**
Repeat from * to ** around, slst to tch to join; turn.
Rounds 13-14: Rep Rounds 11-12.
Stripe 4:
Rounds 15-18: Rep Rounds 9-10 (Stripe 2). (4 rounds total)
Stripe 5:
Rounds 19-22: Rep Rounds 11-14 (Stripe 3). (4 rounds total)
Rounds 23-24: Rep Rounds 9-10 (Stripe 2). (2 rounds total)
Body of hat is complete. Fasten off the remaining colors, except for the yarn you want to use for the Brim. Proceed to Brim instructions.
Want some company while you crochet?
Get support (and camaraderie!) in the Make & Do Crew community. Join for free here.
Wanna save this pattern?
Premium PDF
easier and faster with fewer mistakes.
- Complete pattern + photo tutorials
- Instant download
- Formatted for easy printing
Ribbed Beanie Brim
- Instructions are written with the stitch count for the smallest size first and each larger size following in parentheses, for example: Preemie (Baby, Toddler, Child, Tween, Adult Small, Adult Medium, Adult Large). It can be very helpful to highlight the numbers for your size before beginning the project. When only one number is given, it pertains to all sizes.
Stitch counts at the end of each round are for given sizes.
- Ribbing is worked in rows perpendicular to bottom edge of hat. Ribbing is attached as it’s created by slip stitching to hat edge.
- Each single crochet is worked through the back loop only (blo) of the stitch in the previous row. On odd rows only (those heading away from hat), the last stitch of the row is worked through both loops.
- Pay attention to the RS/WS designation of row as it will help clarify which side of the hat is facing in each row.
- If shorter brim is desired (excluding preemie size), consider modifying Foundation Chain length to x (5, 6, 7, 8, 9, 9) ch. (This will create a bottom ribbing of x (4, 5, 6, 7, 8, 8) sts tall.)
All Sizes
Foundation: With attached yarn, ch 6 (9, 12, 13, 15, 16, 16).
Row 1 (RS): Sc in second ch from hook, sc in each rem ch, slst to second st of hat edge, slst to next hdc along hat edge; turn. (5 (8, 11, 12, 14, 15, 15) sc + 2 slsts on hat)
Row 2 (WS): (Do not ch 1), sk slsts along hat edge, sc in the blo of each sc until 1 rem, sc through both loops of the last st; turn. (5 (8, 11, 12, 14, 15, 15) sc)
Row 3 (RS): Ch 1, sc though blo of each sc, slst in each of the next 2 hdc sts along hat edge; turn.
Row 4 (WS): Rep Row 2.
Rep Rows 3 and 4 around hat, ending with a Row 4. This may require you to slip stitch only one stitch instead of two along hat on the final repeat. It’s fine to improvise here to ensure you end with a Row 4. This will position the yarn at the bottom of brim. Fasten off leaving a 15” tail.
Joining Brim:
Place last row of ribbing on top of foundation row. With existing yarn tail and tapestry needle, use a running stitch to seam brim. See video tutorial for visual guidance. Take care to line up on stitches as you seam. Weave in yarn tail and fasten off.
Finishing
Weave in remaining ends: Learn more here.
Blocking: Once all ends are woven in, you may do a light steam blocking using either a steamer or iron with steam setting. Do not touch steamer or iron directly to yarn. Detailed info here.
Pom Pom: Use Dark yarn to attach fur or yarn pom pom. View a tutorial on making a yarn pom pom here.
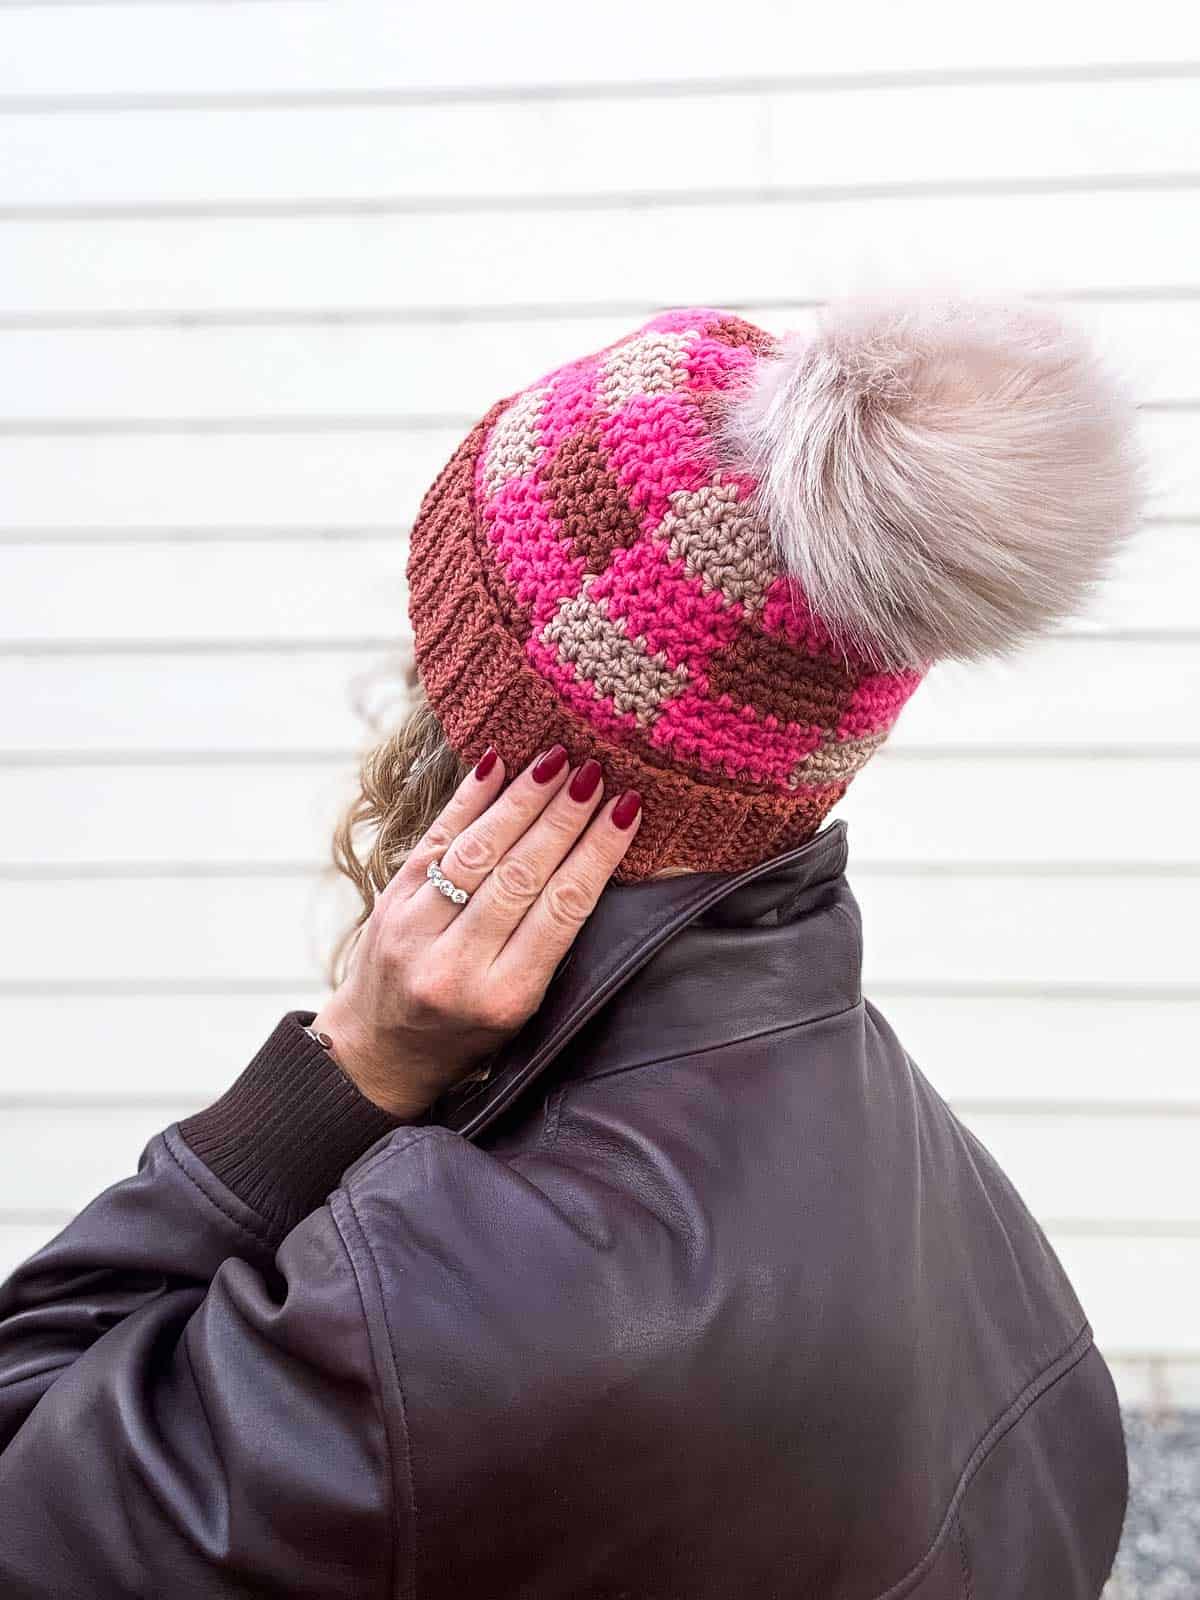
Pop your new beanie on your head and go show the world your positive plaiditude!
Permissions + Copyright:
Please do not publish or share this pattern as your own. You may make items to sell with this pattern. In exchange, please link back this post. Do NOT use our photos as your own sales photos.
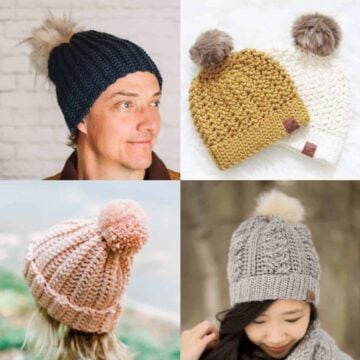
More Hat Free Patterns
I hoped you loved crocheting this plaid beanie pattern. If you're ready for another quick hat project, here are a few of my favorites to make next.
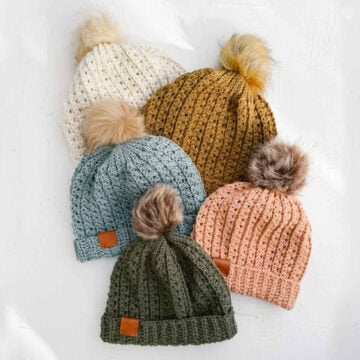
- Sundowner Textured Crochet Hat Pattern (Baby-Adult)
- Multicolor Beanie Crochet Pattern For Babies - Adults
- 3 Hour Free Crochet Newsboy Hat Pattern
- Free Crochet Bunny Hat Pattern (Newborn, Baby, Toddler, Child)
- 1 Hour Easy Child's Crochet Hat Pattern With Toddler Sizes
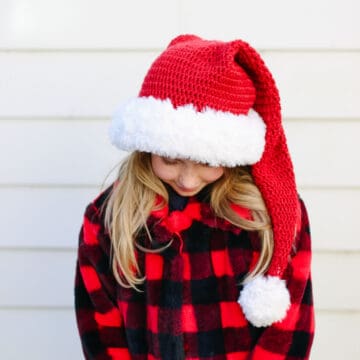
- Easy Classic Santa Hat Crochet Pattern
That was so fun! Now what?
Invitation to our Private Community
Come discuss crocheting your Plaiditude Beanie and lots of other projects and techniques in our Make & Do Crew community. Here thousands of helpful crocheters answer each other's questions and share their stitches. Join us!


Leave a Reply