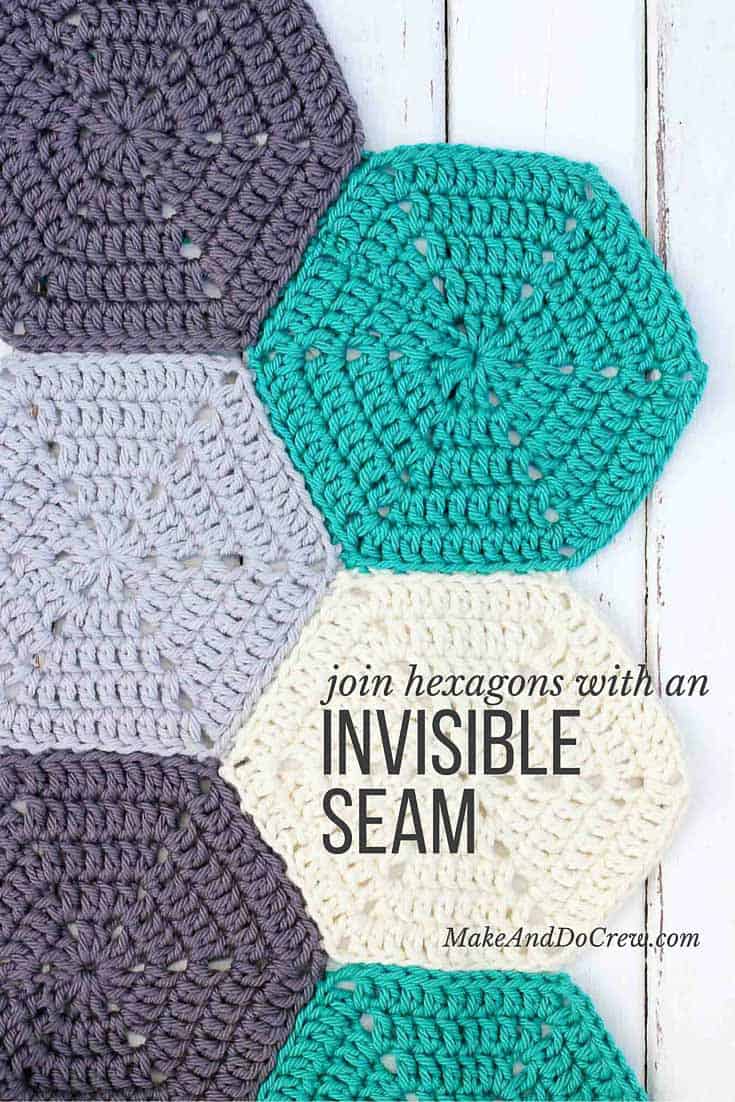
If you’ve ever wanted to know how to join crochet hexagons, granny squares or other crochet pieces together with a non-bulky, invisible seam, this is the tutorial for you!
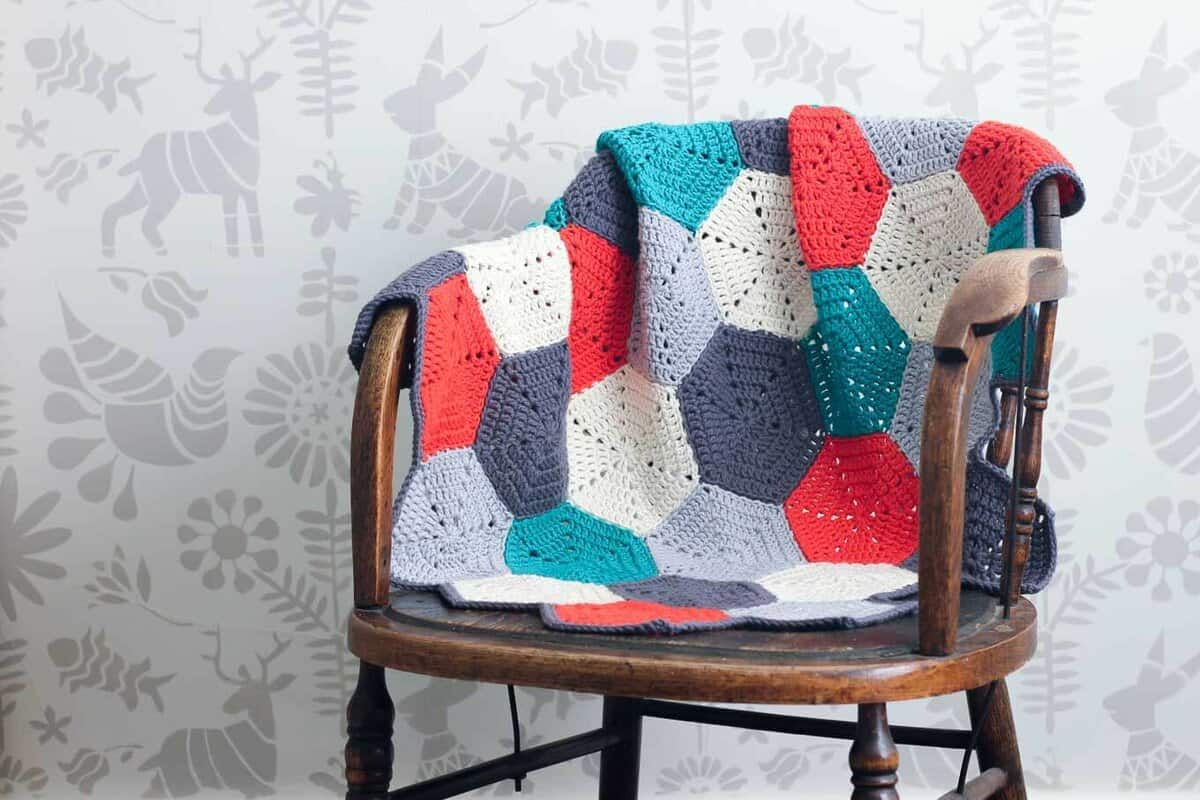
 I recently shared a tutorial for how to crochet a basic hexagon. And since then, I’ve been crocheting the heck of of some hexagons in pursuit of a modern hexagon afghan pattern I am developing. (UPDATE: Get the free hexagon afghan pattern here!)
 When it came time to sew these puppies together, I was looking for a joining method that wouldn’t add any bulk or visual distraction to the hexagons themselves.
 What I came up with eventually is sort of a cousin of the mattress stitch technique. (Now this is the point where someone could say, “Jess, this is the the ol’ ___ stitch my grandma taught me and you’re totally doing it wrong.” To which I would say, “Yeah, so?”)
On her podcast, Craftish, Vicki Howell recently called crochet an oral tradition. Now THAT is a definition made so much sense to me. There’s not a right way to crochet. There’s not a wrong way. There’s just yarn and hooks and creativity. So if you, like me, have ever felt burdened by the idea that you need to learn the “science” of crocheting so you could get some phantom A+ in crochet school, I hereby give you permission to let that idea go.
 And with that, I will show you how to join crochet hexagons with a clean, invisible seam. Is it the only way to do it? Of course not! Does it do the job and look pretty? Why yes. Good enough for me then.
How to Join Crochet Hexagons (or Granny Squares, ETC)
SUPPLIES
• tapestry needle
• yarn in the colors of your hexagons
• scissors
TIPS
First, I highly recommend that you block your crochet pieces before sewing them together. Check out how to make a super inexpensive DIY blocking board and come back when all your hexies are blocked to the same size.
Wanna save this pattern?
You want to keep your pieces lined up so that the stitches are always being sewn one for one. If your stitches get out of alignment, you will end up with weird puckers or uneven angles at the junctures.
To make the seam the least noticeable it can be, use yarn that matches one of the hexagons that is being seamed.
I find it easiest to line the pieces up and keep the seam horizontal in front of me while I’m sewing (as pictured below). This allows me to use my dominant right hand to go back and forth from top to bottom of the seam without switching the needle to the other hand.
Okay, let’s do this!
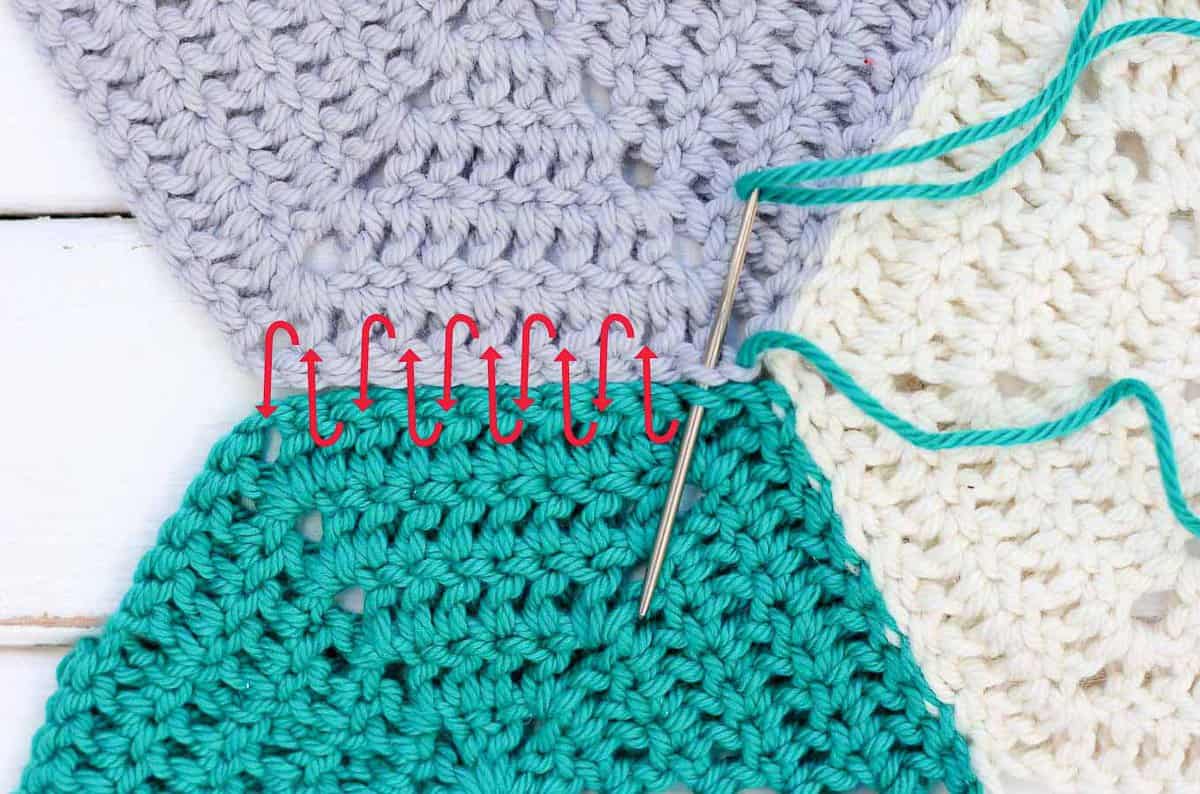
1. Line two hexagons up together, right sides facing down. You will do all your seaming on the back sides of your crochet pieces. The two sides should both have the same number of stitches, so all the stitches on one piece should more or less be lining up with a buddy on the other piece.
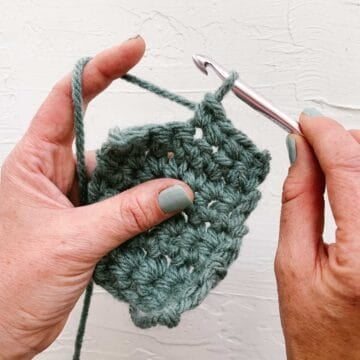
2. Insert your tapestry needle through the back loop of the the chain corner stitch of the bottom hexagon and then proceed through the back loop of the chain corner stitch of the top hexagon. Pull the yarn through, maintaining snug tension, but not pulling it so tight that it puckers.
 3. Insert your tapestry needle through the back loop of the next stitch on the top hexagon (a dc in the case of this hexagon pattern) and proceed through the back loop of the bottom hexagon’s next stitch.
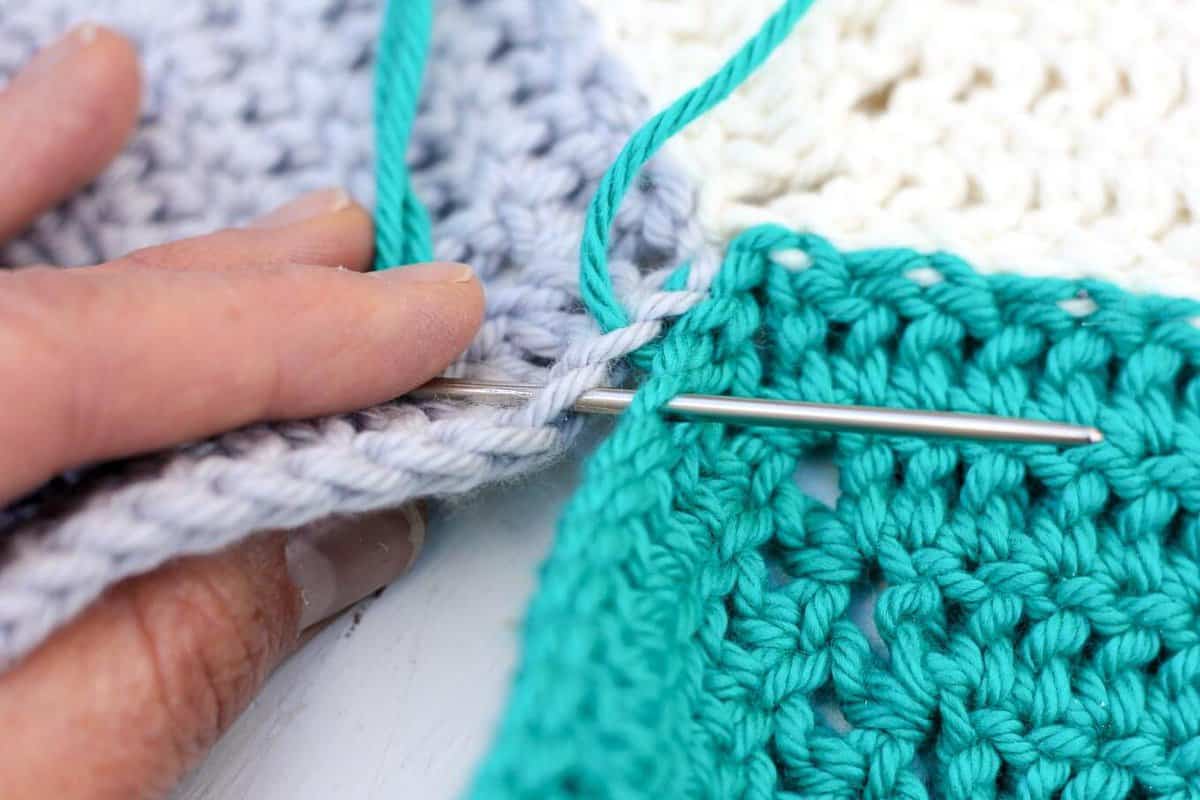
 Here’s another view that shows how you’re only ever working the back loops of the the stitches you’re joining. Also, note how you are never bringing the yarn over the seam, but rather working it back and forth under the back loops. This ensures that the seam remains as invisible as possible.
 4. Continue like this, working from the bottom hexagon to the top hexagon and then from the top hexagon to the bottom hexagon. Repeat until you’ve run out of stitches and have reached the corner chains of your hexagons. Work your needle under the back loop of the chain stitch that is closest to your seam on each hexagon.
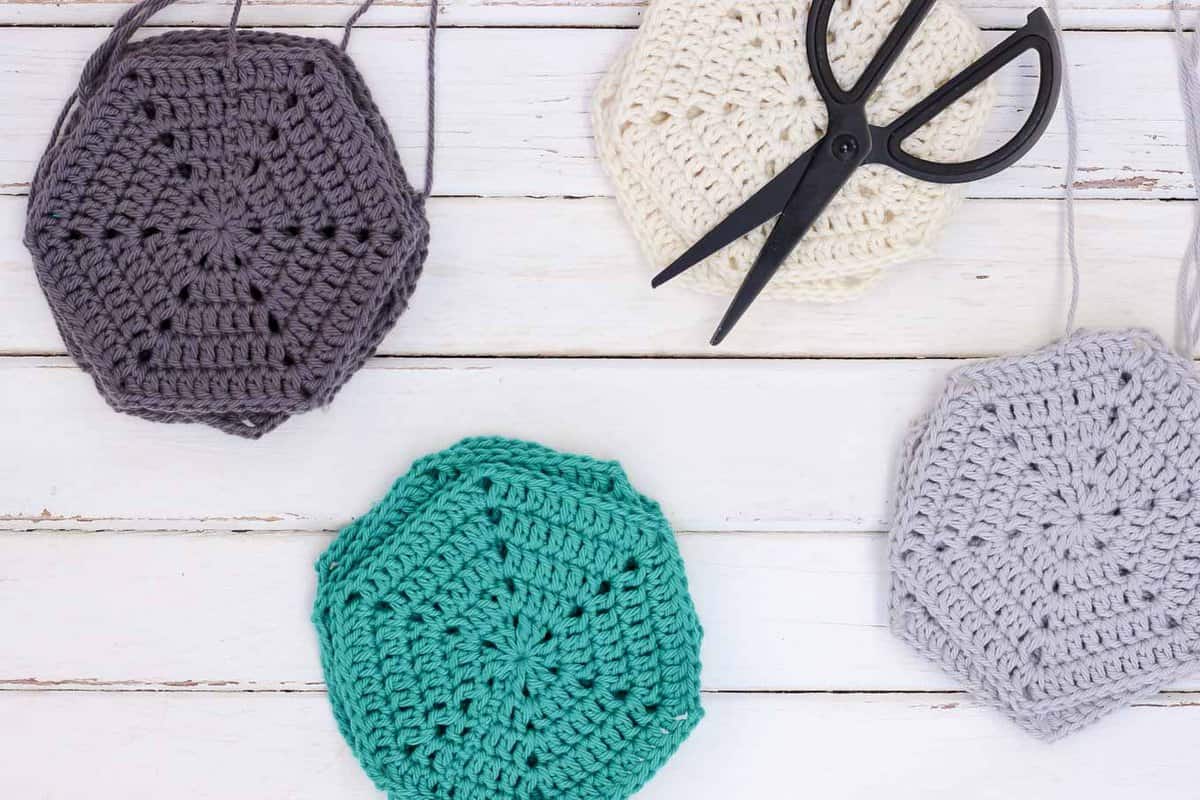
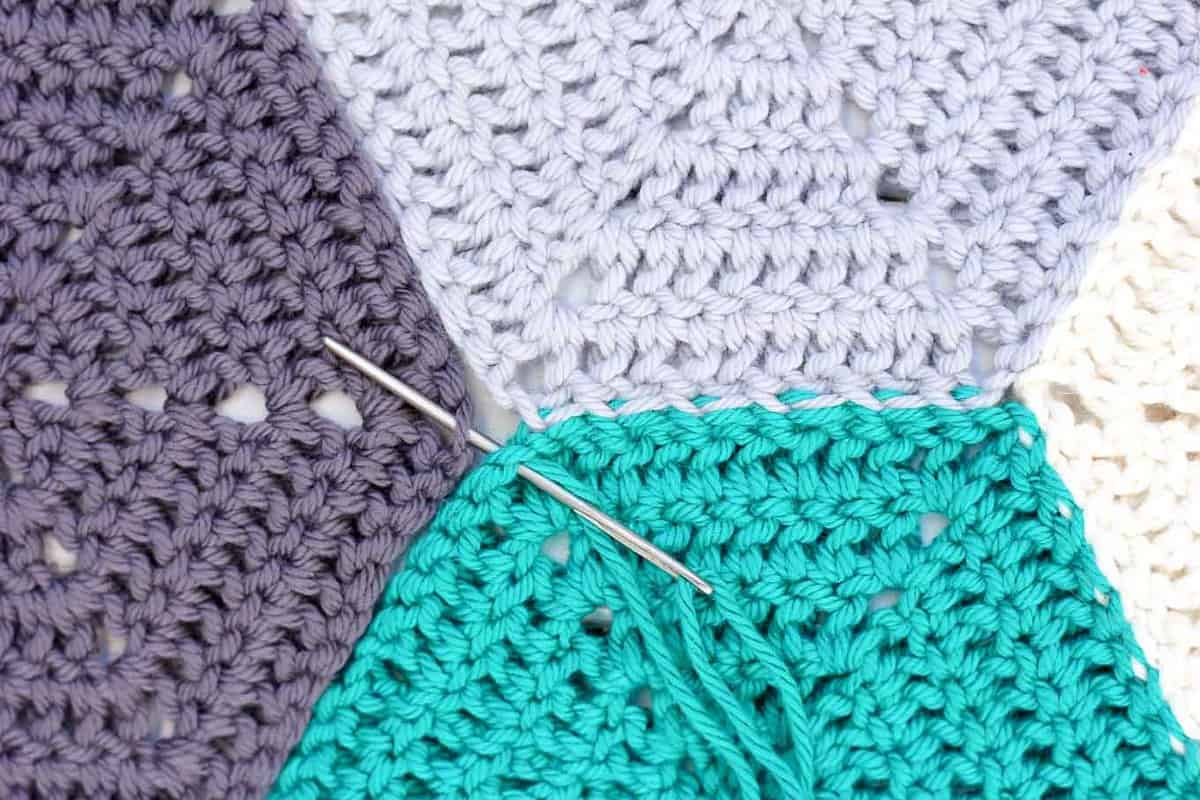
 At this point, you can add another hexagon to the side of one of the hexagons you’ve just seamed. Since I was already working with teal yarn on my needle in this case, I would proceed around the teal hexagon, seaming one hexagon to each side of the teal hexagon and then go back and seam the un-sewn sides of the new hexagons. To do this, I would repeat steps 1-4 for each hexagon I add.
 Talk about a picture equals a thousand words situation. I hope that these photos provide a clear tutorial for how to join crochet hexagons. It’s quite easy once you get the hang of it. Very soon I’ll be sharing the afghan pattern that these crochet hexies are growing into. (UPDATE: Get the afghan pattern here!)
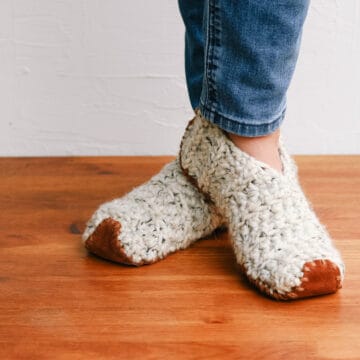
In the meantime, perhaps you’d like to whip up your own DIY blocking board: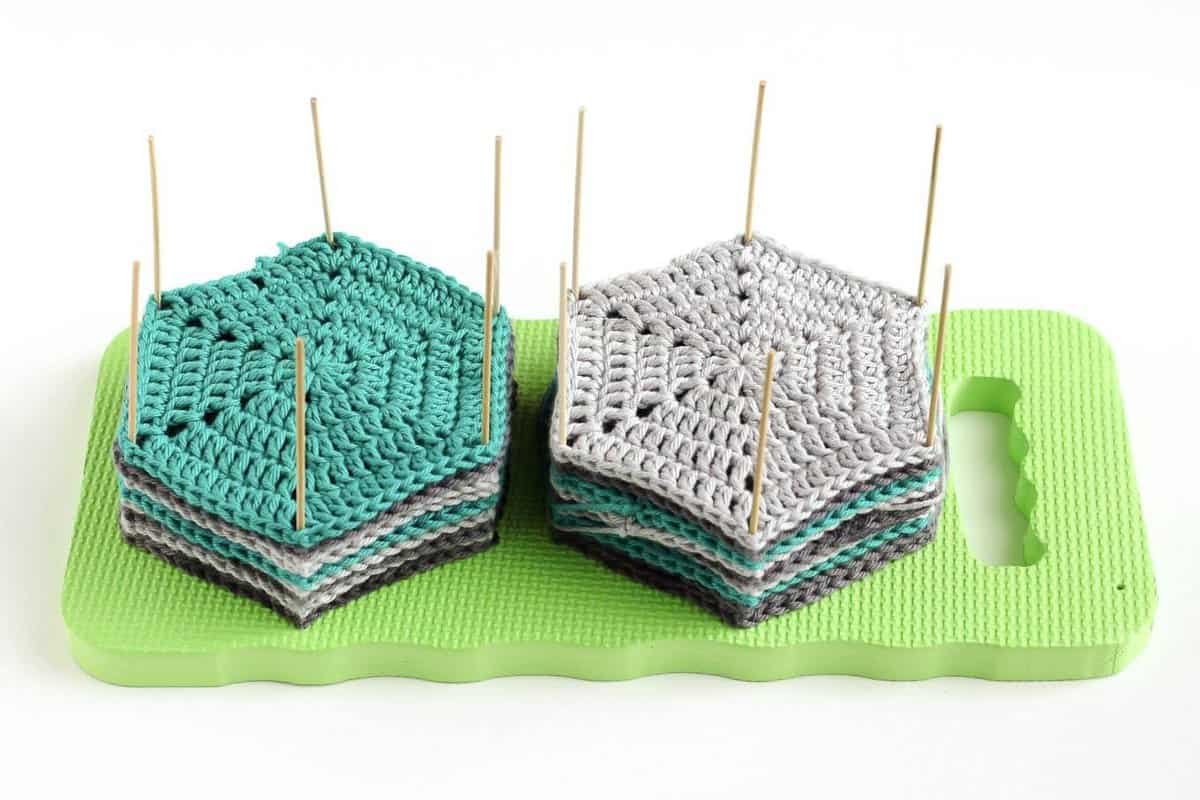 or crochet some slippers with flip flop soles:
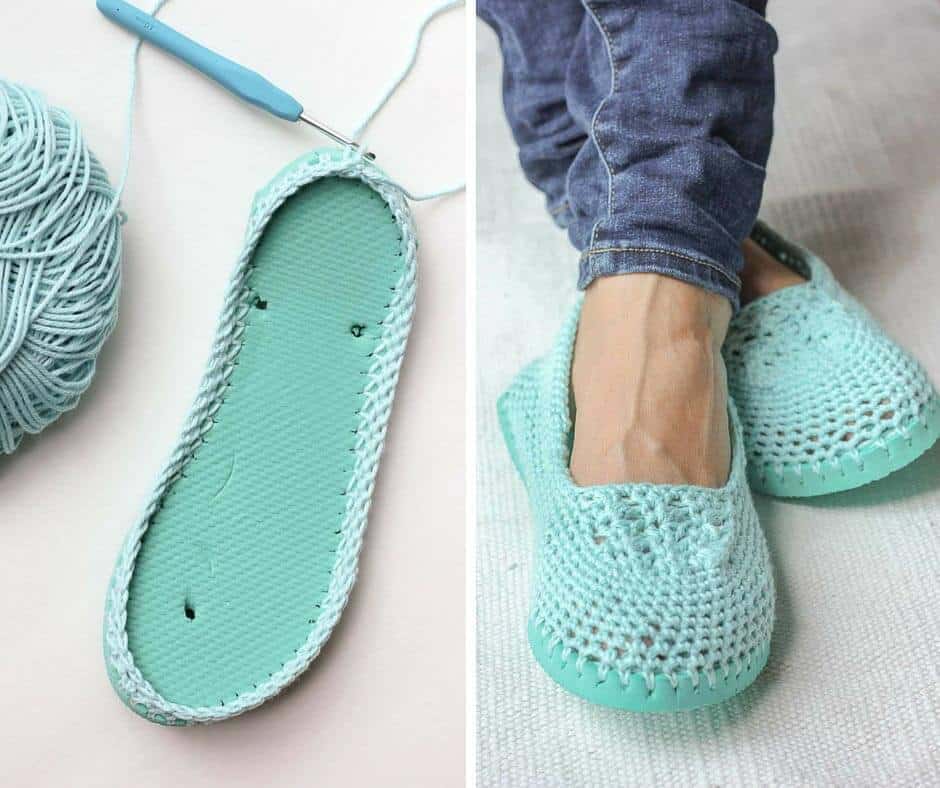

Hayley Kirkby says
I love this tutorial! Thank you so much for sharing it. I have been slowly building a stash of hexagons for the last few months and am at a stage to start joining them now. I have used chunky wool for my hexagons and am thinking about using dk wool to join because I have run out of chunky. Can you think of any disadvantage of using dk to join chunky hexagons?
Jess @ Make and Do Crew says
It's so fun to have a big stash and finally get to join them! I think that as long as the DK weight yarn is a really sturdy one, you should be just fine It will likely help the seam be more invisible actually. The biggest key is just making sure the seams are strong enough to stand the test of time. 🙂
Happy crocheting, Hayley!
Jess
Sarah says
Hi there, love this hexagon pattern/these instructions. Thankyou!! I'm new to crotchet and am making any blankets for my twins who are due in two months. I've just finished one, but want to find a way of doing something around the edges that will make the blanket more of a traditional rectangular shape. Any suggestions of what I could do with sides to make the sides straight?