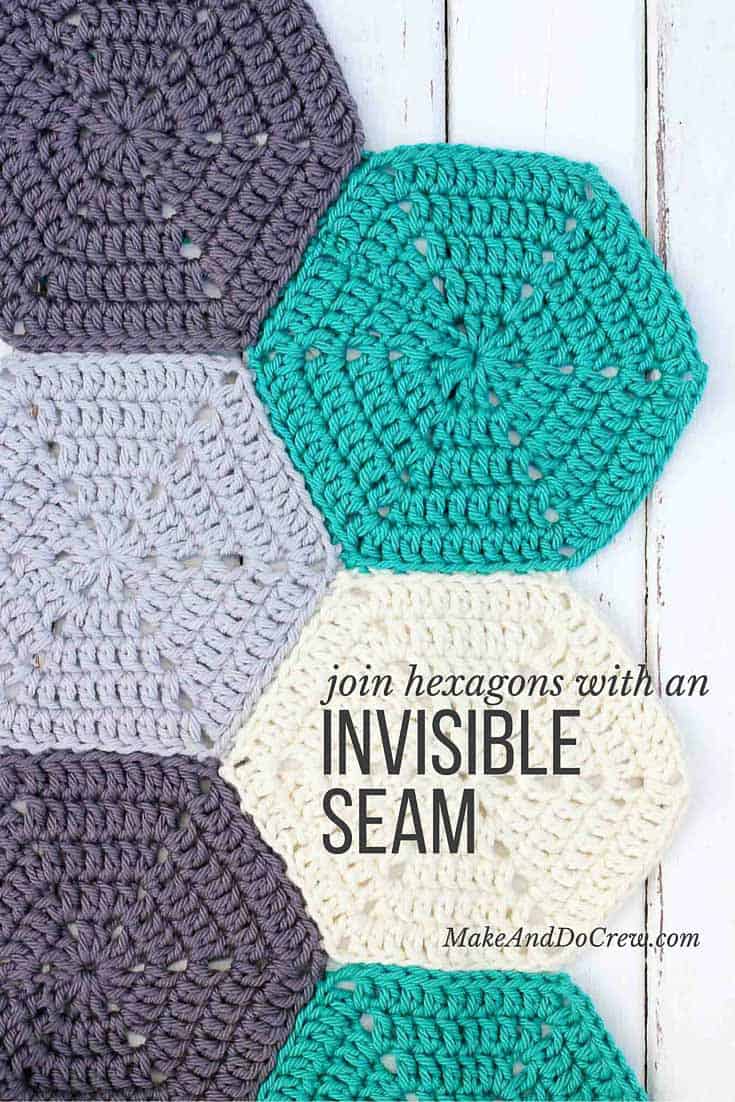
If you’ve ever wanted to know how to join crochet hexagons, granny squares or other crochet pieces together with a non-bulky, invisible seam, this is the tutorial for you!
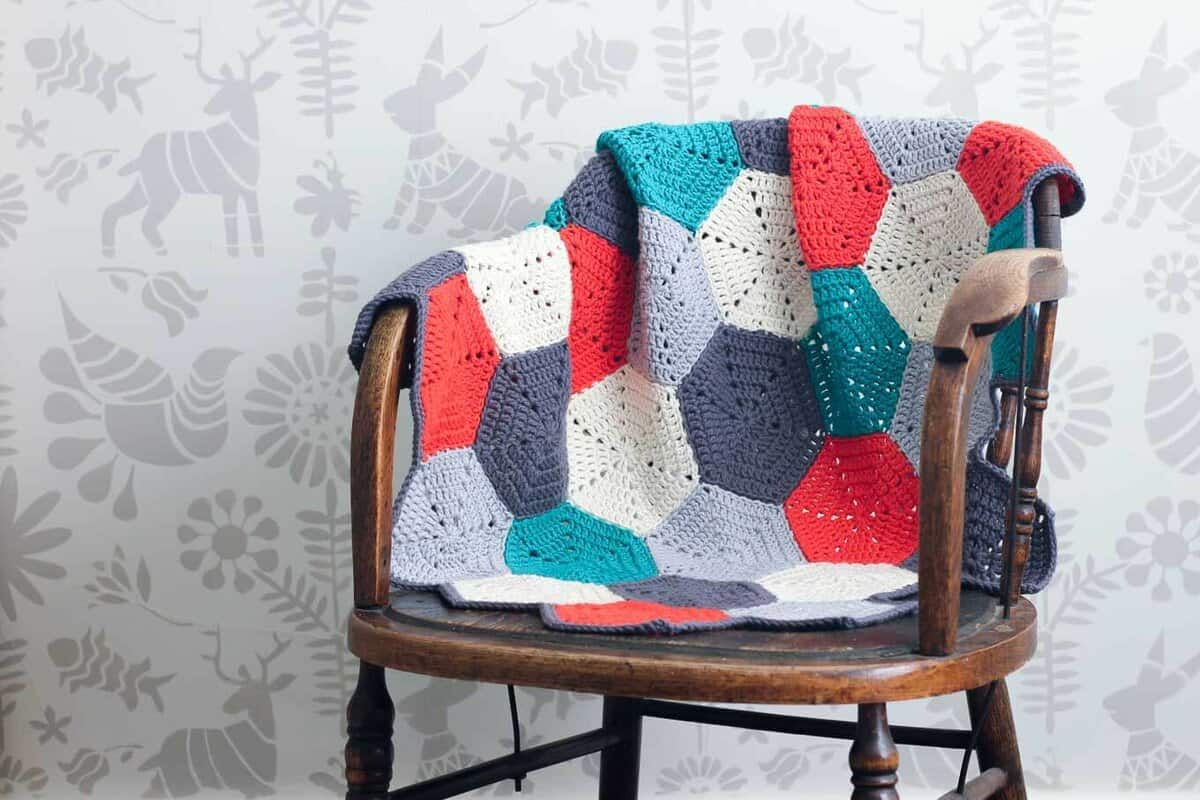
 I recently shared a tutorial for how to crochet a basic hexagon. And since then, I’ve been crocheting the heck of of some hexagons in pursuit of a modern hexagon afghan pattern I am developing. (UPDATE: Get the free hexagon afghan pattern here!)
 When it came time to sew these puppies together, I was looking for a joining method that wouldn’t add any bulk or visual distraction to the hexagons themselves.
 What I came up with eventually is sort of a cousin of the mattress stitch technique. (Now this is the point where someone could say, “Jess, this is the the ol’ ___ stitch my grandma taught me and you’re totally doing it wrong.” To which I would say, “Yeah, so?”)
On her podcast, Craftish, Vicki Howell recently called crochet an oral tradition. Now THAT is a definition made so much sense to me. There’s not a right way to crochet. There’s not a wrong way. There’s just yarn and hooks and creativity. So if you, like me, have ever felt burdened by the idea that you need to learn the “science” of crocheting so you could get some phantom A+ in crochet school, I hereby give you permission to let that idea go.
 And with that, I will show you how to join crochet hexagons with a clean, invisible seam. Is it the only way to do it? Of course not! Does it do the job and look pretty? Why yes. Good enough for me then.
How to Join Crochet Hexagons (or Granny Squares, ETC)
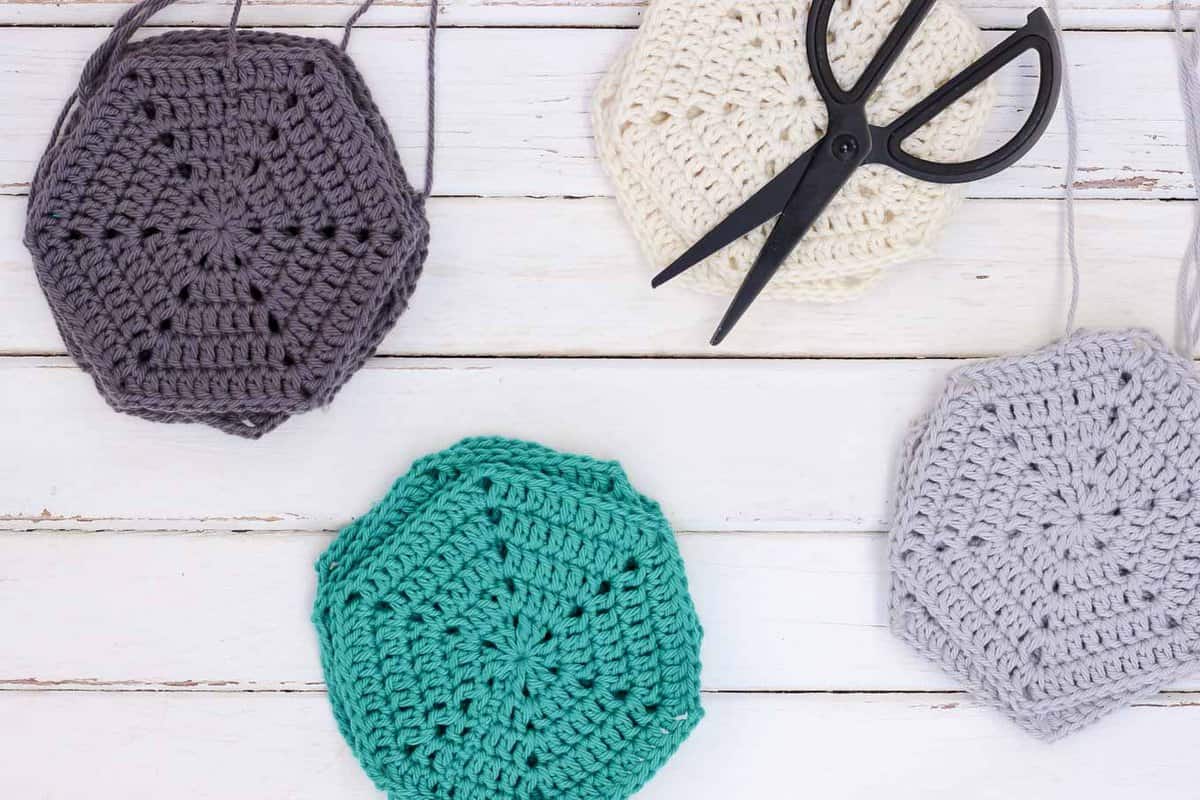
SUPPLIES
• tapestry needle
• yarn in the colors of your hexagons
• scissors
TIPS
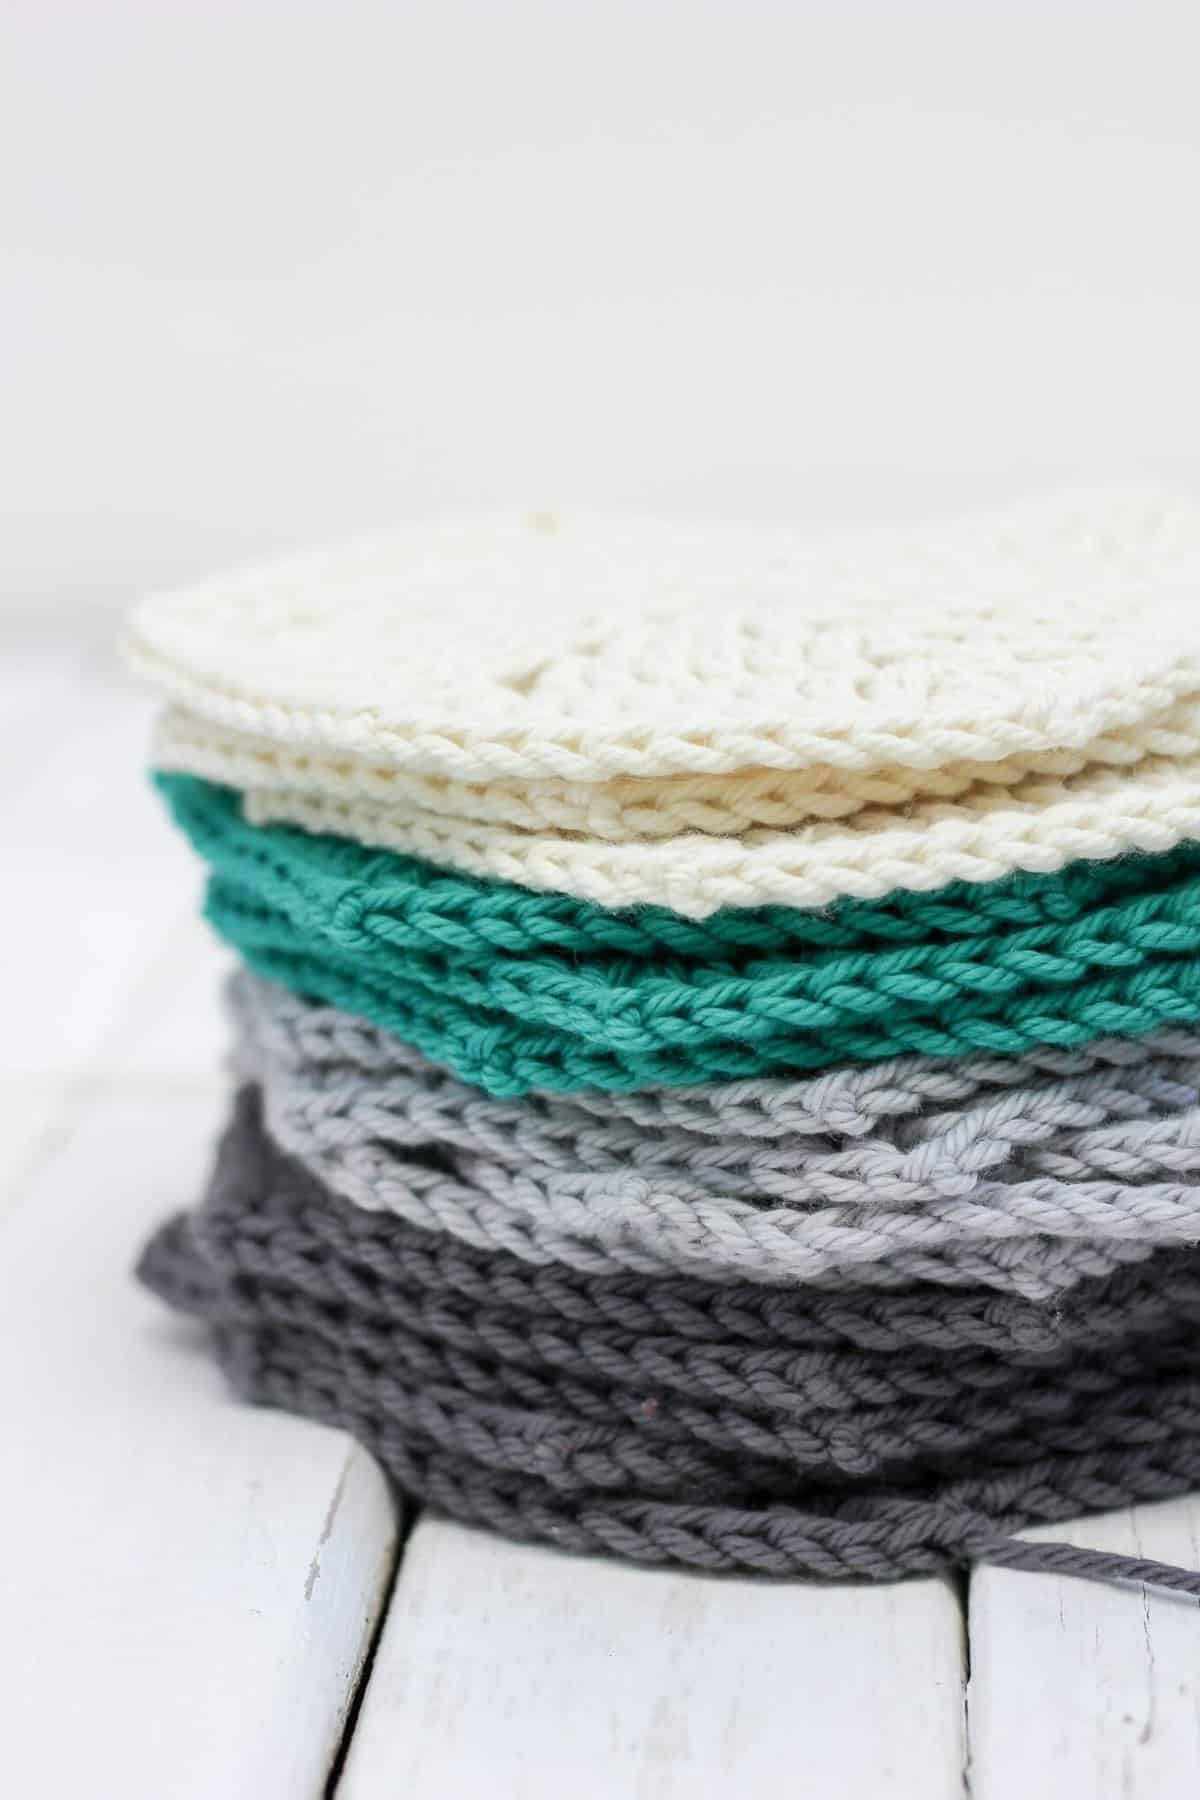
First, I highly recommend that you block your crochet pieces before sewing them together. Check out how to make a super inexpensive DIY blocking board and come back when all your hexies are blocked to the same size.
Wanna save this pattern?
You want to keep your pieces lined up so that the stitches are always being sewn one for one. If your stitches get out of alignment, you will end up with weird puckers or uneven angles at the junctures.
To make the seam the least noticeable it can be, use yarn that matches one of the hexagons that is being seamed.
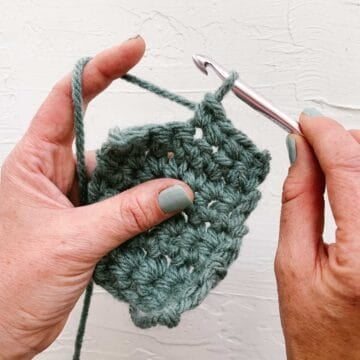
I find it easiest to line the pieces up and keep the seam horizontal in front of me while I’m sewing (as pictured below). This allows me to use my dominant right hand to go back and forth from top to bottom of the seam without switching the needle to the other hand.
Okay, let’s do this!
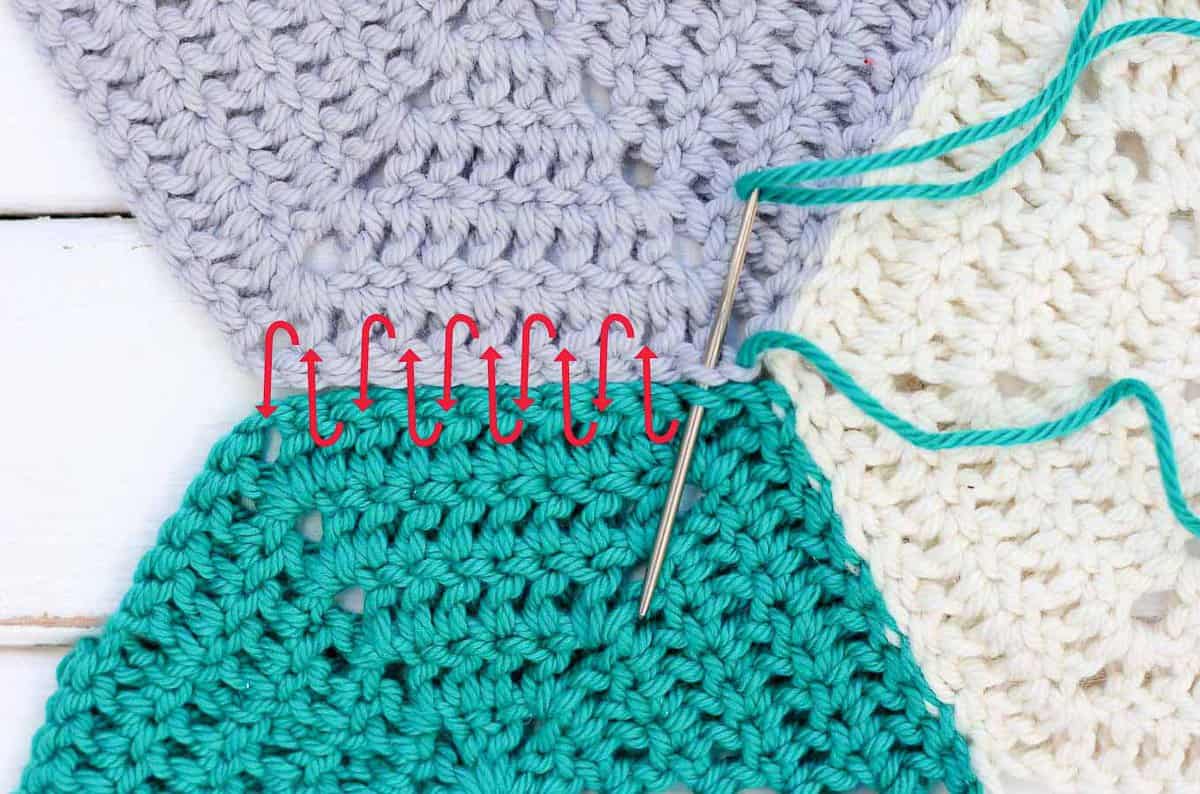
1. Line two hexagons up together, right sides facing down. You will do all your seaming on the back sides of your crochet pieces. The two sides should both have the same number of stitches, so all the stitches on one piece should more or less be lining up with a buddy on the other piece.
2. Insert your tapestry needle through the back loop of the the chain corner stitch of the bottom hexagon and then proceed through the back loop of the chain corner stitch of the top hexagon. Pull the yarn through, maintaining snug tension, but not pulling it so tight that it puckers.
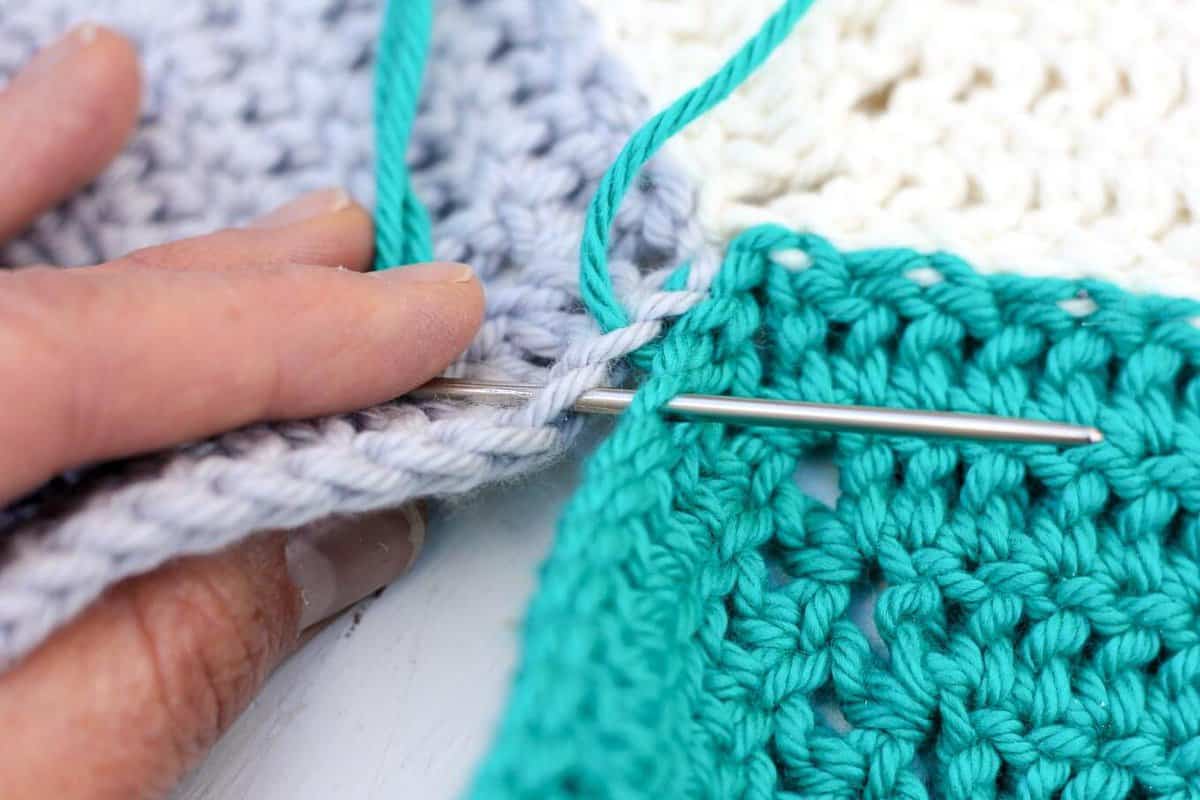
 3. Insert your tapestry needle through the back loop of the next stitch on the top hexagon (a dc in the case of this hexagon pattern) and proceed through the back loop of the bottom hexagon’s next stitch.
 Here’s another view that shows how you’re only ever working the back loops of the the stitches you’re joining. Also, note how you are never bringing the yarn over the seam, but rather working it back and forth under the back loops. This ensures that the seam remains as invisible as possible.
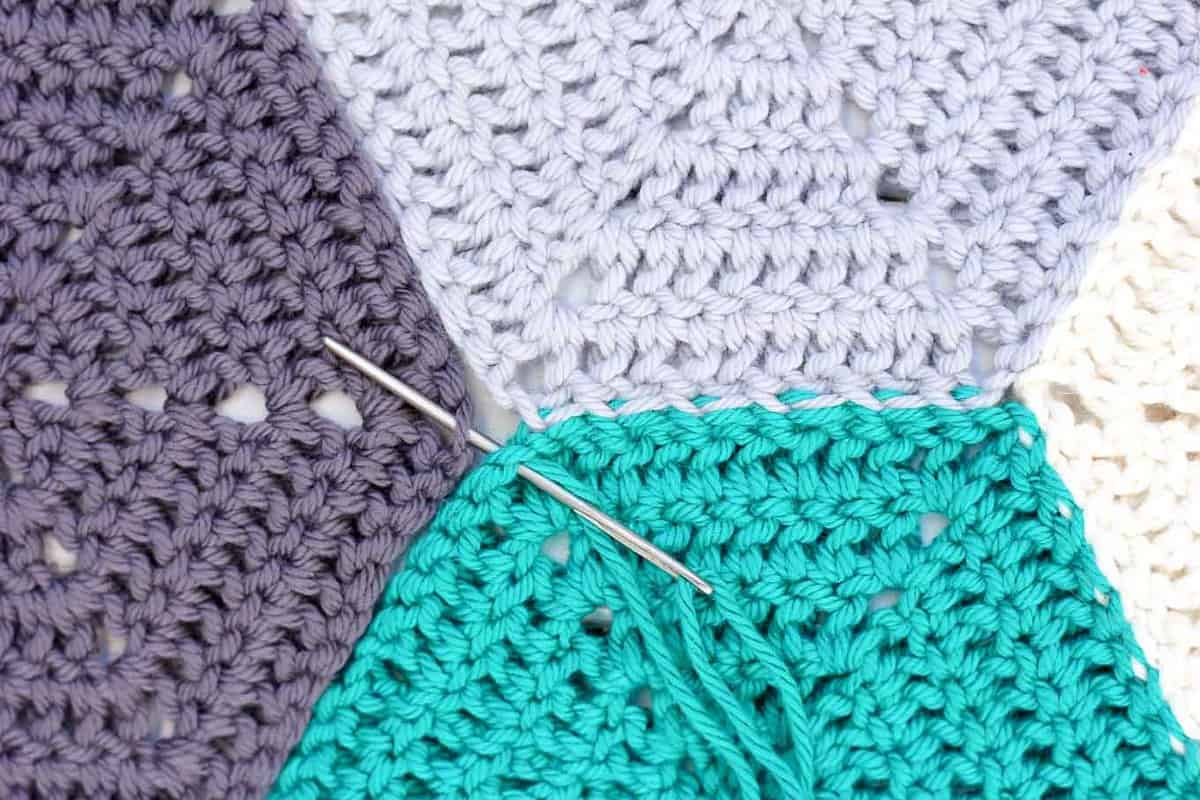
 4. Continue like this, working from the bottom hexagon to the top hexagon and then from the top hexagon to the bottom hexagon. Repeat until you’ve run out of stitches and have reached the corner chains of your hexagons. Work your needle under the back loop of the chain stitch that is closest to your seam on each hexagon.
 At this point, you can add another hexagon to the side of one of the hexagons you’ve just seamed. Since I was already working with teal yarn on my needle in this case, I would proceed around the teal hexagon, seaming one hexagon to each side of the teal hexagon and then go back and seam the un-sewn sides of the new hexagons. To do this, I would repeat steps 1-4 for each hexagon I add.
 Talk about a picture equals a thousand words situation. I hope that these photos provide a clear tutorial for how to join crochet hexagons. It’s quite easy once you get the hang of it. Very soon I’ll be sharing the afghan pattern that these crochet hexies are growing into. (UPDATE: Get the afghan pattern here!)
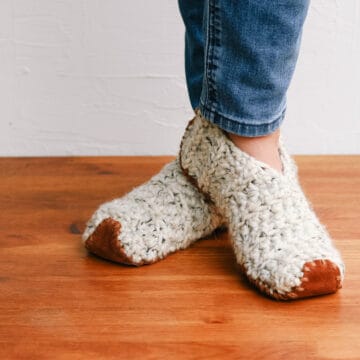
In the meantime, perhaps you’d like to whip up your own DIY blocking board: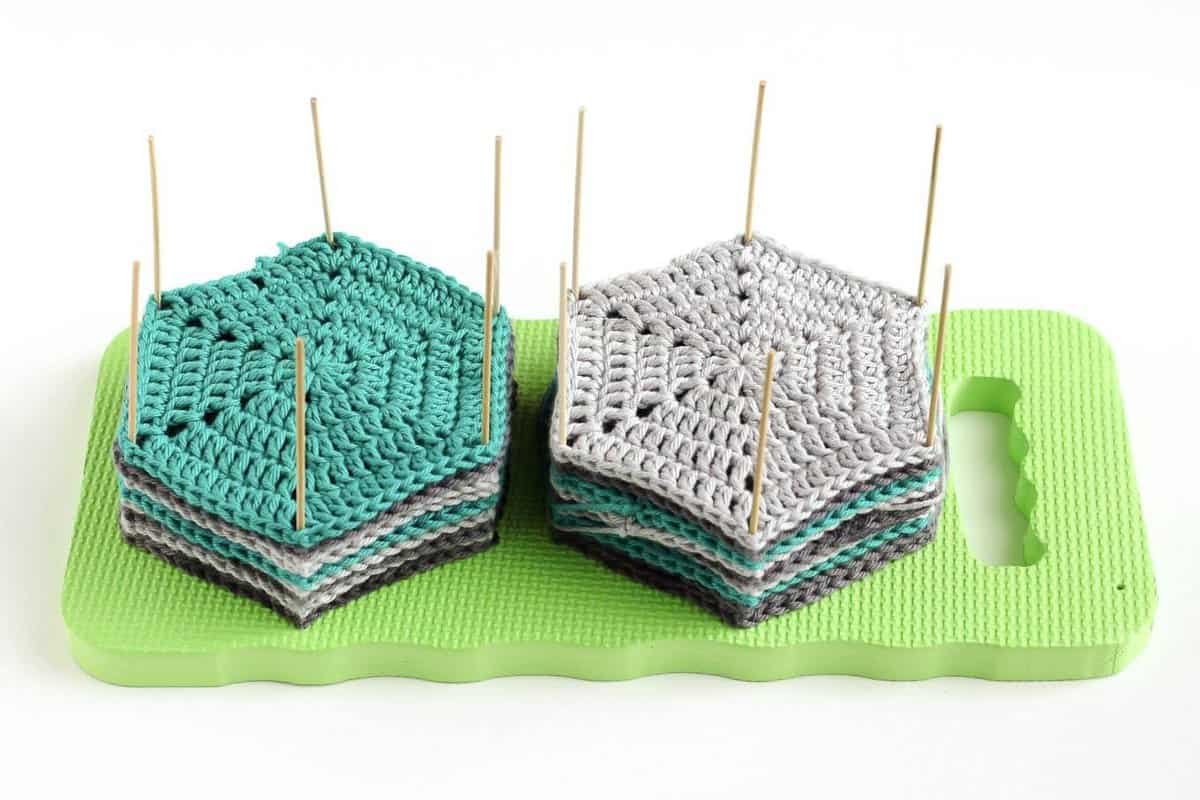 or crochet some slippers with flip flop soles:
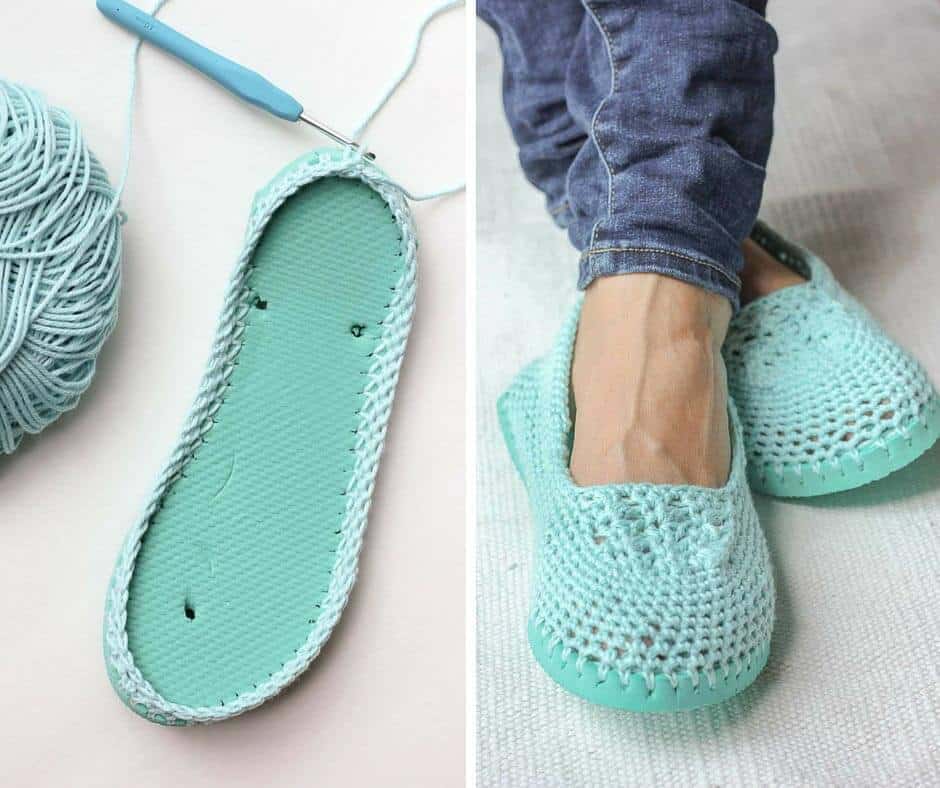
Lina Meghji says
How do you thread the needle? As in do you overlap so that two pieces of yarn are going through each patch or do you tie off the yarn at the eye so you're just pulling one long piece of yarn through everything? And do you cut like a 12in piece of yarn and join as much as you can with that and then cut another piece to keep going or can you theoretically just keep jointing with the same yarn string?
Jess @ Make and Do Crew says
Great questions! I would play it by ear whether I used one or two strands (like the strand is folded in half and knotted or left unknotted to be one strand). If you need the seam to be super invisible, I'd use one strand. But if you need it to be super strong, I'd fold it over and use two. Then I do indeed cut a long-ish length of it, attach it to the seam I'm working on and keep seaming until I use all the yarn, then fasten off. (Just like regular sewing.)
I hope that's helpful!
Jess
Carol says
Good useful instructions. I am making a hexagon afghan for my grown grandson. He wants a
neutral color between the hexagon (as a background) , but without a ridge. Is that possible ? I appreciate your down to earth way of doing and explaining .....:-)
Paige says
What I've done is one single crochet border around each hexagon in the same color as the hexagon. Then another sc border in the neutral color you speak of. This for each hexagon. Then, the joining stitch goes through that neutral color of each hexagon, giving that divider you're looking for. I like that look too.
Jess @ Make and Do Crew says
Sounds lovely, Paige!
Lauren says
Hello! I am very new to crocheting (relearning) and thought that doing the hexagons would be a great learning experience. I'm nowhere near stitching anything together, but I'm trying to figure this out! So when you finish the stitch for that particular color/ hexagon, is the knot noticeable? I don't want multiple knots just hanging off the back of the blanket, I guess is what I'm trying to say.
The finished product is beautiful by the way! Thanks for sharing!
Jess @ Make and Do Crew says
Hey Lauren,
Thank you! Here's a trick I did with my blanket--when I finished a hexagon, I left a pretty long tail (like 15" or more) and pulled that tail through my last stitch loop to create a sort of knot. Then, I used those tails to sew the hexies together whenever possible so that there were fewer knots that had to be made. For the strands that weren't ultimately used to sew hexagons together, I used a tapestry needle to weave the tails back and forth through the back of the afghan to weave in the ends.
Does that make sense? Hope so!
Jess
Chelle Campbell says
I like this tutorial - it seems so easy to do. I have a question, though. When you flip it over when done, so the right side is facing up, because you only connected the hexagons through the back loops, is there any kind of gap between the blocks in the front because the front loops are not connected? Thank you for your fun and easy to follow tutorials. I'll have to find the one for the half hexagon too!
Jess @ Make and Do Crew says
Hey Chelle,
I haven't noticed a gap and if you look in the photos, there really isn't one. I think the stitches are all close enough together than the gap isn't really visible. 🙂
Marilyn Petroff says
I am 80years old and this is the first easy joing I have ever found. Been crocheting since I was 14. Thank you for this as I am trying to figure out how to put 3 inch squared granny squares for a baby afghan.
Jess @ Make and Do Crew says
Well, good golly Marilyn, that is a serious compliment! Thanks so much for your kind words. I'm so happy to hear this has helped you. 🙂
Enrica says
Your instructions are really clear and useful. And also very funny, too! 🙂 Thanks for sharing them with us.
Enrica
Jess @ Make and Do Crew says
Haha-I'm so glad you found them useful (and entertaining!) Happy crocheting!
Jess
Christine says
Hi there! I absolutely love your 'happy hexagons' blanket and am currently working on it, but I do have a question about the joining method. Do you use the yarn from the hexagons themselves (like, the pieces of yarn that you have left when you finished off and that is still part of the hexagon) or do you use a new piece of yarn and if so, how do you join it? Sorry, English isn't my native language and I know this might not be very clear, but I've tried my best to explain it and I hope you can help me! Thanks in advance! 🙂
Jess @ Make and Do Crew says
Hey Christine,
Your English is impeccably clear 🙂 This is a great question! Generally, I added a new piece of yarn. When doing so, I would actually just tie a knot in the most hidden place possible and then try to do the joining method on top of the tail. Does that make sense? Essentially, I always try to seam/crochet on top of the tails so that they can be disguised without me having to weave them in. Worst case scenario though, I'd just weave that end in and then use the long string to seam many hexagons together. (I'd always use the color of thread that matched one of the hexagons.)
Let me know if that doesn't make sense and I'll try to explain it another way.
Happy crocheting!
Jess
TigerKim says
Gorgeous! Thanks for your sharing your skills and work.
Carol says
Thank you for this great tutorial! Nice job and beautiful hexies!
Jess @ Make and Do Crew says
Thanks so much, Carol! Glad it was useful for you.
Happy crocheting!
Jess
Amelia says
quero aprender a emendar ,quero saber qtas rodelas fazer pra dar um tapete
LULY DELGADO CHICAÍZA says
unirlos es fácil, todos se los une en horizontal y vertical, pero unos quedan más afuera, OTROS QUEDAN MÁS ADENTRO , pero no quedan lineal , para que quede en forma de línea recta tenemos que realizar la mitad del hexágono y esto es lo que quiero que me enseñes, y haciendo la mitad del hexágono queda excelente, por favor ayúdame, tengo los hexágonos para una colcha cama doble, pero no me cuadran, para mí es hacer la labor mitad del hexágono, pero no puedo hacer la mitad,como voy cuadrando.
gracias por tú ayuda.
Jess @ Make and Do Crew says
Hi Luly!
I'm sorry that I don't speak better Spanish. I translated your comment using Google and I think I understand it to be asking how to fill in the sides of the blanket that are uneven because of the hexagon shape? I have a pattern for a half hexagon that I hope to post soon. I think that will help you. 🙂
Jess
April Morris says
I am so excited to find this simple but incredible way to join pieces together! Could you please tell me how you tie off the yarn when finished?
Nyn says
Hi Jess
I have been cricheting for 30+ years, there are no rules in crochet, just do whatever feels right for you.
I to always use knots, they do help all iteams stay together and last much longer. There are times like for iteams ment for children if I swing acrylic I will take a lighter and lightly burn/ melt my knots that way I know no amount of pulling and washing will unravel my knots...lol. Extra security lol..
I have seen to many of other peoples projects come apart, or always have tails hanging out, if those keep getting cut out of the way eventually they become to short and then hole thing unravels..
So yes knots are a good thing..
I also start all knew colors with a slip knot secured in place. ?
Nyn says
Sorry for my errors, I didn't double check before posting.
Aletta says
Tak you so much!