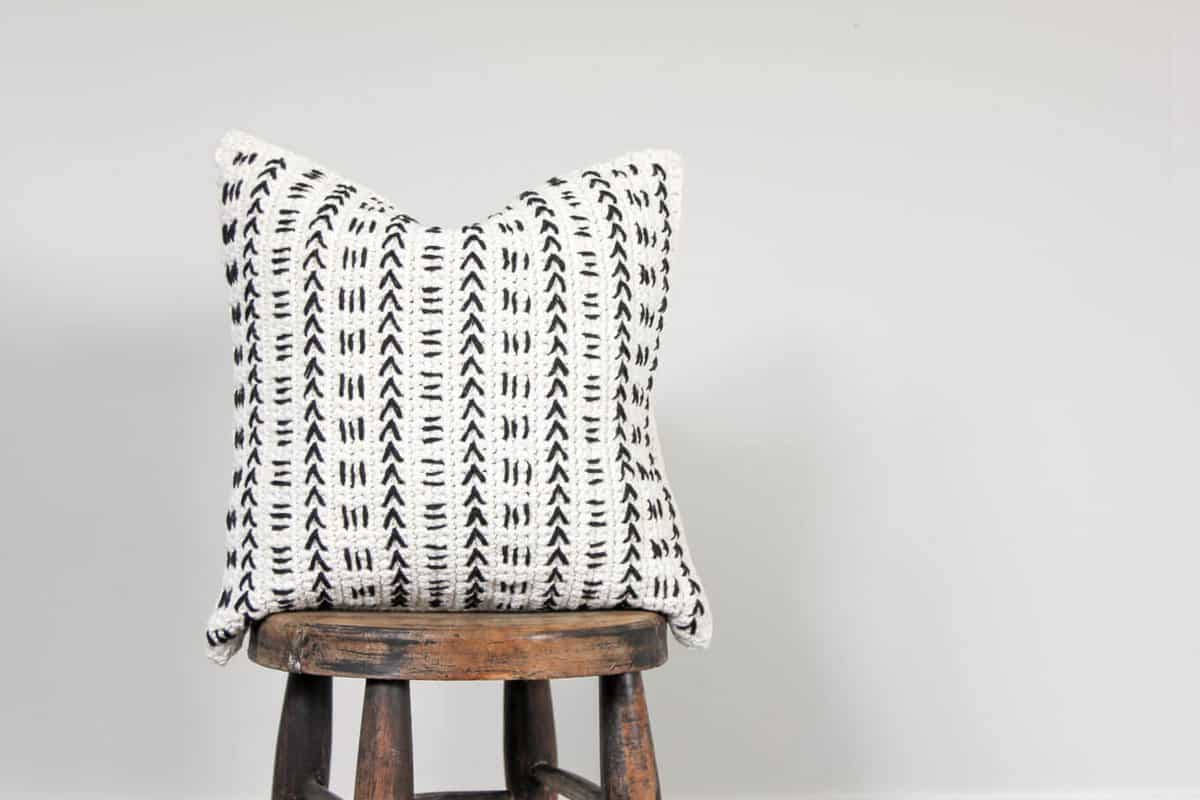
This free crochet pillow pattern uses a mud-cloth-inspired design to make a modern piece of couch flair! Excellent pattern for beginners! Get the free pattern below or purchase the ad-free, printable PDF here.
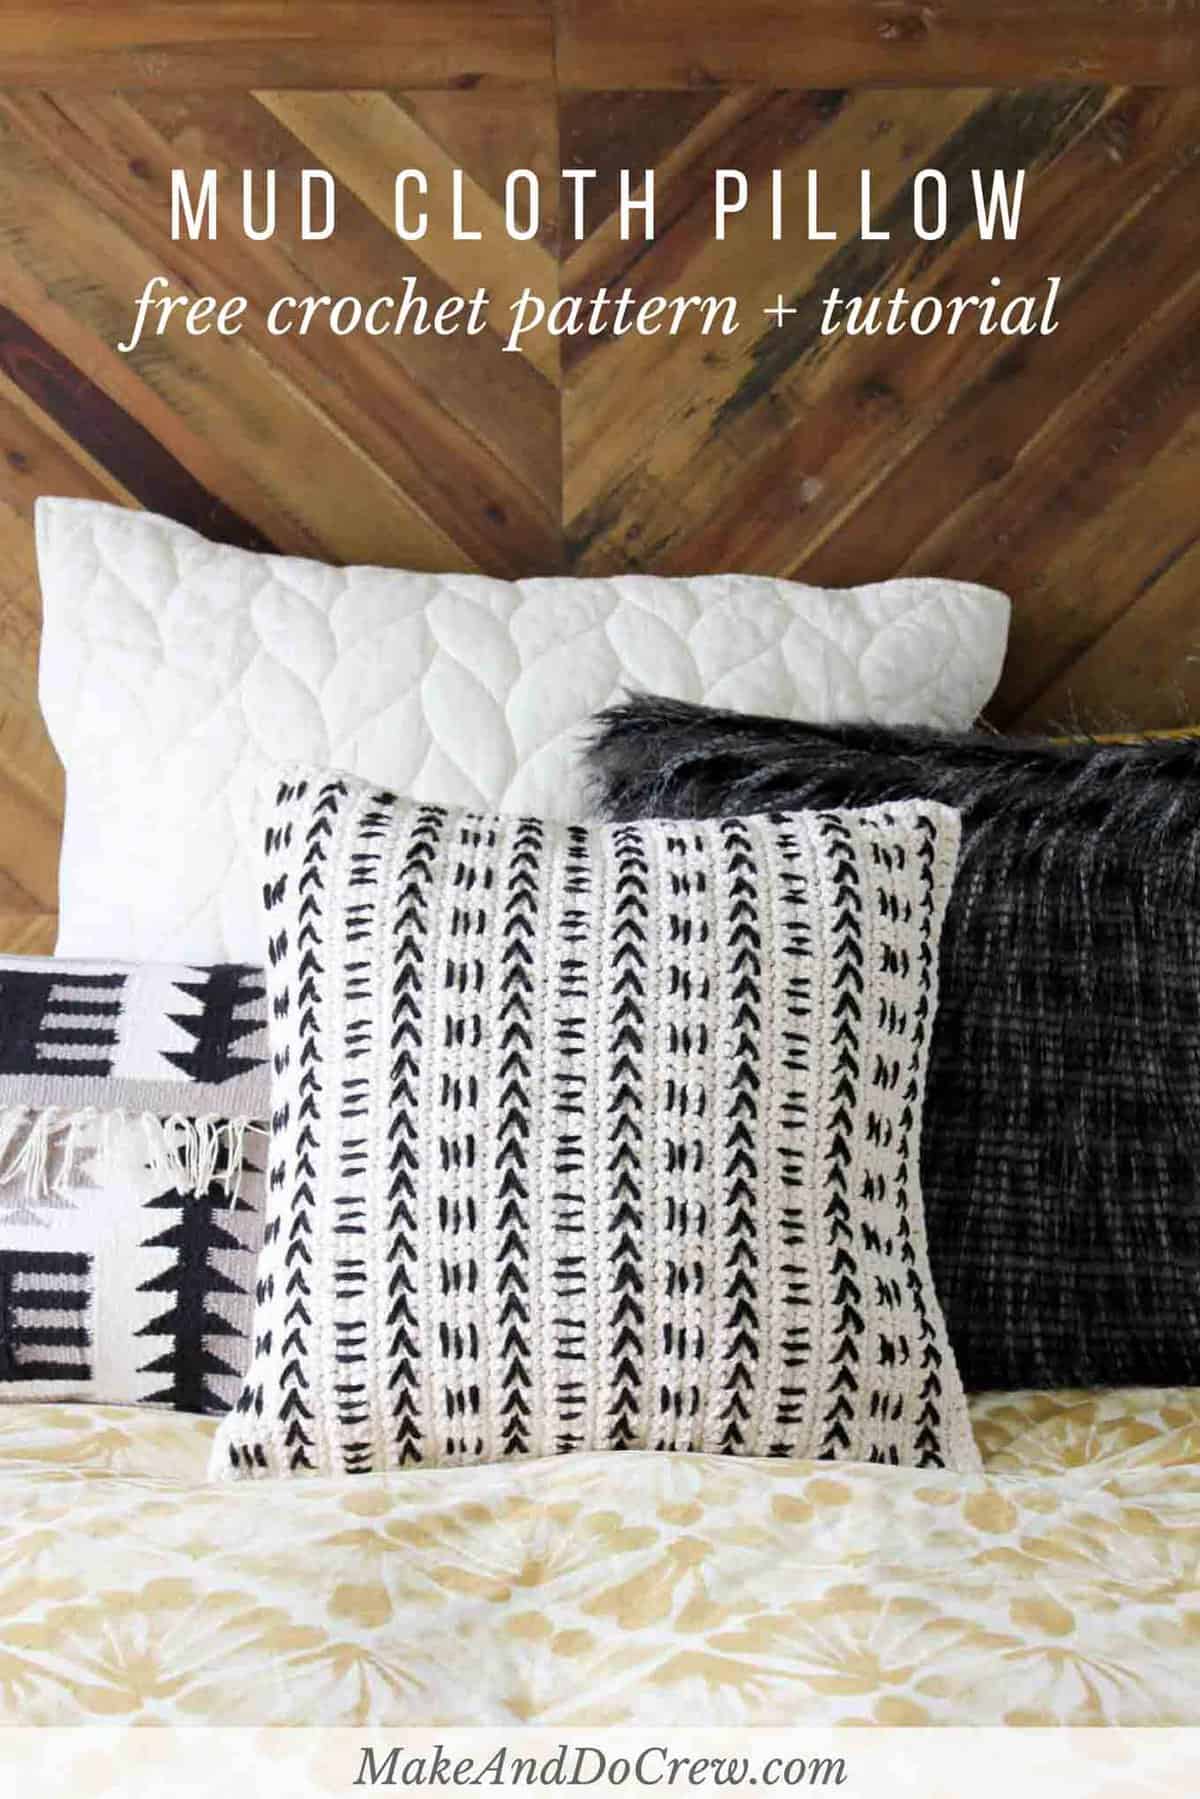 This free crochet mud cloth pillowcase pattern is a collaboration with my friends at Lion Brand Yarn. This post contains affiliate links.
When I recently asked on Instagram for your opinions on what color mud cloth pillow I should crochet, I was met with a few “What in the world is mud cloth?” inquires. So, first things first: Mud cloth is a type of fabric that is made in Mali by actually dying fabric with mud. The result is graphic, tribal fabrics that have really caught on in popularity with the wanna-be world traveler crowd like myself.
In fact, my designer friend Alexandra from Two of Wands just happened to be working on a crochet mud cloth pattern at the same time as me. Her designs are so stunning–I can’t wait to see what the finished pattern looks like!
Please do not publish or share this pattern as your own. You may make items to sell with this pattern. In exchange, please link back to this post. Do NOT use my photos as your own sales photos. You can read my policies here. Now let’s make something awesome!
Mud Cloth Crochet Pillow Pattern — Free Pattern!
Purchase the ad-free, printable PDF with all instructional photos here.
Add this pattern to your Ravelry favorites here.
Pin this pattern for later here.
Measurements:
Finished pillowcase: 18”x18”
Supplies:
So you can spend more time making pillows and less time shopping, this pattern contains affiliate links at no extra cost to you.
(Purchase a kit with all the yarn needed here.)
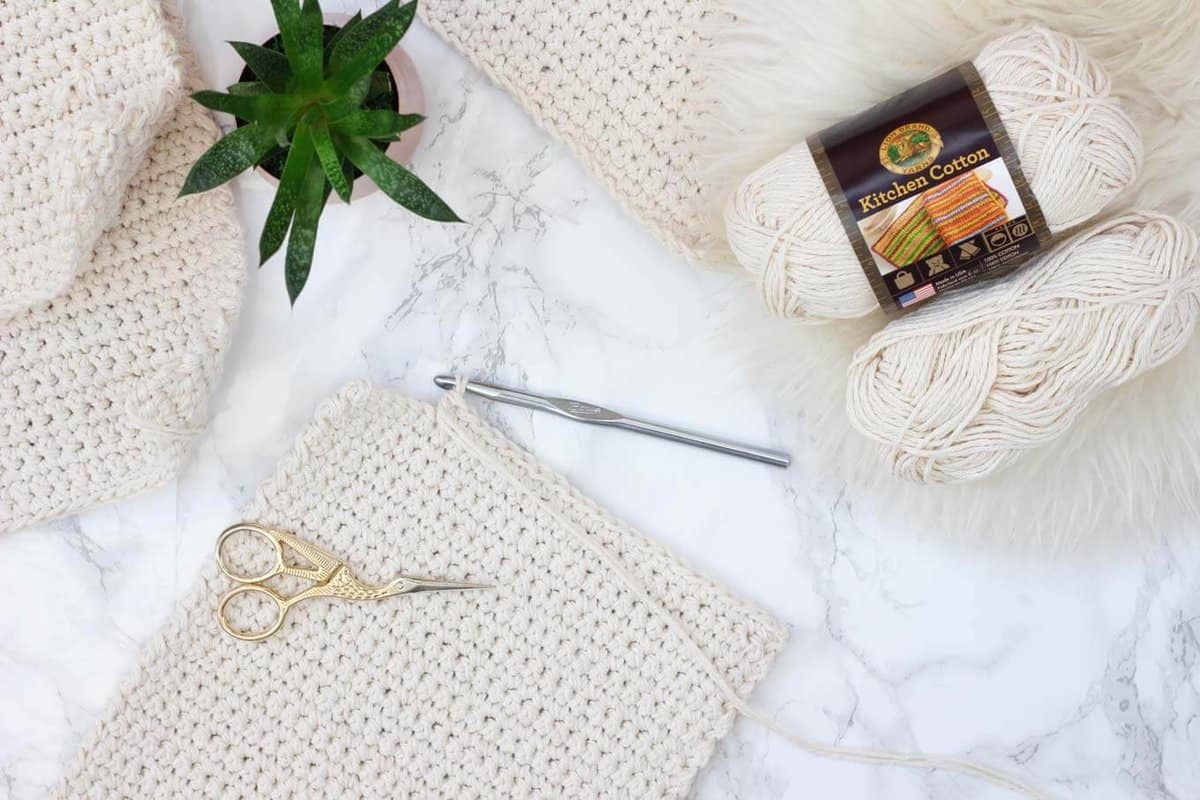
• Lion Brand Kitchen Cotton – 12 skeins (1888 yards) – color: Vanilla (MC)
• Lion Brand Kitchen Cotton – 1 skein (99 yards) – color: Licorice (AC)
• Tapestry needle
• Size J [6.0 mm] crochet hook
• Stitch markers or safety pins
• (3) 1.5” wooden buttons
• 18”x18” pillow insert (ideally with down or synthetic down filling)
• Sewing needle and thread to match buttons
Gauge:
• 12 st = 4”, 14 rows = slightly over 4” worked in single crochet
Abbreviations and Glossary:
sc – single crochet
sk – skip
sl st – slip stitch
ch – chain
RS – right side
WS – wrong side
MC – main color
AC – accent color
yo – yarn over
Overall Pattern Notes:
• Pillowcase is worked in three sections: a front panel and two back panels. The front panel is embroidered before all three panels are sewn together. Alternatively, you can simply crochet two front panels and sew them together if you don’t desire a removable pillowcase.
•Pattern is worked with two strands of yarn held together throughout.
• Work stitches tightly to achieve a dense, even fabric. Check gauge and use a smaller hook if your stitches are turning out too loose.
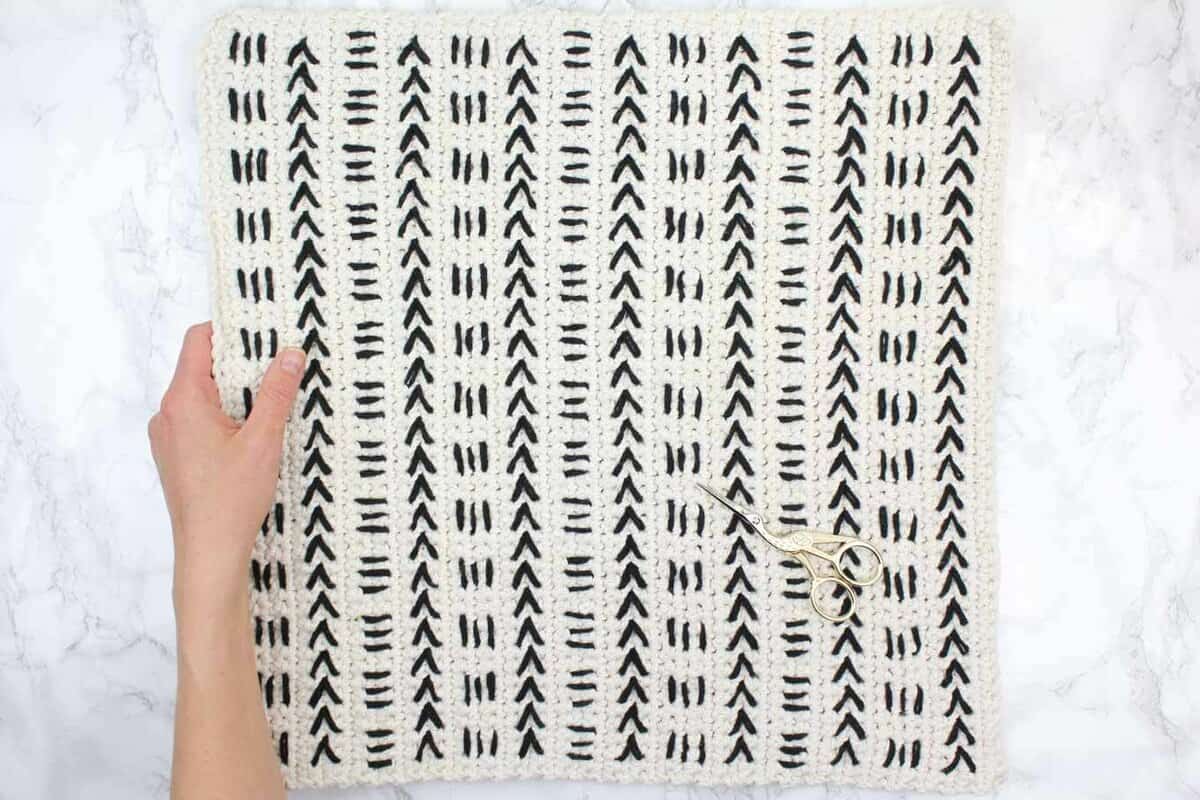
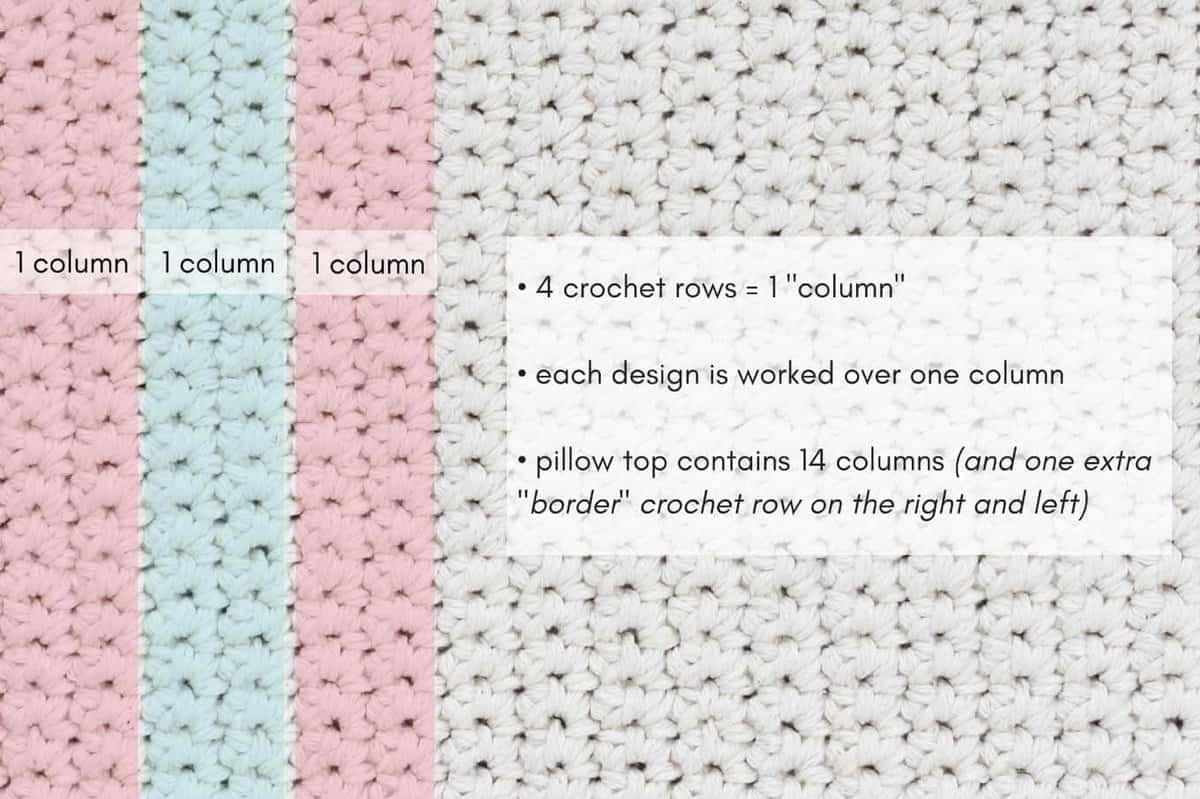
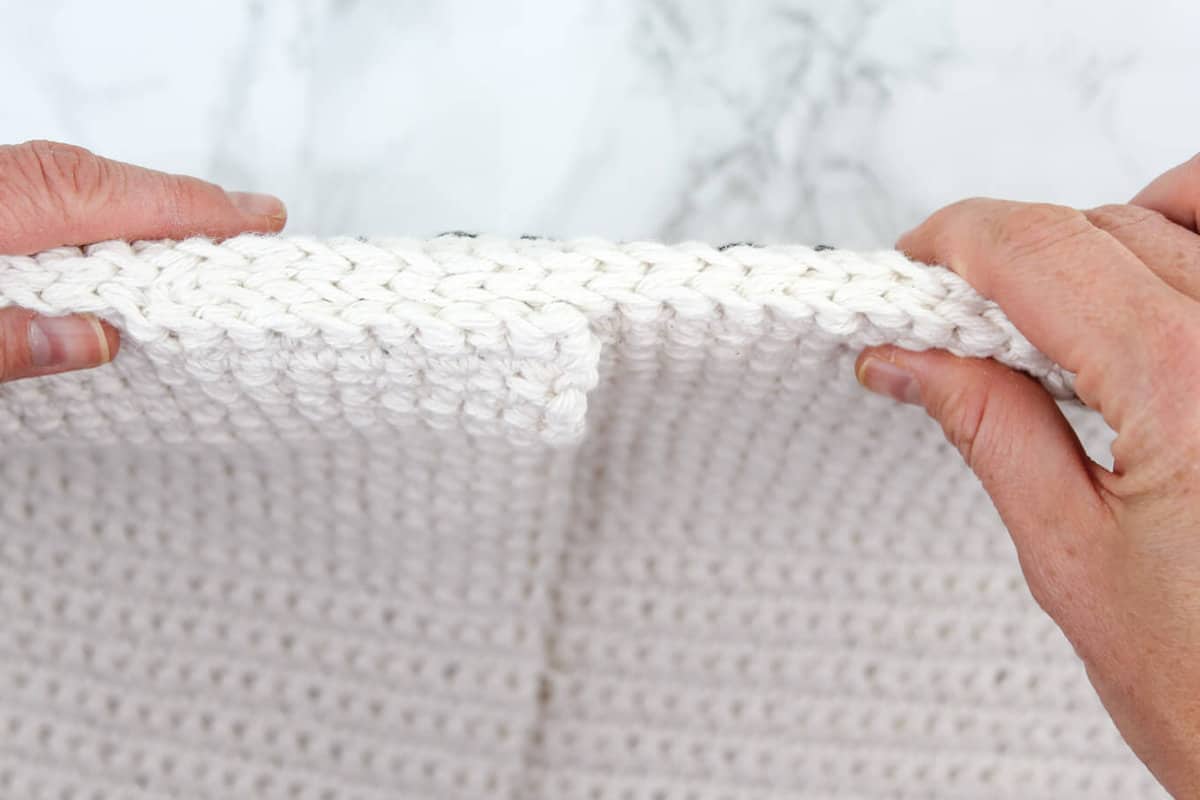
• To ensure you have the correct number of total rows in each panel, reference photo below for guidance on counting rows. Your panels should have 14 total “columns” (sets of 4 rows) plus 2 “border” rows for a total of 58 crochet rows.
FRONT PANEL
Foundation Row: With 2 strands of MC held together, ch 54.
Row 1: Sk first sc, sc in each ch. Place marker in front of last stitch to denote RS; turn. (53)
Row 2: Sk first sc, sc in each sc; turn. (53)
Rows 3-58: Repeat Row 2.
WIDER BACK PANEL
Foundation Row: With 2 strands of MC held together, ch 36.
Row 1: Sk first sc, sc in each ch. Place marker in front of last stitch to denote RS; turn. (35)
Row 2: Sk first sc, sc in each sc; turn. (35)
Rows 3-58: Repeat Row 2.
NARROWER BACK PANEL
Foundation Row: With 2 strands of MC held together, ch 28.
Row 1: Sk first sc, sc in each ch. Place marker in front of last stitch to denote RS; turn. (27)
Row 2: Sk first sc, sc in each sc; turn. (27)
Rows 3-58: Repeat Row 2.
ADDING MUD CLOTH EMBROIDERY DESIGN
Notes:
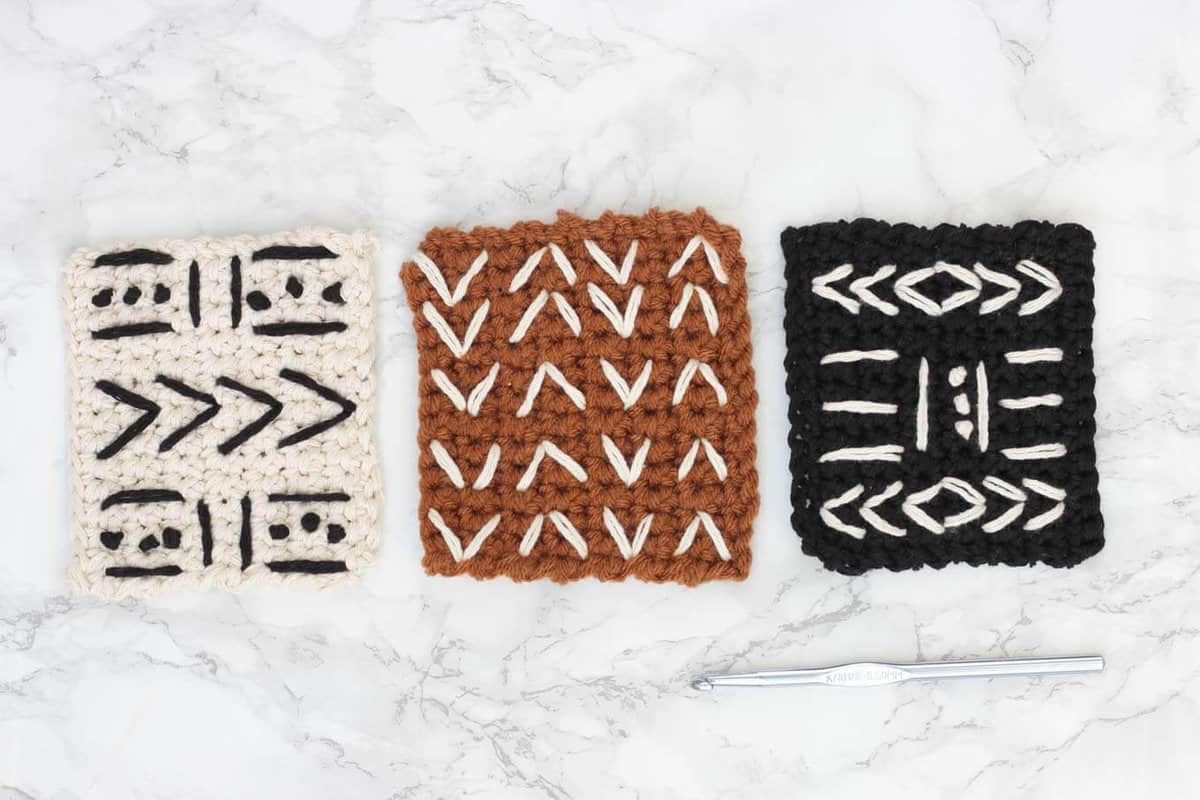
• Keep this part fun! I’m providing a lot of detail for those who like it, but don’t be afraid to just check out the photos for general technique and then invent your own mud cloth designs!
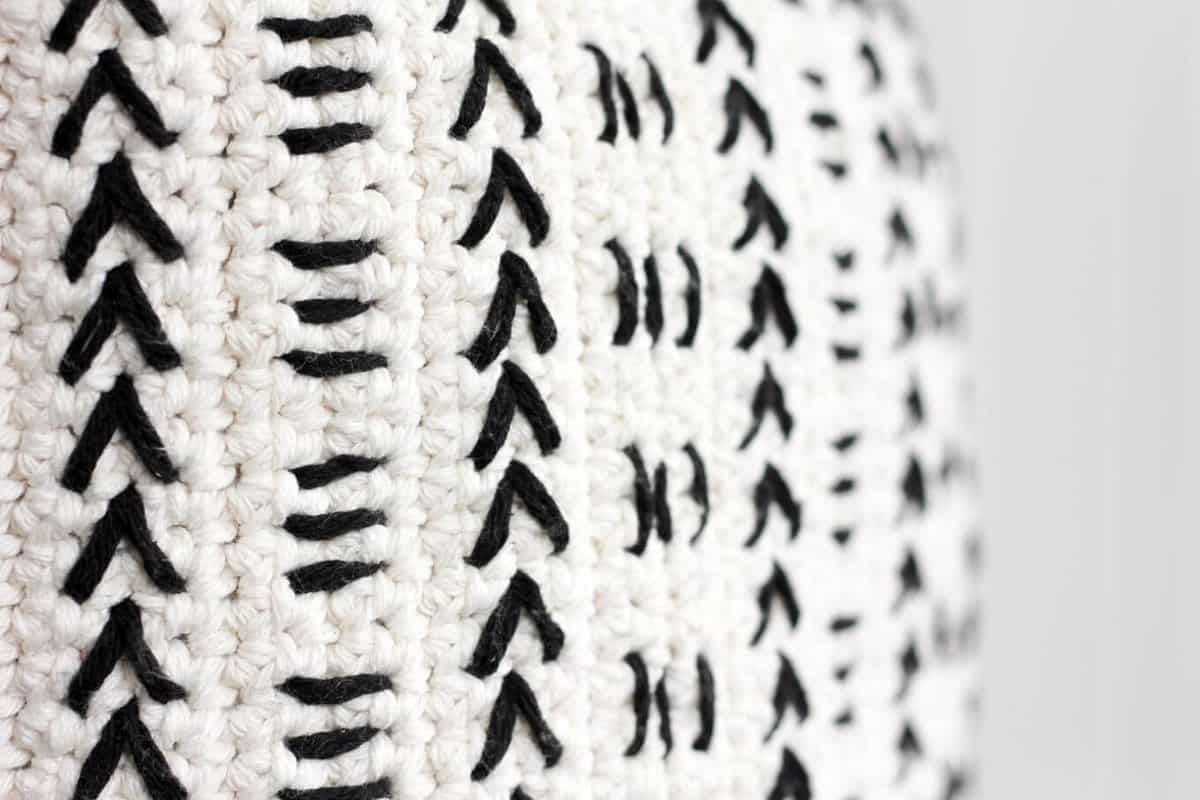
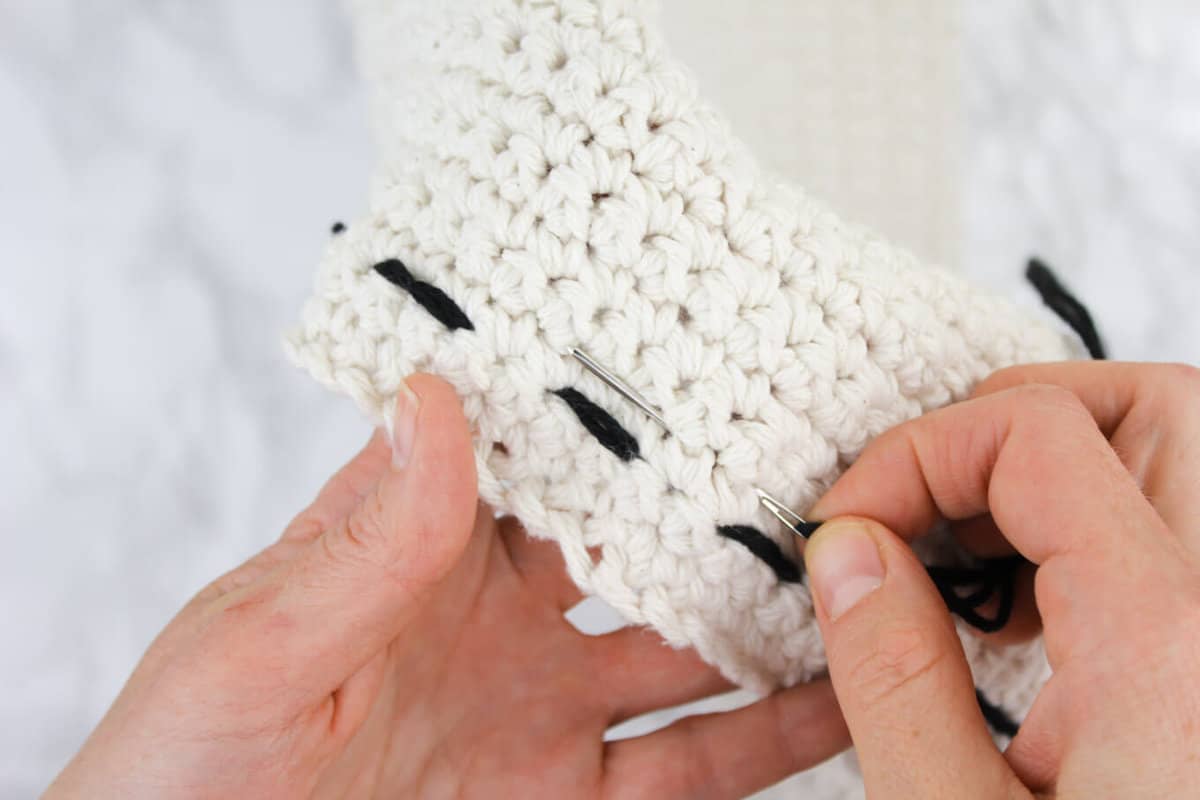
• All embroidery designs are worked with one strand of AC yarn doubled over and a tapestry needle. Simply cut a long strand of yarn, embroider as much as you can, tie yarn off and begin with a new piece whenever necessary.
• Each embroidery design is worked over four crochet rows. In this pattern, we’ll refer to each set of four rows as one column. (See photo at top of pattern in “Overall Pattern Notes” section.)
• It’s important to pay attention to which is the wrong side and right side the pillow front so that the “columns” appear appropriately for the embroidery section. The RS of your pillow top should have 14 columns and one border crochet row on both the right and the left.
• To recreate the sample, work the vertical lines design in the first column (rows 2-5), then the arrow design in the next column (rows 6-9), then the horizontal lines design in the next column (rows 10-13). Repeat this sequence until the last column, ending with an arrow design in rows 54-57.
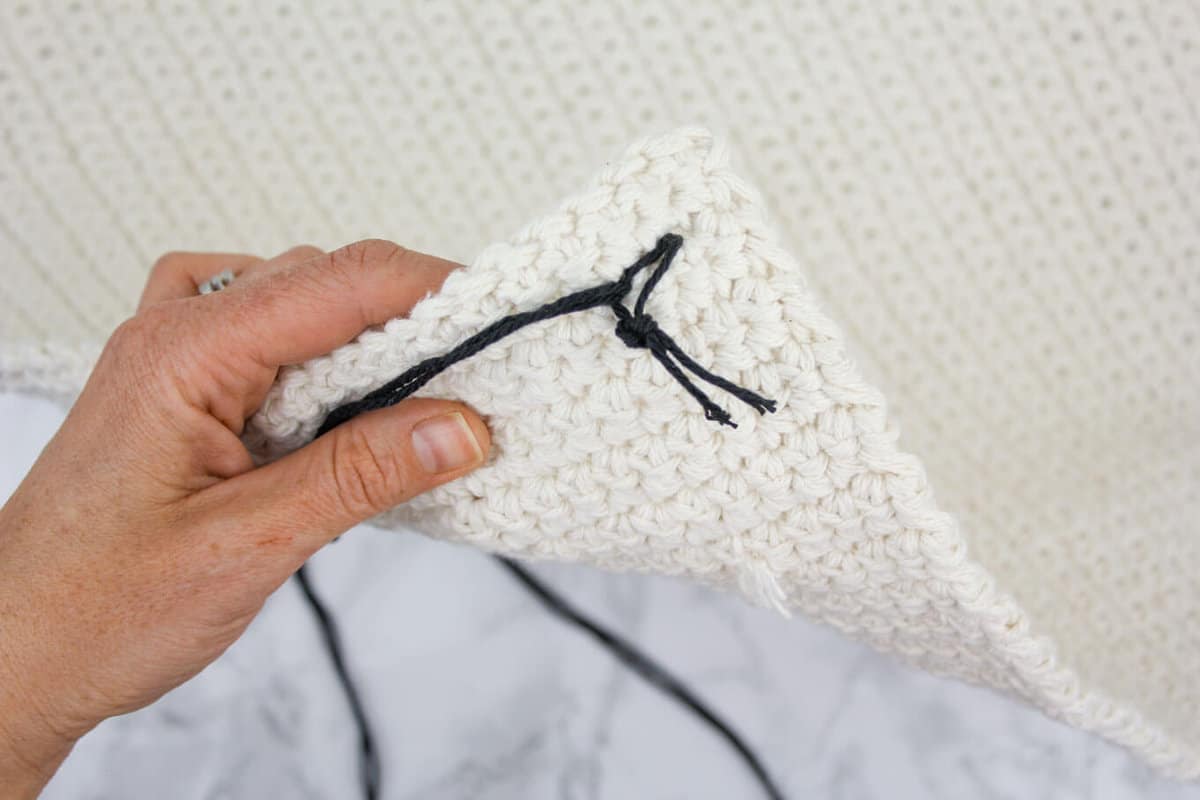
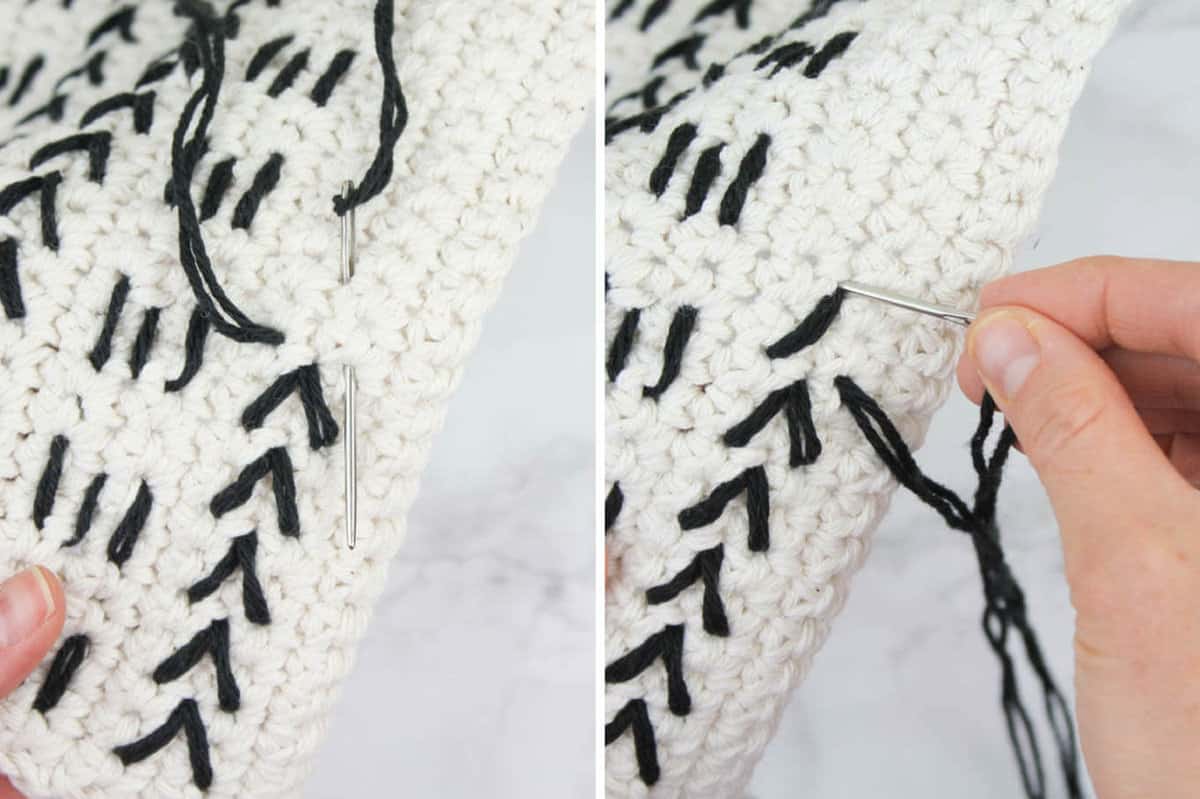
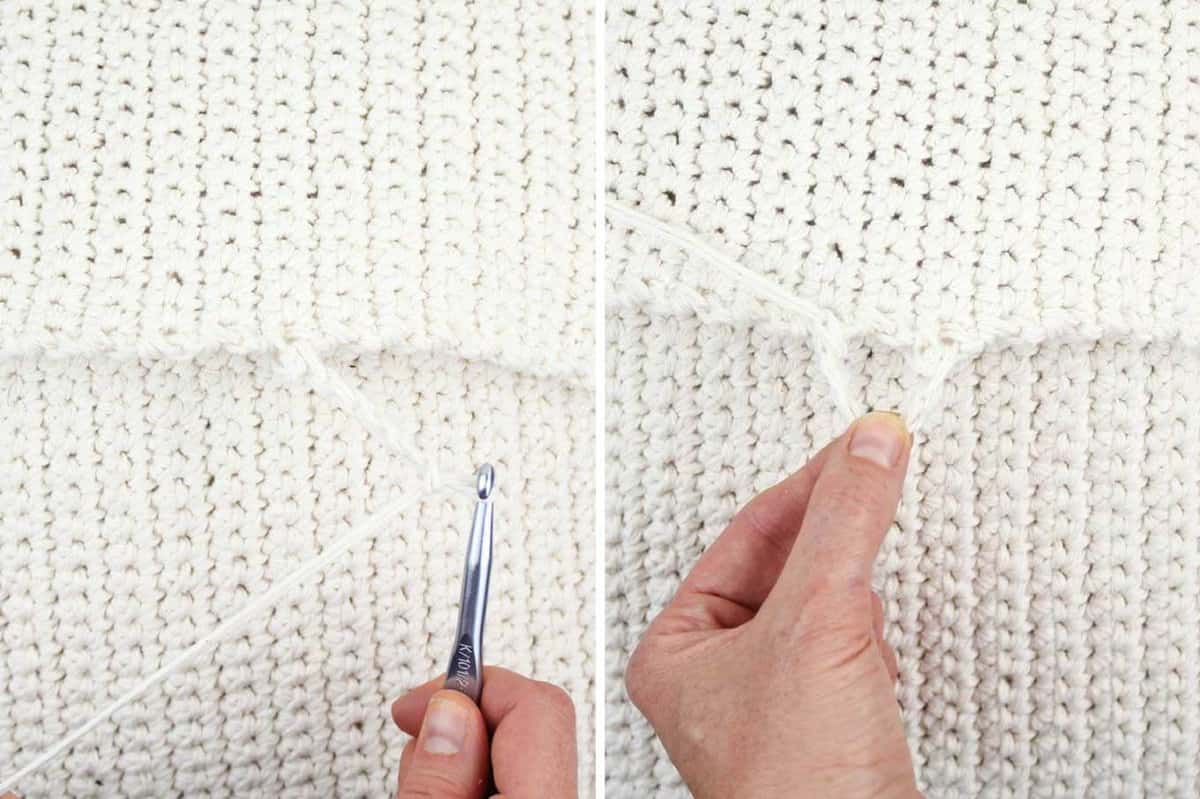
• To make sure embroidery is secure, double back in loop created by the yarn knot on the backside of the pillow. (See photo below.)
Vertical Lines Design
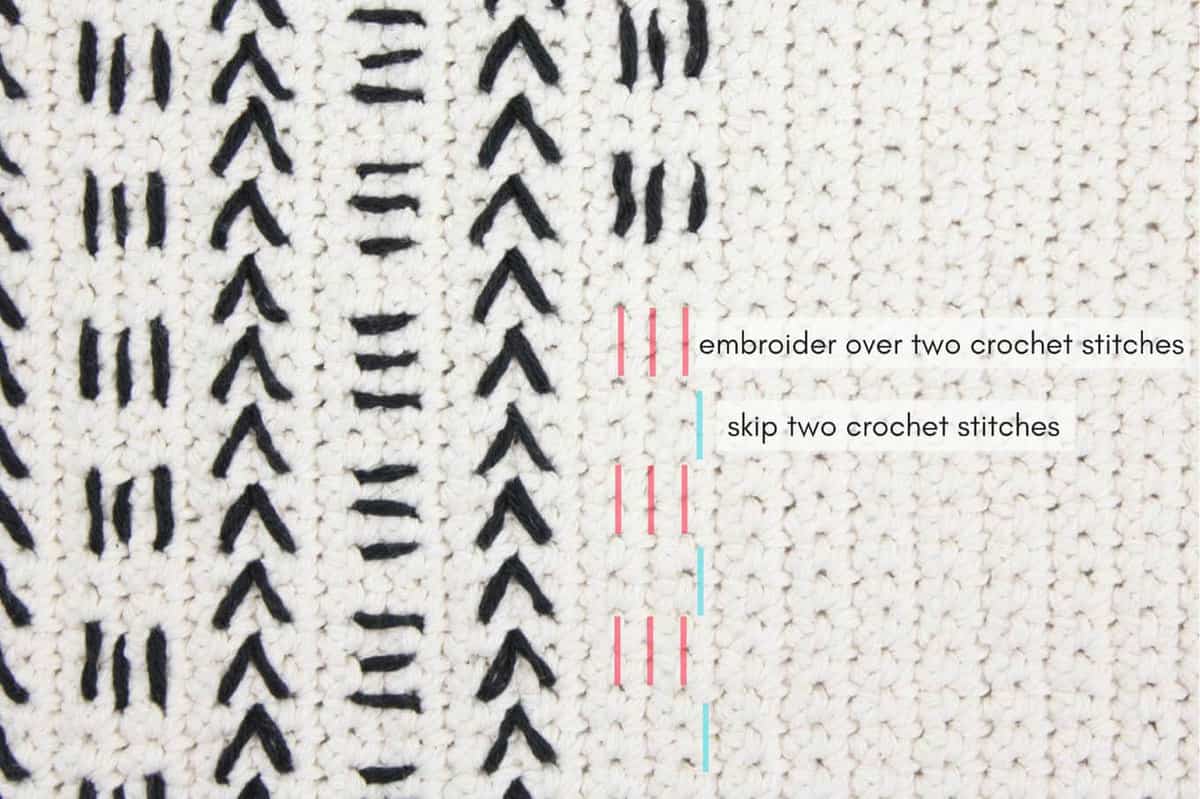
2. Embroider one vertical line over two crochet stitches. Repeat twice.
3. Skip two crochet stitches.
Arrows Design
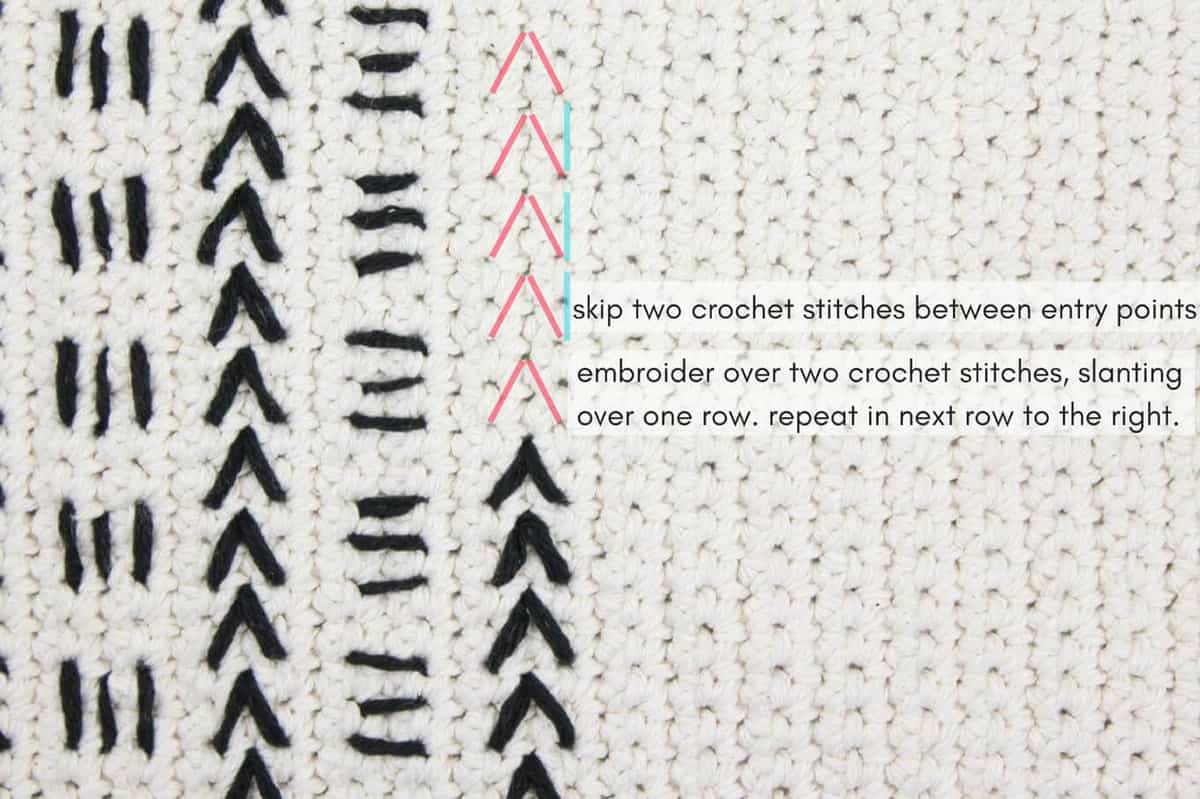
2. Embroider one diagonal line over two crochet stitches and one row. Repeat with a second diagonal line, joining first line in the same hole.
3. Skip two crochet stitches between arrow entry points.
4. Repeat step 2 and 3 (24) more times.
See photos below for additional detail on creating the arrow.
Horizontal Lines Design
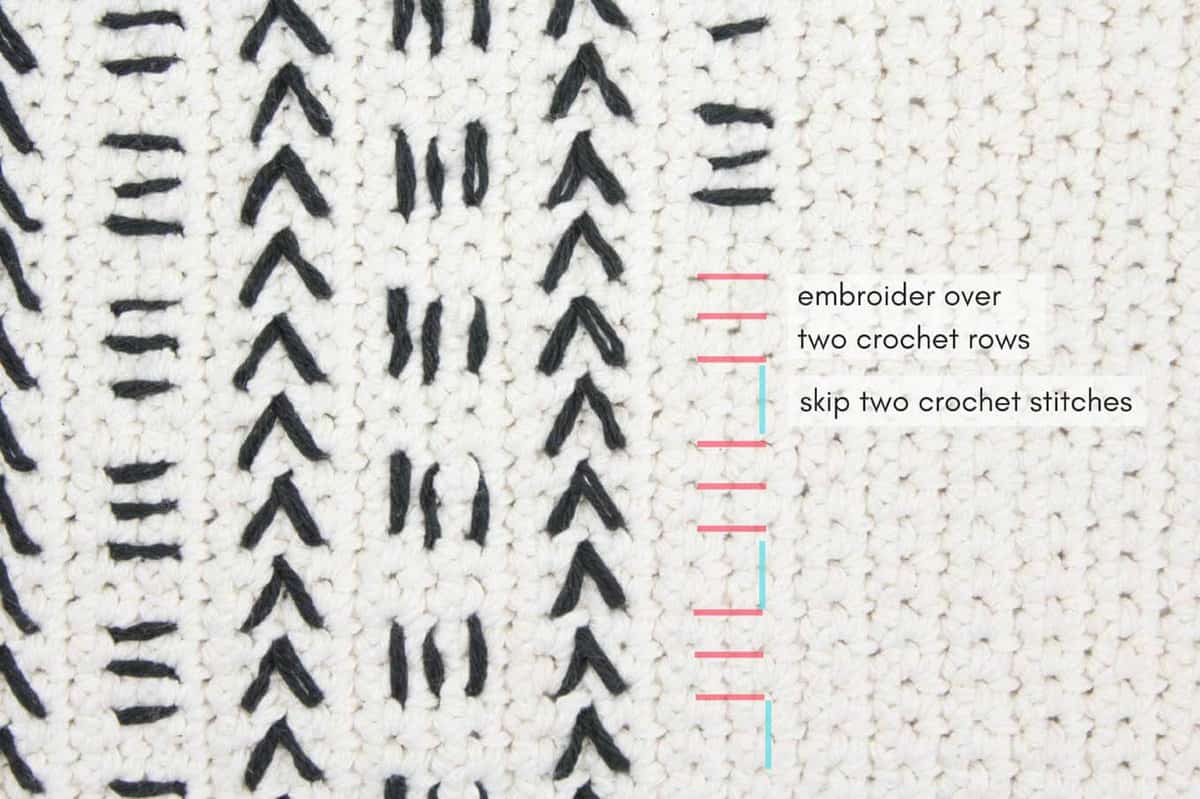
2. Embroider one horizontal line over two crochet rows. Repeat twice.
3. Skip two crochet stitches.
4. Repeat step 2 and 3 (12) more times.
SEWING PANELS TOGETHER
Notes:
• While the intent of the pillowcase is that it’s removable, you may choose to place the pillow insert in the case before you sew the last few inches of the final seam so as not to stretch the pillowcase while inserting the form.
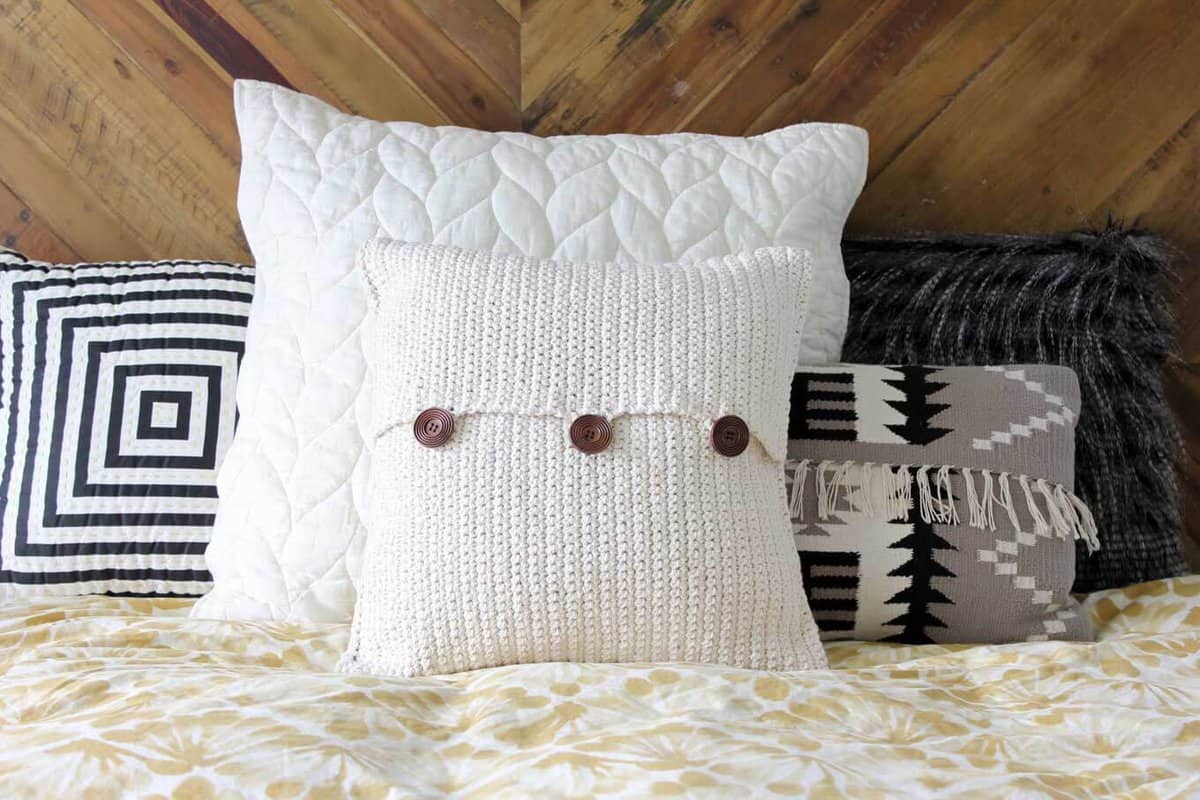
• The two back panels will overlap by about 1.5”.
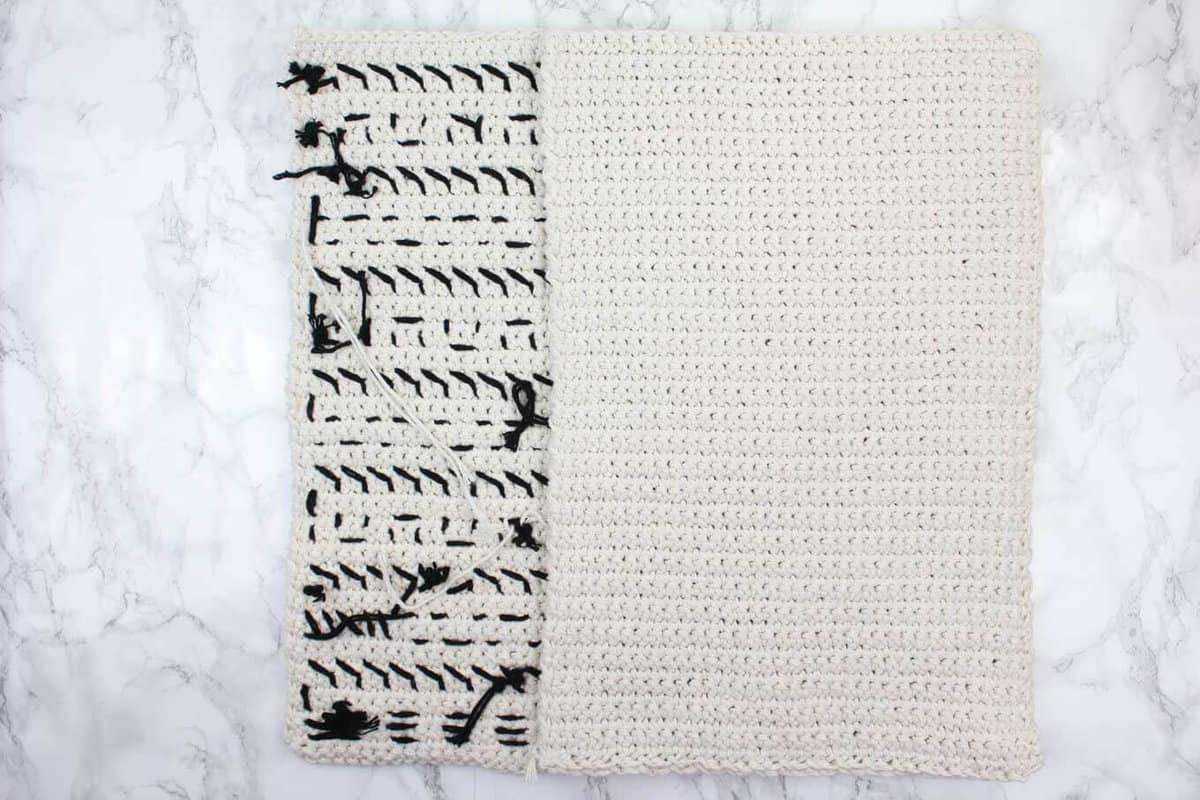
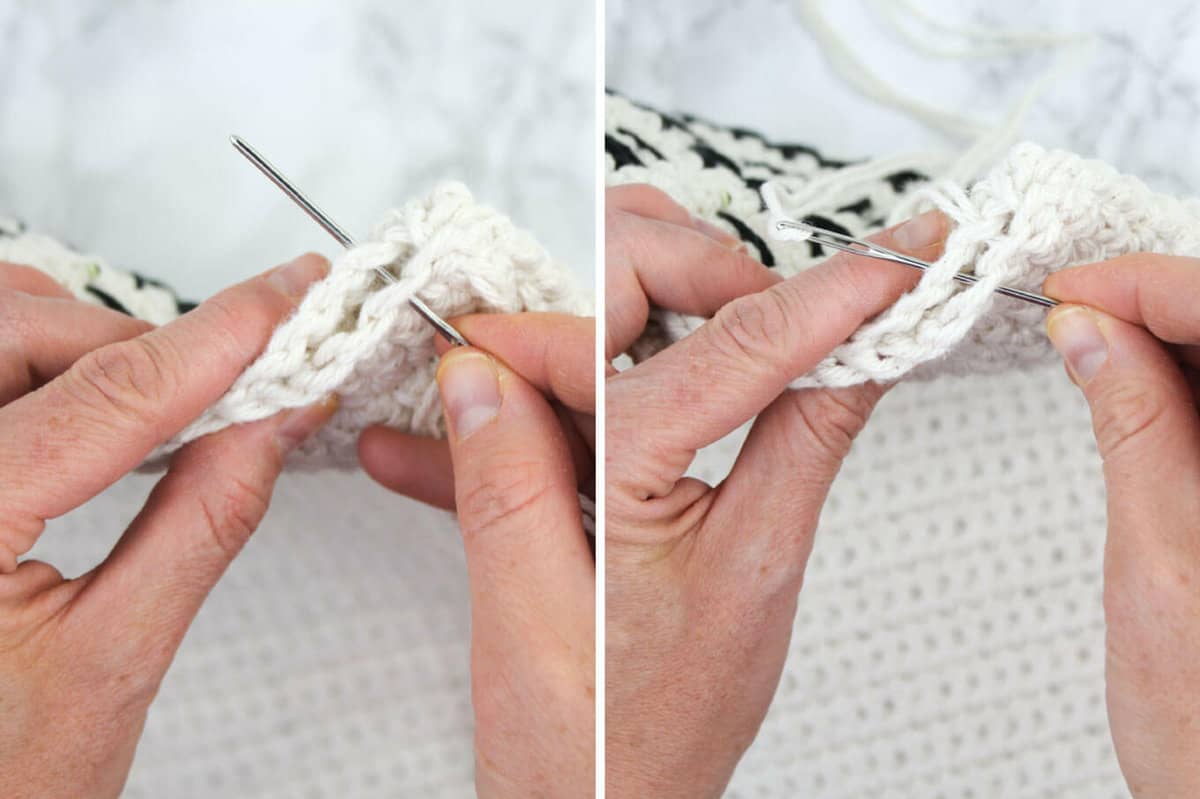
Place narrower back panel on pillow front with wrong sides facing. Seam as you did on the opposite side, beginning with the longer seam first and then working the two shorter seams from the corners to the middle of the pillowcase. You may choose to place the pillow form in the pillowcase before you sew the last few inches of the final seam.
ADDING BUTTONS + LOOPS
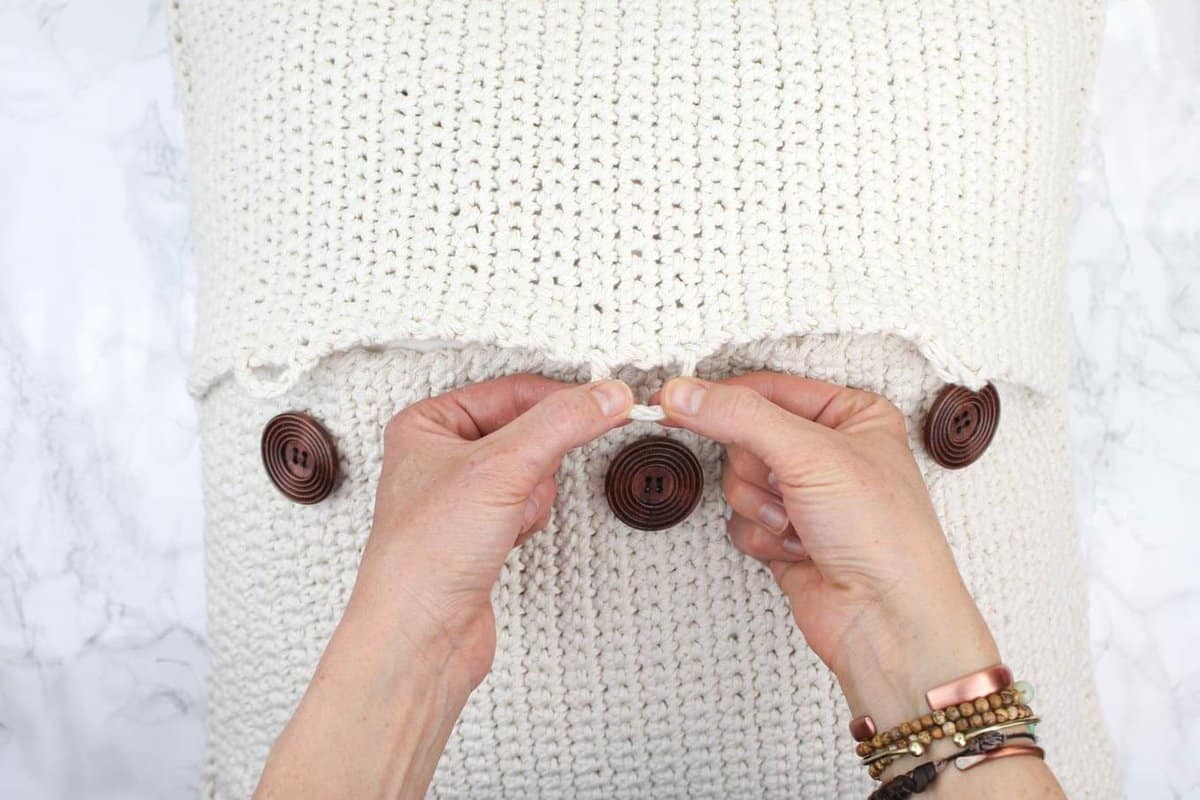
Repeat to make a third button loop in the space between the 44th and 45th rows and the 48th and 49th rows.
If you haven’t inserted the pillow form yet, do so now. Sew wooden buttons to the wider back panel using a needle and sewing thread.
Give your new mud cloth pillow a hug and take pride you just DIYed your own awesome piece of couch flair!
I love to see your finished projects! Use #MakeAndDoCrew and tag me Instagram (@MakeAndDoCrew) to show off your stitches and have a chance to be featured.
1. Urban Gypsy Boho Bag 2. Cabin Boots 3. Coachella Boots 4. Be a Deer Afghan

Joyce says
Jess,
I have moved put of state lately and I bought some new living room furniture. I was looking for some pillows to go with my new set. I just fell in love with the mud room pillows The colors and designs go perfectly with my new living room furniture. They are so easy to make and the stitching is easy to follow. thanks for sharing.
Jess @ Make and Do Crew says
Yay! I hope you enjoy them. Congrats on the big move. I know how moving that far can be quite a transition.
Hope you settle in nicely! 🙂
Jess
Racheal says
Please send some videos of how to make this amazing slippers for kids. I saw one awesome slippers for male that I love so much. Thank you for this wonderful inspiration.
Priscilla says
I lived in Mali for eight years and love Bogolan (mud cloth). This idea is great! It will compliment our African decor very nicely!
Jess @ Make and Do Crew says
Wow, what a cool experience, Priscilla! As someone who knows your mudcloth, I’m so happy this take on the beautiful fabric has your approval! 🙂
Jess
Irma Hendricks says
very pretty. I like the embroidery design and the back of the pillow. Nice for outdoor furniture.
Jess @ Make and Do Crew says
Oh yes! I hadn’t thought of using it outside, but I think that would be lovely!
Thank you Irma!
Jess
anna says
So original and beautiful !!!!!!!!!!!!!!!!!
Anna
Jess @ Make and Do Crew says
Thank you so much, Anna! I really have been enjoying it since I finished it. 🙂
Kristyn says
I love this simple design and the embroidery how to was super easy to understand, thanks for sharing.
Jess @ Make and Do Crew says
Thank you for your kind words, Kristyn. I’m really happy to hear that you found it easy to understand. That’s what I was going for! 🙂
Jess