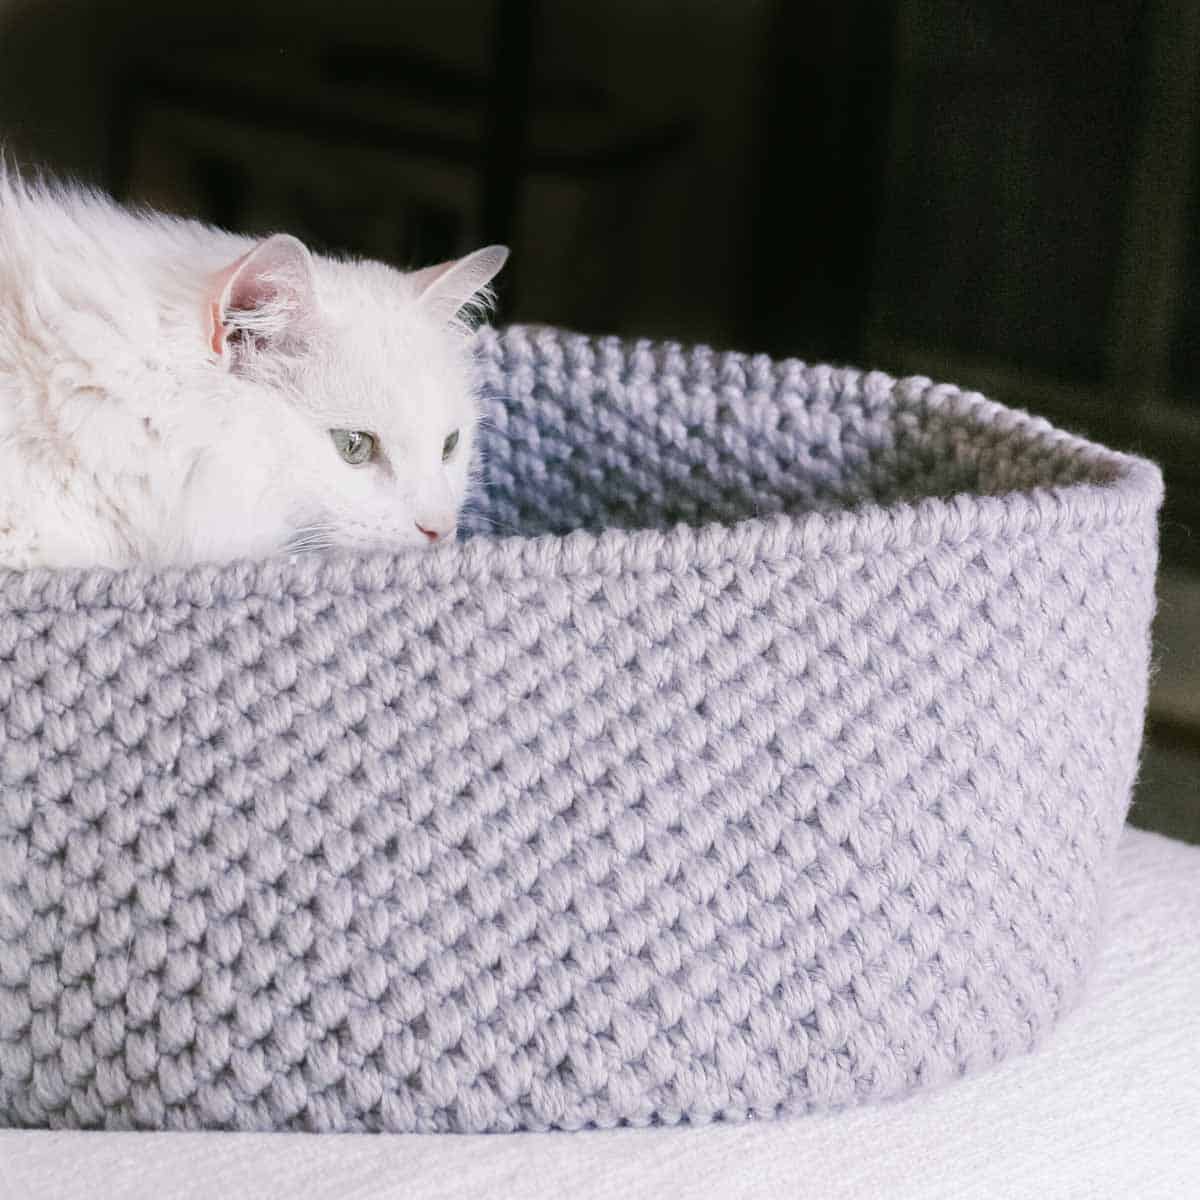
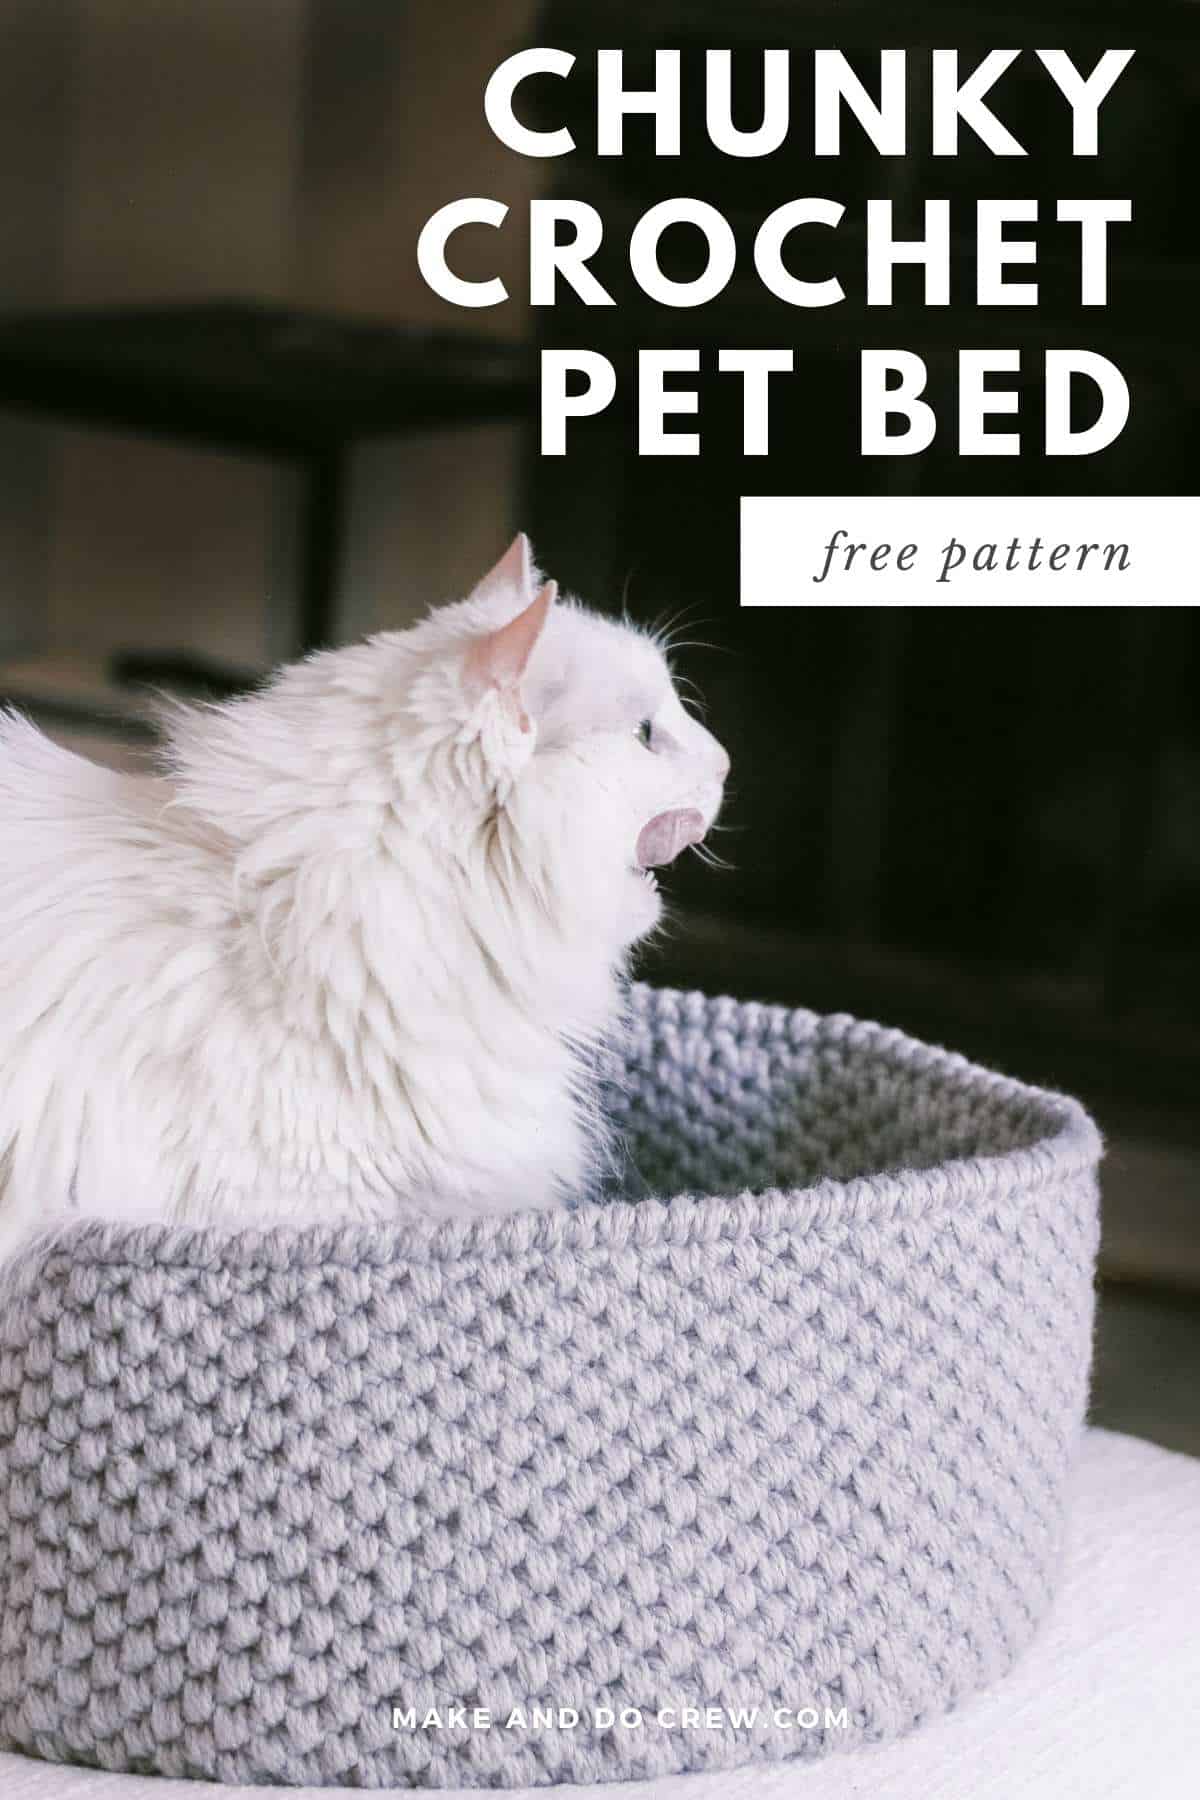
Make a cozy, machine-washable crochet cat bed for your favorite feline friend! This crochet pet bed pattern is super simple and offered in two sizes to fit small to medium cats and dogs.
Get the free crochet cat bed pattern and tutorial below or purchase the ad-free, printable PDF.
This pet bed crochet pattern is part of a collaboration with Lion Brand Yarns. This post contains affiliate links.
Jump to:
Crochet Cat Bed Pattern Introduction
Crochet a comfy, machine-washable and antimicrobial haven for your fur baby! This cat and dog bed pattern uses single crochet to create a sturdy, yet cozy, pet bed. Make the optional faux fur snuggle pad for extra cozy-factor.
Skills You’ll Practice
While crocheting this dog and cat bed, you’ll use the following advanced beginner-level skills:
- Single crochet (sc)
- Double crochet (dc)
- Slip stitch (sl st)
- Crocheting a circle and working in the round
- Weaving in ends
Complete beginner? Check out our guide on How to Crochet for Beginners
How to Crochet a Ped Bed Step-By-Step
This cat or dog bed comes together quite easily with zero seaming.
Step 1. Crochet the bottom circle using one strand of yarn and double crochet stitches.
Step 2. Add a second strand of yarn and continue working in the round to form the sides. The two strands of yarn held together ensure the sides of the bed are quite stiff, giving the bed structure.
Step 3. Crochet a simple border around the top using the crab stitch (aka reverse single crochet.)
Step 4. Use faux fur yarn to crochet a circle the size of the bed bottom. This step is optional, but creates and extra cosy crochet cat bed and the furry blanket is easy to remove and wash.
Pin it! click to pin this pet bed pattern for later ⇨
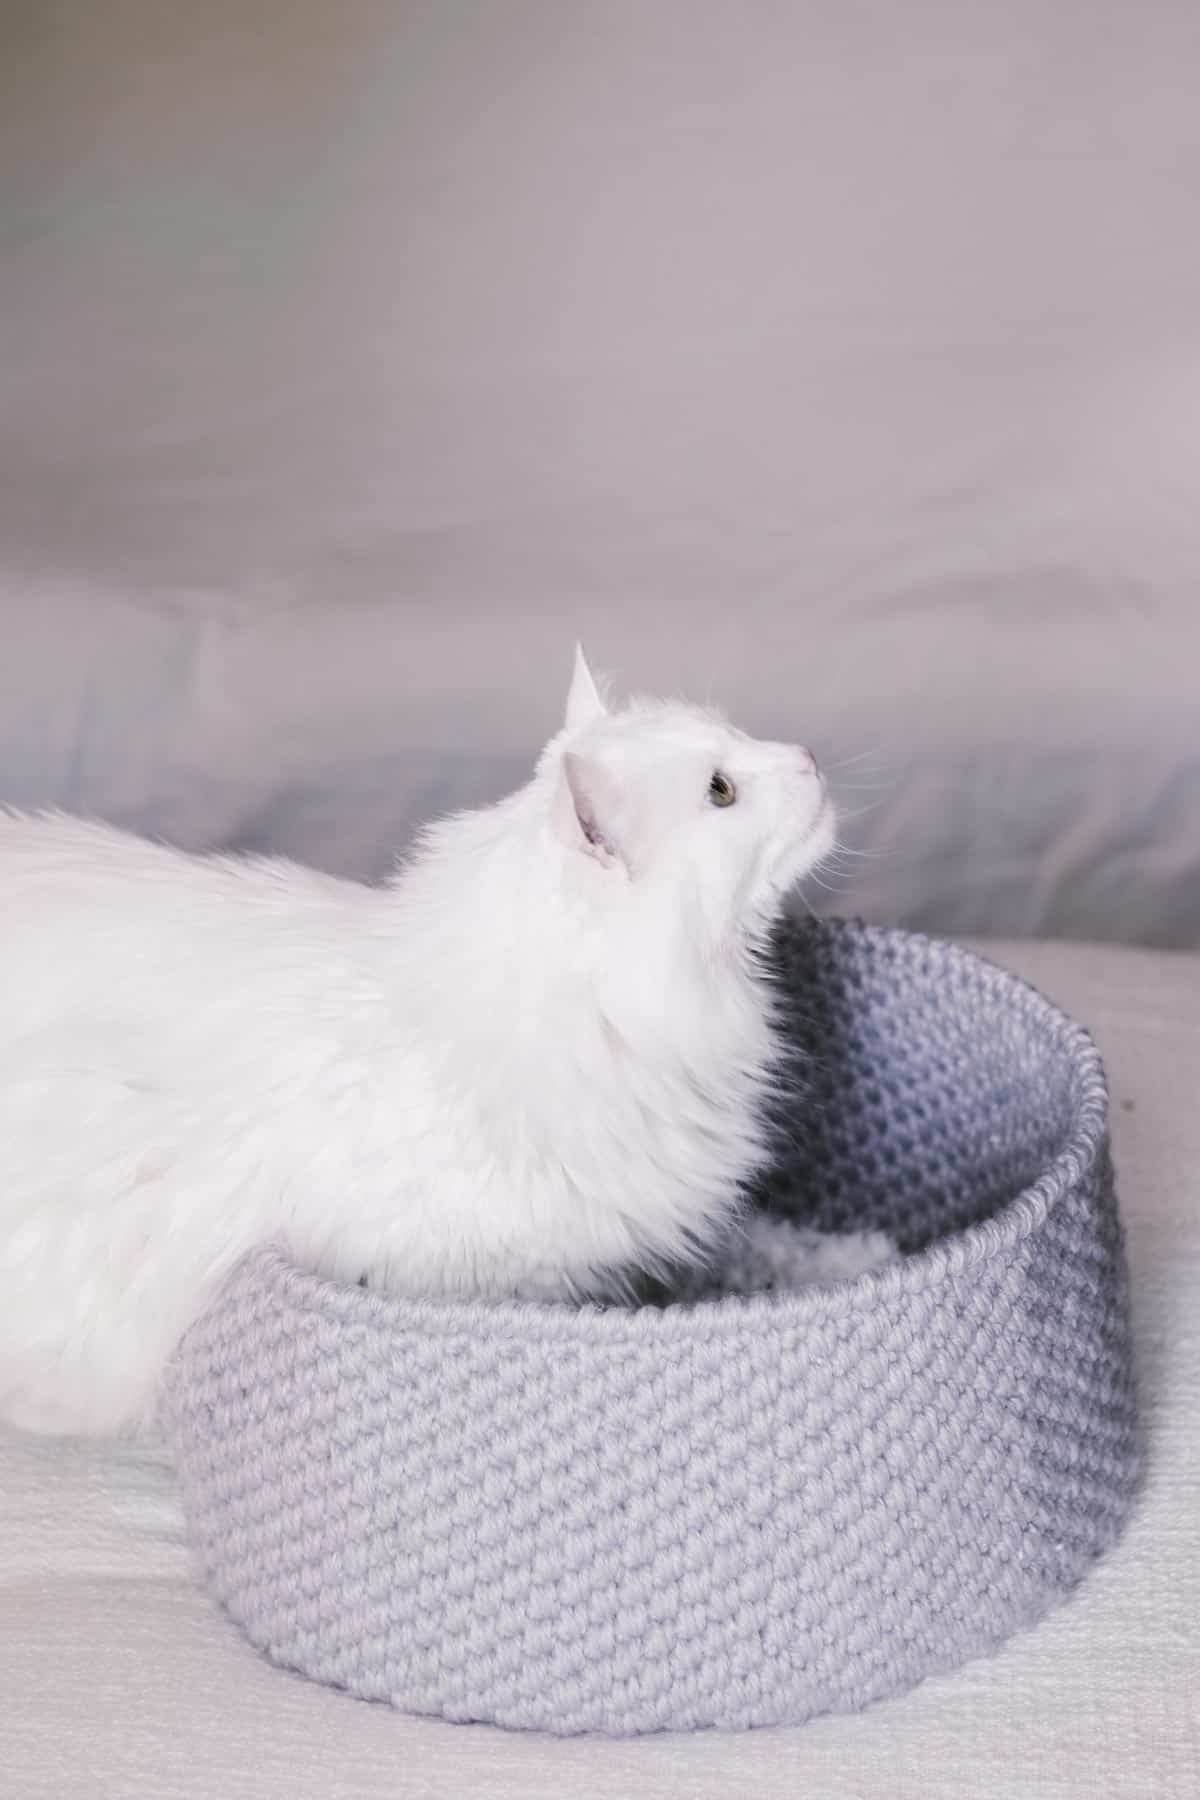
Keep the sized of the bed up for a secluded cat cave.
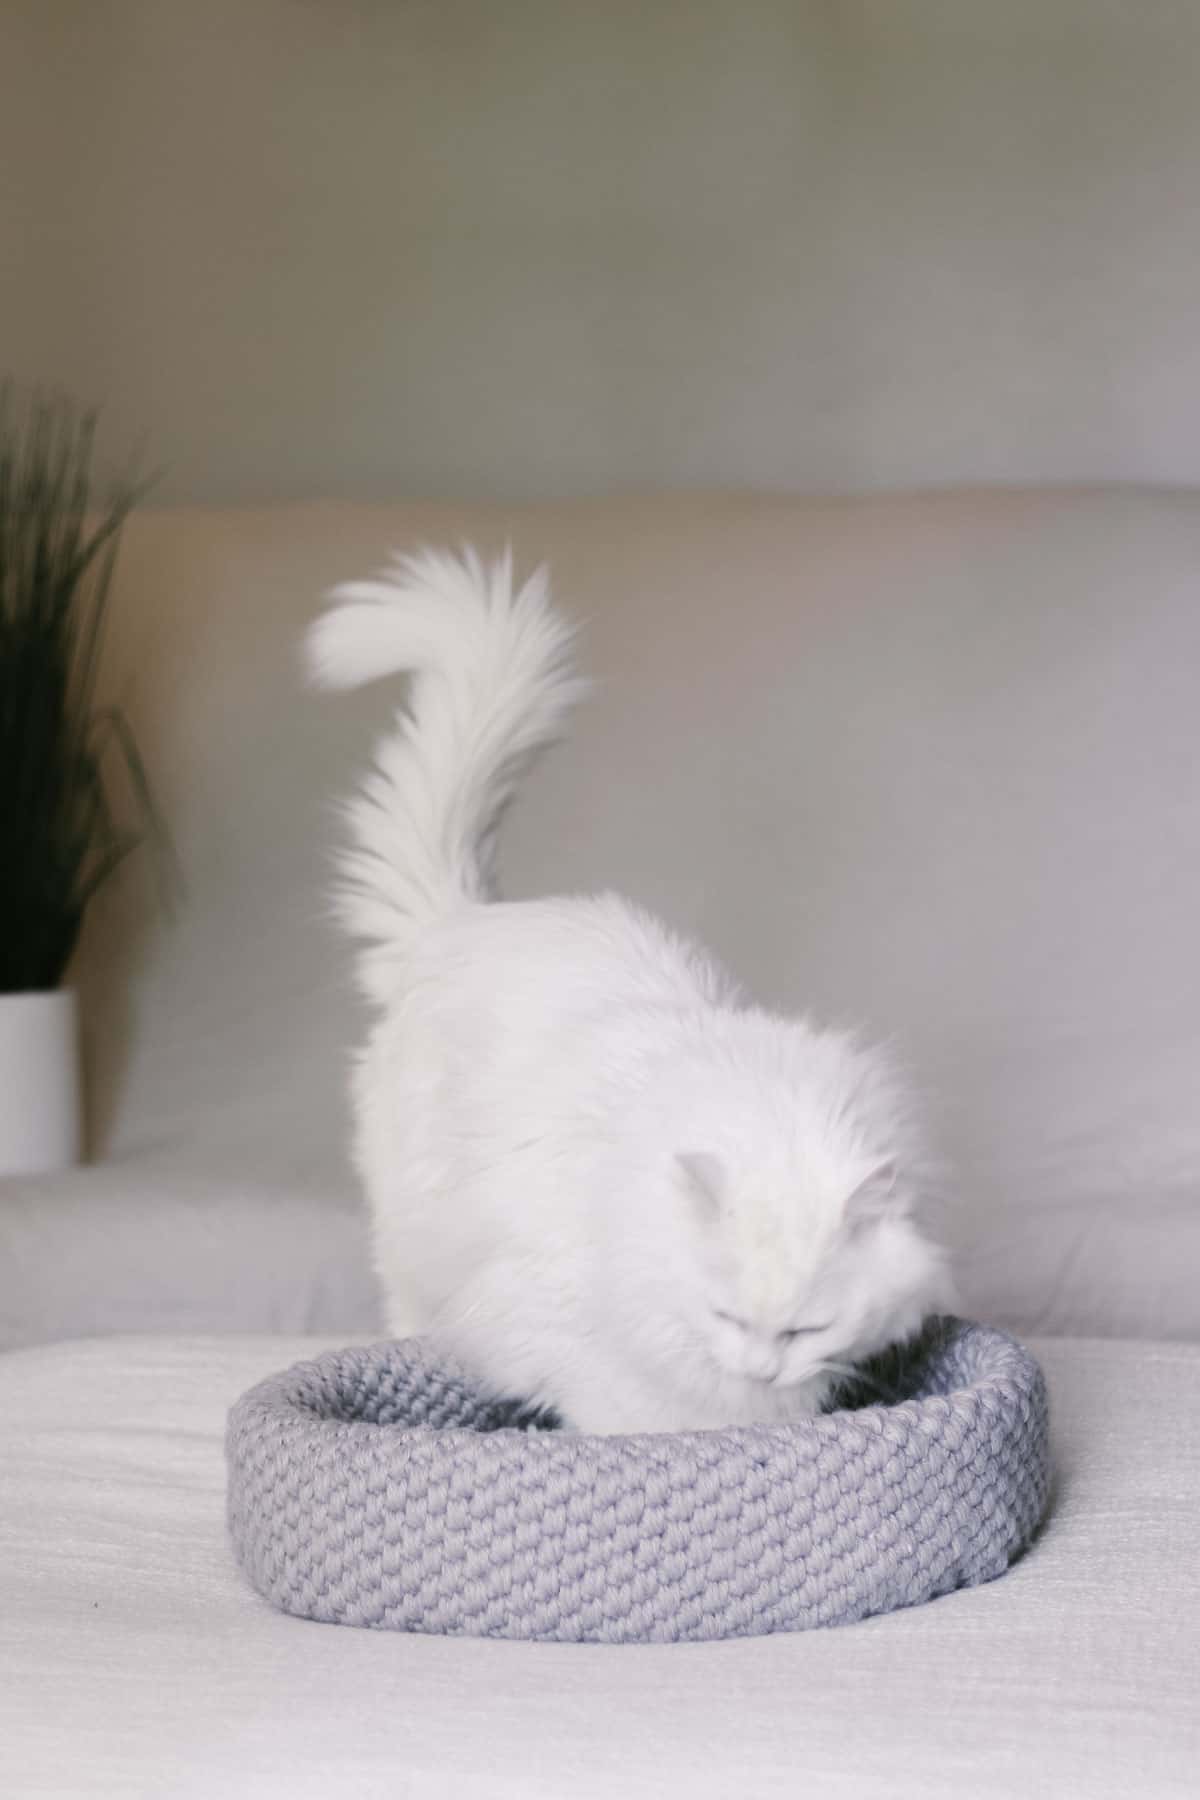
Or fold them inward if your pet prefers a head rest.
Why you’ll love this kitty bed!
Will It Fit My Cat?
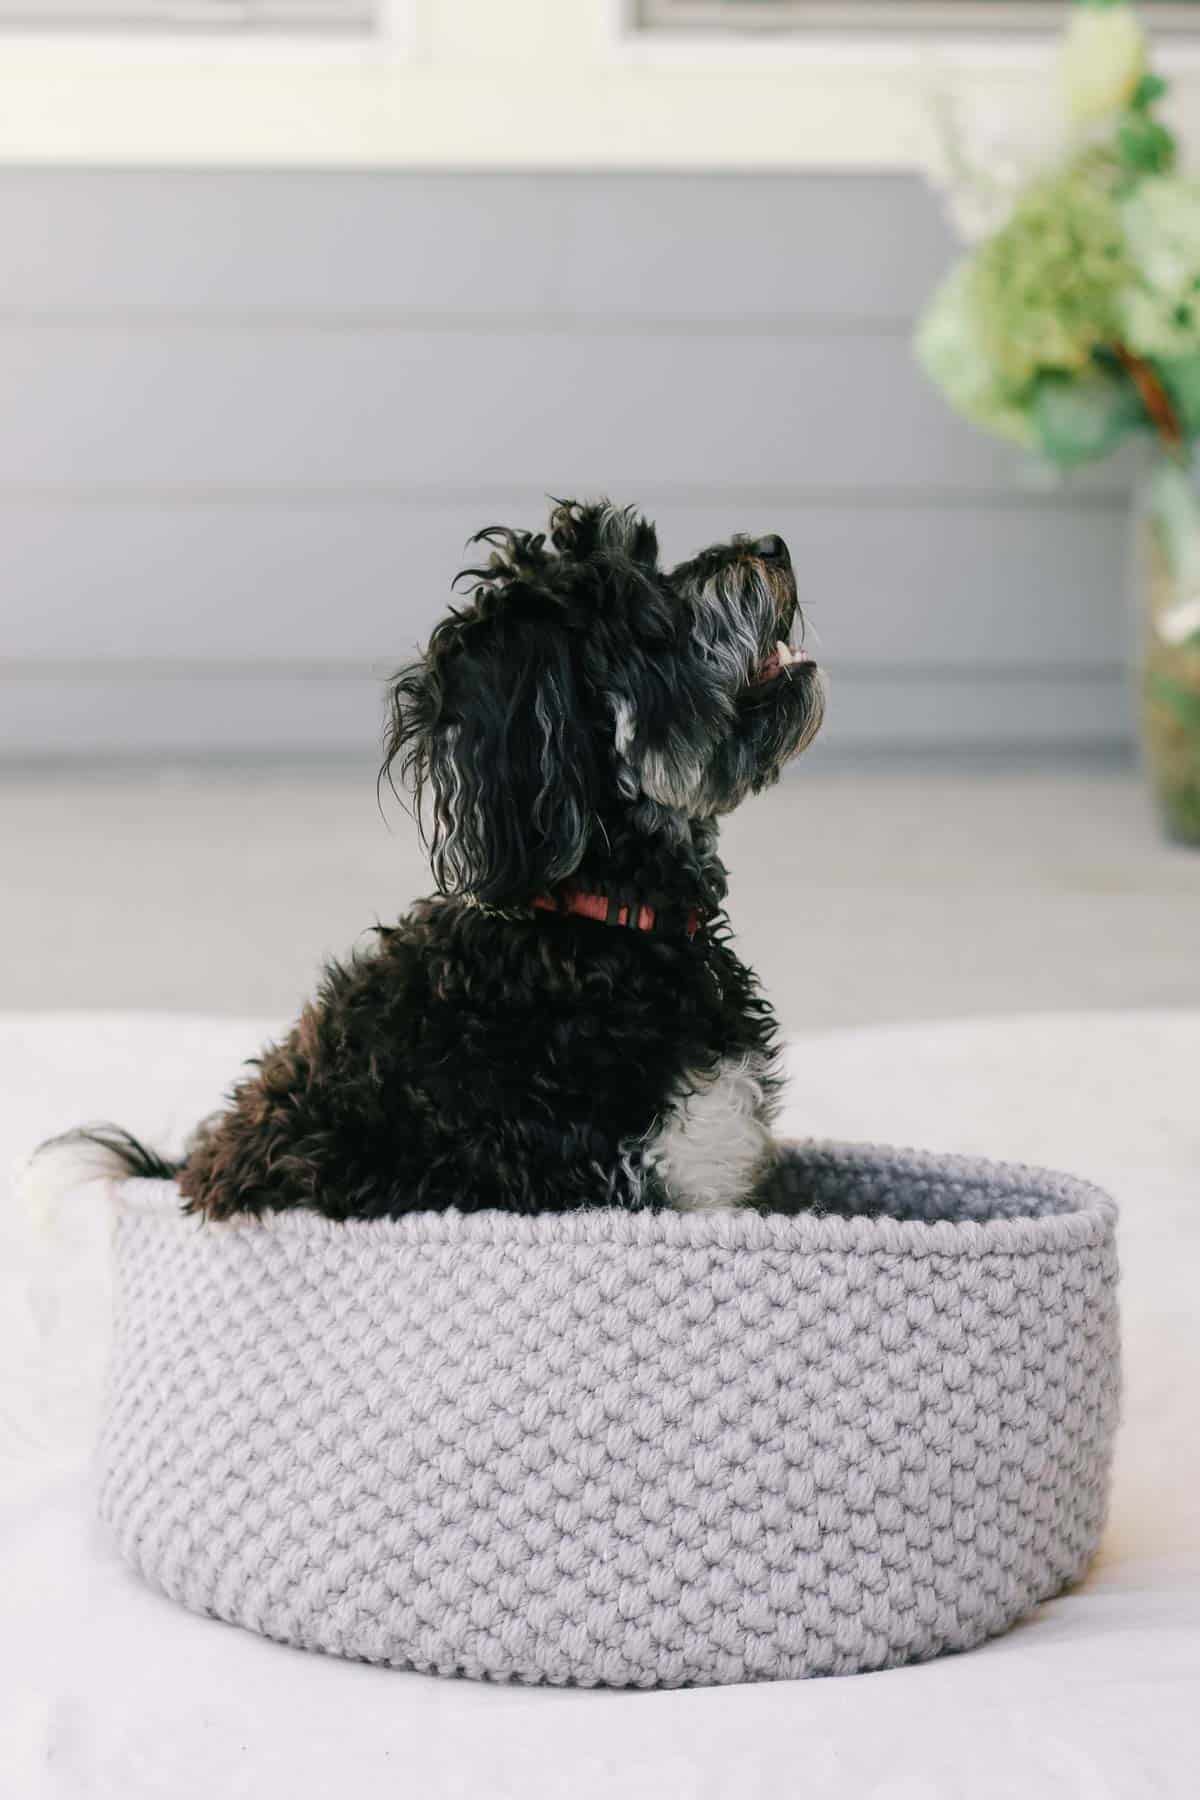
This crochet cat bed pattern is written in two sizes to accommodate most cats and smaller breeds dogs. (Think like chihuahuas, miniature pinschers, and havanese.)
The small bed, which is what is pictured, measures 15” across. It’s best for pets under about 8 pounds.
The medium bed measures 19.5” across. It’s ideal for pets under about 14 pounds.
The sides on both sizes are approximately 7” tall.
Modifying the Size for Larger Cats and Dogs
For bigger breeds like Maine Coones or Ragdoll cats, it’s quite easy to make a larger cat bed to give your furry friend more space. I’ve included specific notes in the free pattern below, but it basically comes down to adjusting the size of the bottom circle.
Similarly, if you’d like to make more of a cat cave or cat house with higher sides, just work extra rounds to make the walls of the bed taller.
Keep in mind that adjusting the size of your crocheted cat nest will also affect the amount of yarn needed for the project overall.
Pro Tip: Another option to make a larger pet bed is to follow the pattern as written, but substitute a jumbo yarn such as Lion Brand WOW.
Best Yarn For a Crochet Bed Bed
For the Harbor Pet Bed pattern, we used Lion Brand Basic Stitch Anti-Microbial Thick & Quick yarn.
It’s a recycled, chunky weight yarn that provides long-lasting protection against odor, allergens, and bacteria (up to 100 washes). The Amicor technology that makes this yarn anti-microbial keeps crochet and knit items fresher for long, making it perfect for pet projects!
Substitutions
If Lion Brand Basic Stitch Anti-Microbial Thick & Quick yarn is not available near you, you can substitute another category 5 weight yarn such as Hue + Me.
All-in-One Crochet Kit
If you don’t live near amazing yarn stores or if you just like to get fun packages in the mail, the all-in-one kit is a perfect way to make your cat cave or dog digs.
This bundle from Lion Brand includes all the Basic Stitch Anti-Microbial Thick & Quick yarn you’ll need, plus a bonus printable PDF of the pattern (delivered digitally).
Print this Pattern
Prefer to crochet on the couch? Need a portable, printable pattern? You’ll love the premium PDF! The instantly downloadable, ad-free file is formatted for easy printing and includes the complete cat bed pattern and all the tutorial photos.
More Free Crochet Patterns for Animal Lovers
If you love furry friends, check out these animal-themed crochet patterns.
Harbor Pet Bed – Free Pattern
Supplies + Materials
Order an all-in-one kit from Lion Brand.
- Lion Brand Basic Stitch Anti-Microbial Thick & Quick (Weight: 5/bulky-chunky – 87 yds, 3.5 oz, 100 g)
color: Cement [209-149AV] – 8 skeins (approx. 790 g) for smaller bed, 12 skeins (approx. 1150 g) for larger bed
- Size L (8.00 mm) crochet hook or size needed to obtain gauge
- Stitch markers or safety pins
Optional Materials:
- Lion Brand Go For Faux (Weight: 6/super bulky – 65 yds, 3.5 oz, 100 g)
color: Chinchilla [322-204BH] – 1 entire skein for smaller bed, 2 entire skeins for larger bed
Measurements
Small bed (pictured) measures 15” across. Best for pets under 8 pounds.
Medium bed measures 19.5” across. Best for pets under 14 pounds.
The sides on both sizes are approximately 7” tall.
You can easily modify the size of the bed by creating a smaller or larger bottom circle. Adjusting the size will also affect the amount of yarn needed for the project overall.
Gauge
Base circle: diameter of 5 rounds = 7.5”
Sides of Bed: 9 sts x 12 rows = 4”
Gauge check instructions are given
after Round 5 of the bed bottom.
Abbreviations + Glossary
(US Terms)
ch – chain
dc – double crochet
PM – place marker
rep – repeat
RS – right side
rsc – reverse single crochet
sc – single crochet
sk – skip
slst – slip stitch
st(s) – stitch(es)
Special Stitches
SPsc – spike single crochet: work as a typical single crochet, but hook is
inserted in base of stitch one round
below. This creates the look of a visual spike pointing down.
Permissions + Copyright:
Please do not publish or share this pattern as your own. You may make items to sell with this pattern. In exchange, please link back this post. Do NOT use our photos as your own sales photos.
How to Crochet the Spike Stitch
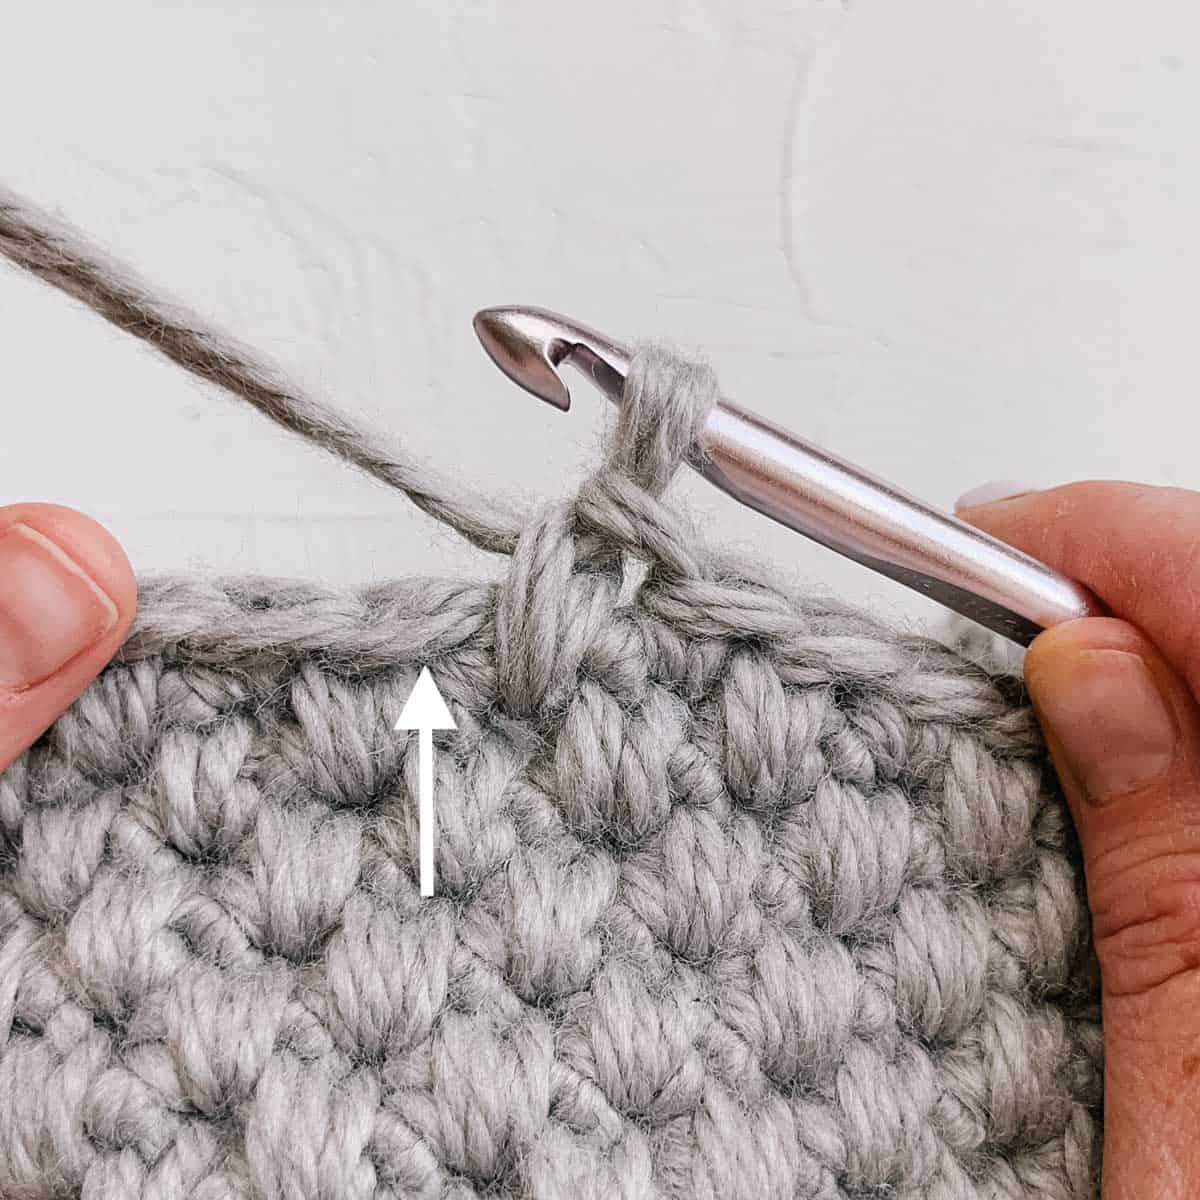
The sides of this pet bed pattern are crocheted using the spike stitch.
The spike stitch is an easy variation on single crochet. The unique twist is where the hook is inserted for every other stitch.
One single crochet is worked under the previous row, making it a taller “spike.” The next single crochet is worked as usual.
Here are step-by-step instructions to crochet the spike stitch:
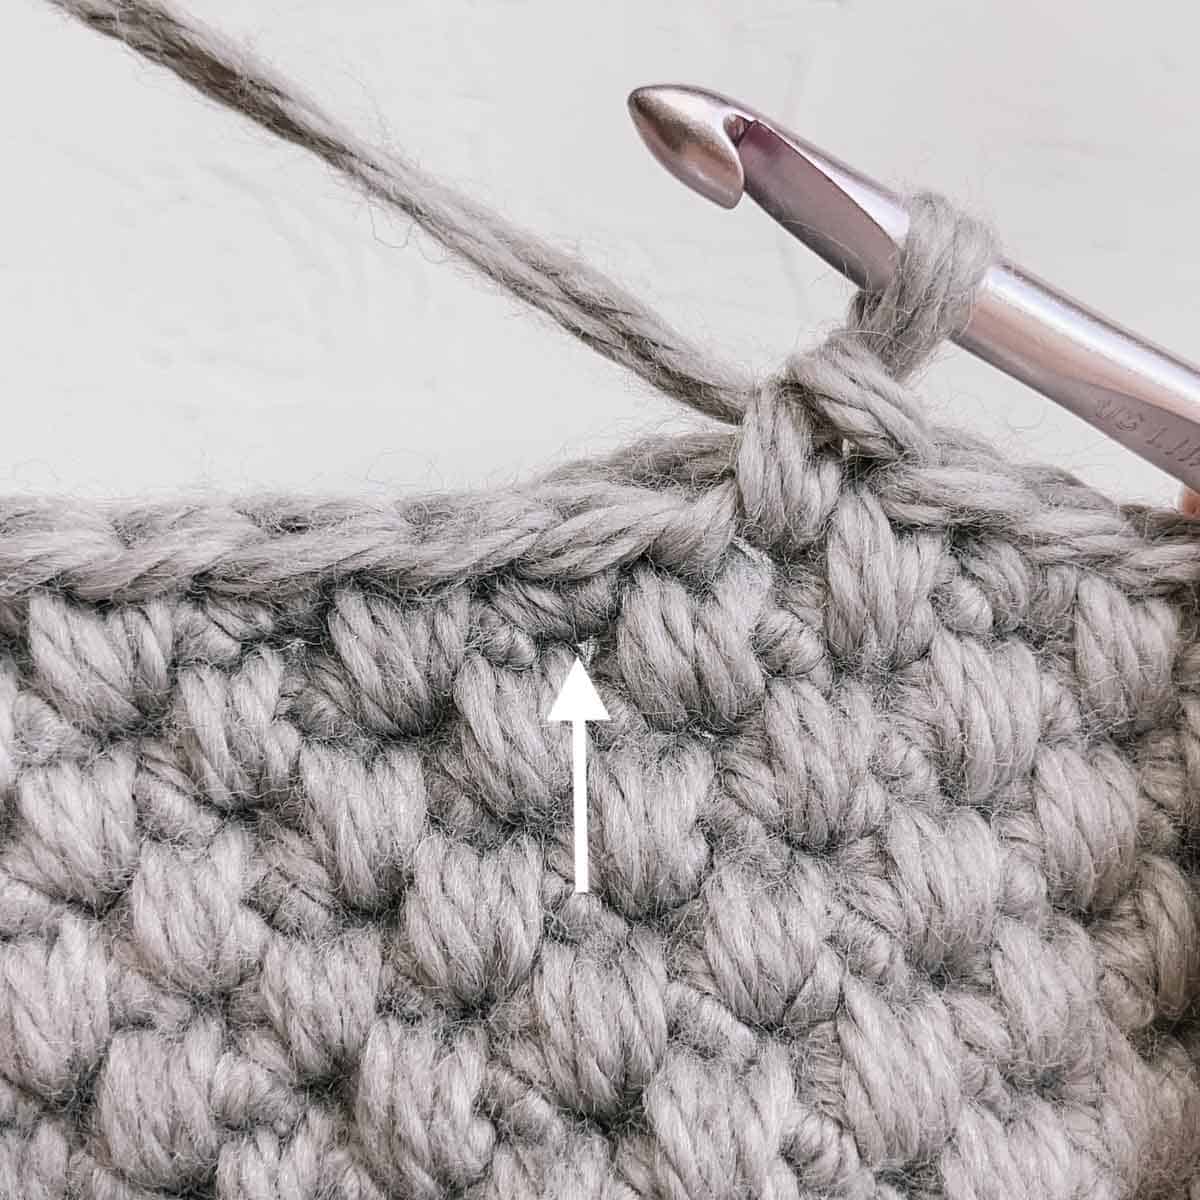
Step 1: Insert hook below next single crochet.
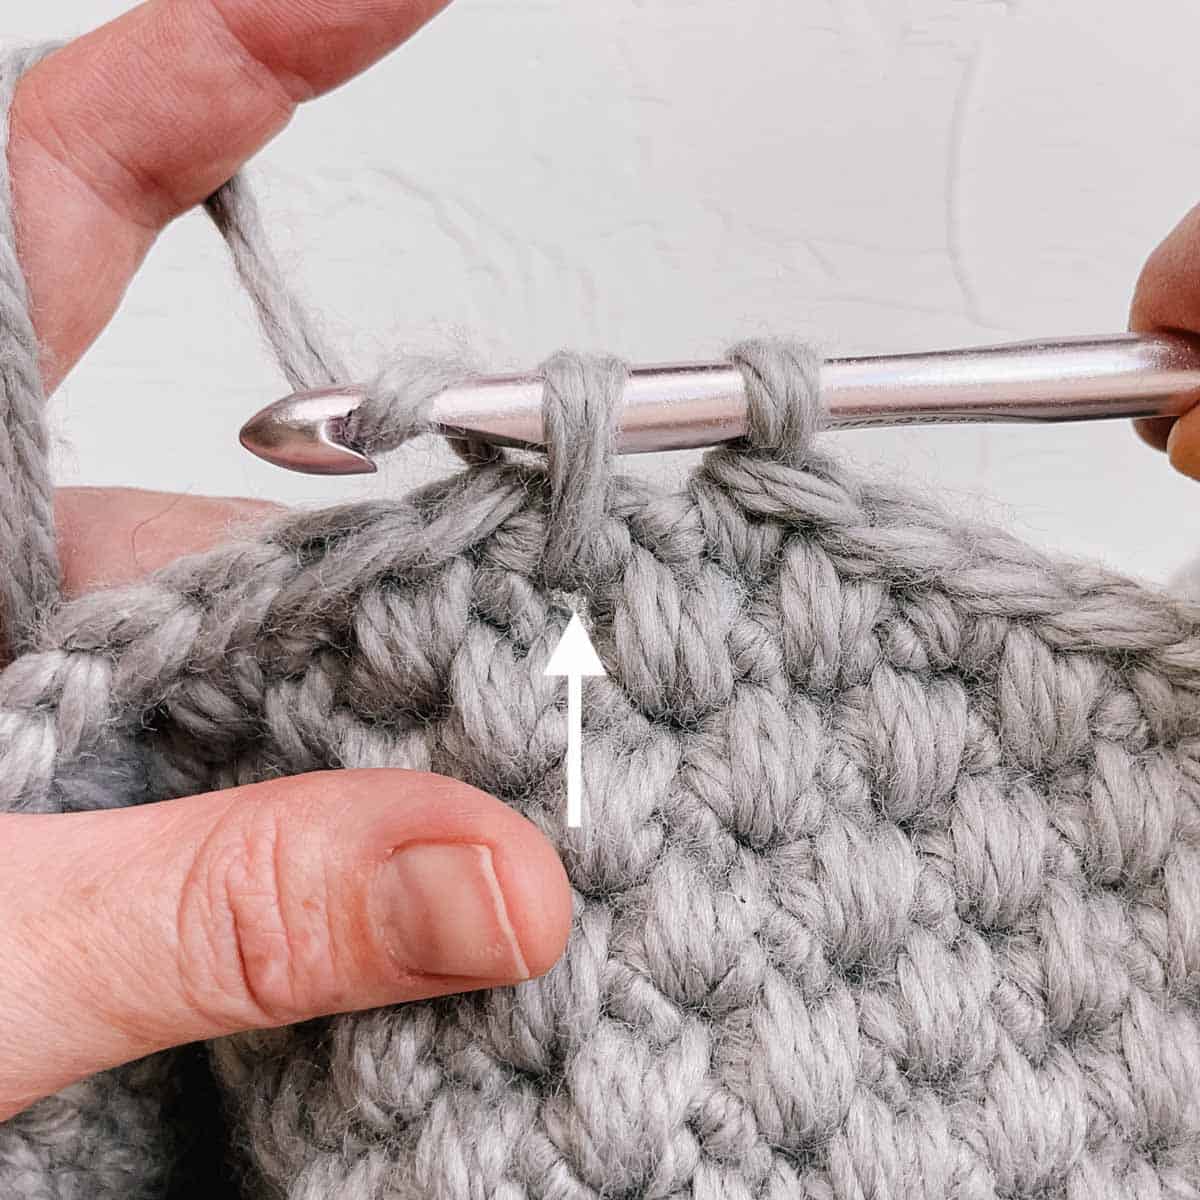
Step 2: Yarn over and pull up a loop to height of other stitches (which is higher than usual).
Step 3: For the next single crochet, insert the hook in the top loops of the next stitch (as usual).
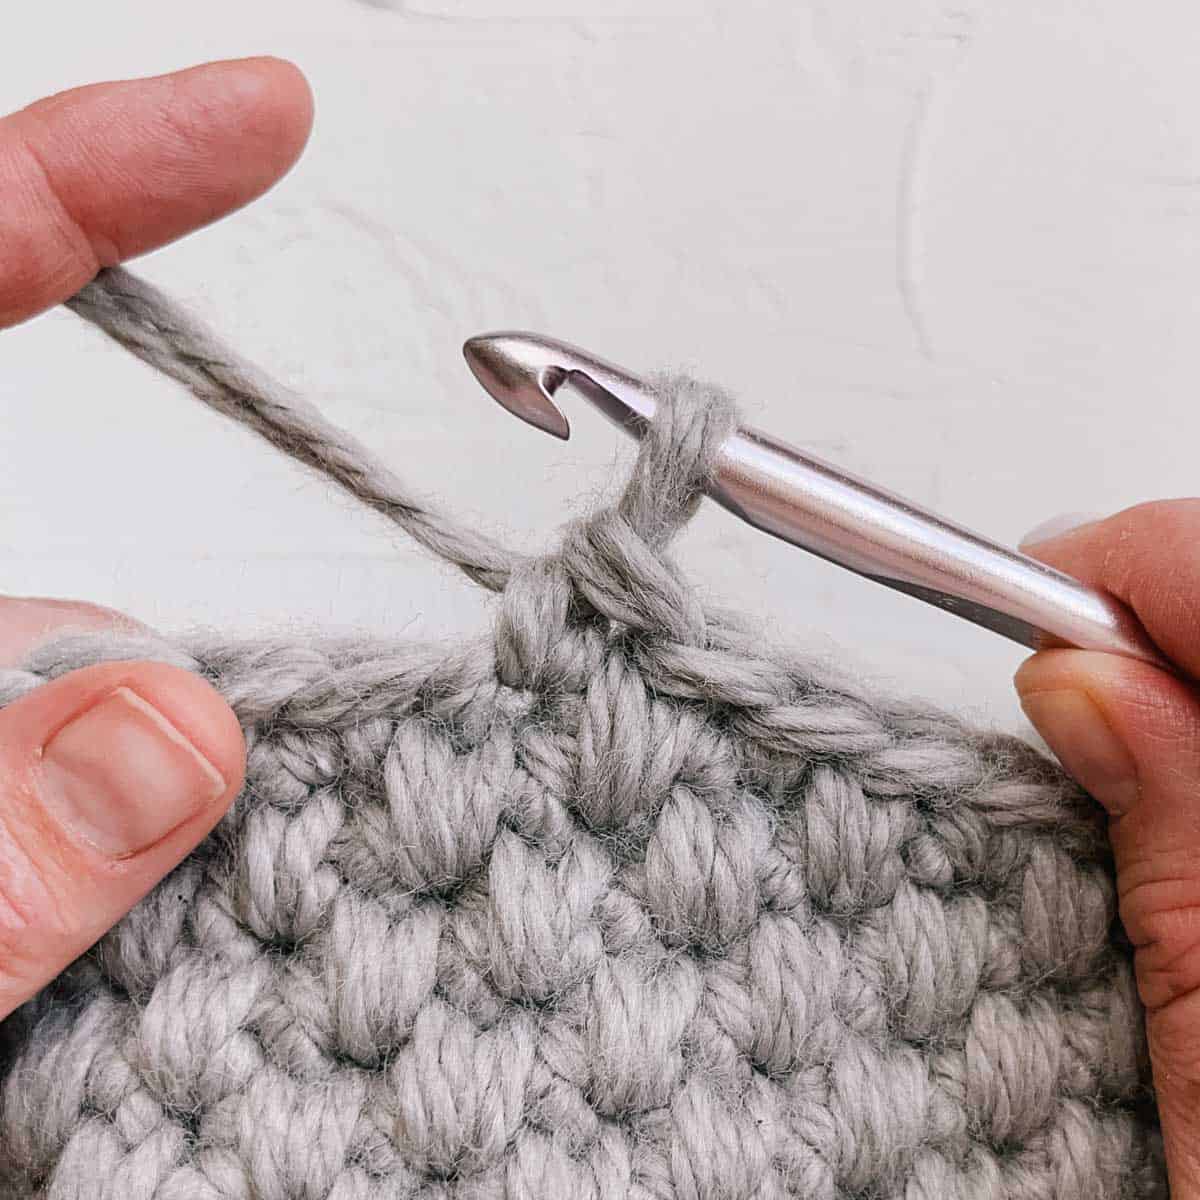
Step 4: Complete as a typical single crochet.
Overall Pattern Notes
- Bed is worked in the round in one seamless piece, beginning with the circle bottom.
- The bottom uses one strand of yarn. The sides of the bed use two strands held together
Print This Pattern: purchase the ad-free, printable PDF
Bottom of Bed
Notes:
- Chain 3 counts as one double crochet throughout. Chain these stitches tightly to minimize the gap that can be created by the turning chain.
- Circle is worked in joined rounds, which means you’ll slip stitch to the beginning of each round to complete it. The right side is facing you throughout.
- To modify the bed size, adjust the number of rounds in the bottom circle. Regardless of modifications, end your circle by following the instructions for Round 10.
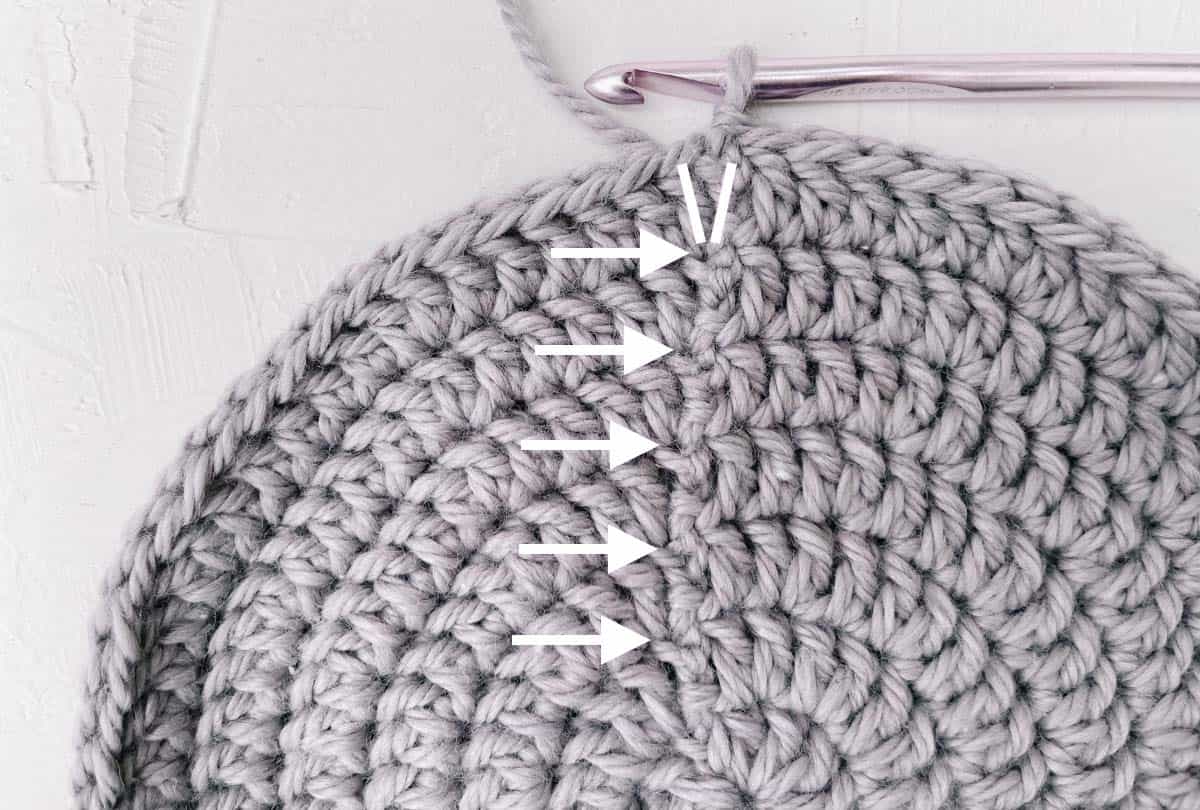
Using one strand of yarn:
Foundation: Make a magic ring.
Round 1 (RS): Ch 3, 11 dc into the ring, slst to third ch from the beginning of the round to join. (12 dc)
Round 2: Ch 3, 2 dc in each st around, slst to join. (24 dc)
Round 3: Ch 3, dc in top of ch 3 from previous round (first increase made), dc in next st, [2 dc in next st, dc in next st] 5 times, slst to join. (36 dc)
Round 4: Ch 3, dc in top of ch 3 from previous round (first increase made), dc in next 2 sts, [2 dc in next st, dc in next 2 sts] 5 times, slst to join. (48 dc)
Round 5: Ch 3, dc in top of ch 3 from previous round (first increase made), dc in next 3 sts, [2 dc in next st, dc in next 3 sts] 5 times, slst to join. (60 dc)
Gauge Check: While meeting gauge isn’t essential in this cat bed pattern,
doing so will help ensure it turns out the size you expect and uses the listed
amount of yarn.
At this point, diameter of circle should measure approximately 7.5” across. If
it’s much smaller, increase your hook size and try again. If it’s much larger,
decrease your hook size and try again.
Round 6: Ch 3, dc in top of ch 3 from previous round (first increase made), dc in next 4 sts, [2 dc in next st, dc in next 4 sts] 5 times, slst to join. (72 dc)
Premium PDF
easier and faster with fewer mistakes.
- Complete pattern + photo tutorials
- Instant download
- Formatted for easy printing
Round 7: Ch 3, dc in top of ch 3 from previous round (first increase made), dc in next 5 sts, [2 dc in next st, dc in next 5 sts] 5 times, slst to join. (84 dc)
Round 8: Ch 3, dc in top of ch 3 from previous round (first increase made), dc in next 6 sts, [2 dc in next st, dc in next 6 sts] 5 times, slst to join. (96 dc)
Round 9: Ch 3, dc in top of ch 3 from previous round (first increase made), dc in next 7 sts, [2 dc in next st, dc in next 7 sts] 5 times, slst to join. (108 dc)
Small bed, continue onto Round 10. Medium bed, repeat three more increase rounds continuing in the established pattern.
- Two double crochet every 7th stitch (120 dc)
- Two double crochet every 8th stitch (132 dc)
- Two double crochet every 9th stitch (144 dc)
Pro Tip: All sizes double-check your stitch count at this point. An odd number of stitches are needed for the sides of the bed, so work Round 10 without increasing if you accidentally ended up with an odd number already.
Round 10: Ch 3, dc first st, dc in each dc until one remains, 2 dc in last st (increase made), slst to join. (Small: 109 dc, Medium: 145 dc)
Keep yarn attached.
Want some company while you crochet?
Get support (and camaraderie!) in the Make & Do Crew Facebook Group.
Sides of Bed
Notes:
- Sides of bed are worked in alternating single crochet stitches and single crochet spike stitches (SPsc). See the photo tutorial at the end of the pattern for visual guidance. Each round should end with the same type of stitch it began with.
- Sides are worked in spiral rounds with the right side facing you throughout. This means you won’t slip stitch to join at the end of the round. Keep a stitch marker in first stitch of round and move it up as you work.
- Continue using the same hook size as with the bottom circle. If you notice the stitches for the sides of the bed are loose and floppy though, try a smaller hook. The stitches on the bed sides are intended to be worked quite tightly to create a stiff fabric.
Our Latest Crochet Inspiration:
Here are a few more free crochet patterns and tutorials that are hot off the presses.
Attach a second strand of yarn. From here on, hold the previous strand and new strand together as if they are one.
Using two strands of yarn:
Round 1 (RS): Ch 1, sc in top of ch 3 from previous round, PM in first sc, sc in each st. (Small: 109 sc, Medium: 145 sc)
Round 2: [Sc in next stitch, SPsc in next stitch] repeat around.
Round 3: [SPsc in sc stitch, sc in SPsc stitch] repeat around.
Rounds 4-20: Continue working in spiral, alternating a sc in each SPsc stitch and a SPsc stitch in each sc.
When final round is complete, slst into first two stitches of round to taper spiral.
Edging uses reverse single crochet (aka the crab stitch), which is worked in the
opposite direction as typical single crochet. Right-handed: Work counterclockwise.
Left-handed: Work clockwise. In both cases, the right side will continue to face you.
Round 21 (RS): Rsc in each of next two sts, rsc in each st to end of round, slst to first rsc to join.
Fasten off.
Furry Bed Liner Blanket
Notes:
- This step is optional and can be modified to suit your vision. The faux fur circle can be seamed to base of bed if desired. Or try creating two circles and seaming them around a round pillow insert to create an extra cozy bed with a removable cushion.
With same hook and one strand of faux fur yarn:
Follow Bottom of Bed instructions to crochet a circle until you run out of yarn. Place a stitch marker in first stitch of round and move it up as you work. It’s harder to see your increases in fur yarn, so do your best to count the stitches with your fingers.
This section is quite forgiving, so don’t sweat it if your stitch count is off or your increases are not spaced exactly evenly. The main objective is to make sure you end up with a soft and cozy round-ish object to line the bed.
Obsessed with finding the best free crochet patterns?
Check out these collections of handpicked patterns to find your next project.
Finishing
Weave in all ends. Sew snuggle blanket to bottom of bed if desired.
Pet bed can be used with sides up or folded in half inward, whichever your dog or cat prefers.
Pro Tip: Try spritzing a few sprays of cat nip oil in the bed to help your kitty warm up to their bed extra quickly.
Invite your fur baby into their new handmade harbor!
FAQs
Cat lovers will love any gifts for or about their furry friends. Try a crochet cat couch or bed pattern or make small amigurumi animals for cat toys.
More Free Crochet Patterns
Now that you’ve made a crochet kitty bed, here are more patterns you might enjoy.
Learn a New Skill
When you’re ready to master a new skill, check out our detailed guides that include everything you need to know to level up your crochet game.
- How to Crochet Your First Sweater
- How to Corner to Corner (C2C) Crochet for Beginners – with video tutorials to get you started
- How to Crochet a Beginner Hat – make an entire beanie in 1.5 hours!
- How to Crochet Amigurumi for Beginners – the ultimate guide to making your own toys and plushies
- How to Tunisian Crochet – learn with this video and a standard hook
That was so fun! Now what?
Invitation to our Facebook group
Come discuss crocheting pet beds for your fur babies and lots of other projects and techniques in our Make & Do Crew Facebook group. Here thousands of helpful crocheters answer each others questions and share their stitches. Join us!
How to Crochet a Cat Bed (or Dog Bed) Summary
Materials
Yarn
- Lion Brand Basic Stitch Anti-Microbial Thick & Quick Weight: 5/bulky-chunky – 87 yds, 3.5 oz, 100 g
- color: Cement [209-149AV] – 8 skeins approx. 790 g for smaller bed, 12 skeins (approx. 1150 g) for larger bed
Additional Supplies
- Tapestry needle
- Size L 8.00 mm crochet hook or size needed to obtain gauge
- Stitch markers or safety pins
Optional Materials
- Lion Brand Go For Faux Weight: 6/super bulky – 65 yds, 3.5 oz, 100 g
- color: Chinchilla [322-204BH] – 1 entire skein for smaller bed 2 entire skeins for larger bed
Abbreviations + Glossary (US Terms)
- ch – chain
- dc – double crochet
- PM – place marker
- rep – repeat
- RS – right side
- rsc – reverse single crochet
- sc – single crochet
- sk – skip
- slst – slip stitch
- st(s) – stitch(es)
Abbreviations and Glossary (US Terms):
Want some company while you crochet?
Get support (and camaraderie!) in the Make & Do Crochet Crew Facebook Group. Search “Make and Do Crochet Crew” on Facebook.com.
Permissions + Copyright
Please do not publish or share this pattern as your own. You may make items to sell with this pattern. In exchange, please link back to this page. Do NOT use my photos as your own sales photos.
Overall Pattern Notes
Instructions
The How to Crochet a Cat Bed (or Dog Bed) Pattern
- 1. Using one strand of yarn, create a magic circle (aka magic loop).
- 2. Follow rounds 1-10 to make a circle using double crochet stitches.
- 3. Add an additional strand of yarn before moving onto the bed sides.
- 4. Continue in rounds of the crochet spike stitch to make stiff sides to your cat cave or dog bed.
- 5. Finish with a round of crab stitch (reverse single crochet) as a border around the top of the bed.
- 6. Optional: Crochet a circle using faux fur yarn to add an extra cozy, removable layer to the inside of the bed.
Overall Pattern Notes
- Bed is worked in the round in one seamless piece, beginning with the circle bottom.
- The bottom uses one strand of yarn. The sides of the bed use two strands held together
- Circle is worked in joined rounds, which means you’ll slip stitch to the beginning of each round to complete it. The right side is facing you throughout.
- To modify the bed size, adjust the number of rounds in the bottom circle. Regardless of modifications, end your circle by following the instructions for Round 10.
Leave a Reply