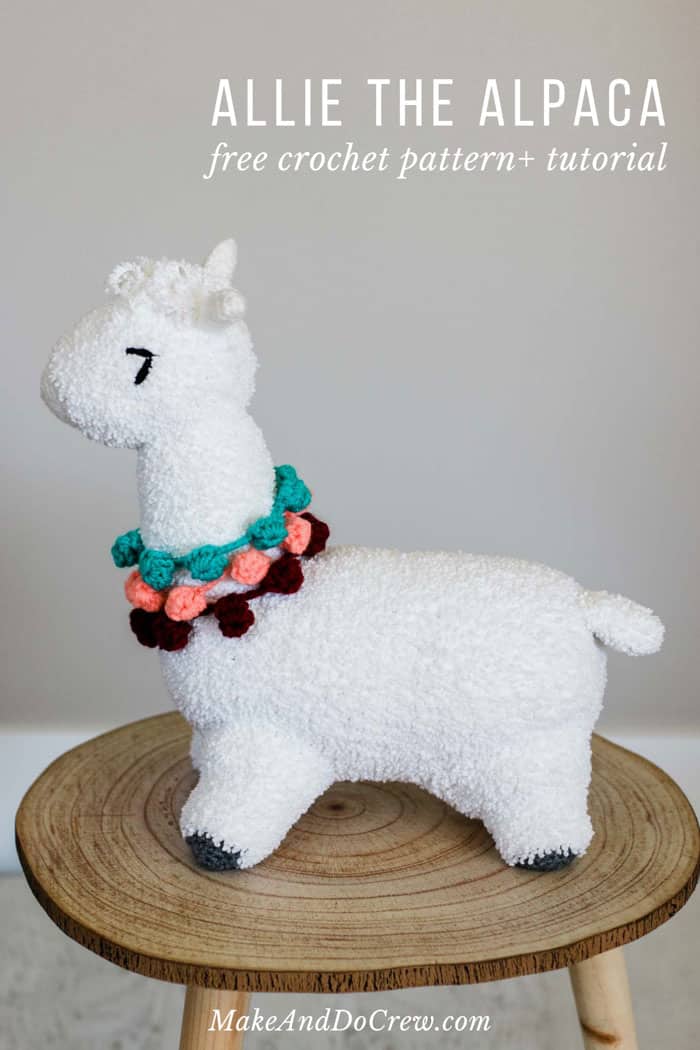
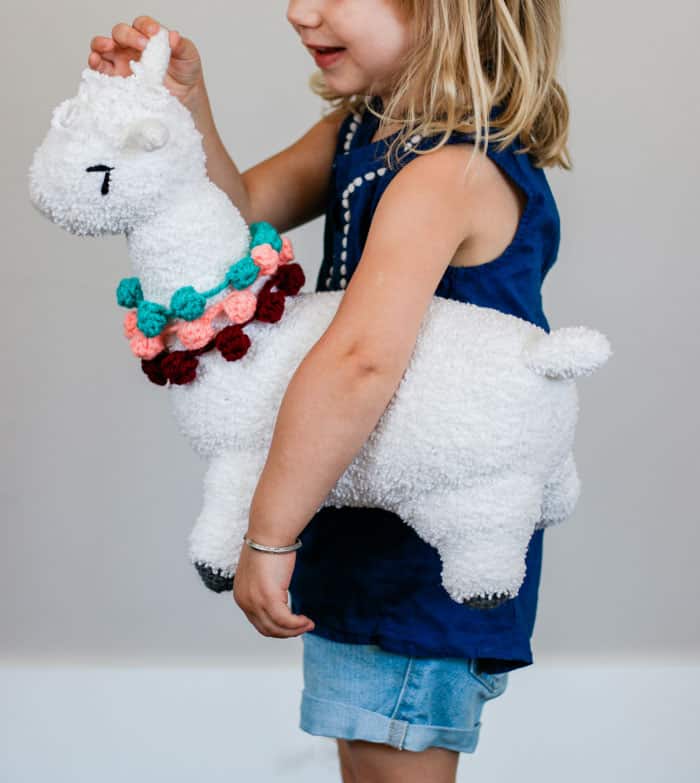
Perfect for alpaca (or llama!) lovers of all ages, this super squishy crochet alpaca toy is just the right size to hug. Get the free pattern below or purchase the ad-free, printable PDF here.
This free crochet alpaca toy pattern is part of a collaboration with my friends at Lion Brand Yarn. This post contains affiliate links.
Are you ready for a cuteness alpaca-olypse?! Ha, okay, this crochet alpaca toy is adorable with or without a pun, so let's learn a little more about how to make her!
A Super Furry Alpaca Friend
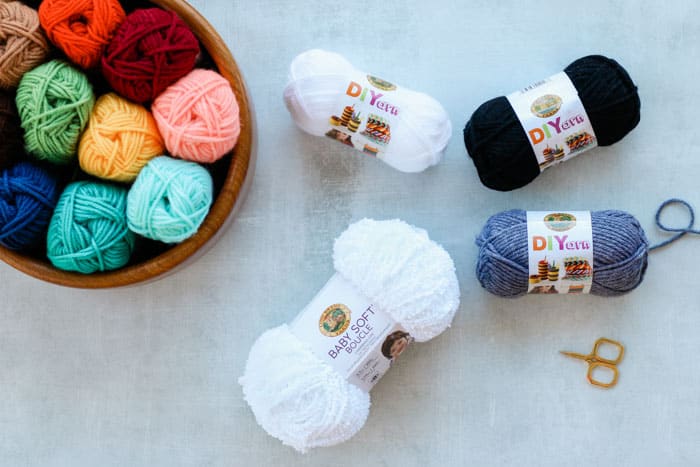
When you look at this Baby Soft Boucle yarn from Lion Brand, you might have a few thoughts:
"This looks like the softest yarn ever!" (You'd be right!)
And then maybe "How do you crochet with that furry stuff?"
And my answer to that would be, WITHOUT FEAR, my friends! It's true, fuzzy yarn like this can make it a bit tougher to see your stitches, but it also makes the yarn extremely forgiving. This means you can enjoy the yarn for the magical softness it gives your alpaca, without obsessing over stitch counts.
As long as you end up with approximately the correct number of stitches on most of the rounds, you'll love the super squishy crochet alpaca toy you end up with. I include more tips on working with fuzzy yarn in the full pattern below.
The Best Crochet Amigurumi Yarn!
When I was sharing the idea for this crochet alpaca toy with a friend of mine at Lion Brand, he suggested I try using DIYarn for the worsted-weight colorful accents in the pattern. I figured out why when I learned DIYarn comes with about 65 yards IS LESS THAN A DOLLAR A BALL! No more buying 300 yards to make two little amigurumi ears--this yarn is the perfect, practical solution for smaller projects that need a little bit of each color. I'm so happy to know about it as an option!
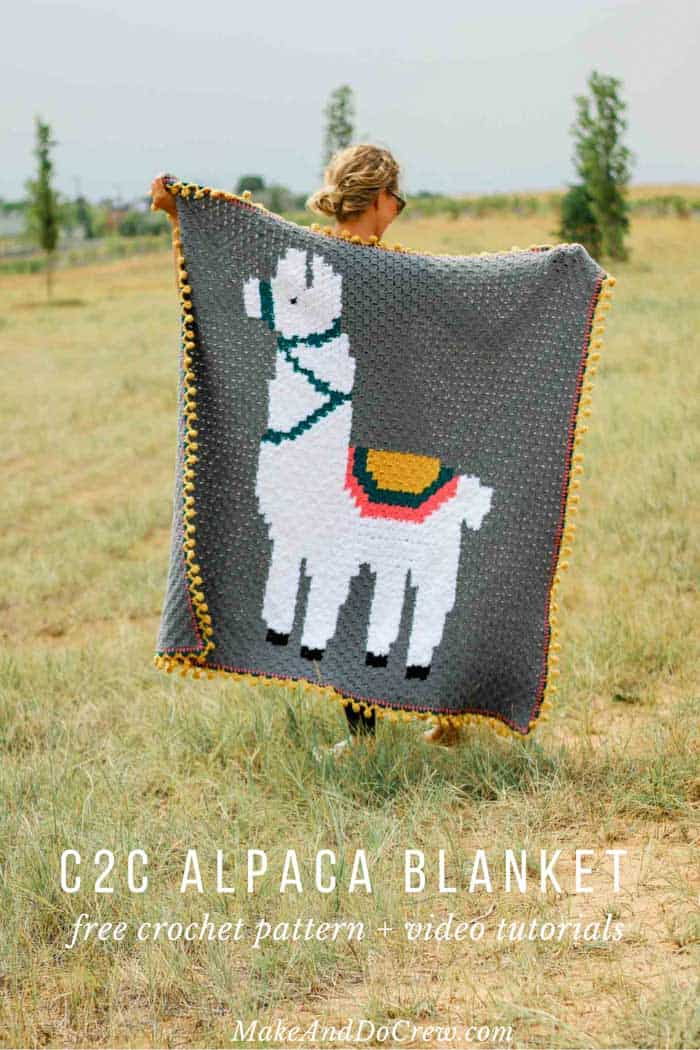
A Matching C2C Alpaca Blanket
The idea for this crochet alpaca toy was inspired by our recent Alpaca Love corner-to-corner blanket. (You can find the free pattern here!) I love the idea of pairing the blanket with the stuffed animal for a sweet handmade baby shower gift. If you decide to make the blanket first, you can use the leftover accent color yarn for the pom pom necklace on the alpaca stuffie too. Yarn stash win!
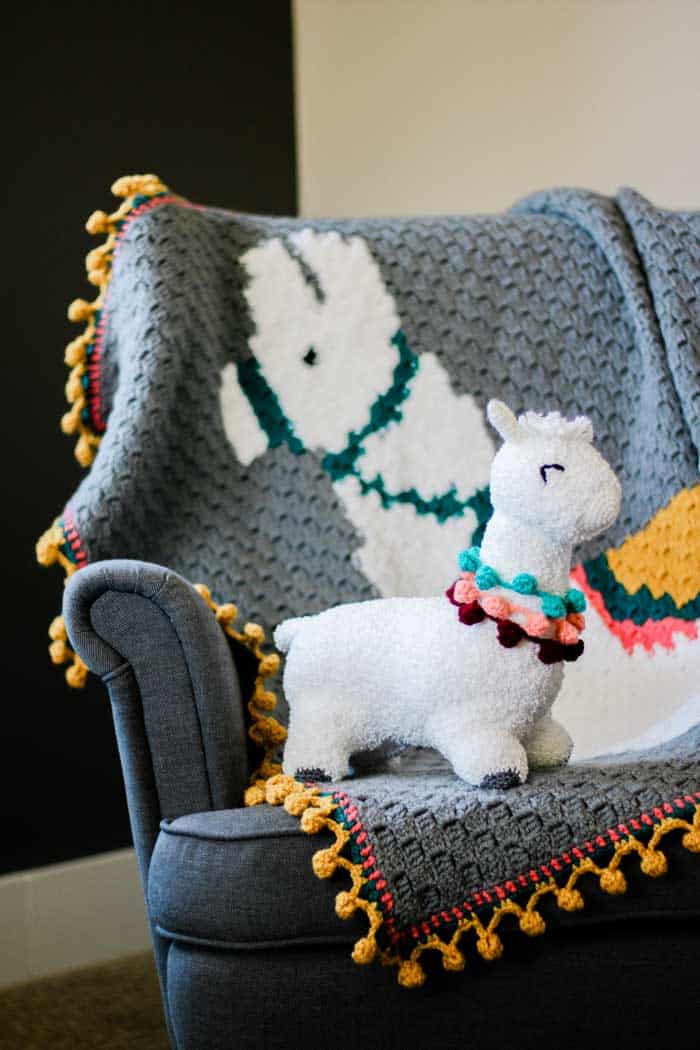
Allie the Crochet Alpaca Toy
Free Pattern
Purchase the ad-free, printable PDF here.
Save this pattern to Ravelry here.
Pin it for later here.
Explanation:
Perfect for alpaca (or llama!) lovers of all ages, this super squishy alpaca toy is just the right size to hug. While the fuzzy yarn might be intimidating, it’s also extremely forgiving, so you can crochet an adorable alpaca friend without obsessing over stitch counts.
Supplies:
This pattern contains affiliate links at no extra cost to you.
Yarns Used:
• Lion Brand Baby Soft Boucle (Weight: 5/bulky - 120 yds, 3.5 oz)
• Lion Brand DIYarn (Weight: 4/medium - 65 yds, 1.05 oz)
COLOR A: Baby Soft Boucle - White (#918-100) - 2 skeins
COLOR B: DIYarn - Charcoal (#205-150) - 1 skein
COLOR C: DIYarn - White (#205-100) - 1 skein
COLOR D: DIYarn - Black (#205-153) - 1 skein
COLOR E: DIYarn - Peach (#205-184) - 1 skein
COLOR F: DIYarn - Aqua (#205-102) - 1 skein
COLOR G: DIYarn -Burgundy (#205-142) - 1 skein
• Tapestry needle
• Size H (5.0 mm) crochet hook
• Stitch markers or safety pins
• T-pinsz or straight pins
• 4-6 oz Polyfil stuffing
• Measuring tape
Measurements:
Nose to tail: 13.5”
Head to feet: 13”
Gauge:
Gauge is quite difficult to measure with this yarn, but here’s what is important to keep in mind:
The stitches need to be tight enough so stuffing can’t escape. Baby Soft Boucle fills out well, so stitches don’t need to be as tight as in places where DIYarn is used.
Abbreviations and Glossary (US Terms):
ch – chain
sl st – slip stitch
sc – single crochet crochet
sc2tog – single crochet two together
sc3tog – single crochet two together
st(s) – stitch(es)
PM – place marker
puff st - [yarn over, insert hook in stitch, yarn over, pull yarn through first two loops on hook] 4 times, yarn over, pull yarn through all five loops on hook, ch 1 to close puff
A Note on Working With Fuzzy Yarn:
Lion Brand Baby Soft Boucle makes fabulously fuzzy stuffed animals, but the stitches can be hard to see. Save yourself some stress and give up on being a meticulous crocheter for this project. This yarn is very forgiving, so worry more about getting close to the total number of stitches in any given round and less about where exactly you’re placing your hook. It may be helpful to mentally note where the middle of the round is approximately and make sure you’ve worked half the stitches of the round by that point.
In fact, for some sections that are worked without increasing or decreasing, you may just choose to work as evenly as possible and count your stitches every few rounds to make sure you’re on track. I promise the yarn will “absorb” your inconsistencies. And don’t underestimate good lighting to help see your stitches!
Because it’s often hard to count the total number of rows worked in furry yarn, this pattern will often provide a measurement to work toward instead of a row count.
Overall Pattern Notes:
• Pieces that are worked in the round are crocheted in a spiral, which means the end of each round isn’t joined with a slip stitch.
• To keep track of where a round begins, it can be helpful to place a marker in first stitch of round and move it to first stitch of next round as pattern progresses.
•Pattern for an alpaca corner-to-corner crochet afghan can be found here. (Combined with the alpaca toy, this can make a perfect baby shower gift!)
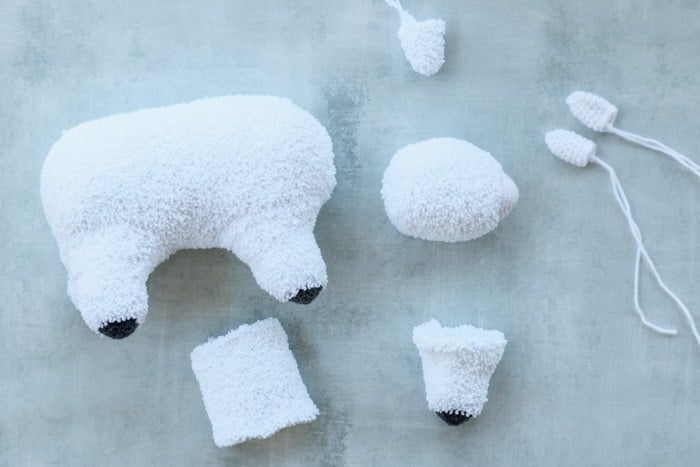
MAIN BODY
Make 1.
Increasing
Using Color A: Create a magic circle.
Round 1: Sc 8 in magic circle. PM in first stitch and continue to move with each round. (8)
Round 2: 2 sc in each sc. (16)
Round 3: [2 sc in next sc, sc in next sc] 8 times. (24)
Round 4: [2 sc in next sc, sc in each of next 2 sc] 8 times. (32)
Round 5: [2 sc in next sc, sc in each of next 3 sc] 8 times. (40)
Round 6: [2 sc in next sc, sc in each of next 4 sc] 8 times. (48)
Round 7: [2 sc in next sc, sc in each of next 11 sc] 4 times. (52)
Round 8: [2 sc in next sc, sc in each of next 12 sc] 4 times. (56)
PM. (This will indicate where solid body section begins.)
Extending Body
Work even for 7.25” as measured from marker placed after Round 8. Because the stitches may be hard to see, you might decide to just work as evenly around as possible and count stitches every few rows to ensure you’re on track.
Decreasing
Round 1: [sc2tog, sc in each of next 12 sc] 4 times. (52)
Round 2: [sc2tog, sc in each of next 11 sc] 4 times. (48)
Round 3: [sc2tog, sc in each of next 4 sc] 8 times. (40)
Round 4: [sc2tog, sc in each of next 3 sc] 8 times. (32)
Round 5: [sc2tog, sc in each of next 2 sc] 8 times. (24)
This is a good time to stuff the main body before the opening becomes too small.
Round 6: [sc2tog, sc in next sc] 8 times. (16)
Round 7: [sc2tog] 8 times. (8)
Fasten off leaving a 15” tail. You may choose to leave body open until legs are sewn on in order to adjust stuffing as necessary.
LEGS
Make 4.
Feet
Using Color B: Create a magic circle.
Round 1: Sc 5 in magic circle. PM in first stitch and continue to move with each round. (5)
Round 2: 2 sc in each sc. (10)
Round 3: [2 sc in next sc, sc in next sc] 5 times. (15)
Round 4: [2 sc in next sc, sc in each of next 2 sc] 5 times. Complete final sc with Color A. Proceed to Legs section without cutting yarn. (20)
Legs
Using Color A:
Round 1: Sc in each sc. (20)
Work even for 1.75” as measured from bottom of Color A.
Wanna save this pattern?
Round 2: [2 sc in next sc, sc in each of next 3 sc] 5 times. (25)
Round 3: [2 sc in next sc, sc in each of next 4 sc] 5 times. (30)
Rounds 4-6: Sc in each sc. (30)
Fasten off leaving 15” tail.
NECK
Make 1.
Using Color A:
Foundation: Ch 25, sl st to first ch to join.
Round 1: Sc in each ch around. (25)
Round 2: Sc in each sc around. (25)
Work even until total height measures 3.75”.
HEAD
Make 1.
Increasing
Using Color C: Create a magic circle.
Round 1: Sc 5 in magic circle. PM in first stitch and continue to move with each round. (5)
Round 2: 2 sc in each sc. (10)
Round 3: [2 sc in next sc, sc in next sc] 5 times. (15)
Round 4: [2 sc in next sc, sc in each of next 4 sc] 3 times. (18)
Round 5: [2 sc in next sc, sc in each of next 5 sc] 3 times. (21)
Round 6: [2 sc in next sc, sc in each of next 6 sc] 3 times. Complete final sc with Color A. (24)
Using Color A:
Round 7: [2 sc in next sc, sc in each of next 7 sc] 3 times. (27)
Round 8: [2 sc in next sc, sc in each of next 8 sc] 3 times. (30)
Round 9: [2 sc in next sc, sc in each of next 9 sc] 3 times. (33)
Round 10: [2 sc in next sc, sc in each of next 10 sc] 3 times. (36)
PM. (This will indicate where non-increase section of head begins.)
Work even for 2.5” from marker. Total head length should measure approx. 5” from tip of nose.
Decreasing
Round 1: Sc2tog 18 times. (18)
This is a good time to stuff the head before the opening becomes too small.
Round 2: Sc3tog 6 times. (6)
Fasten off leaving a 15” tail. Thread tail on tapestry needle and whip stitch around head opening. Cinch closed.
TIP: Disguise any small gaps in decrease stitches when weaving in yarn tail.
TAIL
Make 1.
Using Color A: Create a magic circle.
Round 1: Sc 8 in magic circle. PM in first stitch and continue to move with each round. (8)
Round 2: [2 sc in next sc, sc in next 3 sc] twice. (10)
Work even until total tail height measures 1.75”.
Fasten off leaving a 15” tail.
EARS
Make 2.
Using Color C: Create a magic circle.
Round 1: Sc 3 in magic circle. PM in first stitch and continue to move with each round. (3)
Round 2: 2 sc in each sc. (6)
Round 3: [2 sc in next sc, sc in next sc] 3 times. (9)
Rounds 4-8: Sc in each sc. (9)
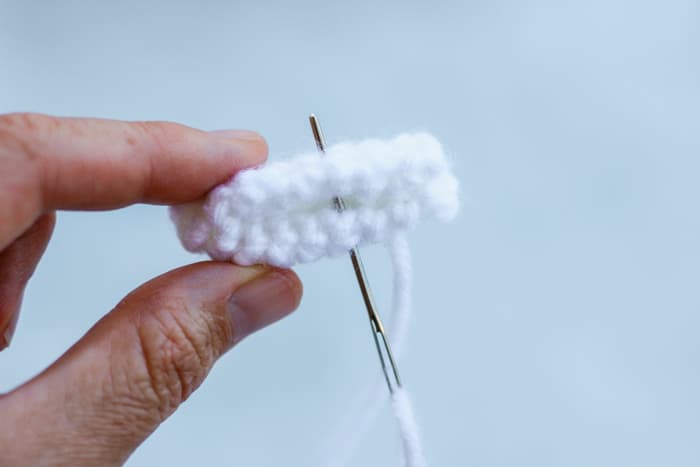
Fasten off leaving a 15” tail. Thread tail on tapestry needle and fold ear in half lengthwise. Sew bottom two thirds of ear together, then thread tail back to bottom of ear. Keep tail attached.
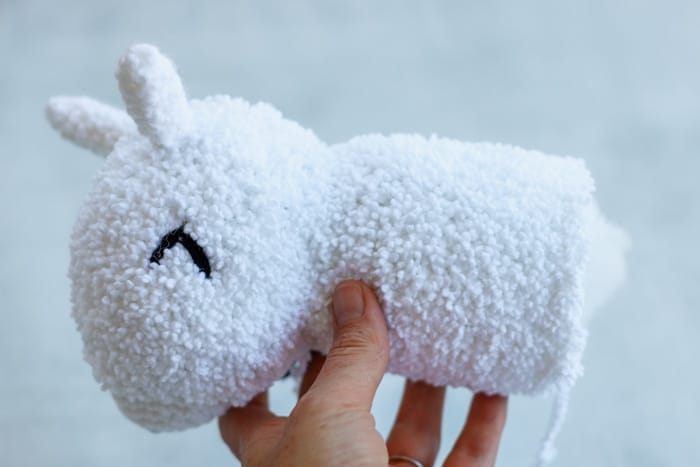
ASSEMBLING ALPACA
Using a tapestry needle and Color D, embroider a “V” shape on head for eyes. (See photo above.) Embroider a mouth if desired.
TIP: For a more delicate mouth, separate strand of yarn into a few pieces so that it isn’t as thick.
Using Color A, sew loops of fuzzy “hair” on top of head, tying periodic sewing knots to secure in place.
Use leftover yarn tails from ears to sew ears to head.
Stuff all body parts except tail. Use leftover yarn tails to sew pieces together whenever possible.
Pin legs to body with T-pins. Whip stitch legs to body.
Add extra stuffing to body as desired. Whip stitch around final opening and cinch closed.
Sew tail to rear. (Main body is symmetrical, so choose whichever side you like.)
Pin head to neck and whip stitch together.
Pin neck to body and whip stitch together.
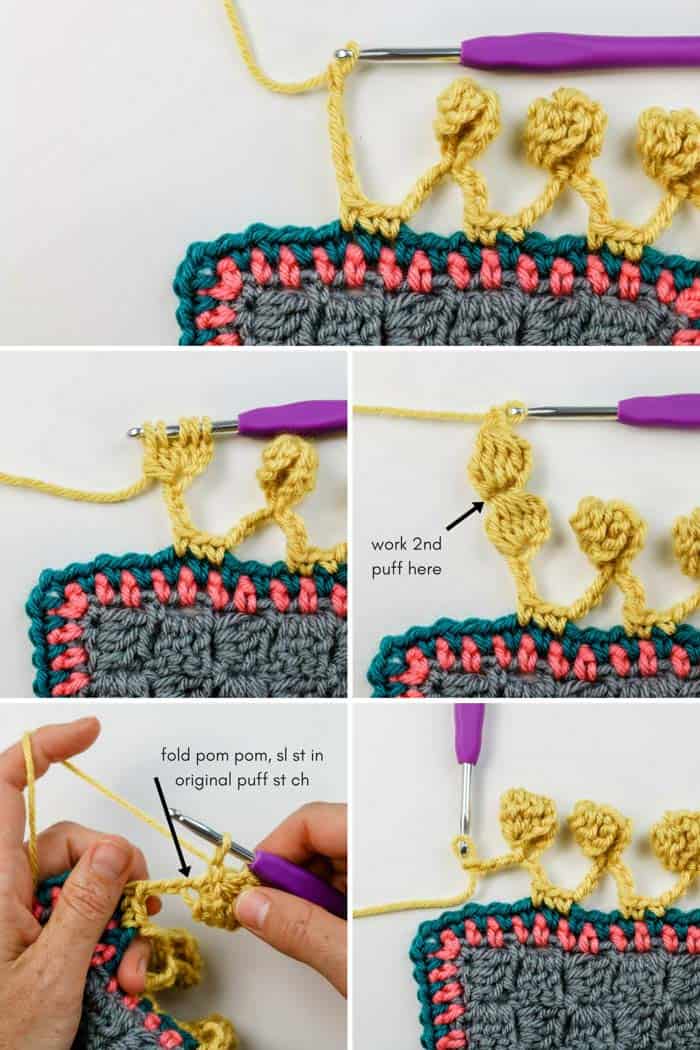
POM POM NECK FLAIR
See photo above for visual explanation. Note that no single crochets between the puff stitches are necessary.
Make 1 in Colors E, F and G.
*Ch 6, in third ch from the hook work puff st, ch 3, work puff st in ch1top of previous puff st, fold pom pom in half, sl st in same ch where first puff st was worked, ch 1 to tighten pom pom together.
To work necklace:
Rep from * to create 9 pom poms. Fasten off leaving a 10” tail. Taking care not to twist necklace, sew last pom pom to first ch. Weave ends into pom poms.
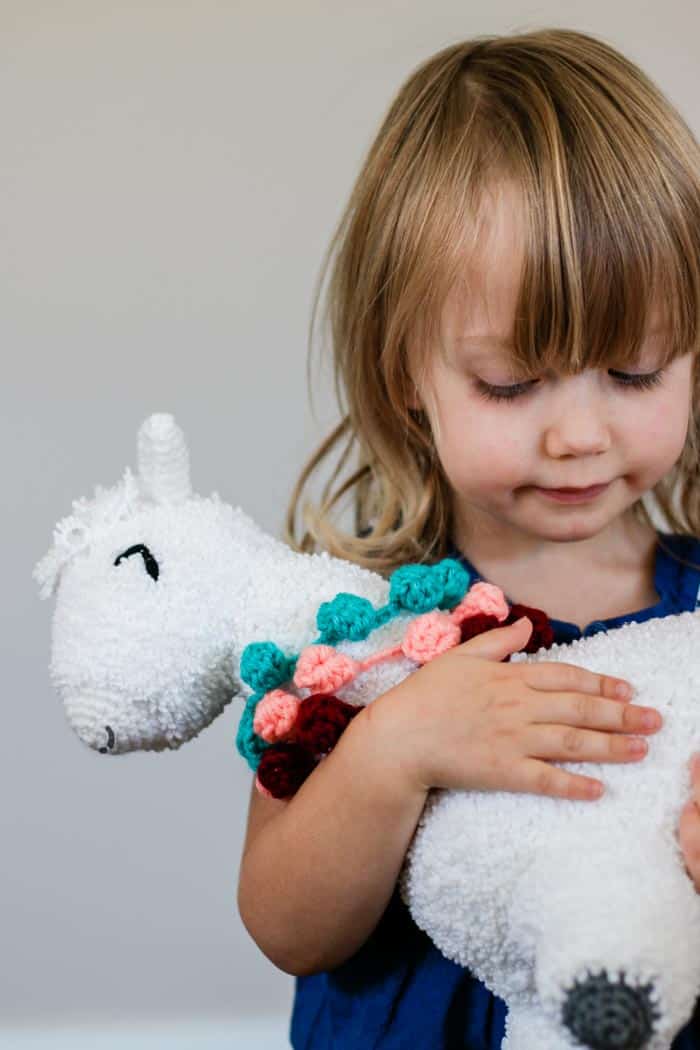
Bestow Allie the Alpaca with her new neck flair and hug some love into her!
More Modern Free Crochet Patterns for Babies and Kids
If you liked making this crochet alpaca toy, you might love some of these other free crochet patterns for little ones from Make & Do Crew! You can always find all our free patterns and tutorials here.
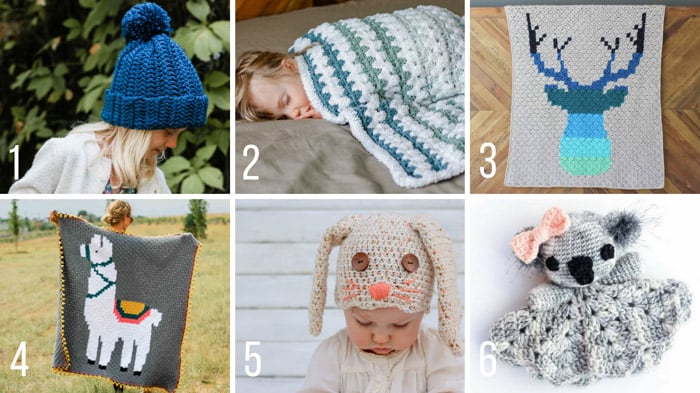
1. 1 Hour Beanie - free crochet pattern + video tutorial
2. Tributary Blanket - very easy free crochet blanket with very few ends to weave in
3. Be a Deer Blanket - free corner-to-corner crochet blanket pattern (kids + adult sizes)
4. Alpaca Love - free corner-to-corner crochet blanket pattern
5. Bunny Hat - free crochet pattern sizes newborn-toddler
6. Koala Lovey - fast, free crochet pattern
More Amigurumi Patterns You Might Like
Once you've learned the basics of crocheting amigurumi, you're ready to tackle this fun and creative plushie patterns.

kate says
Hi,
Last line in head seaction before decreasing says 36sc. Then You decrease Sc2og 13 times. Shouldn't it be 18? Should the next line be 13sc and then 7sc? I've got the printable version and it says the same number of stiches as here.
Jess @ Make and Do Crew says
Thanks so much for asking about that, Kate. You've caught an error! Here's what I revised it to above. It'll be updated in the PDF in your LoveCrochet.com library in the next few days. 🙂
Round 1: Sc2tog 18 times. (18)
This is a good time to stuff the head before the opening becomes too small.
Round 2: Sc3tog 6 times. (6)
Jess