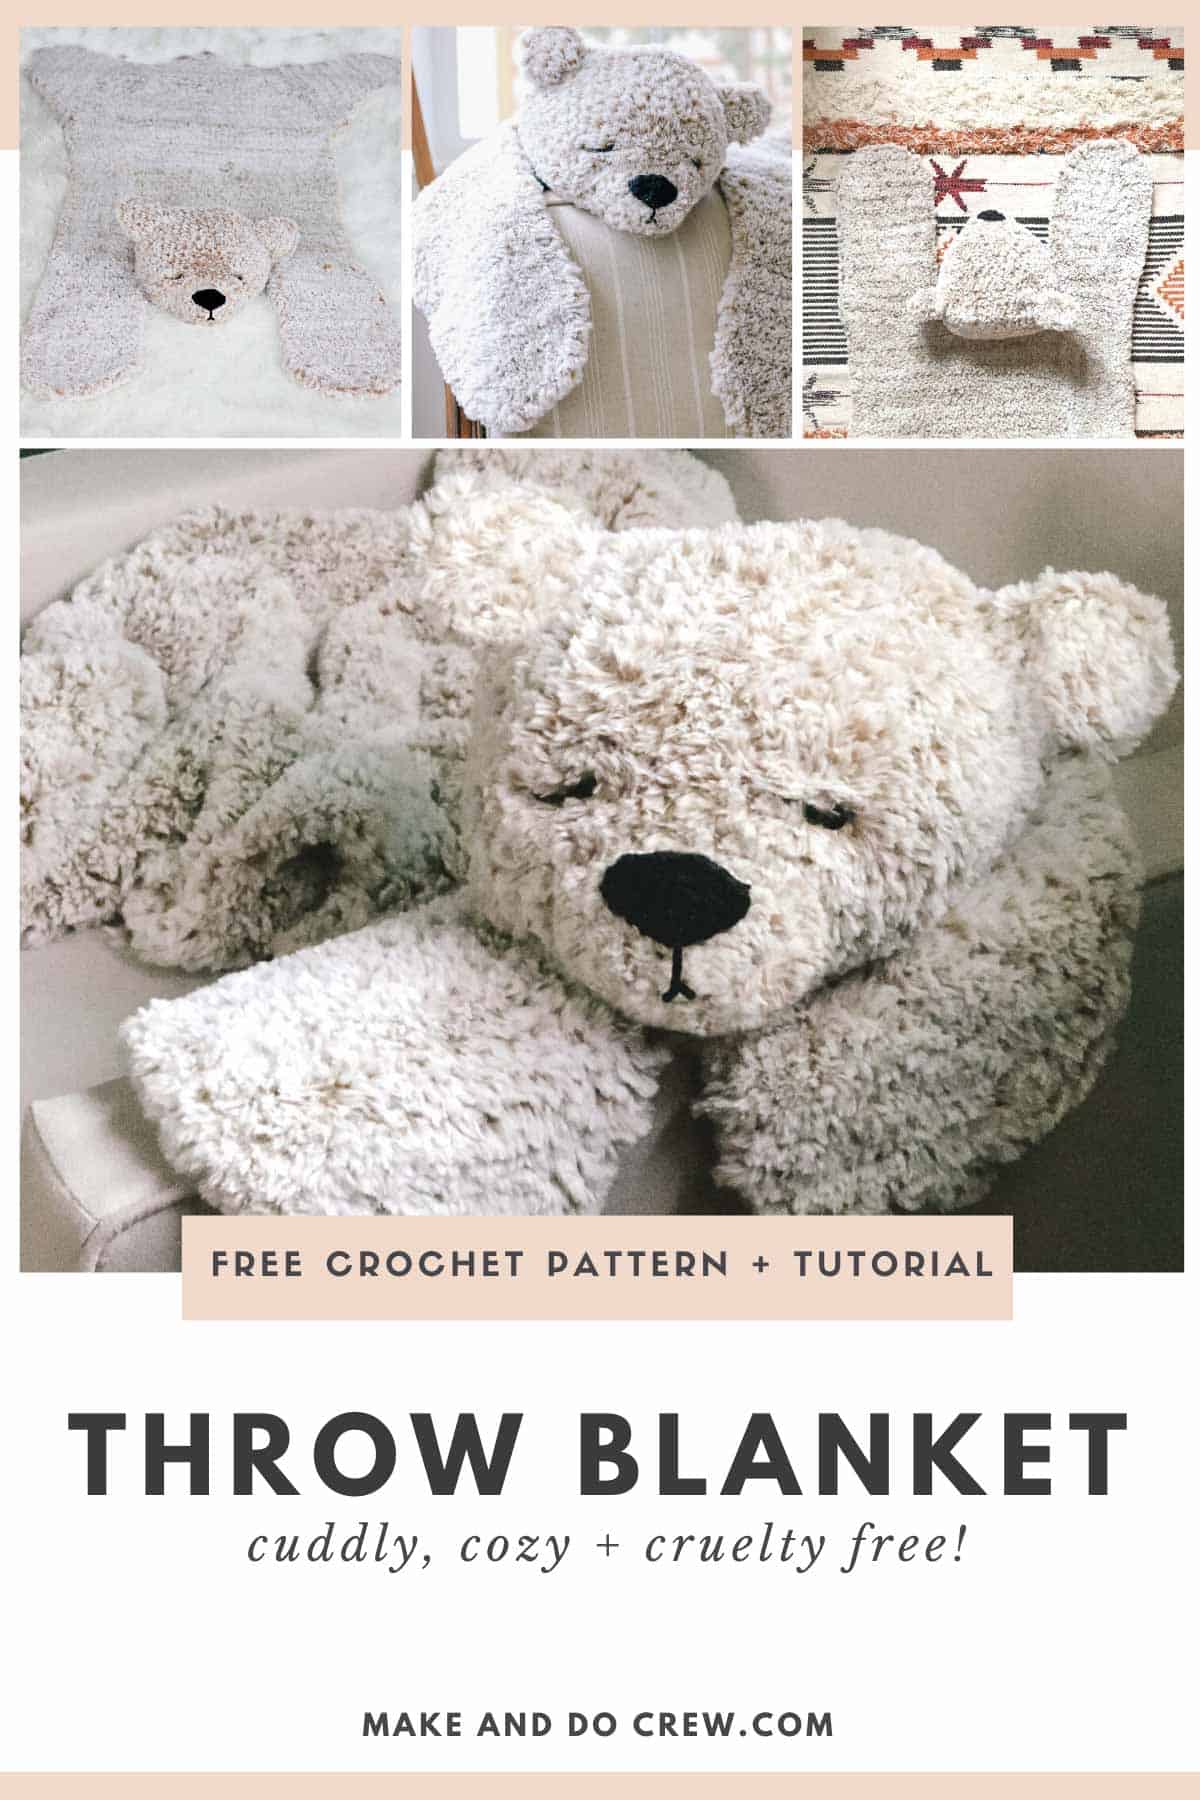
Perfect as a rustic throw, child’s play mat or nursery rug, this cuddly crochet bear blanket is sure to keep you cozy while you hibernate. Find the free pattern below or purchase the ad-free, printable PDF here.
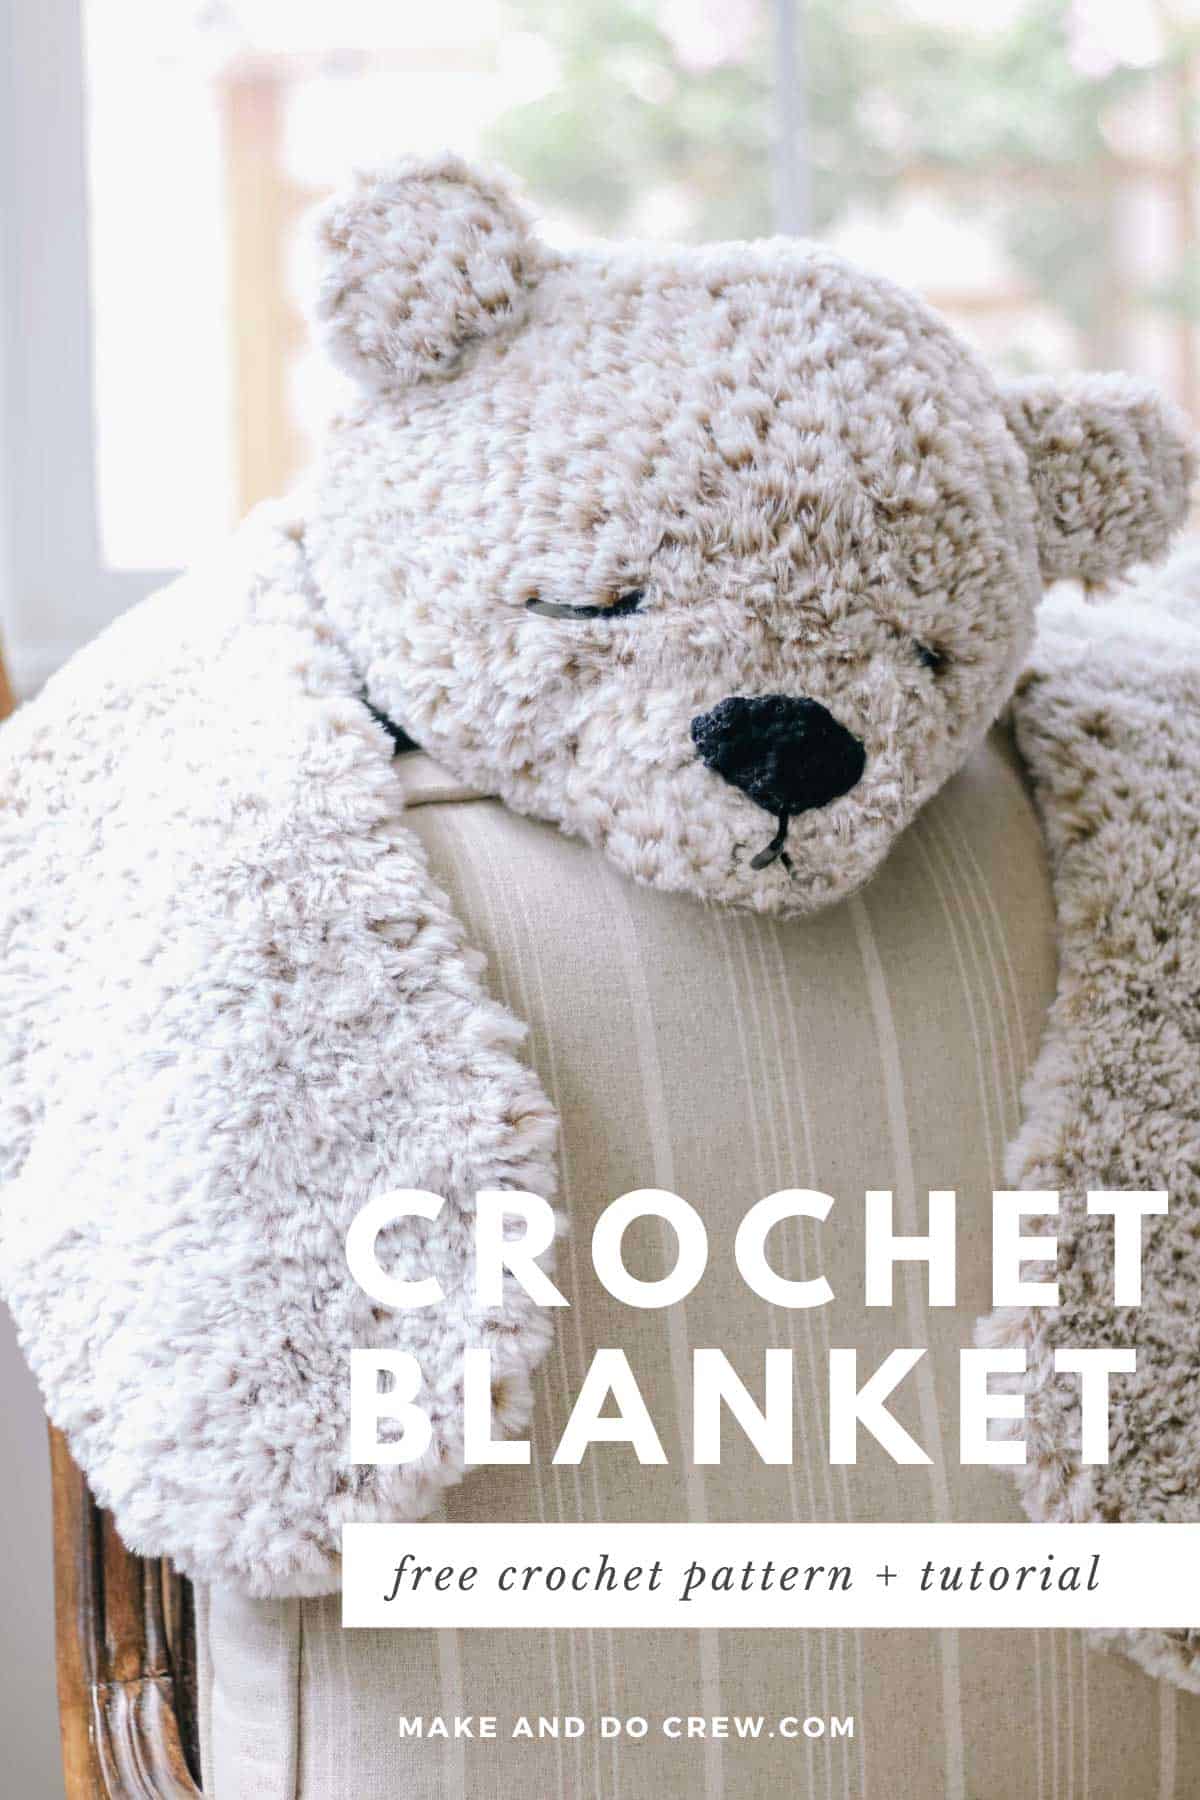
This crochet bear blanket rug pattern is part of a collaboration with Lion Brand Yarns. This post contains affiliate links.
Are you ready for THE SOFEST, coziest crochet project your hands ever did feel? Because this magical bear is made entirely with single crochet, you’ll quickly get the hang of feeling for your stitches in the fuzzy yarn and finish this fun project in no time.
Read on for all the yarn and pattern inspiration details or scroll down for the complete free crochet bear pattern.
The Pattern Inspiration
From Pottery Barn to Target to Etsy, I've seen some adorable animal rugs that are meant for baby nurseries. All the options I've seen though have been made from faux fur fabric so I wanted to design my own crochet take on an animal rug with fur yarn. A bear seemed like the perfect animal to attempt because it's a natural staple in a woodland themed nursery or as part of cozy (grown-up) home decor. Would this little guy look cute as part of a rustic, cabin-y vibe?
Fur Yarn Doesn't Have to Be Intimidating
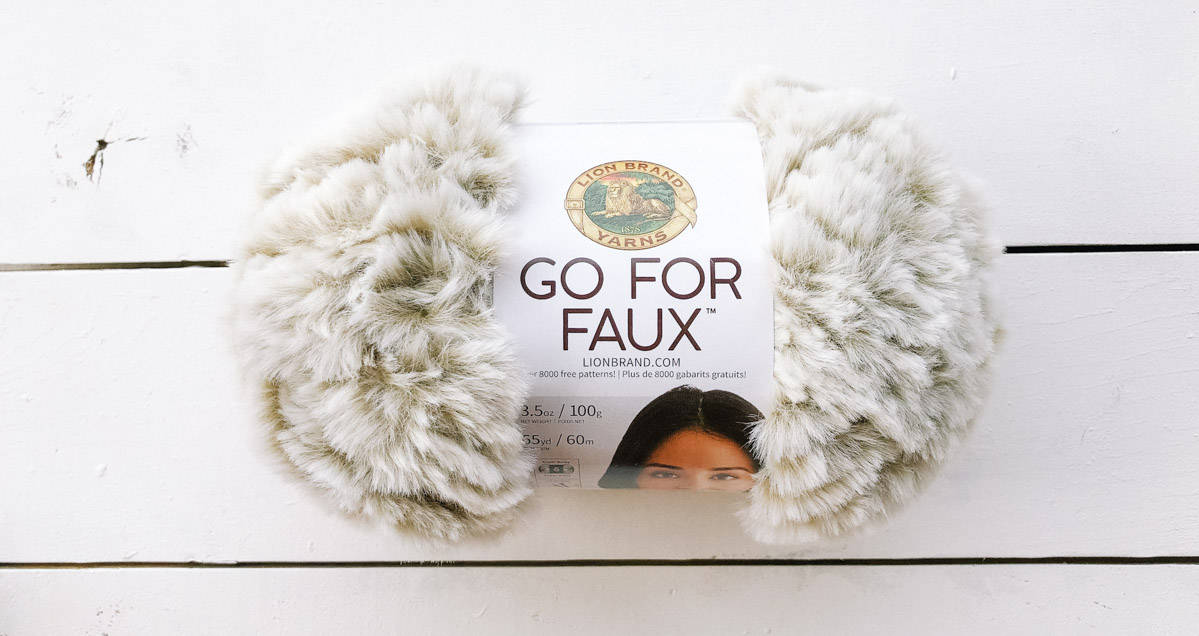
I stayed away from Lion Brand Go For Faux yarn for a long time because I assumed it would be a total headache to keep track of my stitches. I'm so glad I finally gave it a shot though because it's nothing like what I expected. (My first faux fur project was the Backcountry Cardigan and the fur collar totally makes the sweater!)
Because the yarn itself is sort of like a very thin slice of faux fur, the backing that holds the yarn together makes it very easy to feel for your stitches. In someways, I actually prefer this to typical crocheting where I have to look at the stitches to insert my hook. When I feel for the stitches, I'm more easily able to watch TV or supervise my kids while my fingers are doing the looking.
I put together a little video below that shows how I let my fingers lead the way in finding each space to insert my hook. If you've ever been intimidated by crocheting with faux fur yarn, I think this will really put your mind at ease.
And one last thought: I had heard for a while that some colors of Go For Faux had a tendency to shed fur. I've used probably 4-5 different colors at this point and I'm happy to report, I haven't had that experience with any of them. See all the scrumptious colors of Lion Brand Go For Faux here.
VIDEO: How to Feel For Stitches in Faux Fur Yarn
Coziness, Tried and Tested
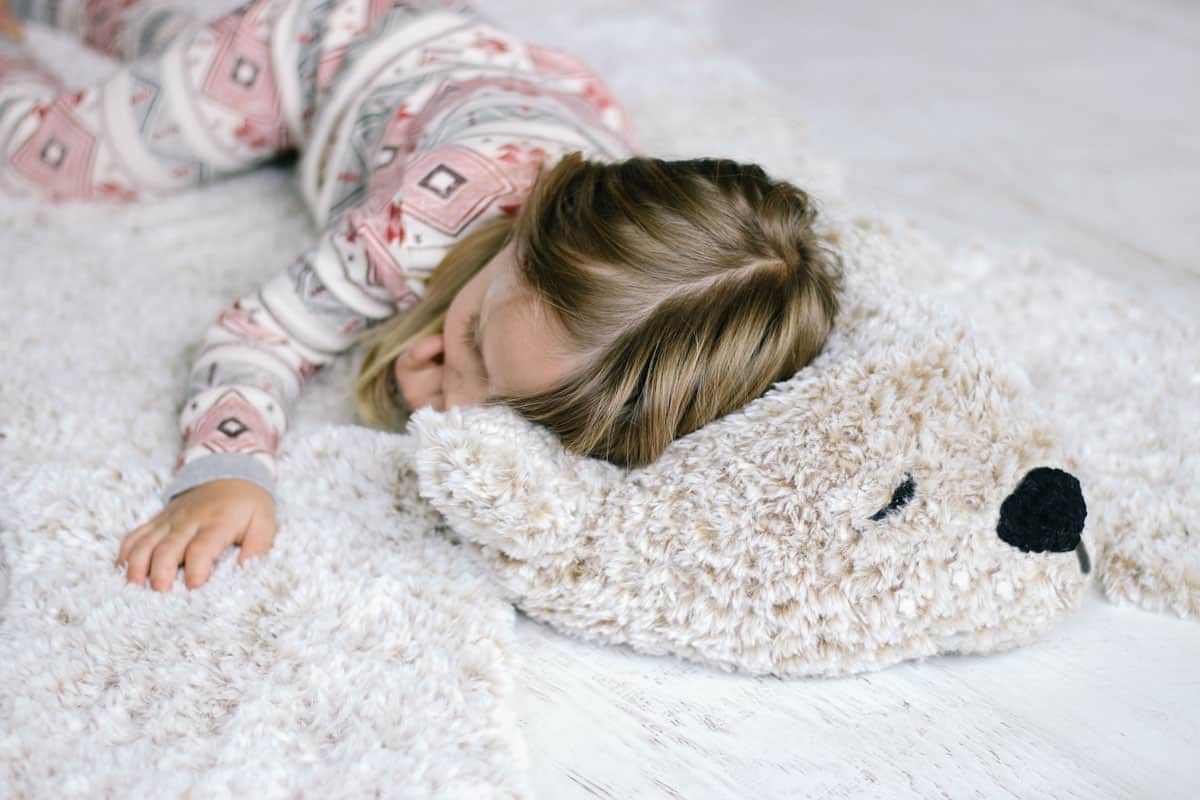
One look at this crochet bear blanket and I think it's pretty clear that this thing is crazy soft. Something I hadn't quite planned though was how well the stuffed head would function as a cozy place to rest your head. In fact, this weekend as I was putting this post together, my rock and roll (ahem, pandemic homeschooling + working mom) lifestyle got the best of my. I could not keep my eyes open.
I laid this bear rug out on the floor of my office, grabbed the C2C Monstera Blanket to cover up with and "rested my eyes" for a full hour. Ha. When I woke up I was SO confused about where I was, what day it was and mostly, how no one in my family had discovered that I was asleep on the job for an entire hour. (Thanks to my husband who plays pretty great defense while I'm "working.")
If you're someone who likes to cuddle up for an impromptu nap, I highly recommend this bear blanket as a staple on your sofa.
Related: Crochet Borders and Edgings for Every Blanket
Grab a Kit With All the Supplies
I'm sharing this pattern today as part of Lion Brand's Countdown to Christmas kick-off, which means we're officially in the holiday countdown. (At least if you need enough time to make all your gifts by hand, that is!) You can pickup the Hibernation Bear Blanket Rug kit from Lion Brand and have all the supplies you need sent straight to your doorstep. You'll also receive a digital download of the pattern to print if you'd like.
And whether you have a grizzly bear, polar bear or panda crochet blanket in mind, you can customize your kit to include any color of yarn you desire. Order your kit here.
Check out all the Countdown to Christmas kits here. There are some awesome options for both crocheters and knitters!
Deliver it! click purchase the full crochet kit from Lion Brand ⇨
Pick Up the Ad-Free, Printable PDF
This is one of those patterns that's quite easy to make, but quite wordy to write up. Scroll down (and down and down and down) to see. Ha. I also included several tutorial images to make crocheting this bear blanket rug as easy as possible. So if you aren't purchasing the kit from Lion Brand, you'll probably find spending a few dollars on the PDF to be a great investment. Not only is it formatted with large type, it's completely free of ads and very simple to print.
Not interested in the PDF? No worries! The complete free Hibernation Bear Blanket Rug pattern is below.
Pin it! click to pin this pattern for later ⇨
More Free Christmas Crochet Patterns
From tree ornaments to c2c crochet patterns to adorable elf hats with ears, we've got you covered with many more crochet patterns for Christmas. We also have loads of quick gifts to crochet and gift ideas for crocheters to add to your own list (hint!)
See more free Christmas crochet patterns →
Hibernation
Crochet Bear Blanket Rug
Free Pattern
Explanation:
Perfect as a rustic throw, child’s play mat or nursery rug, this cuddly bear is sure to keep you cozy while you hibernate. Because it’s made entirely with single crochet, you’ll quickly get the hang of feeling for your stitches and finish this fun project in no time.
Supplies:
Purchase a kit with all the yarn you'll need + a digital copy of the pattern here.
• Color A: Lion Brand Go For Faux (Weight: 6/super bulky - 64 yds, 3.5 oz)
- Color name: Blonde Elk (#322-211) – 11 skeins (approx. 1025g)
• Color B: Lion Brand DIYarn (Weight: 4/medium - 65 yds, 1.05 oz)
- Color name: Black (#205-153) – 1 skein (approx. 10g)
• Tapestry needle
• Size P (12.0 mm)* crochet hook or size needed to obtain gauge
• Size L (8.0 mm) crochet hook
• Stitch markers or safety pins
• Fiberfill - approx. 5-10 oz
*P crochet hooks can vary in size from 10.5-15mm, so verify size of your hook if meeting gauge is proving difficult
Measurements:
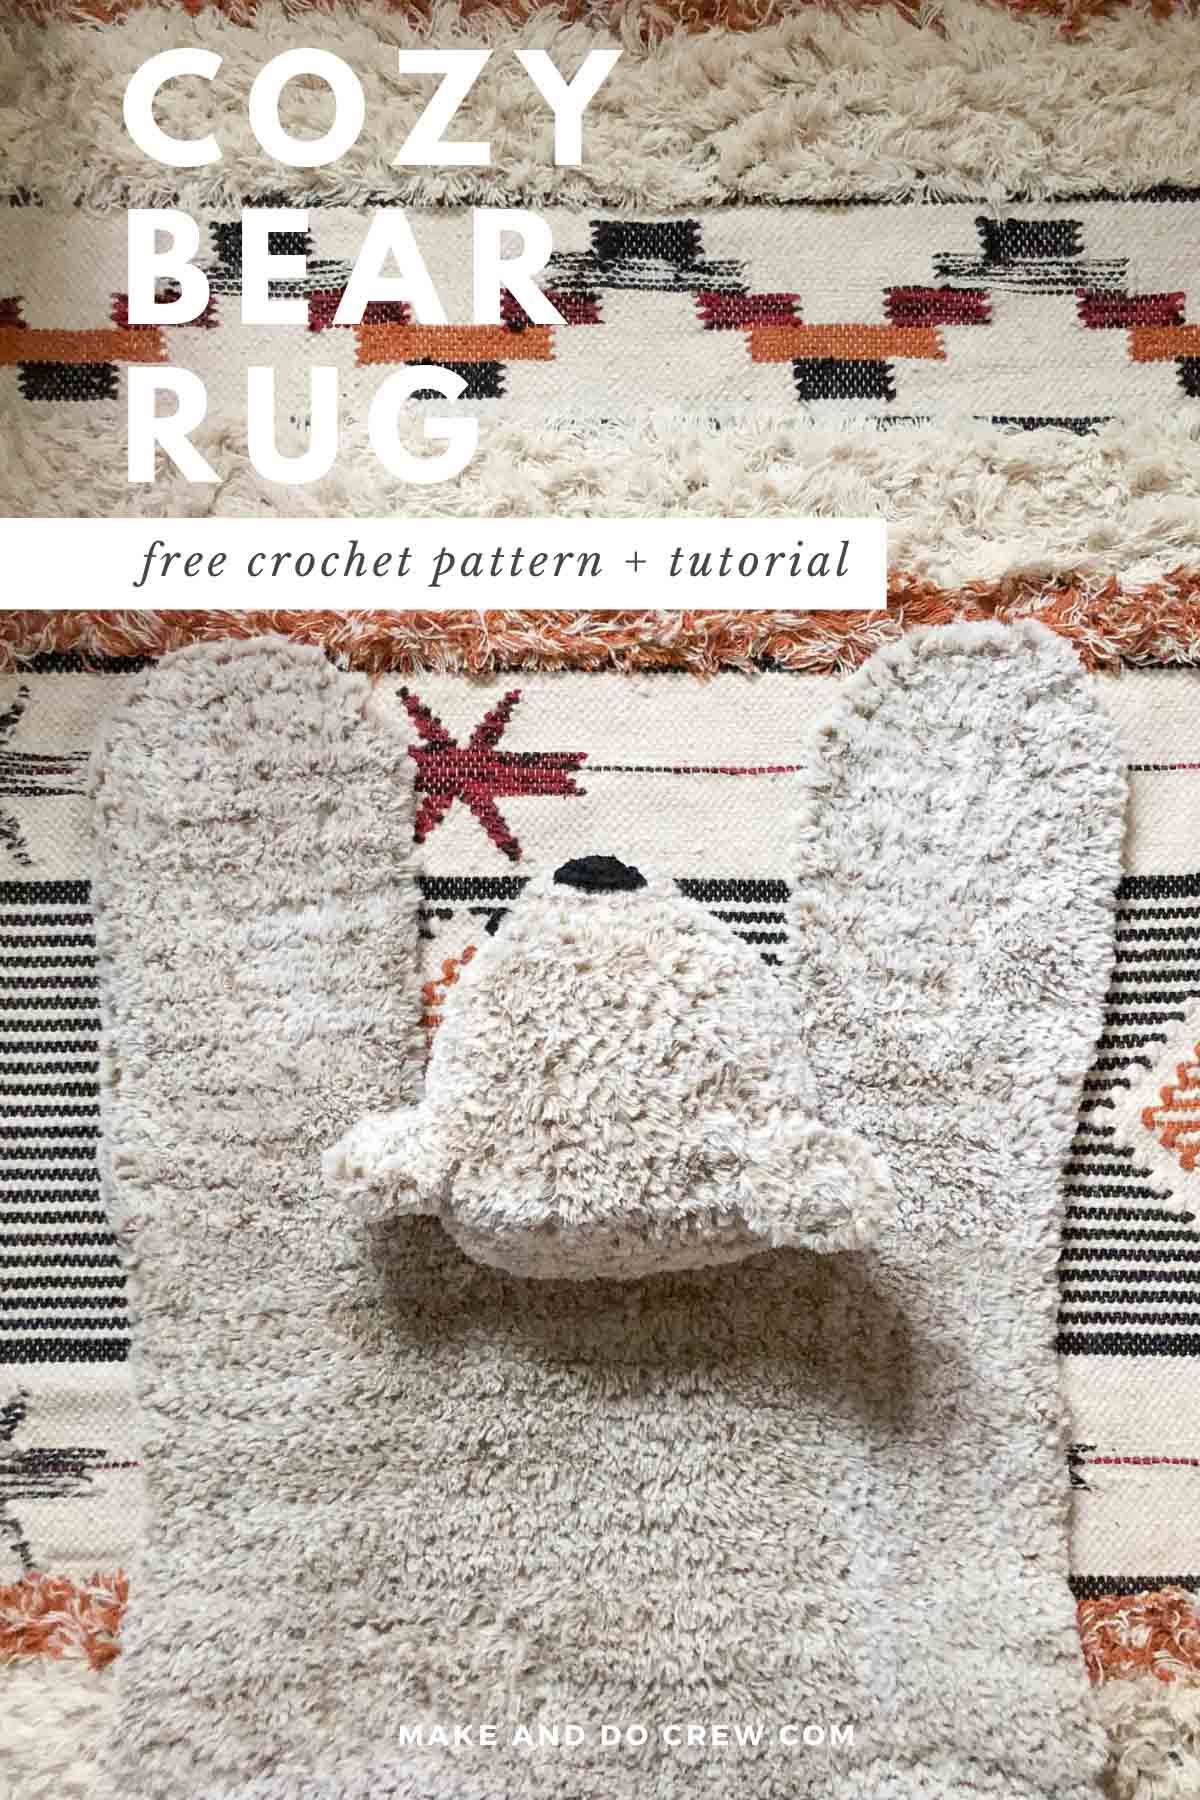
Laying flat, bear measures approximately 54” from front paws to back paws and 42” at widest point.
Gauge:
Gauge is extremely difficult to measure on its own. Instructions are provided for checking gauge below.
Abbreviations and Glossary (US Terms):
ch – chain
PM – place marker
rep – repeat
RS – right side
sc – single crochet
sc2tog – single crochet two together
sc3tog – single crochet three together
sk – skip
slst – slip stitch
st(s) – stitch(es)
WS – wrong side
Want some company while you crochet?
Get support (and camaraderie!) in the Make & Do Crochet Crew Facebook Group here.
Permissions + Copyright:
Please do not publish or share this pattern as your own. You may make items to sell with this pattern. In exchange, please link back this post. Do NOT use my photos as your own sales photos.
Overall Pattern Notes:
• When working with furry yarn, it can be much easier to feel for your stitches instead of looking for them. After a few rows, you’ll get the hang of it and be able to cruise along.
• Similarly, don’t drive yourself crazy if your stitch count is off a bit here and there. As long as the basic pattern is followed, your bear will take shape.
• There is no right or wrong side to the pieces worked in Color A, with the exception of the head.
!! GAUGE CHECK !!
Please don’t skip this step or you may risk running out of yarn before your bear is complete.
To check gauge, with Color A and largest hook:
Foundation Row: Ch 11.
Row 1 (WS): Sc in second ch from hook, sc each ch to end; turn. (10)
Row 2 (RS): Ch 1, sc in each sc to end; turn.
Rep Row 8 more times. Measure swatch vertically and horizontally. 10 stitch x 10 row swatch should measure approximately 7” square. If swatch is too small, increase your hook size and re-swatch. If swatch is too big, decrease your hook size and re-swatch.
MAIN BODY
With Color A and largest hook:
Foundation Row: Ch 44.
Row 1: Sc in second ch and each ch to end; turn. (43)
Row 2: Ch 1, sc in each sc; turn.
Rep Row 2 until piece measures 17.”
Begin Decreasing
- Decrease stitches can be hard to see so a marker is placed in top of stitch created by sc2tog to indicate where to place last stitch of next row. Move marker up as each row is worked.
Row 1: Ch 1, sc2tog (PM in created st), sc in each sc until 2 remain, sc2tog (PM in created st); turn. (41)
Row 2: Ch 1, sc in each sc; turn.
Rep Rows 1 and 2 until row contains 23 sc. (End with a Row 1.)
Rep Row 1 four more times. Final row should contain 15 sc. Fasten off.
ARMS
First Row of each arm is worked into the foundation row of the Main Body. Arms are worked identically except for which side of the Main Body piece the yarn is attached on for each.
Make 2.
With larger hook, attach Color A yarn at corner edge of foundation row of Main Body.
Row 1: Ch 1, sc in first 15 sts; turn. (15)
Row 2: Ch 1, sc in each sc; turn. (15)
Rep Row 2 until Arm measures 14”. End with yarn on outside edge of Arm (even if this means working one more row).
Begin Decreasing
Row 1: Ch 1, sc2tog, sc in each sc until 2 remain, sc2tog; turn. (13)
Rep Row 1 four more times. Final row should contain 5 sc. Yarn should be on inside edge of Arm.
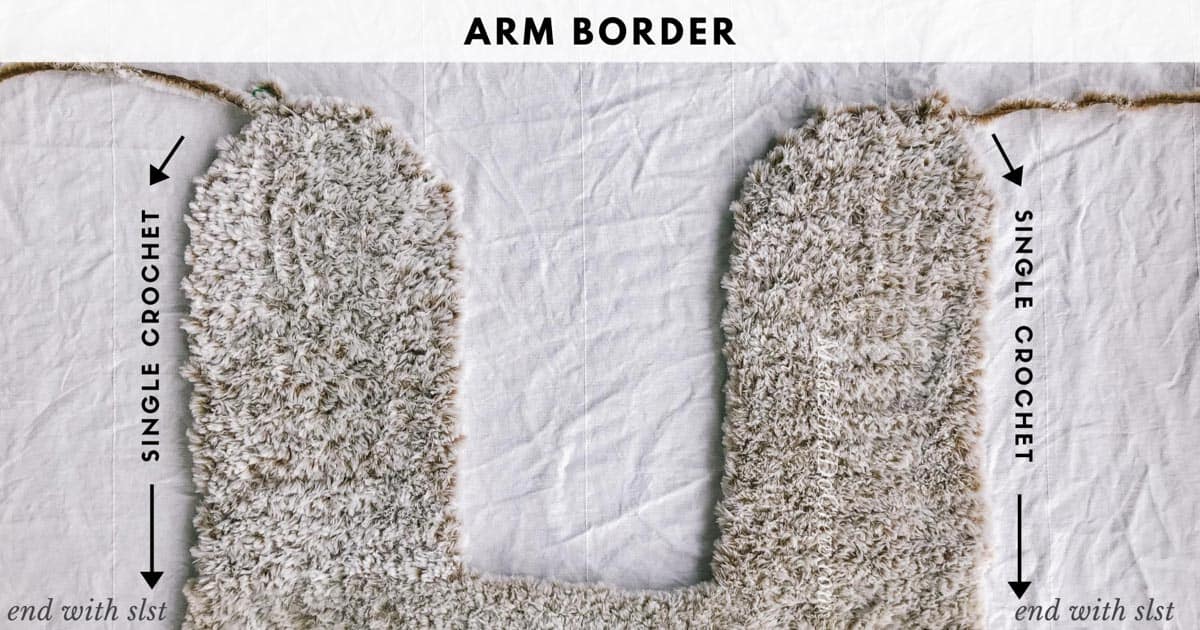
Arm Border: Sc evenly around top of paw and down outer side of arm. Work 1 slst into outer edge of Main Body. Fasten off.
LEGS
- Decrease stitches can be hard to see so a marker is placed in top of stitch created by sc2tog to indicate where to place last stitch of next row. Move marker up as each row is worked.
- Leave a 30” tail when tying slip knot for Foundation Row. This tail will be used for seaming later.
Make 2.
With Color A and largest hook:
Foundation Row: Ch 25.
Row 1: Sc in second ch and each ch to end; turn. (24)
Row 2: Ch 1, sc2tog (PM in created st), sc in each sc; turn. (23)
Row 3: Ch 1, sc in each sc; turn. (23)
Row 4: Ch 1, sc2tog, sc in each sc; turn. (22)
Wanna save this pattern?
Row 5: Ch 1, sc in each sc until 2 remain, sc2tog; turn. (21)
Row 6: Rep Row 4. (20)
Row 7: Rep Row 5. (19)
Row 8: Rep Row 4. (18)
Row 9: Ch 1, sc in each sc; turn. (18)
Row 10: Rep Row 4. (17)
Row 11: Rep Row 9. (17)
Row 12: Rep Row 4. (16)
Row 13: Rep Row 9. (16)
Row 14: Rep Row 4. (15)
Row 15: Rep Row 9. (15)
Row 16: Rep Row 4. (14)
Row 17: Rep Row 9. (14)
Row 18: Rep Row 4. (13)
Row 19: Ch 1, sc2tog (PM), sc in next 9 sc, sc2tog (PM); turn. (11)
Row 20: Ch 1, sc2tog, sc in next 7 sc, sc2tog; turn. (9)
Row 21: Ch 1, sc2tog, sc in next 5 sc, sc2tog; turn. (7)
Row 22: Ch 1, sc2tog, sc in next 3 sc, sc2tog; turn. (5)
Fasten off.
HEAD
1. Muzzle
- Muzzle is worked in a spiral, which means there is no ch 1 at the beginning of each round. Place a stitch marker in the first stitch of round and move it up as each round is worked.
With Color A and larger hook:
Foundation: Ch 3, slst to first ch to join into a loop.
Round 1: Sc 6 in loop, slst to first st of round to join. (6)
Round 2: 2 sc in first st (PM in first sc created), sc in next st, [2sc in next st, sc in next st] twice. (9)
Round 3: [2 sc in next st, 1 sc in each of next 2 sts] 3 times. (12)
Round 4: Sc in each st. (12)
Round 5: [2 sc in next st, 1 sc in each of next 3 sts] 3 times. (15)
Round 6: Rep Round 4. (15)
Round 7: [2 sc in next st, 1 sc in each of next 4 sts] 3 times. (18)
Keep yarn attached.
2. Head
- Again, head is worked in a spiral with RS of Muzzle facing. Place marker in first stitch of round to keep track of where rounds begin and end.
- First round of Head is worked into last round of Muzzle.
Continuing with Color A and larger hook:
Round 1: Sc in each st. (18)
Round 2: [2 sc in next st, 1 sc in each of next 2 sc] 6 times. (24)
Round 3: [2 sc in next st, 1 sc in each of next 7 sc] 3 times. (27)
Round 4: [2 sc in next st, 1 sc in each of next 2 sc] 9 times. (36)
Rounds 5-7: Sc in each sc. (36)
Round 8: [2 sc in next st, 1 sc in each of next 5 sc] 6 times. (42)
Round 9: Sc in each sc. (42)
Round 10: [2 sc in next st, 1 sc in each of next 6 sc] 6 times. (48)
Rounds 11-14: Sc in each sc. (48)
Stuff Muzzle and begin to stuff Head before proceeding.
Round 15: Sc2tog 24 times. (24)
Round 16: Sc2tog 12 times. (12)
Finish stuffing Head before proceeding.
Round 17: Sc2tog 6 times. (6)
Round 18: Sc2tog 3 times. (3)
Fasten off leaving a long enough tail to whip stitch closed any small remaining holes. Then weave in end.
3. Ears
Make 4.
With Color A and larger hook:
Foundation Row: Ch 6.
Row 1: Sc in second ch and each ch to end; turn. (5)
Row 2: Ch 1, sc2tog, sc in next sc, sc2tog; turn. (3)
Row 3: Ch 1, sc in each sc. (3)
Fasten off leaving a long tail for seaming.
4. Joining Ears
With tapestry needle and tail left from fastening off ears, whip stitch two ears together like a sandwich leaving only bottom of ear unseamed.. Keep needle attached.
Stuff ear with fiber fil. Use stitch markers to pin ear in place on head. With tapestry needle and remaining Color A tail, whip stitch around entire base of ear to attach it to head. Weave in tail. Repeat with second ear.
5. Nose
- Nose is made with two strands of Color B held together. Separate a small ball of Color B yarn to create two strands to hold together.
With Color B and smaller hook:
Foundation: Make a magic ring.
Alternative Foundation: Ch 3, sl st to first ch to join into a loop.
Row 1: Ch 1, 3 sc in magic ring; turn. (3)
Row 2: Ch 1, 2 sc in each sc; turn. (6)
Row 3: Ch 1, 2 sc in first sc, sc in next 4 sc, 2 sc in last sc; turn. (8)
Row 4: Ch 1, 2 sc in first sc, sc in next 6 sc, 2 sc in last sc; turn. (10)
Fasten off, leaving a long tail for seaming.
Pin nose in place on muzzle. With tapestry needle and one tail strand, whip stitch nose to muzzle. Fasten off and weave in ends.
6. Eyes
Thread tapestry needle with two strands of Color C. Create two crescent-shaped “sleepy” eyes by whip stitching in desired location. (It’s not necessary to fasten off between eyes. Simply pull needle through head to disguise connecting yarn.) Fasten off.
7. Mouth
Thread tapestry needle with two strands of Color B. Embroider mouth shape and fasten off.
Bringing It All Together
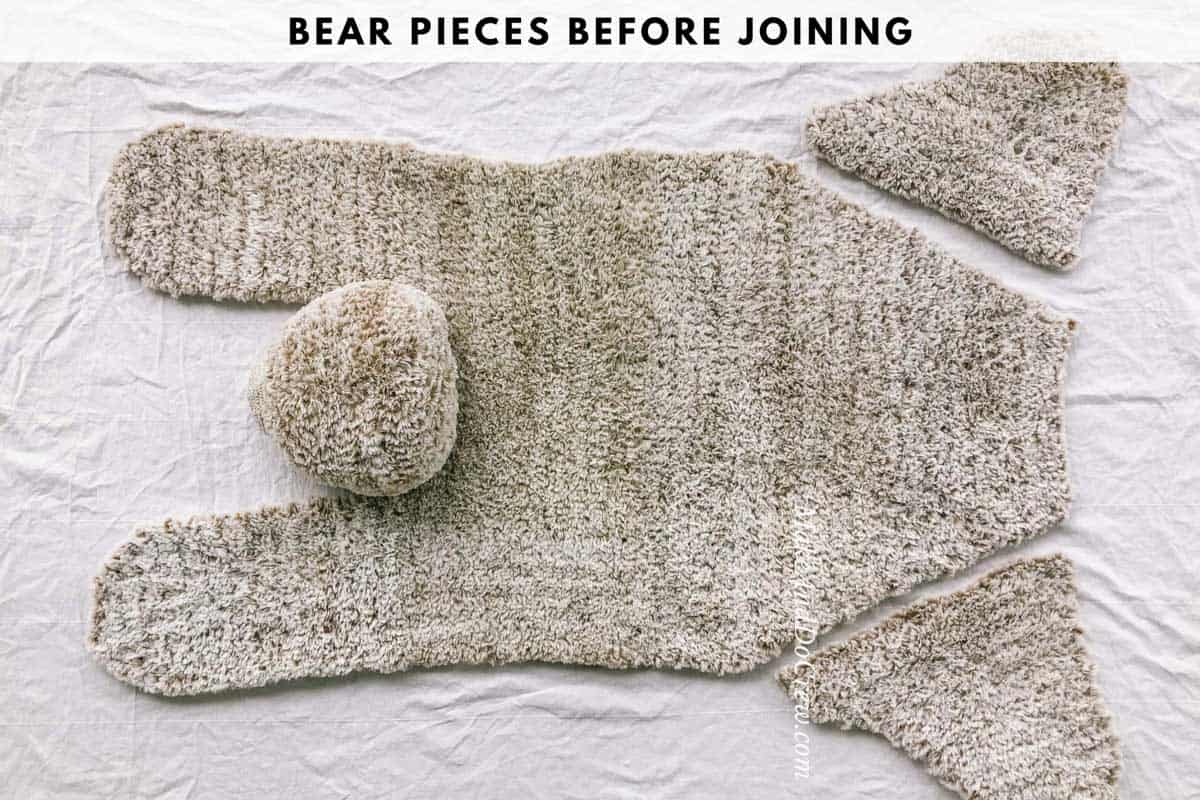
• Pieces do not have a right or wrong side. Simply choose whichever side you prefer of each piece and designate that as the side that faces up.
1. Attaching Legs To Body
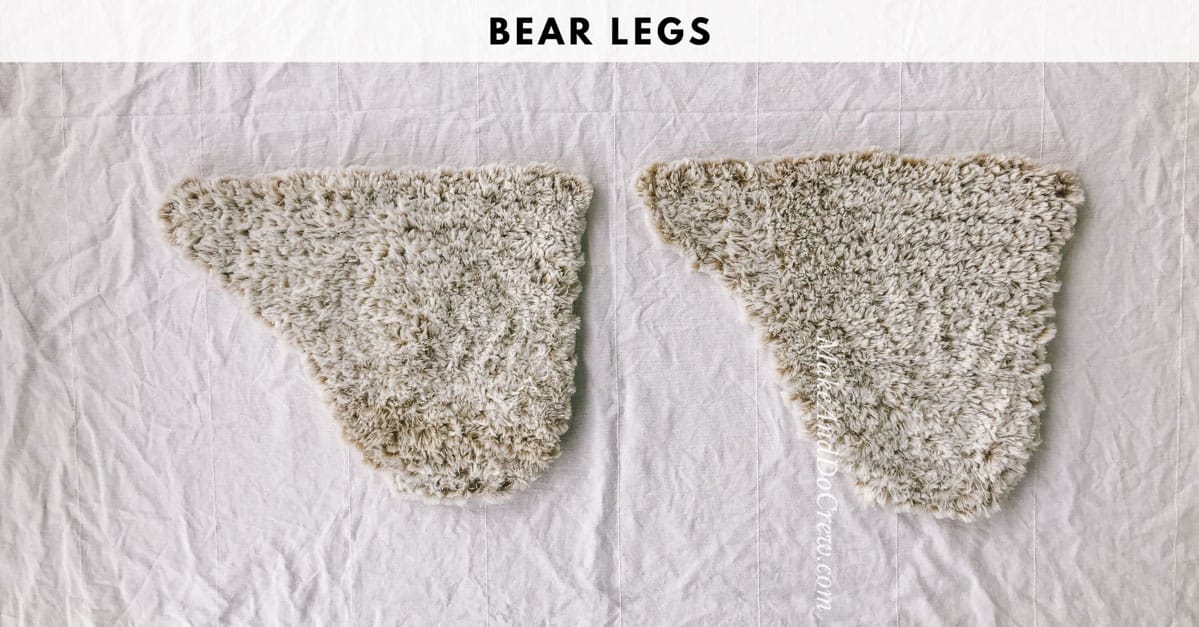
Lay pieces out as shown in photo at end of pattern. Straighter side of leg should face back of bear and more curved side should face front of bear. Pin in place. Using existing tails from leg foundation chain, whip stitch leg to main body piece.
2. Head To Body
Using tapestry needle and a strand of Color A, whip stitch head to main body between arms.
3. Adding a Tail
Using your fingers to feel for stitches, PM in middle stitch of bear’s rear end. (This is the last row of the Main Body section and it’s the eighth stitch, counting from either side.) Counting to the right of the marker, attach Color A in 4th stitch from marker. (Left handed: counting to the left of marker.)
With larger hook and RS of bear facing:
Row 1 (RS): Ch 1, sc in same st yarn attached in, sc in next 8 sts; turn. (9)
Row 2 (WS): Ch 1, sc2tog, sc in each of next 5 sc, sc2tog; turn. (7)
Row 3 (RS): Ch 1, sc2tog, sc in each of next 3 sc, sc2tog; turn. (5)
Row 4 (WS): Ch 1, sc2tog, sc in next sc, sc2tog; turn. (3)
Row 5 (RS): Ch 1, sc3tog. Fasten off. (1)
Weave in all remaining ends.
Snuggle up with your new bear because it’s time for the coziest hibernation ever.
I love to see your finished projects! Use #MakeAndDoCrew and tag me Instagram (@MakeAndDoCrew) to show off your stitches and have a chance to be featured.
More Free, Cozy Crochet Blanket Patterns
We've got lots more free crochet blanket patterns for you to check out. Look through our free pattern collections of corner to corner crochet blankets, baby blankets or dive in and check out all our free crochet afghan patterns here.

Leave a Reply