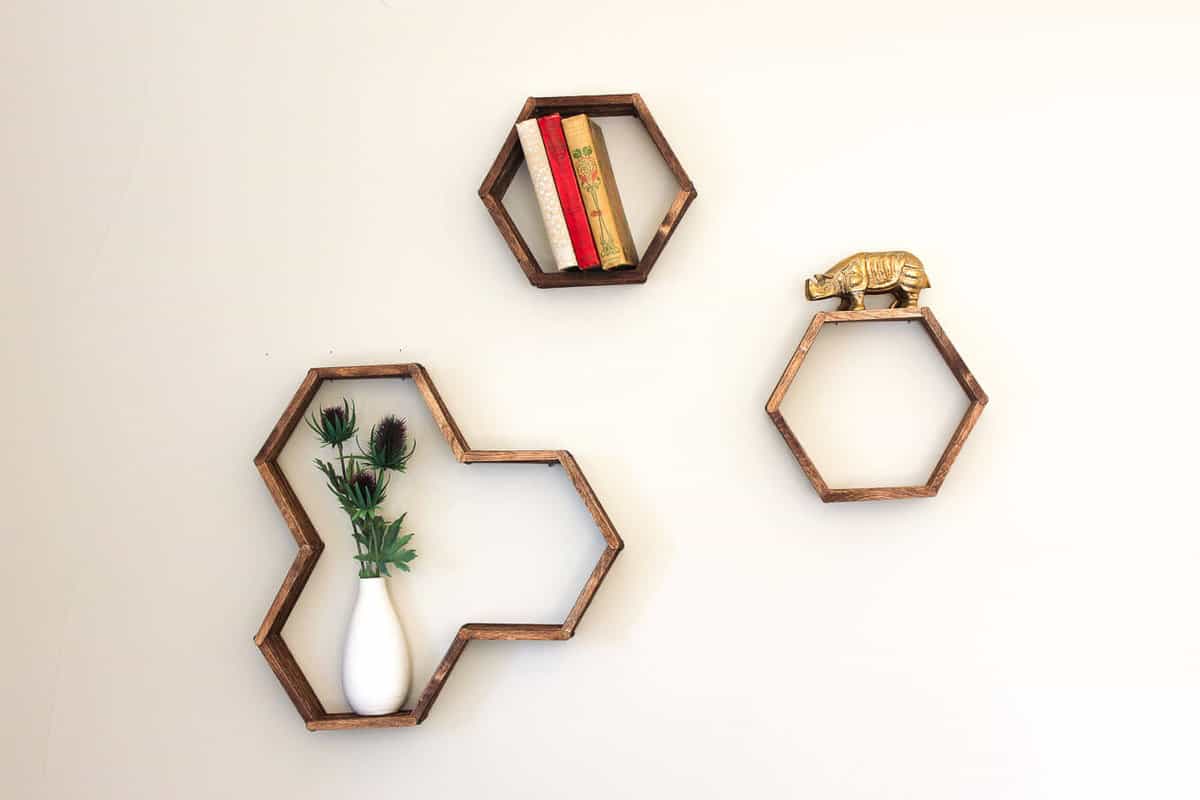
 My favorite craft projects are those that take something mundane, utilitarian or used up and transform it into something beautiful. Well, my friends, it doesn’t get much more ordinary than popsicle sticks. I’m guessing most of us haven’t given them much thought since about third grade. But that is going to change today with these DIY honeycomb shelves. (PS. This project is an extension of my super easy popsicle stick hexagon shelf!)
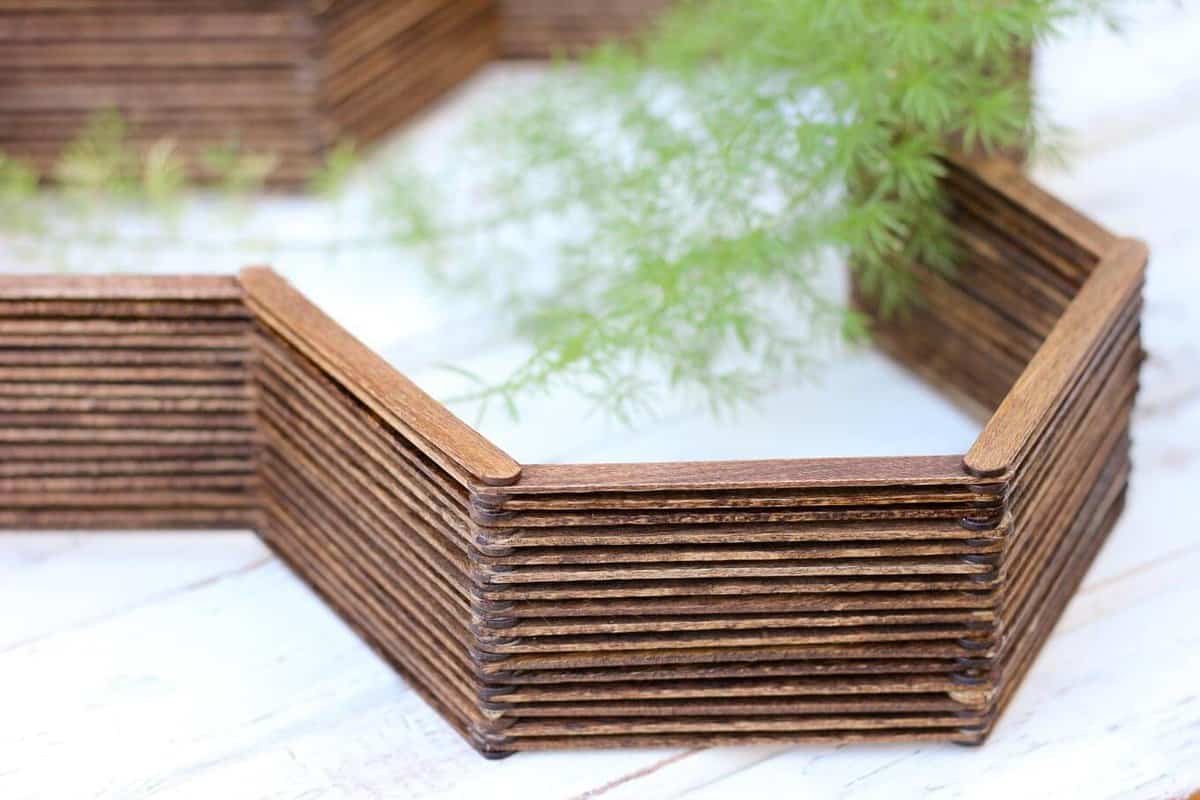 There are just certain DIY projects that make me overflow with joy. This is one of them. It’s super affordable–like less than $10 for the entire set of honeycomb shelves. It’s very doable, even for those who don’t sleep with their glue gun next to them at night. And most of all, it just looks freaking awesome and oh so mid-century-modern-Mad-Men-ish up on the wall.
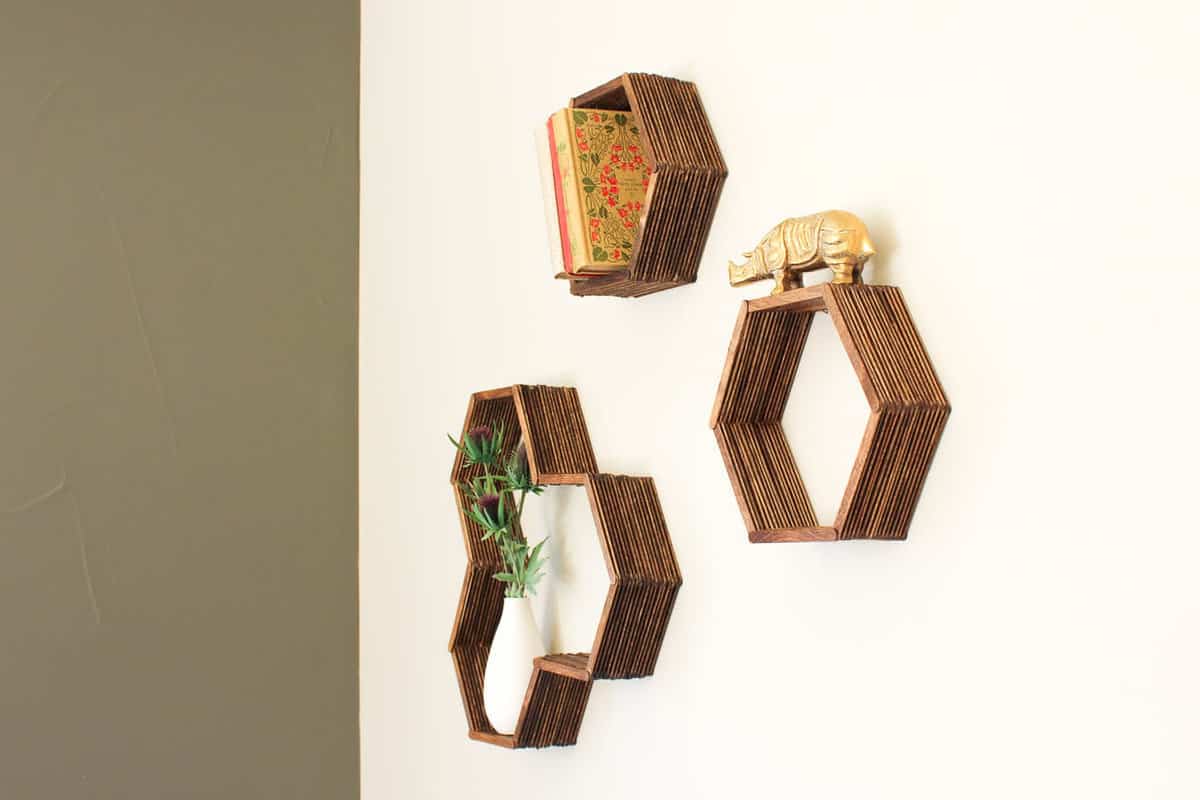 Don’t you want an entire wall of these?! Perhaps I’ll make our bedroom into one big wooden honeycomb beehive!
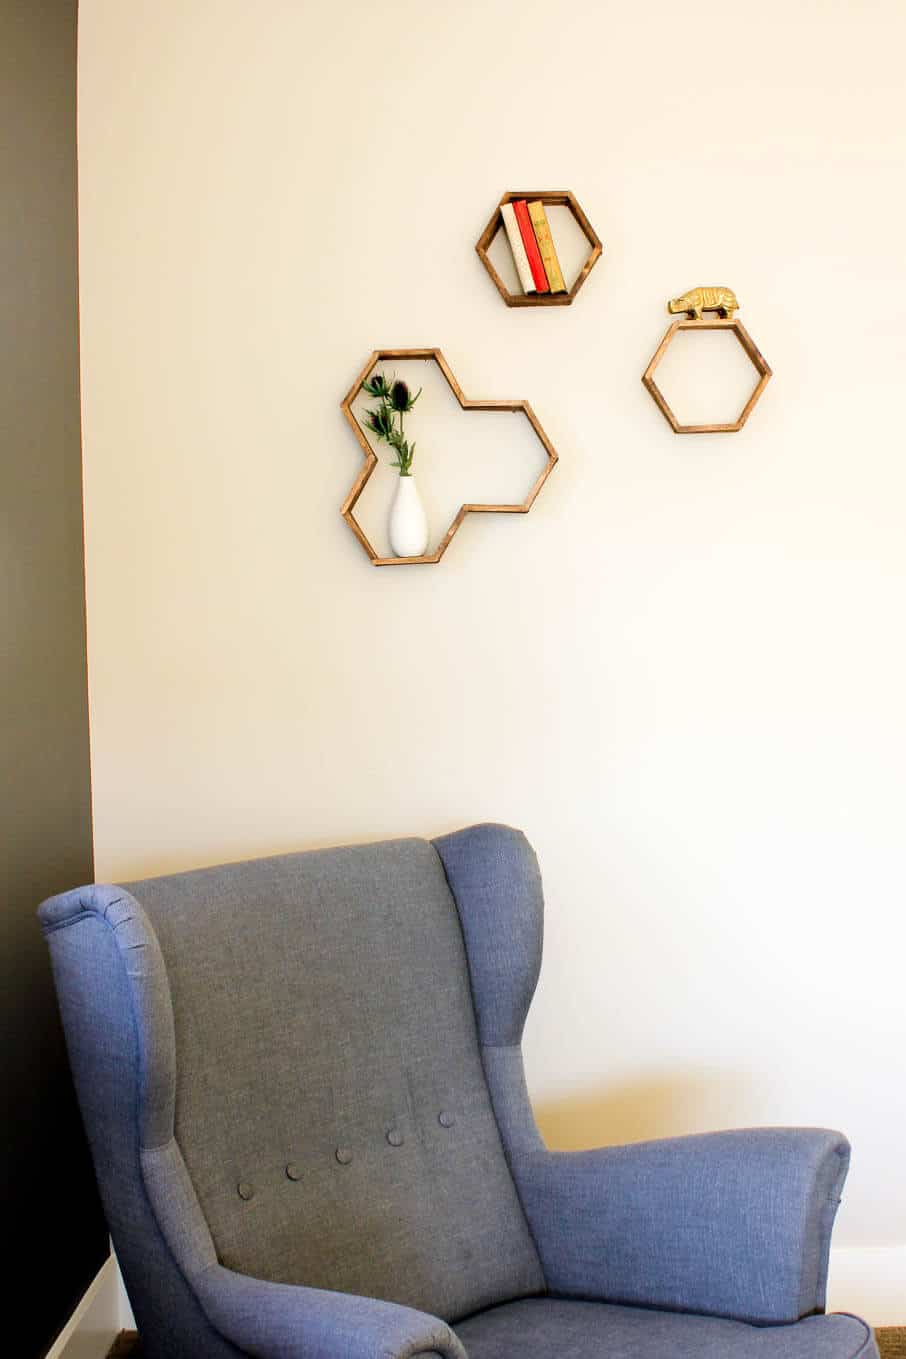
Last week, I explained how to make single hexagon shelves. I love how these add dimension and warmth to the wall. Plus, I can change out what is in the them throughout the year. The three part hexagon shelf is simply an extension of this same idea. To me, the combination of the larger shelf and the two smaller ones looks like a perfect little family on the wall.
Like with the single hexagon shelf, I found that having a template for this larger one also made it easier to get the angles right with very little effort. These larger honeycomb shelves actually benefit from a template even more because there are more angles to manage.
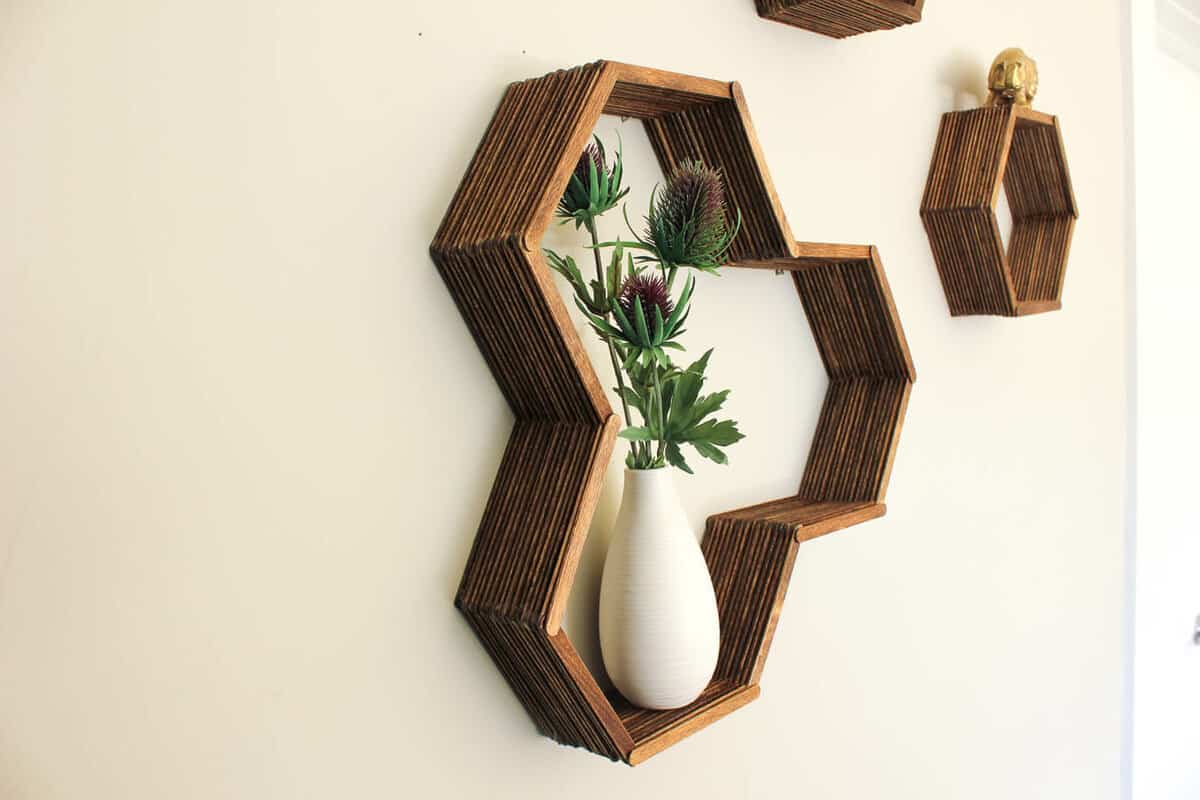 So I put together a simple template to build the honeycomb shelves on top of and added it to the Make & Do Crew Subscriber’s Vault. Simply subscribe in the pink and green box at the bottom of the post and you’ll get instant access to it (as well as the hexagon shelf template and all our other freebies.)
Honeycomb Shelf Supplies
• popsicle sticks (I used about 200 for the larger honeycomb shelf and about 100 per each hexagon shelf. Hint: buy 1000 from Amazon for $8 like I did so you can honeycomb your whole house!)
• tacky glue • honeycomb shelf template (Optional, but helpful. Enter your email at the bottom of the post for instant access.)
• wood stain (I used Minwax English Chestnut)
• paintbrush
• 2 picture hangers (Optional–I didn’t use them.)
Instructions
1. If you’re using the template, print it, trim it and tape it together.
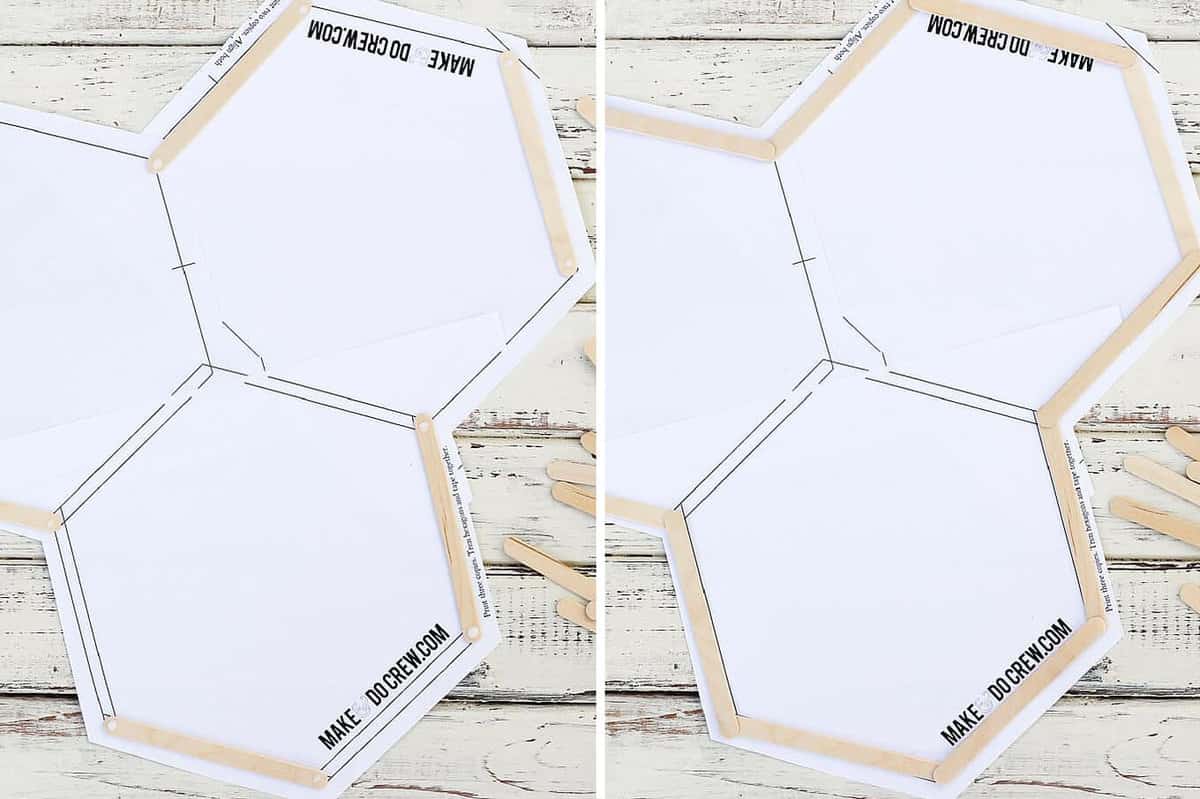 2. Position popsicle sticks as pictured, alternating every other hexagon side. I find it fastest to add a drop of glue to both ends of 3-4 sticks at a time and then lay them in their appropriate position.
3. Add glue to more sticks and use them to make a second layer on top of the first, alternating every other hexagon side.
4. Continue like this until your honeycomb shelf is desired depth. I went about 16 popsicle sticks deep per side.
Wanna save this pattern?
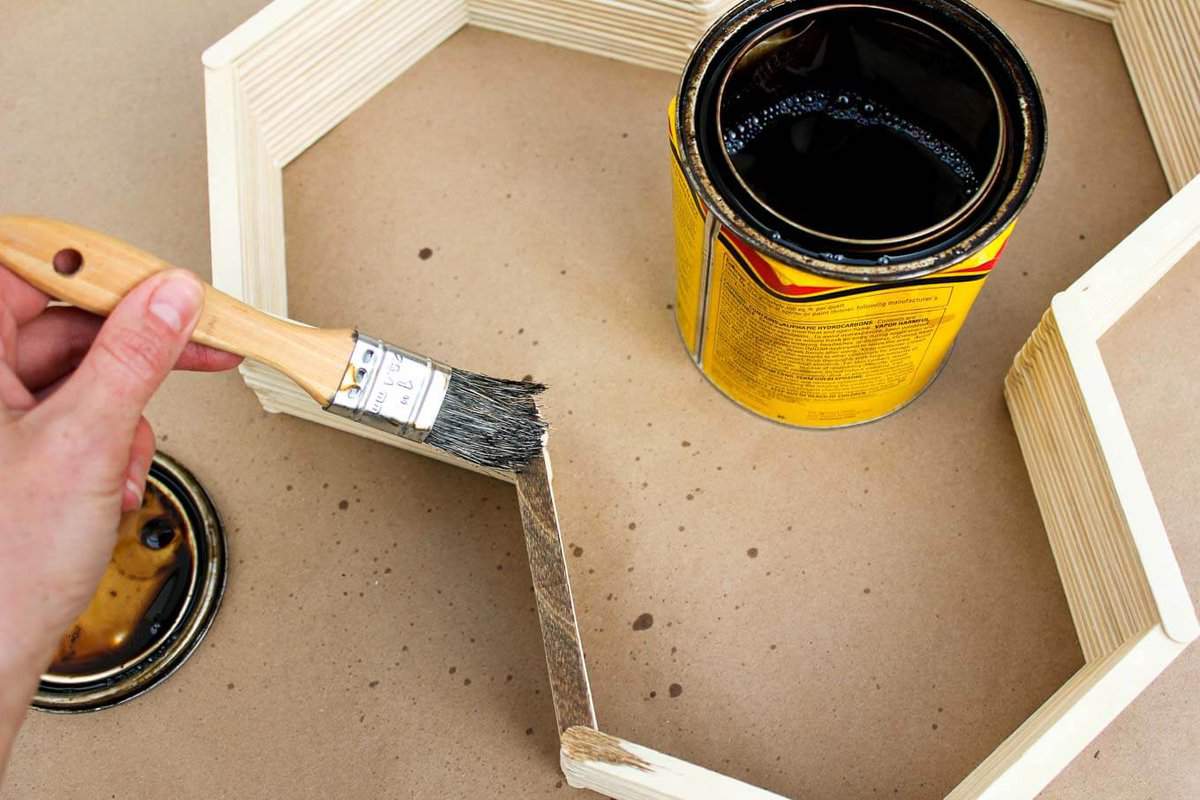
5. After the glue is dry, use a paintbrush to apply wood stain. Make sure to get stain in between each stick. Let the stain dry.
 6. If you’d like, glue a picture hanger on the top side of the top hexagon and the top side of the adjacent, side hexagon. I opted to simply hang two nails in the wall for the upper hex side to rest on and one nail as a counterbalance for the adjacent hex.
7. To make a set of friends for your new honeycomb shelf, check out my tutorial for DIY hexagon shelves.
8. Fill your new DIY shelves with your favorite miniature possessions. Less is more.
9. Sit back, admire and let your third grade self revel in the lowly popsicle stick’s full potential finally actualized.
If these honeycomb shelves get you in the mood to deck out your walls even further, check out these DIY wall art ideas:
Coffee Stirrer Wall Art
Easy Button Wall Art
Inspirational Art (With Quotes!)
Or if you just simply love hexagons like I do, you have to check out my knit Beekeeper’s Quilt–the craziest project I’ve ever made (and somehow actually FINISHED!! :))
And if you have 700 popsicle sticks left over because you ordered the 1000 pack from Amazon, like I did, here are a few other popsicle stick wall art:
Geometric Heart DIY Wall Art
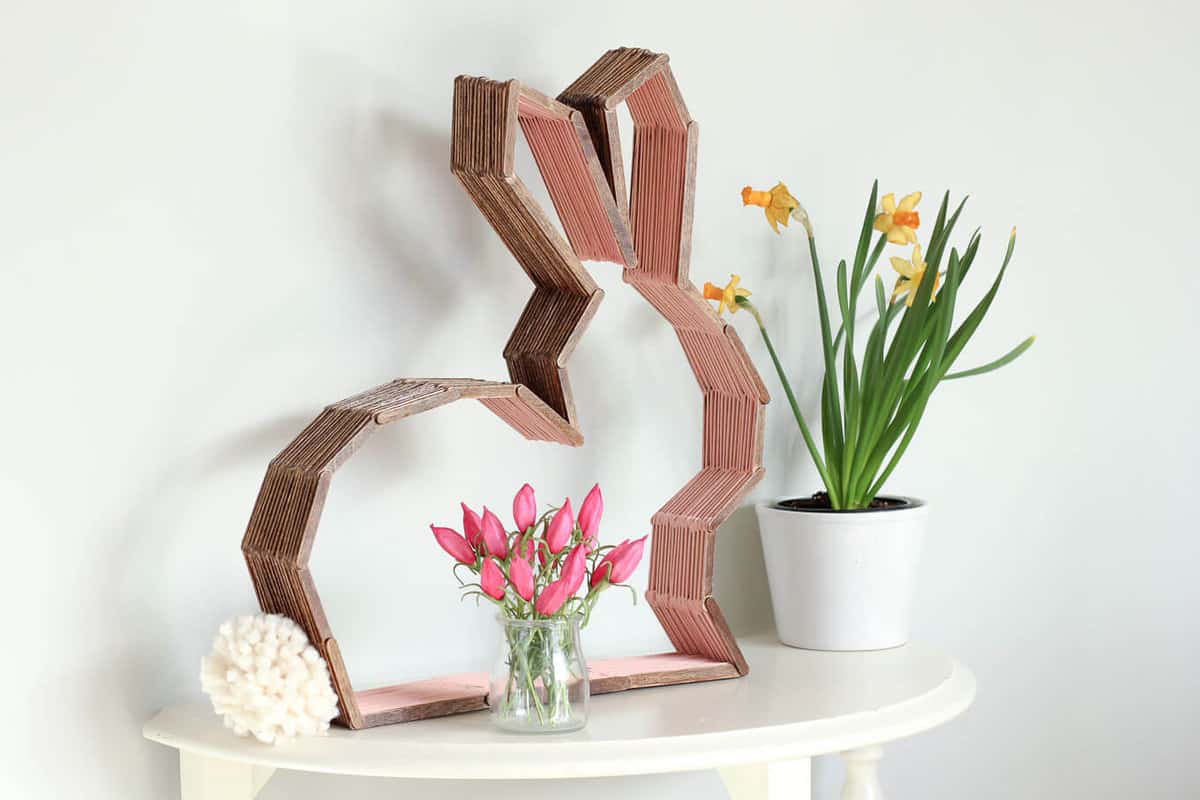
Modern Bunny Shelf (perfect for Easter or a nursery!)
Easy Hexagon Shelf
DIY Popsicle Stick Valentines (that double as art!)

Snazzy blog photos can make it look like some people are doing it all (effortlessly!) while others of us (me!) are barely holding it together. So whenever I can, I like to introduce a little reality check in the form of a very un-Pinterest-worthy detail from my perfectly imperfect real life. My hope is that it’s a helpful reminder all of us that NO ONE is nailing it all the time.
You know that moment when you’re decorating and, finally, you have everything just so?
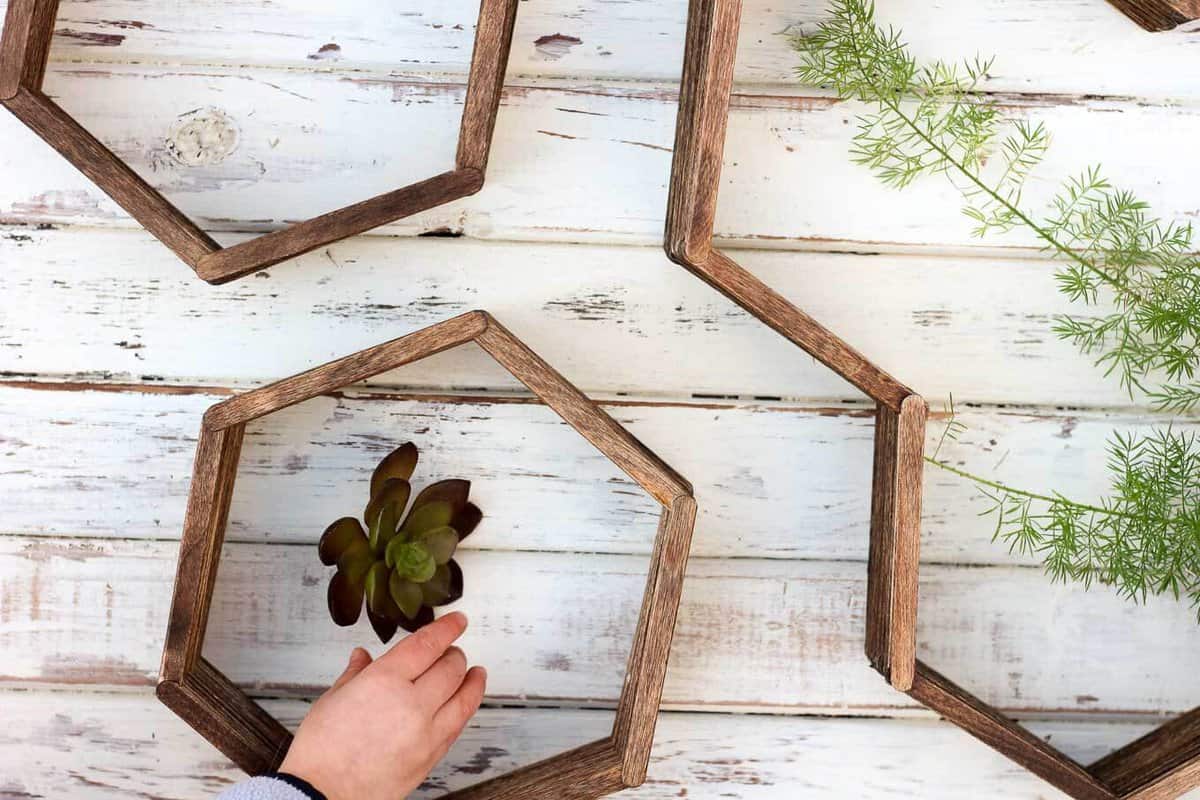
And then a little hand reaches in…
As a mom of two small children, I am never alone. Not when I cook. Not when I sleep. Not when I pee. And most certainly, not when I photograph honeycomb shelves.
I find the constantness of motherhood to be one of the hardest parts. But on the hard days when I just want to run away to Target and pee next to strangers instead of my family, I remind myself that being a mom also means that I always have a very eager, hands-on photography assistant at the ready.


Apple says
Hey there!
I’m trying to tape together the three hexagons, but they don’t line up exactly. Parts of them line up, but then the other lines don’t match.
When I printed them, I unchecked “fit to page”. Do you think that may have made a difference?
Thanks!
Jess @ Make and Do Crew says
Hey there, Apple. I’m sorry you’re having trouble taping them together. That sounds kinda annoying 🙂 I’ve taken a stab at making the template a little clearer and I’m hoping you can be my tester. I just emailed it to you. Would you mind letting me know if it’s easier to figure out now? And, I would def keep “fit to page” unchecked since you want the template to print full size so that it’s the exact size as the popsicle sticks. It’ll just be easier that way.
Thanks for your feedback!
jess
Sheila says
About how long did it take for you to make the shelf, including glue dry time? I want to do this as a project for my church’s moms group but am worried the glue may take too long to dry and not leave enough time for staining.
Jess @ Make and Do Crew says
Hey Sheila,
That sounds so fun! Crafting with other women is so satisfying and rewarding, isn’t it? I would say you can build the shelf in less than an hour. I think the drying time will depend on what glue you use, but I’ve actually used regular old Elmer’s school glue before and it dried quite quickly. (Like the bottom of the shelf was totally dry by the time I was building the top.) Perhaps you want to try a sample one with the glue you plan to use and get a good estimate of total time required, but I’d guess the entire thing could be accomplished in around 1.5 hours.
I’d love to see a photo if you end up doing this project. Happy crafting!
Jess
Dipti says
How amazing and unique is this!! This is definitely one of the best DIYs for home decor I have seen yet. And the way it finally turns out to be is also so pretty. Totally sharing this one on all our social media platforms. Great job.
Cheers.
Jess @ Make and Do Crew says
Gosh, what a nice compliment, Dipti. These shelves really make me happy every time I see them hanging on the wall, so I’m so glad you can appreciate them too. And thank you so much for sharing the tutorial. I appreciate YOU for that!
Happy crafting!
Jess
Kellie says
Is there a way to hang these without putting holes in the wall?
Jess @ Make and Do Crew says
Hey Kellie,
That’s a great question. I think in order to avoid holes in the wall, you might need some of those plastic hooks that attach to the wall with a bit of gummy, sticky stuff. That’s the only option I can think of. The shelves are really pretty light though, so you might be able to get them to hang on a couple of thumbtacks if you’re willing to put itsy bitsy holes in your wall.
Let me know if you find a good solution. I’d love to find a way around beating up my walls every time I come up with a new art project.
Jess
Kellie says
How did you hang these? Is there a way to hang them without putting holes in my wall?
alison says
Hi – I’ve subscribed and am trying to access the vault for both shelf templates, but when I go to it it asks me for my password? I’m not sure how to get in
Jess @ Make and Do Crew says
Hey Alison,
Thanks so much for reading Make and Do Crew! I’ll walk you through the steps to get your templates.
When you subscribed, you should have received an email asking you to confirm your subscription. Once you click that, you’ll receive another email that gives you the password to enter the Make & Do Crew Vault. (It’s the same password for everyone.)
Have you gotten that yet? If not, just check your spam folder for the confirmation email or do a search within your email for “Make and Do Crew.”
Let me know if this works for you. I’m here to help if not.
Happy crafting!
Jess
Amy says
Question: Would Gorilla Wood Glue work for these?
Jess @ Make and Do Crew says
Hey Amy,
Totally! I think it would work great. I’ve actually made this with regular old school glue too and it worked fine. I think that because you’re gluing so many little surfaces, it’s actually really pretty strong by the end. Let me know if you have any other questions!
Happy shelf-making!
jess
Nikole Fuqua says
This is super adorable! I’ve been super obsessed with gold and copper paint lately and I think this project would look great with those colors!
Jess @ Make and Do Crew says
Yes! Me too, Nikole! I actually just painted some shelf stands copper and I love them. Send me a pic (or tag me on Instagram @makeanddocrew). I’d love to see where you take them.
Happy crafting!
jess
Amanda Flint says
I would put the big one in the middle and span the little ones out from it, making the sides only like 2 inches apart! These are amazing! Thanks for the tutorial!
Jess @ Make and Do Crew says
Hey Amanda,
That could be really cool! I love that you can change the look of them based on how closely you hang them to each other. I’d really love to make an entire wall of them. Hope you enjoy yours!
Happy shelf-making.
j
peggy mcclelland says
I really want to make this but I can’t get the template please tell me what to do. It keeps asking me for a password but all it let’s me do is my name and email. I don’t know what to do. peggla@msn.com
Peggy mcclelland
Jess @ Make and Do Crew says
Hey Peggy!
I’m sorry you’re having trouble. Once you enter your name and email in any of the subscription boxes on the site, you should get a confirmation email (check your spam or promotions folders). Just click the link in that email to confirm that you did indeed intend to subscribe. You’ll then immediately receive an email with the password to access The Vault where the template (and lots of other freebies) is located. Any questions, please just let me know. I’m here to help!
Thanks for reading Make & Do Crew!
j
DeBorah Beatty says
How stable are these off the wall? And what kind of glue did you use, please. My mind is in a frenzy with what I can do with these as a display for my talisman dolls.
Jess @ Make and Do Crew says
Ha, DeBorah, I completely understand the “frenzy” you speak of. My mind is often in the same state when I see a new idea. I’m so happy these shelves have inspired you. I think they’re actually fairly stable, assuming that no one is touching them much. It helps that they lie flat against the wall. And if you wanted extra stability, you could attach a toothed picture hanger to the back, which I didn’t do here. (Even so, that gold rhino is pretty stable up on his high perch 🙂
I used tacky glue for my shelves.
I’d love to see a photo if you decide to make these! Happy crafting!
j
DeBorah Beatty says
Will do! I was thinking if they’re flimsy, to add a back. I want them to sit on a table or shelf in addition to hanging.
Thanks for the quick response.
Jess @ Make and Do Crew says
Hey DeBorah–I haven’t found them to be flimsy at all. Apparently popsicle sticks make for pretty good building materials! They sit pretty well on a flat surface too, especially if you can get the sticks lined up well. (The template helps with that.)
Enjoy!
j
Kate says
These look really cool! The only thing is that when I try to get access to the template, it directs me to another image. Is there any other way to access it?
Thanks!
Jess @ Make and Do Crew says
Ahhhh, boooo! I’m so sorry, Kate. Thanks for pointing that out to me. I’ve encountered that tech glitch before. It should be working for you now. Just enter your email in the subscribe box at the bottom of the post. You’ll get an email asking you to confirm your subscription and as soon as you do that, you’ll get another email with all The Vault access info. If you have any trouble at all, please let me know. I’m sorry about the inconvenience. I never want technology to stand in the way of crafting!
j
sharrel says
Will you send a full size template of both hex selves.I have tried 20+ times to print them????
Jess @ Make and Do Crew says
Hey Sharrel,
I’m so sorry you haven’t been able to print them. Did you subscribe and gain access to the password protected area? If you let me know where you’re getting hung up, I’d be happy to help you sort it out. We won’t let a printing snafu get in the way of your crafting!
j
sharrel says
I did subscribe and I got as far as the password. I did not make up a password, so I did not know what to enter.
Jess @ Make and Do Crew says
Okay great. The password is in the welcome email you received. (It’s the same for everyone. It’s also case sensitive, so type it just like you see it.)
Let me know if you run into any hiccups. Happy shelf building!
Jess
sharrel says
I got it. Thank you
Jess @ Make and Do Crew says
Great, Sharrel! I add patterns and templates often and now you’ll have access to all of them 🙂 I hope you enjoy the shelves!
j
Lori Sall says
I cannot print the templates for these either. It says that I need to download the PDF app and I do this and nothing, the templates aren’t there. I want to make the bunny and the shelves.
Ina says
Hi Jess, I’m Ina from Germany and I Need your help, please. Mann thanks in advance. I trief to get the template, but I’not receiving the Email. I would love to work it out. Kind regards from Berlin.
Jess @ Make and Do Crew says
Hello from CO, USA! You should have received an email from me right after you subscribed. Perhaps check your spam or junk folders. If you still don’t see it, you can just enter your email address again and you won’t receive duplicate emails from me in the future.
Hope that helps!
Jess