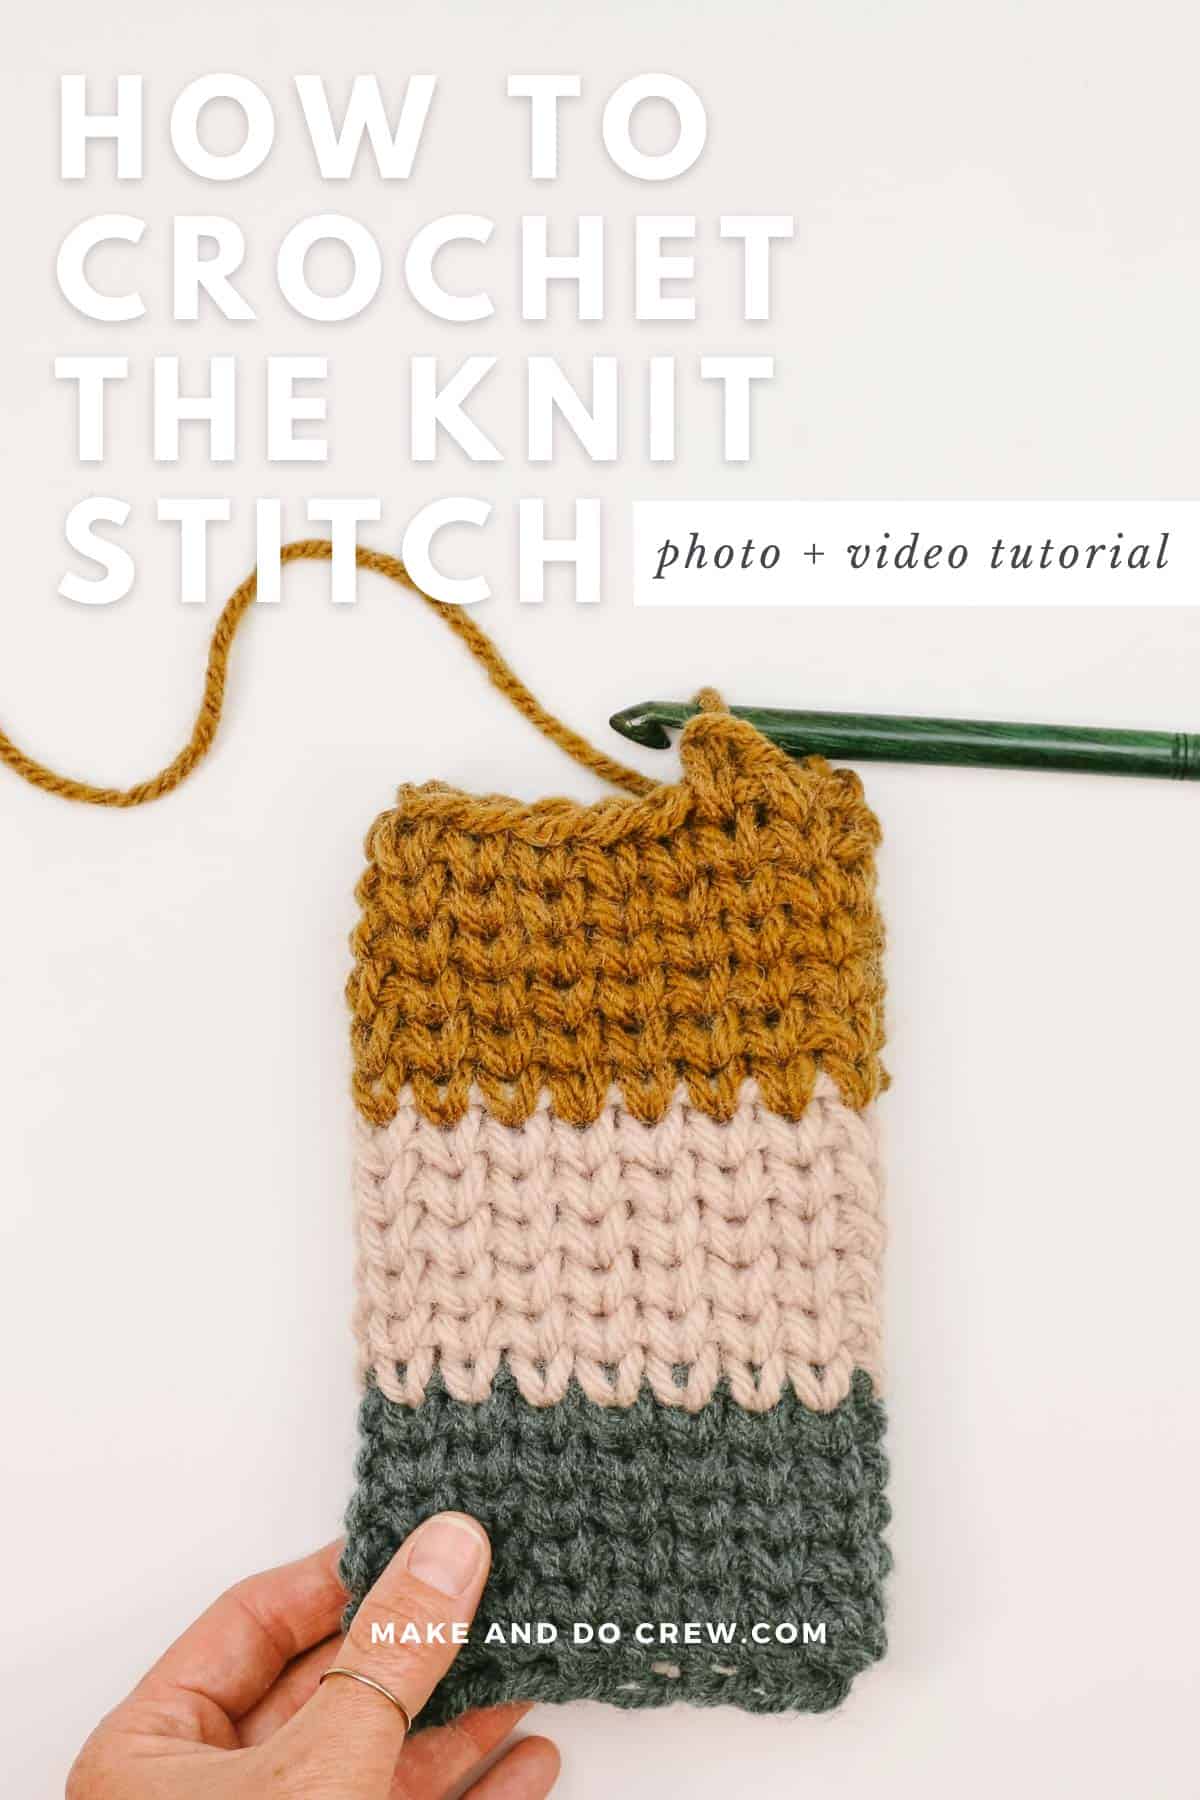
Learn how to crochet the knit stitch successfully in this step-by-step video tutorial.
The knit stitch (AKA the waistcoat or center single crochet stitch) can be tricky at first. But try a few specific tips mentioned in this video and you'll know how to make crochet look like knitting in no time!
This free knit-stitch video tutorial is part of a collaboration with Lion Brand Yarns. This post contains affiliate links.
How to Crochet the Knit Stitch
Can I make a crochet confession?
While I love the freeform nature of crochet, I often prefer the look of knitting.
Is that a sin to admit on a crochet site? I don't think so, right? All yarn lovers can be friends, whether we're knitting, crocheting or--like my kids--just cutting up old skeins.
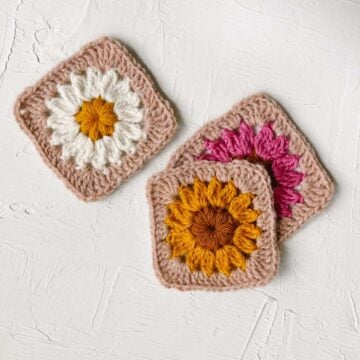
Related: 15+ modern crochet patterns that look KNIT ⇨
How to Crochet the Waistcoat Stitch - Only Easier
I've wanted to learn how to crochet the knit stitch for years. And I've tried. Every time it's turned out too tight, too janky or just not knit-looking enough.
After studying several different tutorials though and a lot of trial and error, I figured out the tricks that make crocheting the knit stitch a success for me.
I thought I'd share those tips with you in a quick video tutorial in case you've had the same struggles (or if you just want to learn how to make crochet look like knitting!)
P.S. You can always find all our stitch tutorials and round-ups here. Find all our crochet video tutorials here.
A Simple Twist on Single Crochet
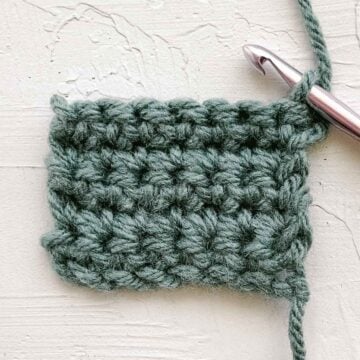
The thing I love about the knit stitch/waistcoat stitch/center single crochet stitch is that is worked using ONLY single crochet. Seriously! Once you get your tension working and master the few tips I share here, this stitch is e-a-s-y.
Personally, I find that the knit stitch looks a lot more like legit stockinette fabric when worked in the round versus in rows. It can be crocheted either way though, so find what works the best for you and what serves the purpose of your project.
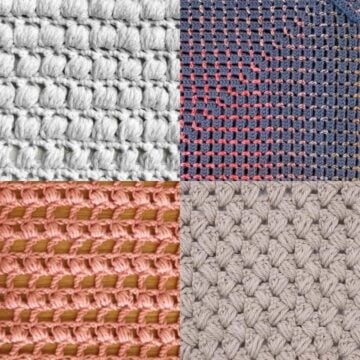
Related: 40+ Crochet Stitches to Use In Blanket Designs
Pin it! click to pin this tutorial for later ⇨
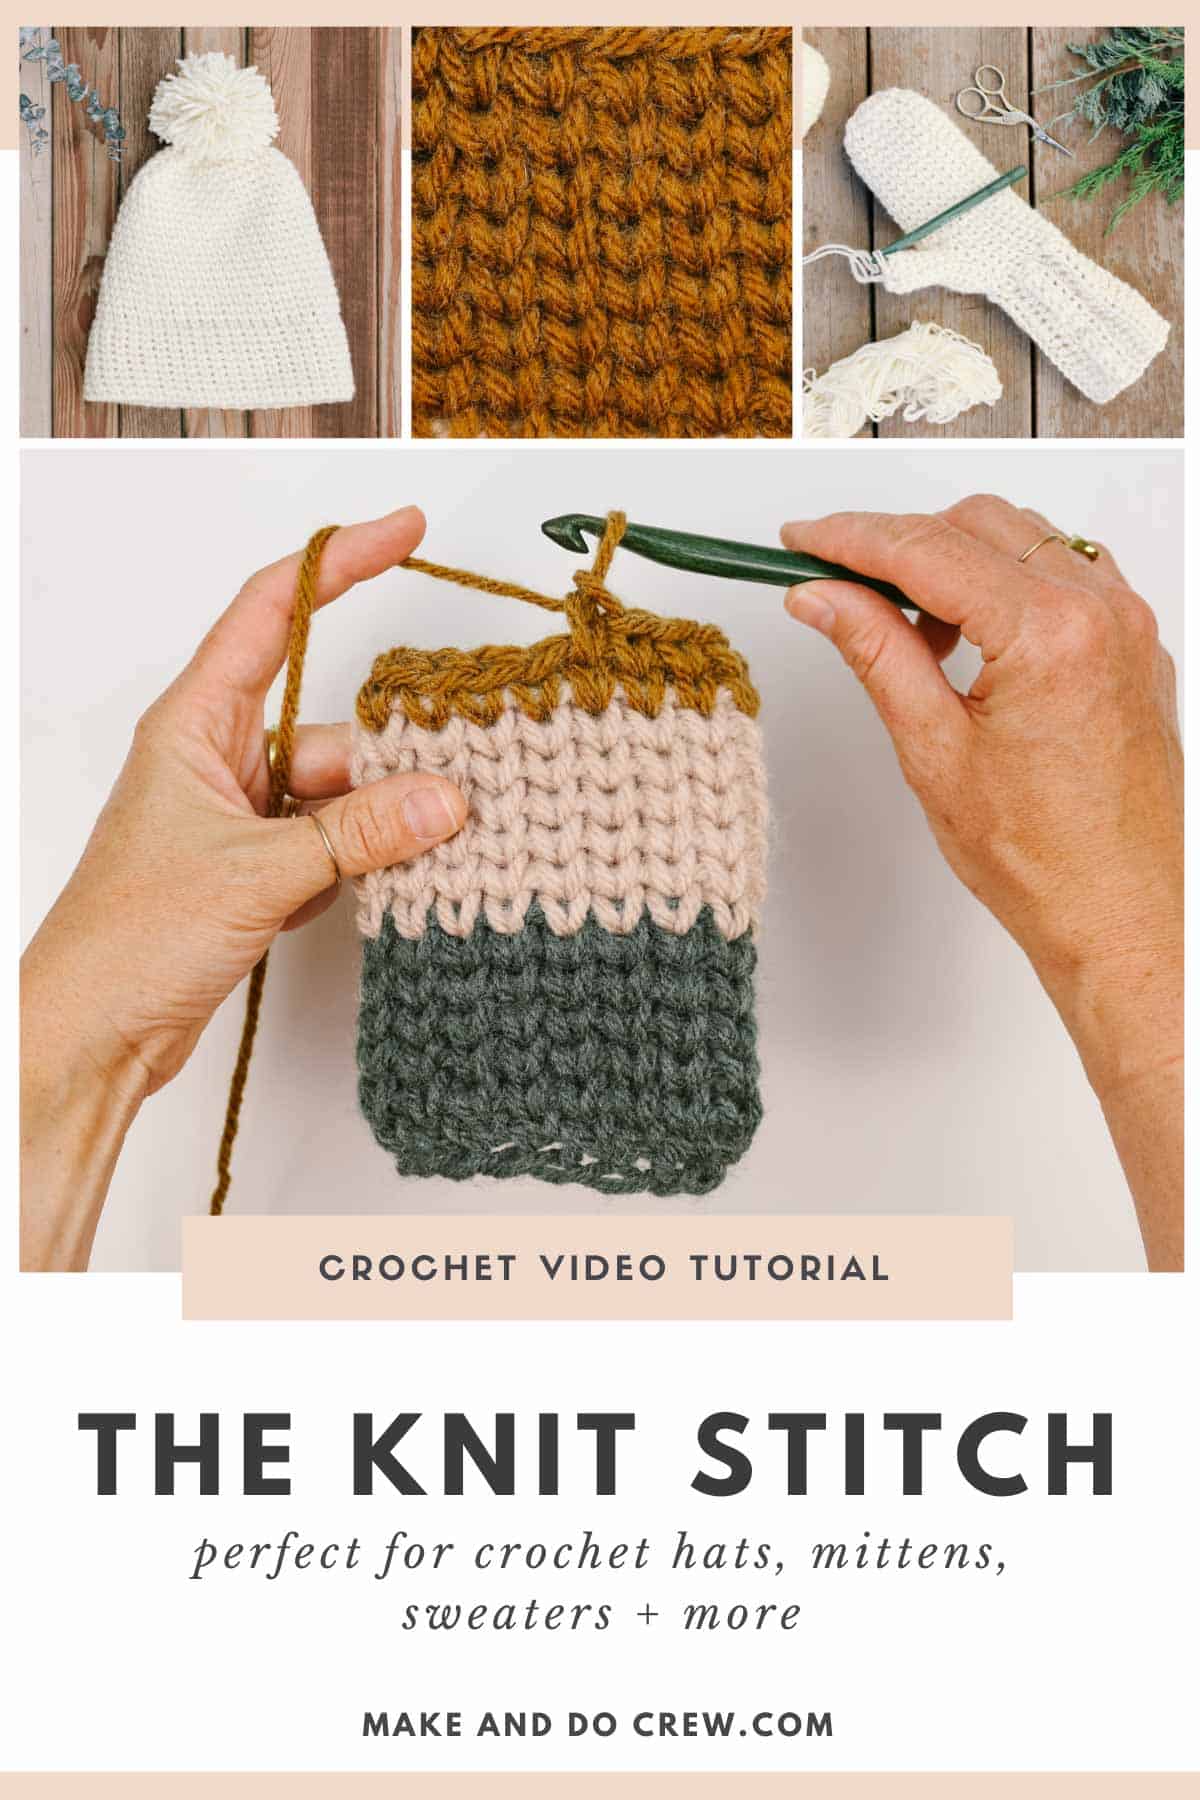
How To Crochet the Knit Stitch Video Tutorial
In the video tutorial below, I cover how to crochet the knit stitch in the round as well as how to make the join as invisible as possible while you work. Scroll down a bit further for the written waistcoat stitch instructions and answers to some FAQs.
Waistcoat Stitch Free Crochet Patterns
If you're interested in trying out the crochet knit stitch on a project, here are a few to try. Many of these are also included in our collection of free crochet patterns that look knit here.
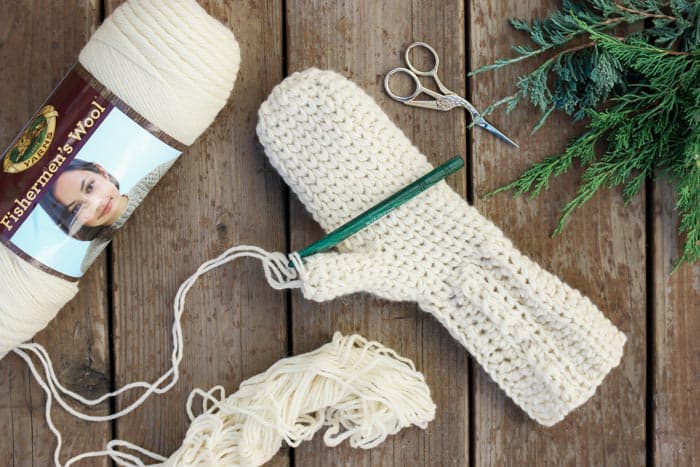
3-Hour Chunky "Knit" Mittens - Whether you’re headed to the backcountry or just back to the coffee shop, these classic women's mittens will keep your hands toasty warm like the mitts your grandma used to make.
Morning Mittens - This mitten pattern uses cozy wool and a knit-looking stitch to create a timeless style that's great for personalizing and gift-giving.
Everyday Beanie - Looks knit, but it's not! This pattern uses single crochet stitches to create a double-brimmed, modern beanie for men or women.
Related: 27+ Free Crochet Beanie Patterns
The Crochet Knit Stitch
Here are step-by-step written instructions for crocheting the waistcoat stitch in the round. Follow the photo tutorial below to learn the knit-stitch for your next project.
Abbreviations (US terms):
ch - chain
sc - single crochet
sl st - slip stitch
Notes:
When crochet the knit stitch in the round, there are two ways to work:
• Work in rounds by chaining one at the beginning of the round and slip stitching to the first single crochet at the end of the round.
• Work in a spiral in an amigurumi-type method.
For this tutorial, I'm describing the first option, but just know that both are possible.
Wanna save this pattern?
Crocheting the Knit Stitch in the Round:
Foundation Round: Ch any multiple of chains, sl st to first ch of round to form a circle.
Round 1: Ch 1, sc in each ch, sl st to first sc to join.
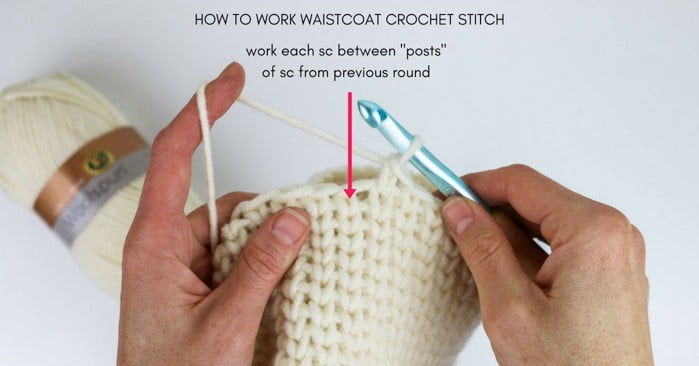
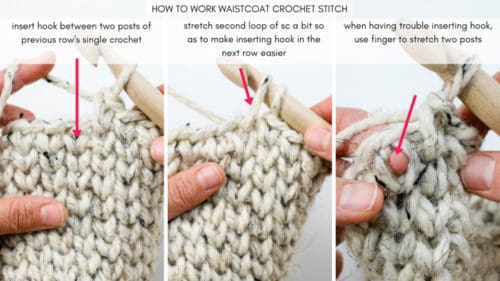
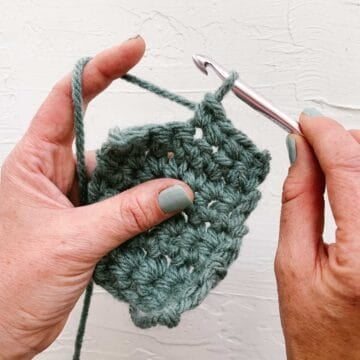
Round 2: Ch 1, sc in between the posts of each sc (see photo below), sl st to first sc to join.
Repeat Round 2 for remainder of project.
Essential Tips for Waistcoat Stitch Success
If you're not the video-watching type, here are the tips in cliff notes form:
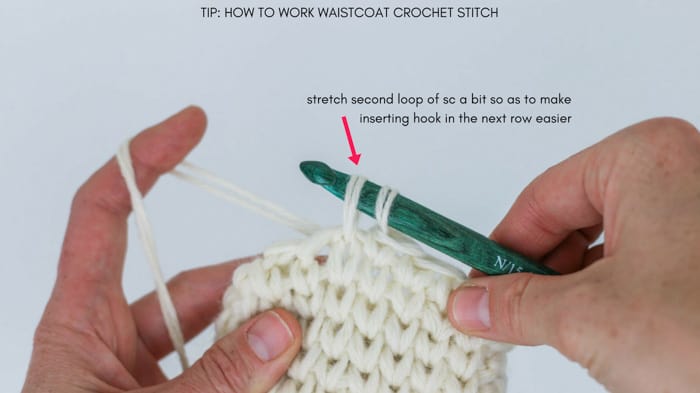
• Use a larger hook than you usually would for the yarn. I can't stress this enough. You need a significantly bigger hook to make the spaces between the single crochet posts wide enough to insert your hook through.
• Once you insert your hook in the correct place and yarn over, tip your hook up a bit to loosen the stitch even further. This will help make the next stitch easier to work. (See photo below.)
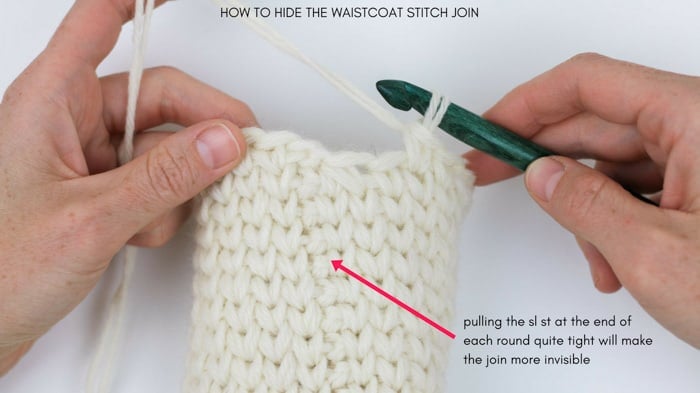
• When slip stitching at the end of each round, pull the slip stitch quite tight. This will make the join nearly disappear. (See photo below.)
I hope this tutorial helps you know how to crochet the knit stitch with confidence! If you have any pattern ideas you'd like to see created with this stitch, please let me know in the comments below.
Waistcoat / Center Single Crochet Stitch FAQs
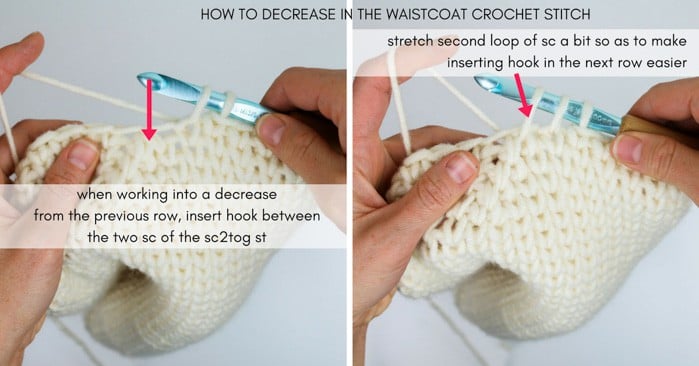
How to decrease in the crochet knit stitch?
You can shape items crocheted with the knit stitch just as you would any other crochet project. Increasing is as simple as working two single crochets into the same space between the single crochet posts.
If you're wondering how to decrease using the knit stitch though, it's also very similar to a typical sc2tog. In the photo on the right below, you can see how the sc2tog is simply worked between the posts of two sc stitches.
When you have three loops on your hook as pictured on the right, you'll yarn over and pull through all three loops. This will decrease your round by one stitch.
Can you crochet a stockinette stitch?
The waistcoat stitch is the closest crochet version of a knit stockinette stitch. Each crochet stitch looks like a "V" and when worked in the round, is almost indistinguishable from actual knit fabric at first glance.
Is the waistcoat stitch stretchy?
The waistcoat crochet stitch is many things, but stretchy is not really one of them. Because of how the stitch is constructed, the fabric created with this "knit" crochet stitch is denser than actual knit stockinette fabric.
The sturdiness of the stitch lends itself well to warm crochet mittens, hot pads or baskets. If you'd prefer a more flexible fabric, be sure to size up your hook even more than you might usually with the waistcoat stitch.
Is the waistcoat stitch reversible?
Yes! When worked flat in rows, the waistcoat stitch can be reversible. When the knit stitch is crocheted in turned rows though, the stitches don't line up on top of each other exactly, so the fabric has a little less of a direct stockinette look.
Free Crochet Patterns That Look Knit
There are many ways to make crochet mimic knitting. Here are a few patterns that use addition techniques to achieve the classic knit look. You can also see our collection of free crochet patterns that look knit here.
Hideaway Infinity Scarf- This knit-look cowl is made from a simple rectangle and basic stitches, making it the perfect project for beginners.
Knit Look Beanie - This design from Ned & Mimi uses modern color-blocking to update a classic "knit" hat silhouette.
Chunky Knit Look Blanket - Crochet Dreamz uses thick yarn and a large hook to mimic the stylish look of a chunky knit throw.

The How to Crochet the Knit (Waistcoat) Stitch
Materials
- Any Yarn
- Any Hook 2 sizes larger than you'd typically use with the yarn, pointy tipped hooks work the best
Abbreviations + Glossary (US Terms)
- ch – chain
- sc – single crochet
- sl st – slip stitch
Abbreviations and Glossary (US Terms):
Want some company while you crochet?
Get support (and camaraderie!) in the Make & Do Crochet Crew Facebook Group. Search “Make and Do Crochet Crew” on Facebook.com.
Permissions + Copyright
Please do not publish or share this pattern as your own. You may make items to sell with this pattern. In exchange, please link back to this page. Do NOT use my photos as your own sales photos.
Overall Pattern Notes
Instructions
How to Crochet the Waistcoat Stitch Step-by-Step
- 1. Foundation Round: Ch any multiple of chains, sl st to first ch of round to form a circle.
- 2. Round 1: Ch 1, sc in each ch, sl st to first sc to join.
- 3. Round 2: Ch 1, sc in between the posts of each sc, sl st to first sc to join.

- 4. Repeat Round 2 for remainder of project.
Sue fogl says
I love the video. But could you post a video on your 3-hour chunky mittens? The pattern is different than the one above.
Sue
Ros says
Hi... I have found your instructions interesting... may I ask your advice please?
I would like to make a skirt in the round using the waistcoat crochet stitch. I don't want to line it. I want to use a yarn called Bamboo Jazz. It is 50% bamboo & 50% cotton.
I need to learn to do increaseing. I would like to do it waist down.... would you have PDF pattern or instructions that might help me please? Thank you. Roswitha
Billie Joy Eller says
Wow I hadn't even noticed the music I was paying so much attention that I didn't hear it HAAA
Jess @ Make and Do Crew says
The music is long gone! 🙂
Ruth says
Where do you find crochet hooks like you used on the video tutorial of how to do the knit stitch with a crochet hoook?
Jess @ Make and Do Crew says
Hey Ruth,
I think I bought it at Joann's. I'm pretty sure it's made by Susan Bates. 🙂
Jess
Audrey says
Is the knit stitch as stretchy as a regular knit made with knitting needles? I prefer crocheting--have not knitted in a very long time, but sometimes I think a knitted project works better than a crocheted one. Thank you for the video tutorial and written instructions.
Jess @ Make and Do Crew says
Hey Audrey,
I'd say it's a bit stiffer (and less stretchy overall) than a knit stitch. There's more yarn involved in the crochet version, so I think that is what contributes to the overall sturdier feeling. Hope that helps!
Jess
Kayla Raifsnider says
Absolutly love the video!! I've wanted to know how this was done, and listening to the explanation was so helpful! Thank you!!
Jess @ Make and Do Crew says
I'm so happy to hear that Kayla! I've wanted to master this one for a long time too.
Jess
Tracey says
Hi, for some reason I cannot find or access your video tutorials, I haven't crocheted for a number of years, your blogs piqued my interest again but each link is taking me back and forth, been trying for 20 minutes. Was interested in the knit stitch.
Jess @ Make and Do Crew says
Hey Tracey,
I'm sorry for your trouble. The video tutorial is within the blog post, above this comment area. It's below the introduction, but above the written instructions. Are you not able to see it? What type of device and internet browser are you using?
Jess
Elizabeth says
To crochet the knit stitch - does it have to be in "THE ROUND " ?
Jess @ Make and Do Crew says
Hey Elizabeth,
Nope! It can be worked flat and still look quite close to knitting. I have found that I prefer the look of it in the round just slightly because the vertical rows of stitches line better, but people def work it flat too. 🙂
Jess
Biscuit says
I know God will Bless you in some way for sharing and giving your knowledge to others. I've have always wanted to do this. Thank you so very much.
Have a Blessed Holiday!
Jess @ Make and Do Crew says
Thank you so much, Biscuit. It's my pleasure. 🙂
Jess