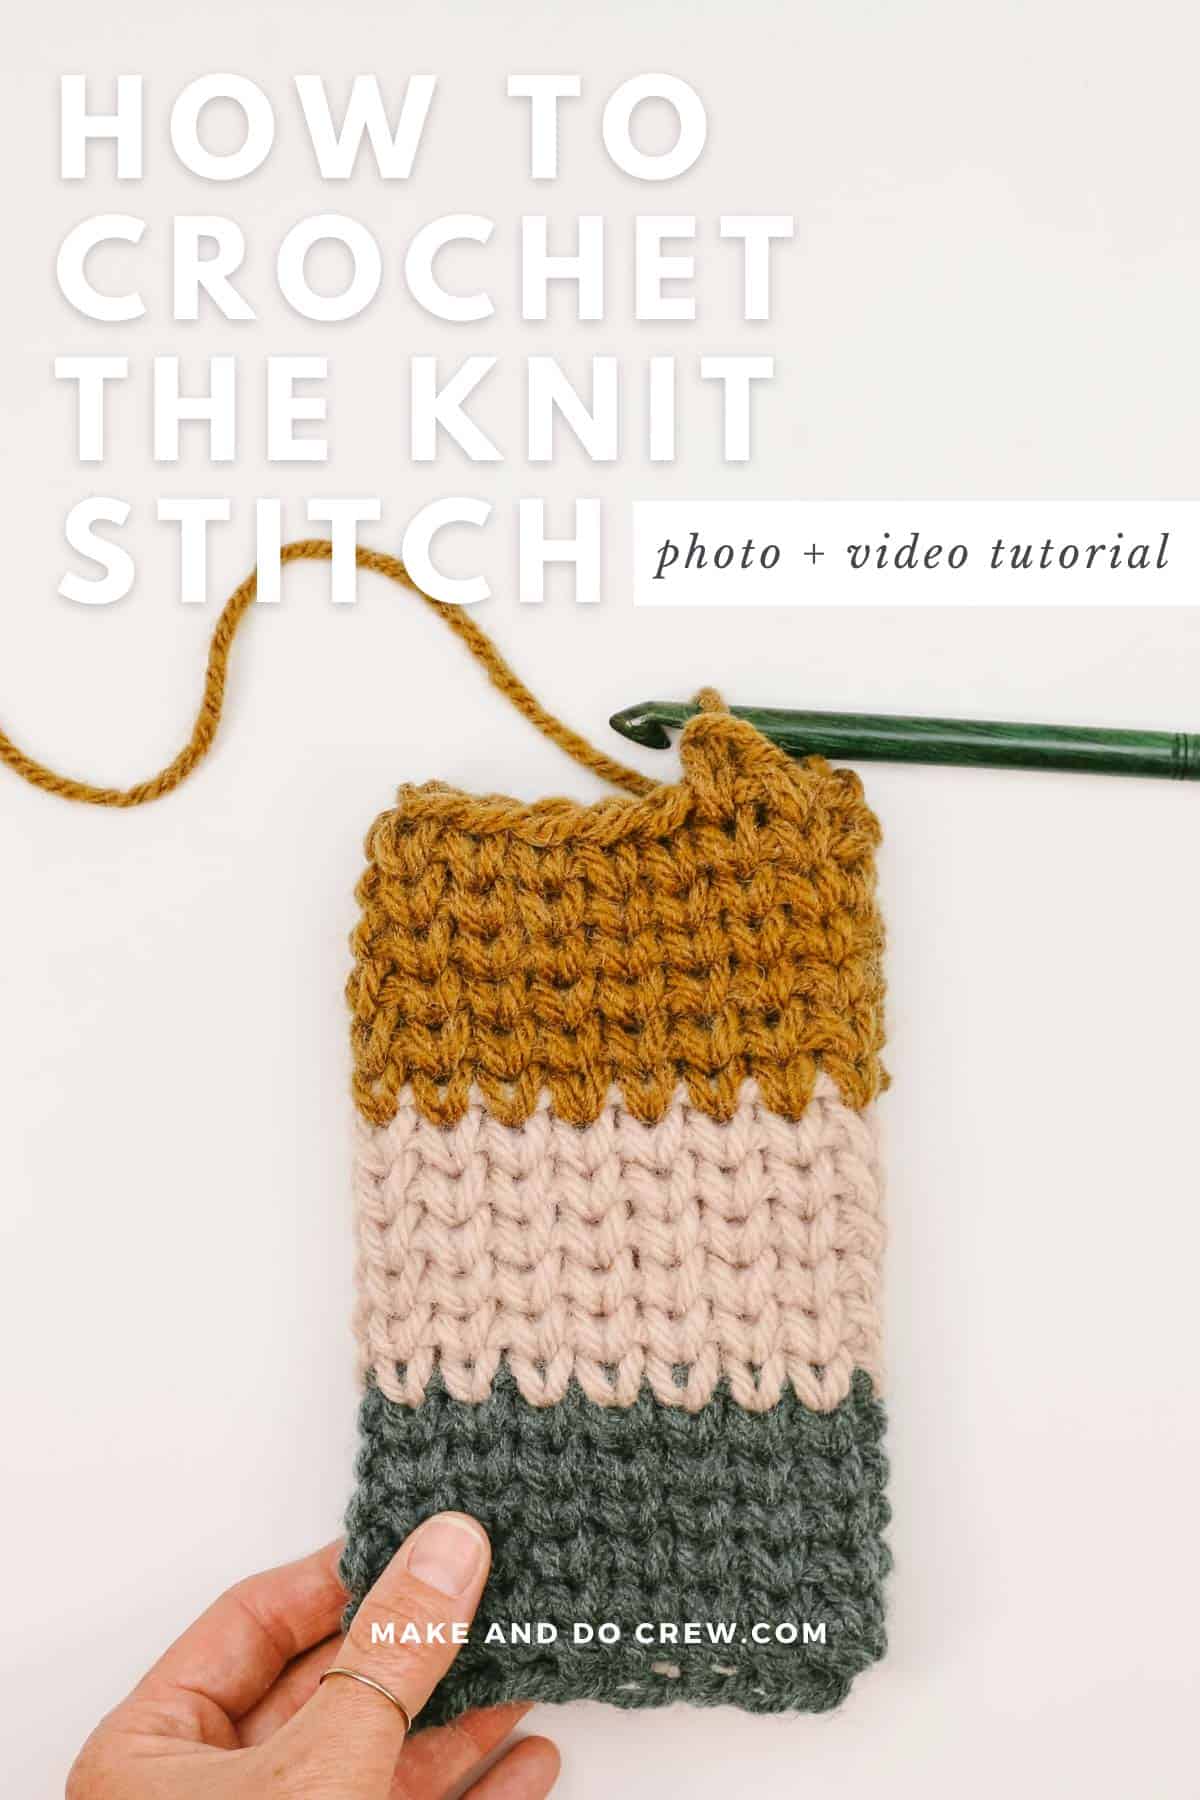
Learn how to crochet the knit stitch successfully in this step-by-step video tutorial.
The knit stitch (AKA the waistcoat or center single crochet stitch) can be tricky at first. But try a few specific tips mentioned in this video and you'll know how to make crochet look like knitting in no time!
This free knit-stitch video tutorial is part of a collaboration with Lion Brand Yarns. This post contains affiliate links.
How to Crochet the Knit Stitch
Can I make a crochet confession?
While I love the freeform nature of crochet, I often prefer the look of knitting.
Is that a sin to admit on a crochet site? I don't think so, right? All yarn lovers can be friends, whether we're knitting, crocheting or--like my kids--just cutting up old skeins.
Related: 15+ modern crochet patterns that look KNIT ⇨
How to Crochet the Waistcoat Stitch - Only Easier
I've wanted to learn how to crochet the knit stitch for years. And I've tried. Every time it's turned out too tight, too janky or just not knit-looking enough.
After studying several different tutorials though and a lot of trial and error, I figured out the tricks that make crocheting the knit stitch a success for me.
I thought I'd share those tips with you in a quick video tutorial in case you've had the same struggles (or if you just want to learn how to make crochet look like knitting!)
P.S. You can always find all our stitch tutorials and round-ups here. Find all our crochet video tutorials here.
A Simple Twist on Single Crochet
The thing I love about the knit stitch/waistcoat stitch/center single crochet stitch is that is worked using ONLY single crochet. Seriously! Once you get your tension working and master the few tips I share here, this stitch is e-a-s-y.
Personally, I find that the knit stitch looks a lot more like legit stockinette fabric when worked in the round versus in rows. It can be crocheted either way though, so find what works the best for you and what serves the purpose of your project.
Related: 40+ Crochet Stitches to Use In Blanket Designs
Pin it! click to pin this tutorial for later ⇨
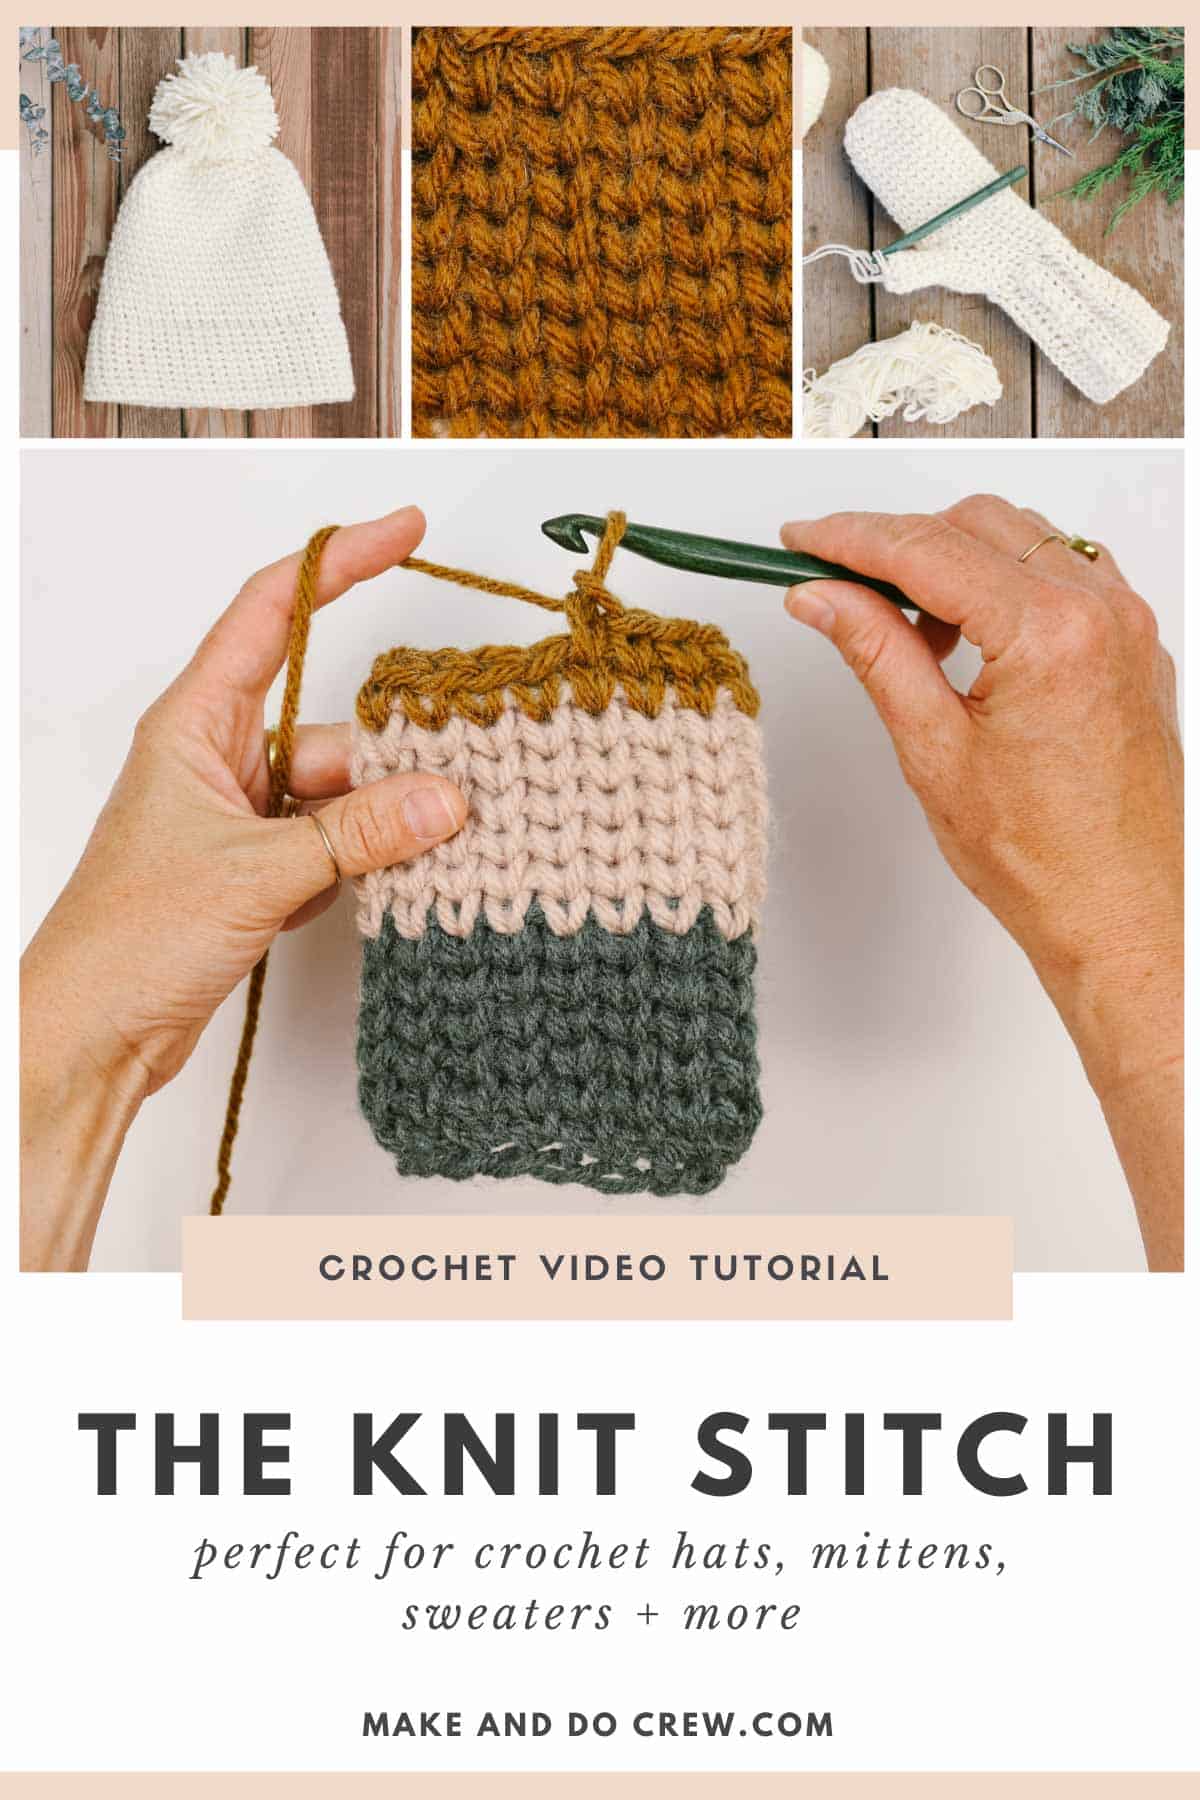
How To Crochet the Knit Stitch Video Tutorial
In the video tutorial below, I cover how to crochet the knit stitch in the round as well as how to make the join as invisible as possible while you work. Scroll down a bit further for the written waistcoat stitch instructions and answers to some FAQs.
Waistcoat Stitch Free Crochet Patterns
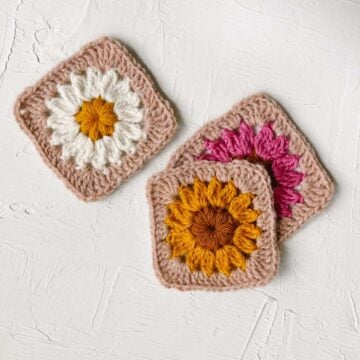
If you're interested in trying out the crochet knit stitch on a project, here are a few to try. Many of these are also included in our collection of free crochet patterns that look knit here.
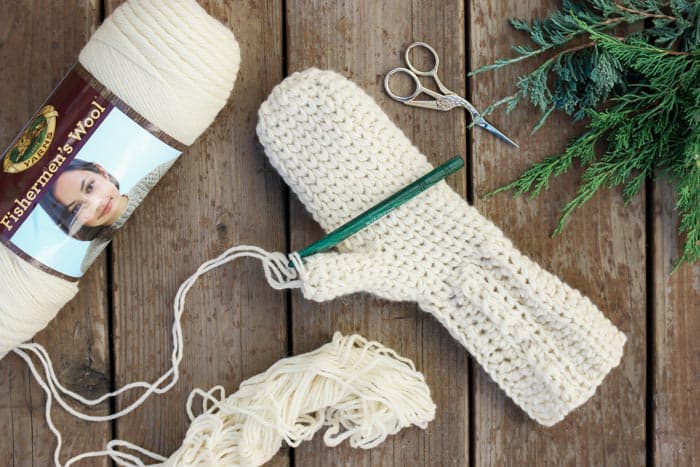
3-Hour Chunky "Knit" Mittens - Whether you’re headed to the backcountry or just back to the coffee shop, these classic women's mittens will keep your hands toasty warm like the mitts your grandma used to make.
Morning Mittens - This mitten pattern uses cozy wool and a knit-looking stitch to create a timeless style that's great for personalizing and gift-giving.
Everyday Beanie - Looks knit, but it's not! This pattern uses single crochet stitches to create a double-brimmed, modern beanie for men or women.
Related: 27+ Free Crochet Beanie Patterns
The Crochet Knit Stitch
Here are step-by-step written instructions for crocheting the waistcoat stitch in the round. Follow the photo tutorial below to learn the knit-stitch for your next project.
Abbreviations (US terms):
ch - chain
sc - single crochet
sl st - slip stitch
Notes:
When crochet the knit stitch in the round, there are two ways to work:
• Work in rounds by chaining one at the beginning of the round and slip stitching to the first single crochet at the end of the round.
• Work in a spiral in an amigurumi-type method.
For this tutorial, I'm describing the first option, but just know that both are possible.
Wanna save this pattern?
Crocheting the Knit Stitch in the Round:
Foundation Round: Ch any multiple of chains, sl st to first ch of round to form a circle.
Round 1: Ch 1, sc in each ch, sl st to first sc to join.
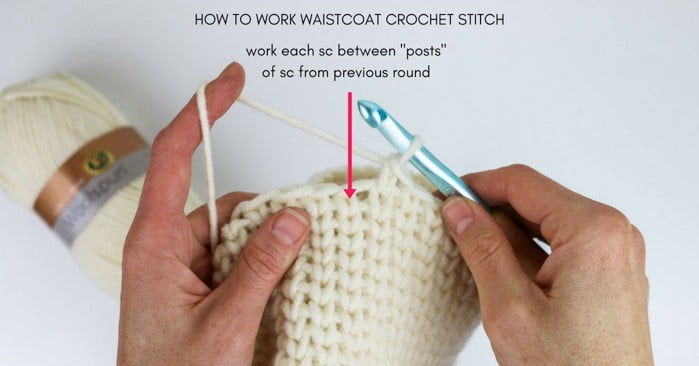
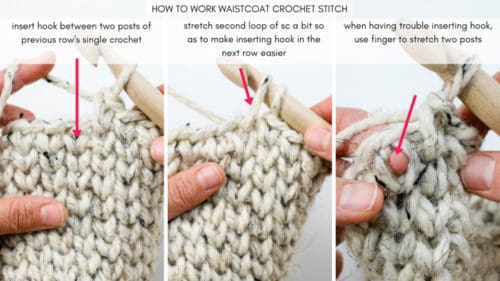
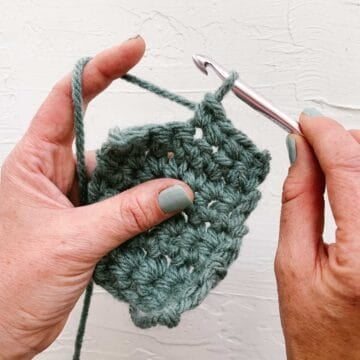
Round 2: Ch 1, sc in between the posts of each sc (see photo below), sl st to first sc to join.
Repeat Round 2 for remainder of project.
Essential Tips for Waistcoat Stitch Success
If you're not the video-watching type, here are the tips in cliff notes form:
• Use a larger hook than you usually would for the yarn. I can't stress this enough. You need a significantly bigger hook to make the spaces between the single crochet posts wide enough to insert your hook through.
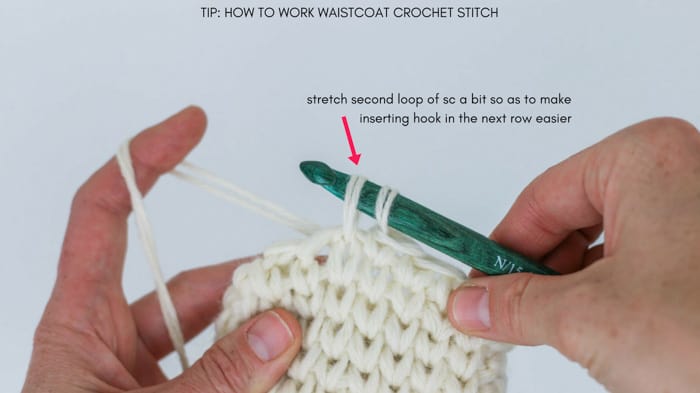
• Once you insert your hook in the correct place and yarn over, tip your hook up a bit to loosen the stitch even further. This will help make the next stitch easier to work. (See photo below.)
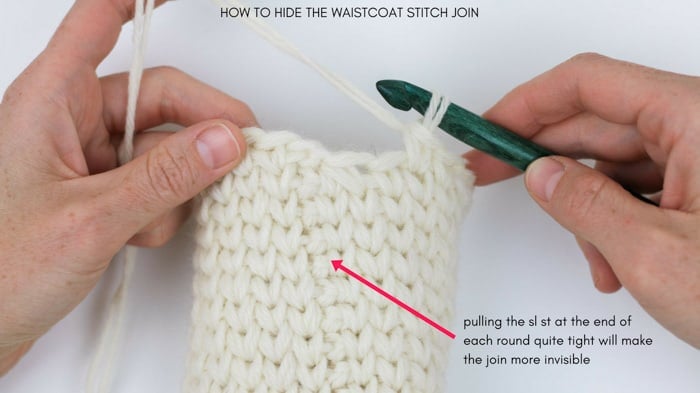
• When slip stitching at the end of each round, pull the slip stitch quite tight. This will make the join nearly disappear. (See photo below.)
I hope this tutorial helps you know how to crochet the knit stitch with confidence! If you have any pattern ideas you'd like to see created with this stitch, please let me know in the comments below.
Waistcoat / Center Single Crochet Stitch FAQs
How to decrease in the crochet knit stitch?
You can shape items crocheted with the knit stitch just as you would any other crochet project. Increasing is as simple as working two single crochets into the same space between the single crochet posts.
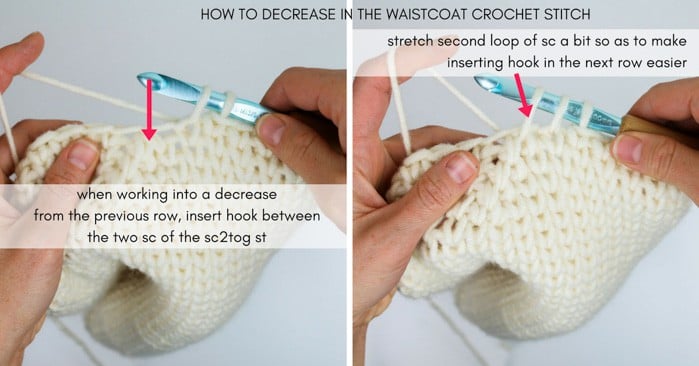
If you're wondering how to decrease using the knit stitch though, it's also very similar to a typical sc2tog. In the photo on the right below, you can see how the sc2tog is simply worked between the posts of two sc stitches.
When you have three loops on your hook as pictured on the right, you'll yarn over and pull through all three loops. This will decrease your round by one stitch.
Can you crochet a stockinette stitch?
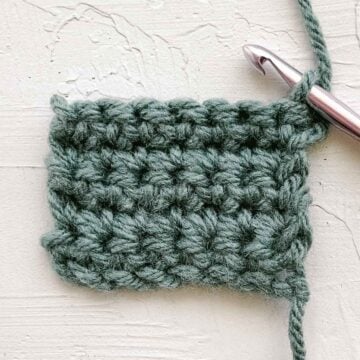
The waistcoat stitch is the closest crochet version of a knit stockinette stitch. Each crochet stitch looks like a "V" and when worked in the round, is almost indistinguishable from actual knit fabric at first glance.
Is the waistcoat stitch stretchy?
The waistcoat crochet stitch is many things, but stretchy is not really one of them. Because of how the stitch is constructed, the fabric created with this "knit" crochet stitch is denser than actual knit stockinette fabric.
The sturdiness of the stitch lends itself well to warm crochet mittens, hot pads or baskets. If you'd prefer a more flexible fabric, be sure to size up your hook even more than you might usually with the waistcoat stitch.
Is the waistcoat stitch reversible?
Yes! When worked flat in rows, the waistcoat stitch can be reversible. When the knit stitch is crocheted in turned rows though, the stitches don't line up on top of each other exactly, so the fabric has a little less of a direct stockinette look.
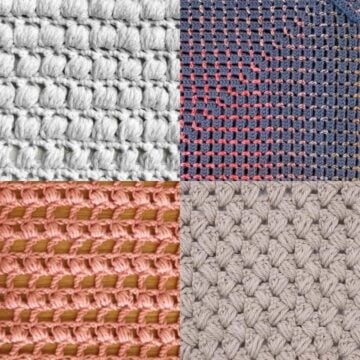
Free Crochet Patterns That Look Knit
There are many ways to make crochet mimic knitting. Here are a few patterns that use addition techniques to achieve the classic knit look. You can also see our collection of free crochet patterns that look knit here.
Hideaway Infinity Scarf- This knit-look cowl is made from a simple rectangle and basic stitches, making it the perfect project for beginners.
Knit Look Beanie - This design from Ned & Mimi uses modern color-blocking to update a classic "knit" hat silhouette.
Chunky Knit Look Blanket - Crochet Dreamz uses thick yarn and a large hook to mimic the stylish look of a chunky knit throw.

The How to Crochet the Knit (Waistcoat) Stitch
Materials
- Any Yarn
- Any Hook 2 sizes larger than you'd typically use with the yarn, pointy tipped hooks work the best
Abbreviations + Glossary (US Terms)
- ch – chain
- sc – single crochet
- sl st – slip stitch
Abbreviations and Glossary (US Terms):
Want some company while you crochet?
Get support (and camaraderie!) in the Make & Do Crochet Crew Facebook Group. Search “Make and Do Crochet Crew” on Facebook.com.
Permissions + Copyright
Please do not publish or share this pattern as your own. You may make items to sell with this pattern. In exchange, please link back to this page. Do NOT use my photos as your own sales photos.
Overall Pattern Notes
Instructions
How to Crochet the Waistcoat Stitch Step-by-Step
- 1. Foundation Round: Ch any multiple of chains, sl st to first ch of round to form a circle.
- 2. Round 1: Ch 1, sc in each ch, sl st to first sc to join.
- 3. Round 2: Ch 1, sc in between the posts of each sc, sl st to first sc to join.
- 4. Repeat Round 2 for remainder of project.
Majesty says
One of the best criochet tutorials I’ve seen! Well done! Can’t wait to try this!
Jess @ Make and Do Crew says
Thanks so much, Majesty! I hope you enjoy it! I really like using this stitch.
Jess
Melinda says
Thanks so much for sharing and thanks for making it simple. Music was a bonus ?
Jess @ Make and Do Crew says
haha, oh man. I'm glad to have gotten the music corrected. What an oops! 🙂
Caelum says
I cannot wait to try this! My dad always complains about how many holes there are in my crochet projects. He simply does not understand that certain patterns are supposed to have holes. I cannot wait to show him!
Thanks!
-Caelum
Jess @ Make and Do Crew says
Haha! That sounds like a dad thing to complain about! 😉 I can imagine my dad saying the same thing. This will be perfect for him.
Happy crocheting!
Jess
Craftbyrem says
Thank u for this.
Jess @ Make and Do Crew says
You're welcome! 🙂
Leah says
I liked your simple explanation, I can’t wait to try this stitch.
Jess @ Make and Do Crew says
I hope you like it, Leah! It's almost magical to see how much it looks like knitting. 🙂
Jess
Regi says
stop with the music please! Thanks
Sarah says
I'm so excited to try this stitch out.
Fantastic tutorial, but I do have to agree with the comments above, the music over your speaking from 2:52 onwards makes it almost impossible to follow.
It really is an amazing and beautiful tutorial though, thank you for taking the time to film and share!
Jess @ Make and Do Crew says
Thanks Sarah! The music was a total accident and shouldn't be there! Oops! Removing it now!
Jackie says
I would have enjoyed watching this video if the annoying music would have let me hear what you were saying. I’ll fine another video to learn this stitch.
Jess @ Make and Do Crew says
I'm sorry, Jackie. I made a mistake and have corrected it. Thanks for your patience.
Jess
Virginia H. says
Great tutorial except for the unnecessary music which made it hard to hear you. I've made several of your crochet items and you do a fantastic job. Than you.
Jess @ Make and Do Crew says
Hey Virginia,
Thanks for the feedback. Are you talking about the music at the very beginning and very end of the tutorial? I'm guessing so as that is the only music involved. Thanks for letting me know it didn't work well for you.
Jess
Jen says
I think she is referring to the music that starts up again at about 2:50 into the video and remains on until the end. Other than that great video and I LOVE this pattern! ?
Wendy says
The music starts at about 2:52 and it's loud! It really does make it difficult to hear what you're saying. Thanks for sharing this stitch!
Jess @ Make and Do Crew says
I'm sorry Wendy, that was totally an accident on my part. An extra audio track snuck in at the last minute. Working on fixing it now. 🙂
Regi says
It just started right in the middle somewhere LOLOL, I didn't notice where because I stopped watching the video because I started looking for the ad so I could stop it. Thanks and I love this stitch tutorial....and you are a really good instructor.
Jess @ Make and Do Crew says
Oh man. That is totally my mistake. The was a extra audio clip included in my edited video at the last second. I am so sorry! I'm fixing it now, lol.
Thanks for the kind words about my teaching. Apparently I'm a better teacher than video editor!
Jess
dana says
The music starts at 2:50 and is super loud, we can't hear what you're saying.
Jess @ Make and Do Crew says
Oh my gosh. What a goof up! That shouldn't be there, lol. I can see how you wouldn't be able to hear me! I'll get a different version uploaded asap.
🙂
Jess
Karen says
Thank you! Love this stitch. The video was a little difficult to hear your explanation as music was playing loudly. I have used many of your patterns and love them all.
Margarey Eldridge says
When I learned tbis stitch a couple of years ago it was called a split stitch.
Jess @ Make and Do Crew says
Oh really? That's great to know! Thanks for filling me in on that alternative name. I haven't heard that one yet. 🙂
Jess
Connie hills says
Thank you so very much for showing me how to crochet like that.
Jess @ Make and Do Crew says
My pleasure, Connie!
Pam Carlson says
I enjoy watching your tutorial videos. I would like to make a suggestion though. As a beginner, I need to have your camera closer to your work so I can see exactly what you are doing. Experienced cricketers and knitters probably can figure out what you are doing. I like to watch your video and then pause it and then crochet what you are doing.
Jess @ Make and Do Crew says
Thanks Pam. I really appreciate the feedback. I'll keep that in mind with future videos. 🙂
Jess
Bunny says
WOW, need to find this site on my desktop computer. Thank you for sharing!!!!!!
Jess @ Make and Do Crew says
Hi Bunny!
I'm happy you found your way here. 🙂
Jess