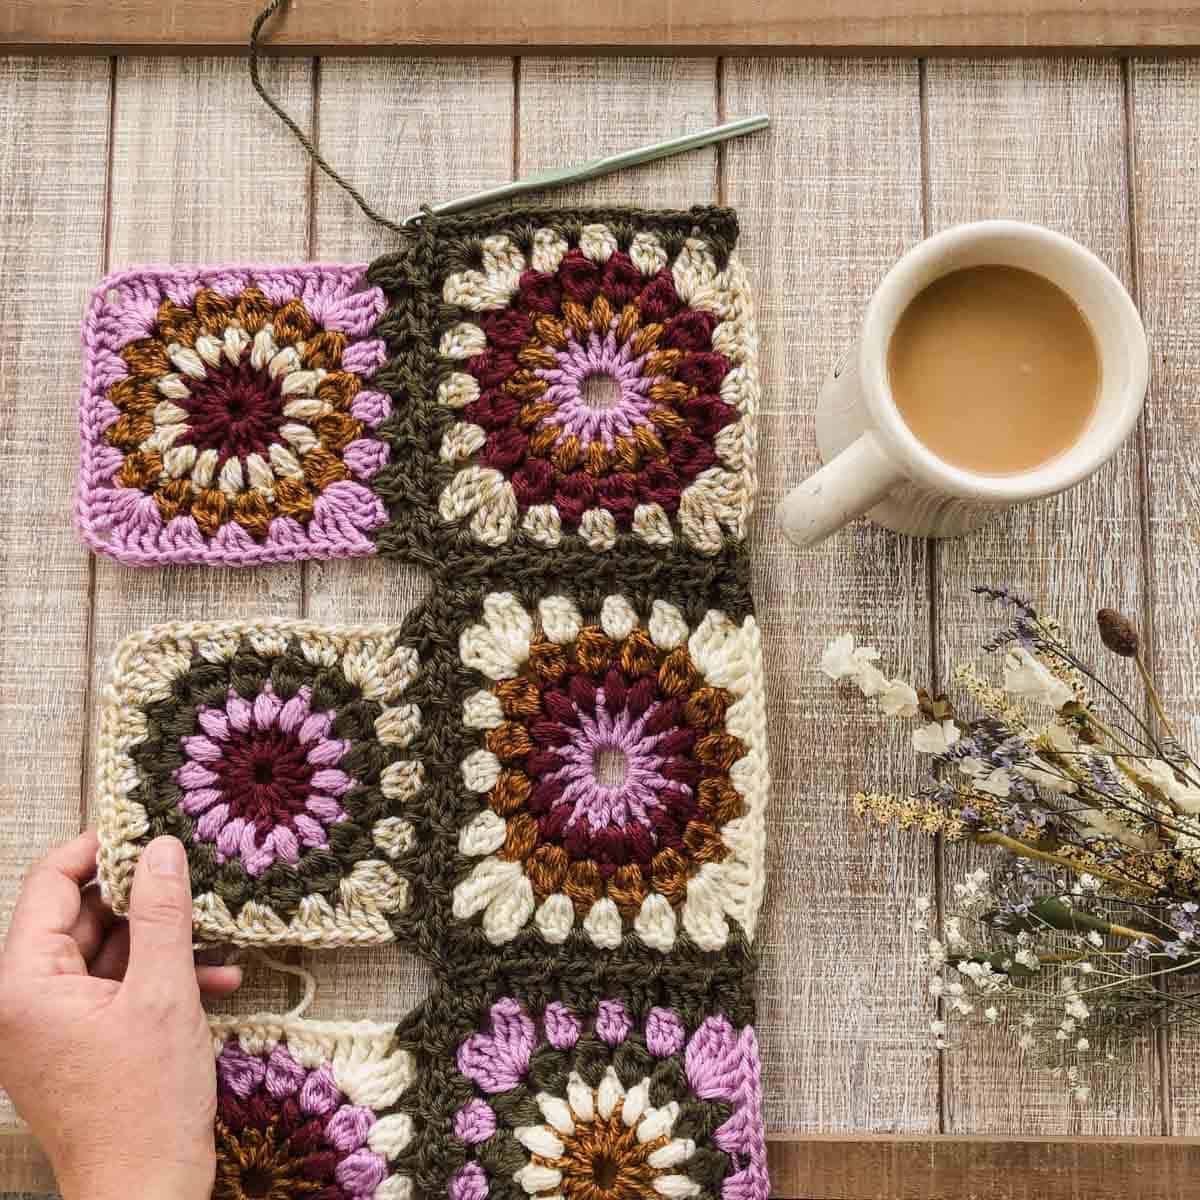
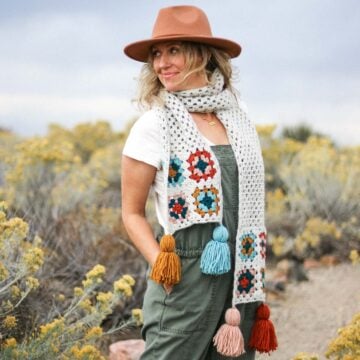
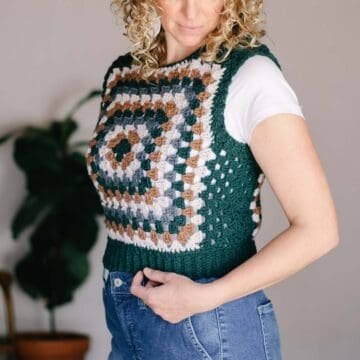
Learn how to join crochet granny squares as you go in order to create a flat "seam" (without any actual seaming!) This is the technique used in the Revival Cardigan pattern.

This join as you go crochet video tutorial is part of a collaboration with Lion Brand Yarns. This post contains affiliate links.
Do you ever immediately dismiss a beautiful crochet pattern because it look like it'll take too much seaming? This used to happen to me all the time with granny square patterns.
And then I learned this join as you go technique.
Seamless Crochet Joining = Game Changer
Seriously, if there's one crochet skill to learn this year, this might be THE ONE to master!
You'll never look at a granny square project or hexagon blanket the same again. With an understanding of seamless joining, a whole new world of patterns will open up to you.
AND I've got right-hand and left-hand video tutorials for you! (Scroll down further for written join as you go instructions and a photo tutorial.)
What Is Specifically Great About This Seamless Join?
I really like this technique in particular because it allows the joining "seam" to lie very flat. Sometimes a more textured join is the style you're going for. When it comes to drapey garments or blankets though, this technique is where it's at.
Let's learn how to join crochet granny squares as you go!
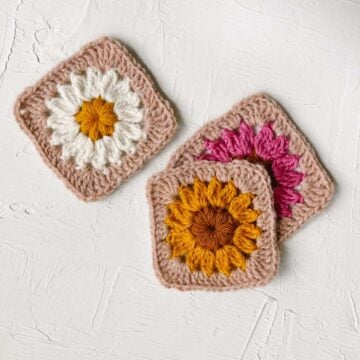
Related: How to Make a Flower Granny Square Step-by-Step
Right-Handed Video Tutorial
Left-Handed Video Tutorial
Links Mentioned in The Video
- Revival Cardigan - free crochet pattern and tutorial
- Lion Brand Basic Stitch Anti-Pilling yarn
- Edie Eckman's website and newsletter
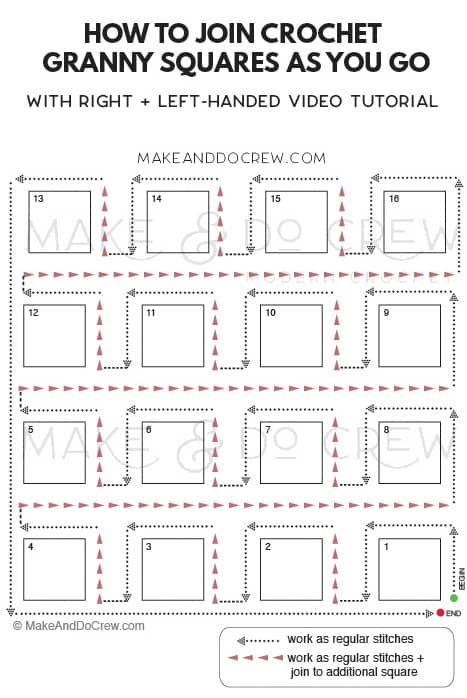
Note: The diagram below indicates the direction to work for right-handed crocheters. If you are left handed, attach yarn in opposite corner to begin and work the mirror image of this diagram.
Seamless Join Crochet Granny Squares Written Instructions
Arrange granny squares as desired. (Rows and columns can include any number of squares.)
Attach yarn in bottom left corner of grid. (Left-handed, attach in the bottom right corner.)
In Same Corner: Ch 3 (counts as 1 dc), 2 dc in corner…
Along Next 3 Sides of Square: ...3 dc in between each 3dcCl to next corner…
And In Second and Third Corners: …[3 dc, ch 1, 3 dc] all in corner sp…
In Fourth Corner: ...3 dc, ch 2, (grab next granny square)...
Wanna save this pattern?
In Second Granny Square:
In First Corner: ...3 dc, ch 2…
Along First Side of Square: …*Remove loop from hook, insert hook from the top down in next space of first granny square (between 3dcClusters), pick up working loop, pull through space; 3 dc in next space of second square, ch 2; rep from * to corner…
Second Corner: ...Remove loop from hook, insert hook from the top down in last space between 3dcClusters of first granny square, pick up working loop, pull through space, 3 dc in corner, ch 2, remove loop from hook, insert hook from the top down in adjacent corner of first granny square, pick up working loop, pull through space; 3 dc in same corner space of second granny square….
Second and Third Sides of Square and Third Corner: Work as sides/corner of square 1 were worked.
Fourth Corner: Work as fourth corner of first square was worked.
Repeat this joining process with the rest of your first row squares. On last square of row, stop after second side is worked, just before 3rd corner (two sides will be unworked at this point).
Third Corner of last square: ...3 dc, ch 2, (grab next granny square)...
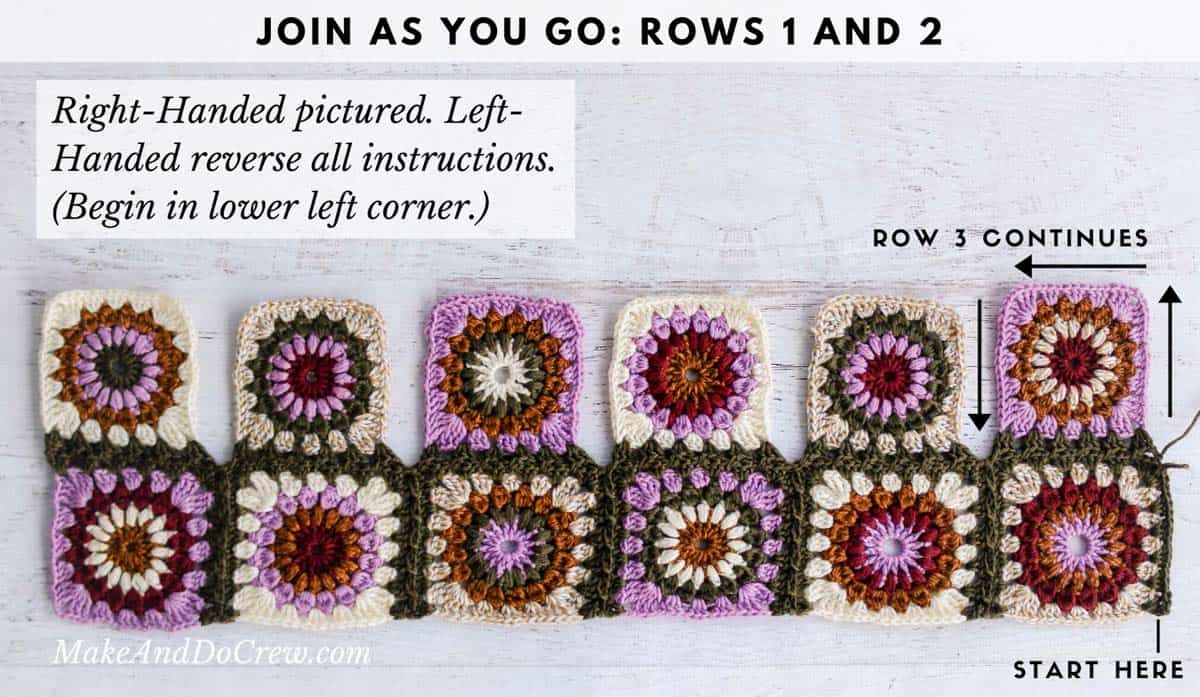
Joining Second Row of Grannies:
***First Side of First Square: 3 dc, ch 2 in first corner, *remove loop from hook, insert hook from the top down in next space (between 3dcClusters) of adjacent granny square, pick up working loop, pull through space; 3 dc in next space on working square, ch 2; rep from * to corner…
Corner Join: ...Remove loop from hook, insert hook from the top down in last space between 3dcClusters of adjacent granny square, pick up working loop, pull through space, 3 dc in corner of working square, ch 2, remove loop from hook, insert hook from the top down in nearest corner space of Row 1, pick up working loop, pull through space, slst into corner space of next square in Row 1, ch 2**, (grab next granny square to be joined on second row)...
Corner of Next Square: ...3 dc in corner space, ch 2, rep from * to next corner…
Continue adding squares in this manner until row 2 contains 6 squares, ending at **...
Finishing End of Row Corner: ...3 dc in corner of 6th square, ch 2, remove loop from hook, insert hook from the top down in nearest corner space of Row 1, pick up working loop, pull through space, 3 dc in same corner of 6th square…
Rep from *** for each additional row.
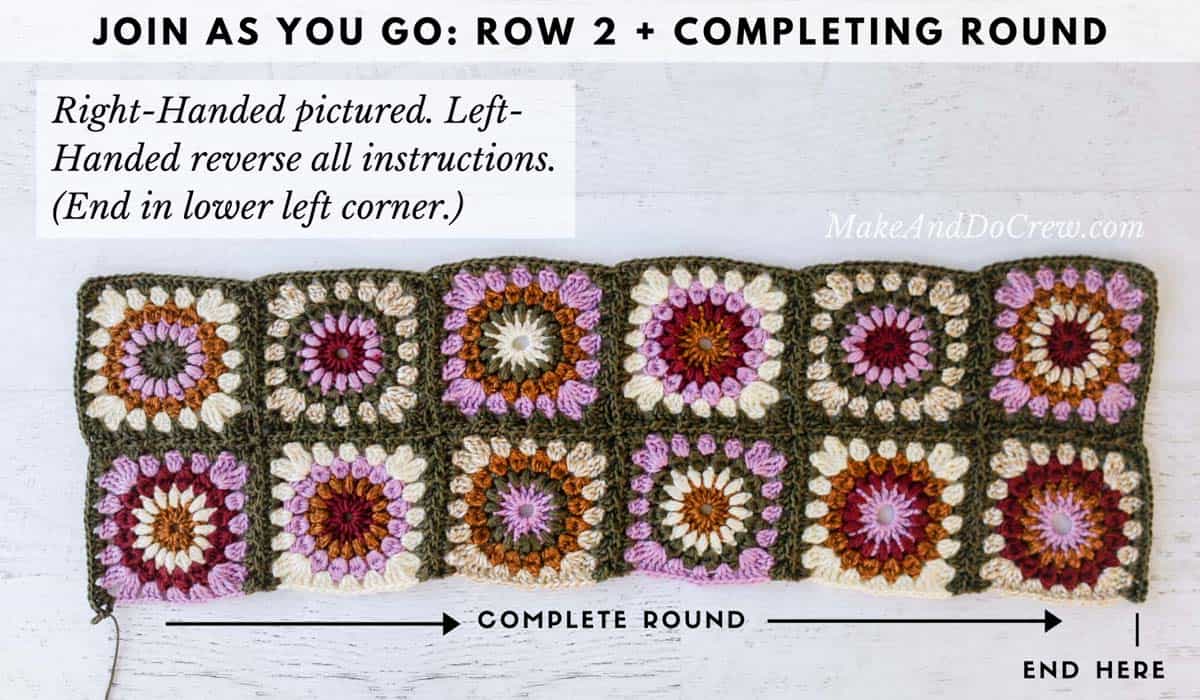
Completing Joining Round:
Continue around the last row of squares as shown in diagram above. Place 3 dc between each 3dcCl and place [3 dc, ch 1, 3 dc] in each corner space, joining as you go in the same manner as before.
Next, work down the first half of unfinished side edge of total rectangle in the same manner. At intersection where granny rows meet, work into corners as 3 dc in corner of first granny, ch 1, sl st in ch2sp between grannies of first and second rows, ch 1, 3 dc in corner of next granny. Continue side edge with 3 dc between each 3dcCl to next corner.
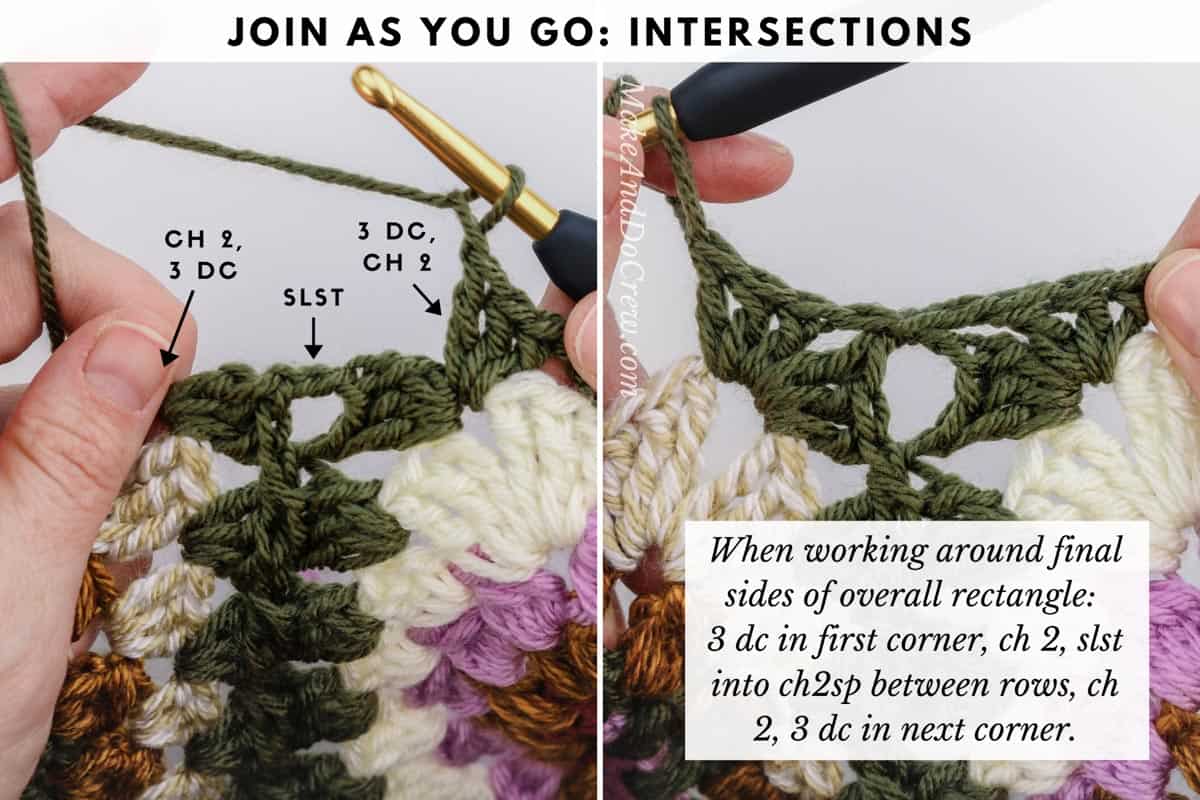
Place [3 dc, ch 1, 3 dc] in next corner and finish final edge with 3 dc between each 3dcCluster and work each intersection between grannies as was done for intersection of Granny Rows 1 and 2.
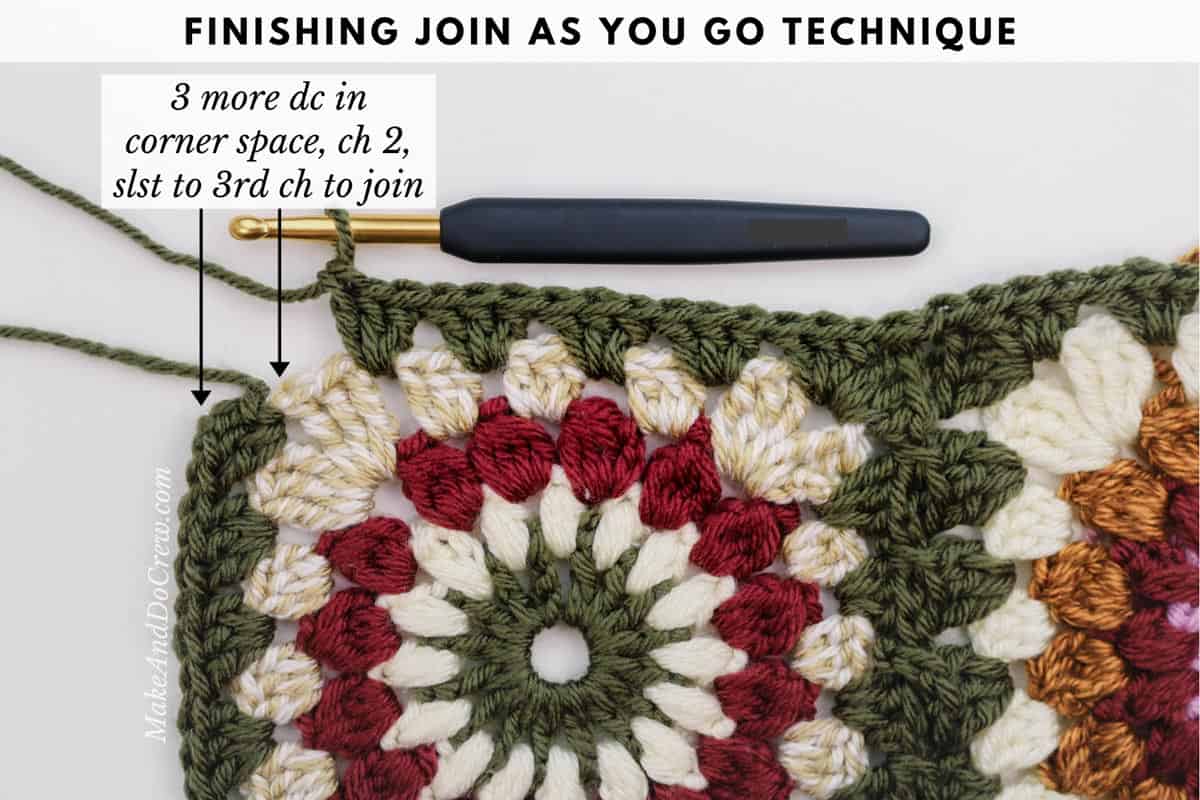
Final Corner Where Joining Began: 3 dc, ch 1, slst to 3rd chain to join. Do not fasten off.
Pretty magical, isn't it? What else do you want to crochet now that you know how to join as you go? My answer is: EVERYTHING!
More Helpful Crochet Technique Video Tutorials
If you love learned new crochet techniques like this, I think you'll love both of these in-depth tutorials:

Traci Anderson says
Where is the video?? Seriously....
Trish says
Thank you so much for providing this join as you go method for granny squares. I really get tired of all that stitching just to put the granny square blanket together! The video and written instructions makes sense and are easy to follow. Now I just have to go back to that bag with all the granny squares and finish that baby blanket before I start anything new. This puts GS projects back on the happy list again..
gloria jean williams says
Doesn’t the seamless join of granny squares make the garment larger. It appears that it’s adding another round of rows to each square. How do I adjust the pattern. I am making a granny square coat. This join would throw off the size. I love your method and want to incorporate it without making my coat larger. Thank you