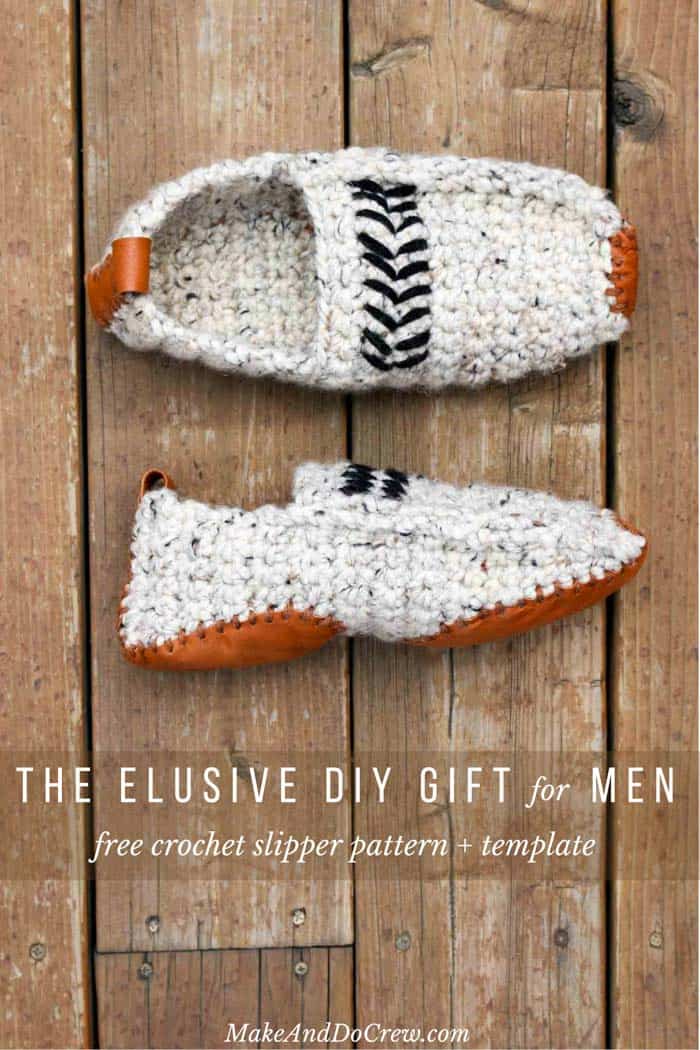
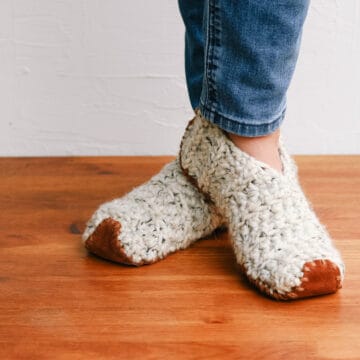
Outfit your dad, husband, brother or boyfriend in a pair of modern men’s crochet slippers with leather soles for the perfect quick DIY gift! The free unisex pattern and video overview is below or purchase the ad-free, printable PDF here.
This free men’s crochet slippers pattern is part of an ongoing collaboration with my friends at Lion Brand Yarn. This post contains affiliate links. #wooliscoming #winteriscoming
Ugh. Shopping for men. I really think the only thing harder than buying something for a man in your life is making something for a man in your life. Once you’ve crocheted your husband/son/dad/boyfriend a beanie, what’s left? (Okay, well, yeah, you could always make them a sweater that they might never wear, but you might as well make one for yourself that you’ll love instead!)
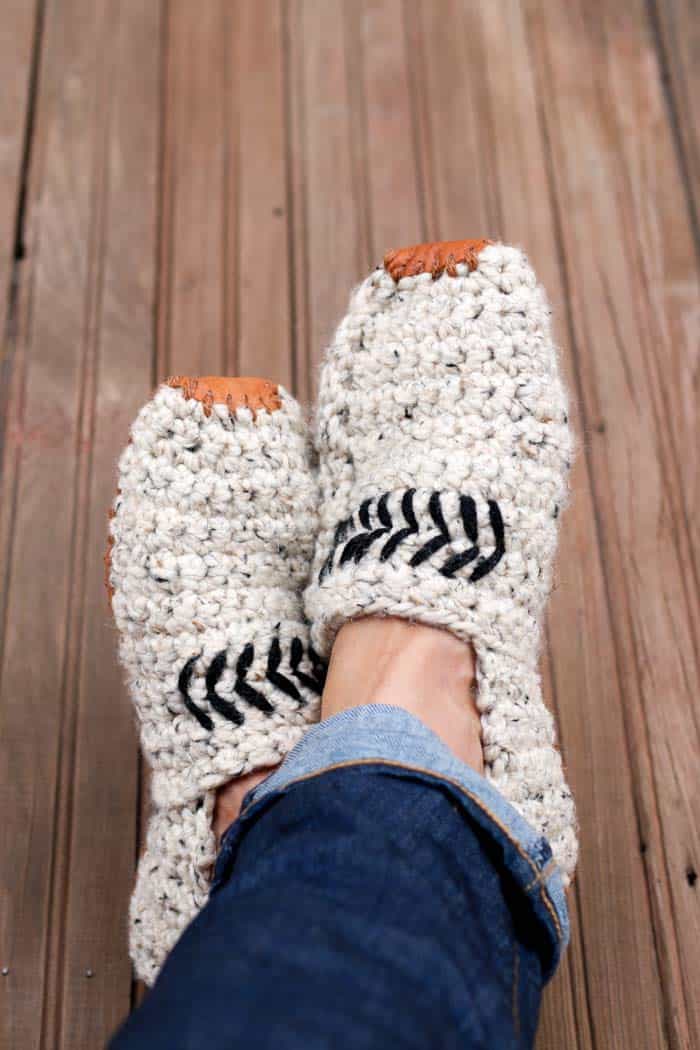
Ladies and Gents are covered!
Last week I shared a simple, modern pair of crochet women’s slippers that can make an easy go-to gift for the ladies in your life. When I finished those though, I realized that it’s actually the men in my life that provide the biggest DIY gift-giving challenge. So today, we’ve got e-v-e-r-y-o-n-e covered with these two adult crochet slippers patterns.
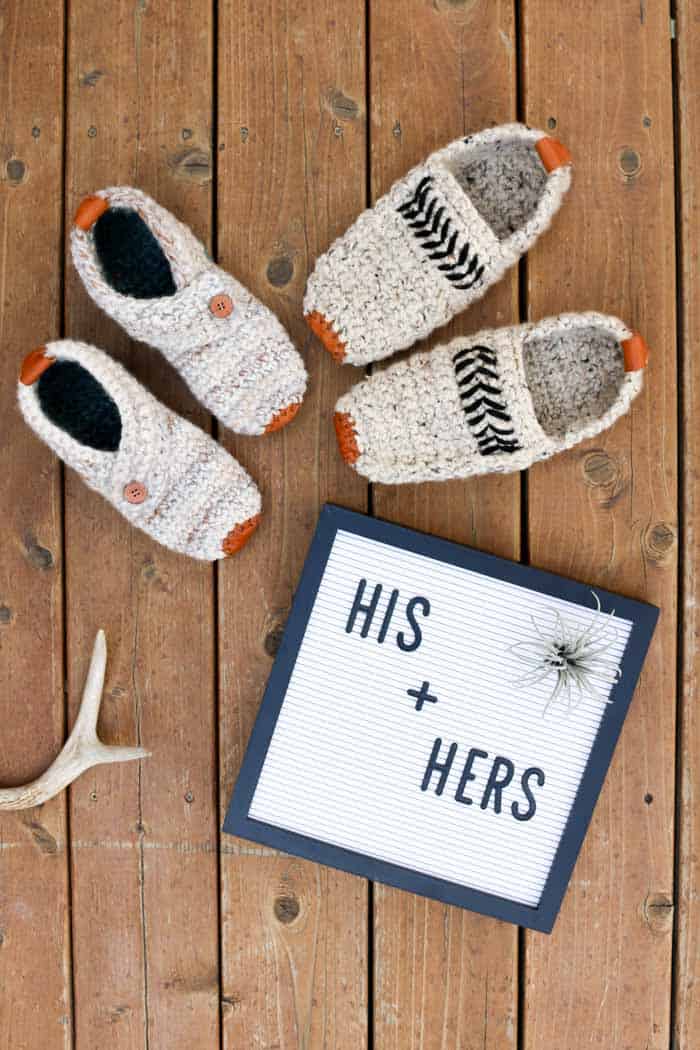
In fact, today’s men’s crochet slippers pattern actually works well ladies too, so gals, take your pick on whichever style you like best.
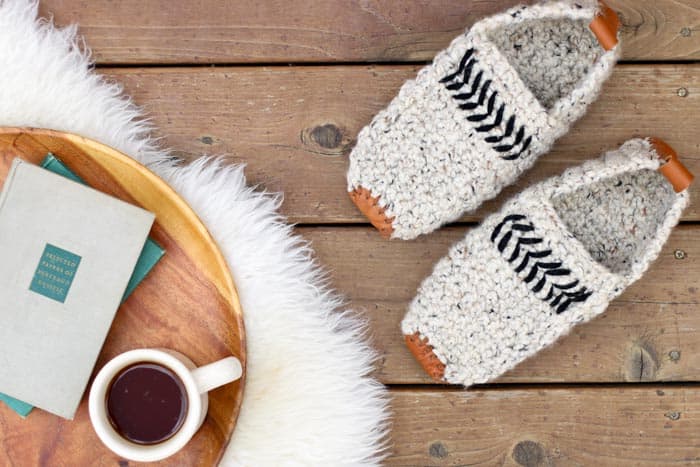
The Leather Soles
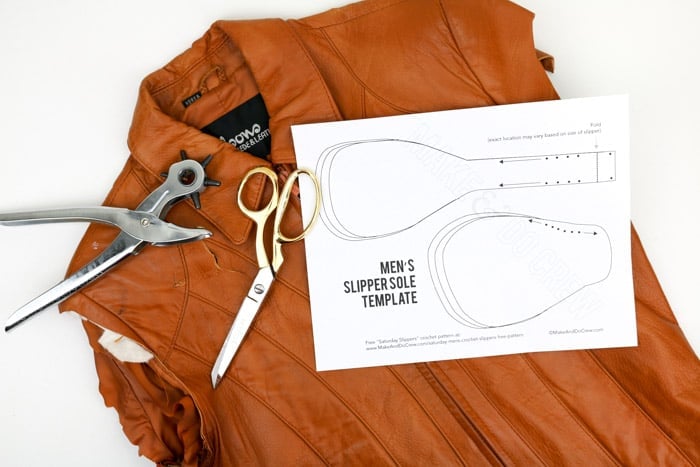
Just like the women’s Sunday Slippers, this men’s crochet slippers patten relies on leather soles for a touch of distinguished fancy-pants sophistication. The same thrifted leather jacket I used for the women’s version once again came through and provided some beautiful carmel-colored leather soles to make these slippers less, well, slippery. If you’d like to create your own soles from upcycled leather, look for a jacket or purse that’s made from fairly thick leather, the more patina, the better.
And again, I put together a free printable slipper sole and added it to the subscriber Vault. Just subscribe in the box on the sidebar or at the bottom and you’ll receive an email from me with download instructions.
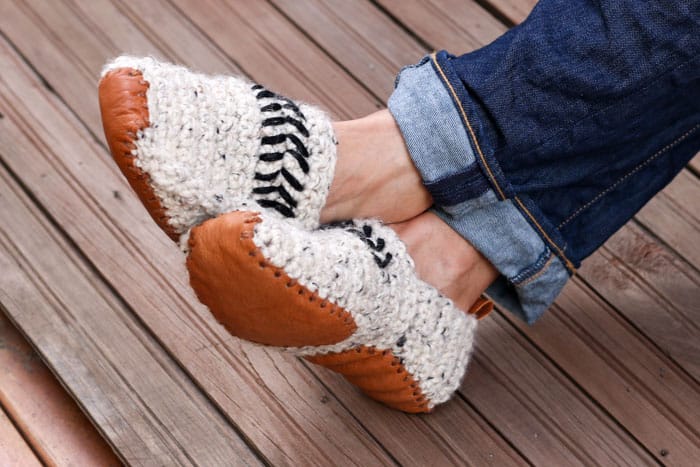
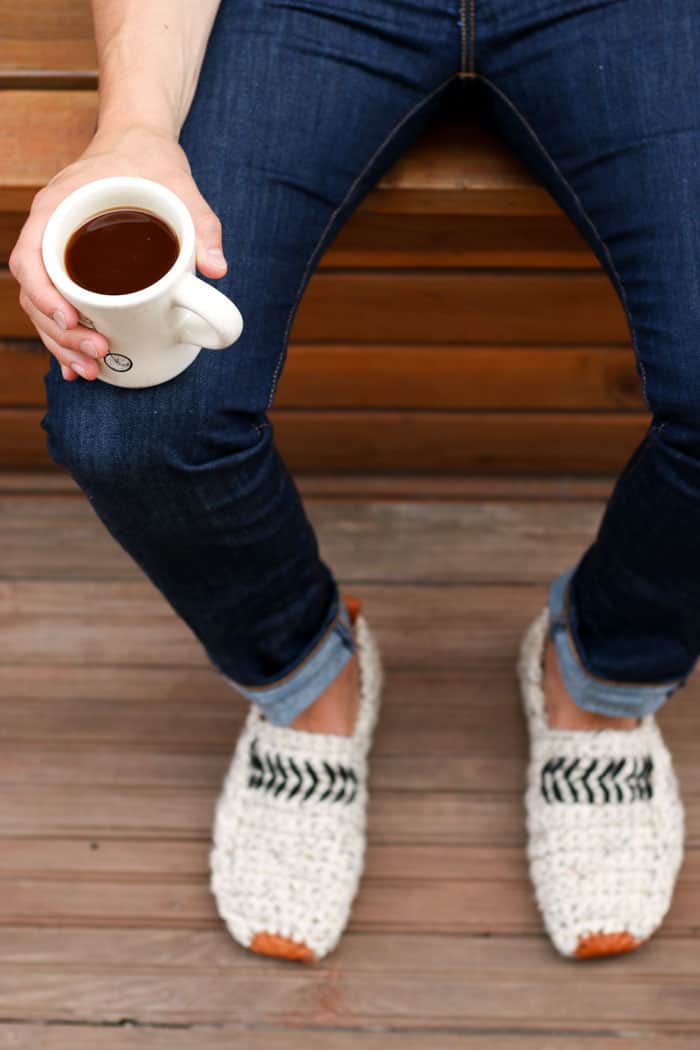
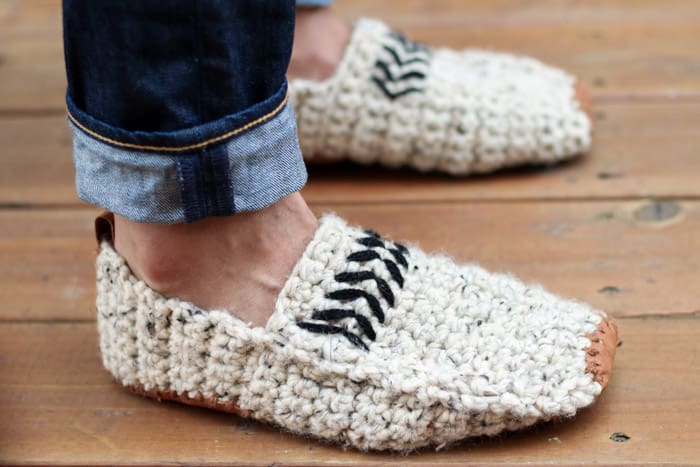
The Saturday men’s chunky slippers are worked flat then seamed and spiffed up with some simple embroidery. You only need to know how to single crochet to make these puppies! They’re really speedy to make, so if you start now, you can outfit every single gentleman you know with new crochet slippers by the end of the year! (And if you’re looking for more crochet footwear projects, check out all my free crochet patterns using flip flops.)
Related: Make these fast beginner slippers for a DIY gift for the whole fam.
The Yarn
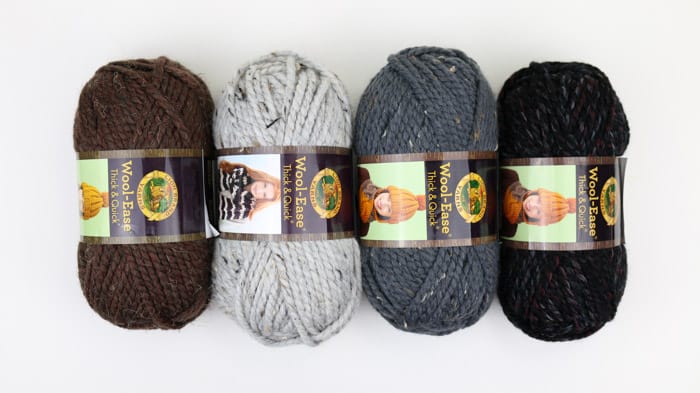
I used Lion Brand Wool-Ease thick & Quick in the color “Oatmeal” for these men’s crochet slippers, but there are so many colors in this line of yarn that would work well for a masculine project. These are four colors, in my opinion, are just begging to be wrapped around a man’s foot. 🙂
I put together a brief video below that shows exactly how easily this men’s crochet slippers pattern comes together! Scroll down for the complete free pattern.
Please do not publish or share this pattern as your own. You may make items to sell with this pattern. In exchange, please link back to this post. Do NOT use my photos as your own sales photos. You can read my policies here.
Saturday Men’s Crochet Slippers
Free Pattern
Purchase the ad-free, printable PDF here.
Add this pattern to your Ravelry Favorites here.
Pin it for later here.
Explanation:
At a loss for what to make the man in your life? These modern men’s crochet slippers will give you a go-to gift for dads, sons, brothers and boyfriends from now on. In fact, the pattern includes women’s sizes as well, so you can outfit everyone you know! Worked flat with very simple stitches and techniques, these easy slippers can be crocheted in an evening and worn the next day. Add embroidery and optional leather soles for a touch of sophistication and you’ll have a gift that feels functional, personalized and totally cozy!
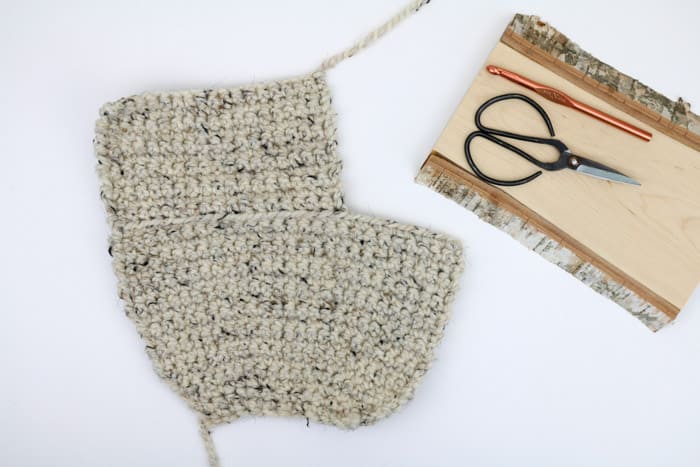
Supplies:
So you can spend more time crocheting and less time shopping, this pattern contains affiliate links at no extra cost to you.
• Lion Brand Wool-Ease Thick & Quick (Weight: 6/super bulky – 106 yds, 6 oz)
– Main Color (MC): Oatmeal 1 (2, 2, 2) skeins
• Vanna’s Choice (Weight: 4/medium – 170 yds, 3.5 oz)
– Accent Color: Black – approx. 5 yards
– Color to match leather soles (Toffee pictured) – approx. 12 yards (Optional)
• Tapestry needle
• Size M (9 mm) crochet hook
• Stitch markers or safety pins
• Printed leather sole template (optional) (to access, subscribe in the box at the bottom of the pattern)
• Leather for sole—try a thrifted leather jacket or purse! (optional)
• Leather punch or hammer and nail (optional)
• Fishing line to sew leather to slippers (optional)
Sizes:
Men’s shoe sizes: 6/7, 8/9, 10/11, 12/13
Women’s shoe size equivalents: ⅞, 9/10, 11/12, 13/14
Gauge:
9.5 sc = 4”
10 rows = 4”
Abbreviations and Glossary (US Terms):
ch – chain
sp – space
sc – single crochet
scblo – single crochet through the back loop only
scflo – single crochet through the front loop only rep – repeat
st – stitch
RS – right side
WS – wrong side
MC – main color
AC – accent color
Overall Pattern Notes:
• Right and left slippers are worked identically until the heel section.
• Stitches are intended to be worked tightly. If in doubt, please check your gauge.
• Instructions for men’s size 6/7 are listed, with sizes 8/9, 10/11, 12/13 following in parentheses. 6/7 (8/9, 10/11, 12/13)
• If you’re creating slippers for someone who is not nearby to try them on, or you’d like to adjust the pattern to create a different size, this chart of shoe sizes measured in inches from Shoes.com could be helpful. Keep in mind, they’ll stretch a bit when worn.
• See the women’s version of this free crochet slippers pattern here.
Toe
Make 2.
Foundation Row: Using MC, make a slip knot and leave a 20” tail. Ch 13.
Row 1: Ch 1, sc in each sc; turn. (12)
Row 2: Ch 1, [sc in each of next 3 sc, 2 sc in next sc] 3 times; turn. (15)
Row 3: Ch 1, [sc in each of next 4 sc, 2 sc in next sc] 3 times; turn. (18)
Row 4: Ch 1, [sc in each of next 5 sc, 2 sc in next sc] 3 times; turn. (21)
Row 5: Ch 1, [sc in each of next 6 sc, 2 sc in next sc] 3 times; turn. (24)
Rows 6-10: Ch 1, sc in each sc; turn. (24)
Sizes 6/7, 8/9, 10/11 Row 11: Ch 1, sc in each sc; turn. (24)
Sizes 12/13 Row 11: Ch 1, [sc in each of next 7 sc, 2 sc in next sc] 3 times; turn. (27)
Rows 12-16: Ch 1, sc in each sc; turn. 24, 24, 24, (27)
Size 6/7: Move on to heel section. (there should be 16 total rows at this point)
Size 8/9: Rep Row 12 once more. (there should be 17 total rows at this point)
Size 10/11: Rep Row 12 twice more. (there should be 18 total rows at this point)
Size 12/13: Rep Row 12 three more times. (there should be 19 total rows at this point)
Do not fasten off.
Wanna save this pattern?
Heel
Notes:
• This section is worked back and forth in rows. Row 1 is worked into the last round of toe section.
• Heels are crocheted identically with the exception of which loop you’re working into.
Right Heel
Row 1 (RS): Ch 1, scblo in next 17 (17, 17, 18)
Row 2 (WS): Ch 1, sc in each sc from Row 1; turn. 17 (17, 17, 18)
Rep Row 2 4 (6, 6, 7) times.
Row 3: Ch 1, 2 sc in first sc, sc in each sc until 1 sc remains, 2 sc in last sc; turn. 19 (19, 19, 20)
Row 4: Ch 1, sc in each sc; turn. 19 (19, 19, 20)
Size 6/7: (there should be 24 total rows in the toe and heel sections combined)
Size 8/9: (there should be 27 total rows in the toe and heel sections combined)
Size 10/11: (there should be 28 total rows in the toe and heel sections combined)
Size 12/13: (there should be 30 total rows in the toe and heel sections combined)
Fasten off leaving a 20” tail.
Left Heel
Row 1 (RS): Ch 1, scflo in next 17 (17, 17, 18)
Row 2 (WS): Ch 1, sc in each sc from Row 1; turn. 17 (17, 17, 18)
Rep Row 2 4 (6, 6, 7) times.
Row 3: Ch 1, 2 sc in first sc, sc in each sc until 1 sc remains, 2 sc in last sc; turn. 19 (19, 19, 20)
Row 4: Ch 1, sc in each sc; turn. 19 (19, 19, 20)
Size 6/7: (there should be 24 total rows in the toe and heel sections combined)
Size 8/9: (there should be 27 total rows in the toe and heel sections combined)
Size 10/11: (there should be 28 total rows in the toe and heel sections combined)
Size 12/13: (there should be 30 total rows in the toe and heel sections combined)
Fasten off leaving a 20” tail.
Seaming Side, Toe and Heel
Notes:
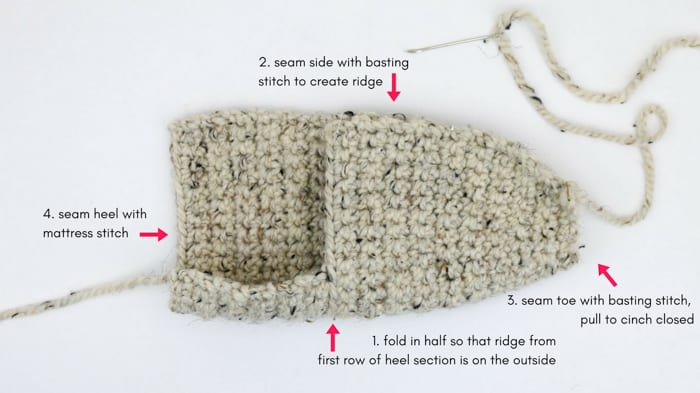
• You may find it helpful to read through the entire seaming section and reference photo above before beginning. Watching the brief video overview of this project could also help clarify seams if you’re a visual learner.
SIDE SEAM: Fold slipper toe section so that the ridge in Row 1 of the heel section is on the outside of the slipper. With stitch markers, pin wrong sides of the side edge together. Using a tapestry needle and the tail initial chain, seam side of slipper with a basting stitch. Work underneath one full stitch on both sides of the fabric to create a slight ridge. Weave in end. (See photo above.)
TOE SEAM: Using tapestry needle and MC, sew a basting stitch through chains from the Foundation Row. Pull yarn tight in order to cinch seam together and close toe. Weave in end. (See photo below.)
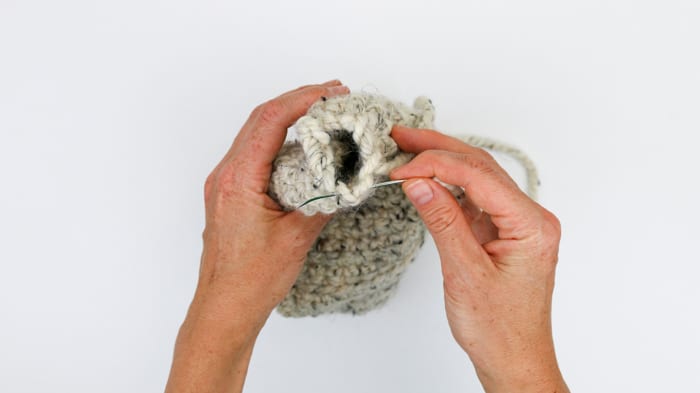
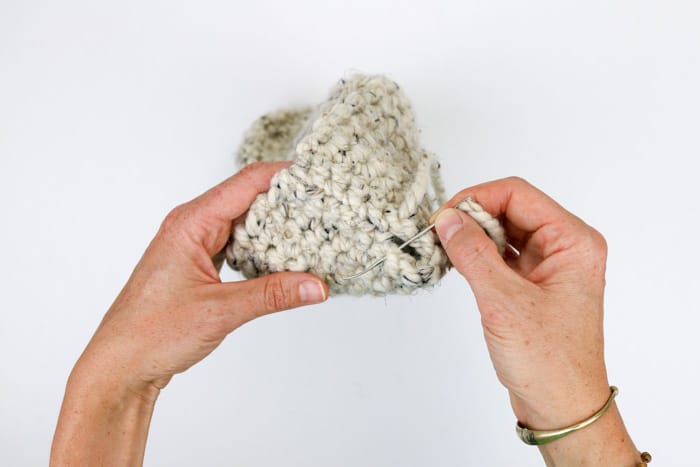
HEEL SEAM: With RS of slipper facing out, fold heel flap so that both back corners are brought together. Pin together if desired. Using tapestry needle and the tail from the heel section, seam using the mattress stitch. Weave in end. (See Photo below.)
Adding Embroidery
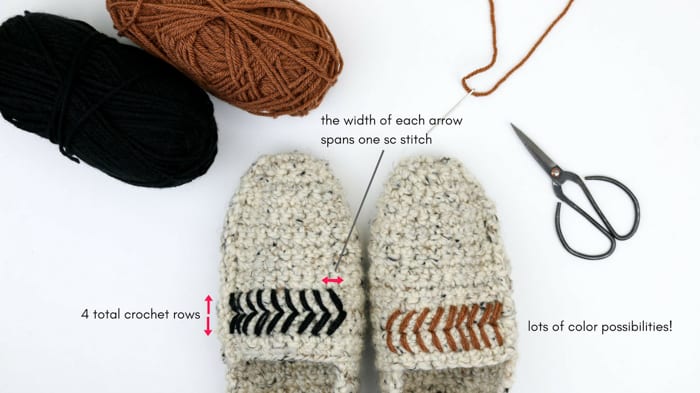
Notes:
• Adding embroidery is a fun way to spiff up your slippers. Feel free to experiment with different designs!
• The embroidery stitches are worked into the holes between the single crochet stitches.
• Reference photo above for additional visual details.
Using a tapestry needle and a doubled over strand of worsted weight yarn, work a series of nine arrows as pictured above. As shown, each single side of the arrows spans the height of two crochet rows and one crochet stitch.
Note: the photo shows the option of one or two rows of single crochet above the top of the arrows. Ultimately, I chose to leave two rows of space above the arrows. These two rows will look slightly different on each slipper because of one slipper is technically using the back of the crochet fabric and one is using the front. This is not important to understand, just know that nothing is wrong!
Adding Leather Soles
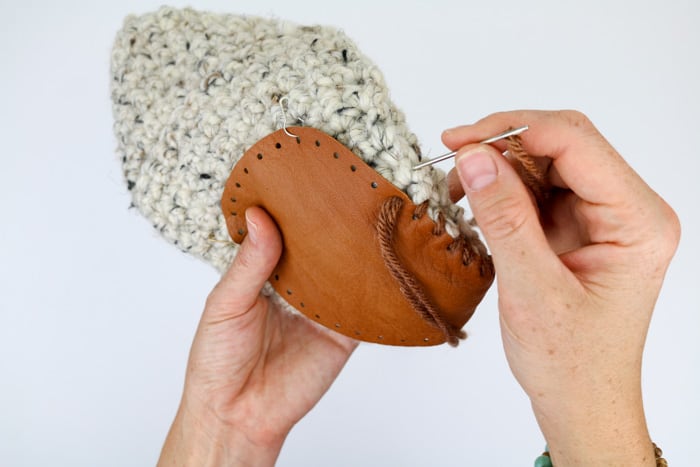
Notes:
• The leather soles are optional, but will help the slippers last longer and slip less on wood floors.
Print the toe and heel pad templates and use them to cut leather pieces for both slippers. (Find leather at craft stores, on Amazon or look for thicker leather jackets and purses at thrift stores.)
Use a leather punch or a nail and hammer to make holes around each leather piece about ⅜” apart. Do not punch holes in the top section of leather than will be at the top of the slipper ankle.
With a tapestry needle and a doubled over piece of yarn that matches your leather, sew soles to slipper bottoms using a whip stitch. I’ve found that even the strongest yarn can wear out pretty quickly when used to secure slipper soles, so you can choose to use a doubled over piece of monofilament (fishing line) instead or in addition.
Light the fire, pour a scotch and bestow these cozy slips on your favorite gentleman (or gentlelady 🙂 )!
That was so fun! Now what?
Invitation to our Facebook group
Come discuss making slipper patterns and lots of other crochet projects and techniques in our Make & Do Crew Facebook group. Here thousands of helpful crocheters answer each others questions and share their stitches. Come join us here.
More Free Crochet Slippers + Socks Patterns
- 2 Hour Crochet Slippers Pattern – made from rectangles, so easy!
- How to Crochet on Flip Flops Soles – and will they fall apart?
- Unisex Crochet Slippers Pattern – my go-to gift for dads and grandpas
- Crochet Slippers with Leather Soles – modern take on a classic
- Easy Crochet Slipper Socks – a great basic pattern
- Gender Neutral Slipper Socks Pattern – the coziest ever!
- Tall Crochet Mukluks Slippers Pattern – super comfortable + stylish


Anna says
I’m making my brother a pair and he wears a size 11.5. Would it be wise to just make 10/11 since it stretches some? Thanks
Jess @ Make and Do Crew says
I think that would probably work fine! 🙂
Anna Smith says
Is there a video for the men’s slippers that don’t go so fast? It is for the Modern Men’s crochet slippers. Thank you.
Leah says
Where do you find a 9MM crochet hook? I have looked at the craft store and all I can find is 8mm or 10mm. Which size should I use?
Thanks,
Leah
Jess @ Make and Do Crew says
If you tend to be tight crocheter, I’d go for the 10mm. If you’re a loose crocheter, I’d do the 8mm. If you’re just “regular,” I’d do the 8mm because you want these to be pretty tight stitches anyhow. 🙂
Jess
Wendy Miller says
If i need to fit a 12W for a man do i need to increase my stitches anywhere?
Sandy Mathis says
I love your site and always look forward to see what you make. You are very creative. I love that. I made the men’s slipper, I thought for gifts’ for a couple of guys who do not live close by. Both wear 9 1/2 and 10. I made the 10/11 pattern first. When I finished (they made up very quickly) I realized that they would fit my husband’s feet, (he wears a size 12-EE shoe). When I tried them on him, they fit both going around and lengthways. They were too big going around his ankle and not high enough going up to his ankle and kept slipping off his foot. I fixed the problem by opening the back of the heel and taking out the last row with the increase on both sides of the last row, seaming the heel and added 3 rows of sc around the opening. They, now, fit him great. Then I realized that the the rest of the sizes for the men only have a shorter number of rows for the length but have the same number of stitches going around. Should the other sizes have fewer stitches? I am new to crocheting but I keep all of your patterns. I have made the Shrug for each of my great-grand-daughters for Christmas. I would also like to make the lady’s slippers for my four sisters for Christmas but now I am worried about the pattern. Thank you for your help! Sandy
Jess @ Make and Do Crew says
Hey Sandy,
Thanks for your kind words. I’d be interested to know if the pair you gave your husband had the same gauge I list in the pattern? It sounds like your gauge might have been a bit big. My guess is that you should use a smaller hook for the other pairs to achieve a gauge closer to what’s listen in the pattern. That’s just my first guess. 🙂
Jess
Alisia says
Hi ma’am love love love your work !!
Do you sell them at all ? I do not have the patience to make these haha! Very interested thank you
Alisia
Jess @ Make and Do Crew says
Hey Alisia,
I’m sorry, I don’t sell them at this time. 🙂
Jess
Lex says
Thank you so much for this free pattern! I was wondering if you could provide any more details on seaming the sides–the slippers I made look slightly different at the toe than the ones you made (much more rounded, not as square toed), and the man who tried them on said that they were a bit big in the toe area (which is what I was expecting after trying them on myself). I’m wondering if I should have sewn the part of the side closer to the toe tighter than I did? Or do you have any other tips on how to make the toe region fit a bit snugger without unraveling and starting over with less increases? Thank you again!
Jess @ Make and Do Crew says
Hey Lex,
Good question. I’m wondering if just including a little more fabric in your “seam allowance” might tighten things up, meaning that you do just seam the slippers a little closer to the toe. This way, there will be a bit more of an “edge” along the outside of the slipper and most likely, a bit more of a square toe too.
I hope that’s helpful!
Jess
Carly says
Hi Jess
Thanks for Sharing such a trendy fabulous pattern
Is there a tip for how to add the punches holes in an even way or do I just use a ruler?
Carly
Jess @ Make and Do Crew says
Hey Carly,
You’re welcome! I just eyeballed the holes, but a ruler would also work great!
Jess
Sandy says
I love all your patterns thank you so much for sharing with us. You are so talented. Thanks again.
Sandy
Lou | mallooknits says
Definitely on my to do list for this winter! Both slippers (women’s and men’s) are so adorable and sophisticated! I know my husband will love them! Thank you for another great pattern.
Jess @ Make and Do Crew says
Thank you Lou. I hope your husband enjoys them! 🙂
Em says
Done with my right foot sock! Prob will add a border because the heel doesn’t go as high up as it should so they fall off easily. I did the heel as 17 chains or what u call it (I’m Swedish) so to make it go higher I’ll just do like 19 chains?
Em says
Hi!
I’m wondering what’s the point with the single crochet through the back loop only on the first row of the heel of section? 🙂 just did that one now.
Em
Jess @ Make and Do Crew says
Just a little visual detail. 🙂 If you don’t care for it, feel free to do normal sc.
Yvonne Bolger says
Jess, you are a very talented woman. Your designs are classy. So many of us are visual learners and your videos are so very appreciared. Personally, I enjoy the fact that you’ve brought something new to the crochet world…(how many afghans can one use or give away?) Love the fact that these are both portable take far less time to complete. Do you ever work with thread crochet? Love it as well but how many people use doilies any more….there must be something else out there. . Keep up the great work….don’t change.. Am sure others appreciate the fact that you consider cost with your designs as in using inexpensive flip flops and thrift store leather items for your designs. Thank you!
Marilyn says
Totally agree! (Well said Yvonne) Thanks for all you do Jess!
Jess @ Make and Do Crew says
It’s truly my pleasure, Marilyn. Thank you for being here!
Jess