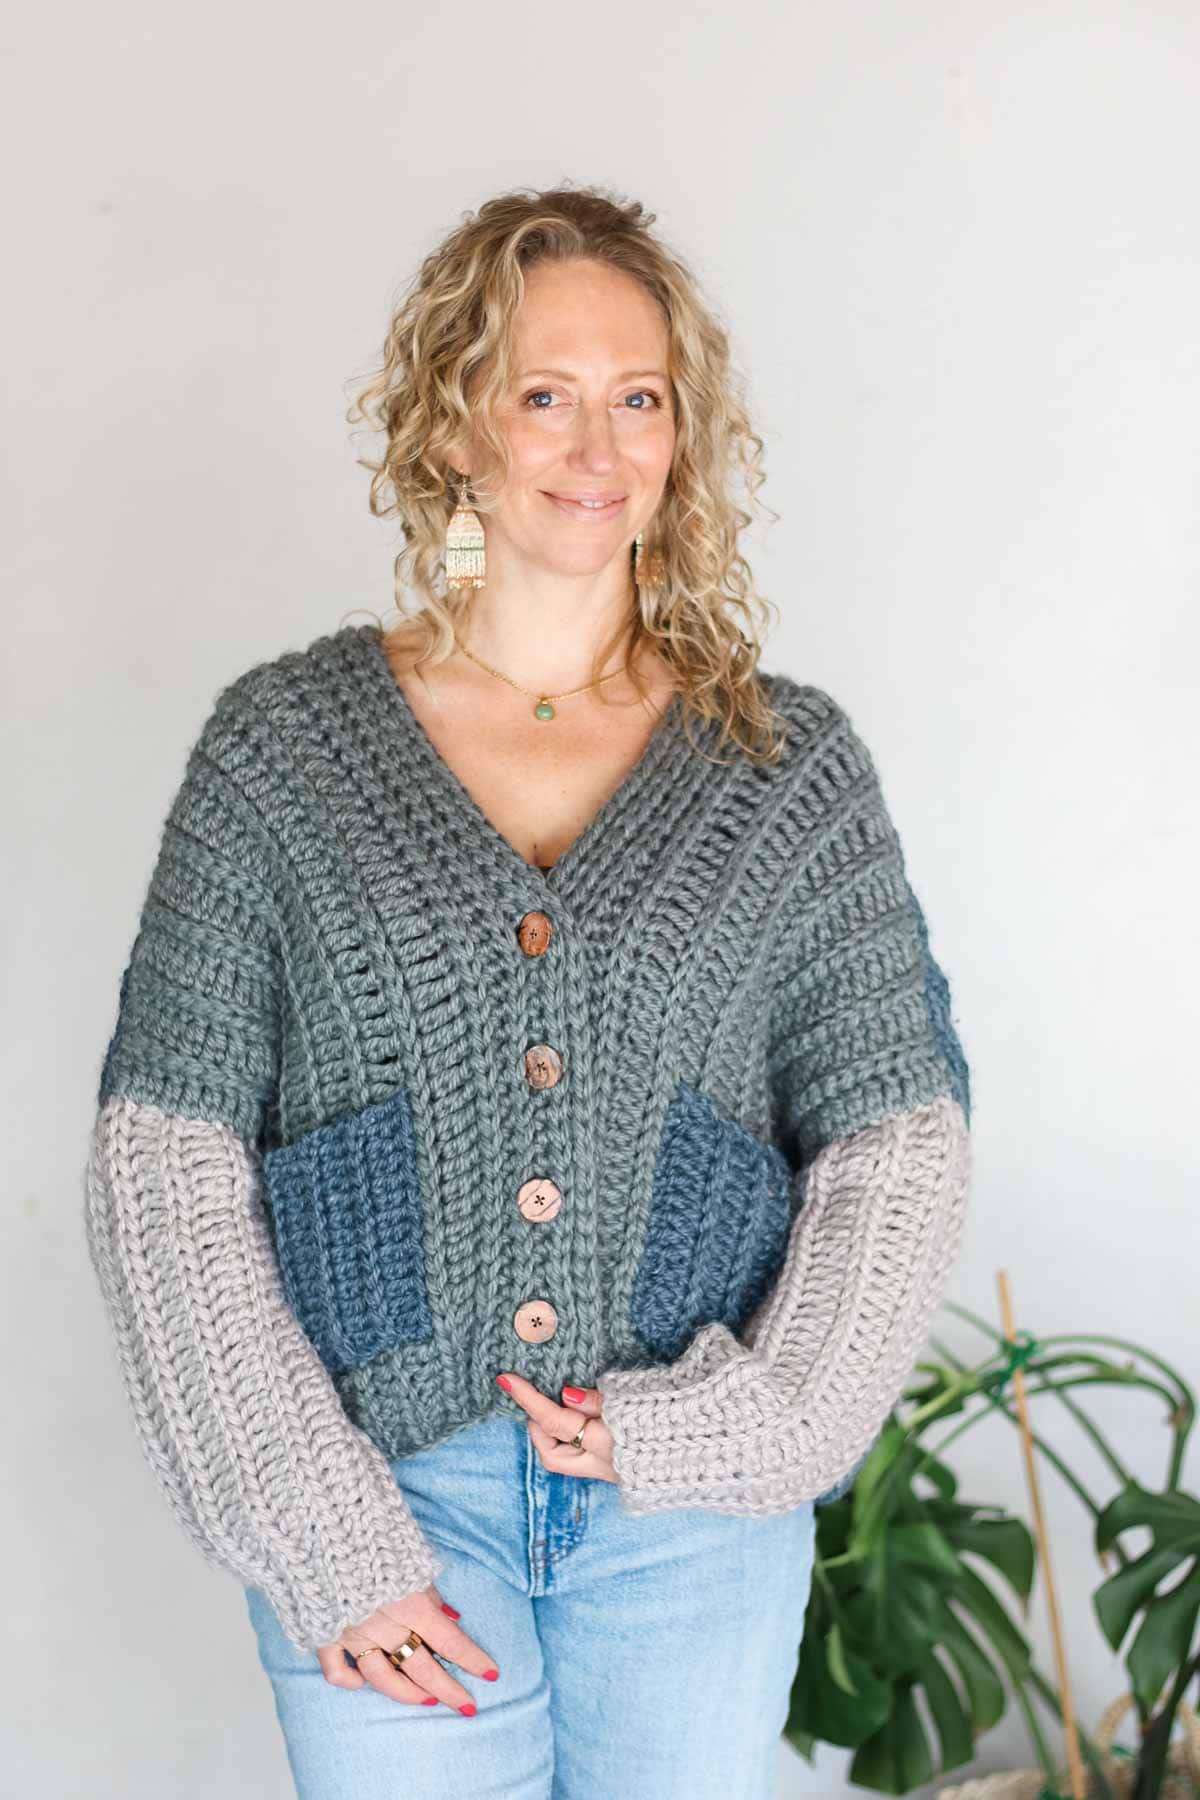
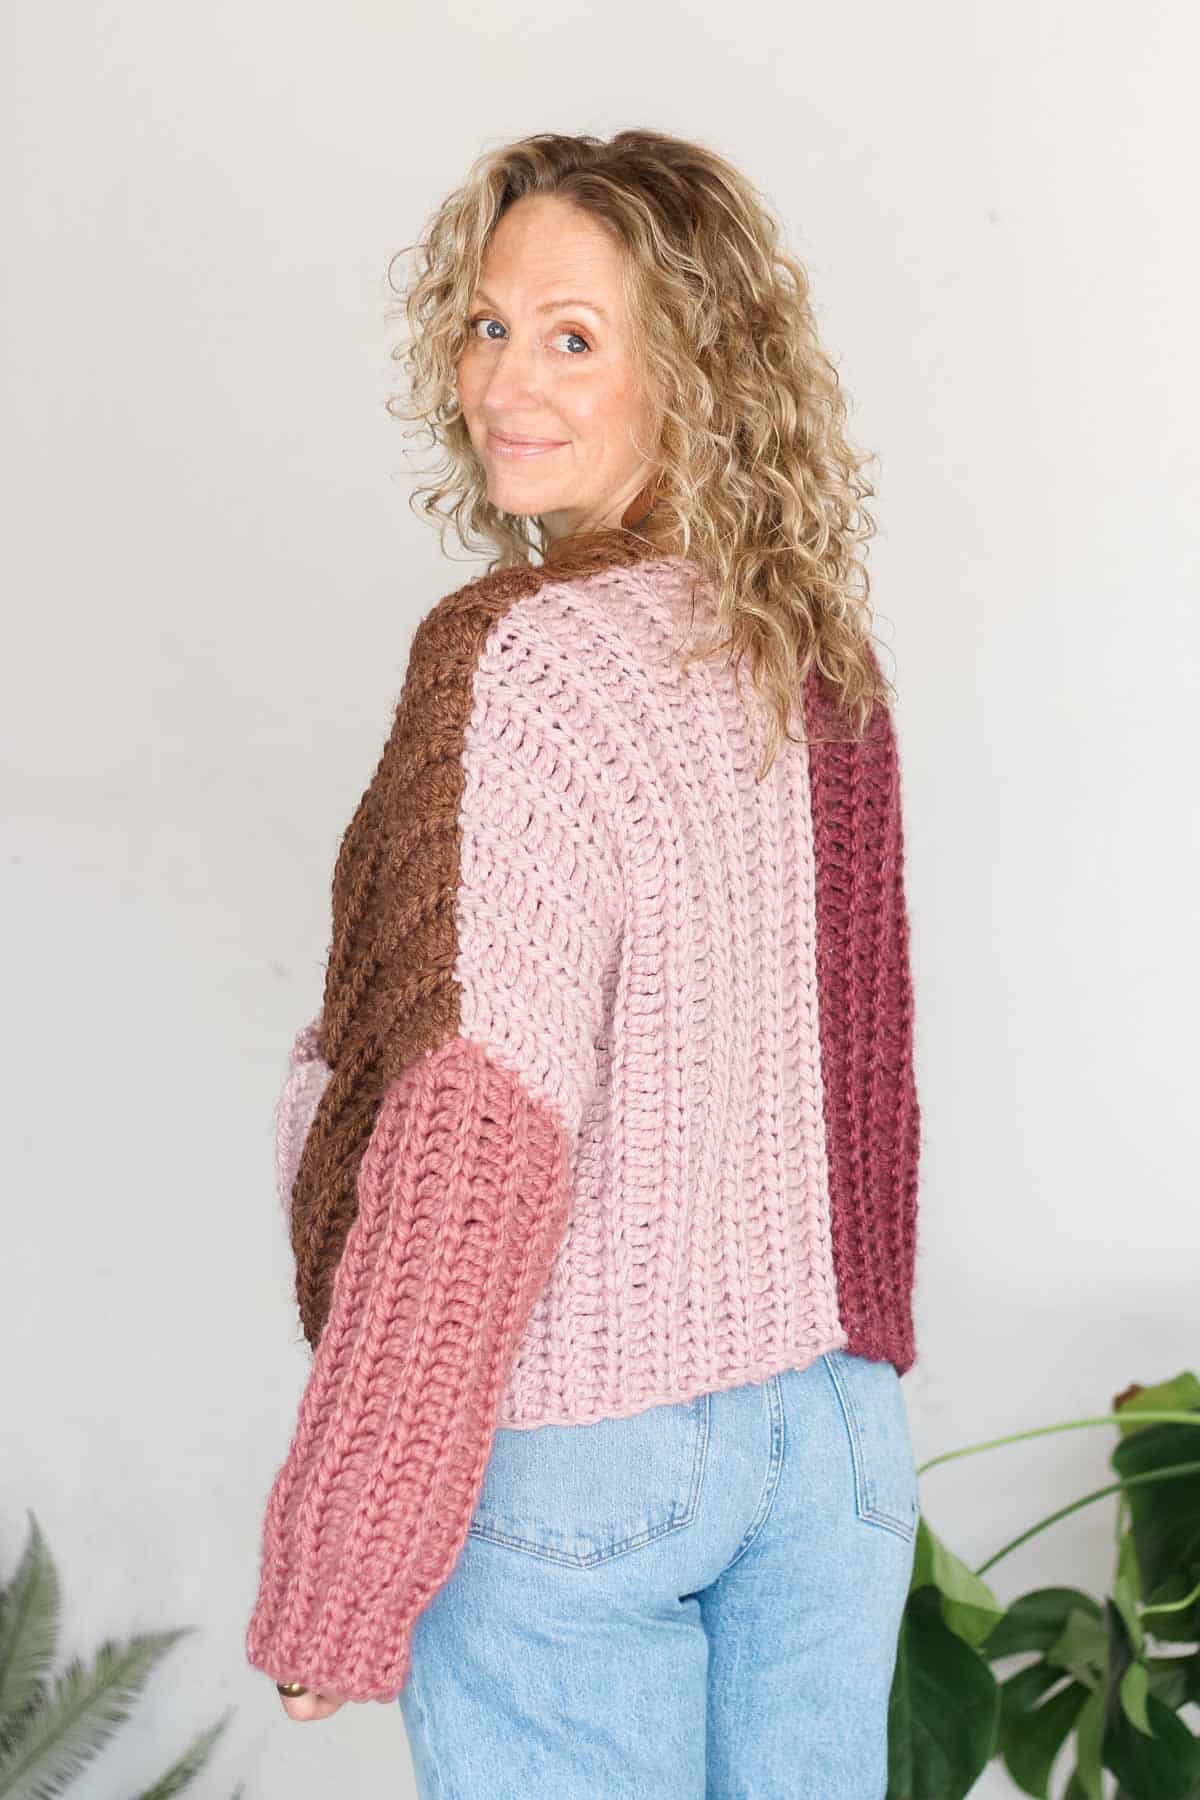
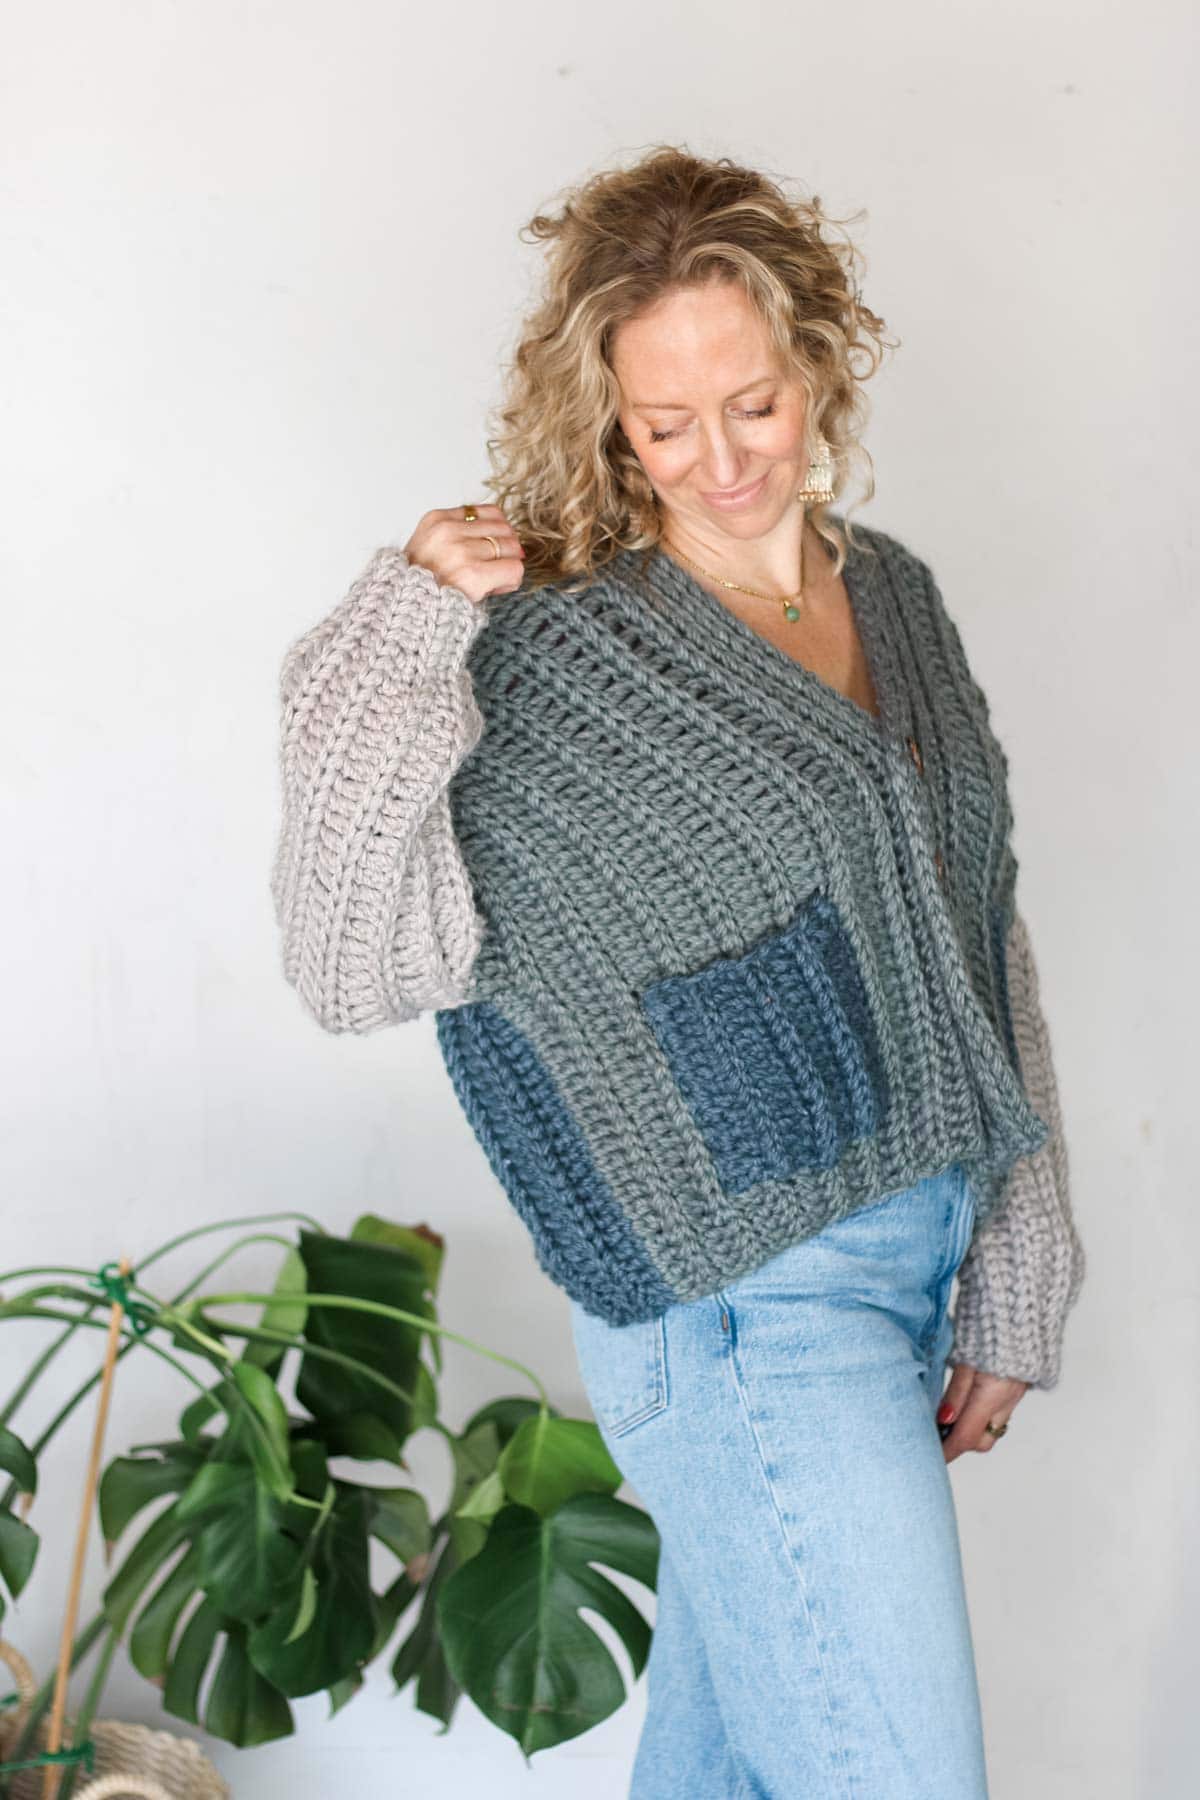
The fastest chunky crochet cardigan pattern you'll find! Designed for speed and style, you can stitch this beauty up in just three days.
The free cardi pattern and video tutorial are below or purchase the ad-free, printable PDF for easy mobile viewing.
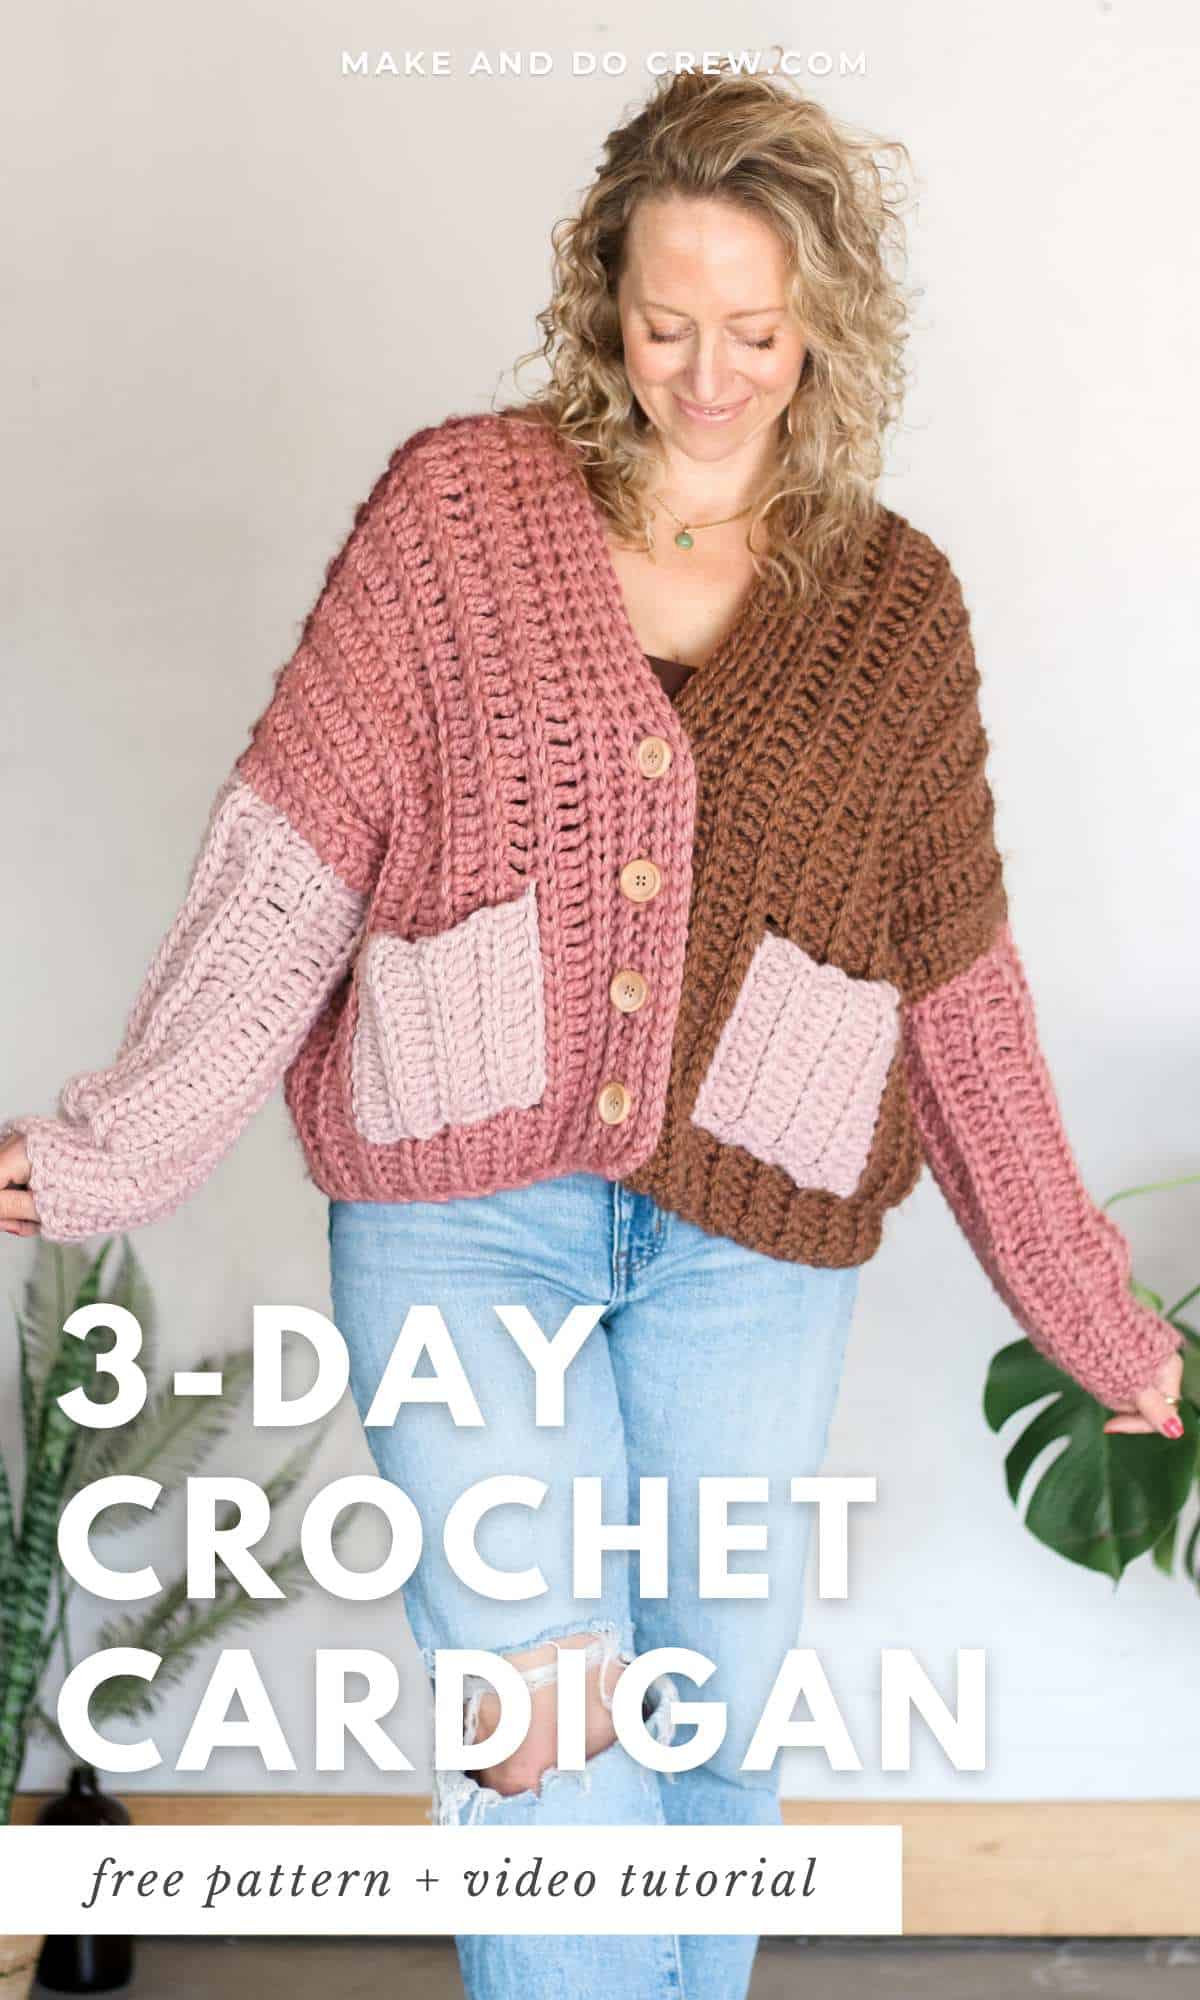
This cozy, oversized cardigan pattern is part of a collaboration with Lion Brand Yarns. This post contains affiliate links.
3 Days to Done Cardigan - Free Pattern
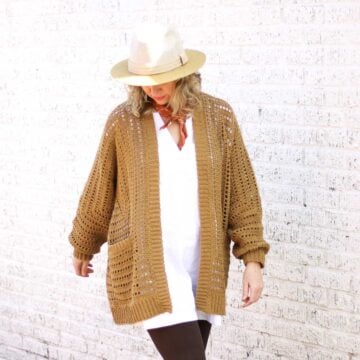
Why wait weeks for a handmade sweater when you can stitch this up in a long weekend? The oversized fit makes it perfect for throwing over any outfit, while the pockets and buttons add both function and flair.
Whether you’re lounging at home or heading out, this knit-look crochet cardigan will become your new throw-on-and-go layer.
Print this Pattern
Prefer to crochet on the couch? Need a portable, printable pattern? You'll love the premium PDF e-book! The instantly downloadable, ad-free file is formatted for easy printing and includes the complete pattern, all the photo tutorials and printable worksheet to plan your color-blocking.
Premium Pattern E-Book
easier and faster with fewer mistakes.
- Complete pattern + photo tutorials
- Color-planning worksheet
- Instant download
- Formatted for easy printing
Supplies + Materials
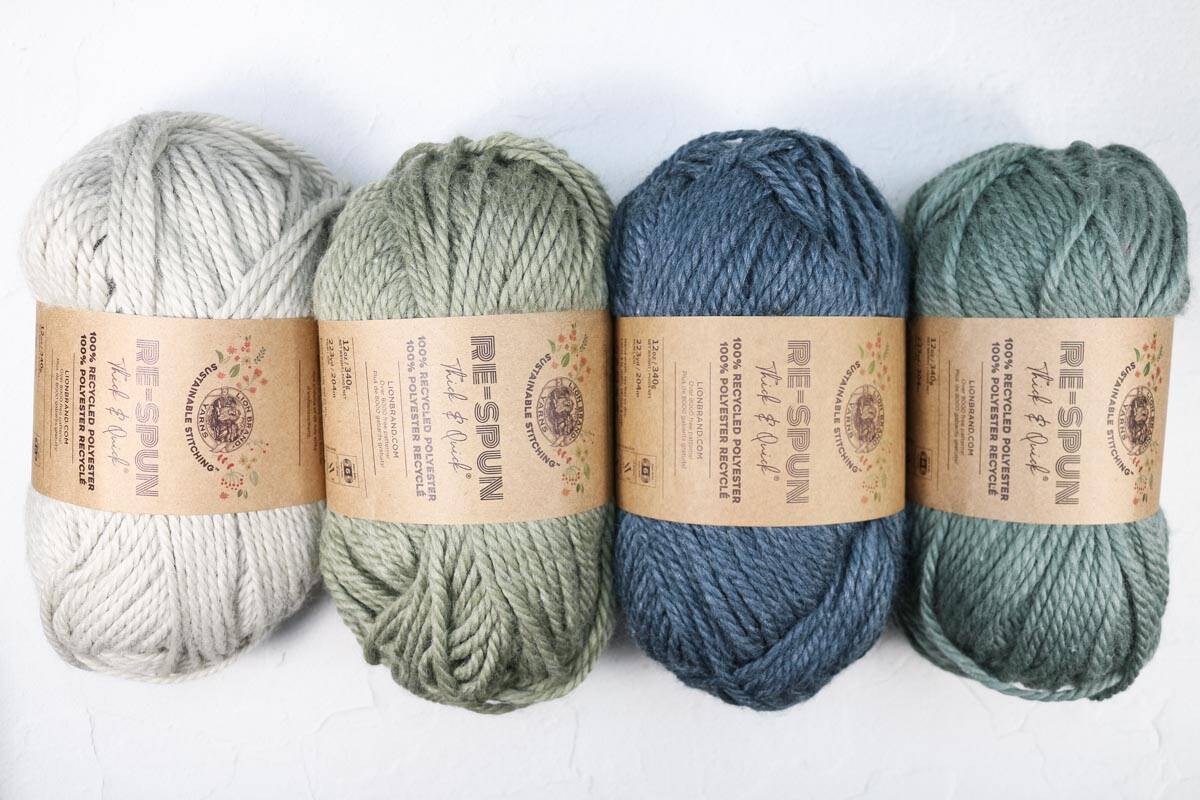
• Lion Brand Re-Spun Thick & Quick (#6/super bulky - 223 yds, 12 oz, 340 g) - 4 (4, 5, 5, 5, 5, 6) skeins (approx. 1070 (1220, 1360, 1420, 1490, 1630, 1810) g)
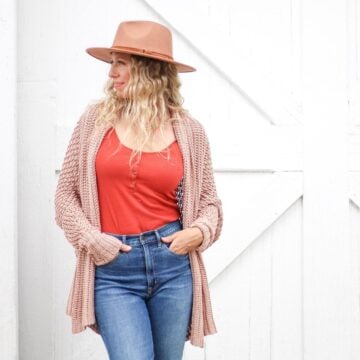
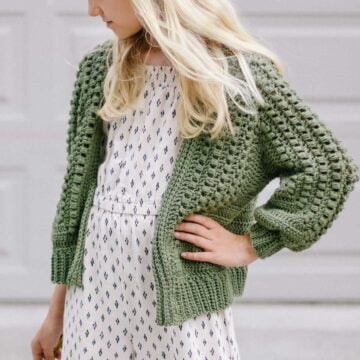
Green Sample Pictured:
- Night Sky [843-110AT]
- Spruce [843-173N]
- Fog [843-151S]
Pink Sample Pictured:
- Sepia Rose [843-101BA]
- Dark Cherry [843-114S]
- Desert Sand [843-102AJ]
• Size N (10 mm) crochet hook or size needed to obtain gauge
Yarn Amounts
Columns list the yarn requirements per panel. Cardigan will require two of each panel.
| SIZE | BACK (g) | FRONT (g) | SLEEVE (g) | POCKET (g) | TOTAL* (g) |
|---|---|---|---|---|---|
| XS/S | 200 | 155 | 140 | 40 | 1070 |
| S/M | 235 | 185 | 150 | 40 | 1220 |
| M/L | 265 | 215 | 160 | 40 | 1360 |
| L/XL | 290 | 215 | 165 | 40 | 1420 |
| XL/2X | 300 | 235 | 170 | 40 | 1490 |
| 2X/3X/4X | 335 | 265 | 175 | 40 | 1630 |
| 4X/5X | 370 | 300 | 195 | 40 | 1810 |
* Total yarn required to make a solid-colored cardigan.
Measurements
| Size | Fits Bust | Sweater Length* | Chest Width* |
|---|---|---|---|
| XS/S | 31” | 20.5” | 25.5” |
| S/M | 35” | 21” | 28.75” |
| M/L | 39” | 21.5” | 32” |
| L/1X | 43” | 21.5” | 35.25” |
| 1X/2X | 47” | 22.5” | 35.25” |
| 2X/3X/4X | 51” | 23” | 38.5” |
| 4X/5X | 59” | 23.5” | 41.5” |
* When laid flat
Gauge
8 stitches = 4”
2 extended double crochet rows + 3 yarn over slip stitch rows = 4”
Abbreviations + Glossary (US Terms)
blo – insert hook through the back loop only
ch – chain
hdc – half double crochet
PM – place marker
rep – repeat
RS – right side
sc – single crochet
slst – slip stitch
sk – skip
st(s) – stitch(es)
WS – wrong side
yo – yarn over
yoslst – yarn over slip stitch
Special Stitches
edc – extended double crochet:
yo, insert hook in designated stitch, yo and pull up a loop [3 loops on hook],
yo and pull through first loop on hook,
yo and pull through two loops on hook [2 loops on hook], yo and pull through two loops on hook [1 loop left on hook]
edc2tog – extended double crochet two together:
yo, insert hook in the designated stitch, yo and pull up a loop [3 loops on hook],
yo and pull through first loop on hook,
yo and pull through two loops on hook [2 loops on hook] yo, insert hook in next stitch, yo and pull up a loop [4 loops on hook],
yo and pull through first loop on hook,
yo and pull through two loops on hook [3 loops left on hook],
yo and pull through all three loops [1 loop left on hook]
Step-by-Step Video Tutorial
Follow along as I show you how to make this sweater step-by-step in the video below.
Skill Level
Advanced Beginner: In this project you'll practice a variation of double crochet, increasing and decreasing, meeting gauge and joining pieces together.
Want some company while you crochet?
Get support (and camaraderie!) in the Make & Do Crew community. Join for free here.
Overall Pattern Notes
- If you’re new to reading crochet patterns, check out more info.
- Instructions are written with the stitch count for the smallest size first and each larger size following in parentheses, for example: XS/S (S/M, M/L, L/1X, 1X/2X, 2X/3X/4X and 4X/5X). It can be very helpful to highlight the numbers for your size before beginning the project. When only one number is given, it pertains to all sizes. Stitch counts at the end of each round are for given sizes.
- When pattern mentions “right back” or “left front,” for example, it’s referring to the side of your body it will be on when worn.
- A marker is placed between the ribbing stitches and the main cardigan stitches as a reminder to work the ribbing section of the row in a different stitch. Using the marker is optional.
- The skipped chains at the beginning of each Row 1 do not count a stitch throughout pattern. Similarly, the turning chains at the beginning of each row do not count as stitches throughout.
- After Row 1, all stitches in pattern are worked under the back loop only. For brevity, this isn’t mentioned in each row. The only exception to this is the last stitch of each row, which is worked under both the middle and back loops to create a cleaner edge.
Permissions + Copyright:
Please do not publish or share this pattern as your own. You may make items to sell with this pattern. In exchange, please link back this post. Do NOT use our photos as your own sales photos.
Gauge Check / Pockets
Please don’t skip this step or you will risk your cardigan not fitting as expected. Once the gauge is met, you can use the swatch as one of your pockets.
Foundation Row: Leaving a 24” tail before the slip knot, ch 15.
Row 1 (RS): Sk 2 ch, edc in each ch; turn. (13)
From this point on, all stitches are worked through the back loop only except for the final stitch. except for the final stitch. except for the final stitch of each row, which is worked under the middle and back loops.
Row 2 (WS): Ch 1, yoslst in each st to end; turn.
Row 3 (RS): Ch 2, edc in each st; turn.
✨Unlock this free subscriber-exclusive pattern ✨
Follow these steps to view the full free pattern below
To complete front panel:
Rep Rows 3 and 4 [3 (4, 5, 5, 5, 6, 7)] more times. (41 (42, 43, 43, 45, 46, 47) sts)
Now, we’ll work in only yarn over slip stitches to create the collar ribbing.
Right handed crocheters: If buttonholes are desired on the left front (traditionally male side) create them in Row 3 of the Ribbing Rows, otherwise buttonholes will be added on the right (typically female) front side.
Left handed crocheters: Add buttonholes on Row 3 of the Ribbing Rows for the right (traditionally female) front side. If you prefer to have buttonholes on the left (typically male) front side, skip "adding button holes" and add them to the left front.
Ribbing Rows 1-6 (6, 6, 8, 8, 8, 8): Ch 1, yoslst in each st; turn.
To add button holes: Counting from the bottom edge of panel, place markers in the 5th, 11th, 17th and 23rd sts. These indicate where buttonholes will be placed, so adjust as desired. (If you adjust the placement, take note of the number of stitches between each buttonhole so you can easily mark where to sew buttons on opposite front panel.
Button Hole Row (RS): Ch 1, yoslst to marker, *ch 1, sk marked st, yoslst in each st to next marker**; rep from * to ** until no marked sts remain, yoslst to end of row; turn.
When working into buttonhole chs in Row 4, yoslst in the back loop of the ch as you do in all other stitches.
At this point, you should have 16 (18, 20, 22, 22, 24, 26) rows and piece should measure approximately 18.5 (18.5, 18.5, 18.5, 19.5, 19.5, 19.5)” (foundation row) x 10.25 (11.75, 13.5, 13.5, 14.25, 15.75, 17.5)” (height of all rows). Fasten off leaving a 24 - 26” tail.
Left Back + Right Front
(Left Handed: Right Back + Left Front)
Follow the instructions below to make one back and one front panel.
Foundation Row: Leaving a 24 - 26” tail before the slip knot, ch 38 (38, 38, 38, 39, 39, 39).
Row 1 (RS): Sk first ch, hdc in next 5, PM, edc in each remaining ch to end; turn. (37 (37, 37, 37, 38, 38, 38) sts)
From this point on, all stitches are worked through the back loop only except for the final stitch.
Row 2 (WS): Ch 1, yoslst in each st to end; turn.
Row 3 (RS inc): Ch 1, hdc in first 5 sts, edc until 1 st remains, 2 edc in last st; turn. (38 (38, 38, 38, 39, 39, 39) sts)
Row 4 (WS): Rep Row 2.
To complete back panel:
Rep Rows 3 and 4 [3 (4, 5, 5, 5, 6, 7)] more times. (41 (42, 43, 43, 45, 46, 47) sts)
Now, we’ll work without increasing at the end of each odd-numbered row.
Row 1 (RS): Ch 1, hdc in first 5 sts, edc each st to end; turn. (41 (42, 43, 43, 45, 46, 47) sts)
Row 2 (WS): Ch 1, yoslst in each st to end; turn.
Rep Rows 1 and 2 [2 (2, 2, 3, 3, 3, 3)] more times.
At this point, you should have 16 (18, 20, 22, 22, 24, 26) rows and piece should measure approximately 18.5 (18.5, 18.5, 18.5, 19.5, 19.5, 19.5)” (foundation row) x 12.75 (14.5, 16, 17.5, 17.5, 19.25, 20.75)” (height of all rows). Fasten off leaving a 24 - 26” tail.
To complete front panel:
Rep Rows 3 and 4 [3 (4, 5, 5, 5, 6, 7)] more times. (43)(41 (42, 43, 43, 45, 46, 47) sts)
Now, we’ll work in only yarn over slip stitches to create the collar ribbing. If buttonholes were added on previous front, skip “adding button holes” here.
Right-handed crocheters: If buttonholes are are desired on the right front (traditionally female) create them in Row 3 (3, 3, 5, 5, 5, 5) of the Ribbing Rows.
Left handed crocheters: If buttonholes are are desired on the left front (traditionally male) create them in Row 3 (3, 3, 5, 5, 5, 5) of the Ribbing Rows.
Ribbing Rows 1-6 (6, 6, 8, 8, 8, 8): Ch 1, yoslst in each st; turn.
To add button holes: Counting from the bottom edge of panel, place markers in the 5th, 11th, 17th and 23rd sts. These indicate where buttonholes will be placed, so adjust as desired. (If you adjust the placement, take note of the number of stitches between each buttonhole so you can easily mark where to sew buttons on opposite side.)
Button Hole Row (RS): Ch 1, yoslst to marker, *ch 1, sk marked st, yoslst in each st to next marker**; rep from * to ** until no marked sts remain, yoslst to end of row; turn.
When working into buttonhole chs in Row 4, yoslst in the back loop of the ch as you do in all other stitches.
At this point, you should have 16 (18, 20, 22, 22, 24, 26) rows and piece should measure approximately 18.5 (18.5, 18.5, 18.5, 19.5, 19.5, 19.5)” (foundation row) x 10.25 (11.75, 13.5, 13.5, 14.25, 15.75, 17.5)” (height of all rows). Fasten off leaving a 24 - 26” tail.
Sleeves
Follow the instructions below to make two sleeves. As written, sleeves are long and create an oversized look. For shorter sleeves, eliminate 4-5 chains from foundation row.
Note: You may notice that larger sizes have shorter sleeves. This is intentional because the width of the main sweater body is larger to begin with.
Foundation Row: Leaving a 24 - 26” tail before the slip knot, ch 36 (33, 31, 28, 29, 26, 23).
Increasing:
Row 1 (RS): Sk 2 ch, 2 edc in third ch from hook, edc in each ch until 7 remain, PM, hdc each of next 2 ch, sc in last 5 chs; turn. (35 (32, 30, 27, 28, 25, 22) sts)
From this point on, all stitches are worked through the back loop only except for the final stitch.
Row 2 (WS): Ch 1, yoslst in each st to end; turn.
Row 3 (RS inc): Ch 2, 2 edc in first st, edc in each st until 7 remain, hdc each of next 2 sts, sc in last 5 sts; turn. (36 (33, 31, 28, 29, 26, 23)
Row 4 (WS): Rep Row 2.
Rep Rows 3 and 4 [1 (1, 2, 2, 2, 3, 4)] more times. (37 (34, 33, 30, 31, 29, 27) sts)
Working Even:
Row 5 (RS): Ch 2, 1 edc in each st until 7 sts remain, hdc each of next 2 sts, sc in last 5 sts; turn. (37 (34, 33, 30, 31, 29, 27) sts)
Row 6 (WS): Rep Row 2.
Rep Rows 5 and 6 [0 (1, 0, 1, 1, 0, 0)] more times.
Decreasing:
Row 7 (RS dec): Ch 2, edc2tog over first 2 sts, edc in each st until 7 remain, hdc each of next 2 sts, sc in last 5 sts; turn. (36 (33, 32, 29, 30, 28, 26) sts)
Row 8 (WS): Rep Row 2.
Rep Rows 7 and 8 [2 (2, 3, 3, 3, 4, 5) more times. (34 (31, 29, 26, 27, 24, 21) sts)
At this point, you should have 14 (16, 18, 20, 20, 22, 26) rows and piece should measure approximately 17.5 (16, 15, 13.5, 14, 12.5, 11)” (foundation row) x 11.25 (12.75, 14.5, 16, 16, 17.5, 20.75)” (height of all rows). Fasten off leaving a 24” tail.
Our Latest Crochet Inspiration:
Here are a few more free crochet patterns and tutorials that are hot off the presses.

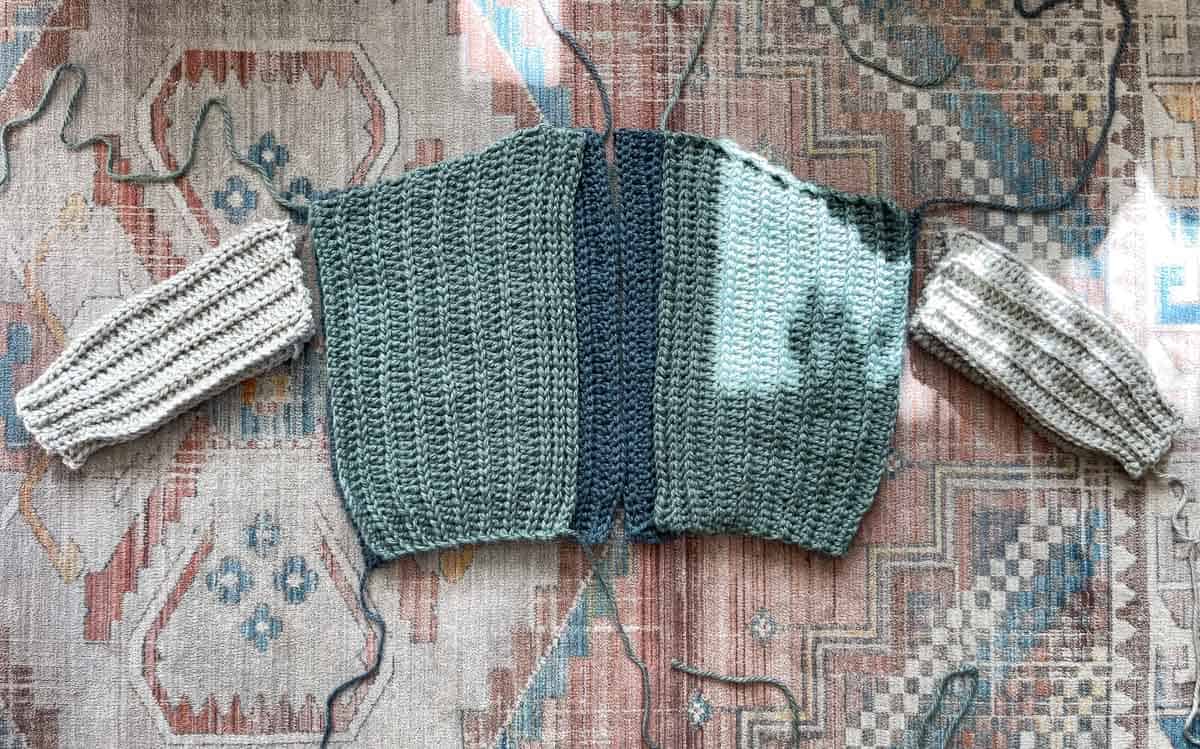
Joining
All joining is done with a tapestry needle and existing yarn tails. At the end of each seam, weave in the tail and cut yarn. Pin panels together with stitch markers before seaming to ensure stitches on each panel are lined up.
See video tutorial above and photos at end of pattern PDF for visual explanation of these steps.
1. Joining Back Panels
Wanna save this pattern?
With WS of panels facing up and last row of each panel touching, pin in place. Whip stitch together, working through only the loop that’s facing up on each panel.
2. Joining Shoulders
With WS of each panel together, pin shoulder slope of front and back panels together. Take care to line up yoslst rows when pinning. Zig zag stitch panels together.
Repeat on opposite side of sweater.
3. Joining Sleeves at Shoulder
Place a stitch marker in center of sleeve panel along shoulder edge. This indicates where sleeve should align with shoulder seam. Pin sleeve to front and back panels. To create the smoothest seam possible, sleeve should be seamed over 17 (16, 16, 14, 14, 13, 11) stitches of front and 17 (16, 16, 14, 14, 13, 11) stitches of back. Zig zag stitch sleeve in place.
Repeat on opposite side of sweater.
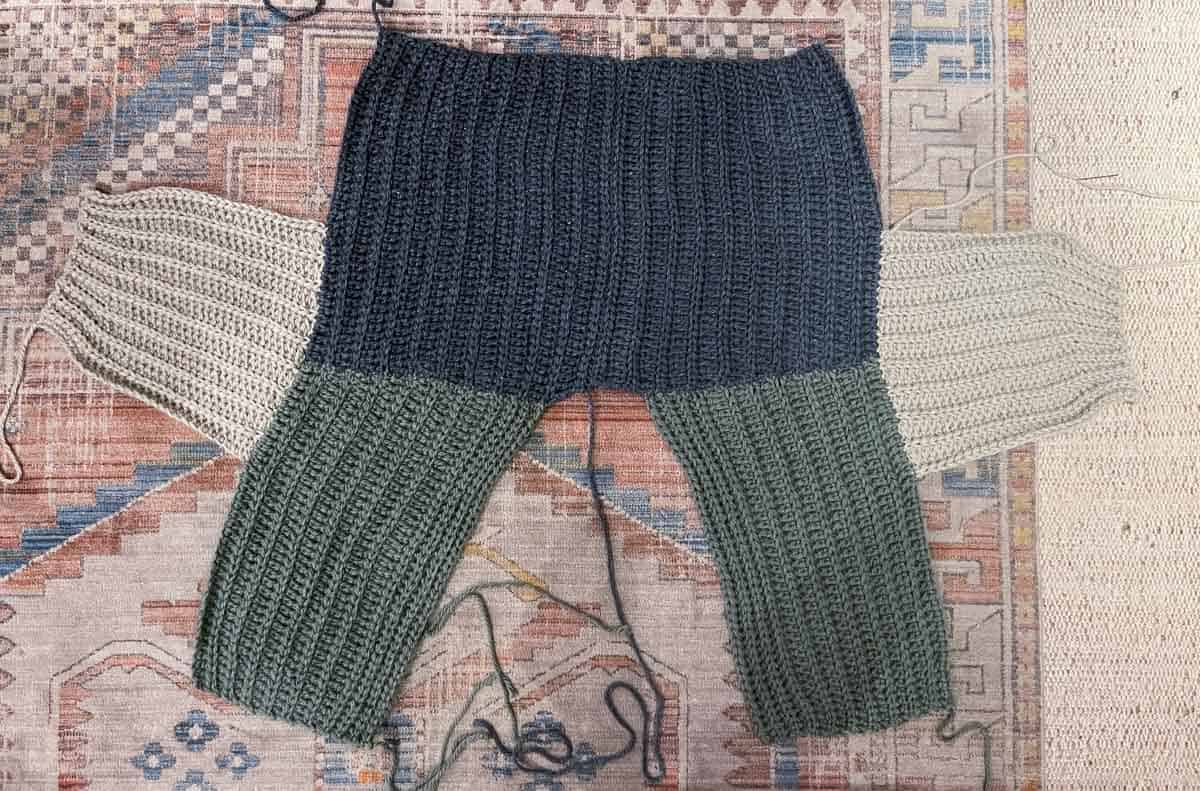
4. Seaming Sleeves
With RS of sleeve facing out, pin last sleeve row to foundation chain row taking care to line up sts. Use a running stitch to join sleeve edges together.
5. Seaming Sides
With RS of panels facing out, pin front and back panel together at side, below armhole. Use a zig zag stitch to seam, working under the post of each double crochet as you go.
6. Joining Pockets
Pin pocket on cardigan front so that the rows of each edc and yoslst align. It’s important the foundation row of pocket faces the side seam so that pocket stitches are in same direction as the cardigan.
To check that pocket is straight, ensure there are the same number of stitches under pocket visible in each front panel row.
Use a running stitch to seam three sides of pocket. Repeat for second pocket.
7. Adding Buttons
On panel that does not include buttonholes: In the “ditch” between the four vertical bars of collar ribbing, place markers in the 5th, 11th, 17th and 23rd sts counting from bottom edge. These markers should line up with buttonholes on opposite front panel.
Use a sewing needle and thread that matches buttons, sew a button to each marked stitch.
Finishing
Weave in any remaining ends: There shouldn’t be many!
Blocking: Once all ends are woven in, do a light steam blocking using either a steamer or iron with steam setting. Focus on any areas that aren’t laying as flat as you’d like, such as front collar ribbing or seams. Do not touch steamer or iron directly to yarn.
Toss on your new favorite cardi—fast hooks and cozy looks for the win!
Invitation to our Private Community
Come discuss crocheting garments and lots of other projects and techniques in our Make & Do Crew community. Here thousands of helpful crocheters answer each other's questions and share their stitches. Join us!
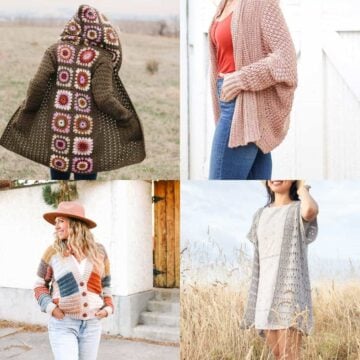
More Free Cardigan Patterns
We'd love to help you build the handmade wardrobe of your dreams! Here are some projects to consider making next.
- Nearly Seamless Crochet Cardigan - Easy Free Pattern
- Easy C2C Crochet Cardigan Pattern Made From Rectangles
- 20 Crochet Hexagon Cardigans + Sweaters for Beginners
- Modern Crochet Granny Square Cardigan - Free Pattern + Videos
- How to Crochet a Patchwork Cardigan Free Pattern + Tutorial
- Child's Crochet Hexagon Cardigan Pattern With Toddler Sizes


Leave a Reply