This packable granny square bucket hat crochet pattern offers a modern take on a classic motif. The free pattern is below or you can purchase the ad-free, printable PDF here.
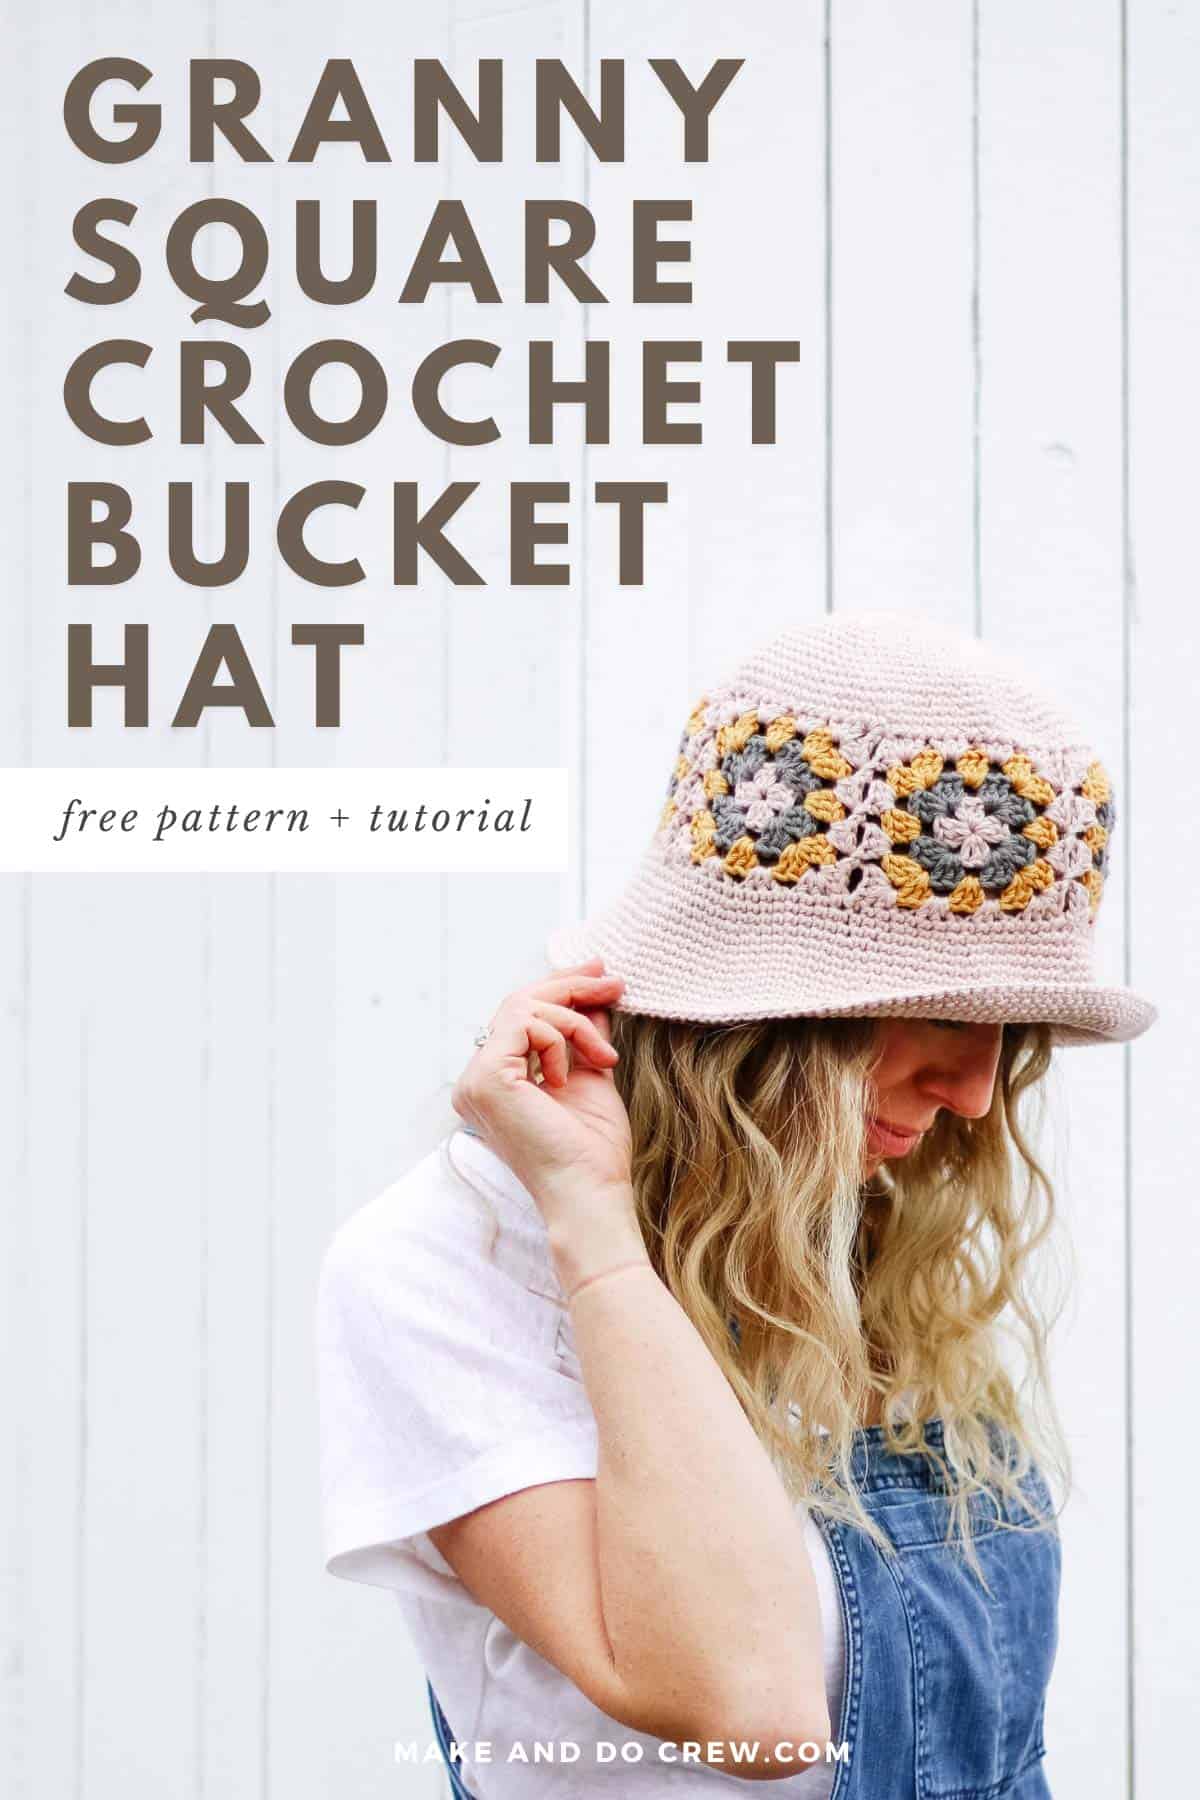
This free granny square bucket hat crochet pattern is part of a collaboration with Lion Brand Yarns. This post contains affiliate links.
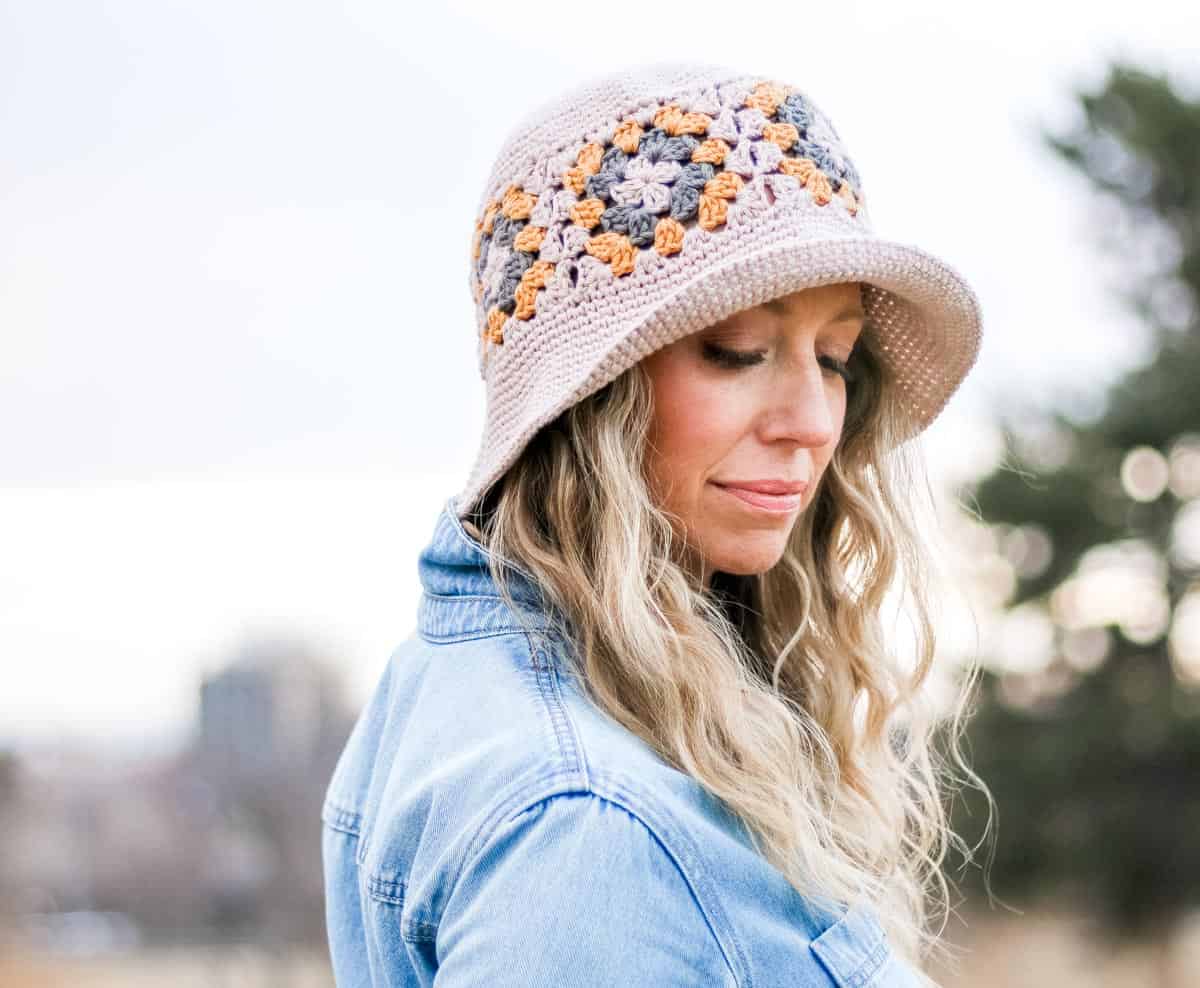
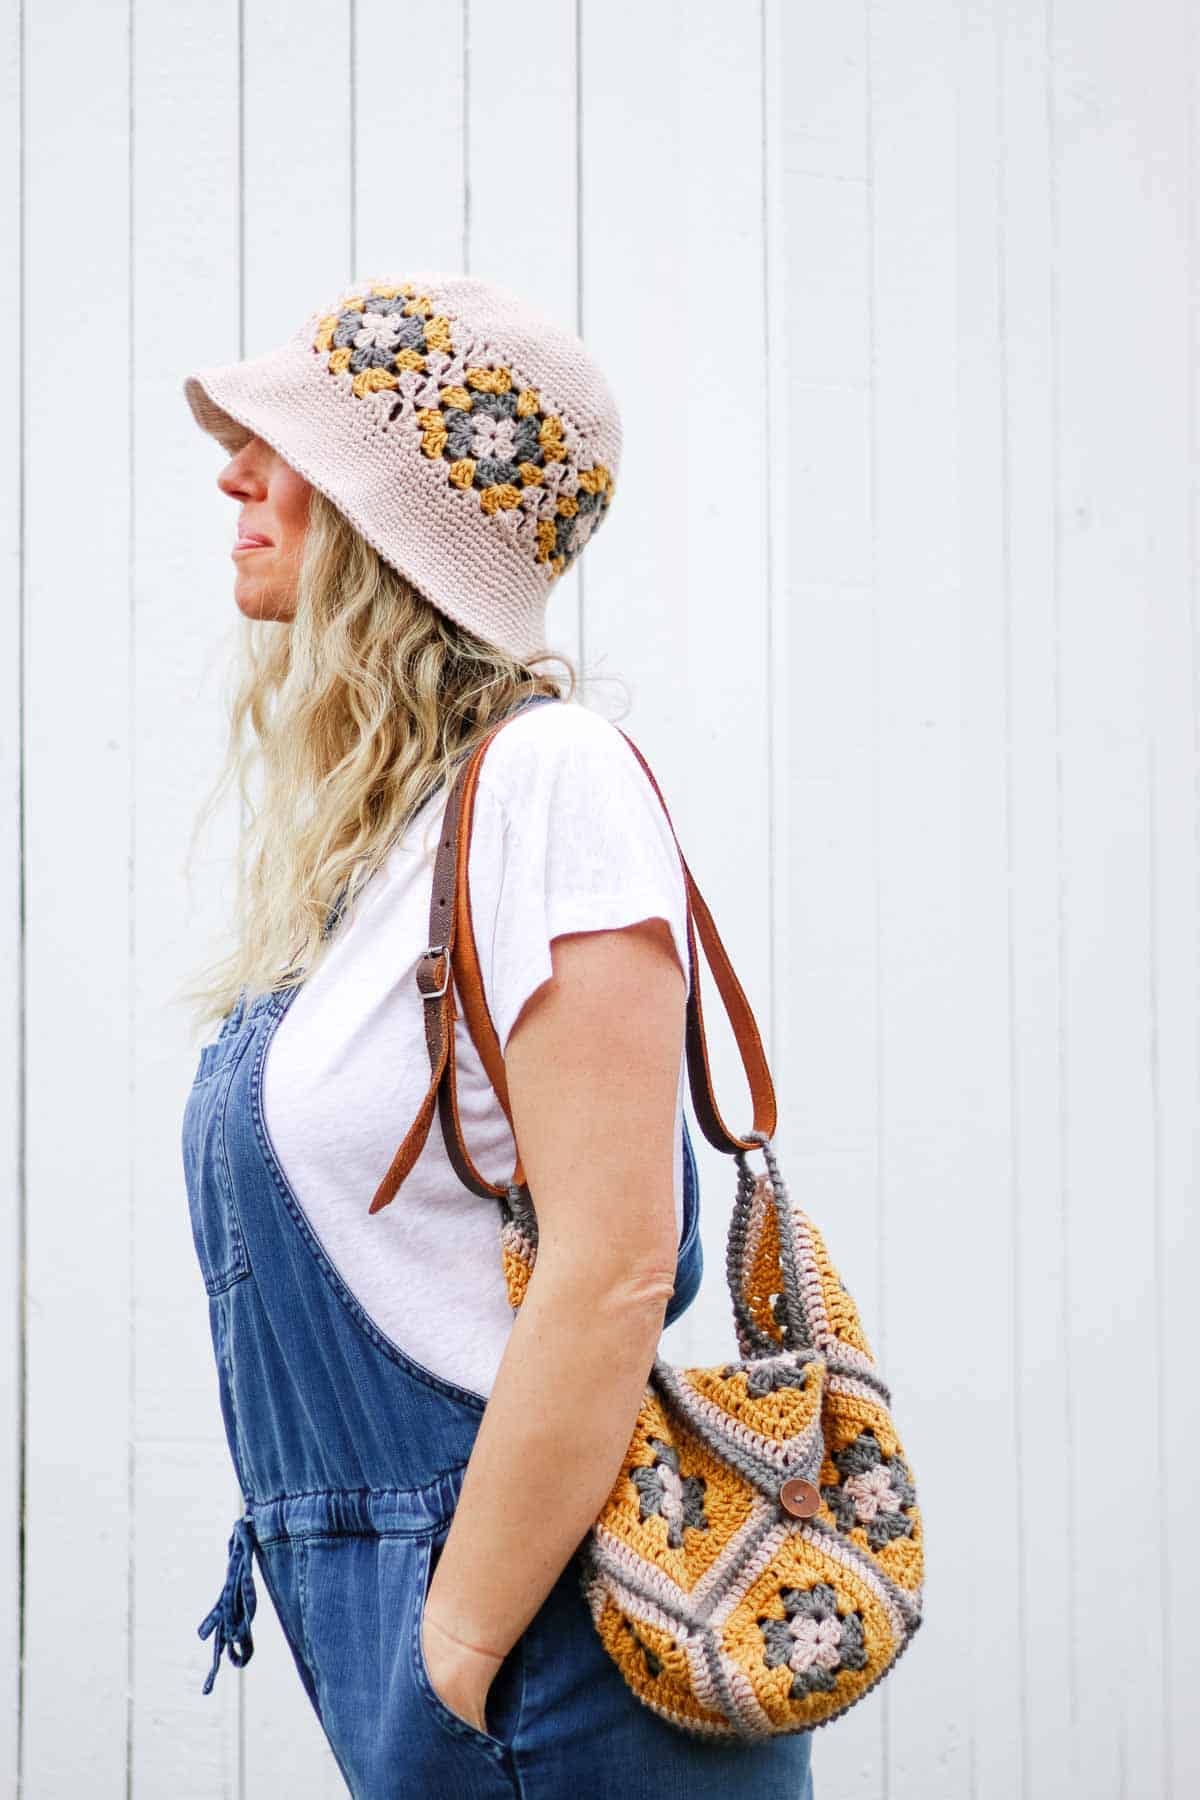
Iconic squares accent this packable crochet granny hat for a look that’s both nostalgic and current. Flip the brim for a cute peek-a-boo or wear it down for maximum shade.
Keep reading for granny square frequently asked questions and yarn details or scroll down for the free Halcyon granny square bucket hat pattern.
Don’t miss the coordinating Halcyon Granny Square Bag pattern here.
Related: 30+ Free Crochet Top Patterns for Warm Weather
Video overview
If you want to know how to crochet a granny square bucket hat step-by-step, watch the brief video below to see the entire process in 60 seconds. Watch how the pattern comes together as you prepare to crochet your own granny hat!
(If you have an ad-blocker running, you’ll need to disable it to view the video.)
Related: Step-by-Step Daisy Granny Square Tutorial
Granny square hat FAQs
If you’re new to crocheting granny squares, they’re pretty great because each round simply builds on top of the “spaces” in the round before. Your previous round is a guide for your next round, so they’re simple to follow and quite easy to see when you’ve made a mistake.
In this pattern, you’ll get to practice crocheting a traditional granny square motif.
You’ll learn join as you go crochet techniques to seam the squares together (so fun!) and then how to increase at different rates to make the top and brim of the bucket hat.
This bucket hat pattern uses six crochet granny squares to make the hat.
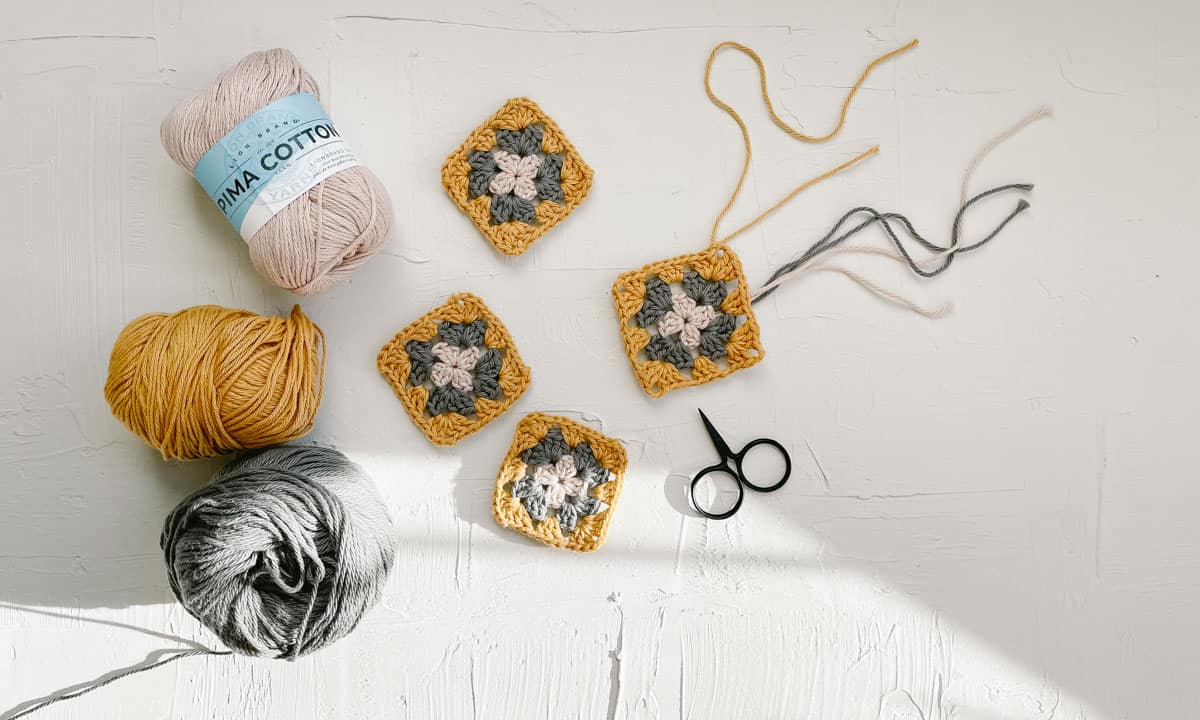
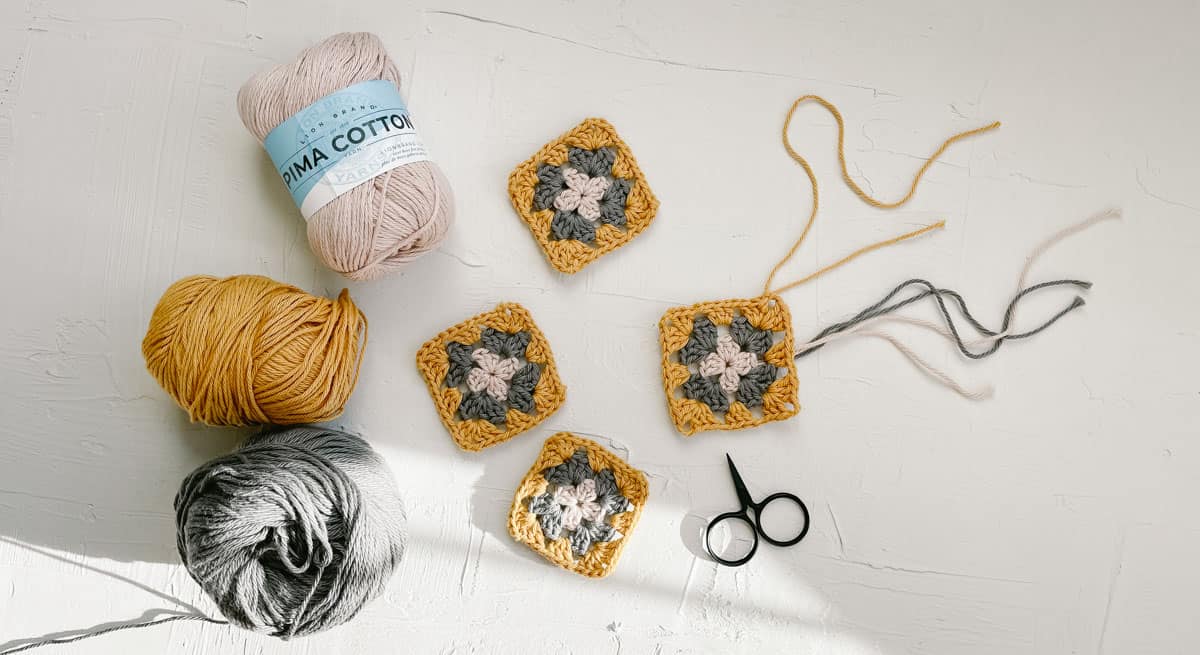
The Halcyon granny square bucket hat uses Lion Brand’s Pima Cotton, which we also used in this granny square bag. The softness of this cotton makes for a really comfortable, packable hat. The colors of Pima Cotton are beautiful muted shades and pair effortlessly together. You may not be able to stop at just one Halcyon!
RELATED: How to Shop Your Stash: The Best Patterns for Using the Yarn You Have
Absolutely! For a longer, floppier brim, you can work additional rounds in the brim section. Keep in mind this will require more yarn than what’s listed in the pattern. For a shorter brim, simply reduce the number of brim rounds.
The look of this granny square bucket hat can be changed quite a bit by the colors you choose. Stick to one solid color throughout for a more streamlined look.
A solid oatmeal-colored hat will look understated and modern, while a seven color scrap-buster cap will catch the eye of everyone at the beach.
Related: 35+ Easy Chunky Crochet Hat Patterns
You might also love:
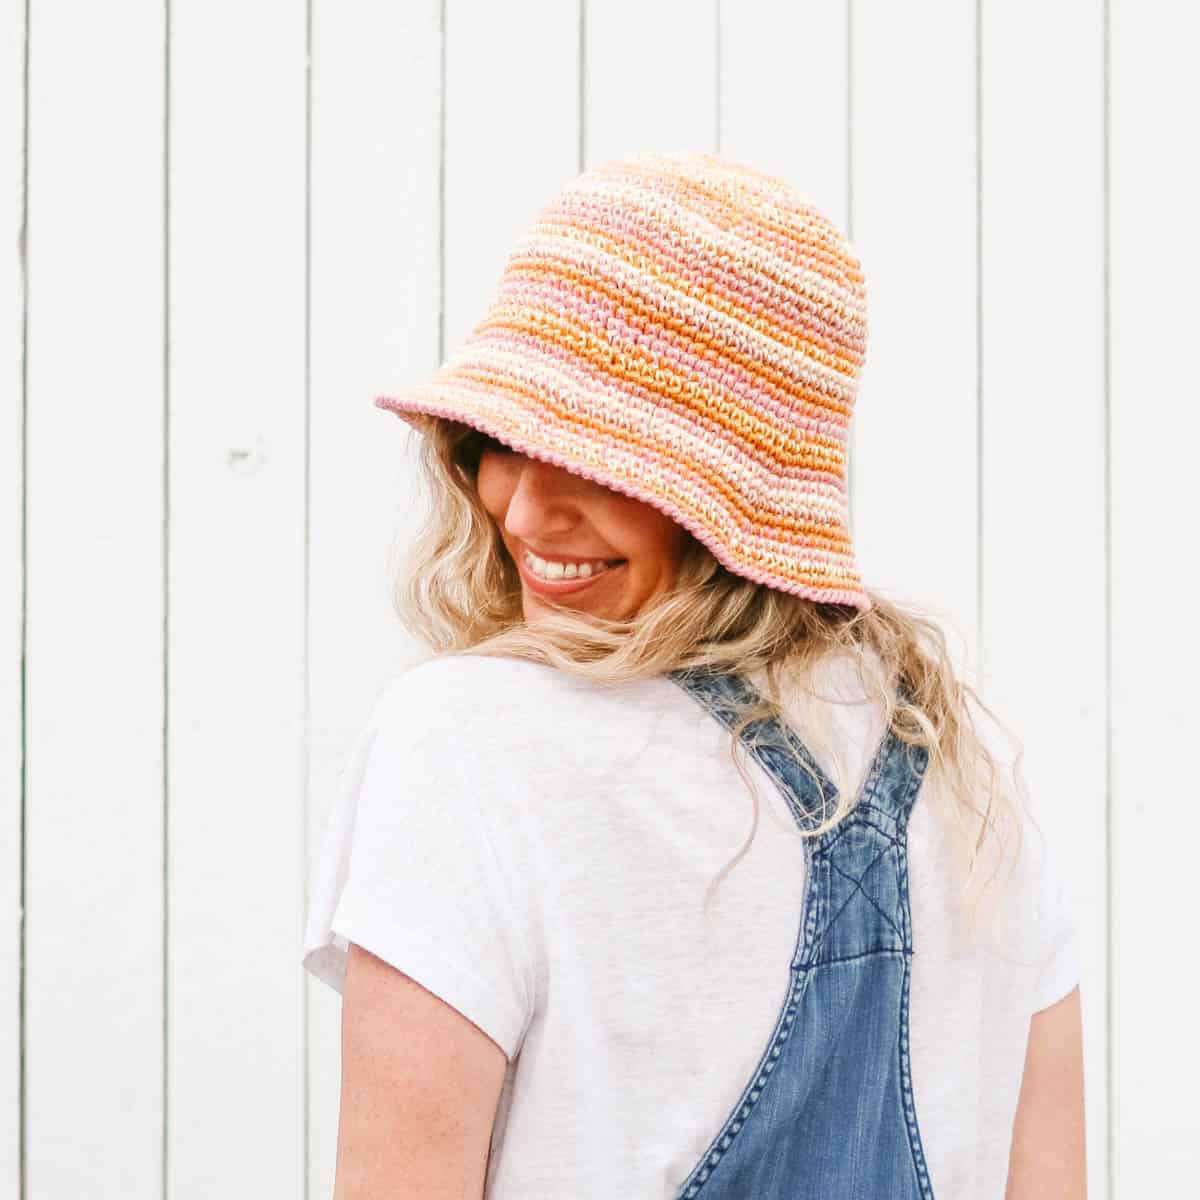
The Scrappy Bucket hat
- Made entirely with single crochet
- Packable, yet structured
- Perfect for using up stash yarn
Yarn + substitutions
Most worsted weight cotton yarns will substitute well in this granny square bucket hat crochet pattern, but be sure to check your gauge with the included instructions. This is what will help guarantee your hat turns out the size you expect!
And if Lion Brand’s Pima Cotton is not available near you, you can check YarnSub.com for similar suggestions.
Related: 30+ Free Crochet Dress Patterns: Beginner to Advanced
All-in-one crochet kit
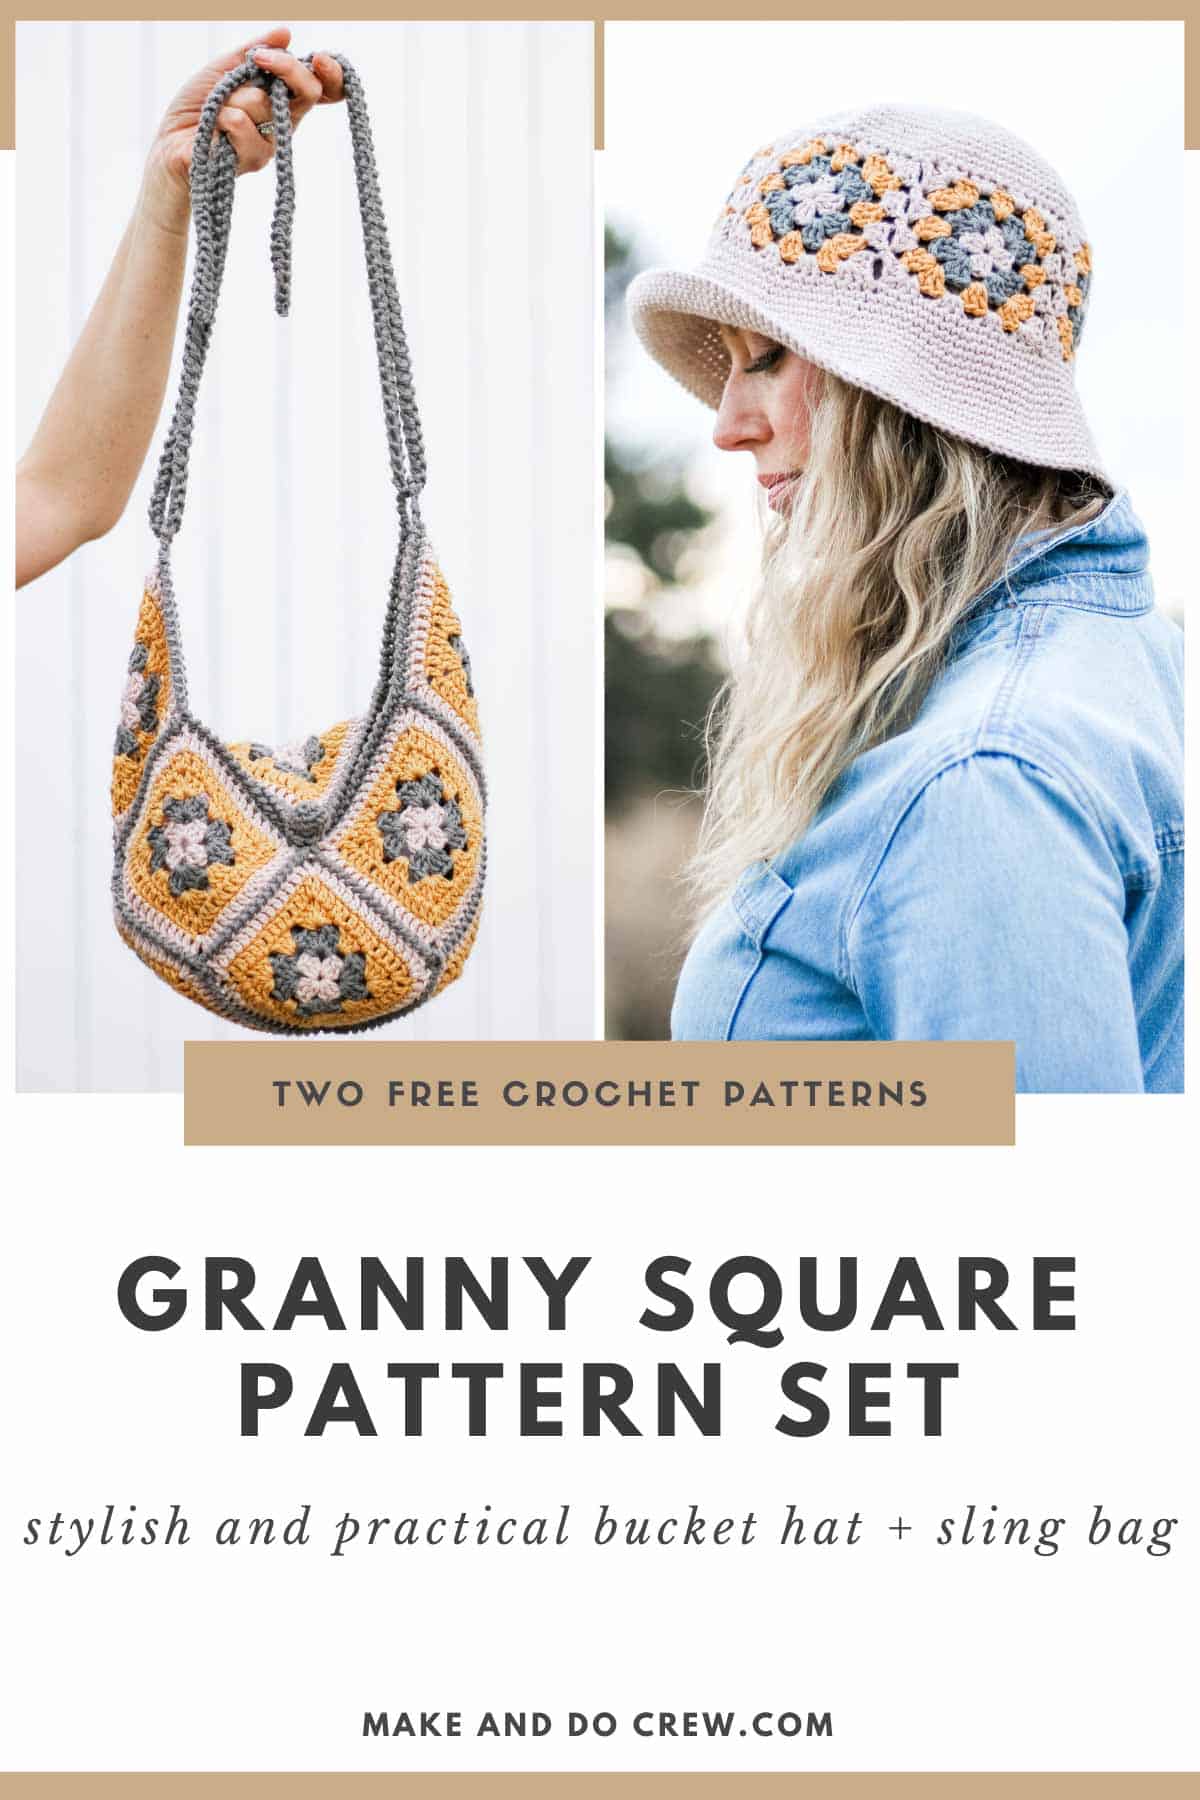
If you don’t live near amazing yarn stores or if you just like to get fun packages in the mail, the all-in-one Halcyon Hat and Bag crochet kit is a perfect way to get your supplies.
This bundle from Lion Brand includes all the Pima Cotton you’ll need to make BOTH the hat and the bag, plus a free printable PDF of each pattern (delivered digitally).
This kit in particular is a lot of stylish crochet fun for your yarn-buying buck!

Print this pattern
We know many people like to work from a paper copy of their crochet pattern. This is why we love offering our patterns in large-type, ad-free PDFs that are formatted for easy printing.
The ad-free PDF includes the complete written pattern and all the photo tutorials in one easy printable document. Purchase the Halcyon Bag PDF here.
If you’d like to bundle both the Halcyon Bag and Bucket Hat patterns, you can purchase that PDF here.
Upgrade to the premium PDF
Formatted for easy printing + couch crocheting
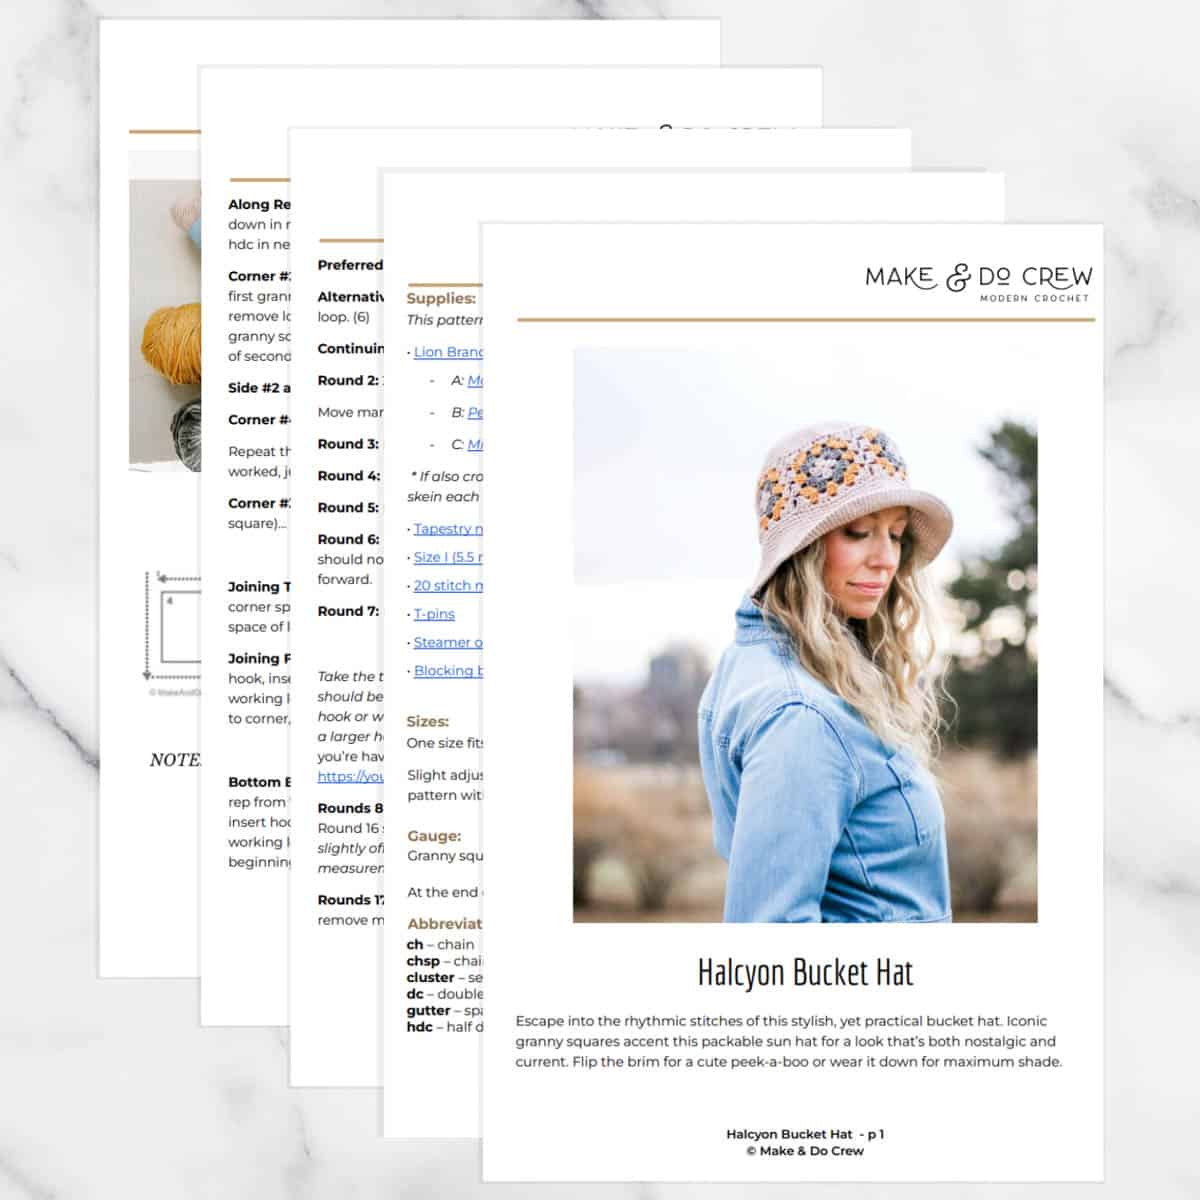
Halcyon Crochet Granny Square Bucket Hat
Free Pattern
Explanation: Escape into the rhythmic stitches of this stylish, yet practical bucket hat. Iconic granny squares accent this packable sun hat for a look that’s both nostalgic and current. Flip the brim for a cute peek-a-boo or wear it down for maximum shade.
Supplies:
Order an all-in-one kit from Lion Brand here.
• Lion Brand Pima Cotton (Weight: 4/medium – 186 yds, 3.5 oz/100 g)
– Color A: Mademoiselle [762-184P] – 2 balls (approx. 115 g)
– Color B: Pewter [762-152B] – 1 ball (approx. 12 g)
– Color C: Mineral Yellow [762-159S] – 1 ball (approx. 16 g)
* If also crocheting the Halcyon Granny Square Bag, two total skeins of Color A and 1 skein each of Color B and C will be enough to make both projects.
• Tapestry needle
• Size I (5.5 mm) crochet hook or size needed to obtain gauge
• 20 Stitch markers
• T-Pins
• Steamer or iron with steam function (alternative: use a spray bottle)
• Blocking board
Measurements:
One size fits most – approx 22” circumference.
Slight adjustments up or down in sizing can be accomplished by working the pattern with a smaller or larger hook.
Gauge:
Granny squares should measure 3 x 3″
At the end of Round 7, circle should measure 3”
Abbreviations and Glossary (US Terms):
ch – chain
chsp – chain space
cluster – set of three stitches
dc – double crochet
gutter – space between granny square join
hdc – half double crochet
rep – repeat
RS – right side
sc – single crochet
sk – skip
slst – slip stitch
st(s) – stitch(es)
WS – wrong side
Permissions + Copyright:
Please do not publish or share this pattern as your own. You may make items to sell with this pattern. In exchange, please link back this post. Do NOT use our photos as your own sales photos.

Print the premium pattern!
Overall Pattern Notes:
• If substituting yarn of a different weight, follow measurement notes throughout instead of the number of rounds given. Simply work as many rounds for each square as it takes to meet the approximate pattern measurements.
Circular Top
Notes:
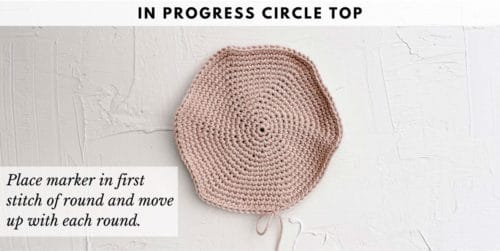
• Circle is worked in the round with the RS facing throughout. Rounds are spirals and therefore are not joined at the end of each.
• Place marker in first stitch of round and move as each round is worked. This is critical in keeping track of the beginning/end of each round.
• Similarly, optional markers are used beginning in Round 6 to keep track of where increases are placed. Move markers up as each round is worked. Use a different color marker for the first st of round and the increases to differentiate.
• IMPORTANT: Stitches are intended to be worked tightly to create a structured fabric. If in doubt, use a smaller hook to achieve tighter tension. Circle is measured several rounds in to ensure gauge.
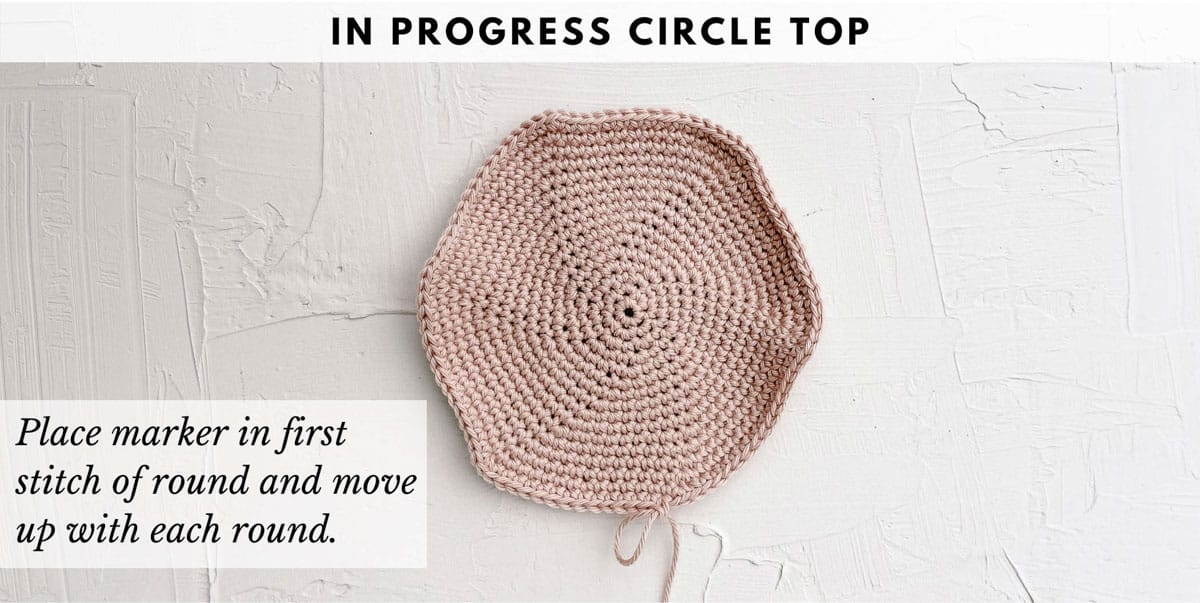
With color A:
Preferred Foundation Round: Create a magic loop, ch 1 and work 6 sc within. (6)
Alternative Foundation Round: Ch 4, sl st to join into a loop. Ch 1, work 6 sc within loop. (6)
Continuing in spiral:
Round 2: 2 sc in first st (PM in first sc made), 2 sc in each st. (12)
Move marker to first st of each round from here forward.
Round 3: [2 sc in next st, sc in next st] 6 times. (18)
Round 4: [2 sc in next st, sc in next 2 sts] 6 times. (24)
Round 5: [2 sc in next st, sc in next 3 sts] 6 times. (30)
Round 6: [2 sc in next st (PM in first sc made), sc in next 4 sts] 6 times. (36) Piece should now have 6 marked stitches. These indicate the stitches to increase in moving forward.
Round 7: [2 sc in marked st, sc in each st to next marker] 6 times. (42)
Want some company while you crochet?
Get support (and camaraderie!) in the Make & Do Crochet Crew Facebook Group.
! Gauge Check !
IMPORTANT: Take the time to measure your circle now so that your hat fits later! Your circle should be just over 3” across.
If it’s much larger than 3”, remake either with a smaller hook or working your stitches more tightly. If it’s smaller than 3”, remake either with a larger hook or working your stitches more loosely. This video tutorial is incredibly helpful if you’re having trouble achieving the correct vertical gauge.
Rounds 8-16: Rep Round 7 nine more times. Piece should increase by 6 sts per round. Round 16 should contain 96 sts. Circle should measure 6.7” across. (If measurement slightly off, add or eliminate a round in the next section of working even. If measurement is off more than about .3”, adjust hook size and remake circle.)
Rounds 17-19: Sc in each sc. (96) Fasten off leaving a 40” tail for seaming. Do not remove markers.
You might also love:
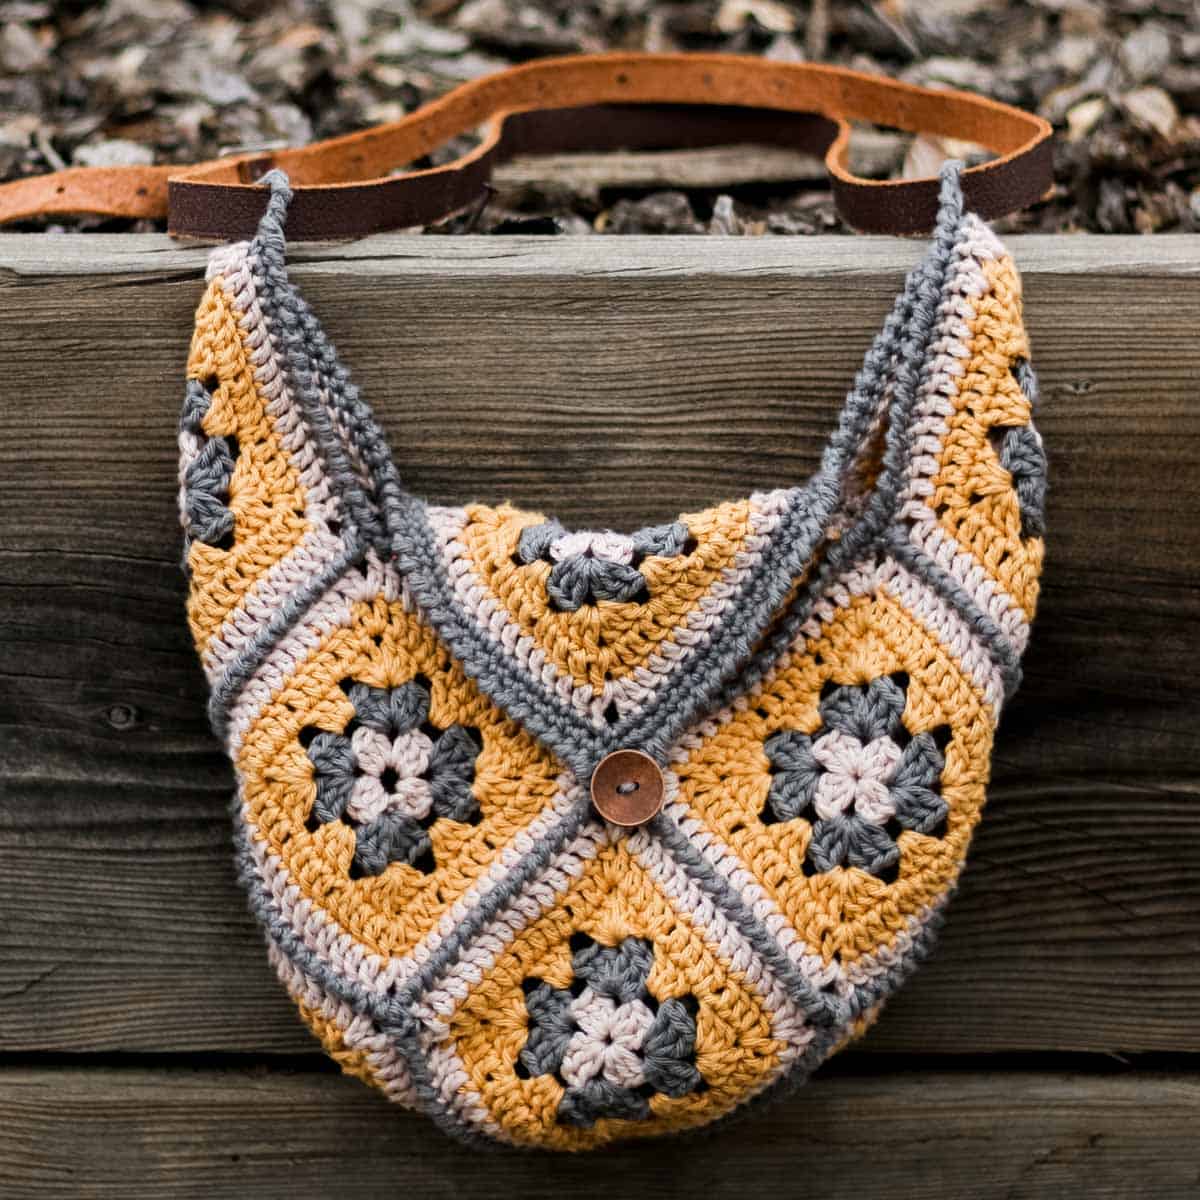
The Halcyon Bag
- Fun construction
- Sturdy strap
- Multiple ways to wear
Granny Squares
Notes:
• Granny squares are worked in the round with the RS facing throughout.
• Because hat is not reversible, consider tightly tying yarn tails together and fastening off instead of weaving in ends. (Of course, if you’re a purist, grab your tapestry needle and go to town!)
• Ch 3 counts as 1 dc.
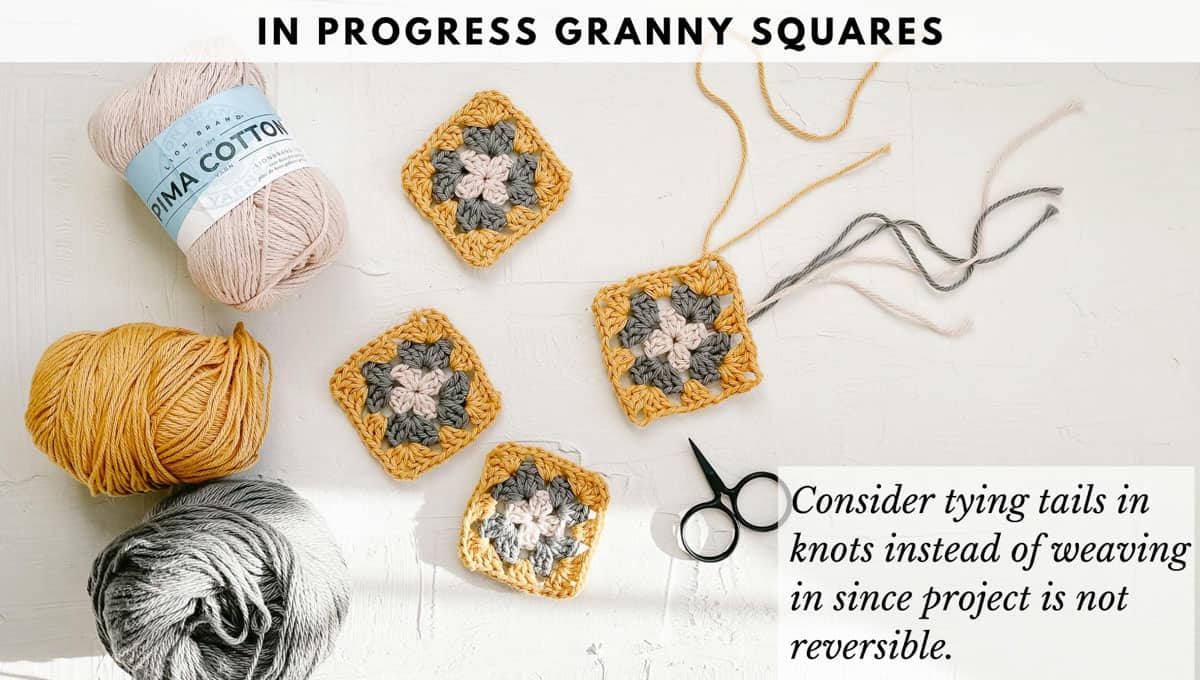
Make 6 squares.
With color A:
Wanna save this pattern?
Preferred Foundation: Create a magic loop.
Alternative Foundation: Ch 4, slst to join into a loop.
Round 1 (RS): Ch 3 tightly, 2 dc in loop, ch 1, [3 dc in loop, ch 1] three times; slst to top of ch from beginning of round to join. Fasten off. (1 cluster per side)
Join Color B in any ch1sp.
Round 2 (RS): Ch 3 tightly, 2 dc in same sp, ch 2, 3 dc in same sp (corner made), ch 1, [3 dc, ch 2, 3 dc, ch 1] in three remaining ch1sps, slst to top of ch from beginning of round to join. Fasten off. (2 clusters per side)
Join Color C in any ch2sp.
Round 3 (RS): Ch 3 tightly, 2 dc in same sp, ch 2, 3 dc in same sp, ch 1, [3 dc, ch 1] in next ch1sp, *[3 dc, ch 2, 3 dc, ch 1] in corner ch2sp, [3 dc, ch 1] in next ch1sp; rep from * twice more. Fasten off. (3 clusters per side)
Each square should measure 3” across. If sizing is off, adjust hook size and remake until accurate measurement is reached. This is essential for ensuring finished hat measures as expected.
More Free Crochet Sun Hat Patterns:
Here are a few crochet sun patterns makers love and we think you will too!
Blocking Granny Squares
Taking the time to block your squares now will result in a tidier-looking bag.
Use T-pins to pin each square down to a blocking board or other surface. Block all squares to a standard size, approximately 5” X 5”. Steam block squares using steamer or iron, taking care not to touch yarn directly.
Joining Squares
Notes:
• Squares are joined using a join as you go method that creates zero extra ends to weave in. Hooray!
• Watch a video tutorial on this joining method here. (Note: the video uses double crochet stitches, but this hat pattern uses half double crochet stitches to join.)
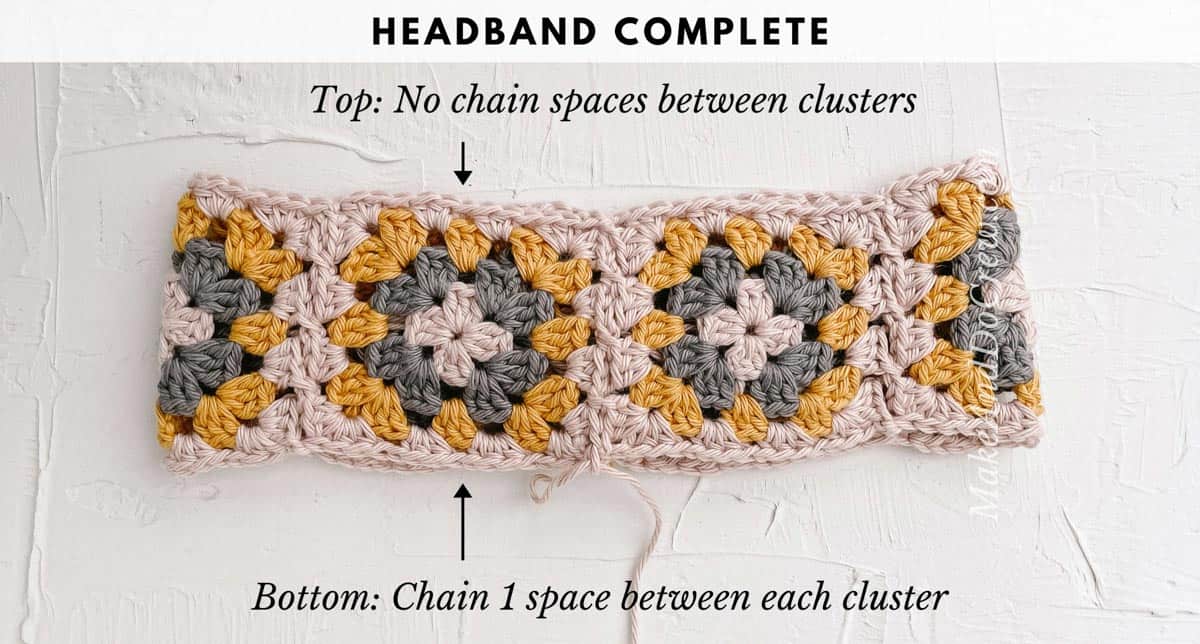
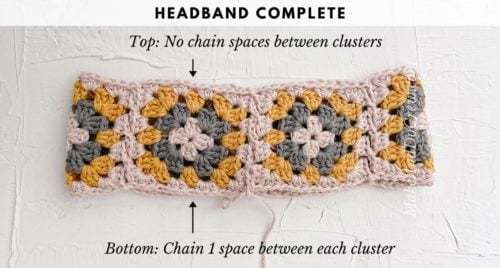
• In order to slightly taper granny square “headband”, the top edge of joining round does not include ch1sps between each hdc cluster. The bottom edge does utilize ch1sps between each hdc cluster.
Arrange squares in one row of six. Make sure RS is facing up on all squares. Follow diagram below that maps out the path to join all squares without fastening off.
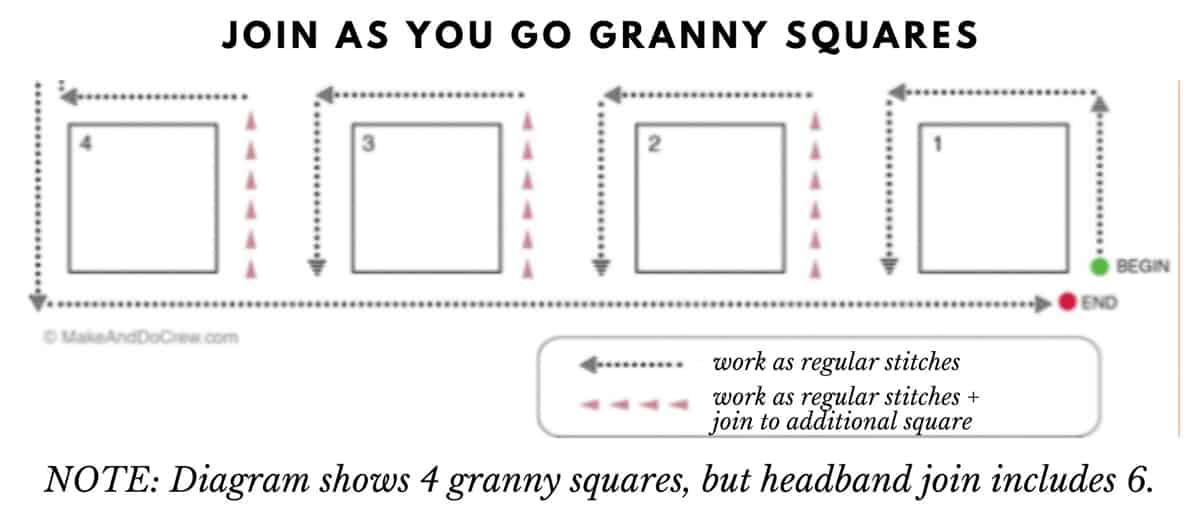
Attach Color A yarn in any corner of first square. (This corner is now considered the bottom of the band.)
In Corner #1: Ch 2 (counts as 1 hdc), 2 hdc in corner, ch 1…
Along Remainder of Side #1:…[3 hdc, ch 1] in each ch1sp to next corner…
Corners #2 and #3: …[3 hdc, ch 2, 3 hdc] all in corner sp…
Side #2 (top): …3 hdc between each 3dcCl to next corner… (do not ch 1 between clusters)
Corner #3: …[3 hdc, ch 2, 3 hdc] all in corner sp…
Side #3: …[3 hdc, ch 1] in each ch1sp to next corner…
In Corner #4: …3 hdc, ch 2, (grab next granny square)…
In Second Granny Square:
In Corner #1: …3 hdc, ch 2…
Along Remainder of Side #1: …*Remove loop from hook, insert hook from the top down in next ch1sp of first granny square, pick up working loop, pull through space; 3 hdc in next space of second square, ch 2; rep from * to corner…
Corner #2: …Remove loop from hook, insert hook from the top down in last ch1sp of first granny square, pick up working loop, pull through space, 3 hdc in corner, ch 2, remove loop from hook, insert hook from the top down in adjacent corner of first granny square, pick up working loop, pull through space; 3 hdc in same corner space of second granny square….
Side #2 and #3 and Corner #3: Work as sides/corner of first square were worked.
Corner #4: Work as fourth corner of first square was worked.
Repeat this joining process with 4 more squares. On last square, stop after Side #2 is worked, just before third corner (two sides will be unworked at this point).
Corner #3 of Last Square: …3 hdc, ch 2, (grab first granny square to attach to last square)…
Joining First and Last Square:
Joining Top Corners: *remove loop from hook, insert hook from the top down in corner space of first square, pick up working loop, pull through space; 3 hdc in corner space of last square, ch 2…
Joining First Side of Square #1 and Third Side of Square #6: *Remove loop from hook, insert hook from the top down in next ch1sp of first granny square, pick up working loop, pull through space; 3 hdc in next space of last square, ch 2; rep from * to corner, 3 hdc in corner space, ch 2 (do not join bottom corner to first square)…
Bottom Border:
Note: The purpose of the bottom border is to make the bottom edge of each granny square identical the other three sides. There should be four half double crochet clusters placed in each granny square edge. Do not work hdc clusters into the join-as-you-go seams.
Bottom Border Edge (RS): 3 hdc in same corner sp, ch 1, *3 hdc in next ch1sp, ch 1; rep from * around entire bottom edge, at end of round, remove loop from hook, insert hook front the top down in corner ch2sp of last square that was joined, pick up working loop, pull through space to join final corners, slst to top of ch 2 from beginning of joining round. Do not fasten off.
Brim
Notes:
• After Round 1, Brim is again worked in a spiral with the RS facing throughout.
• This section contains increases every second or third round. Once markers are in place, move them up as each round is worked.
• View video tutorial on adding optional wire to stiffen brim here.
Set Up Round: With Color A already attached, slst to bottom edge of Bottom Border so working yarn is positioned in joining gutter between two squares, ch 1, [sc in corner sp of square, sc in each hdc and ch1sp to next corner sp, sc in corner sp] 6 times, slst to first sc of round to join. (96 sc)
TIP: Because of the nature of half double crochet, it can be hard to count your stitches in a situation like this. More importantly than focusing on exact placement of each set up round stitch, just make sure there are 16 single crochet along the edge of each square (96 total in the round).
Round 2 (RS): [2 sc in next st (PM in first sc made), sc in next 7 sts] 12 times. (108 sc) Brim should now have 12 marked stitches. These indicate the stitches to increase in moving forward. Make sure first marker of round is distinguishable from other markers.
Round 3: Sc in each sc.
Round 4: [2 sc in marked st, sc in each st to next marker] 12 times. (120)
Rounds 5-6: Rep Round 3.
Round 7: Rep Round 4. (132)
Rounds 8-9: Rep Round 3.
Round 10: Rep Round 4. (144)
Rounds 11-14: Rep Round 3.
For a longer or shorter brim, adjust the number of rounds. Fasten off and weave in ends.
Related: 27+ Best Crochet Hat Patterns for Winter
Joining Hat With Circle Top
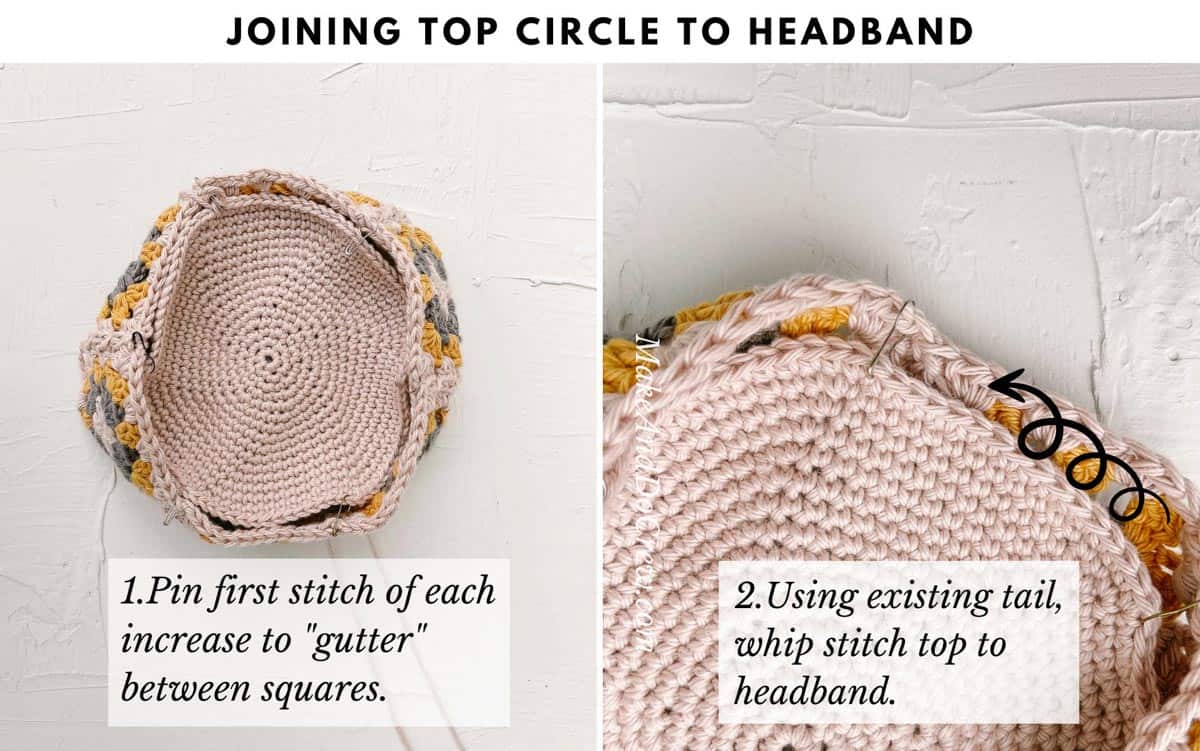
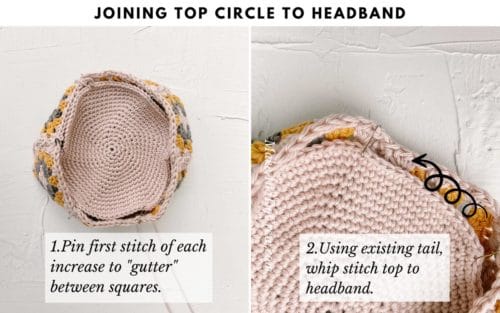
With RS of each facing out, use stitch markers to pin circle top to granny square headband. Align each “gutter” between granny squares with the marked 2sc increases circle top. With leftover yarn tail from circle and tapestry needle, whip stitch circle and headband together. (Note: There are more stitches in headband than in circle, so work between each circle increase to accommodate all headband stitches. Fasten off and weave in any remaining ends.)
Share your stitches!
Tag us (@MakeAndDoCrew) and use #HalcyonHat to show off your makes!
What to make next?
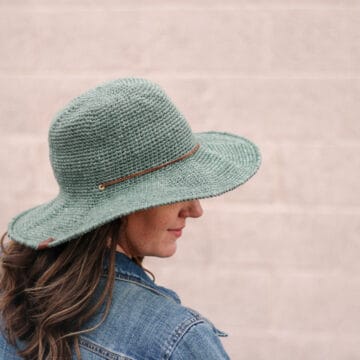
Whether you’re into crochet sweaters, C2C crochet blankets, Tunisian or crocheting your own fedora hat, we’ve got you covered. You can find all our free crochet patterns here.
You must use the category name, not a URL, in the category field.How to Crochet a Granny Square Bucket Hat
Materials
- Lion Brand Pima Cotton – Weight: 4/medium – 186 yds, 3.5 oz/100 g * If also crocheting the Halcyon Granny Square Bag, two total skeins of Color A and 1 skein each of Color B and C will be enough to make both projects.
- COLOR A: Mademoiselle 762-184P* – 2 skeins (approx. 115 g)
- COLOR B: Pewter 762-152B – 1 skein (approx. 12 g)
- COLOR C: Mineral Yellow 762-159S – 1 skein (approx. 16 g)
- Tapestry needle
- Size I (5.5 mm) crochet hook or size needed to obtain gauge
- 20 stitch markers
- T-pins for blocking
- Steamer or iron with steam function alternative: use a spray bottle
- Blocking board
Abbreviations + Glossary (US Terms)
- ch – chain
- chsp – chain space
- cluster – set of three stitches
- dc – double crochet
- gutter – space between granny square join
- hdc – half double crochet
- rep – repeat
- RS – right side
- sc – single crochet
- sk – skip
- slst – slip stitch
- st(s) – stitch(es)
- WS – wrong side
Abbreviations and Glossary (US Terms):
Want some company while you crochet?
Get support (and camaraderie!) in the Make & Do Crochet Crew Facebook Group. Search “Make and Do Crochet Crew” on Facebook.com.
Permissions + Copyright
Please do not publish or share this pattern as your own. You may make items to sell with this pattern. In exchange, please link back to this page. Do NOT use my photos as your own sales photos.
Overall Pattern Notes
Instructions
CIRCULAR HAT TOP
- 1. Begin with a magic ring to create a foundation loop.
- 2. Increasing at a rate of 6 single crochet per round, continue growing your circle until you've completed seven rounds.
- 3. Stop to measure your gauge. This is important for ensuring your bucket hat is the size you expect.
- 4. Continue increasing at a rate of 6 single crochet per round until you lhave 16 rounds total.
- 5. Work the final two rounds without increasing, simply placing one single crochet in each stitch.
GRANNY SQUARES
- Make 6 total granny squares.
- 1. Begin with a magic ring to create a foundation loop.
- 2. Crochet rounds 1-3 as outlined in the free pattern above. Each round should increase by 1 "cluster" per side. (Cluster = a set of 3 double crochet)
- 3. Measure your square. Each should be about 3" across. If sizing is off, adjust hook size and remake until accurate measurement is reached. This is essential for ensuring finished hat measures as expected.
JOINING SQUARES
- 1. Follow diagram that maps out the path to join all squares without fastening off. (No extra ends to weave it – hooray!)
- 2. Beginning in corner #1 of the first granny square, work up first square side, then around to side #2 and #3.
- 3. Grab next granny square and join it to side #3 of first granny square.
- 4. Work side #2 and #3 of second granny square.
- 5. Repeat steps 3-4 until all squares are joined.
- 6. End by joining side #1 of first square to side #3 of sixth square. You should now have essentially a granny square headband.
- 7. Crochet bottom border as outlined in free pattern above. Keep yarn attached.
BRIM
- 1. Use yarn that's already attached to follow the "set up round" in the free pattern above. The most important part of this step is ensuring the correct stitch count. It's less important to place the stitches exactly where described.
- 2. Increasing at a rate of 12 single crochet per round, continue by alternating one increase round and one single crochet round with no increasing.
JOINING HAT WITH CIRCLE TOP
- 1. Use stitch markers to pin circle top to granny square headband.
- 2. With leftover yarn tail from circle and tapestry needle, whip stitch circle and headband together.
- (Note: There are more stitches in headband than in circle, so work between each circle increase to accommodate all headband stitches. Fasten off and weave in any remaining ends.)





Leave a Reply