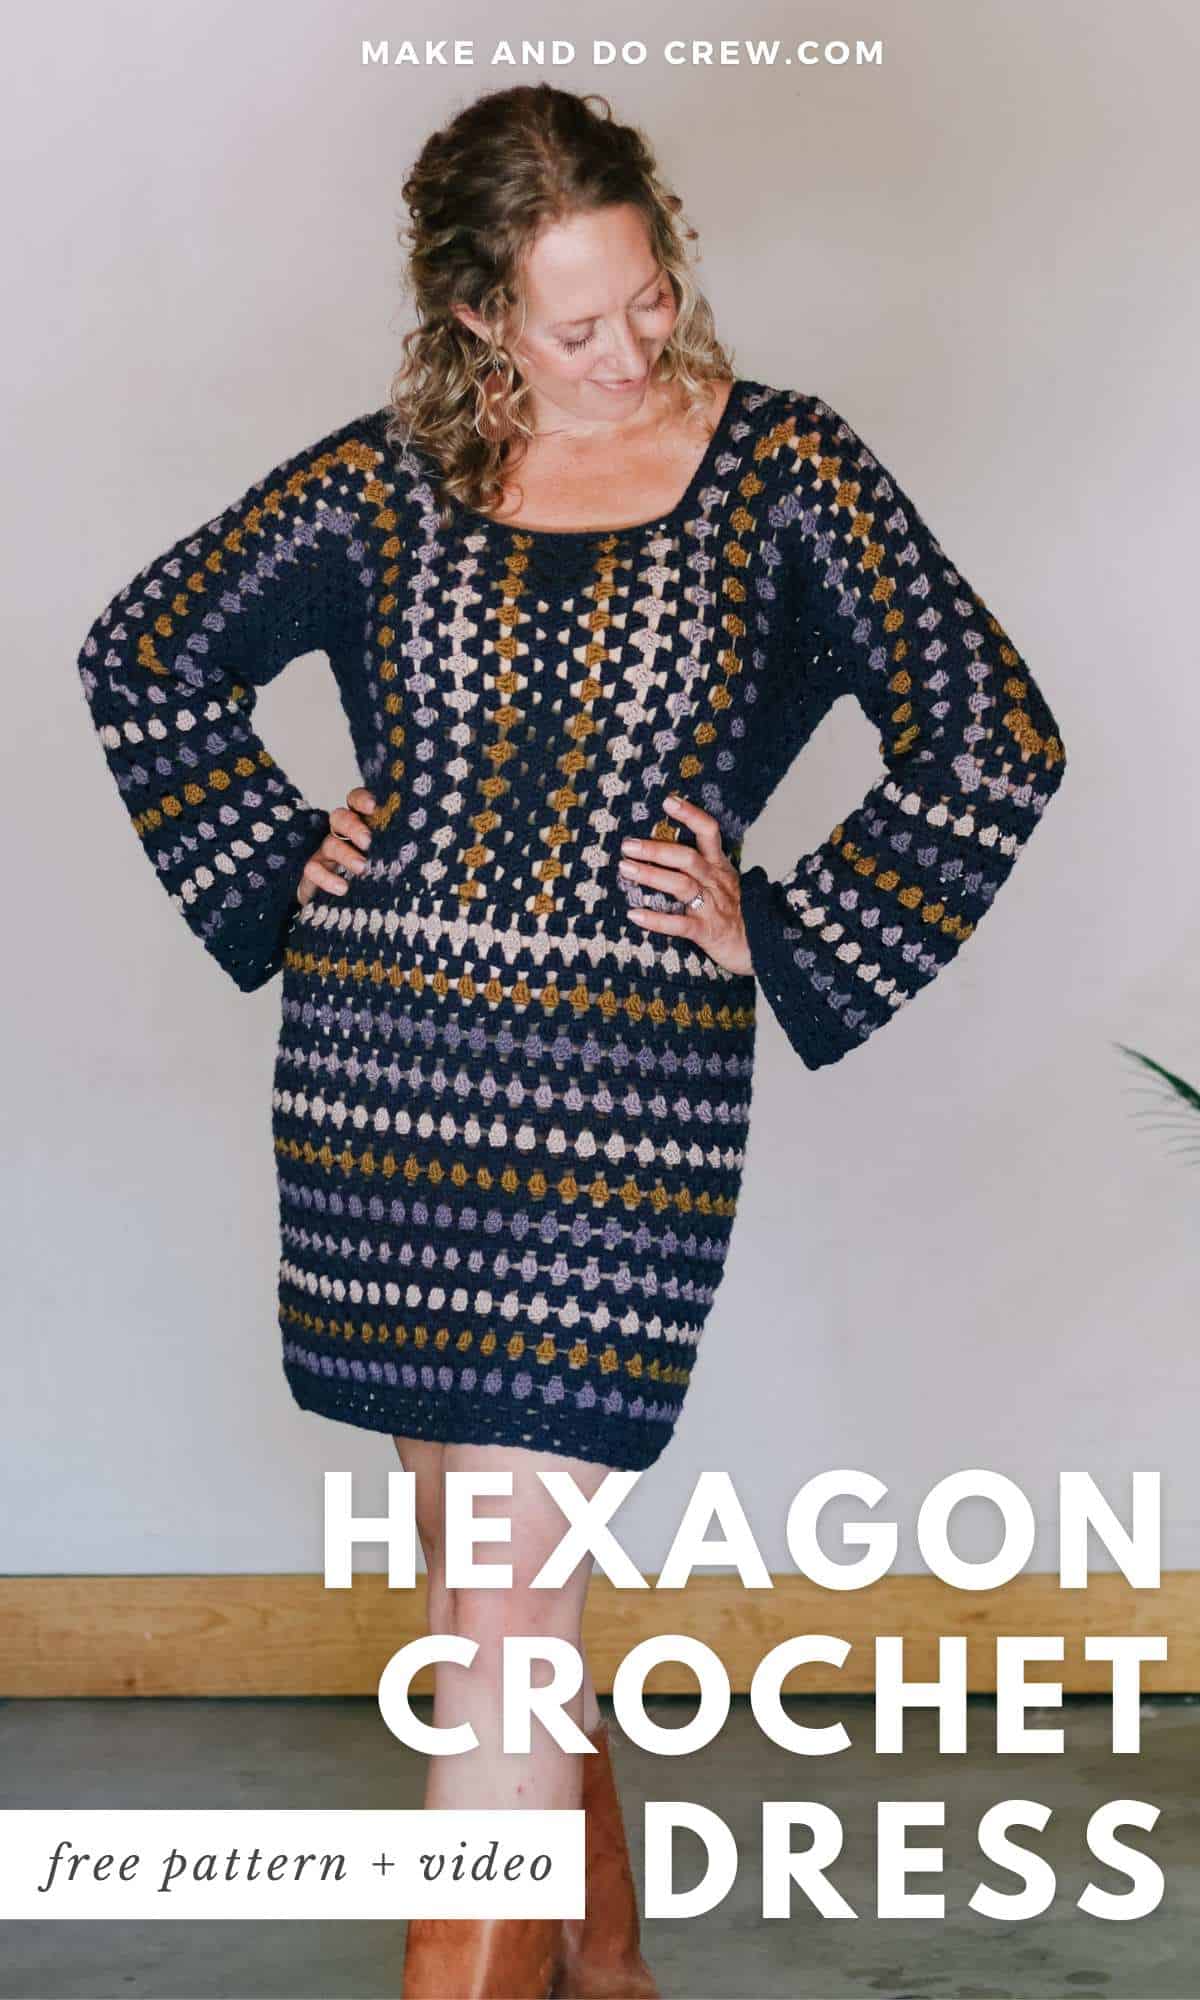
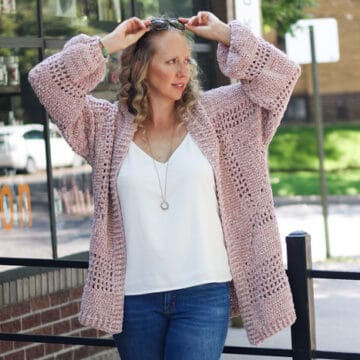
A Taylor Swift crochet dress you can personalize just for you!
Whether you’re a Swiftie or just want to crochet a surprisingly simple garment, you’ll look better than revenge in this customizable dress.
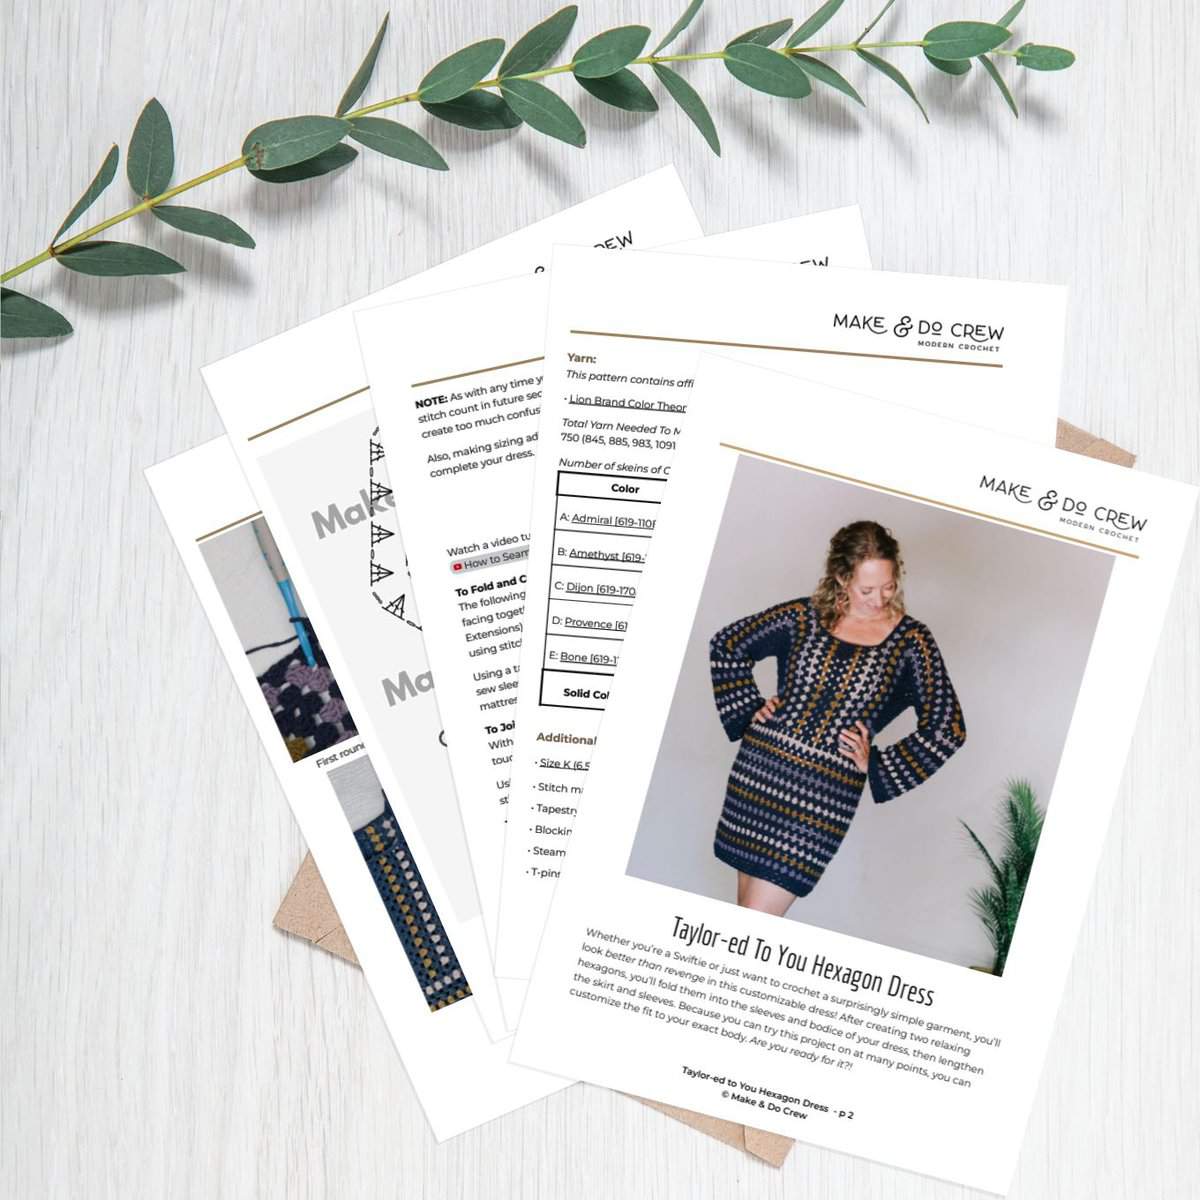
The free granny stitch dress pattern is below or purchase the ad-free, printable PDF with plenty of extras.
This free pattern is part of a collaboration with Lion Brand Yarns. This post contains affiliate links.
Jump to:
Taylor Swift Crochet Dress Made from Hexagons
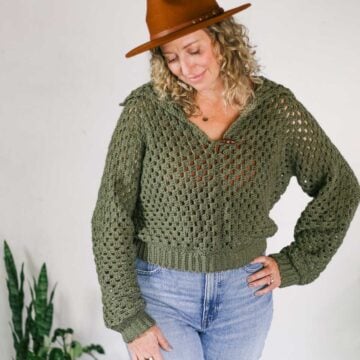
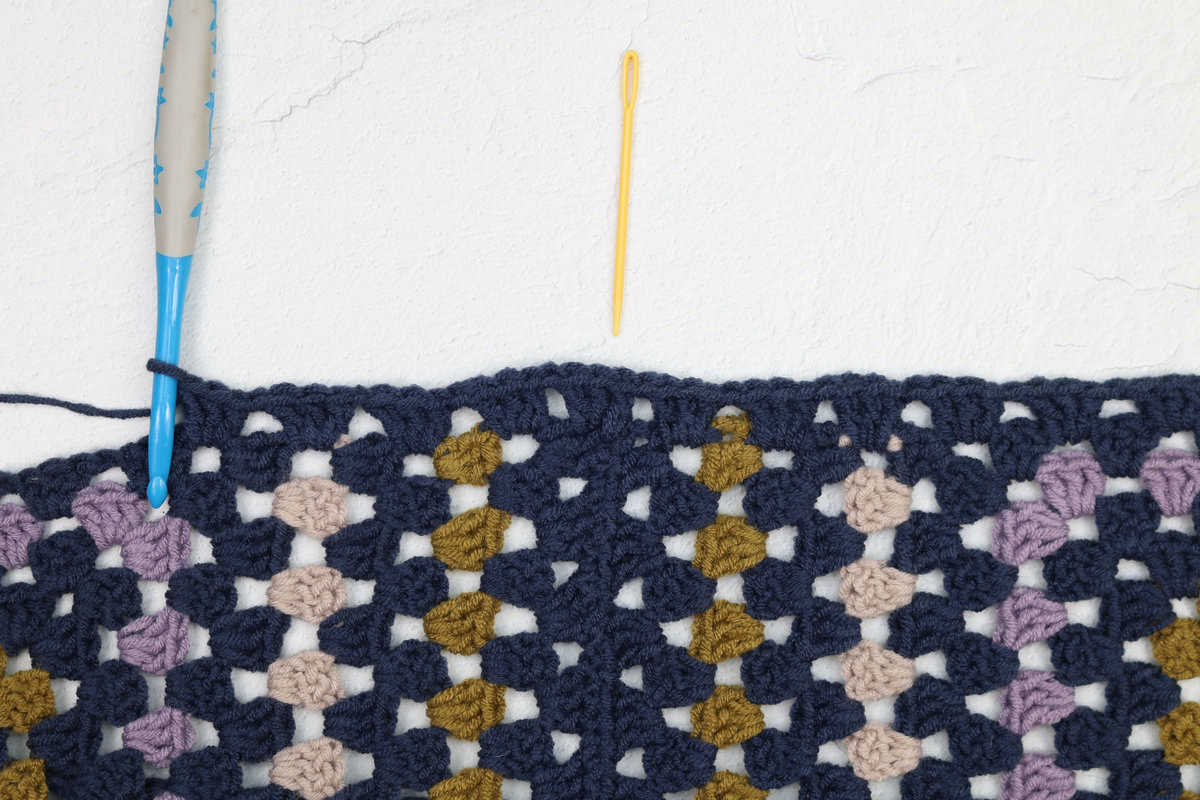
This Taylor-inspired dress pattern is made from two simple hexagons, just like our popular Campfire Cardigan.
After crocheting two relaxing hexagons, you’ll fold them into the sleeves and bodice of your dress, then lengthen the skirt and sleeves. Because you can try this project on at many points, you can customize the fit to your exact body. Are you ready for it?!
Related: Our favorite free crochet dress patterns
Print this Pattern
Prefer to crochet on the couch cuddled up with your cats like Taylor? You'll love the premium PDF! The instantly downloadable, ad-free file is formatted for easy printing and includes the complete pattern, all the photo tutorials, a bonus stitch chart and hexagon labels.
Step-by-Step Video Tutorial
Crochet a Taylor Swift dress along with me in this detailed video. I'll walk you through starting your hexagons, joining them together, extending the length of your dress and adding sleeves.
Note: If you have an ad-blocker running, you'll need to disable it to view the video player below.
When you've finished part 1 of the tutorial, jump down to the second half of the video tutorial here.
More Free Crochet Patterns Made From Hexagons
Add a few of our favorite free crochet patterns to your project queue!


Taylor-ed To You Hexagon Dress - Free Pattern
Supplies + Materials
Order an all-in-one kit from Lion Brand.
• Lion Brand Color Theory Color Theory (Weight 4/ medium 246 yds, 3.5 oz, 100g)
Total Yarn Needed To Make a Solid Color Dress:
750 (845, 885, 983, 1091, 1211, 1344, 1492)g
Number of skeins of Color Theory needed:
| Color | XS/S | S/M | M/L | L/1X | ½X | ⅔X | ¾X | ⅘X |
|---|---|---|---|---|---|---|---|---|
| A: Admiral | 6 | 7 | 7 | 8 | 9 | 10 | 11 | 12 |
| B: Amethyst | 1 | 1 | 1 | 2 | 2 | 2 | 2 | 2 |
| C: Dijon | 1 | 1 | 1 | 1 | 1 | 2 | 2 | 2 |
| D: Provence | 1 | 1 | 1 | 1 | 1 | 1 | 1 | 1 |
| E: Bone | 1 | 1 | 1 | 1 | 1 | 1 | 1 | 1 |
| Solid Color Dress | 8 | 9 | 9 | 10 | 11 | 13 | 14 | 15 |
• Size K (6.5 mm) crochet hook or size needed to obtain gauge
• Stitch markers or safety pins
• Tapestry needle
• Blocking Board (optional)
• Steamer or iron with steam functionality
• T-pins for blocking
All-in-One Crochet Kit
The all-in-one kit is a perfect way to make your Taylor-ed To You Hexagon Dress. This bundle from Lion Brand includes all the Color Theory you'll need, plus a bonus printable PDF of the pattern (delivered digitally).
Measurements
When you meet the pattern gauge, here are the measurements you can expect your dress to have. The pattern is very easy to modify based on the included notes to get the perfect fit for your particular body.
| Size | Fits Actual Bust | Dress Length | Chest Width |
|---|---|---|---|
| XS/S | 31” | 28” | 17.5” |
| S/M | 35” | 28” | 19.5” |
| M/L | 39” | 31” | 21.5” |
| L/1X | 43” | 31” | 23.5” |
| 1X/2X | 47” | 31” | 25.5” |
| 2X/3X | 51” | 34” | 27.5” |
| 3X/4X | 55” | 34” | 29.5” |
| 4X/5X | 59” | 34” | 32.5” |
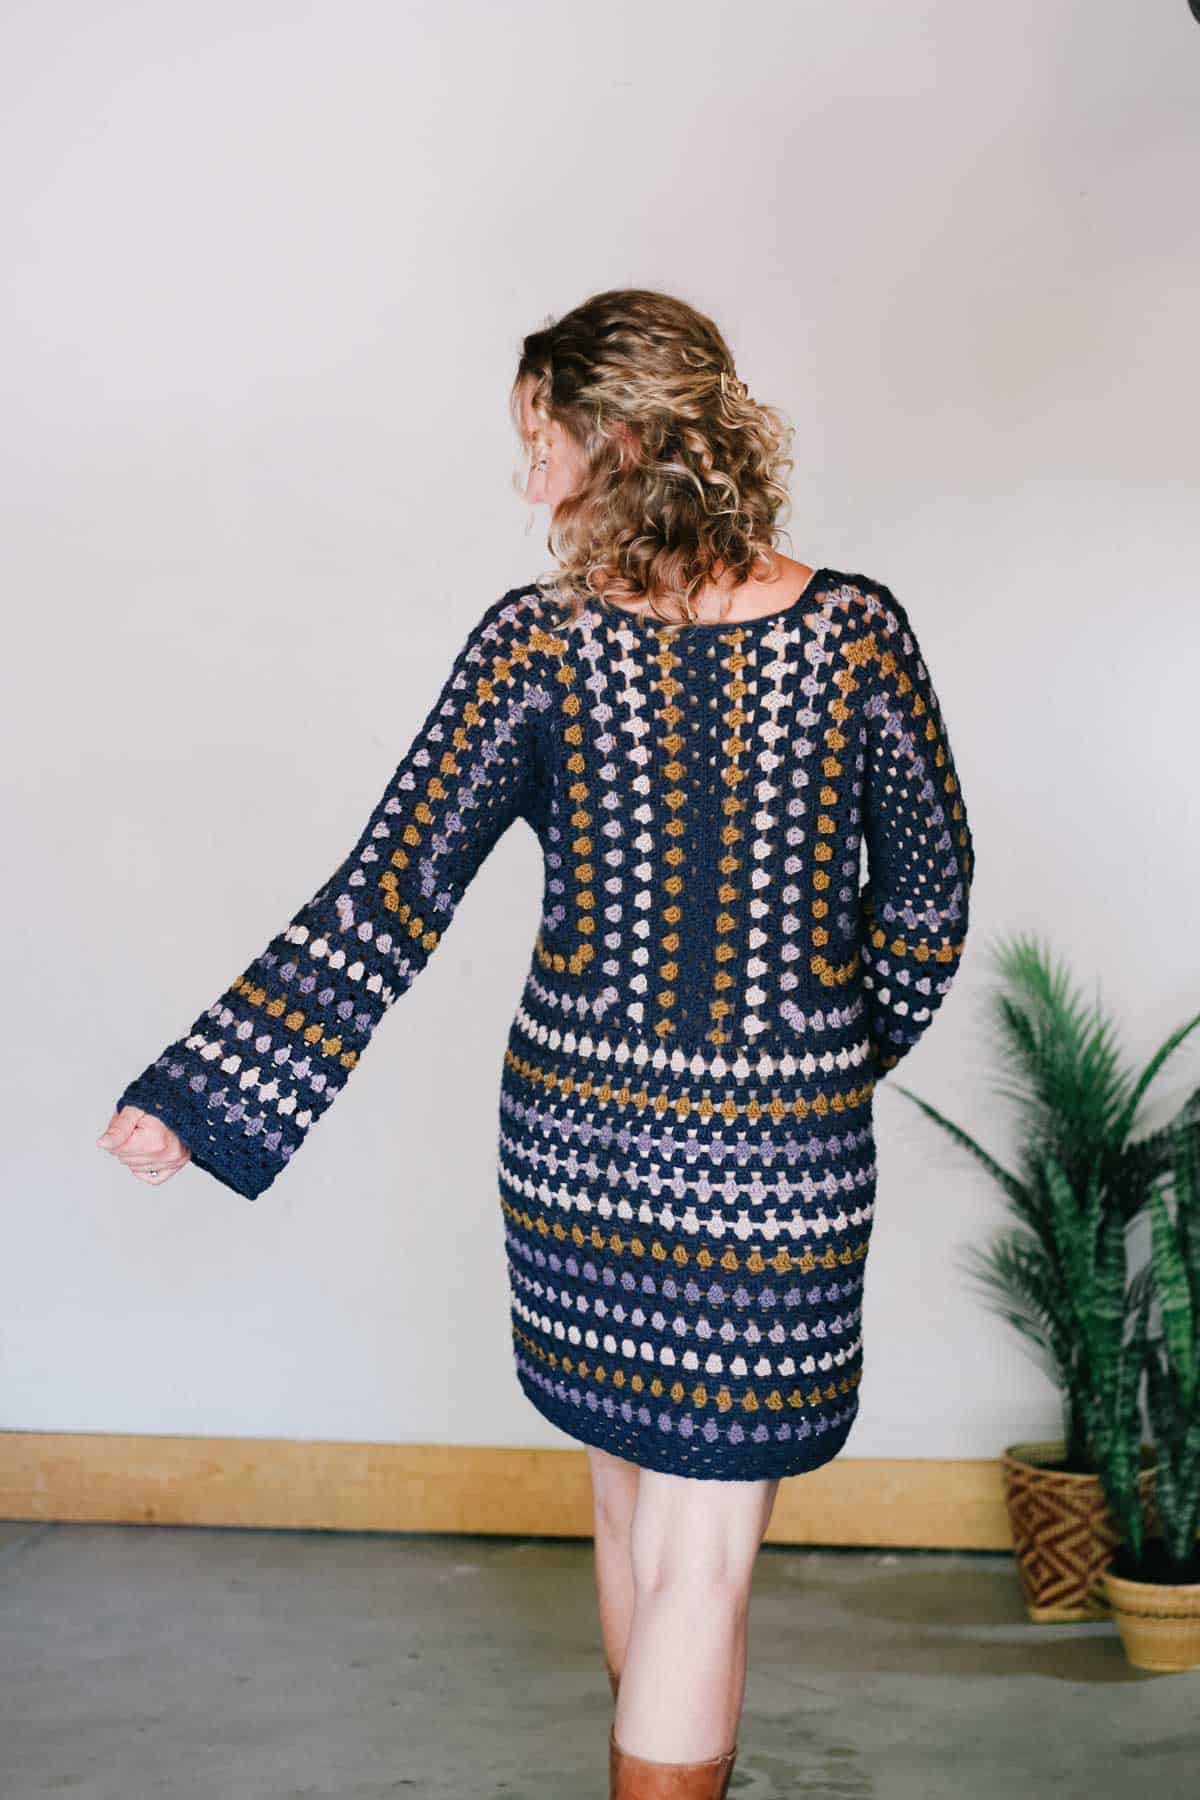
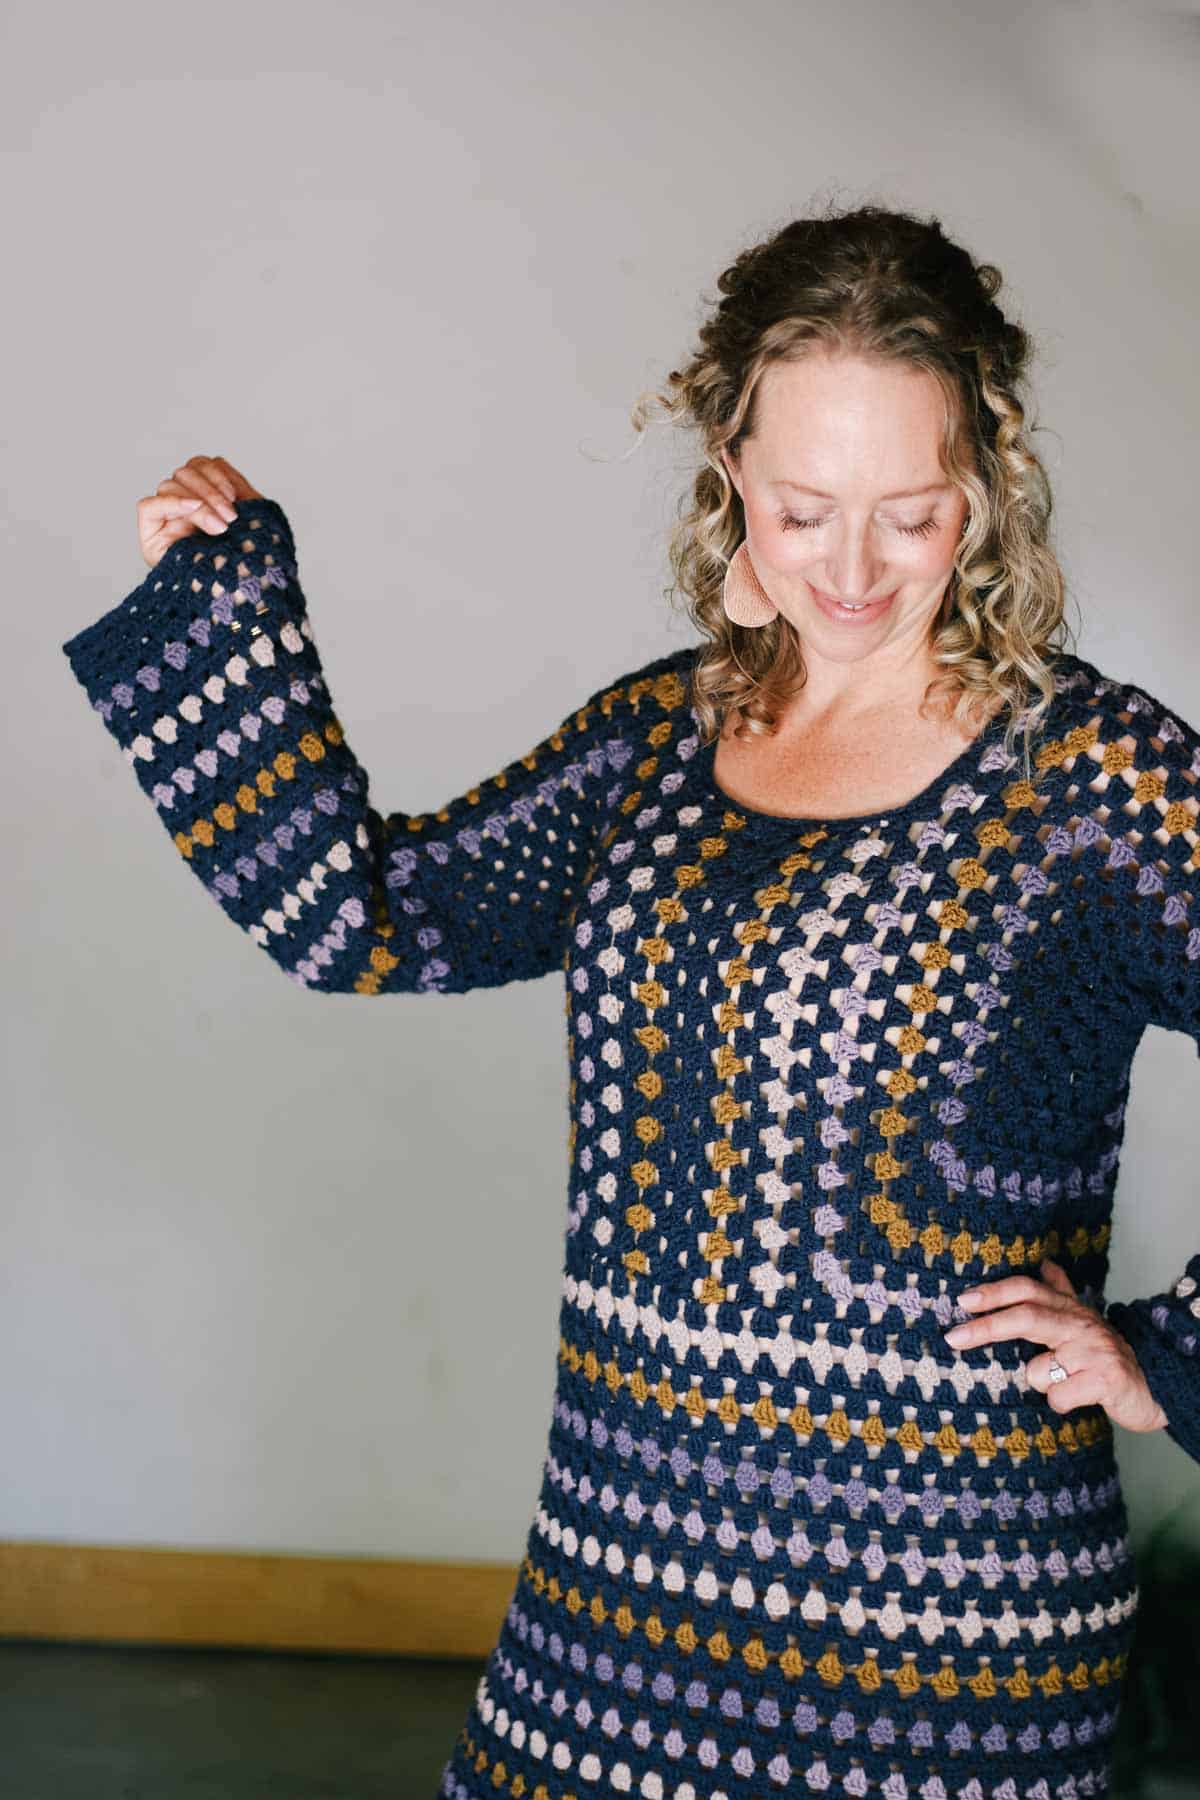
Finished sample pictured is a M/L on a model with a 39” bust.

Don't spend hours for a "meh" result!
Tired of crocheting garments that don't fit? Learn our C.R.A.F.T. Framework to make sweaters that fit and feel amazing!
*Approximate measurements when laying flat
** If between two sizes, size up or down based on how you’d like your dress bust to fit. As written, it has approximately 2 to 5” positive ease. For a more form-fitting dress, size down.
Gauge
4 granny clusters + 4 spaces =4”
8 rounds/rows = 4” worked in double crochet granny pattern
We'll measure our gauge several rounds into the hexagon to make sure we're on track.
Abbreviations + Glossary (US Terms)
ch – chain
cluster – 3 double crochet in same space
dc – double crochet
PM – place marker
rep – repeat
RS – right side
sc – single crochet
slst – slip stitch
tch – turning chain
WS – wrong side
yo – yarn over
Skill Level
This Taylor Swift crochet dress pattern is appropriate for an advanced beginner. To make your project more beginner-friendly, work it in a single color or use self striping yarn.
Advice On Planning Colors:
This pattern is intended to be a fun and playful experiment in color. Don’t be afraid to customize your dress as you wish! (Just keep in mind this may affect the yardage needed of each color.) Here are some concepts to think about as you plan your color scheme.
- It can be helpful to mentally separate your yarn into “light” and “dark” categories. Generally, alternating between rows/rounds of lighter and darker colors will give your dress a balanced look.
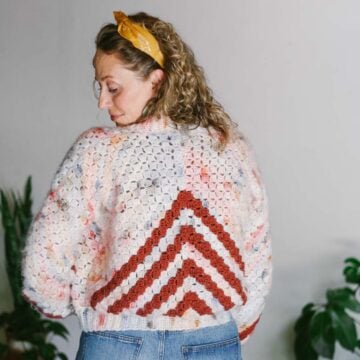
- To create a more deliberate striped look, it can be helpful to plan a color repeat in advance. For example, in the samples pictured, you might notice that the colors always repeat in the same sequence.
You can even create a guide for yourself by taping a small piece of each yarn color in the sequence you want to use, with a note about how many rows/rounds to work each time that color is used. - For a scrappy look, it can work great to simply alternate colors randomly, keeping an eye on the relative lightness or darkness of each section of the sweater.
- If you despise weaving in ends, opt for a self-striping yarn that will do the color changing for you. To create a symmetrical bodice, be sure to start each hexagon with the same color of the yarn cake so that the colors unfold similarly on both sides of your dress.
Lion Brand Mandala Ombre can work well for this. (With any yarn, be sure to check your gauge and adjust your hook size as needed.)
- To achieve the color repeat as the M/L sample shown, work the hexagon as follows and continue in this pattern for each extension. The number of stripe repeats will vary by size.
To Begin:
Color A x 8
**
Color B x 1
Color A x 2
Color C x 1
Color A x 2
Color D x 1
Color A x 2
Color E x 1
Repeat in sequence from ** for all remaining rounds/rows. (You may notice that my bottom extension in the photos reorders the stripes a bit, which isn’t necessary.)
- If you follow a similar stripe sequence, you can likely keep your main color attached in the hexagon, bottom extension and sleeve rounds. Drop it to the wrong side as you attach the new color and pick it up again in the next round.
Permissions + Copyright:
Please do not publish or share this pattern as your own. You may make items to sell with this pattern. In exchange, please link back this post. Do NOT use our photos as your own sales photos.
Print This Pattern: purchase the ad-free, printable PDF
Overall Pattern Notes
- If you’re new to reading crochet patterns, check out more info here.
- Instructions are written with the stitch count for the smallest size first and each larger size following in parentheses, for example: XS/S (S/M, M/L, L/1X, 1X/2X, 2X/3X, 3X/4X and 4X/5X). It can be very helpful to highlight the numbers for your size before beginning the project. When only one number is given, it pertains to all sizes.
Stitch counts at the end of each round are for given sizes.
- Chain 3 at beginning of round/row counts as 1 double crochet throughout pattern.
- Weave in your ends at the end of each main section. You’ll thank yourself!
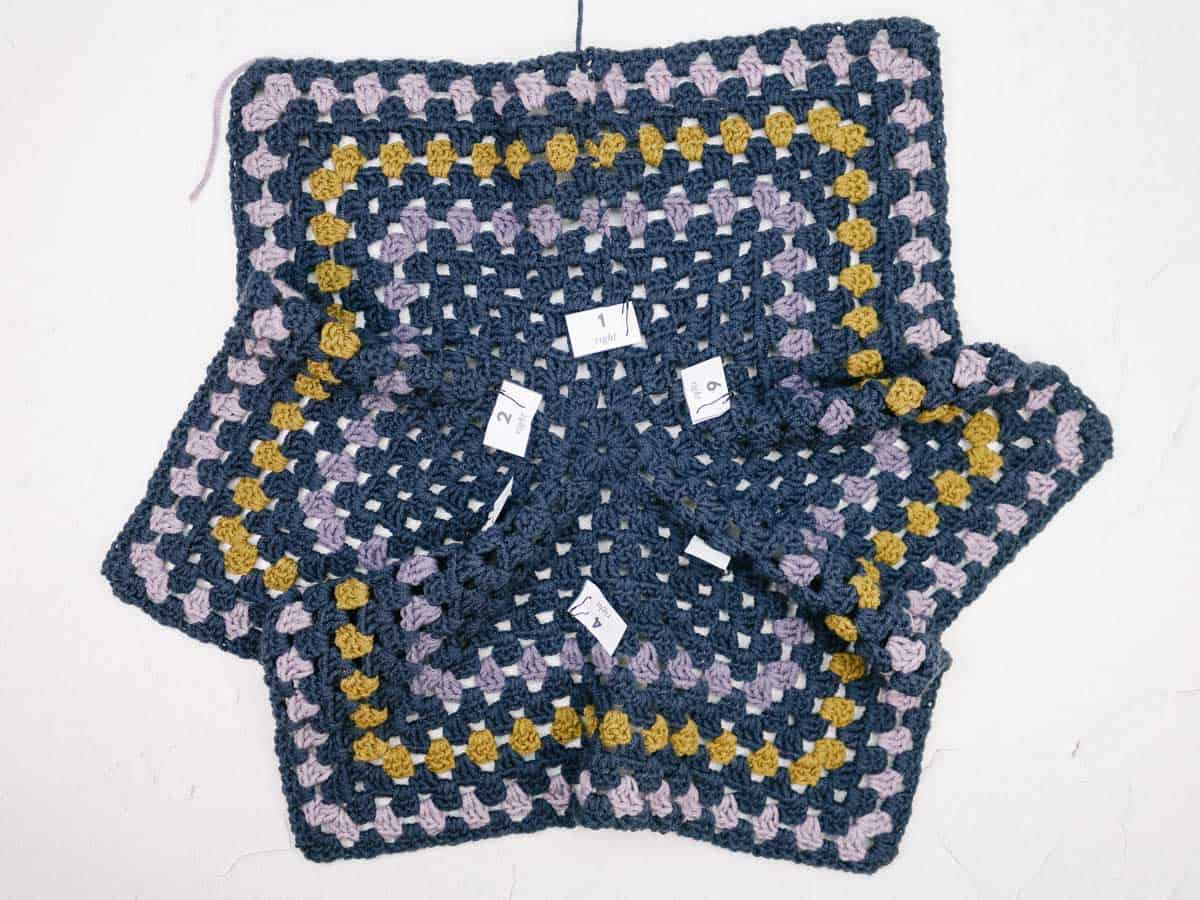
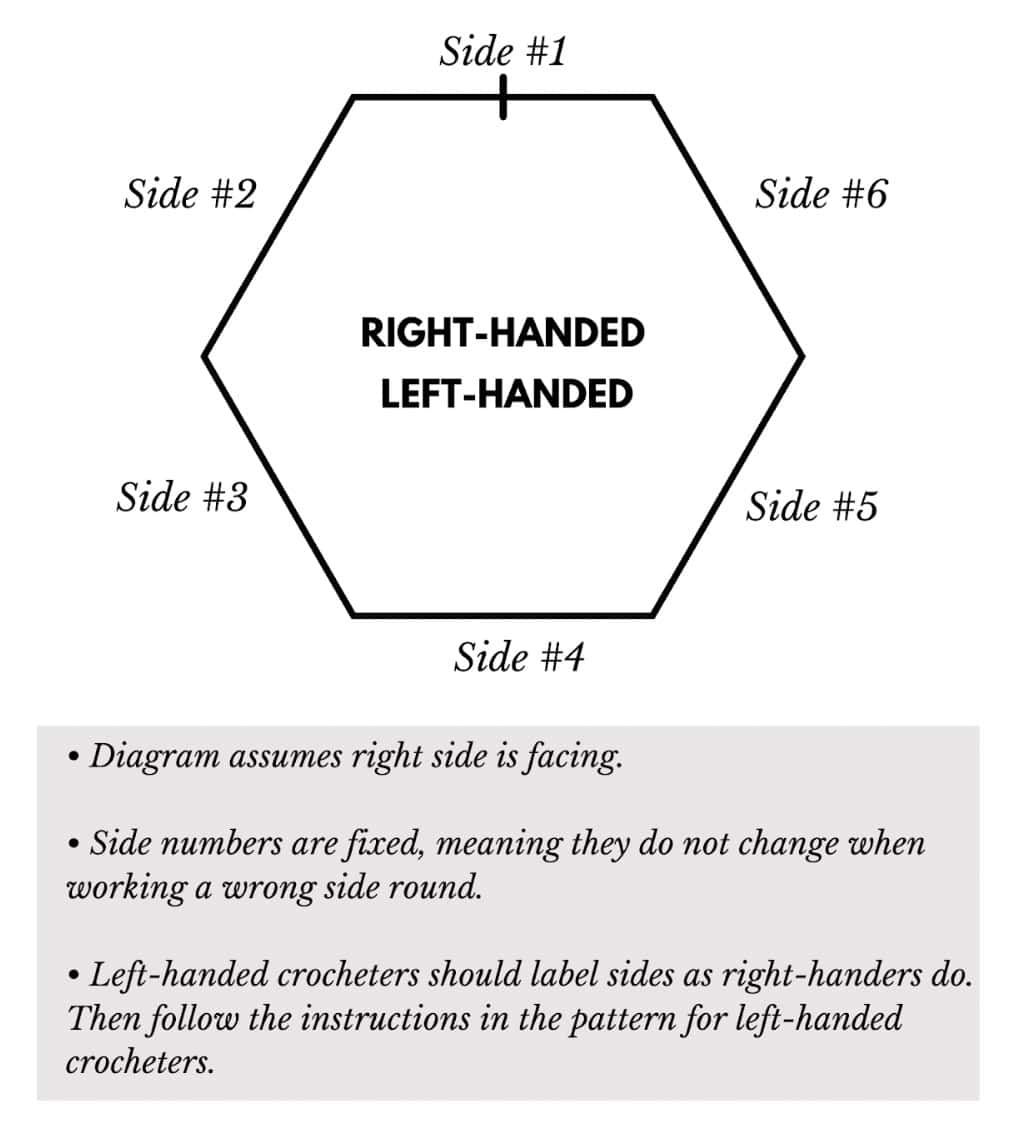
- Pattern refers to different sides of the hexagon by number, which is illustrated in the chart at the end of the pattern. Think of these side numbers as fixed to the hexagon, regardless of orientation. For example, Side 3 is always Side 3, whether you flip the hexagon over or not. Side 3 does not become Side 5, just because the hexagon is flipped to the wrong side.
When you measure gauge after Round 8, please pin name tags to each hexagon side. This will ensure you can easily identify hexagon locations as described in the instructions.
Hexagons (Bodice)
Notes:
- Hexagon is worked in turned rounds.
- After a few rounds, hexagon will look wavy and should not be able to lay flat. This is intentional to create enough fabric for the body and sleeves.
- Corner spaces will always be made of 3 chains. Spaces along the sides of the hexagon will be made with 1 chain.
- When switching colors for a new round, use the new color to complete the final yarn over of the round you’re finishing. Fasten off previous color. Turn your work and proceed with new color in the next round.
Alternatively: simply complete the final slip stitch to join the round and fasten off. Then attach the new color in the same space and begin with the next round heading in the opposite direction.
Make 2.
Preferred Foundation: Create a magic ring.
Alternate Foundation: Ch 4 and slst to first ch to form a ring.
Round 1 (RS): Ch 3, 2 dc in ring, ch 1, (3 dc in ring, ch 1) 5 times, slst to top of ch 3 to join; turn. (6 sides, 1 cluster/side)
Round 2 (WS): Ch 3, (2 dc, ch 3, 3 dc) all in first ch1sp, ch 1, [(3 dc, ch 3, 3 dc, ch 1) all in next ch1sp] five times, slst to top of ch 3 to join; turn. (2 clusters/side)
✨Unlock this free subscriber-exclusive pattern ✨
Follow these steps to view the full free pattern below
Round 3 (RS): Ch 3, 2 dc in next ch1sp, ch 1, [(3 dc, ch 3, 3 dc) all in next ch3sp, ch 1, 3 dc in next ch1sp, ch 1] five times, (3 dc, ch 3, 3dc) all in next ch3sp, ch 1, slst to top of ch 3 to join; turn. (3 clusters/side)
Round 4 (WS): Ch 3, 2 dc in next ch1sp, ch 1, [(3 dc, ch 3, 3 dc) all in next corner ch3sp, ch 1, (3 dc, ch 1) in each ch1sp to corner] six times, ch 1, (3 dc, ch 1) in each ch1sp to end of round, slst to top of ch 3 to join; turn. (4 clusters/side)
Round 5 (RS): Rep Round 4. (5 clusters/side)
Round 6 (WS): Rep Round 4. (6 clusters/side)
Round 7 (RS): Rep Round 4. (7 clusters/side)
Round 8 (WS): Rep Round 4. (8 clusters/side)
!! Gauge Check !!
Please stop and take a minute to measure your hexagon. This will ensure your dress is the size you expect it to be. Measure from the center of the hexagon to the center of the edge on one side (radius). This should measure approximately 4”.
Measure several sides of the hexagon. Each side should measure 8.25-8.75”. If your hexagon radius or each side length is too large, decrease your hook size and rework hexagon. If your hexagon radius is too small or each side length is too small, increase your hook size and rework hexagon.
Once correct gauge is established, lay hexagon flat with RS facing up. (Last round worked was a WS round.) Use stitch markers to pin side-number name tags to each side according to the chart below.
Rounds 9-14 (14, 16, 16, 16, 18, 18, 20): Rep Round 4. Hexagon should now contain 14 (14, 16, 16, 16, 18, 18, 20) rounds. Final round should have 14 (14, 16, 16, 16, 18, 18, 20) clusters per side and measure approximately 7 (7, 8, 8, 8, 9, 9, 10)” from center of hexagon to middle of one of the edges.
Premium PDF
easier and faster with fewer mistakes.
- Complete pattern, photo tutorials, hexagon labels and stitch chart
- Instant download
- Formatted for easy printing
Back + Front Extensions
Extra rows are now worked along specific sides on each hexagon to extend fabric that will form the center back and center front of the dress bodice.
To switch colors at the end of a row, use the color of the upcoming row to complete the final yarn over of the row you’re finishing. Fasten off previous color. Proceed with new color in the next row.
Want some company while you crochet?
Get support (and camaraderie!) in the Make & Do Crew community. Join for free here.
Left Side of Dress as Worn
Notes:
Wanna save this pattern?
- Back = side #5, Bottom = side #4, Front = side #3
- Chain 4 counts as 1 double crochet + 1 chain space.
Back Extensions
You will work along Side #5 only. Not counting the corner between sides #5 and #6, PM in 1st (1st, 2nd, 2nd, 2nd, 3rd, 3rd, 4th) ch1sp.
Right-handed crocheters: Attach yarn in ch3sp corner between Sides #4 and #5.
Left-handed crocheters: Attach yarn in marked space.
Row 1 (RS): Ch 3, 2 dc in same space, *ch 1, 3 dc in next ch1sp; rep from * along side until only marked space (left-handed: corner) remains, ch 1, 3 dc in final chsp; turn. (14 (14, 15, 15, 15, 16, 16, 17) clusters)
Including corner, there should be 1 (1, 2, 2, 2, 3, 3, 4) space(s) left unworked.
Row 2 (WS): Ch 4, *3 dc in next ch1sp, ch 1; rep from * along side until 1 cluster remains, dc in top of tch; turn. (13 (13, 14, 14, 14, 15, 15, 16 clusters + 2 dc)
Row 3 (RS): Ch 3, 2 dc in first ch1sp, *ch 1, 3 dc in next ch1sp; rep from * along side until 1 cluster remains, ch 1, 3 dc in last ch1sp; turn. (14 (14, 15, 15, 15, 16, 16, 17) clusters)
Rep Rows 2 and 3 one (two, two, three, four, four, five, five) more times. Fasten off leaving a long tail for seaming.
Back extension should now contain 5 (7, 7, 9, 11, 11, 13, 13) rows.
Front Extension
You will work along Side #3 only. Not counting corner between sides #2 and #3, PM in 4th (4th, 5th, 5th, 5th, 6th, 6th, 6th) ch1sp.
🧶Adjust stitch marker placement for a more or less modest neckline.
- For a higher neckline, skip fewer ch1sps before placing marker.
- For a lower neckline, skip more ch1sps before placing marker.
Right-handed crocheters: Attach yarn in marked stitch.
Left handed crocheters: Attach yarn in ch3sp corner between Sides #3 and #4.
Row 1 (RS): Ch 3, 2 dc in same space, *ch 1, 3 dc in next ch1sp; rep from * along side until only corner (left-handed: marked space) remains, ch 1, 3 dc in final chsp; turn. (11 (11, 12, 12, 12, 13, 13, 15) clusters)
Including corner, there should be 4 (4, 5, 5, 5, 6, 6, 6) space(s) left unworked.
Row 2 (WS): Ch 4, *3 dc in next ch1sp, ch 1; rep from * along side until 1 cluster remains, dc in top of tch; turn. (10 (10, 11, 11, 11, 12, 12, 14) clusters + 2 dc)
Row 3 (RS): Ch 3, 2 dc in first ch1sp, *ch 1, 3 dc in next ch1sp; rep from * along side until 1 cluster remains, ch 1, 3 dc in last ch1sp; turn. (11 (11, 12, 12, 12, 13, 13, 15) clusters)
Rep Rows 2 and 3 one (two, two, three, four, four, five, five) more times. Fasten off leaving a long tail for seaming.
Front extension should now contain 5 (7, 7, 9, 11, 11, 13, 13) rows.
Right Side of Dress as Worn
Notes:
- Back = Side #3, Bottom = Side #4, Front = Side #5
- Chain 4 counts as 1 double crochet + 1 chain space.
Back Extension
You will work along Side #3 only. Not counting corner between sides #2 and #3, PM in 1st (1st, 2nd, 2nd, 2nd, 3rd, 3rd, 4th) ch1sp.
Right-handed crocheters: Attach yarn in marked stitch.
Left-handed crocheters: Attach yarn in ch3sp corner between Sides #3 and #4.
Repeat instructions for Left Back Extension.
Front Extension
You will work along Side #5 only. Not counting corner between sides #5 and #6, PM in 4th (4th, 5th, 5th, 5th, 6th, 6th, 6th) ch1sp.
🧶If you adjusted neckline stitch marker placement on the opposite front, do the same here.
Right-handed crocheters: Attach yarn in ch3sp corner between Sides #4 and #5.
Left handed crocheters: Attach yarn in marked space. Repeat instructions for Left Front Extension.
Video Tutorial Part 2
In the second half of the video instructions, I cover how to try on your dress to adjust the fit. We also learn how to extend the length of your dress and add bell sleeves.
Note: If you have an ad-blocker running, you'll need to disable it to view the video player below.
Fit Check
Fit Check:
The simple seaming process that follows is a great opportunity to try your hexagons on and check the fit of your dress bodice so far. To do this, follow all the folding and pinning instructions below, but do not actually sew the pieces together before trying them on.
If you’re happy with the fit, carry on with seaming. If you’d like to adjust the fit slightly, follow the instructions below.
The nature of a shift dress like this is that the hips will have the same width as the bust. You might find it helpful to measure the widest part of your body and compare that to your dress bodice circumference to determine how the finished dress will fit.
To Measure: Lay the pinned bodice flat and measure the width at the chest. Multiply by two. This is the approximate circumference of your dress at the bust and will also be the circumference at the hips.
🧶To make your dress bust fit tighter:
Remove an even number of rows of the Back Extensions (and the same number from the Front extensions). For example, you might remove 2 rows from the Back and Front Extensions on both hexagons. This would reduce the overall circumference of the bust (and hips) by about four inches.
🧶To make your dress bust fit looser:
Add an even number of rows of the Back Extensions (and the same number to the Front extensions). For example, you might add 2 rows to the Back and Front Extensions on both hexagons. This would increase the overall circumference of the bust (and hips) by about four inches.
NOTE: As with any time you adjust a given pattern, making changes will affect the stitch count in future sections, specifically the Bottom Extension. This shouldn’t create too much confusion, but I want you to have a heads up ahead of time.
Also, making sizing adjustments like this may affect the amount of yarn needed to complete your dress.
Joining Hexagons
To Fold and Create the Sleeves:
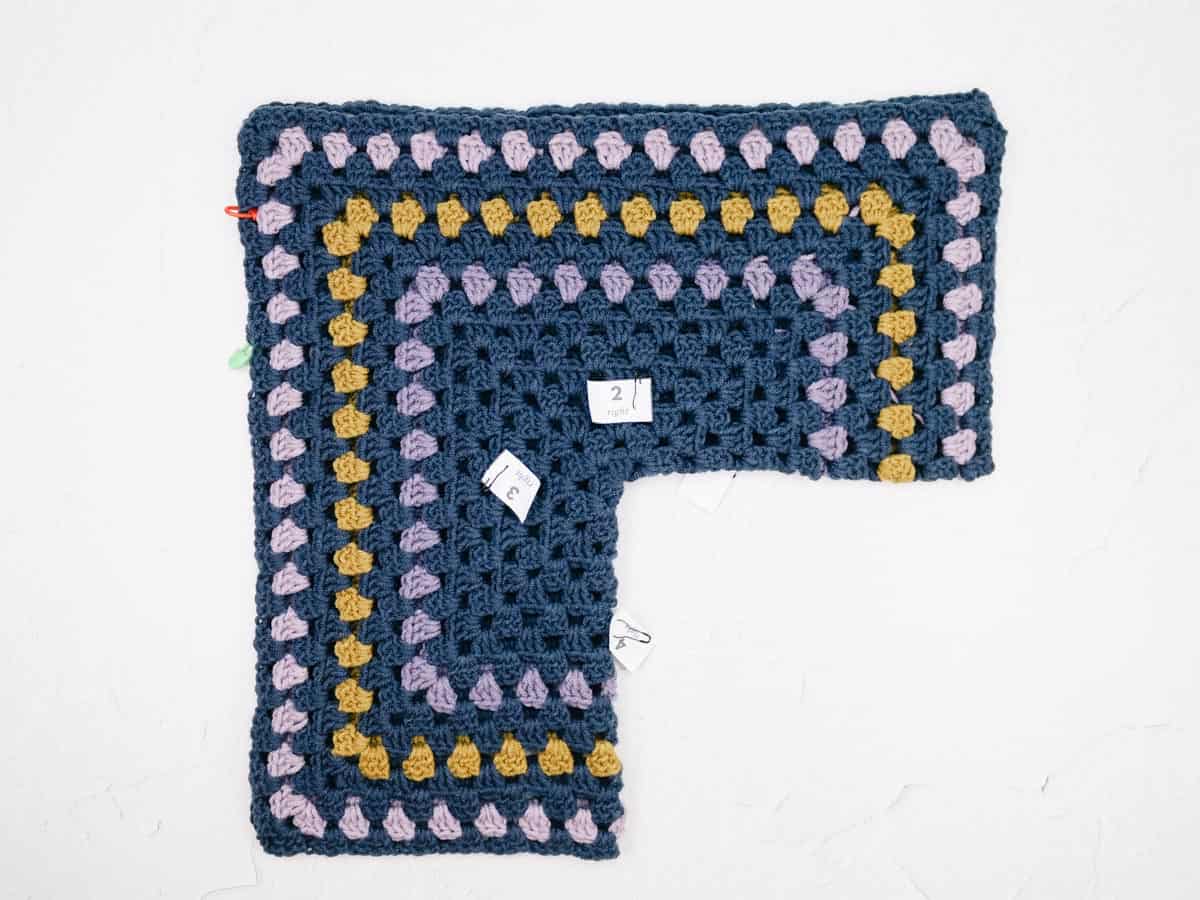
The following instructions are to be completed on one hexagon at a time. With RS facing together, use stitch markers to pin Sides #2 and #6 together (and Front + Back Extensions). Take care to line up clusters on either side of hexagon sides. Pin in place using stitch markers. Folded hexagon should now resemble an “L” shape.
Using a tapestry needle and the same color yarn used in your last hexagon round, sew sleeve seam from the hexagon edge (elbow area) toward shoulder using the mattress stitch. Sew entire length of hexagon side. Repeat with second hexagon.
To Join the Back Extensions:
With RS still facing in, lay hexagons next to each other so back extensions are touching. Pin in place, taking care to line up clusters on either side of extensions.
Using a tapestry needle and existing yarn tail, sew back seam using the mattress stitch.
To Join the Front Extensions:
With RS still facing in, pin Front extensions together, taking care to line up clusters on either side of extensions.
Using a tapestry needle and existing yarn tail, sew front seam from the bottom edge upward using the mattress stitch.
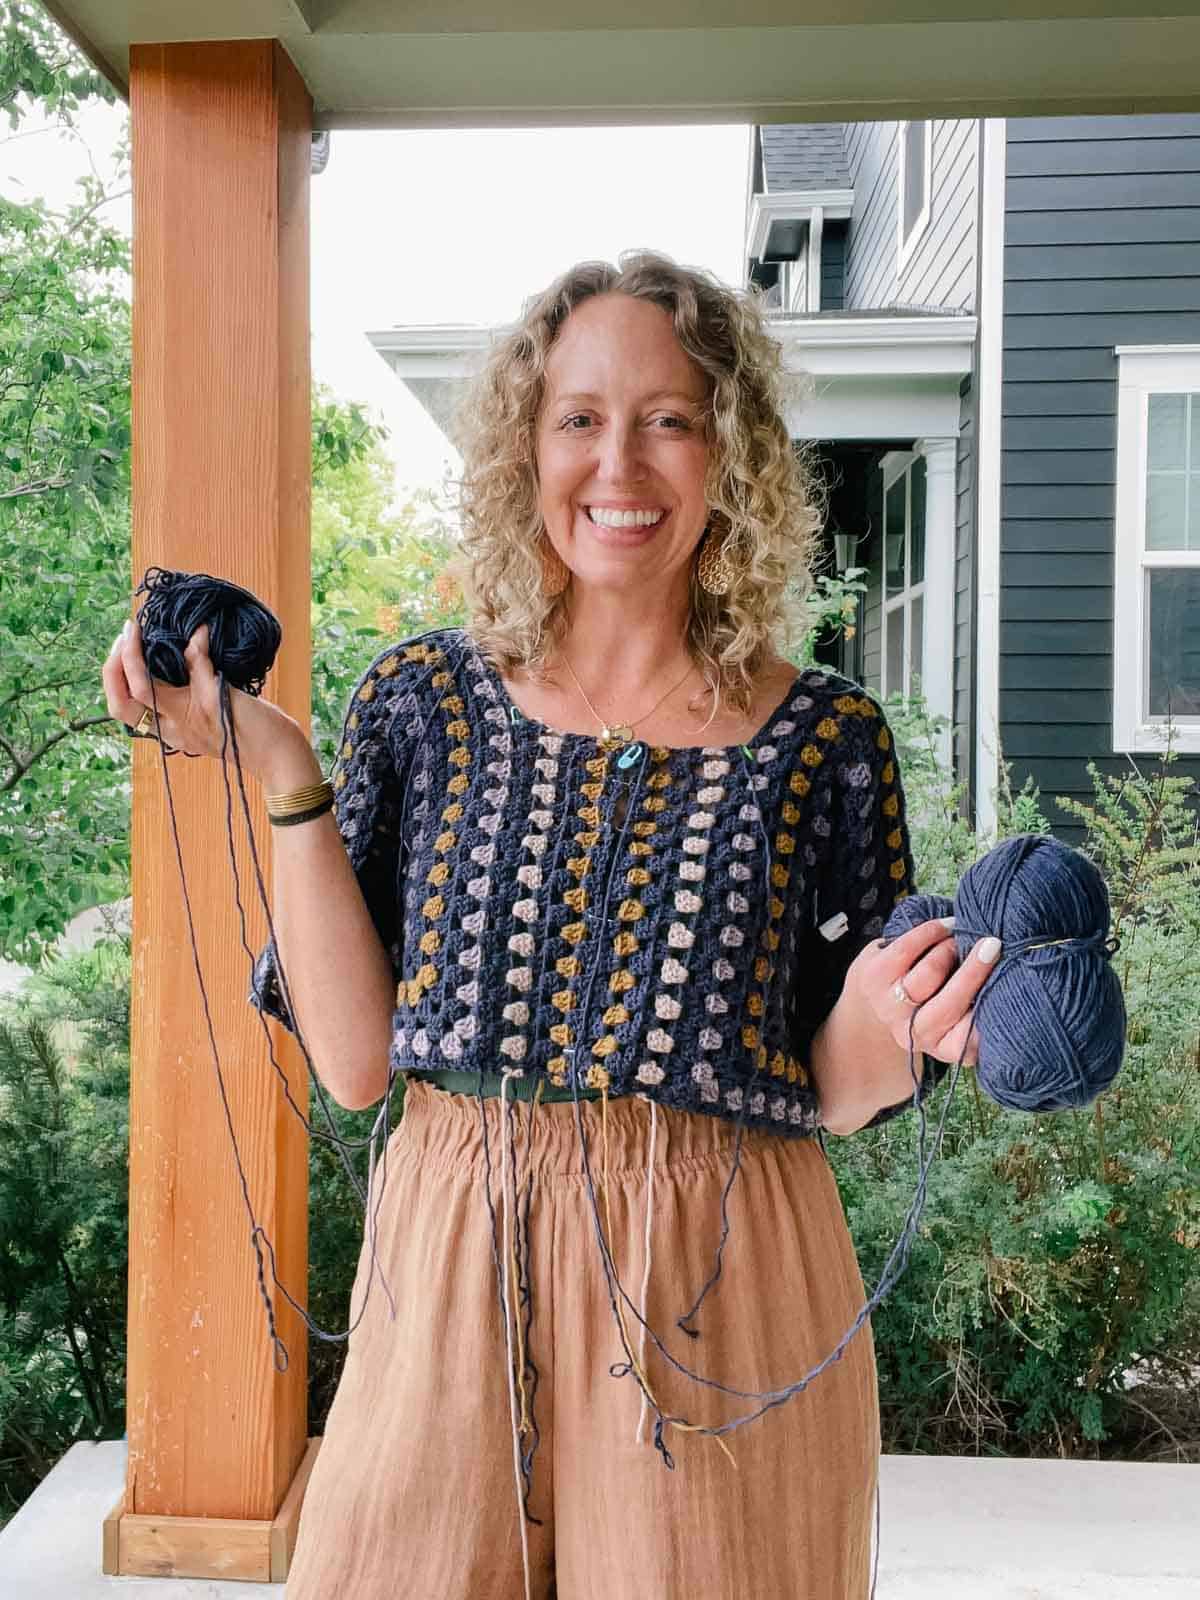
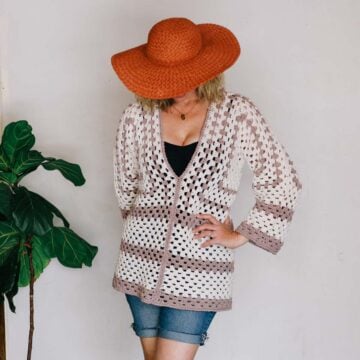
Congrats! You’ve got yourself a lil’ cropped sweater!
Obsessed with finding the best free crochet patterns?
Check out fun garment ideas to find your next project.


Bottom Extension (Skirt)
When working Round 1, you will crochet along bottom hexagon Sides #4 as well as along the raw row edges of the Back and Front extensions.
When crocheting into the row edges of the Extensions, you will work into each row edge that begins with a chain 4. You will skip the row ends that begin with a cluster. This will make more sense as you’re crocheting the round.
With RS of facing, attach yarn in any ch1sp along bottom edge, beneath either underarm.
Round 1 (RS):
Getting Started (all sizes): Ch 3, 2 dc in same chain space…
Along first hexagon side: *ch 1, 3 dc in next ch1sp; rep from * along bottom of hexagon, 3 dc in hexagon corner ch3sp…
Along Front/Back extensions: *sk next extension row edge, ch 1, 3 dc in next extension row edge; rep from * along bottom of extensions (work 3 dc in the seam that joins the extensions), sk last extension row edge…
Along second hexagon side: ch 1, 3 dc in corner ch3sp, *ch 1, 3 dc in next ch1sp; rep from * along bottom of hexagon, 3 dc in hexagon corner ch3sp…
To continue: Work in established pattern over next set of extensions and to finish last section of first hexagon.
To finish round: End round with a ch 1, slst to top of ch 3 to join; turn.
Round 2 (WS): Ch 3, 2 dc in first ch1sp, ch 1, *3 dc in next ch1sp, ch 1; rep from * (3 dc, ch 1) in each ch1sp to end of round, slst to top of ch 3 to join; turn. (40 (44, 48, 52, 56, 60, 64, 68) clusters)
Rep Round 2 33 (33, 34, 34, 34, 36, 36, 35) more times. Bottom Extension should now contain (35 (35, 36, 36, 36, 38, 38, 37) rounds.
You can try on your dress here and evaluate the length. If you’re happy, fasten off. For a longer dress, continue in the established pattern until desired length is reached.
Tip: Prefer a longer dress, but unsure if you’ll have enough yarn? Consider moving onto the sleeves now and coming back to add additional length to your dress with whatever yarn you have leftover.
Sleeves
- Sleeves are worked in turned rounds.
- Again, this section is easily customizable to fit your arms. Work fewer rounds for shorter sleeves or extra rounds for longer sleeves.
- When working Round 1, top of sleeve seam where hexagons meet counts as 1 granny cluster. (So work 3 dc into each ch1sp on either side of the seam, chaining 1 in between.)
Make 2.
Set Up:
With RS facing out, lay dress so shoulder hexagon seam is visible. There will be two hexagon corner spaces at the end of the shoulder seam near the elbow. One corner space is technically on the front of the dress and the other is technically on the back of the dress. You’ll attach your yarn in one of these spaces depending on your dominant hand.
Right and left-handed crocheters: Attach yarn in hexagon corner space on the same side as your dominant hand.
Round 1 is worked with right side of dress facing out. This means right-handed crocheters will work clockwise. Left-handed crocheters will work counter clockwise.
Round 1 (RS): Ch 3, 2 dc in same chsp, ch 1, skip seam, 3 dc in next chsp, ch 1, *3 dc in next ch1sp, ch 1; rep from * until end of round, slst to top of ch 3 to join; turn. (15 (15, 17, 17, 17, 19, 19, 21) clusters)
Round 2 (WS): Ch 3, 2 dc in same ch1sp (1 cluster made), ch 1, *3 dc in next ch1sp, ch 1; rep from * until end of round, slst to top of ch 3 to join; turn. (15 (15, 17, 17, 17, 19, 19, 21) clusters)
Round 3 (RS): Ch 3, 2 dc in same ch1sp (1 cluster made), ch 1, *3 dc in next ch1sp, ch 1; rep from * until end of round, slst to top of ch 3 to join; turn. (15 (15, 17, 17, 17, 19, 19, 21) clusters)
Rounds 4-15 (17, 21, 21, 21, 23, 23, 23): Rep Rounds 2-3.
🧶 To shorten/lengthen sleeves, work fewer or more repeats. Ending with RS/WS specifically doesn’t matter. The finishing rounds should be worked with the RS facing regardless.
Finishing Border Round 1 (RS): Ch 1, sc in each dc and ch1sp, slst to first sc to join. Do not turn.
Finishing Border Round 2 (RS): Ch 1, slst in each sc around sleeve, slst to first st to join. Fasten off.
Neckline Border
With RS facing, attach Color A along back of neckline.
Round 1 (RS): Ch 1, sc evenly around neckline at the approximate frequency outlined below. Then slst to first sc to join. Do not turn.
- 1 sc in each dc
- 1 sc in each ch1sp
- 2 dc in each extension row edge with a space
- 1 dc in each extension row edge with a cluster
Round 2 (RS): Ch 1, slst in each sc around neckline, slst to first st to join. Fasten off.
Finishing
Weave in remaining ends: Since you’ve been weaving in your ends as you go, you shouldn’t have many left. (Right!? 😉
Blocking: Once all ends are woven in, you may do a light steam blocking using either a steamer or iron with steam setting. Focus on any areas that aren’t laying as flat as you’d like, such as the seams. Do not touch steamer or iron directly to yarn.
Put on some red lipstick and go rock your crochet dress era!
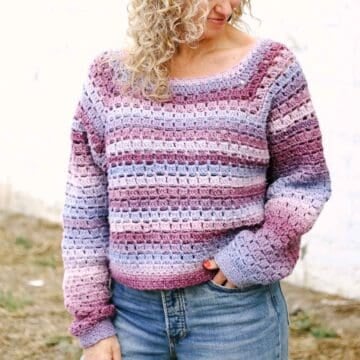
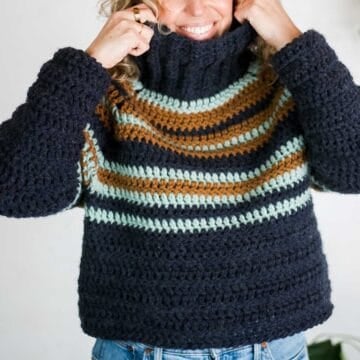
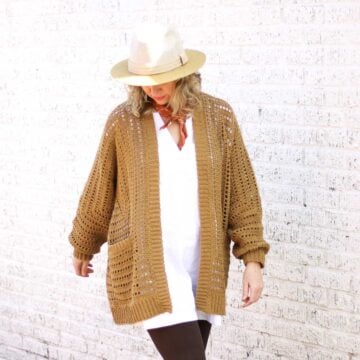
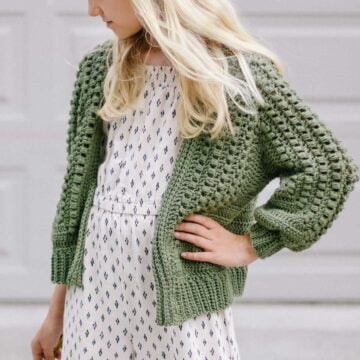
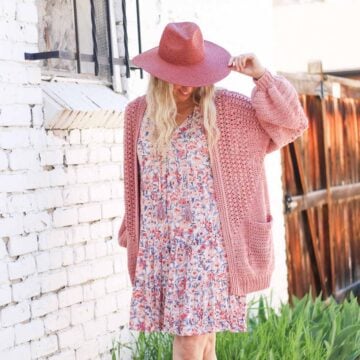
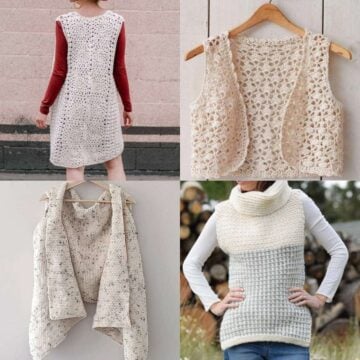
More Crochet Garments Made From Hexagons
I love to design clothing with hexagons as the foundation. Here are more projects that are constructed in the same way as the Taylor-ed To You Dress.

That was so fun! Now what?
Invitation to our Facebook group
Come discuss being in your crochet era and lots of other projects and techniques in our Make & Do Crew Facebook group. Here thousands of helpful crocheters answer each other's questions and share their stitches. Join us!


Leave a Reply