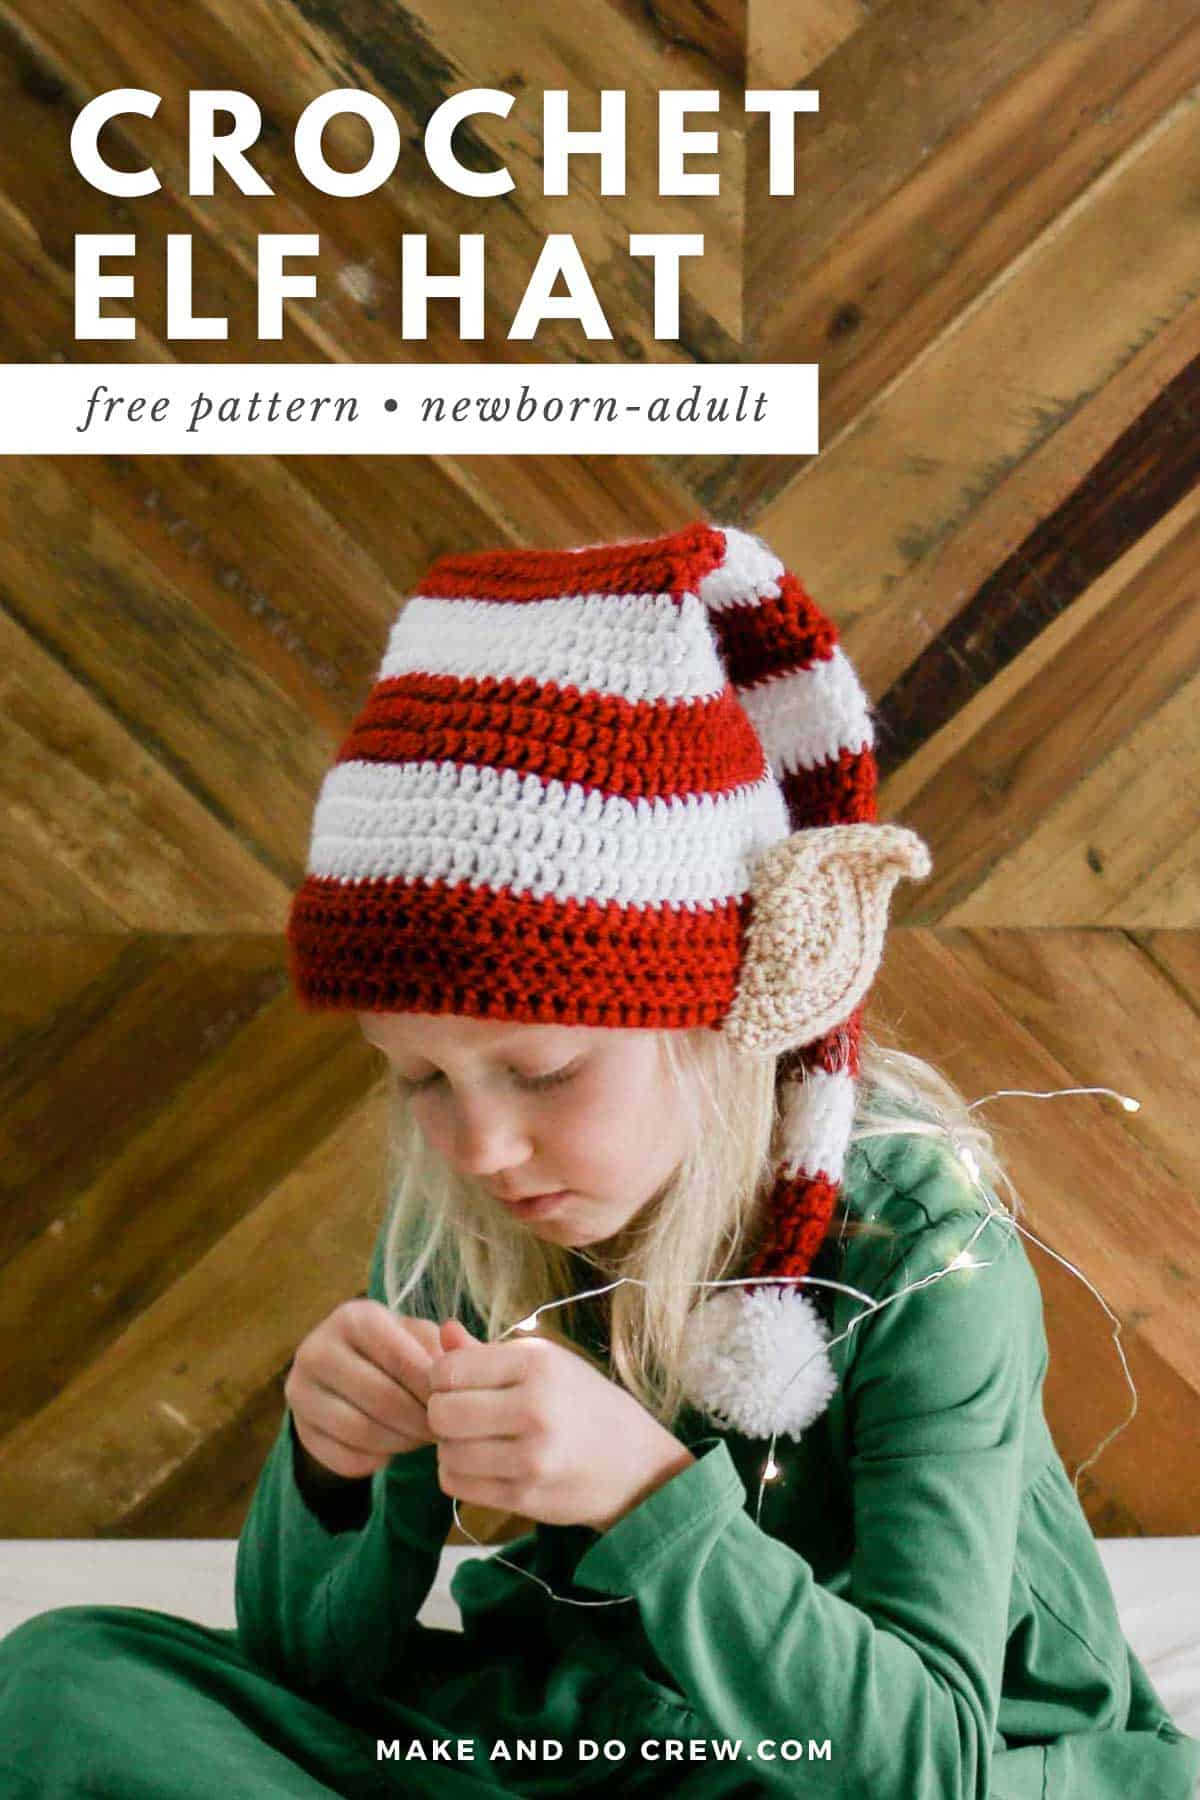
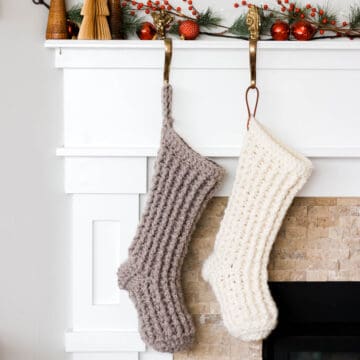
Whether you have upcoming Christmas photos or are planning a trip to the North Pole, this festive crochet elf hat pattern with ears is a must for each member of the family. Get the free pattern in sizes newborn baby through adult below or purchase the ad-free, printable PDF here.
This crochet elf hat pattern is part of a collaboration with my Lion Brand Yarn. This post contains affiliate links.
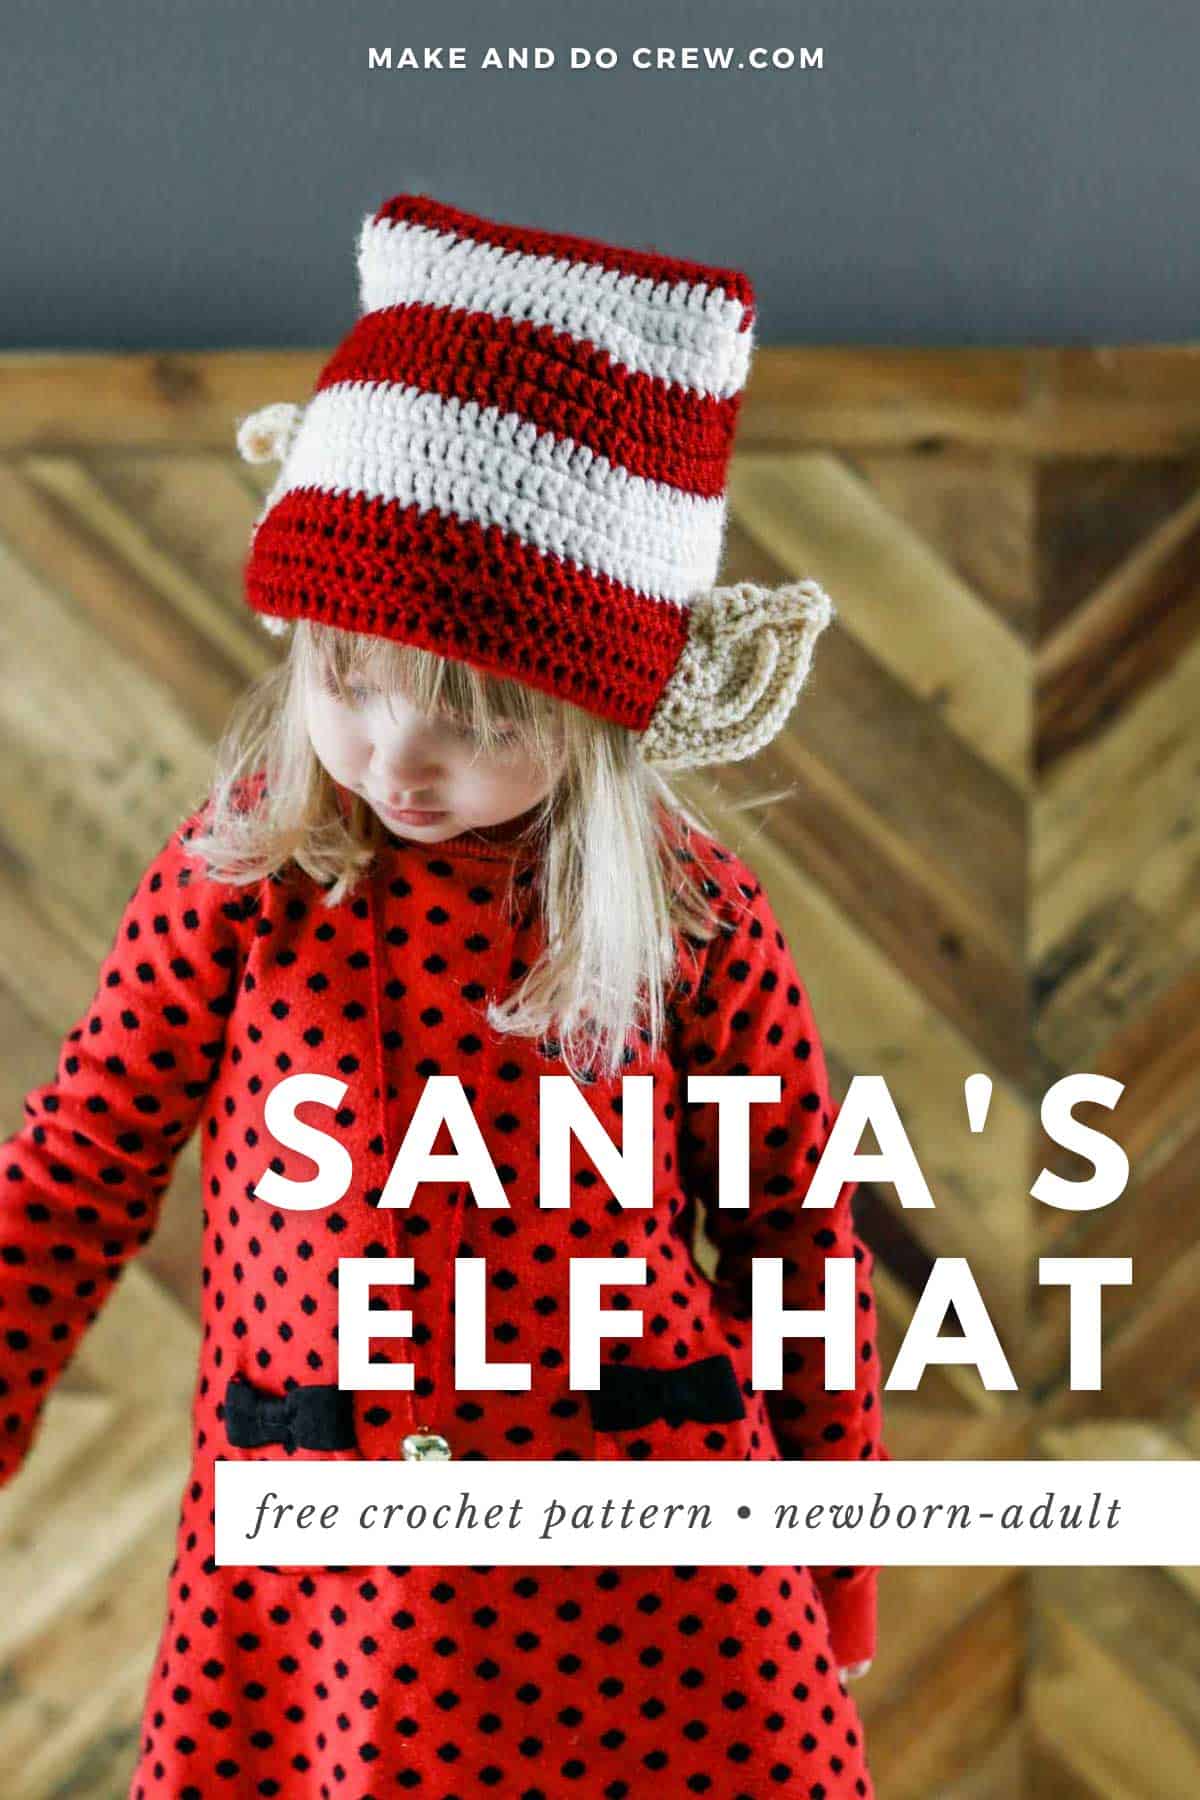
Santa's Helper Elf Hat Crochet Pattern
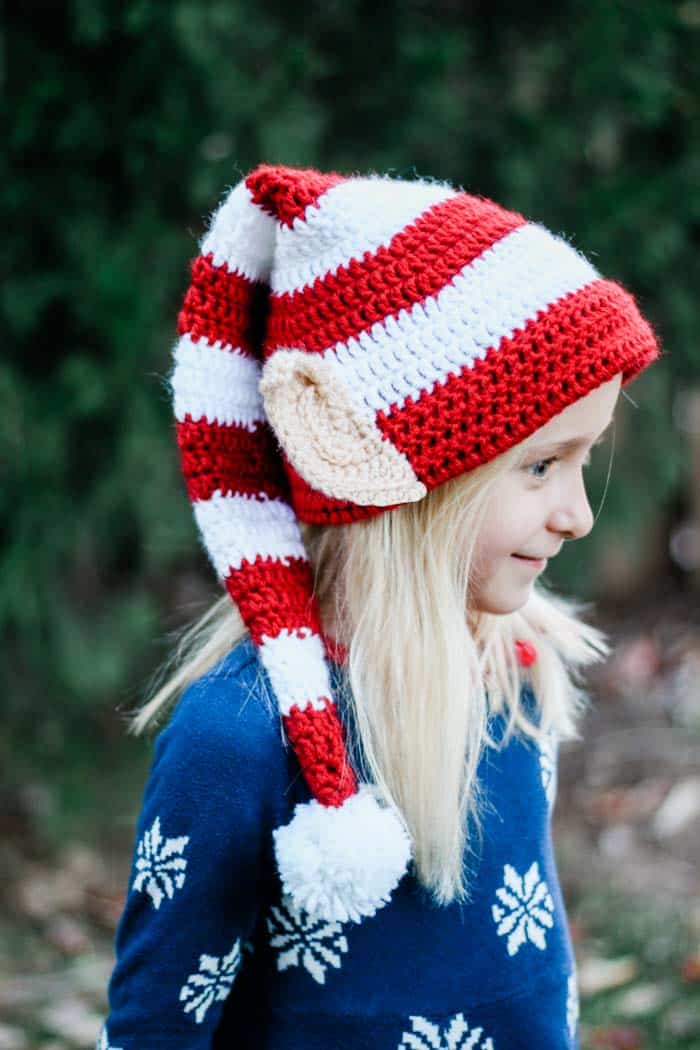
What is cuter than a crochet elf hat pattern? A crochet elf hat pattern with little pointy ears, of course!
I tend to be kind of literal at times, so when I set out to create a free crochet elf hat pattern, I wanted to include all the details that make elves elf-y. The result can be crocheted quick enough to make one for every member of your little elf family.
[ez-toc]
Why you'll love this elf hat crochet pattern!
A Crochet Elf Hat With Ears (of course!)
When designing this hat pattern, crochet elf ears went through a few iterations before I felt like I had gotten them right. Some looked like a blob of gum stuck to a shoe, others were too Yoda-like and some, quite frankly, looked like a different body part that would not be appropriate to sew onto a child's hat. Ha.
The final ears, though, are pretty darn charming. And each time my three-year-old wears this hat, the ears get a little more adorable. I think there's something about how they get wrestled about when she's putting the hat on (often backward) that has relaxed them into perfection.
Related: 35+ Free Chunky Crochet Beanie Patterns
Become a Topic of Crochet Conversation
One thing is for sure, I promise will get comments every time you wear this hat. Turns out people find crochet elf hats with ears pretty darn charming. All the more reason to make one for everyone in your family!
I love that everywhere we've gone this fall, my kids look like they're on work release from Santa's workshop. (And of course, no elf would be complete without a sidekick in a crochet snowman hat.) Having these crochet elf hats around hasn't helped with the "Is it Christmas yeeeeet?" questions around our house.
Santa's Helper Elf Hat Crochet Pattern Overview
If you prefer to watch instead of read, you can learn more about this elf hat pattern in the brief video below as you prepare to crochet your own Santa's Helper hat!
(If you have an ad-blocker running, you'll need to disable it to view the video.)

A Creative Family Christmas Photo Idea
While my kids just love feeling like they're part of Santa's crew when they play outside in the Colorado cold, I also love the idea of dressing up your whole family in crochet elf hats for your Christmas photo.
Wouldn't a family of elves make for a charming family Christmas card? Since this free crochet elf hat pattern comes in sizes newborn, baby, toddler, child, teen and adult, no elf has to be left behind this holiday season.
RELATED: Plan your dream temperature blanket project this January
Or A Remote Christmas Party Prop
If you're celebrating the holidays long distance or remotely this year, wouldn't it be fun show up to your next Zoom happy hour with a crocheted elf hat? Or send hats to your family members so you can all be matching while you sip eggnog on FaceTime together!
Get the Printable Pattern Version
If you're like me and enjoy crocheting from the comfort of your couch, you'll find the inexpensive ad-free PDF of this crochet elf hat to be a great little investment.
Not only is it color coded so you know exactly where to switch colors, it's formatted with large type for clear printing. Purchase the ad-free, printable PDF on Etsy here or LoveCrafts here.
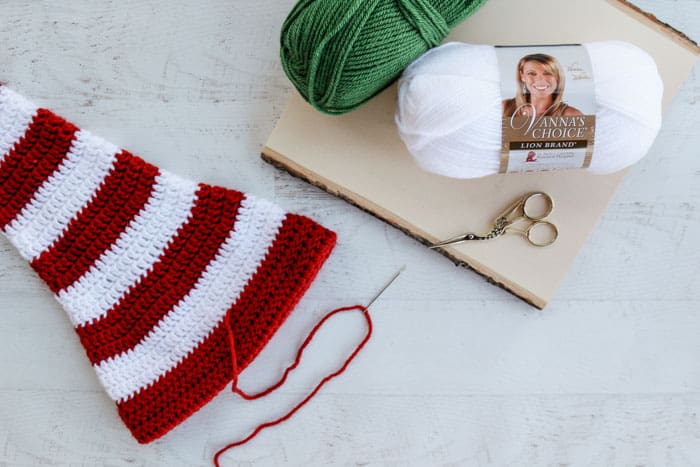
The Perfect Yarn for a Long Tail Crochet Elf Hat
I used Lion Brand's Vanna's Choice yarn for this free crochet elf hat pattern for a few reasons:
• The colors are vivid and perfect for a long tail, dramatic crochet elf hat. (See them all here!)
• Vanna's Choice is worsted weight, so it's pretty fast to work with and also easy to substitute if it's not available in your neck of the woods.
• It's machine washable for all the messy elves out there. Working in Santa's workshop can be a dirty job, you know.
Yarn Substitute Ideas
You can really use any worsted weight yarn to crochet this Santa's elf hat. Lion Brand Basic Stitch would be a great choice because it comes in a variety of rich colors. You can also search YarnSub.com for an alternative acrylic yarns to substitute.
Just keep in mind that you want to use a yarn that's the same thickness as what is used in the pattern so that your crochet elf hat fits as expected. That means you're looking only for yarns that are a category 4 (aka worsted weight).
A Quick Crochet Christmas Gift
Of course we all intend to start Christmas crochet projects early. But if you're like me and it's the very last minute and you're searching for a quick crochet gift idea, look no further!
This crochet elf hat can be made in a few hours thanks to the quick double crochet stitches. You'll begin at the very tip top of the long tail working in the round and crochet your way down to the brim of the hat, WITHOUT cutting your yarn to switch colors for the stripes.
Once you get the hang of this easy hat pattern, I know you'll want to elf-up everyone on your Christmas list!
RELATED: 30+ Christmas Ornaments to Crochet
Pin it! click to pin this elf hat pattern for later ⇨

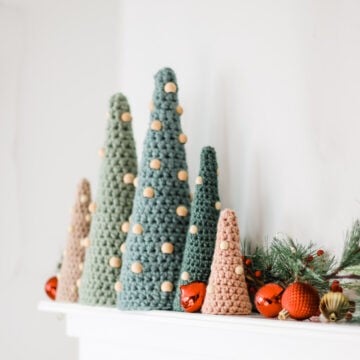
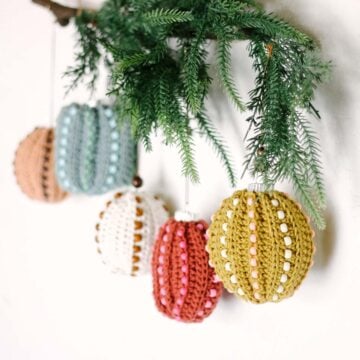
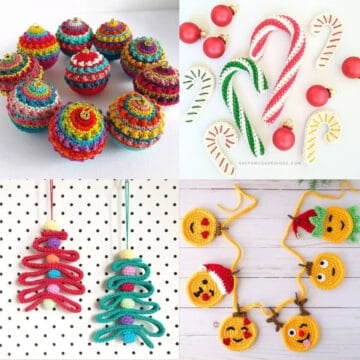
More Free Christmas Crochet Patterns
From tree ornaments to c2c crochet patterns to adorable elf hats with ears, we've got you covered with many more crochet patterns for Christmas. We also have loads of quick gifts to crochet and gift ideas for crocheters to add to your own list (hint!)
See more free Christmas crochet patterns →
"Santa's Helper" Crochet Elf Hat
Free Pattern
UPDATE: This pattern was originally posted in December 2015 and it was my first original crochet pattern. I've learned a lot since then, so I've completely re-written the pattern with clearer instructions updated sizing and new photos. You can still find the original version of the Santa's Helper Elf Hat crochet pattern in the Subscriber Vault.
Purchase the ad-free, printable PDF on Etsy here or LoveCrafts here.
Add this pattern to your Ravelry favorites here.
Pin it for later here.
Explanation:
Whether you have upcoming Christmas photos or are planning a trip to the North Pole, this festive crochet elf hat is a must for each member of the family. Worked from the top down with very simple increases, the hat grows quickly and involves very little seaming. Tie a jingle bell to the pom pom to add a little Christmas magic for the smallest elves.
Written in sizes newborn-adult, so no elf needs to be left behind this Christmas season.
Supplies:
• Lion Brand Vanna’s Choice (Weight: 4/medium - 170 yds, 3.5 oz)
- Color A: Cranberry (#860-180)
- Color B: White (#860-100)
- Color C: Beige (#860-123) or color to match skin tone (see suggestions below)
• Tapestry needle
• Size I (5.5 mm) crochet hook
• Pom pom maker or piece of cardboard
• Jingle bell (optional)
Sizes / Circumference of Actual Head:
0-6 Months - 14-15” (Note: Do not leave infants unsupervised when wearing.)
6-12 Months - 15-16” (Note: Do not leave infants unsupervised when wearing.)
Toddler - 16-18”
Child - 18-20”
Tween - 20-22”
Adult - 22-24”
For most accurate sizing, measure recipient’s head circumference and choose size accordingly. When meeting gauge, the finished hat will fit loosely when recipient is on the smaller end of the size range. If a more snug fit is desired, size down.
Gauge:
14 dc = 4”
8 rows = just over 4”
Abbreviations and Glossary (US Terms):
ch – chain
dc – double crochet
RS – right side
sc – single crochet
sl st – slip stitch
st(s) – stitch(es)
tr – treble crochet
WS – wrong side
Overall Crochet Pattern + Sizing Notes:
• When matching skin tone for elf ears, a few other colors to try include:
- Lion Brand Vanna’s Choice - Chocolate (#860-126)
- Lion Brand DIYarn - Camel (#205-124)
- Lion Brand Basic Stitch - Goldmine (#201-126)
• Pattern is worked from the top down in one piece.
• To change colors between rows, work the final yarn over of the last dc of the row with the new color. Pattern is written with the assumption that the last dc and final sl st before a color change row will be worked this way.
• Do not cut yarn after color changes. Instead, simply keep it attached in inside of hat. Reference note at beginning of each round for which color yarn is used.
• For a less noticeable join, work ch-3 at beginning of each row fairly tightly. This ch-3 counts as a dc throughout.

Main Crochet Elf Hat Instructions
Foundation: Make a magic ring using Color A.
Round 1 (Color A): Ch 3, 5 dc in ring, sl st to 3rd ch at beginning of round to join. (6 dc)
Round 2 (Color A): Ch 3, dc in each dc, sl st to 3rd ch at beginning of round to join. (6 dc)
Round 3 (Color A): Ch 3, 2 dc in next dc, (dc in next dc, 2 dc in next dc) twice, sl st to 3rd ch at beginning of round to join. (9 dc)
✨Unlock this free subscriber-exclusive pattern ✨
Follow these steps to view the full free pattern below
Round 14 (Color A): Ch 3, dc in next 5 dc, 2 dc in next dc, (dc in next 6 dc, 2 dc in next dc) twice, sl st to 3rd ch at beginning of round to join. (24 dc)
Round 15 (Color A): Ch 3,dc in each dc, sl st to 3rd ch at beginning of round to join. (24 dc)
Round 16 (Color A): Ch 3, dc in next 6 dc, 2 dc in next dc, (dc in next 7 dc, 2 dc in next dc) twice, sl st to 3rd ch at beginning of round to join. (27 dc)
Round 17 (Color B): Ch 3, dc in each dc, sl st to 3rd ch at beginning of round to join. (27 dc)
Round 18 (Color B): Ch 3, dc in next 7 dc, 2 dc in next dc, (dc in next 8 dc, 2 dc in next dc) twice, sl st to 3rd ch at beginning of round to join. (30 dc)
Round 19 (Color B): Ch 3,dc in each dc, sl st to 3rd ch at beginning of round to join. (30 dc)
Round 20 (Color A): Ch 3, dc in next 8 dc, 2 dc in next dc, (dc in next 9 dc, 2 dc in next dc) twice, sl st to 3rd ch at beginning of round to join. (33 dc)
Round 21 (Color A): Ch 3, dc in each dc, sl st to 3rd ch at beginning of round to join. (33 dc)
Round 22 (Color A): Ch 3, dc in next 9 dc, 2 dc in next dc, (dc in next 10 dc, 2 dc in next dc) twice, sl st to 3rd ch at beginning of round to join. (36 dc)
Round 23 (Color B): Ch 3,dc in each dc, sl st to 3rd ch at beginning of round to join. (36 dc)
Round 24 (Color B): Ch 3, dc in next 10 dc, 2 dc in next dc, (dc in next 11 dc, 2 dc in next dc) twice, sl st to 3rd ch at beginning of round to join. (39 dc)
Round 25 (Color B): Ch 3,dc in each dc, sl st to 3rd ch at beginning of round to join. (39 dc)
Round 26 (Color A): Ch 3, dc in next 11 dc, 2 dc in next dc, (dc in next 12 dc, 2 dc in next dc) twice, sl st to 3rd ch at beginning of round to join. (42 dc)
Round 27 (Color A): Ch 3,dc in each dc, sl st to 3rd ch at beginning of round to join. (42 dc)
Round 28 (Color A): Ch 3, dc in next 12 dc, 2 dc in next dc, (dc in next 13 dc, 2 dc in next dc) twice, sl st to 3rd ch at beginning of round to join. (45 dc)
Continue with instructions for appropriate size.
0-6 Months
Round 29 (Color B): Ch 3, dc in next 7 dc, 2 dc in next dc, (dc in next 8 dc, 2 dc in next dc) 4 times, sl st to 3rd ch at beginning of round to join. (50 dc)
Round 30 (Color B): Ch 3, dc in next 23 dc, 2 dc in next dc, dc in next 24 dc, 2 dc in last dc, sl st to 3rd ch at beginning of round to join. (52 dc)
Round 31 (Color B): Ch 3,dc in each dc, sl st to 3rd ch at beginning of round to join. (52 dc)
Rounds 32-36 (Color A): Ch 3,dc in each dc, sl st to 3rd ch at beginning of round to join. (52 dc)
Fasten off both colors, leaving a 35” tail of Color A.
6-12 Months
Round 29 (Color B): Ch 3, dc in next 7 dc, 2 dc in next dc, (dc in next 8 dc, 2 dc in next dc) 4 times, sl st to 3rd ch at beginning of round to join. (50 dc)
Round 30 (Color B): Ch 3, dc in next 8 dc, 2 dc in next dc, (dc in next 9 dc, 2 dc in next dc) 4 times, sl st to 3rd ch at beginning of round to join. (55 dc)<
Rounds 31-36 (Color A): Ch 3, dc in each dc, sl st to 3rd ch at beginning of round to join. (55 dc)
Fasten off both colors, leaving a 35” tail of Color A.
Related: 27+ Easy Hats to Crochet for Winter
Wanna save this pattern?
Toddler
Round 29 (Color B): Ch 3, dc in each dc, sl st to 3rd ch at beginning of round to join. (45 dc)
Round 30 (Color B): Ch 3, dc in next 13 dc, 2 dc in next dc, (dc in next 14 dc, 2 dc in next dc) twice, sl st to 3rd ch at beginning of round to join. (48 dc)
Round 31 (Color B): Ch 3,dc in each dc, sl st to 3rd ch at beginning of round to join. (48 dc)
Round 32 (Color A): Ch 3, dc in next 6 dc, 2 dc in next dc, (dc in next 7 dc, 2 dc in next dc) 5 times,
Round 33 (Color A): Ch 3, dc in next 7 dc, 2 dc in next dc, (dc in next 8 dc, 2 dc in next dc) 5 times, sl st to 3rd ch at beginning of round to join. (60 dc)
Round 34 (Color A): Ch 3, dc in next 8 dc, 2 dc in next dc, (dc in next 9 dc, 2 dc in next dc) 5 times, sl st to 3rd ch at beginning of round to join. (66 dc)
Rounds 35-37 (Color B): Ch 3, dc in each dc, sl st to 3rd ch at beginning of round to join. (66 dc)
Rounds 38-43 (Color A): Ch 3, dc in each dc, sl st to 3rd ch at beginning of round to join. (66 dc)
Fasten off both colors, leaving a 35” tail of Color A.
Child
Round 29 (Color B): Ch 3, dc in each dc, sl st to 3rd ch at beginning of round to join. (45 dc)
Round 30 (Color B): Ch 3, dc in next 13 dc, 2 dc in next dc, (dc in next 14 dc, 2 dc in next dc) twice, sl st to 3rd ch at beginning of round to join. (48 dc)
Round 31 (Color B): Ch 3,dc in each dc, sl st to 3rd ch at beginning of round to join. (48 dc)
Round 32 (Color A): Ch 3, dc in next 6 dc, 2 dc in next dc, (dc in next 7 dc, 2 dc in next dc) 5 times, sl st to 3rd ch at beginning of round to join<. (54 dc)
Round 33 (Color A): Ch 3, dc in next 7 dc, 2 dc in next dc, (dc in next 8 dc, 2 dc in next dc) 5 times, sl st to 3rd ch at beginning of round to join. (60 dc)
Round 34 (Color A): Ch 3, dc in next 8 dc, 2 dc in next dc, (dc in next 9 dc, 2 dc in next dc) 5 times, sl st to 3rd ch at beginning of round to join. (66 dc)
Round 35 (Color B): Ch 3, dc in next 9 dc, 2 dc in next dc, (dc in next 10 dc, 2 dc in next dc) 5 times, sl st to 3rd ch at beginning of round to join. (72 dc)
Rounds 36-37 (Color B): Ch 3,dc in each dc, sl st to 3rd ch at beginning of round to join. (72 dc)
Rounds 38-44 (Color A): Ch 3,dc in each dc, sl st to 3rd ch at beginning of round to join. (72 dc)
Fasten off both colors, leaving a 35” tail of Color A.
Tween
Round 29 (Color B): Ch 3,dc in each dc, sl st to 3rd ch at beginning of round to join. (45 dc)
Round 30 (Color B): Ch 3, dc in next 13 dc, 2 dc in next dc, (dc in next 14 dc, 2 dc in next dc) twice, sl st to 3rd ch at beginning of round to join. (48 dc)
Round 31 (Color B): Ch 3,dc in each dc, sl st to 3rd ch at beginning of round to join. (48 dc)
Round 32 (Color A): Ch 3, dc in next 6 dc, 2 dc in next dc, (dc in next 7 dc, 2 dc in next dc) 5 times, sl st to 3rd ch at beginning of round to join. (54 dc)
Round 33 (Color A): Ch 3, dc in next 7 dc, 2 dc in next dc, (dc in next 8 dc, 2 dc in next dc) 5 times, sl st to 3rd ch at beginning of round to join. (60 dc)
Round 34 (Color A): Ch 3, dc in next 8 dc, 2 dc in next dc, (dc in next 9 dc, 2 dc in next dc) 5 times, sl st to 3rd ch at beginning of round to join. (66 dc)
Round 35 (Color B): Ch 3, dc in next 9 dc, 2 dc in next dc, (dc in next 10 dc, 2 dc in next dc) 5 times, sl st to 3rd ch at beginning of round to join. (72 dc)
Round 36 (Color B): Ch 3, dc in next 10 dc, 2 dc in next dc, (dc in next 11 dc, 2 dc in next dc) 5 times, sl st to 3rd ch at beginning of round to join. (78 dc)
Round 37 (Color B): Ch 3,dc in each dc, sl st to 3rd ch at beginning of round to join. (78 dc)
Rounds 38-40 (Color A): Ch 3, dc in each dc, sl st to 3rd ch at beginning of round to join. (78 dc)
Rounds 41-43 (Color B): Ch 3, dc in each dc, sl st to 3rd ch at beginning of round to join. (78 dc)
Rounds 44-51 (Color A): Ch 3, dc in each dc, sl st to 3rd ch at beginning of round to join. (78 dc)
Fasten off both colors, leaving a 35” tail of Color A.
Adult
Round 29 (Color B): Ch 3,dc in each dc, sl st to 3rd ch at beginning of round to join. (45 dc)
Round 30 (Color B): Ch 3, dc in next 13 dc, 2 dc in next dc, (dc in next 14 dc, 2 dc in next dc) twice, sl st to 3rd ch at beginning of round to join. (48 dc)
Round 31 (Color B): Ch 3,dc in each dc, sl st to 3rd ch at beginning of round to join. (48 dc)
Round 32 (Color A): Ch 3, dc in next 6 dc, 2 dc in next dc, (dc in next 7 dc, 2 dc in next dc) 5 times, sl st to 3rd ch at beginning of round to join. (54 dc)
Round 33 (Color A): Ch 3, dc in next 7 dc, 2 dc in next dc, (dc in next 8 dc, 2 dc in next dc) 5 times, sl st to 3rd ch at beginning of round to join. (60 dc)
Round 34 (Color A): Ch 3, dc in next 8 dc, 2 dc in next dc, (dc in next 9 dc, 2 dc in next dc) 5 times, sl st to 3rd ch at beginning of round to join. (66 dc)
Round 35 (Color B): Ch 3, dc in next 9 dc, 2 dc in next dc, (dc in next 10 dc, 2 dc in next dc) 5 times, sl st to 3rd ch at beginning of round to join. (72 dc)
Round 36 (Color B): Ch 3, dc in next 10 dc, 2 dc in next dc, (dc in next 11 dc, 2 dc in next dc) 5 times, sl st to 3rd ch at beginning of round to join. (78 dc)
Round 37 (Color B): Ch 3, dc in next 37 dc, 2 dc in next dc, dc in next 38 dc, 2 dc in last dc, sl st to 3rd ch at beginning of round to join. (80 dc)
Round 38 (Color A): Ch 3, dc in each dc, sl st to 3rd ch at beginning of round to join. (80 dc)
Round 39 (Color A): Ch 3, dc in next 38 dc, 2 dc in next dc, dc in next 39 dc, 2 dc in last dc, sl st to 3rd ch at beginning of round to join< (82 dc)
Round 40 (Color A): Ch 3, dc in each dc, sl st to 3rd ch at beginning of round to join. (82 dc)
Rounds 41-43 (Color B): Ch 3, dc in each dc, sl st to 3rd ch at beginning of round to join. (82 dc)
Rounds 44-51 (Color A): Ch 3, dc in each dc, sl st to 3rd ch at beginning of round to join. (82 dc)
Fasten off both colors, leaving a 35” tail of Color A.
Elf Hat Ears
Notes:
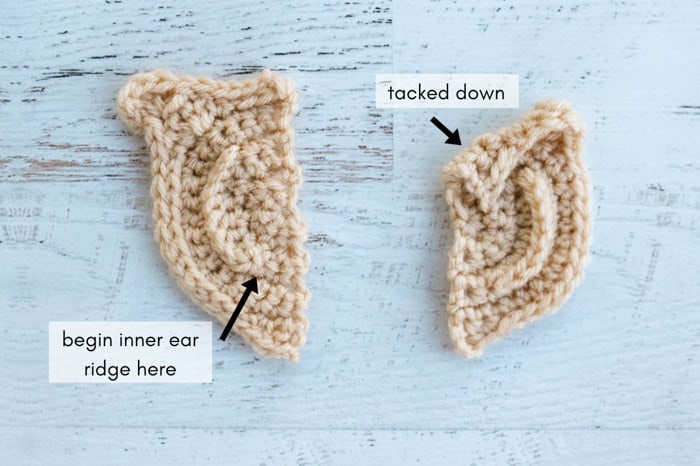
• See photo below for ear detail.
All Sizes
Make 2.
Foundation: Make a magic ring using Color C.
Row 1: Ch 1, 6 sc in ring; turn. (6 sc)
Row 2: Ch 1, (2 sc in next sc, sc in next sc) 3 times; turn. (9 sc)
Row 3: Ch 1, (2 sc in next sc, sc in next 2 sc) 3 times; turn. (12 sc)
Row 4: Ch 1, (2 sc in next sc, sc in next 3 sc) 3 times; turn. (15 sc)
Row 5: Ch 1, (2 sc in next sc, sc in next 4 sc) 3 times; turn. (18 sc)
Continue with instructions for appropriate size.
Newborn - Toddler
Row 6: Ch 3 (Counts as first dc), dc in first sc, sc in next sc, sl st in next 9 sc, sc in next sc, (2 dc, tr, dc) in next sc, sc in next sc, sl st in next 4 sc; turn.
Row 7: Ch 1, sl st in next 6 sts, (2 dc, tr) in next st, 3 sl st down the side of tr just made, sl st in each st to end of row. Fasten off, leaving a 20” tail.
Inner Ear Ridge: Attach yarn to Row 4, mid ear, above lobe. (See photo B.) 7 sc along curve of Row 4. Fasten off.
Repeat for second ear, except work Inner Ear Ridge on the WS of ear, creating a mirror image of first ear.
Child - Adult
Row 6: Ch 1, (2 sc in next sc, sc in next 5 sc) 3 times; turn. (21 sc)
Row 7: Ch 3 (counts as first dc) dc in first sc, sc in next sc, sl st in next 12 sc, sc in next sc, (2 dc, tr, dc) in next sc, sc in next sc, sl st in next 4 sc; turn.
Row 8: Ch 1, sl st in next 6 sts, (2 dc, tr) in next st, 3 sl st down the side of tr just made, sl st in each st to end of row. Fasten off, leaving a 20” tail.
Inner Ear Ridge: Attach yarn to Row 4, mid ear, above lobe. (See photo B.) 9 sc along curve of Row 4. Fasten off.
Repeat for second ear, except work Inner Ear Ridge on the WS of ear, creating a mirror image of first ear.
Finishing
With RS of hat facing out, fold over bottom Color A brim toward the outside of hat until Color A section is folded in half. Using a tapestry needle and attached yarn tail, whip stitch around hat to secure. (See photo in blog post above.)
Using tapestry needle and skin-colored yarn, tack down top inner edge of both ears.
For best ear placement on hat, attach them in the same position the wearer’s real ears will be. (This means there is slightly less room between the ears in the back of the hat than in the front.) Let the lobes hang below the Color A cuff a bit. With skin-colored yarn, sew ears onto hat using a whip stitch.
Create a pom-pom, tie jingle bell inside it if desired. (Avoid adding a jingle bell if the recipient is under 3-years-old due to risk of choking.) Attach pom-pom to the top of hat. Here’s a DIY pom-pom tutorial if you need help.
Call up Santa because you’re ready to be put to work!
I love to see your finished projects! Use #MakeAndDoCrew and tag me Instagram (@MakeAndDoCrew) to show off your stitches and have a chance to be featured.
More Free Christmas Crochet Patterns
- 30+ Crochet Christmas Ornament Patterns
- 30+ Christmas Crochet Patterns
- Crochet Gift Ideas to Make This Year
- Best Gifts For a Crocheter
- Baby Snowman Crochet Hat Pattern
- Hygge Holiday Crochet Blanket Pattern
- C2C Crochet Baby Bear Blanket Pattern
- Mitten - C2C Crochet Graph
That was so fun! Now what?
Invitation to our Facebook group
Come discuss crocheting cute elf hats and lots of other crochet projects and techniques in our Make & Do Crew Facebook group. Here thousands of helpful crocheters answer each others questions and share their stitches. Come join us here.

The How to Crochet an Elf Hat - A Summary
Materials
Yarn
- Color: Lion Brand Vanna’s Choice Weight: 4/medium - 170 yds, 3.5 oz
- Cranberry #860-180
- White #860-100
- Beige #860-123 or color to match skin tone (see suggestions below)
Additional Supplies
- Tapestry needle
- Size I 5.5 mm crochet hook
- Pom pom maker or piece of cardboard
- Jingle bell optional
Abbreviations + Glossary (US Terms)
- ch – chain
- dc – double crochet
- RS – right side
- sc – single crochet
- sl st – slip stitch
- st(s) – stitch(es)
- tr – treble crochet
- WS – wrong side
Abbreviations and Glossary (US Terms):
Want some company while you crochet?
Get support (and camaraderie!) in the Make & Do Crochet Crew Facebook Group. Search “Make and Do Crochet Crew” on Facebook.com.
Permissions + Copyright
Please do not publish or share this pattern as your own. You may make items to sell with this pattern. In exchange, please link back to this page. Do NOT use my photos as your own sales photos.
Overall Pattern Notes
Instructions
Easy Crochet Elf Hat Pattern with Ears - Pattern Overview
- 1. Begin with a foundation round of a magic ring using Color A.
- 2. Round 1, chain 3, 5 double crochet in ring, slip stitch to 3rd chain at beginning of round to join.
- 3. Repeat steps for Rounds 2-51 with Color A and B.
Elf Hat Ears
- 4. For elf hat ears, make a magic ring using Color C.
- 5. Chain 1, 6 single crochet in ring; turn.
- 6. Repeat for Row 2-7.
Finishing
- 7. For inner ear ridge, attach yarn to Row 4, mid ear, above lobe. Repeat for second ear.
- 8. Use a tapestry needle and attach yarn tail to secure both ears.
- 9. Add pom-pom, tie jingle bell inside if desired.
- 10. Call up Santa because you’re ready to be put to work!
Brian Martin says
How adorable! I wanna make one for my baby!
Karen says
I have the alternate sizes and am reading through the pattern before I start. I am confused because round 7 joins with green and then the next "join" is in round 10 but it says join using white. Then the next join in round 13 says join using green. Should the round 10 join be using white instead of green?
Jess @ Make and Do Crew says
Hey Karen,
It alternates ever few rows between white and green. So when it says "join with white," it's referring to the fact that you'll want to slip stitch into the 2nd chain at the beginning of the row using the color of the new section you're about to start. This makes the seam invisible. So in row 10, you're joining with white because you're just about to start a white section.
Hope that is helpful!
Jess
Miranda says
Hello Jess,
I love the hat, and would like to make several for my cousins' toddlers for Christmas.
Did you happen to have a gauge for this pattern?
I reduced down to a 4.25mm hook, but the hat's are coming out too large (I'm aiming for a 18" circumference). I must be using thicker yarn, or a looser DC (or both).
Thanks,
Miranda
Jess @ Make and Do Crew says
Hey Miranda,
I'm sorry it's taken me a couple of days to measure this for you! The gauge is 7 dc = 2" and 3.5 rows = 2". I just added it to the pattern as well. How does that compare to what you're getting? Also, the fact that you're referencing your hook size in mm makes me wonder if you're in the UK? This pattern is written in US terms--just clarifying that in case that is the problem! 🙂
Jess
Tracey says
Downloaded the pattern without issues, but what is the gauge for this hat?! I crochet loose, and am usually 2 hook sizes smaller than the pattern states, but without gauge I'm lost!
Jess @ Make and Do Crew says
Hey Tracey--
I'm sorry about that. I just added the gauge to the pattern. 7 DC = 2 inches and 3.5 rows = 2 inches.
Hope that's helpful!
Jess
Carol says
I would like the pattern for the different sized elf hats please. Thank you!
Jess @ Make and Do Crew says
Hey Carol,
If you subscribe in the box above this comment area you'll get an email that tells you how to access the larger sizes.
Happy crocheting!
jess
Della Hackworth says
love these! would love to do adult sizes!!
Jess @ Make and Do Crew says
Hey Della,
If you subscribe in the box at the bottom of the pattern, you'll receive an email with a link to access the other sizes of the pattern (for free :).
Happy crocheting!
Jess
Dana Samardzich says
I am finishing the ears on this hat, but I'm stuck on the single crochet ridge in the middle. Can you give an instruction for how to do that?
Jess @ Make and Do Crew says
Hey Dana,
It might be helpful to look at the image of the ears as closely as possible. Essentially, you're just attaching the yarn in the middle of the inside of the ear so that you can sc a small curve on the surface of the ear. It's meant to replicate the inner "C" shape of your ear. Does that make any sense at all? 🙂
Please let me know if not. I'm happy to explain it another way.
Jess
Dana Samardzich says
Dear Jess,
Thank you for your response. I was trying to crochet around the other single crochets and I couldn't make it work. Am I pretty much just picking up a loop in the post of the single crochet to attach it and start the ridge?
Dana
Kelley says
Want to make an elf hat for a 1 year old who wears18 month clothes. Thank you!
Jess @ Make and Do Crew says
Hey Kelley,
If you subscribe in the box above this comment area, you'll receive an email to download the additional sizes of the pattern.
Happy crocheting!
Jess0
Helen says
I entered the my email. The email I received did not have a clickable link. I emailed you directly and the link you provided brought me back here after entering the password.
Jess @ Make and Do Crew says
Hey Helen,
I believe I emailed you back. Were you able to get your hands on the pattern?
Helen says
The link just brought me here after entering the password. No, I didn't get the pattern, unfortunately.
Karen says
Helen, once you enter the password, you have to click on the name of the pattern, not the "tutorial here" part. Took me about 30 minutes to figure it out! Good luck!
Jess @ Make and Do Crew says
Thanks for helping out, Karen! Yes, the "tutorial here" is simply a quick and easy way to get back to the blog post so that you can reference it if you'd like to.
Kim McMiller says
I entered my email, but am not getting a response for the different sizes.
Jess @ Make and Do Crew says
Hey Kim,
Boo! Sometimes it can get stuck in your spam folder. Did you search your email for Make and Do Crew? If it's not showing up, you might want to just try subscribing again. (You won't get subscribed for multiple emails.) If none of that works, send me an email at jess (at) makeanddocrew (dot) com.
We'll get you what you need!
Jess
Sarah says
I'm a little confused by the picture that you have posted and the pattern. The picture ends with green and then the red, but your pattern has you doing two rows of white (rows 17 and 18) then the 5 rows of red.
Jess @ Make and Do Crew says
Great catch, Sarah! You're right. Are you crocheting the newborn size? (The one that's in the blog post?) That size is a bit smaller and therefore has a different number of stripes than the toddler size, which is pictured.
Does that clear things up? Let me know if not!
Jess
Sarah says
Yes I was doing the newborn size. Its a bit confusing to see the picture of a larger size then the posted pattern size but I understand now.
carolyn mcmahon says
Hi! I've been going around in circles trying to get adult & child sizes of this pattern. I've done the write in email address thing 2 times and end up right back here - IN the vault!!!. I've read all you comment replies on this and I don't see how those people got to the bigger size patterns either!
Help!!!
Connie says
I was a little confused too..but you click on the name of the project to get the pattern for the other sizes. You click on "Santa’s Helper Crochet Elf Hat Pattern (With Ears!)"
You don't click on "Tutorial Here" If you click on the "Here" it takes you to the original tutorial.
Jess @ Make and Do Crew says
You're right, Connie! The tutorial link is just there so that you can easily reference all the pattern photos and write up about the pattern in general. Thanks for offering help to other readers. 🙂