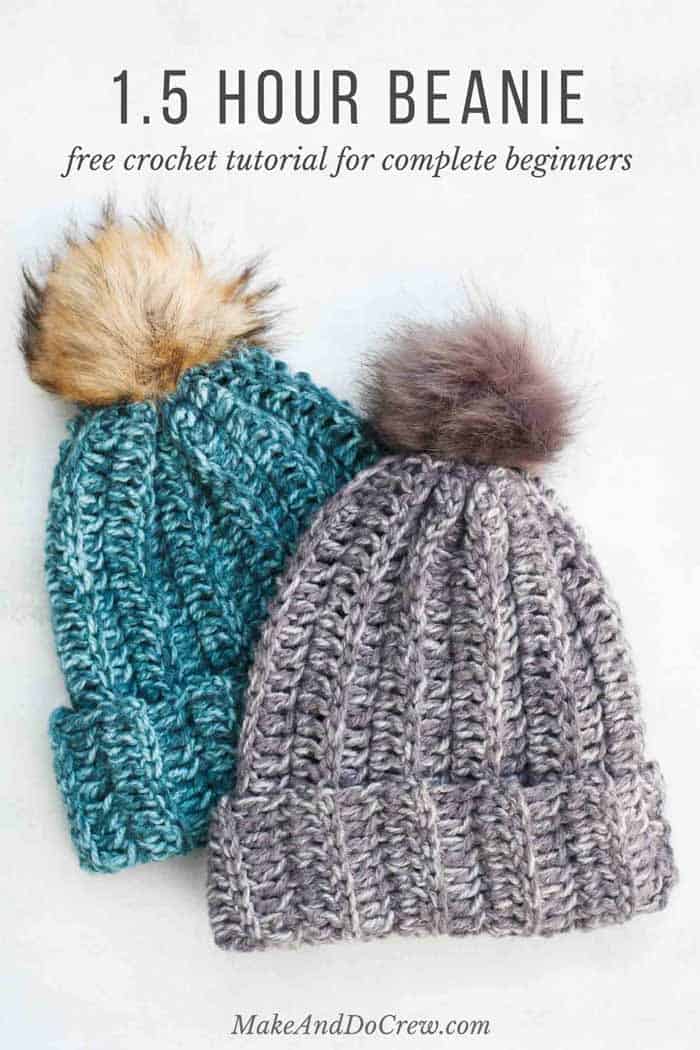
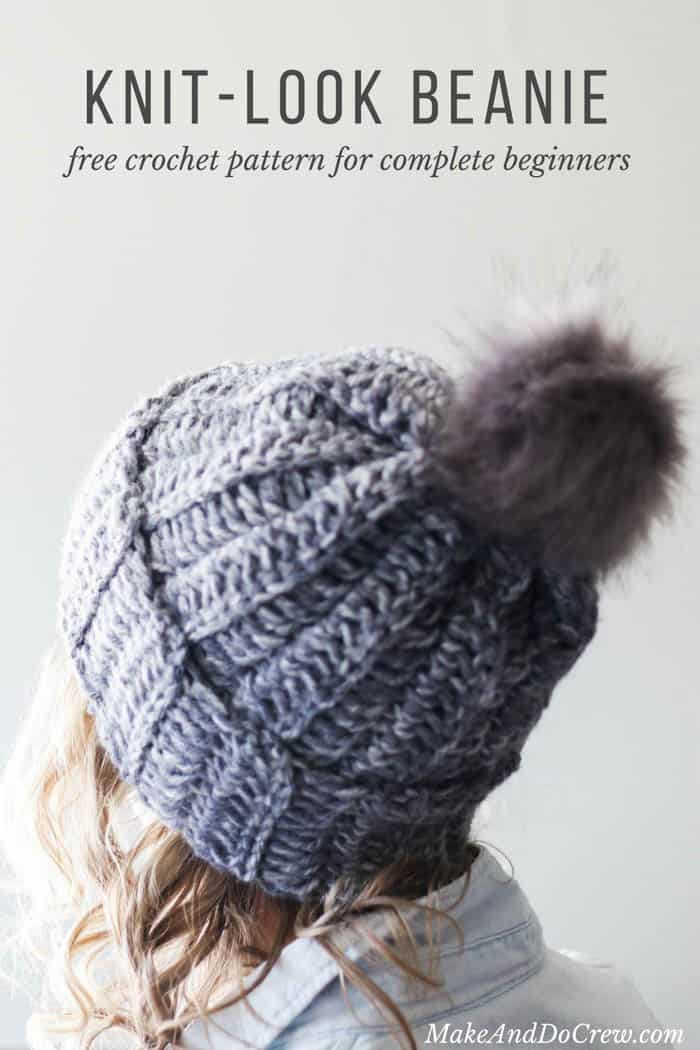
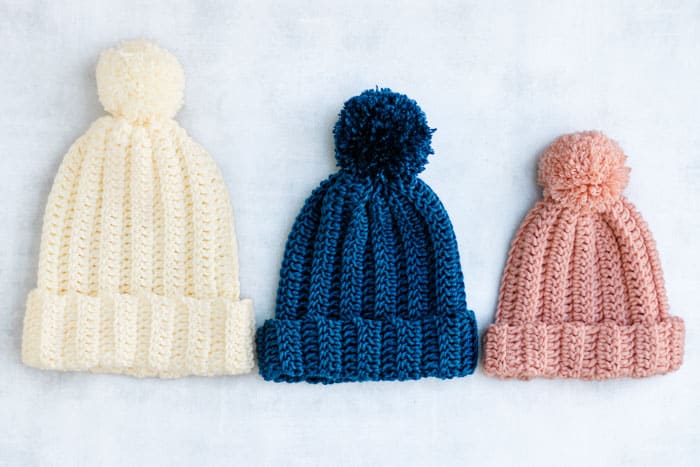
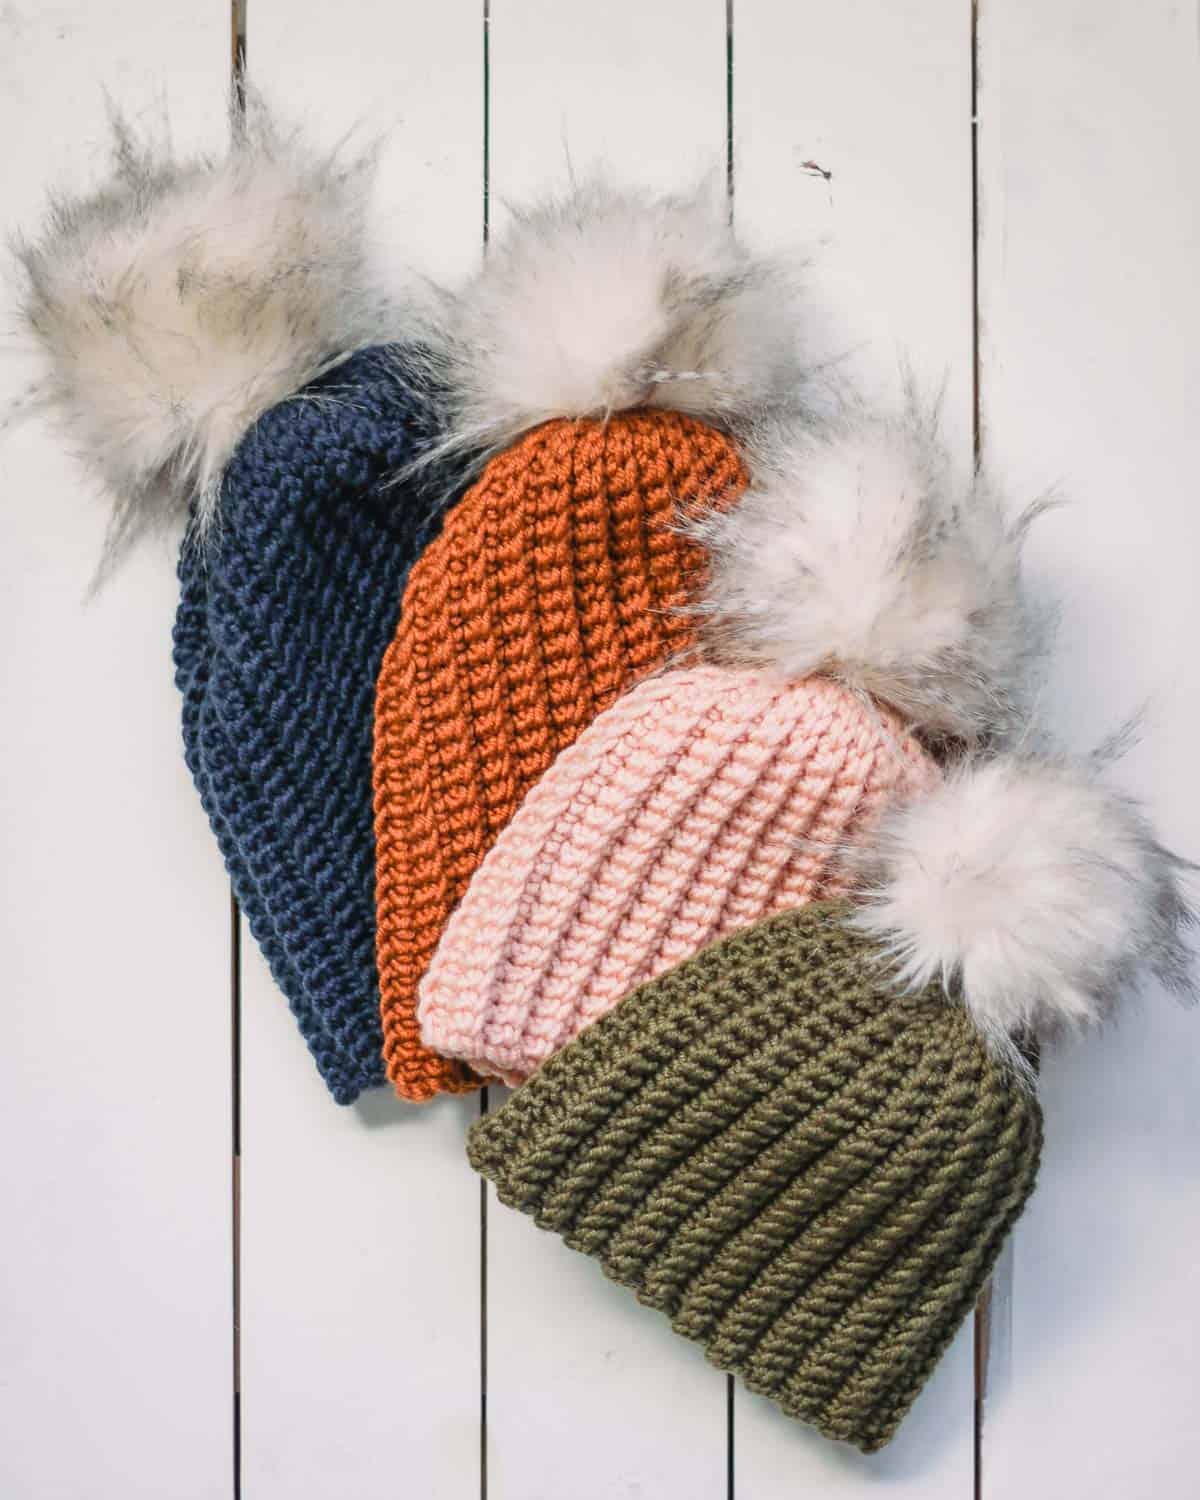
Whether you're new to learning how to crochet a hat or just looking for a super fast project, this free crochet hat pattern for beginners is astonishingly easy.
If you can crochet a rectangle, you can make this simple unisex beanie pattern!
Get the full free pattern and step-by-step video tutorial below or purchase the ad-free, printable PDF here.
This easy crochet hat pattern + tutorial contains affiliate links.
Jump to:
- A True Beginner Crochet Hat Pattern
- How to Crochet a Hat in 1.5 Hours
- Save This Beanie Pattern
- A Winter Crochet Beanie That Looks Knit
- How to Modify this Simple Hat Pattern
- Size Chart for Crocheting Beanies
- Best Yarn for Chunky Beanies
- Step-By-Step Video Tutorial
- Easy Crochet Hat Pattern
- A Tapered Beginner Crochet Hat Option
- FAQs About Crocheting Hats
- More Free Crochet Hat Patterns
- Invitation to our Facebook group
- That was so fun! Now what?
- How to Crochet a Chunky Ribbed Beanie - A Summary
A True Beginner Crochet Hat Pattern
Need a last minute gift? Just learned how to crochet? Snowstorm blowing in? Whatever your situation, this extremely easy crochet beanie pattern has you covered.
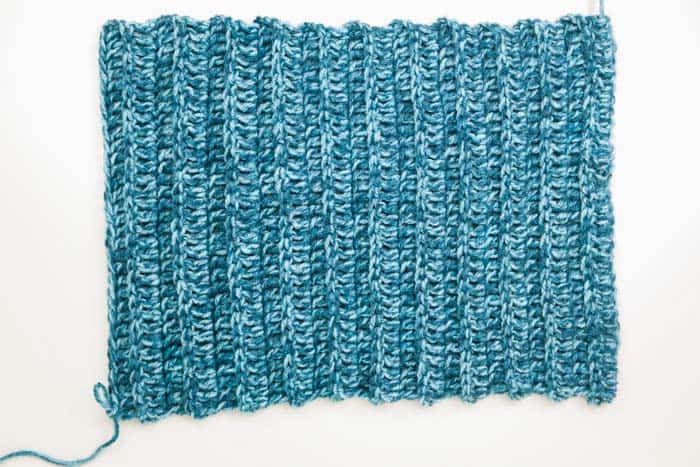
Crocheting a hat usually requires working in the round, plus a decent amount of counting and increasing or decreasing. But not this time!
With our beginner-friendly approach, you’ll lean on the most basic crochet stitches to create a simple hat from a rectangle. This makes this pattern easy enough to attempt as your first crochet project ever.
Why you'll love this ribbed beanie pattern!
How to Crochet a Hat in 1.5 Hours
Here's a quick overview of how to crochet a basic beanie:
Step 1: Measure your head circumference.
Step 2: Crochet a rectangle based on your head measurements. (Details below.)
Step 3: Join the rectangle into a "tube."
Step 4: Cinch one end of the tube closed.
Step 5: Add an optional pom pom.
This method of hat making allows you to finish the entire beanie in about an hour and a half. (And when I say an hour and a half, I mean start to finish. Including the time it takes to find the remote and cue up a movie.)
Save This Beanie Pattern
Not ready to start? Save this free crochet hat pattern for adults and come back to it later.
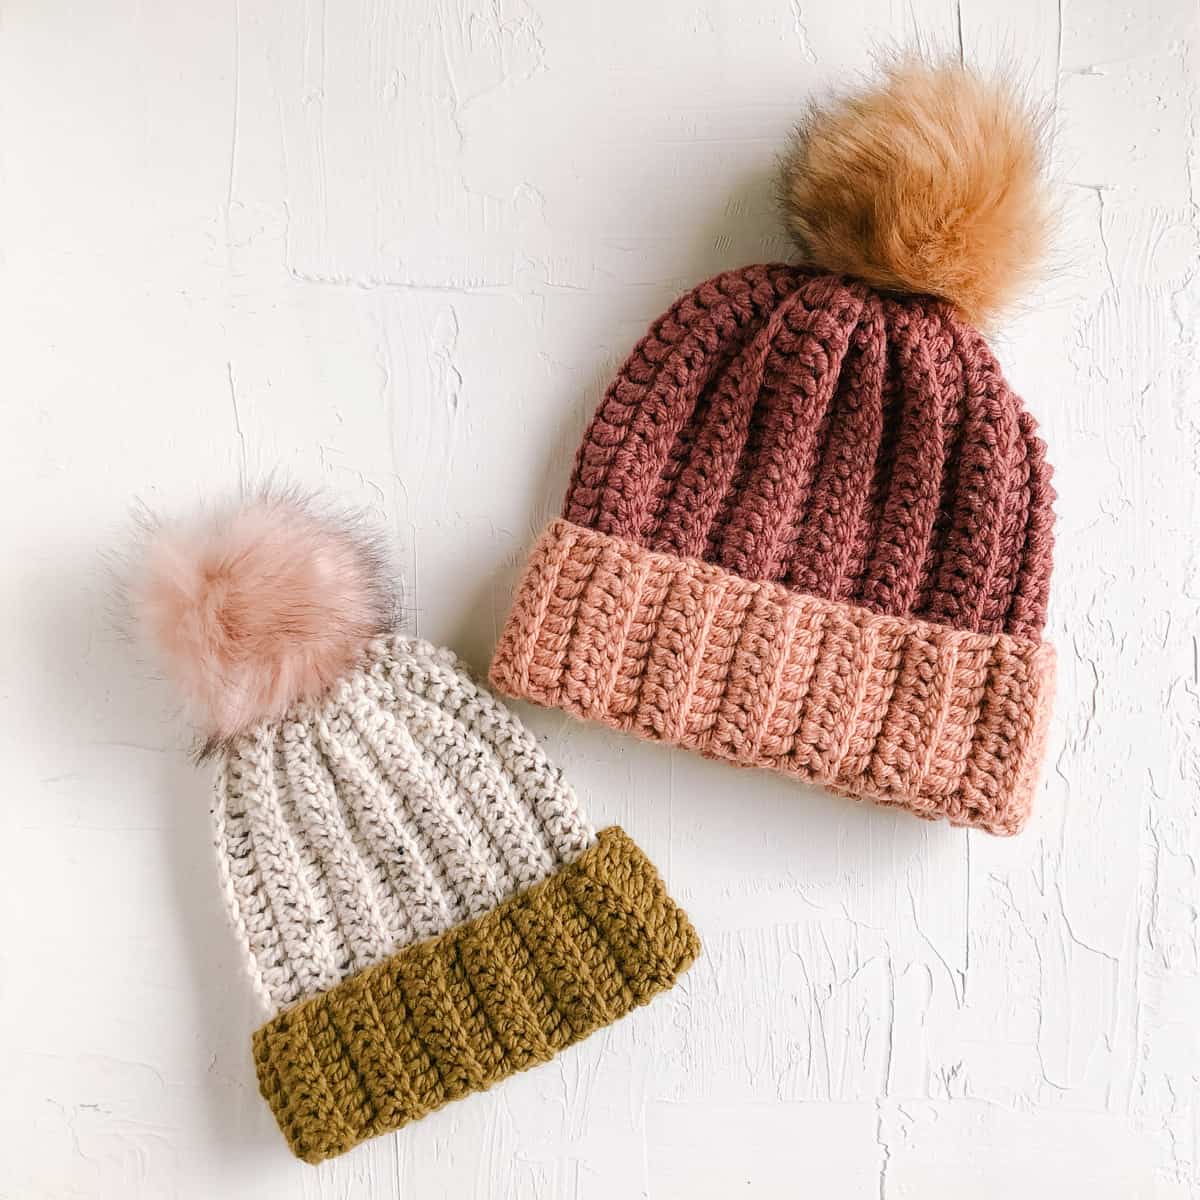
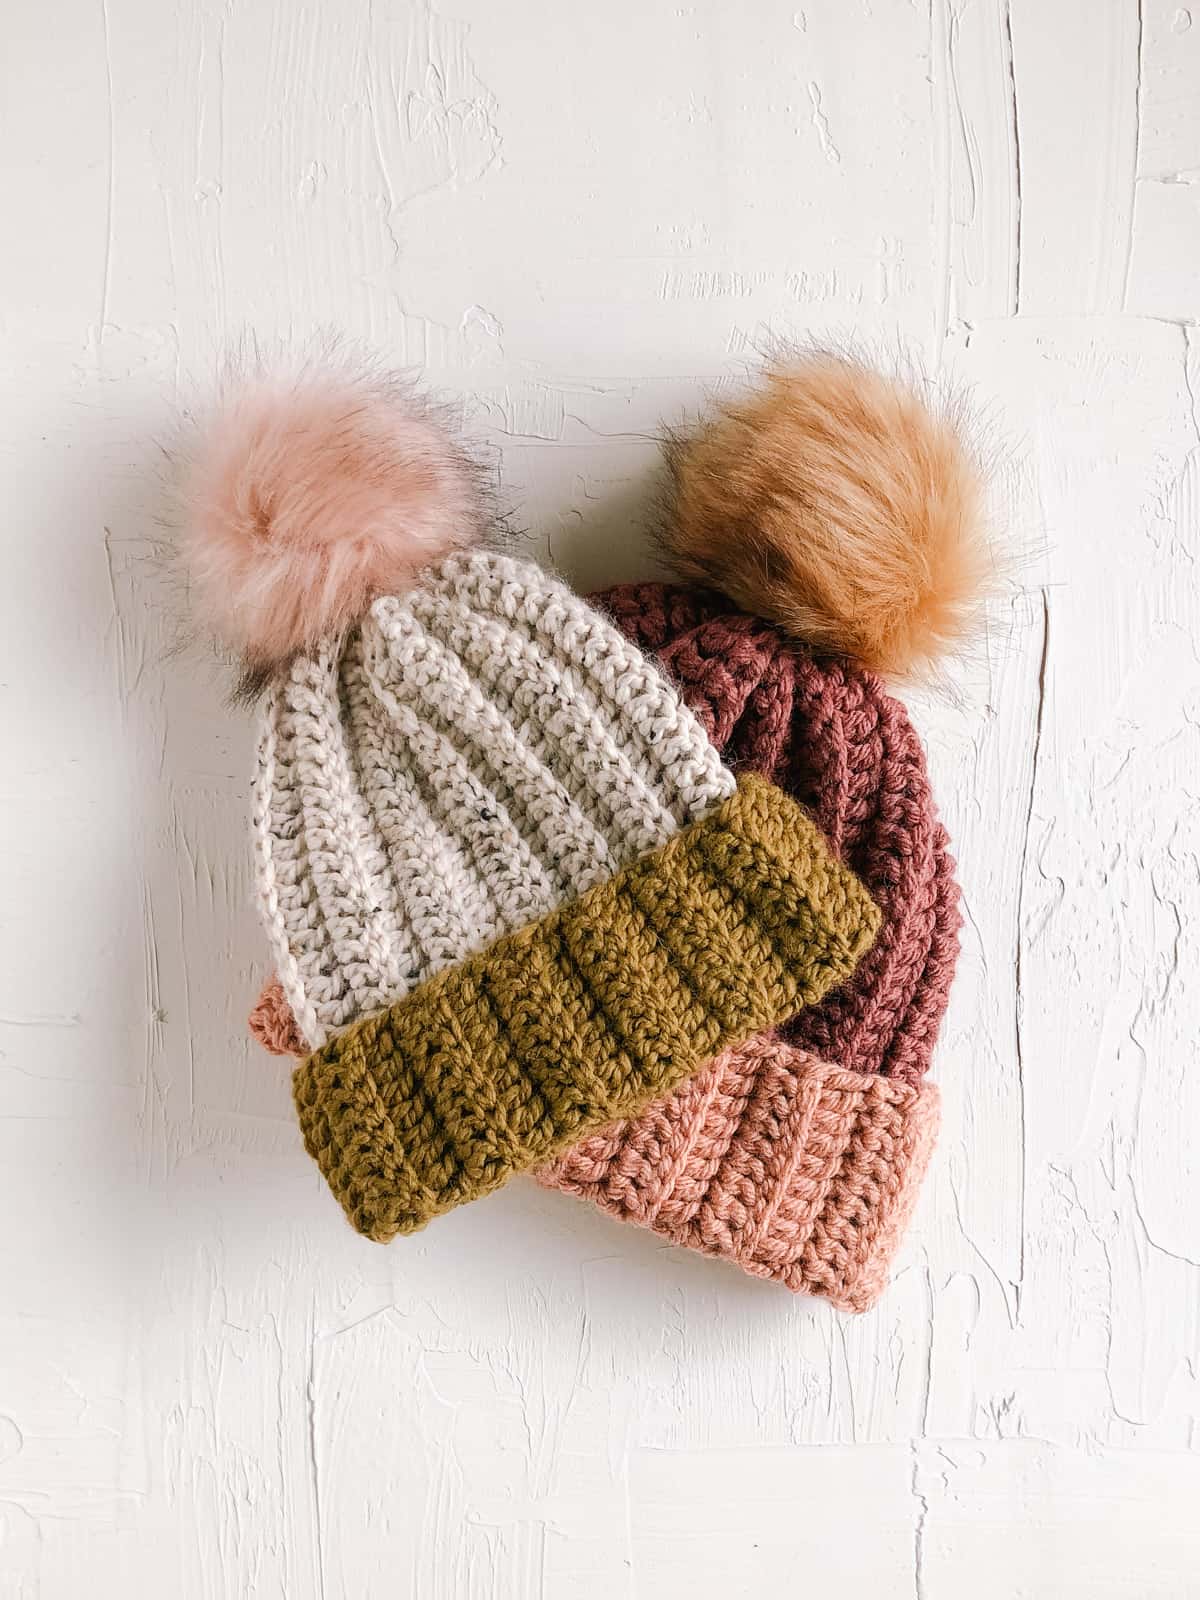
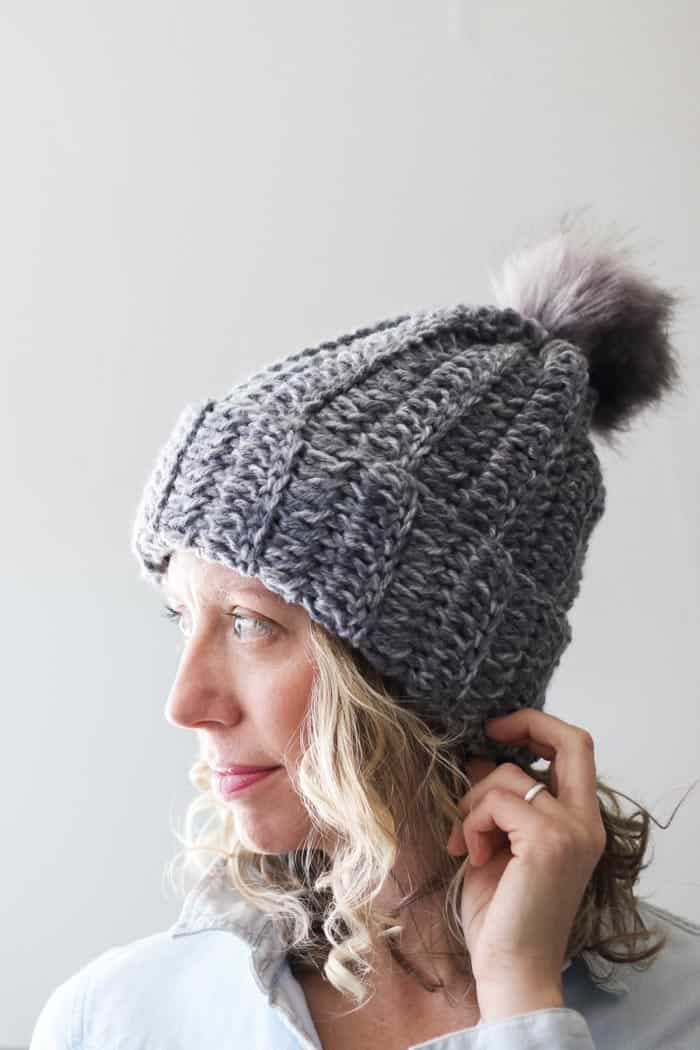
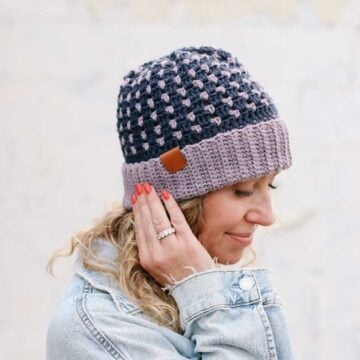
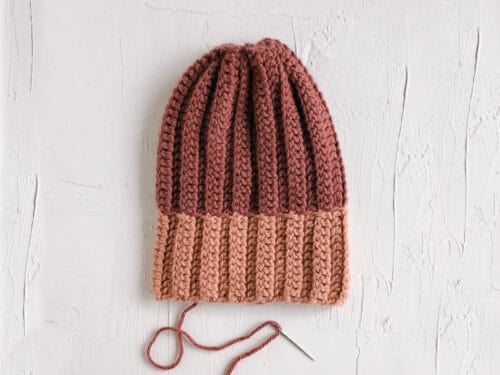
A Winter Crochet Beanie That Looks Knit
I've been really into crochet stitches that look knit lately. (If you are too, you'll love this collection of 15 free crochet patterns that knit and this how to crochet the "knit stitch" video tutorial.)
So when I set out to design this super easy beanie crochet pattern, I decided to give it a ribbed look that resembles the vibe of a classic knit cap.
This is the crochet cap I'd want if I were going ice fishing in Minnesota followed by dinner at my favorite ironic hipster hot dog stand. Ha.
Related: 27+ Best Crochet Hat Patterns for Winter
Creating the Crochet Ribbing Stitch
How do we make crochet look like knitting? In the case of this chunky beanie, it's quite easy.
In this pattern, we're using typical double crochet stitches. Instead of inserting the hook under both loops of each stitch though, we're just working under the "back" loop only (abbreviated "blo"). This creates the nice ribbed look that mimics knitting.
How to Modify this Simple Hat Pattern
When you understand the basic concepts of how to crochet a hat from a rectangle, you can easily modify the style of your beanie.
Here are a few pattern variations to try:
Pro Tip: Once you learn how to crochet a hat, you can begin to substitute different weights of yarn. Simply crochet a rectangle that meets the dimensions listed in the pattern and you’ll be good to go!
Pin it! click to pin this pattern for later ⇨
Size Chart for Crocheting Beanies
The classic style of this beginner crochet hat pattern is perfect for men, women and kids. Choosing the correct size is quite simple. Measure your actual head circumference right above your ears to know which hat size is right for you.
TIP: If you don't have a flexible measuring tape available, wrap a piece of yarn around your head without stretching it and measure the length of the string.
| Hat Size | Head Circumference | Rectangle Measurement |
|---|---|---|
| Preschool | 18-20" | 16.75” x 9.75" |
| Older Child | 19-21" | 18” x 11.25" |
| Adult Small | 20-22" | 18” x 14.5" |
| Adult Medium | 22-23" | 20” x 14.5" |
| Adult Large | 24-25" | 22” x 14.5" |
Adult Sizes
This bean crochet pattern is designed to fit with 2-3 inches of negative ease. This means that the finished hat will be a few inches smaller than your actual head circumference. This allows the hat to feel comfortable without sliding off your head.
Adult Small: Young teen (hat has approx. 18” circumference, unstretched)
Adult Medium: Most women and men (hat has approx. 20” circumference unstretched)
Adult Large: Larger heads (hat has approx. 22” circumference unstretched)
Kid Sizes
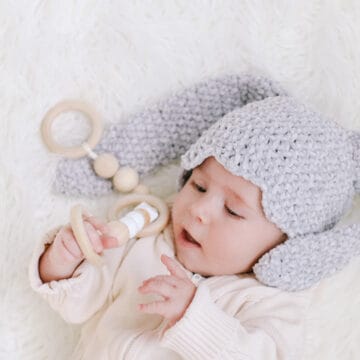
Want to make this crochet beanie pint-sized for your favorite kiddo? You can find this same style of free hat pattern for kids here. This smaller version of the pattern includes preschool and child sizes.
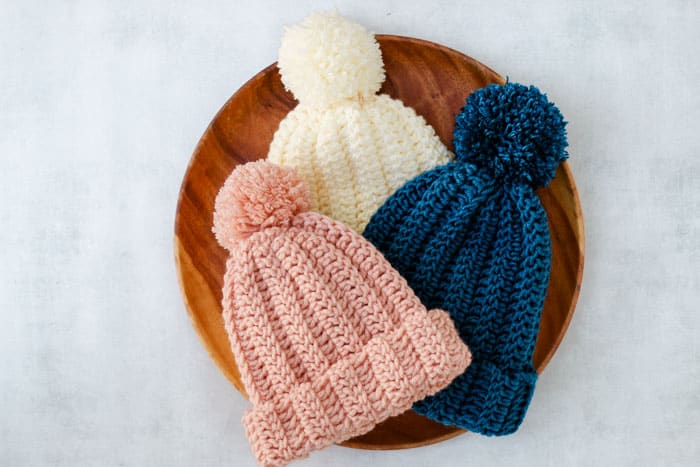
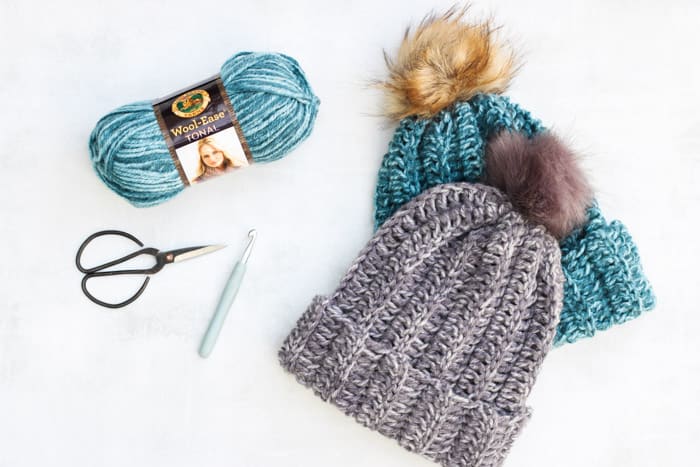
Best Yarn for Chunky Beanies
This easy hat pattern uses a category 5 weight yarn (sometimes also called "bulky weight"). Using a chunky yarn makes this hat quick to whip up and creates the classic winter beanie look.
These are a few of my favorite chunky yarns for fast crochet patterns:
Lion Brand Hue + Me - A gorgeous color palette and low maintenance care instructions make this my go-to chunky yarn.
Lion Brand Wool-Ease Tonal - This painterly yarn has been discontinued, but works great for this pattern if you get your hands on some.
Lion Brand Scarfie - A lofty wool-blend yarn that creates a soft ombre look as you crochet.
Related: 35+ Easy Chunky Beanies to Crochet
How to Substitute Yarn
Would you like to swap out the category 5 yarn to use a different weight yarn? No problem! Simply follow the gauge swatch instructions to determine how many stitches you will need to crochet a rectangle with the same dimensions as the pattern below.
Pro Tip: Want to use up your stash? Holding two strands of worsted weight yarn yarn together is a great substitution for the chunkier category 5 yarns used for the beanies pictured.
Step-By-Step Video Tutorial
If you want to step-by-step guidance as you learn how to crochet a hat for beginners, I've got you covered!
Watch a full step-by-step video tutorial of this beginner crochet hat pattern below. Then scroll down a bit more to find the written instructions and photo tutorial.
(Note: If you're running an ad-blocker, you'll need to disable it to view the video player below.)
Easy Crochet Hat Pattern
Alright, let's explain this concept in written pattern form. Here is exactly how to crochet a chunky ribbed beanie for beginners.
Wanna save this pattern?
Design + Construction Notes
• This basic beanie pattern is worked back and forth in rows. The rectangle will be rotated for seaming which means these rows will become the vertical ribs on the hat.
• To adjust this crochet hat pattern to fit a child, chain fewer stitches at the beginning and work fewer total rows. Get the detailed kids free crochet hat instructions here.
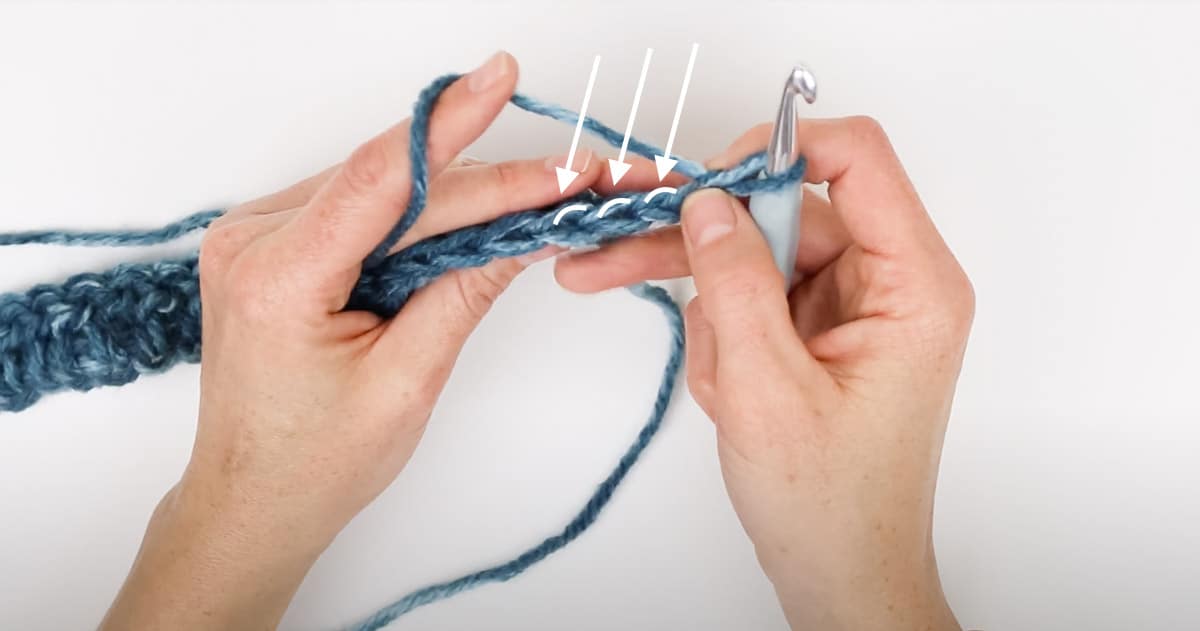
• After Row 1, the double crochet stitches are worked only under the back loop (blo) of the stitch from the previous row. This is always the loop farthest away from you, regardless of which side of the crocheting is facing you.
Yarn Pictured In Tutorial
See notes above for substituting yarns.
• Lion Brand Wool-Ease Tonal (Weight: 5/ bulky - 124 yds, 4 oz) – 2 skeins
- Colors pictured: Smoke (635-149) and Slate Blue (635-107)
Additional Materials
Here's what else you'll need to make your hat.
- Tapestry (yarn) needle
- Size L (8 mm) crochet hook - or whatever size hook helps you meet the gauge below
- Stitch markers or safety pins
- Scissors - the sharper the better if you're making a DIY pom pom
- Fur pom pom or pom pom maker (alternative: a small piece of cardboard)
Gauge
10 stitches = 4”
just over 4 rows = 4”
Checking your gauge is important because it will influence how your hat fits. That said, if your gauge is slightly off but you're happy with your hat height, just adjust the number of rows to achieve your ideal hat "tightness" fit.
Remember: It's always okay to change your hook size to help you achieve the pattern gauge!
Abbreviations and Glossary (US Terms)
These are the crochet terms you'll find in the beginner crochet hat pattern below. If you don't yet know how to read a crochet pattern, just follow along with the video tutorial above. It'll also walk you through how to crochet a hat step-by-step.
ch – chain
dcblo – double crochet through the back loop only (see photo below)
tch – turning chain
st – stitch
sk - skip
RS – right side
WS – wrong side
rep – repeat
Pattern Notes
- This pattern is written in size small with medium and large instructions written in parenthesis. S (M/L)
- The chain 3 at the beginning of each row doesn’t count as a stitch.
- When only one number is given, it applies to all the pattern sizes.
- To make more of a slouch hat than a beanie, add 7-12 chains to your foundation row.
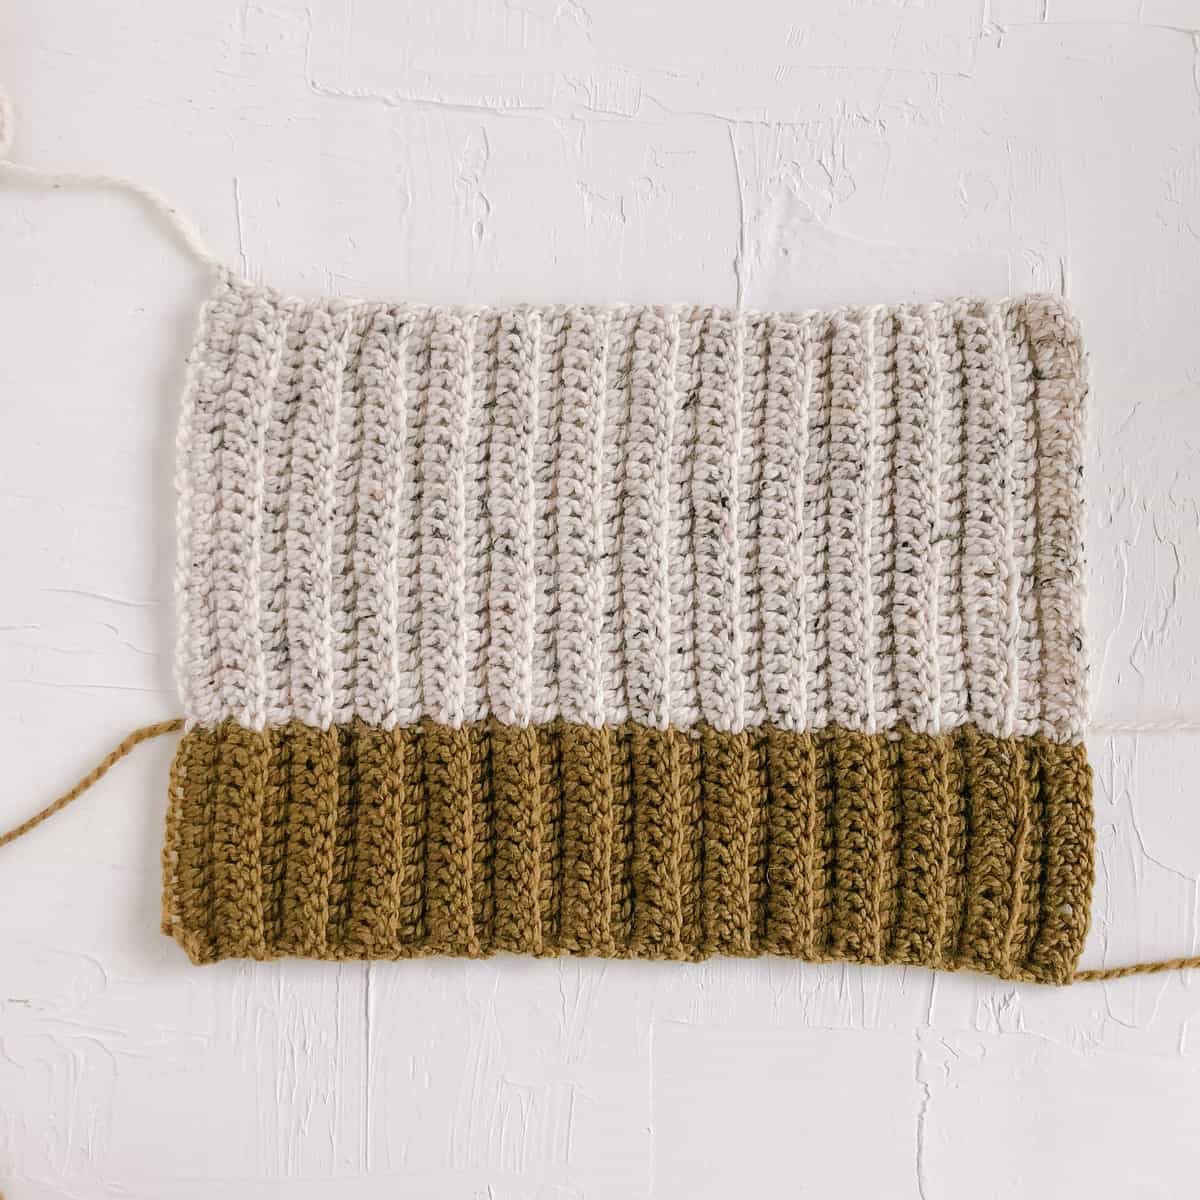
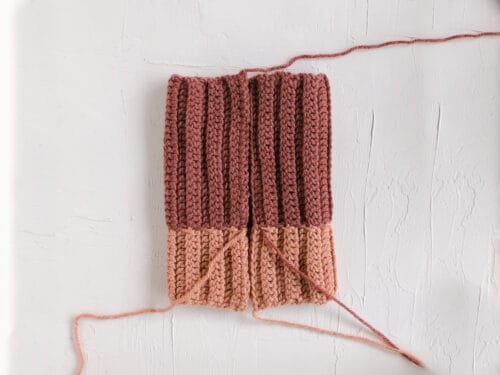
- To create a color-block beanie with a different colored brim: Work approximately 11 sts in one color, then switch colors mid row and complete the row in the second color. Work back and forth switching colors in the middle of each row. Both colors should stay attached to your project throughout.
Begin by checking your head measurement. This will determine how many rows are included in your rectangle. (Reference the size chart above for more details.)
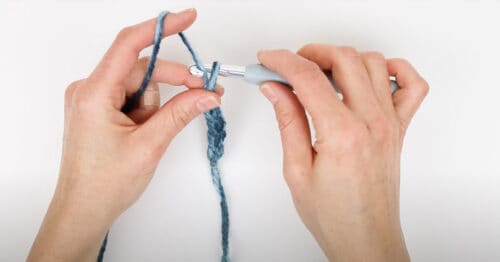
Foundation Row: Chain 37.
(For a two color hat, switch colors after 11 chains and work the remaining 26 chains in your second color.)
Row 1: Skip the first 3 chains, dc in the fourth ch from the hook and each ch to end of row; turn. (34)
Row 2: Ch 3, dcblo in each dc to end of row; turn. (34)
✨Unlock this free subscriber-exclusive pattern ✨
Follow these steps to view the full free pattern below
Rep Row 2 16 (18, 20) more times to create a total of 18 (20,22) rows. If you're not happy with the way the rectangle is fitting around your head at this point, adjust the number of total rows. Be sure to finish with an even number of rows.
Fasten off, leaving a 24” yarn tail.
Dimensions of Finished Rectangle
Rectangle dimensions should now be approximately:
Adult Small: 18” x 14.5"
Adult Medium: 20” x 14.5"
Adult Large: 22” x 14.5"
Determining "Wrong" Side of fabric
If you’re right handed: The tail of your final row should be on the bottom left when the WS is facing.
If you’re left handed, the tail of your final row should be on the top left when the WS is facing. (See photo above for reference.)
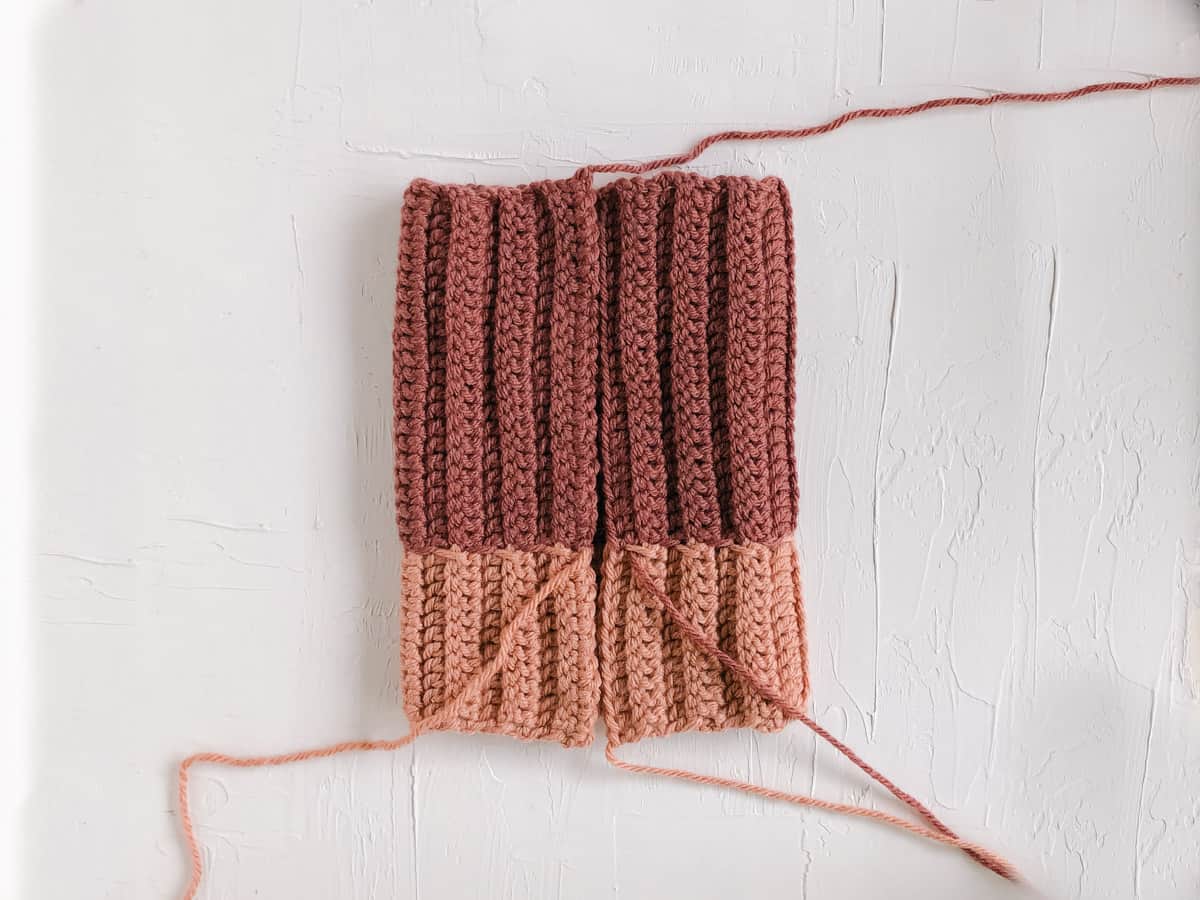
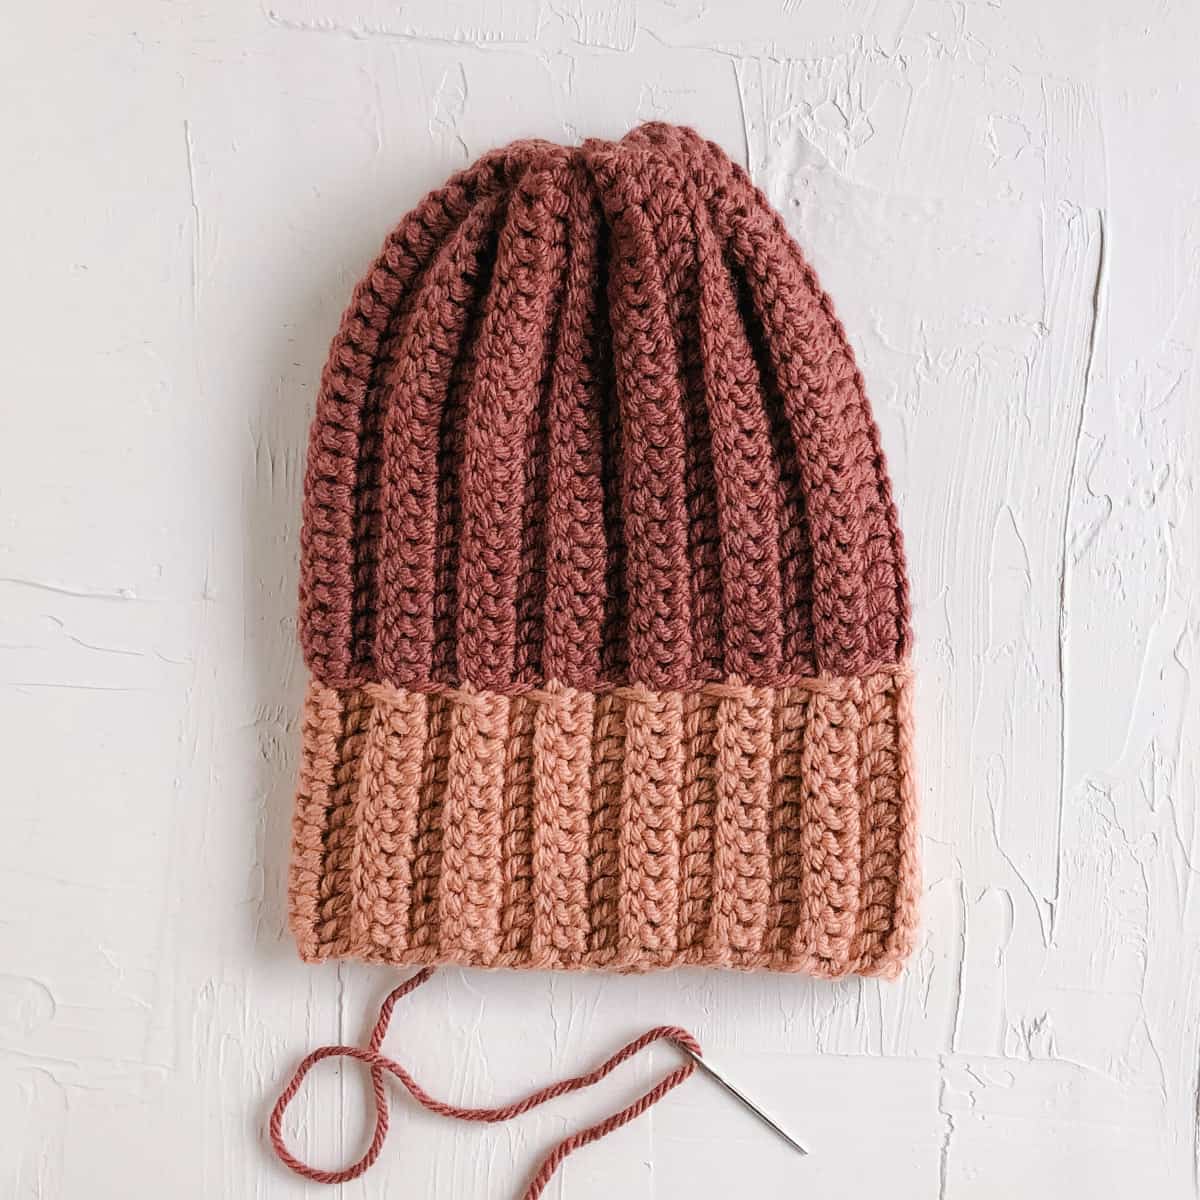
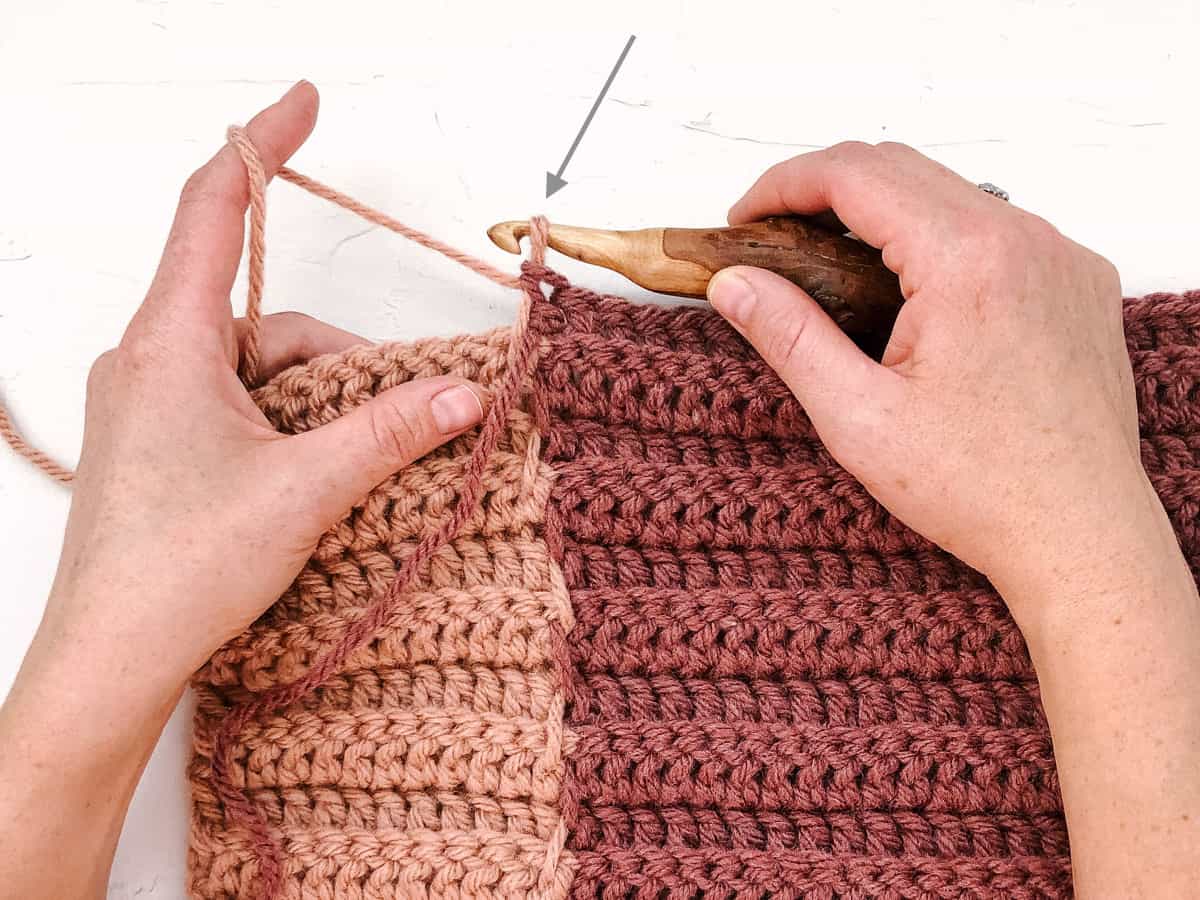
Seaming Rectangle Into a Tube
To best disguise the join, seam is worked only through the chain stitches and the loop of each double crochet stitch that is closest to the seam.
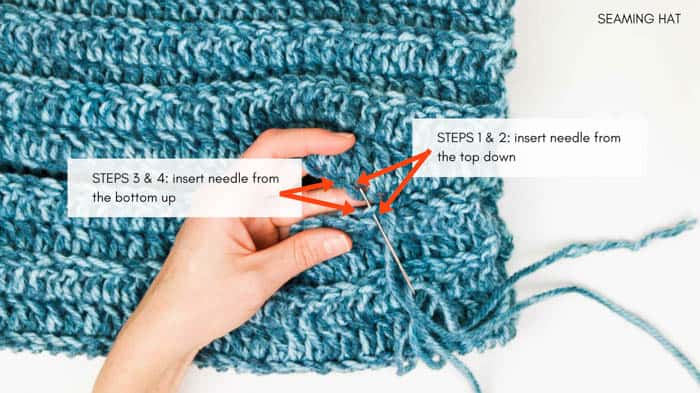
Lay rectangle horizontally with WS facing up. Use stitch markers or safety pins to pin long sides of rectangle together, if desired. Thread tapestry needle with tail from fastening off.
Step 1: Work from the top of double crochet stitch into top of corresponding chain.
Step 2: Then work from bottom of next chain into the bottom of the next corresponding double crochet.
Continue like this through the top of one double crochet to the top of one chain and then through the bottom of one chain and the bottom of one double crochet. Repeat until end of seam.
Tie a simple sewing knot by inserting needle in crochet fabric to create a loop of yarn, then inserting needle through loop of yarn and pulling tight. This will prevent seam from puckering in next step.
Do not cut yarn tail yet.
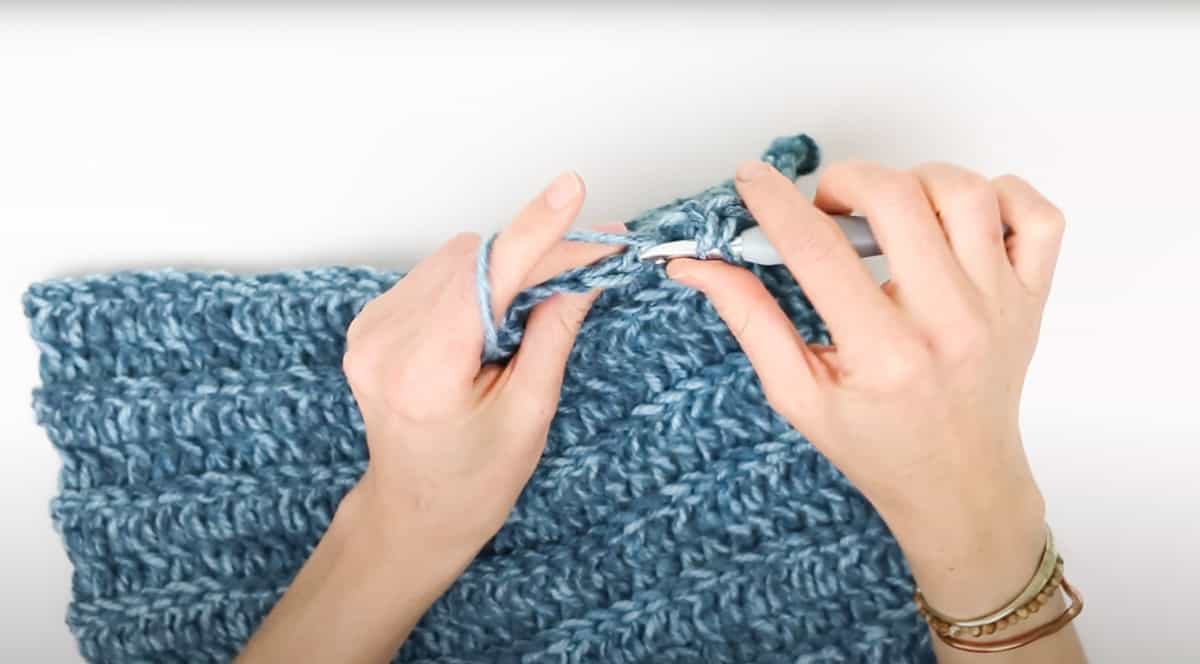
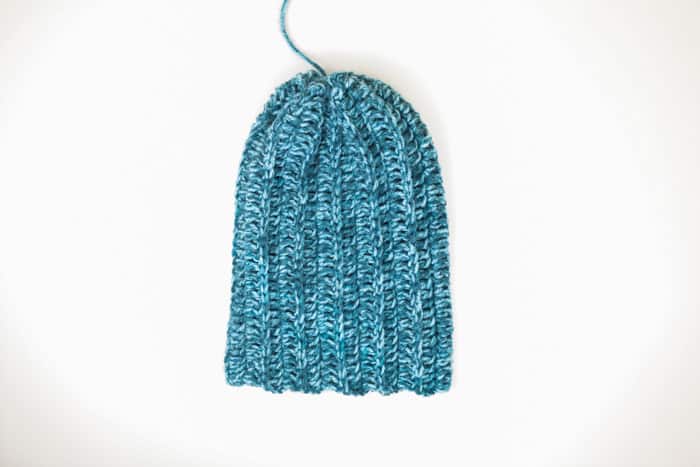
Closing Crochet Beanie Top
Using tapestry needle and strand of yarn leftover from previous seam, whip stitch around the top of the hat. Work one whip stitch into each row end.
Pull yarn tail to tighten circle as much as possible. Then use the attached tapestry needle to sew up remaining small opening in top of hat if necessary. If you plan to attach a pom pom, do not trim this tail or remove your tapestry needle quite yet.
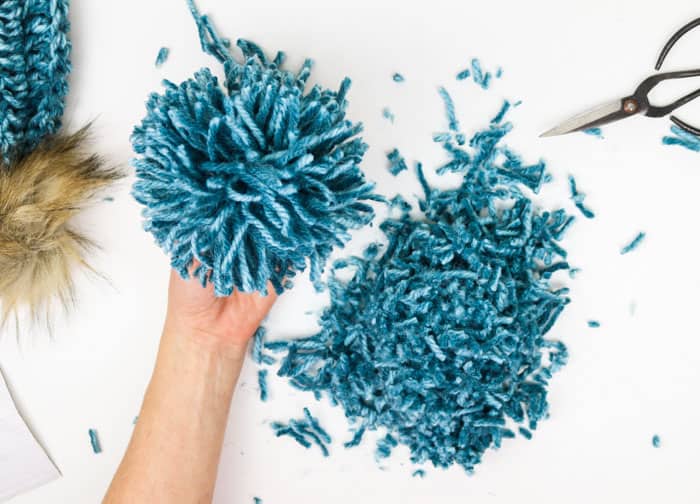
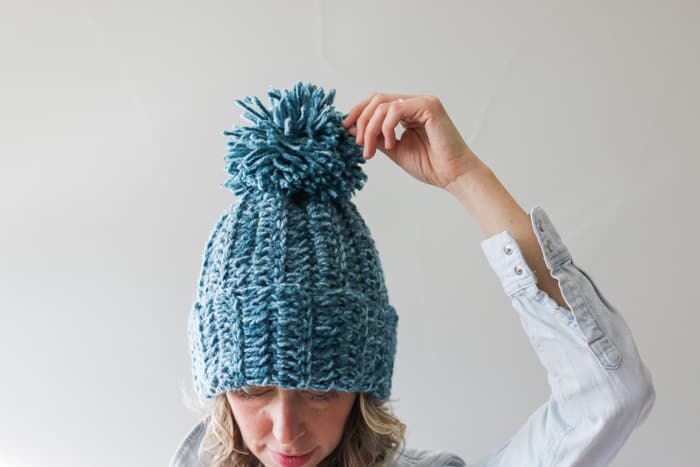
How to Attach a Pom Pom to a Crochet Hat
At this point, you have two finishing options:
Option 1: Create a yarn pom pom with a large pom pom maker or a 2.5” piece of cardboard. Learn how to make a yarn pom pom here.
Option 2: Use a faux fur pom pom that compliments your chosen yarn. Learn how to create your own DIY faux fur pom poms.
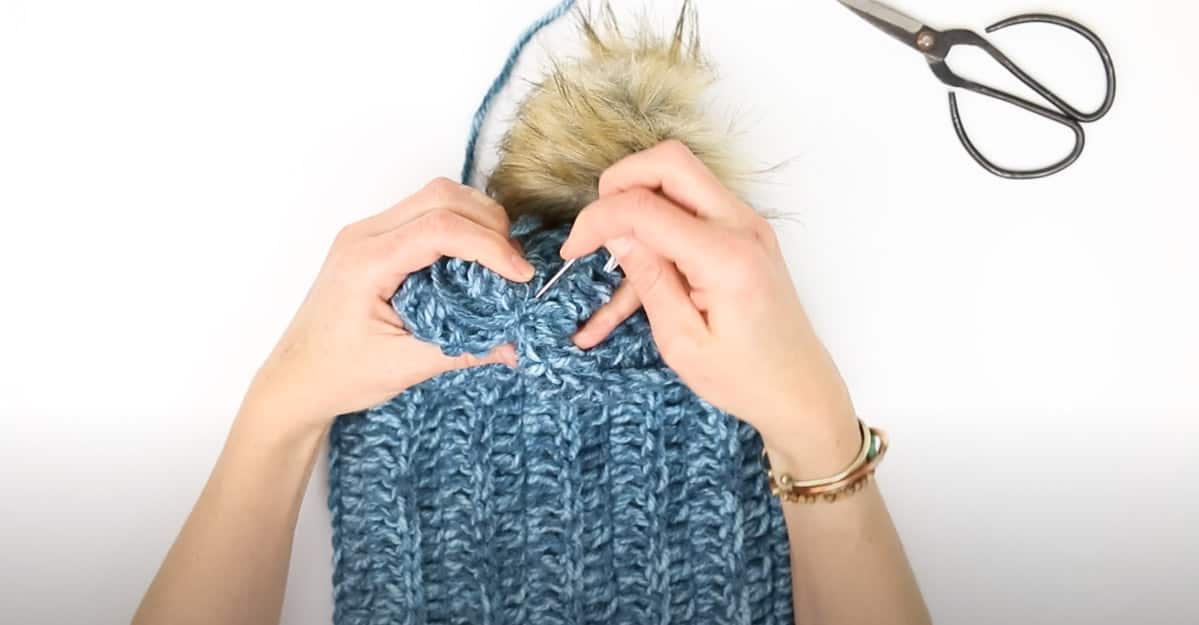
In either case, use remaining tail and attached yarn needle to join pop pom to hat top. If using a yarn pom pom, it can be helpful to whip stitch into the center of the pom pom a few times to help secure all the small pieces of pom pom yarn.
Fasten off and weave in any remaining ends. (There shouldn't be many!)
Pop your new crochet hat on your head and get to work on making one for everyone you know!
A Tapered Beginner Crochet Hat Option
Once you've completed this beginner crochet hat, you'll definitely want to check out our easy crochet hat pattern for babies (and kids and adults) and corresponding easy crochet hat video tutorial.
This pattern uses chunky yarn and equally simple techniques to create a classically tapered hat. And it's written in seven sizes! (preemie, baby, toddler, child, tween, women and men)
FAQs About Crocheting Hats
Absolutely! The 1.5 Hour Beanie pattern is ideal for crochet beginners because it's nothing more than making a large practice swatch. It will take you longer than an hour and a half to complete, but it is a very approachable first crochet project.
Hats can be crocheted from the top to bottom or bottom to top. In the case of this beginner crochet hat pattern, we avoid all this entirely by crocheting one simple rectangle.
This easy hat pattern begins with a typical chain of 37 stitches. The first row is worked in double crochet. The rest of the hat is working in double crochet, but only through the back loop of each stitch.
A crochet hat should generally be 2-3 inches smaller than the circumference of your head (measured right above your ears.) This "negative ease" allows the hat to feel comfortable without falling down your forehead.
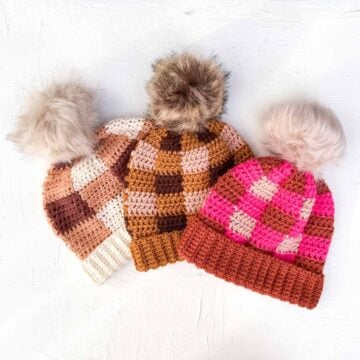
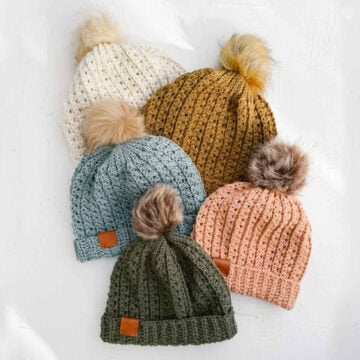
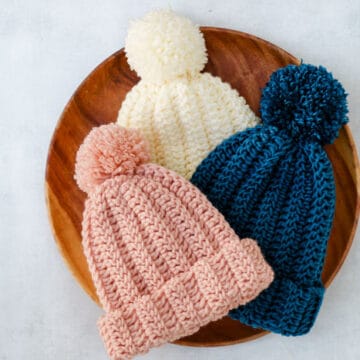
More Free Crochet Hat Patterns
From messy bun beanies to easy crochet bucket hat patterns, we've got lots more ways to keep your head covered. If you loved this pattern, here are some more modern crochet beanie patterns to try out!
See more hat crochet patterns →
Invitation to our Facebook group
Come discuss easy hat patterns and lots of other crochet projects and techniques in our Make & Do Crew Facebook group. Here thousands of helpful crocheters answer each other's questions and share their stitches. Come join us here.
That was so fun! Now what?
More Fast Crochet Patterns
Maybe your countdown to Christmas is on or you just love a quick satisfying crochet project. Here are our most popular free patterns crocheters turn to when they want super fast crochet projects.
• 3 Hour Chunky Crochet Mittens
• Done in a Day Crochet Blanket Pattern
• 2 Hour Fast Beginner Crochet Slippers
• Presto 4.5 Hour Fast Crochet Afghan

How to Crochet a Chunky Ribbed Beanie - A Summary
Materials
Yarn
- Lion Brand Wool-Ease Tonal Weight: 5/ bulky - 124 yds, 4 oz – 2 skeins
- COLOR: Smoke 635-149
- COLOR: Slate Blue 635-107
- Tapestry needle
Additional Supplies
- Size L (8 mm) crochet hook
- Stitch markers or safety pins
- Fur pom pom or pom pom maker/small piece of cardboard
Abbreviations + Glossary (US Terms)
- ch – chain
- dcblo – double crochet through the back loop only
- tch – turning chain
- st - stitch
- sk – skip
- RS – right side
- WS – wrong side
- rep – repeat
Abbreviations and Glossary (US Terms):
Want some company while you crochet?
Get support (and camaraderie!) in the Make & Do Crochet Crew Facebook Group. Search “Make and Do Crochet Crew” on Facebook.com.
Permissions + Copyright
Please do not publish or share this pattern as your own. You may make items to sell with this pattern. In exchange, please link back to this page. Do NOT use my photos as your own sales photos.
Overall Pattern Notes
Instructions
Basic crochet hat making process
- Step 1: Measure your head circumference.
- Step 2: Chain 37 stitches.
- Step 3: Skip first 3 ch, double crochet in each remaining ch; turn.
- Step 4: Crochet a rectangle based on your head measurements, working through the back loop of each double crochet stitch only.

- Step 5: Join the finished rectangle into a "tube."
- Step 6: Cinch one end of the tube closed.
- Step 7: Add an optional pom pom to the closed end of your beanie.

Phyllis A nussmeyer says
I enjoyed looking at your fa ebook page. I want to get started after Christmas is over. Thank you for sharing. Merry Christmas to Christmas.
Jess @ Make and Do Crew says
Thanks so much for saying hello, Phyllis. I'm happy to have you here! 🙂
Jess
Tracy King says
Thanks Jess! Happy Holidays to you and your family ?
Elena says
Thanks so much for the free pdf and for all the patterns you give us the oportunity tu use. Hoping you have a wonderful Christmasand an extra special year.
Jess @ Make and Do Crew says
Thank you for your kindness, Elena. My father-in-law passed away last week, so this Christmas is bittersweet for us. I really appreciate the chance to share my creations with all of you though. 🙂 Merry Christmas!
Jess
T says
This is generally an easy pattern - my only gripes are that the video tutorial shows you doing yarn-unders for the double crochets but that isn’t noted in the written pattern and I cant quite tell if that’s crucial or not; the other is that the tutorial for the seam is super tricky to see. Just the same thank you for this quick and easy hat!
Jess Coppom says
No, not crucial at all. 🙂
Lois Guevara says
Thank you for making the direction so understandable. I love to crochet but find some pattern hard to understand.
Jess @ Make and Do Crew says
Hey Lois,
I'm so glad you found the pattern easy to understand. I have a video tutorial coming out on LoveCrochet.com soon for this pattern that outta make it extra easy! 🙂
Jess
Annie says
Thank you for sharing! Your generosity is much appreciated. Merry Christmas! All the best to you and your family. May your creativity never cease 🙂
Jess @ Make and Do Crew says
Thank you so much, Annie. It's so joyful for me to share my creativity with all of you and see yours in return. 🙂
Merry Christmas!
Jess
Kim Ladouceur says
Thank you for the free pdf for newsletter subscribers! Merry Christmas 😀
GAD says
Thank you for the quick and easy tutorial.
Question: Simply doing a DC in next DC, creates a flat fabric, should it be DC in front loop only of next DC to create a ribbed effect?
Jess @ Make and Do Crew says
Yes! It sure should! Thank you for catching that. 🙂 Hopefully you've seen that I updated the pattern. I appreciate your hawk eye proofreading. 🙂
Jess
Patti says
I love this hat, but it won't let me copy it to a Word document, so I guess I won't be making it. It's too hard for me to work from my computer. I would NEVER try to sell your pattern as my own, or anything else nefarious, I just find that I cannot work from my computer screen. It's so much better for me to print it in a larger font so that I can actually see it, lol. When the eyes get older, these things matter. Anyway, thanks for sharing your work (and I do understand that it is a LOT of work to create a new pattern). I hope that someday you allow us "older folks" to copy it to a form that we can use.
Dena Stilwell says
Merry Christmas and Happy New Year and I love all the stuff you do Thank you Dena
Jess @ Make and Do Crew says
Thank you so much, Dena! Merry Christmas to you too. I hope you have a wonderful and creative 2018. 🙂
Jess
Jeanette Duurvoort says
I have to ask..the first pictures of the hat, is that a FUR pom pom? A "shop" on PETAs radar is knowingly and repeatedly torturing raccoons by skinning ALIVE to use this very same looking pompom...yes..... on a beanie. This is VERY irresponsible. Unsubscribe me immediately.
Valarie says
Just a couple of years ago Lion Brand was making an awesome fake fur yarn called Pelt. I made a long collar out of it and it fools people all the time, but when you get up close and really look, you can see that it is an artificial fiber.
Jess @ Make and Do Crew says
Wow, that yarn sounds awesome! I wish I could have tried it!
Rudeness Police says
Wow, talk about over reacting. Maybe let the author explain before threatening to unsubscribe!
Susan says
Hi Jess!
Thank You So Very Much for sharing another crochet pattern with us! You are very generous with your creativity and conconditional kindness.
Blessings to You and Your Family not only at Christmas but throughout each day.
I am so happy and a blessed to have found your fun crochet blog. I’ve crocheted several of your awesome patterns for myself and for gifts.
Thank you from My Heart and Hook, :-)!
Linda says
So cute! Thanks for teaching and sharing!
Jess @ Make and Do Crew says
You're welcome, Linda! It's my pleasure. 🙂
Jess
Priscilla says
Hi Jess,
Any chance you can do some youtube tutorials?
Thanks.
Molly says
Hi! I am so excited to finish this beanie, but definitely need a video tutorial to figure out everything after making the rectangle! When will this video tutorial be out? Thanks!