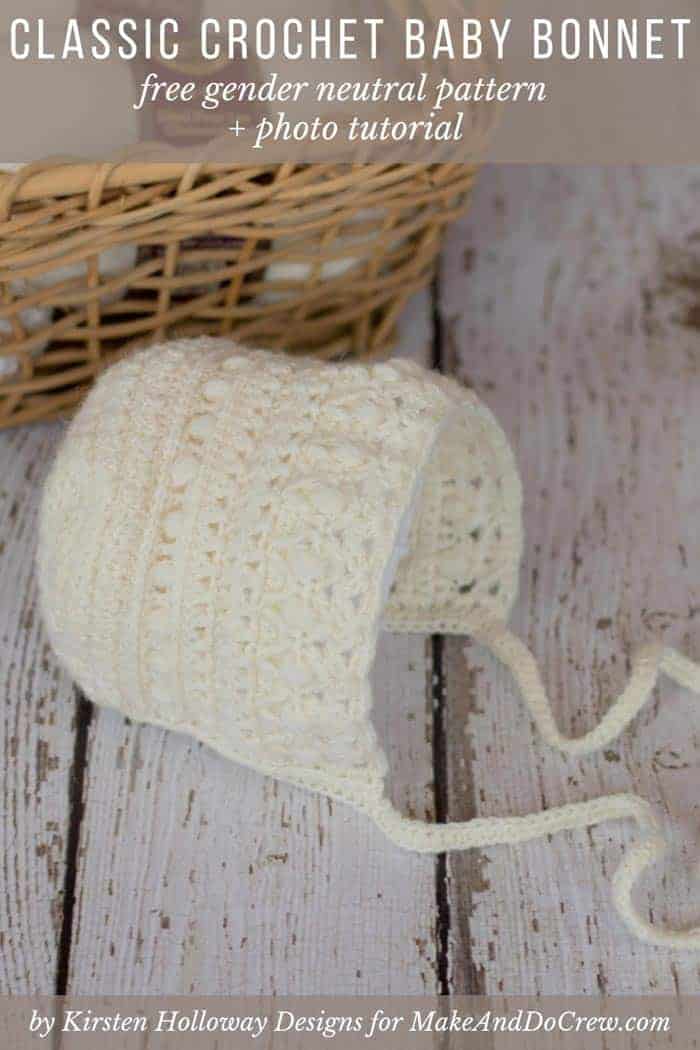
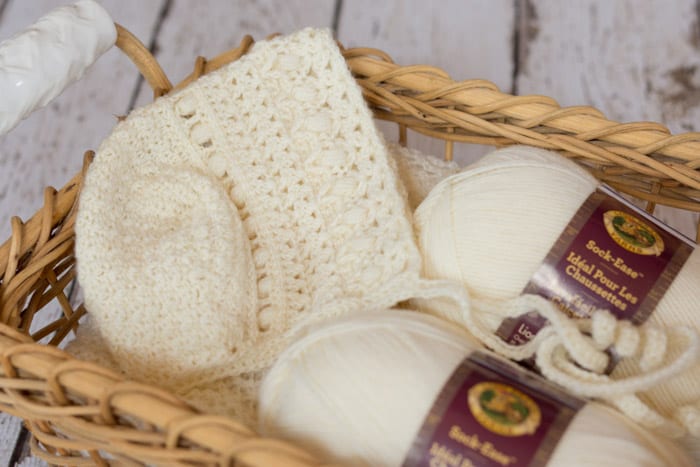
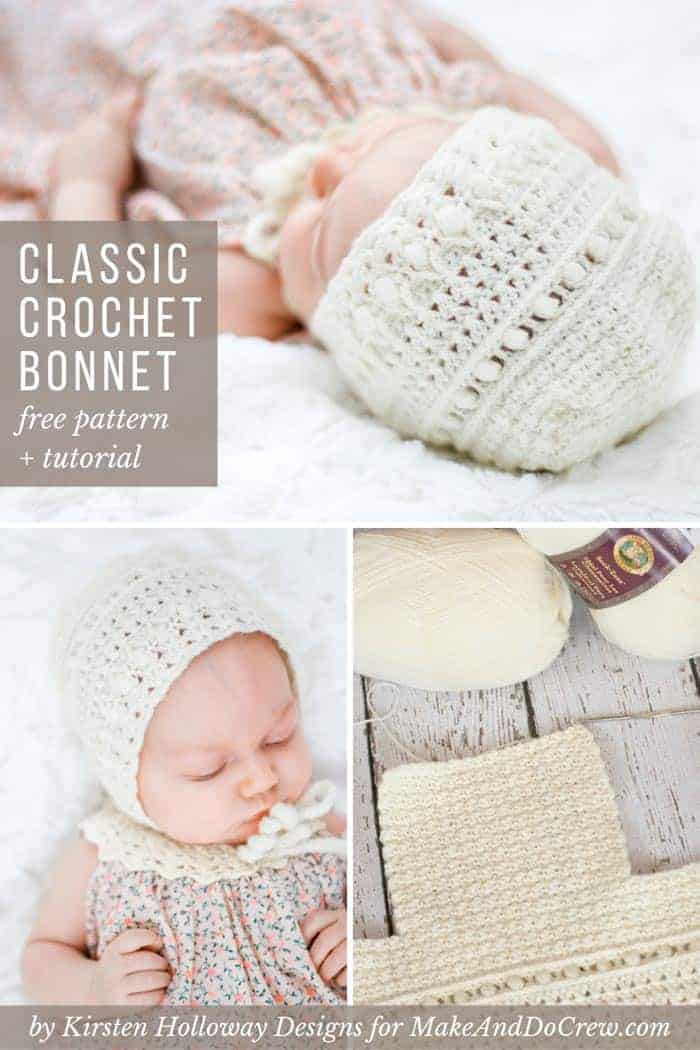
This vintage-inspired, classic crochet baby bonnet pattern will quickly become a cherished family heirloom. Get the free gender-neutral hat pattern below.

Thanks to Lion Brand Yarns for providing the yarn for this free classic crochet baby bonnet pattern. This post contains affiliate links.
Jump to:
- The Inspiration for My Free Crochet Baby Bonnet Pattern
- Simple Stitches and Construction
- A Gender Neutral Baby Bonnet Perfect for Gifts
- The Softest Yarn for Babies
- More Free Crochet Hat & Headband Patterns for Babies & Kids
- Free Baby Bonnet Crochet Pattern - Written Instructions
- Final Thoughts
- More Free Modern Crochet Patterns for Babies and Kids
- That was so fun! Now what?
- Invitation to our Facebook group
Kirsten from Kirsten Holloway Designs is sharing her free crochet baby bonnet pattern with us today! You can see lots of Kirsten's crochet patterns her blog, Kirsten Holloway Designs.
And be sure to check her out on social media too: Instagram, Pinterest, and Facebook. Kirsten, take it away!
The Inspiration for My Free Crochet Baby Bonnet Pattern
I'm all about texture and classic looks that will fit effortlessly into our modern way of life. With vintage styles coming back in a big way both in home decor and in our wardrobes, I wanted something that would bring to mind the styles of the early to mid-20th century.
Everyone's baby wore cute little handmade bonnets back then!
Simple Stitches and Construction
Shells, puff stitches, the seed stitch (also called the lemon peel stitch), and front post treble crochet stitches are artfully combined into an heirloom-quality piece.
The outline, before the bonnet is sewn together, is a simple T with some very basic shaping. The bottom edging also includes the ties.
A Gender Neutral Baby Bonnet Perfect for Gifts
Nowadays, bonnets like this are worn primarily by royal babies, but it doesn't have to just be the Royals or those who shop at high-end boutiques that get to rock these timeless looks!
With how easy this bonnet is to crochet, you’ll be set for last-minute baby shower gifts.
Your baby (or friend, or relative’s baby) can too with this easy-to-make crochet bonnet pattern in 3 sizes!
Related: 35+ Cozy Chunky Hats to Crochet
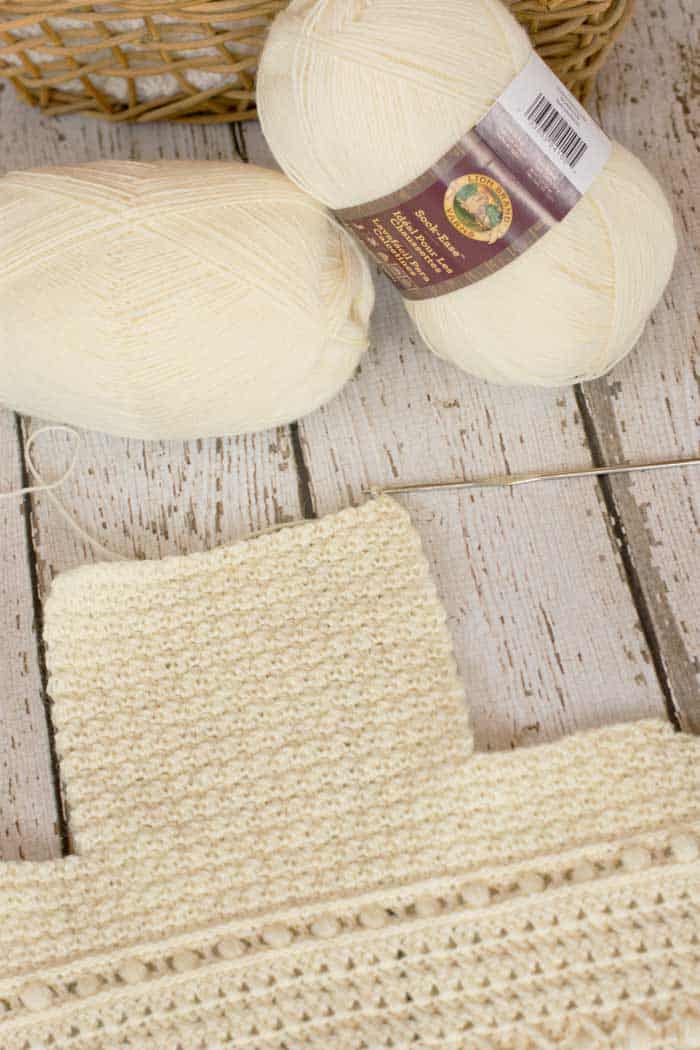
The Softest Yarn for Babies
I decided to use Lion Brand Sock-Ease for this design because baby items made with fingering weight yarn look and feel more delicate than those made with worsted-weight yarn.
If you have never used fingering weight yarn before it does take a little bit of getting used to, but the secret is maintaining relaxed, even tension. This will help your hook to easily slide through without it getting caught or splitting the yarn.
Loops & Threads "Woolike" can be substituted if you cannot find the recommend yarn, but you will need to go up a hook size if you choose to do this.
More Free Crochet Hat & Headband Patterns for Babies & Kids
If you have a gaggle of kiddos in your family, you might also enjoy these other free crochet hat and headband patterns for kids from Make & Do Crew. You can always look through our free crochet patterns for babies and kids too.
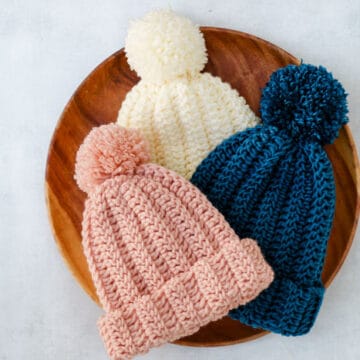


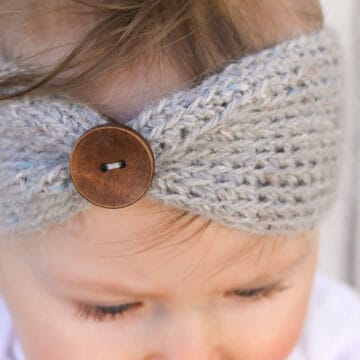
See more free crochet babies & kids patterns →
Free Baby Bonnet Crochet Pattern - Written Instructions
Save it to your Ravelry here.
Pin this pattern for later here.
Explanation:
This easy baby bonnet pattern is a vintage-inspired, timeless crochet piece that adds class and style to any baby's wardrobe.
Supplies:
• Lion Brand Sock-Ease (weight: 1/fingering - 200 yards, 3.5 oz)
- Marshmallow (#240-100) - 1 ball
• Size 0 (2.55mm) crochet hook, or hook needed to obtain gauge
• Yarn needle
• Scissors
Sizes/Measurements:
• Newborn: 5.5” by 5.5” excluding ties
• 6 months: 6.25” x 6.25” excluding ties
• 12-24 Months: 7” x 7” excluding ties
Gauge:
• 14 cross stitches in 4”
• 3 rows of cross stitches is 1” tall
Abbreviations and Glossary (US Terms):
ch - chain
sl st - slip stitch
sc - single crochet
hdc - half double crochet
dc - double crochet
FPsc - front post single crochet
FPtr2tog - front post treble crochet 2 together
RS - right side
WS - wrong side
Hdc puff st - YO, pull up a stitch 5 times, pull through 10 loops on hook, YO, pull through final 2 loops.
Cross st - sk st, dc in next st, cross over st just made and dc in skipped st.
Shell - 4 dc in same st
Working in the 3rd loop of hdc - Look at the top of the stitch, and locate the sideways “V”, bend the stitch to look at the back, and you should see another “V”. You’ll be working into the back loop of that “V”, this is called the 3rd loop.
Seed Stitch - alternate sc and dc stitches across the designated row or partial row, then on the next row work a dc stitch in the sc stitch from the previous row, and a sc stitch in the dc stitch from the previous row.
Overall Pattern Notes:
• Difficulty - Easy/Intermediate
• This beginner bonnet is worked flat in a “T”, and then the bottom of the T is joined to the “arms” at the top by sc. This creates a very classic baby bonnet shape that is more well-known in the knitting world. If you prefer to sew the seam instead of joining it with sc, you may.
• Stitch counts are unimportant for the bottom--only your placement matters.
• You with the "eagle eyes" may notice in the "how to" images that I use a 2.35mm (Size 1) steel hook. The reason? I have very relaxed tension. Most crocheters have to go up a hook size or two from what I use in order to meet gauge, so to save frustration I have written it for a 2.55mm hook.
If you regularly have to go down a hook size or two from what most patterns call for, then a 2.35mm may be what you want to use.
Baby Bonnet for Newborn Size
Ch 68,
Row 1 (RS): sc in second ch from hook, sc in each remaining st of row, ch 3 (counts as first dc of row 2), turn. (67)
Row 2 (WS): sk 2 sts, shell in next st, *sk 3 sts, shell in next st; repeat from * across, when there are 3 sts left in row, sk 2 sts, dc in final st, ch 3 (counts as first dc of row 3), turn. (16 shells, 2 dc)
Row 3 (RS): sk 2 sts, shell between 2nd and 3rd dc of shell from prev row, *sk 4 sts, shell between 2nd and 3rd dc of shell from prev row; repeat from * across, when there are 3 sts left in row, sk 2 sts, dc in top of ch 3, ch 2 (counts as first hdc of row 4), turn. (16 shells, 2 dc)
✨Unlock this free subscriber-exclusive pattern ✨
Follow these steps to view the full free pattern below
Row 15 (WS): FPsc in each st across, ch 1, turn. (67)
Row 16 (RS): sc in first st, dc in next st, *sc in next st, dc in next st; repeat from *until there is 1st left in row, sc in next st, turn. (67)
Row 17 (WS): sl st over 2 sts, ch 1, *dc in next st, sc in next st; repeat from * until there are 3 sts left in row, dc in next st, turn. (63)
Row 18 (RS): sl st over 2 sts, ch 1, *sc in next st, dc in next st; repeat from * until there are 3 sts left in row, sc in next st, turn. (59)
Row 19 (WS): sl st over 2 sts, ch 1, *dc in next st, sc in next st; repeat from * until there are 3 sts left in row, dc in next st, turn. (55)
Row 20 (RS): sl st over 2 sts, ch 1, *sc in next st, dc in next st; repeat from * until there are 3 sts left in row, sc in next st, turn. (51)
Row 21 (WS): sl st over 2 sts, ch 1, *dc in next st, sc in next st; repeat from * until there are 3 sts left in row, dc in next, turn. (47)
Row 22 (RS): sl st over 10 sts, ch 1, [sc in next st, and dc in next st] 13 times, sc in next st, ch 1, turn. Note: there should be 10 sts left at end of row. (27)
Row 23 (WS): ch 1, ch 1, dc in first st, sc in next st, *dc in next st, sc in next st; repeat from * across, dc in final st, turn.
Row 24 (RS): ch 1, sc in first st, dc in next st, *sc in next st, dc in next st; repeat from * across, sc in final st, turn.
Repeat rows 23 and 24 until the flap is long enough to cover the back of the bonnet (roughly 18-20 total rows), then move on to "Ending" section below.
Size 6 mos
Ch 76,
Row 1 (RS): sc in second ch from hook, sc in each remaining st of row, ch 3 (counts as first dc of row 2), turn. (75)
Row 2 (WS): sk 2 sts, shell in next st, *sk 3 sts, shell in next; repeat from * across, when there are 3 sts left in row, sk 2 sts, dc in final st, ch 3 (counts as first dc of row 3), turn. (18 shells, 2 dc)
Row 3 (RS): sk 2 sts, shell between 2nd and 3rd dc of shell from prev row, *sk 4 sts, shell between 2nd and 3rd dc of shell from prev row; repeat from * across, when there are 3 sts left in row, sk 2 sts, dc in top of ch 3, ch 2 (counts as first hdc of row 4), turn. (18 shells, 2 dc)
Row 4 (WS): hdc in next st, *ch 1, sk st, hdc puff st between 2nd and 3rd dc of shell from prev row, ch 1, sk st, hdc in next 2 sts; repeat from * across (note: final hdc will be worked in top of ch-3 from prev row), ch 1, turn. (18 hdc puff sts, 38 hdc)
Row 5 (RS): *sc in next 2 hdc sts, sc in ch-1 sp, sk puff st, sc in ch-1 sp; repeat from * across putting 2 sc in final st of row, ch 1, turn. (75 sc)
Row 6 (WS): sc in each st across, ch 1, turn. (75)
You will now be working on 2 different rows. Your sc sts will be worked on row 7 as normal sts, and your FPtr2tog sts will be worked around the hdc sts you made in row 4. They should form peaks over top of the hdc puff sts. Remember to skip a stitch when you start making the sc sts again-the FPtr2tog counts as a st so you need to make room for it!
Row 7 (RS): sc in next 3 sts, *FPtr2tog placing first leg around hdc next to first hdc puff st from row 4, place second leg around next hdc on other side of hdc puff st from row 4, sc in next 3 sts; repeat from * across, ch 3 (counts as first dc of row 8), turn. (18 FPtr2tog, 57 sc)
Row 8 (WS): [Cross st across next 2 sts] 36 times, sk st, dc in final st of row, ch 3 (counts as first dc of row 9, turn. (74)
Row 9 (RS): [Cross st across next 2 sts] 36 times, dc in top of ch 3, ch 3 (counts as first dc of row 10), turn. (74)
Wanna save this pattern?
Row 10 (WS): [Cross st across next 2 sts] 36 times, dc in final st of row, ch 1, turn. (74)
Row 11 (RS): [Cross st across next 2 sts] 36 times, dc in top of ch 3, ch 1, turn. (74)
**Fasten off**
Working on right side,
Attach yarn to top of ch-3 from prev row,
Row 12 (RS): sc in each st across, putting 2 sc in final st of row, ch 1, turn. Note: you may put the 2 sc in same st in the middle of the row if you prefer. (75)
Row 13 (WS): FPsc in each st across, ch 2 (counts as first hdc of row, turn). (75)
Row 14(RS): hdc in next st, *ch 1, sk st, hdc puff st in the next, ch 1, sk st, hdc in next st; repeat from * across, put hdc in final st of row. (21 hdc, 18 hdc puff sts)
*Fasten off*
Working on right side,
Attach yarn to top of ch-2 from prev row,
Row 15 (RS): ch 1, sc in next 2 hdc sts, *sc in ch-1 sp, sc in puff st, sc in ch-1 sp, sc in hdc; repeat from * across, sc in final st of row, ch 1, turn. (75)
Row 16 (WS): FPsc in each st across, ch 1, turn. (75)
Row 17 (RS): sc in first st, dc in next st, *sc in next st, dc in next st; repeat from * across, sc in final st, ch 1, turn. (75)
Row 18 (WS): dc in first st, sc in next st, *dc in next st, sc in next st; repeat from * across, dc in final st, turn. (75)
Row 19 (RS): sl st over 2 sts, ch 1, *sc in next st, dc in next st; repeat from * until there are 3 sts left in row, sc in next st, turn (71)
Row 20 (WS): sl st over 2 sts, ch 1, *dc in next st, sc in next st; repeat from * until there are 3 sts left in row, dc in next st, turn (67)
Row 21 (RS): sl st over 2 sts, ch 1, *sc in next st, dc in next st; repeat from * until there are 3 sts left in row, sc in next st, turn. (63)
Row 22 (WS): sl st over 2 sts, ch 1, *dc in next st, sc in next st; repeat from * until there are 3 sts left in row, dc in next st, turn. (59)
Row 23 (RS): sl st over 2 sts, ch 1, *sc in next st, dc in next st; repeat from * until there are 3 sts left in row, sc in next st, turn. (55)
Row 24 (WS): sl st over 14 sts, ch 1, [dc in next st, sc in next st] 13 times, dc in next st, ch 1, turn. (27)
Row 25 (RS): *sc in first st, dc in next st; repeat from * across, sc in final st of row, ch 1, turn. (27)
Row 26 (WS): *dc in first st, sc in next st; repeat from * across, dc in final st of row, ch 1, turn. (27)
Repeat rows 25 and 26 until the flap is long enough to cover the back of the bonnet (roughly 20-22 total rows),then move on to "Ending" section below.
Related: 27+ Free Crochet Hats and Beanies for Adults
Size 12-24 mos
Ch 84,
Row 1 (RS): sc in second ch from hook, sc in each remaining st of row, ch 3 (counts as first dc of row 2), turn. (83)
Row 2 (WS): sk 2 sts, shell in next st, *sk 3 sts, shell in next st; repeat from * across, when there are 3 sts left in row, sk 2 sts, dc in final st, ch 3 (counts as first dc of row 3), turn. (20 shells, 2 dc)
Row 3 (RS): sk 2 sts, shell between 2nd and 3rd dc of shell from prev row, *sk 4 sts, shell between 2nd and 3rd dc of shell from prev row; repeat from * across, when there are 3 sts left in row, sk 2 sts, dc in top of ch 3, ch 2 (counts as first hdc of row 4), turn. (20 shells, 2 dc)
Row 4 (WS): hdc in next st, *ch 1, sk st, 5 hdc puff between 2nd and 3rd dc of shell from prev row, ch 1, sk st, hdc in next 2 sts; repeat from * across (note: final hdc will be worked in top of ch-3 from prev row), ch 1, turn.
(20 hdc puff sts, 42 hdc)
Row 5 (RS): *sc in next 2 hdc sts, sc in ch-1 sp , sk puff st, sc in ch-1 sp; repeat from * across putting 2 sc in final st of row, ch 1, turn. (83 sc)
Row 6 (WS): sc in each st across, ch 1, turn. (83)
You will now be working on 2 different rows. Your sc sts will be worked on row 7 as normal sts, and your FPtr2tog sts will be worked around the hdc sts you made in row 4. They should form peaks over top of the hdc puff sts.
Remember to skip a stitch when you start making the sc sts again-the FPtr2tog counts as a st so you need to make room for it!
Row 7 (RS): sc in next 3 sts, *FPtr2tog placing first leg around hdc next to first puff st from row 4, place second leg around next hdc on other side of puff st from row 4, sc in next 3 sts; repeat from * across, ch 3 (counts as first dc of row 8), turn. (20 FPtr2tog, 63 sc)
Row 8 (WS): [Cross st across next 2 sts] 40 times, sk st, dc in final st of row, ch 3 (counts as first dc of row 9), turn. (82)
Row 9 (RS): [Cross st across next 2 sts] 40 times, dc in top of ch 3, ch 3 (counts as first dc of row 10), turn. (82)
Row 10 (WS): [Cross st across next 2 sts] 40 times, dc in final st of row, ch 1, turn. (82)
Row 11 (RS): [Cross st across next 2 sts] 40 times, dc in top of ch 3, ch 1, turn. (82)
Row 12 (WS): [Cross st across next 2 sts] 40 times, dc in final st of row, ch 1, turn. (82)
Row 13 (RS): sc in each st across, putting 2 sc in final st of row, ch 1, turn. Note: you may put the 2 sc in same st in the middle of the row if you prefer. (83)
Row 14 (WS): FPsc in each st across, ch 2 (counts as first hdc of row 15), turn
Row 15 (RS): hdc in next st, *ch 1, sk st, 5 hdc puff in the next, ch 1, sk st, hdc in next st; repeat from * across, put hdc in final st of row. (24 hdc, 20 puff sts)
*Fasten off*
Working on right side,
Attach yarn to top of ch-2 from prev row,
Row 16 (RS): ch 1, sc in next 2 hdc sts, *sc in ch-1 sp, sc in puff st, sc in ch-1 sp, sc in hdc; repeat from * across, sc in final st of row, ch 1, turn. (83)
Row 17 (WS): FPsc in each st across, ch 1, turn. (83)
Row 18 (RS): sc in first st, dc in next st, *sc in next st, dc in next st; repeat from * across, sc in final st, ch 1, turn. (83)
Row 19 (WS): dc in first st, sc in next st, *dc in next st, sc in next st; repeat from * across, dc in final st, turn. (83)
Row 20 (RS): sc in first st, dc in next st, *sc in next st, dc in next st; repeat from * across, sc in final st, turn. (83)
Row 21 (WS): sl st over 2 sts, ch 1, *dc in next st, sc in next st; repeat from *until there are 3 sts left in row, dc in next st, turn. (79)
Row 22 (RS): sl st over 2 sts, ch 1, *sc in next st, dc in next st; repeat from * until there are 3 sts left in row, sc in next st, turn. (75)
Row 23 (WS): sl st over 2 sts, ch 1, *dc in next st, sc in next st; repeat from * until there are 3 sts left in row, dc in next st, turn. (71)
Row 24 (RS): sl st over 2 sts, ch 1, *sc in next st, dc in next st; repeat from * until there are 3 sts left in row, sc in next st, turn. (67)
Row 25 (WS): sl st over 2 sts, ch 1, *dc in next st, sc in next st; repeat from * until there are 3 sts left in row, dc in next st, turn. (63)
Row 26 (RS): sl st over 16 sts, ch 1, [sc in next st, dc in next st] 16 times *alternate sc and dc sts over next 31 sts, when there are 16 sts left at end of row, ch 1, turn. (31)
Row 27 (WS): ch 1, dc in first st, sc in next st, *dc in next st, sc in next st; repeat from * across, dc in final st of row, turn. (31)
Row 28 (RS): ch 1, sc in first st, dc in next st, *sc in next st, dc in next st; repeat from * across, sc in final st of row, turn. (31)
Repeat rows 27 and 28 until the flap is long enough to cover the back of the bonnet (roughly 22-24 total rows),then move on to "Ending" section below.


Ending (all sizes)
Stitch counts are not particularly important for this section-just be as even as you can.
You should now have a T-shaped piece. Join back and sides of bonnet together with sc. This should be done from the bottom to the top, along the inside (WS) of the bonnet.
Fasten off and weave in ends after joining both sides’ edges to the back flap.
Bottom of Bonnet
Row 1 (RS): Join yarn to bottom front corner of bonnet. Working along the bottom edge, hdc in each sc st, and hdc st, 2 hdc in each dc.
Once you reach back section of bonnet hdc2tog across entire back panel, putting 1 hdc in the remaining st, then resume: hdc in each sc st, and hdc st, 2 hdc in each dc to end of other side, ch 1, turn,
Row 2 (WS): working in 3rd loop of hdc, sc in each st across. When working across the back it may be difficult to spot the 3rd loop, but it is there. Look for it almost between the hdc2tog stitches. Continue working in 3rd loop of hdc to end of other side. Do NOT fasten off, then begin ties.
Ties
Note: If you want longer or shorter ties, feel free to adjust your chain counts.
Row 1 (RS): Ch 86, hdc in 3rd ch from hook, hdc in each st across, when you get back to the edge of the bonnet continue working one hdc in each sc until you reach the other side, ch 86, hdc in 3rd ch from hook, hdc in each ch until you arrive back to end of bonnet, join with sl st to hdc.
You may need to twist the chain to make sure the correct side of the tie is showing when you join.
Fasten off and weave in ends.
Final Thoughts
Wow, you crocheted your own baby bonnet. Give your hook a high five and start planning your next project.
Thanks again to Kirsten of KirstenHollowayDesigns.com for sharing this free classic crochet baby bonnet pattern! Be sure to check out Kirsten's blog for lots more free modern crochet patterns!
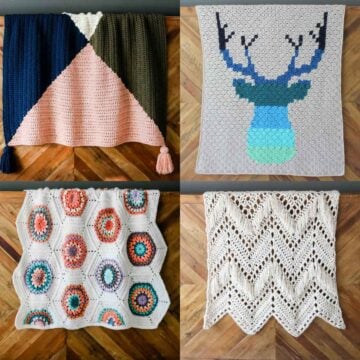
More Free Modern Crochet Patterns for Babies and Kids
If you liked making this baby bonnet crochet pattern, you might love some of these other free crochet patterns for little ones from Make & Do Crew! You can always find all our free patterns and tutorials here.
- 2-Hour Easy Crochet Slippers for Complete Beginners
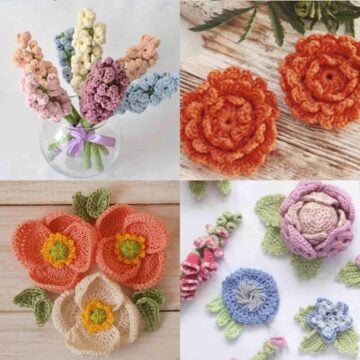
- How to Make Crochet Flowers for Beginners + 33 Easy Patterns
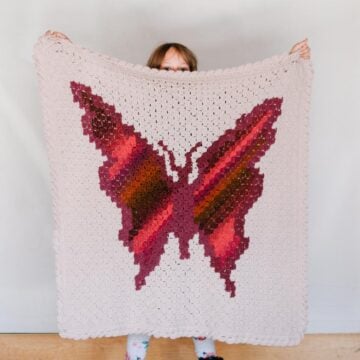
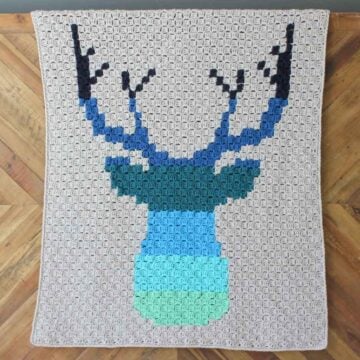
- Corner to Corner Crochet Deer Afghan - Free C2C Pattern
- Free Crochet Flower Headband Pattern (Baby, Toddler, Child, Adult)
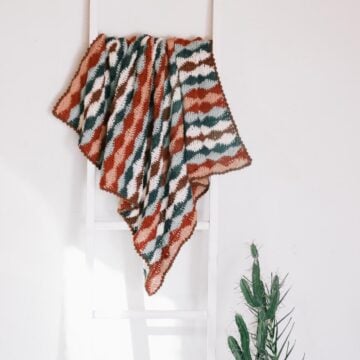
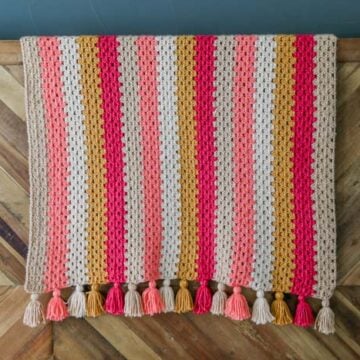
- Modern Crochet Granny Stitch Blanket - Free Pattern!
- How To Make a DIY Pom Pom Rug
- Child's Crochet Hexagon Cardigan Pattern With Toddler Sizes
- Easiest Crochet Baby Hat - Free 1 Hour Pattern


That was so fun! Now what?
Learn a New Skill
When you're ready to master a new skill, check out our detailed guides that include everything you need to know to level up your crochet game.
- How to Corner to Corner (C2C) Crochet for Beginners - with video tutorials to get you started
- How to Crochet a Beginner Hat - make an entire beanie in 1.5 hours!
- How to Crochet Amigurumi for Beginners - the ultimate guide to making your own toys and plushies
- How to Tunisian Crochet - learn with this video and a standard hook
Invitation to our Facebook group
Come discuss baby bonnet crochet patterns and lots of other projects and techniques in our Make & Do Crew Facebook group. Here thousands of helpful crocheters answer each other's questions and share their stitches. Come join us here.
Gina montanaro says
I am trying to make this beautiful bonnet however I’m a little confused on the sl st over 2!sts part. Does that mean to skip over 2 stitches and slip stitch into the third?? Or slip stitch into the next two stitches??
Dana Allen says
Thank you shop much for sharing your pattern, this well look beautiful on my new grand baby that is due in July.
Jess says
Didn't Ambrea do such a great job with this? I'm sure your grandchild loves it!
Cindy S says
i wish there pix on joining... and other parts NOT just finished item!! very pretty but very confusing! im not a knitter so dont understand t shape
a vid would be awesome!!!