Make this Christmas tapestry crochet pattern and enjoy your Scandinavian-inspired pillows all winter long! Scroll down for the complete free pattern or purchase the ad-free, printable PDF of this pattern here.
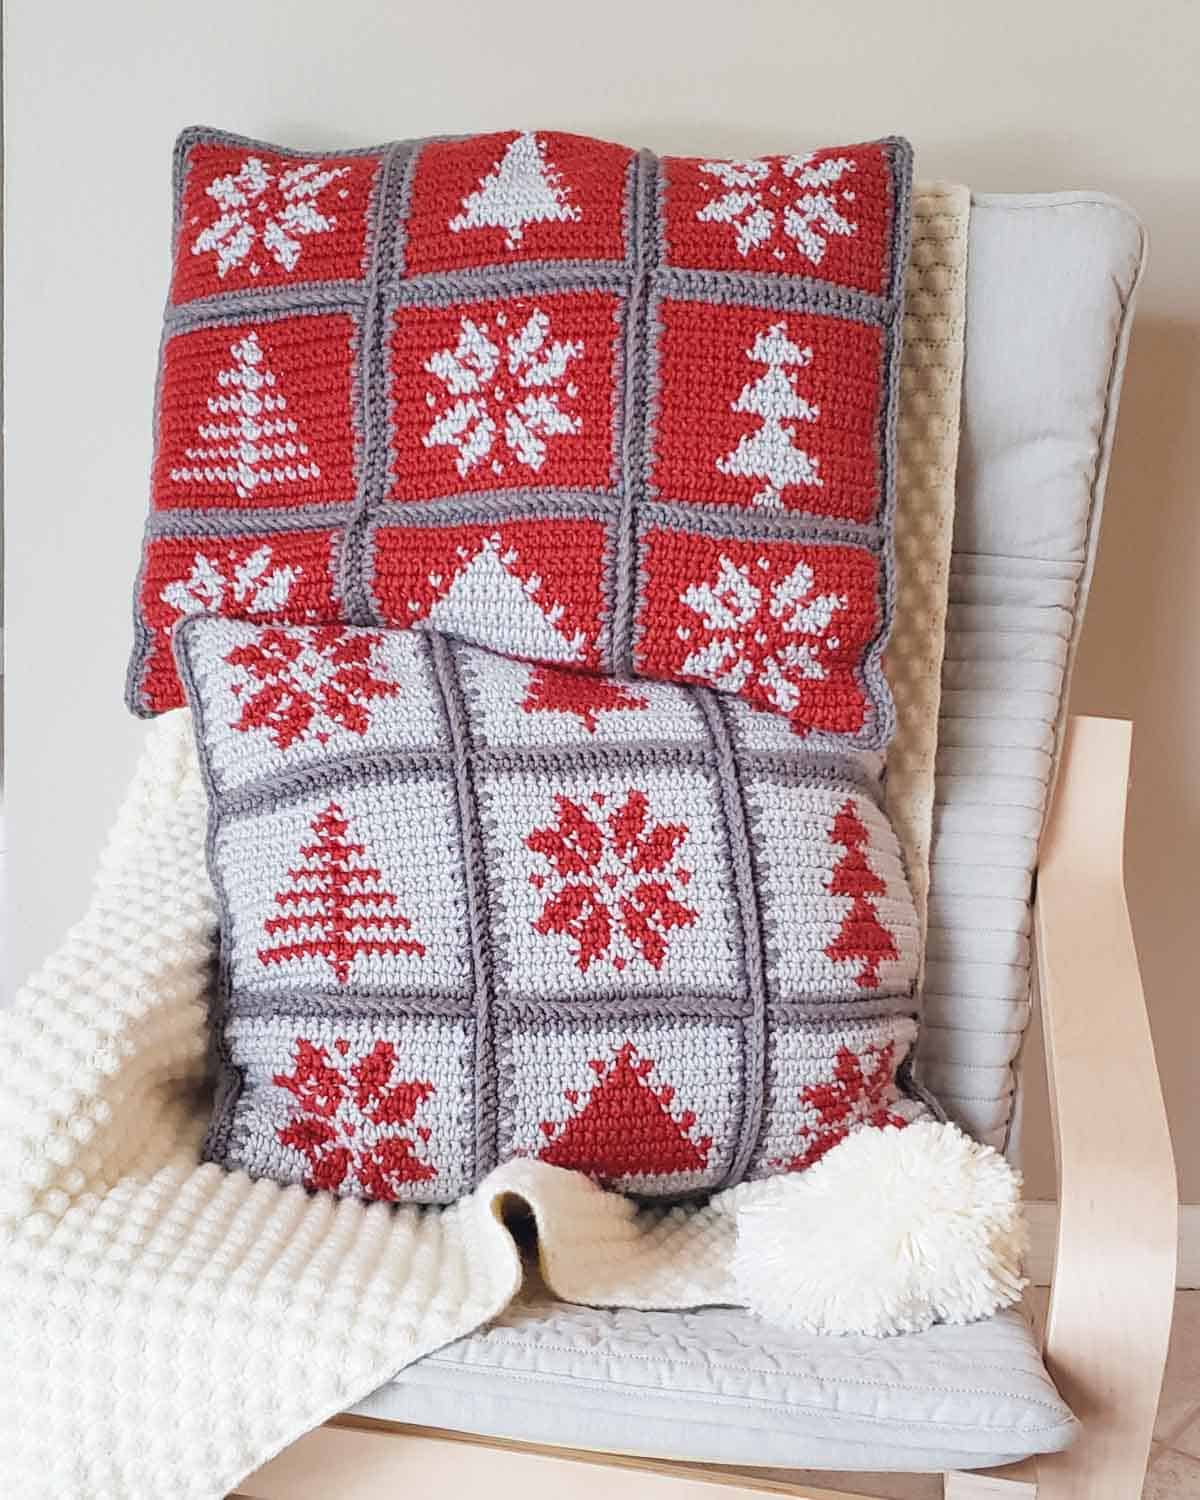
Thanks to Lion Brand Yarns for providing the yarn for this tapestry crochet pillow pattern. This post contains affiliate links.
Welcome back to the Make & Do Crew guest designer series where talented designers from across the internet share their free patterns with you, right here on Make & Do Crew.
Today Sarah from Stitch and Hound is here with her free Christmas tapestry crochet pillow pattern! You can see lots of of Sarah’s crochet patterns her blog, Stitch and Hound. And be sure to check her out on social media too: Instagram, Pinterest, and Facebook. Sarah, take it away!

The Inspiration For My Tapestry Crochet Pillow Pattern
Tapestry crochet is often avoided because it is viewed as an advanced technique. However, tapestry crochet can be simple and result in beautiful, modern pieces. I wanted to demonstrate this by constructing a quick and easy pattern to introduce makers of all levels to the fun technique of tapestry crochet.
As a first generation Swedish immigrant, I wanted to create a piece inspired by the minimalist Scandinavian designs that are so popular today. After several trials and errors, I decided a project comprised of individual tapestry squares would be most manageable for a beginning level crocheter and also achieve the contemporary look I imagined.
The name itself, “Jul Rutor” is Swedish for “Christmas squares,” and these pillows will add a touch of Scandinavian hygge to your holiday décor.
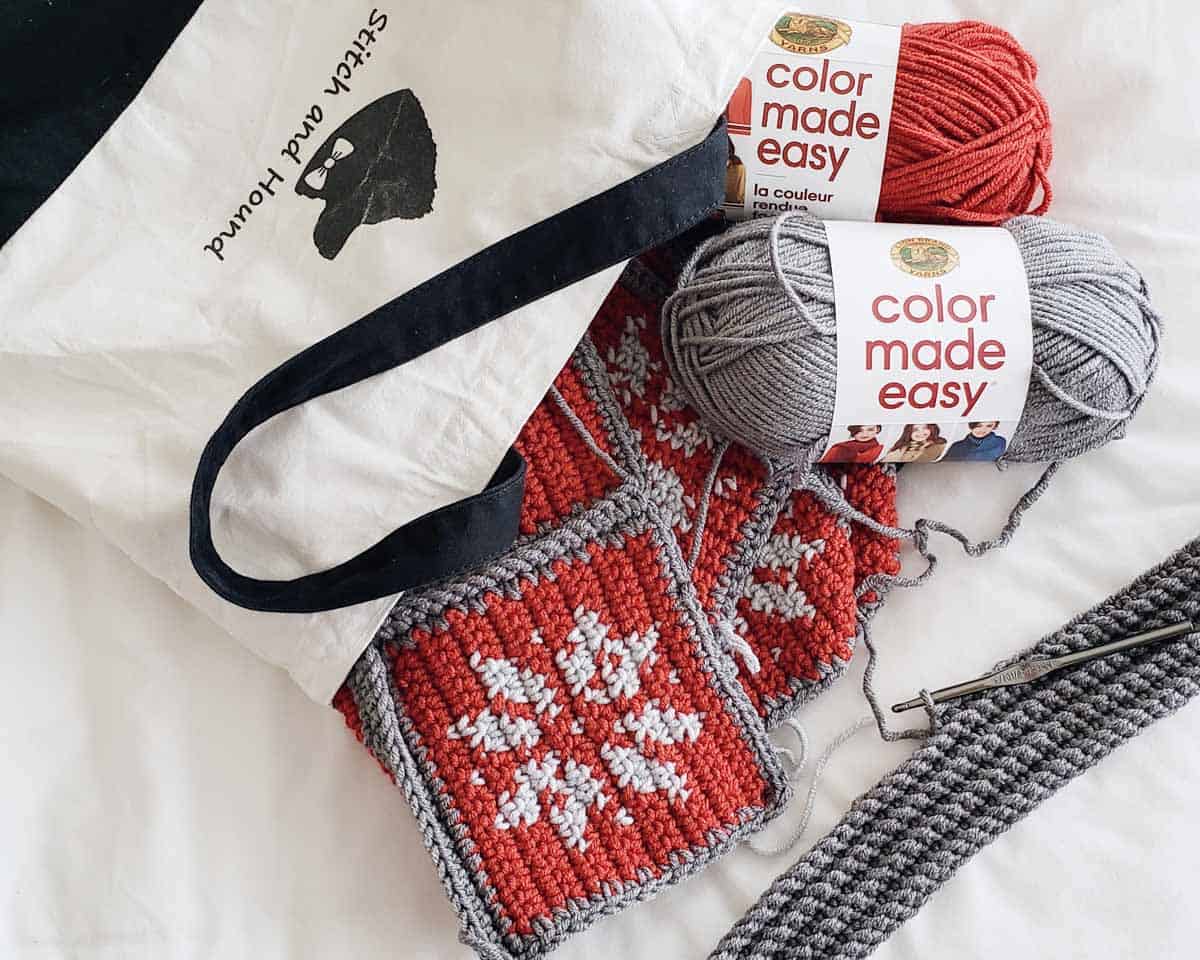
Chunky Yarn In Cozy Christmas Colors
I knew I wanted to use a bulky weight yarn that would work up quickly without blurring the intricate color changes of tapestry crochet. I settled on Lion Brand’s Color Made Easy yarn for the Jul Rutor Throw Pillows.
Color Made Easy is a 100% acrylic, bulky weight yarn. Available in twenty-two different colors, this was the squishiest yarn I have worked with, perfect for cozy home decor. True to the name, “Color Made Easy,” it was the colors that ultimately led me to choose this yarn for the Jul Rutor Throw Pillows.
Color Made Easy comes in modern hues such as millennial, turmeric, and kombucha. Don’t limit yourself to a holiday palette, choose from a variety of on-trend color combinations and keep a touch of Scandinavian decor throughout the seasons.
RELATED: Plan your perfect temperature blanket to start in January
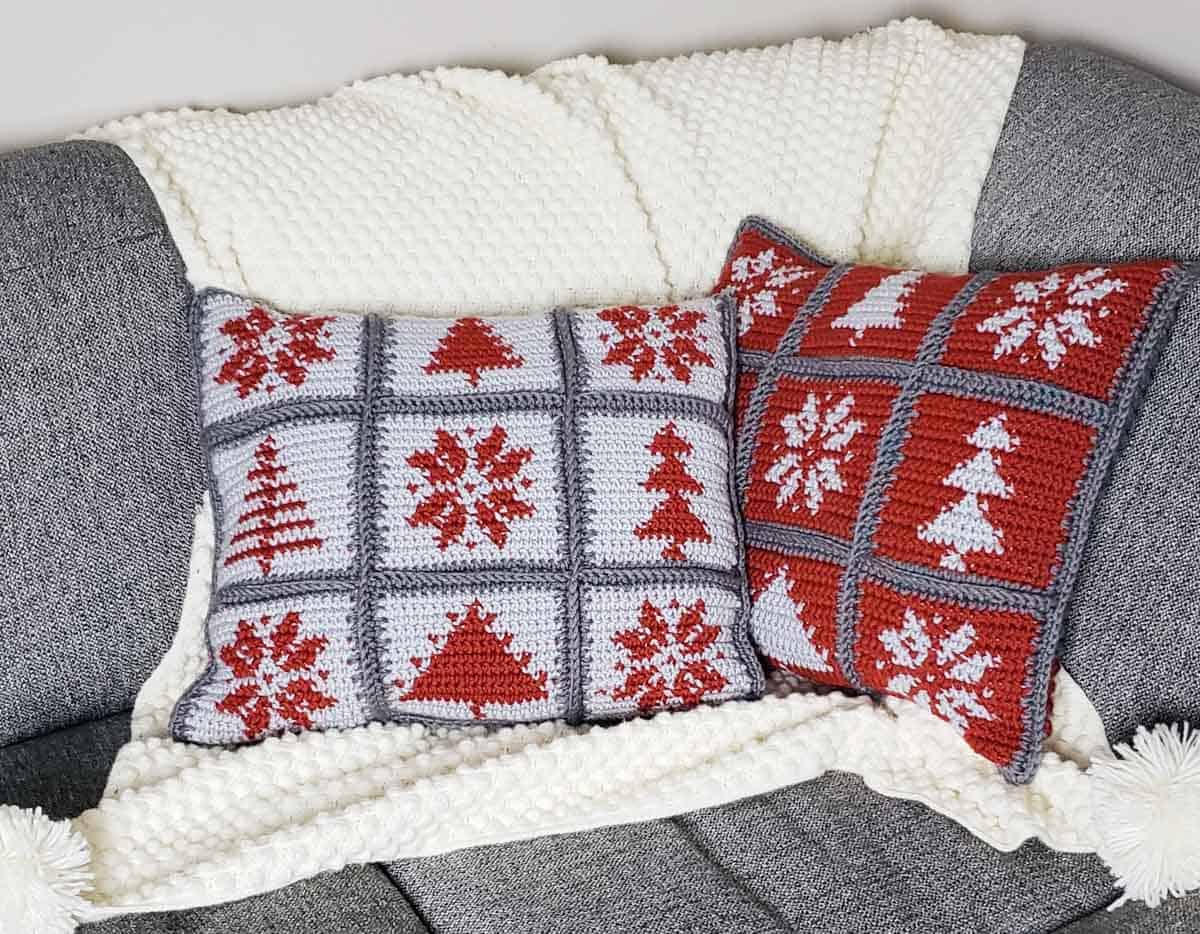
Perfect Pattern for Tapestry Crochet Beginners
This is an easy level crochet project. Single crochet stitches are used throughout with simple tapestry crochet color changes.
Comprised of small, individual squares made from bulky weight yarn, this project works up quickly and is the perfect introduction to tapestry crochet.
click to pin this pattern for later ⇨
More Free Christmas Crochet Patterns
From tree ornaments to c2c crochet patterns to adorable elf hats with ears, we’ve got you covered with many more crochet patterns for Christmas. We also have loads of quick gifts to crochet and gift ideas for crocheters to add to your own list (hint!)
See more free Christmas crochet patterns →
Jul Rutor Tapestry Crochet Christmas Pillow Free Pattern
Purchase the ad-free, printable PDF of this pattern here.
Pin this pattern for later here.
Save this pattern on your Ravelry queue here.
Explanation: Add a touch of Scandinavian style to your decor with these modern throw pillows. Made using bulky yarn, these pillows work up quickly for a simple introduction to tapestry crochet. Comprised of individual squares that are seamed together, these pillows can be made as pictured, or squares can be mixed and matched for a customized look.
This easy level crochet project uses single crochet stitches throughout, with simple tapestry crochet color changes.
Supplies:
To make one pillow:
• Lion Brand Color Made Easy (weight: 5/bulky- 247 yds, 7 oz)
– Color A: Shade #195-149 – 2 balls
– Color B: Anthurium #195-113 – 1 ball
– Color C: Basalt #195-150 – 1 ball
• Size K (6.5 mm) crochet hook
• Yarn needle
• Scissors
• Stitch markers
• 20” x 20” pillow for stuffing
• Download the free graph patterns here
Sizes/Measurements:
• One completed pillow measures 20” x 20”
Gauge:
• 12 stitches x 10 rows in a 4″ swatch
Abbreviations and Glossary (US Terms):
BLO – back loop only
ch(s) – chain(s)
rep – repeat
rs – right side
sc – single crochet
ws – wrong side
Overall Pattern Notes:
• This pattern is worked in rows. When working on the right side (rs), hold your unused strand of yarn behind your work; when working on the wrong side (ws), hold your unused strand of yarn in front of your work. This keeps the right side (rs) of your work looking neat. Note in the pattern that some squares begin on the right side and some begin on the wrong side.
• Carry both strands of yarn throughout your work to maintain consistent tension.
• For pattern grids, odd rows read right to left, even rows read left to right.
• The entire pattern is made using single crochet stitches. For example, “A 9, B 1, A 9, ch 1 and turn” means single crochet 9 stitches in color A, single crochet 1 stitch in color B, single crochet 9 stitches in color A, chain 1 and turn.
• Download the free graph patterns here. Reference these while following the written pattern.
Flower Motif – make 5
Ch 20
Row 1 (ws) with A, sc in 2nd ch from hook, sc in next 18 chs, ch 1 and turn (19 sts).
Row 2 (rs) A 6, B 1, A 2, B 1, A 2, B 1, A 6, ch 1 and turn
Row 3 (ws) A 6, B 2, A 3, B 2, A 6, ch 1 and turn
Row 4 (rs) A 6, B 3, A 1, B 3, A6, ch 1 and turn
Row 5 (ws) A 3, B 3, A 1, B 2, A 1, B 2, A 1, B 3, A 3, ch 1 and turn
Row 6 (rs) A 4, B 3, A 1, B 1, A 1, B 1, A 1, B 3, A 4, ch 1 and turn
Row 7 (ws) A 5, B 3, A 3, B 3, A 5, ch 1 and turn
Row 8 (rs) A 2, B 1, A 6, B 1, A 6, B 1, A 2, ch 1 and turn
Row 9 (ws) A 5, B 3, A 3, B 3, A 5, ch 1 and turn
Row 10 (rs) A 4, B 3, A 1, B 1, A 1, B 1, A 1, B 3, A 4, ch 1 and turn
Row 11 (ws) A 3, B 3, A 1, B 2, A 1, B 2, A 1, B 3, A 3, ch 1 and turn
Row 12 (rs) A 6, B 3, A 1, B 3, A6, ch 1 and turn
Row 13 (ws) A 6, B 2, A 3, B 2, A 6, ch 1 and turn
Row 14 (rs) A 6, B 1, A 2, B 1, A 2, B 1, A 6, ch 1 and turn
Row 15 (ws) A 19
Fasten off and weave in ends
Tree Motif 1 – make 1
Ch 20
Row 1 (rs) with A, sc in 2nd ch from hook, sc in next 18 chs, ch 1 and turn (19 sts)
Row 2 (ws) A 9, B 1, A 9, ch 1 and turn
Row 3 (rs) A 9, B 1, A 9, ch 1 and turn
✨Unlock this free subscriber-exclusive pattern ✨
Follow these steps to view the full free pattern below
Row 1 (rs) with A, sc in 2nd ch from hook, sc in next 18 chs, ch 1 and turn (19 sts)
Row 2 (ws) A 9, B 1, A 9, ch 1 and turn
Row 3 (rs) A 3, B 13, A 3, ch 1 and turn
Row 4 (ws) A 9, B 1, A 9, ch 1 and turn
Row 5 (rs) A 4, B 11, A 4, ch 1 and turn
Row 6 (ws) A 9, B 1, A 9, ch 1 and turn
Row 7 (rs) A 5, B 9, A 5, ch 1 and turn
Row 8 (ws) A 9, B 1, A 9, ch 1 and turn
Row 9 (rs) A 6, B 7, A 6, ch 1 and turn
Row 10 (ws) A 9, B 1, A 9, ch 1 and turn
Wanna save this pattern?
Row 11 (rs) A 7, B 5, A 7, ch 1 and turn
Row 12 (ws) A 9, B 1, A 9, ch 1 and turn
Row 13 (rs) A 8, B 3, A 8, ch 1 and turn
Row 14 (ws) A 9, B 1, A 9, ch 1 and turn
Row 15 (rs) A 19
Fasten off and weave in ends
Tree Motif 3 – make 1
Ch 20
Row 1 (rs) staring with A, sc in 2nd ch from hook, A 7, B 3, A 8, ch 1 and turn (19 sts)
Row 2 (ws) A 9, B 1, A 9, ch 1 and turn
Row 3 (rs) A 5, B 9, A 5, ch 1 and turn
Row 4 (ws) A 6, B 7, A 6, ch 1 and turn
Row 5 (rs) A 7, B 5, A 7, ch 1 and turn
Row 6 (ws) A 8, B 3, A 8, ch 1 and turn
Row 7 (rs) A 9, B 1, A 9, ch 1 and turn
Row 8 (ws) A 6, B 7, A 6, ch 1 and turn
Row 9 (rs) A 7, B 5, A 7, ch 1 and turn
Row 10 (ws) A 8, B 3, A 8, ch 1 and turn
Row 11 (rs) A 9, B 1, A 9, ch 1 and turn
Row 12 (ws) A 7, B 5, A 7, ch 1 and turn
Row 13 (rs) A 8, B 3, A 8, ch 1 and turn
Row 14 (ws) A 9, B 1, A 9, ch 1 and turn
Row 15 (rs) A 19
Fasten off and weave in ends
Tree Motif 4 – make 1
Ch 20
Row 1 (rs) with A, sc in 2nd ch from hook, sc in next 18 chs, ch 1 and turn (19sts)
Row 2 (ws) A 9, B 1, A 9, ch 1 and turn
Row 3 (rs) A 9, B 1, A 9, ch 1 and turn
Row 4 (ws) A 9, B 1, A 9, ch 1 and turn
Row 5 (rs) A 1, B17, A 1, ch 1 and turn
Row 6 (ws) A 2, B15, A 2, ch 1 and turn
Row 7 (rs) A 1, B 1, A 1, B 13, A 1, B 1, A 1, ch 1 and turn
Row 8 (ws) A 4, B 11, A 4, ch 1 and turn
Row 9 (rs) A 3, B 1, A 1, B 9, A 1, B 1, A 3, ch 1 and turn
Row 10 (ws) A 6, B 7, A 6, ch 1 and turn
Row 11 (rs) A 5, B 1, A 1, B 5, A 1, B 1, A 5, ch 1 and turn
Row 12 (ws) A 8, B 3, A 8, ch 1 and turn
Row 13 (rs) A 7, B 1, A 1, B 1, A 1, B 1, A 7, ch 1 and turn
Row 14 (ws) A 9, B 1, A 9 ch 1 and turn
Row 15 (rs) A 19, ch 1 and turn
Fasten off and weave in ends
Back Panel – make 1
With color C, Ch 64
Row 1 sc in 2nd ch from hook, sc in each ch across, ch 1 and turn (63 sts)
Row 2 BLO sc in each st across (63 sts)
Rows 3-51 rep row 2
Fasten off and weave in ends
Borders
For each of the squares, join yarn color C anywhere.
Chain 1, single crochet in each single crochet stitch and in the side of each row.
Place 3 single crochet stitches in each of the corners.
You will end with 76 stitches around each square.
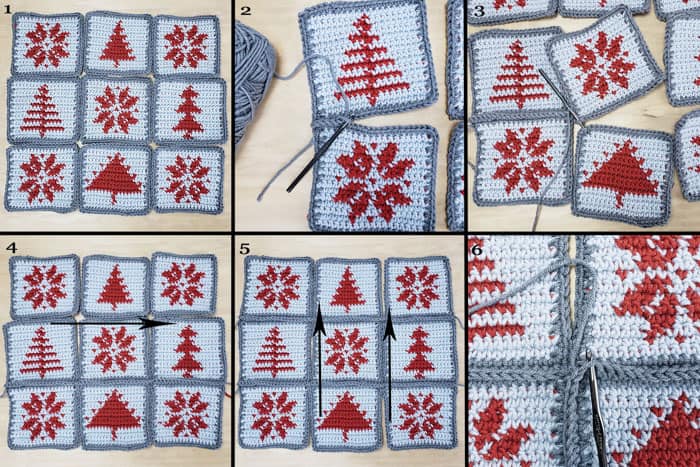
Assembly
1. Lay out pieces as shown, making sure that the right sides of the squares are facing up.
2. Using color C, join the two squares in the corner stitches. Working through both stitches of the squares, single crochet across.
3. When you reach the end of your current squares, join two new squares in each of their corner stitches and continue to single crochet across. Continue until all squares within the row have been joined.
4. Repeat the same process for the top seam.
5. Once you have completed the seams that run from left to right, use the same method to join the seams running from bottom to top.
6. When you run into the seams that run left to right, chain 1 to go over the seam, and continue to single crochet.
Fasten off and weave in all ends.
Place the front and back panels wrong sides together. Beginning anywhere, Join with yarn color C, working through both front and back panels. Chain 1, single crochet in each single crochet stitch and in the side of each row. Place 3 single crochet stitches in each of the corners.
Leave one side unfinished, stuff with a 20” x 20” pillow (or any material you have) and single crochet last side closed.
Fasten off and weave in all ends.
Thanks again to Sarah of Stitch and Hound for sharing this free beginner tapestry crochet Christmas pillow pattern! Be sure to check out Sarah’s blog for lots more free modern crochet patterns!
More Free Crochet Patterns With Color Work Techniques
Interested in more crochet patterns with unique color work techniques? Here are some free patterns from M&DC to help keep you creating beautiful crochet pieces.

1. Navajo Blanket Crochet Shrug – While this free crochet shrug pattern resembles the look of tapestry crochet, its Navajo-blanket-inspired design is actually made by switching colors mid-row using basic crochet techniques!
2. Mud Cloth Crochet Pillow – This free crochet pillow pattern uses a mud-cloth-inspired design to make a modern piece of couch flair! Excellent pattern for beginners!
3. How to Cross Stitch on Crochet – Learn how to cross stitch on crochet including how to design your own cross stitch graphs. Personalize crochet pillows, hats, bags–and pretty much everything else! Free cross stitch graphs included.
4. Be A Deer C2C Afghan – Hello ombre! This corner to corner crochet deer afghan will be a hit with your favorite baby, hipster or hunter! Free c2c downloadable graph pattern included.



Leave a Reply