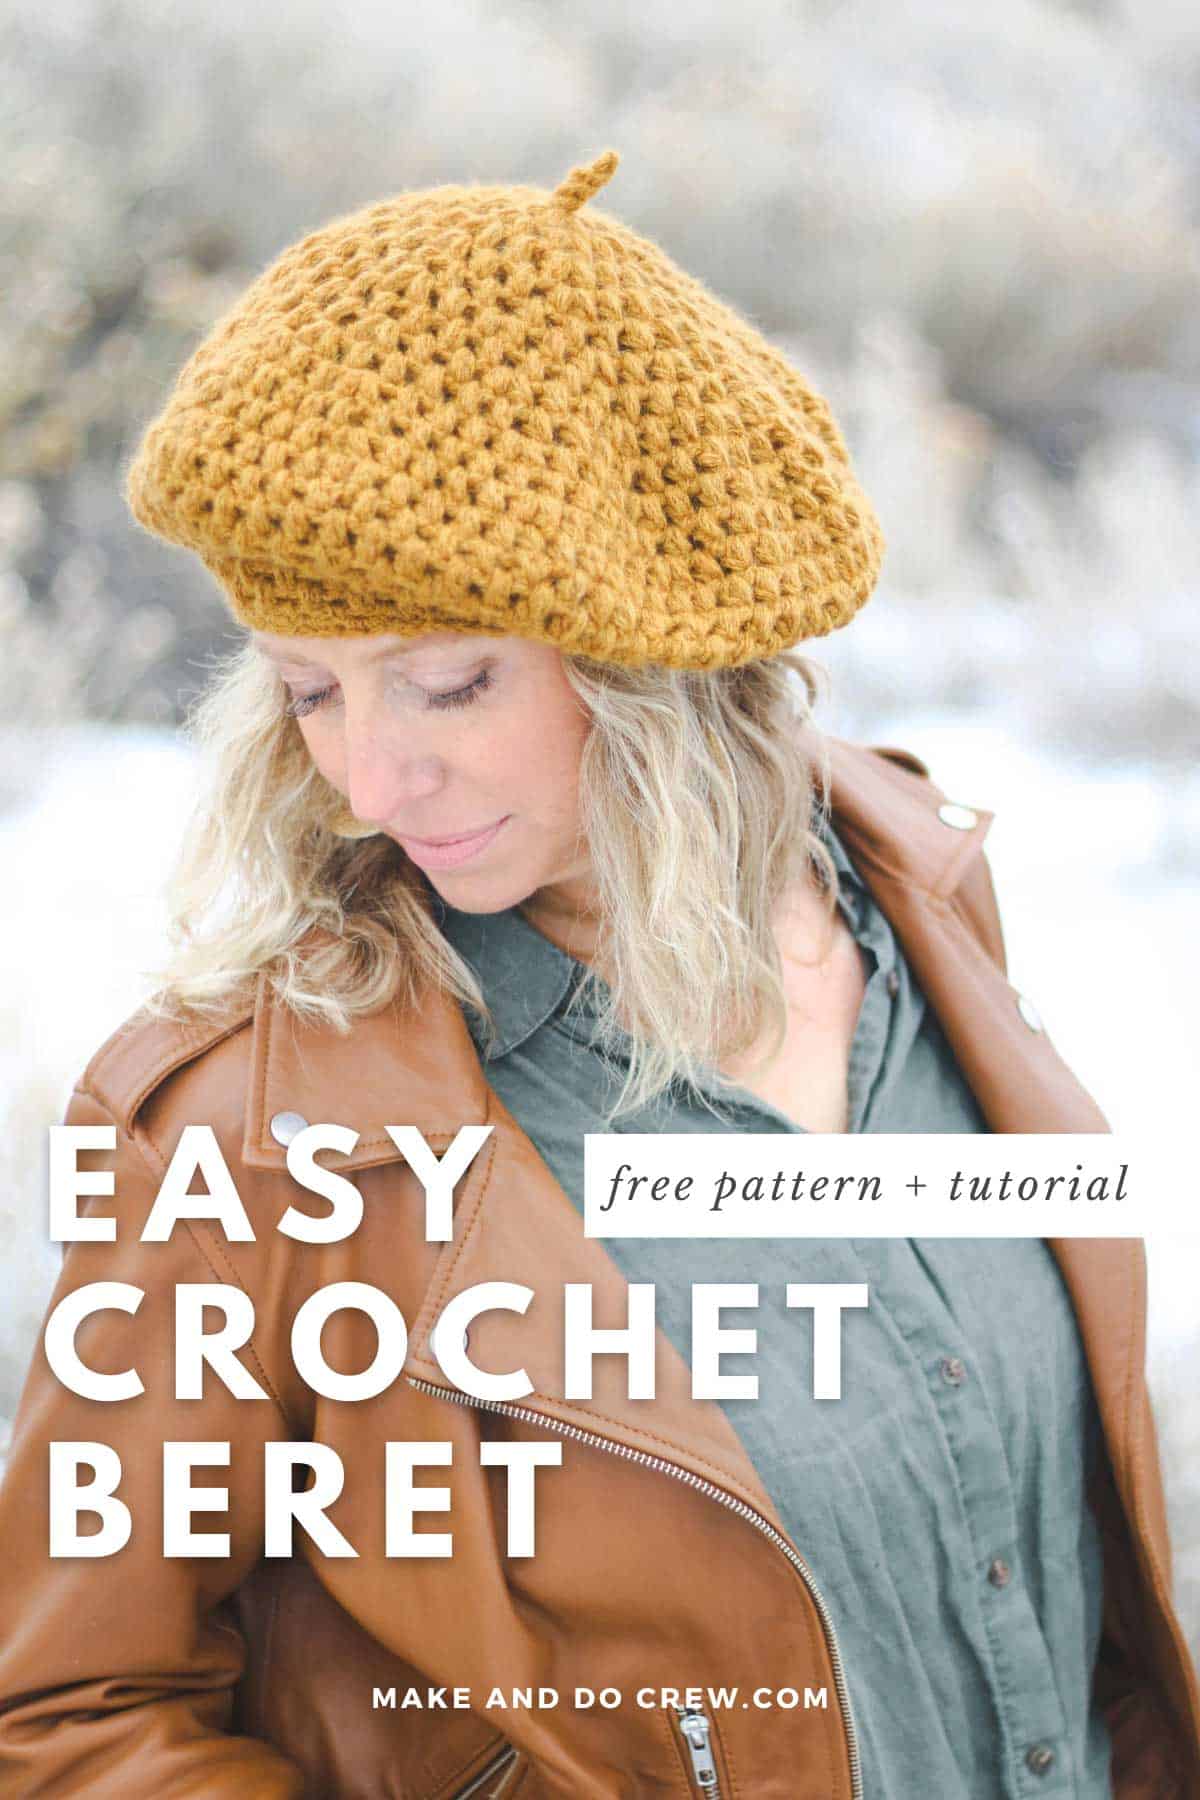
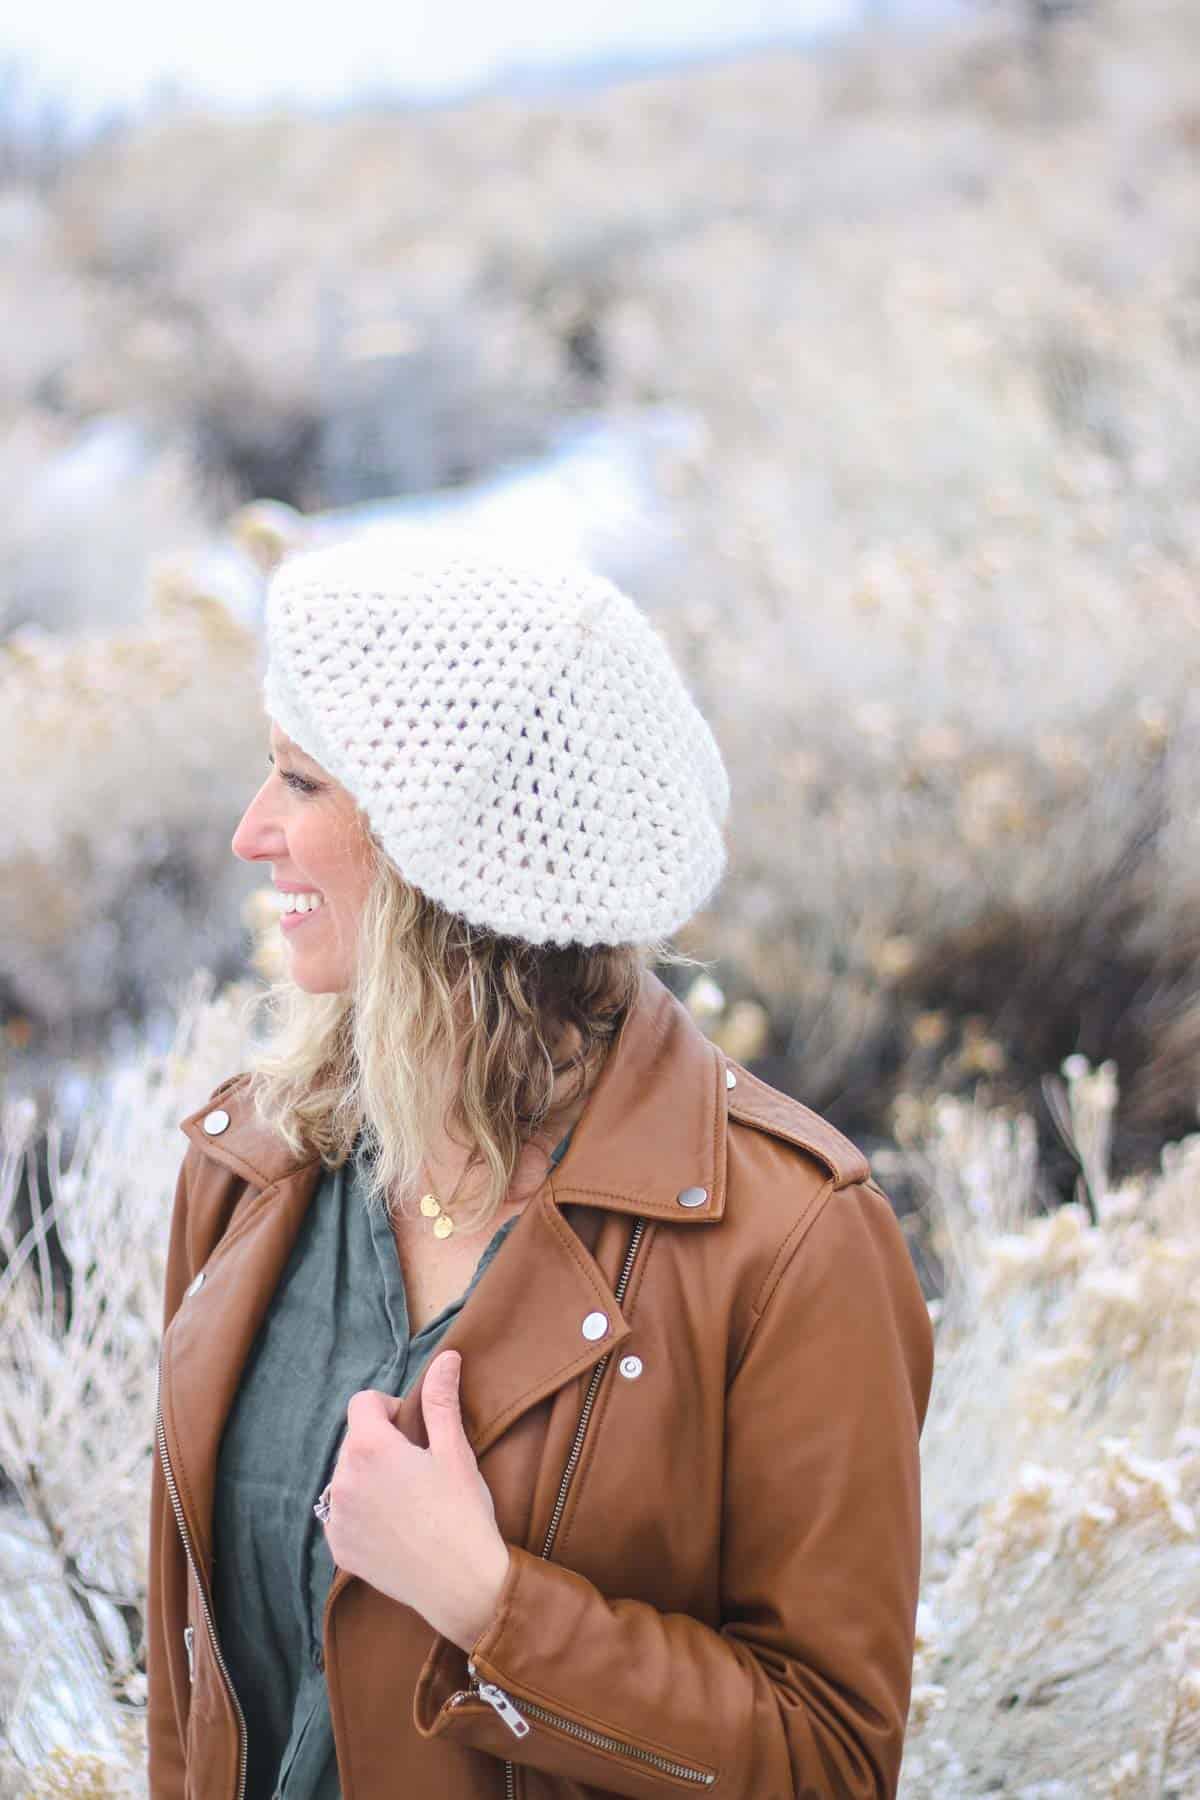
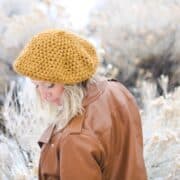
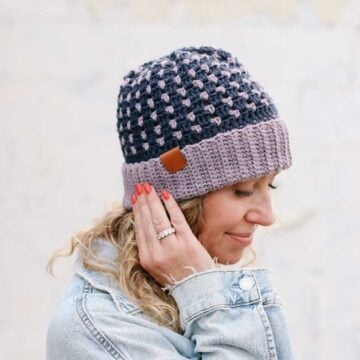
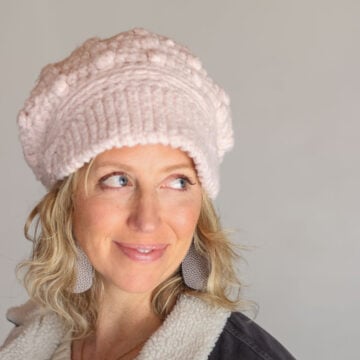
Whether you prefer a traditional French look or more slouch, this easy crochet beret pattern has you covered. I offer plenty of suggestions for customizing the sizing so you can get the perfect fit. Call it a beret, tam, or slouchy hat, but whip one up today!
Get the free beret hat pattern below or purchase the ad-free, printable PDF on Etsy.
This crocheted beret pattern is part of a collaboration with Lion Brand Yarns. This post contains affiliate links.
Puff Stitch Crochet Beret
If you're looking for a quick and easy crochet pattern, this versatile hat is a perfect one-day project. The puff stitches are fast to work and add a unique modern texture. The airy yarn gives the hat a lightweight feel, perfect for wearing in fall, winter, or spring.
You can easily finish crocheting your beret in one evening and wear it the next day.
Keep reading for more yarn and inspiration details or jump down to the free pattern.
Jump to:
- Puff Stitch Crochet Beret
- How to Crochet a Beret Step By Step
- Pattern Overview Video
- Best Yarn for a Beret Hat
- How to Crochet a Puff Stitch
- Beret Sizing
- Classic French Beret Variations
- Print this Pattern
- Crochet All Day Beret - Free Pattern
- Crochet Beret FAQs
- Invitation to our Facebook group
- How to Crochet a Slouchy Beret - Summary
Why you’ll love this slouchy beret!
How to Crochet a Beret Step By Step
While a classic beret might seem intimidating to crochet, it's nothing more than a flat circle with a brim. There are plenty of opportunities to adjust the look and fit of your hat as you work. I explain them in the step-by-step pattern instructions below, but here's a summary.
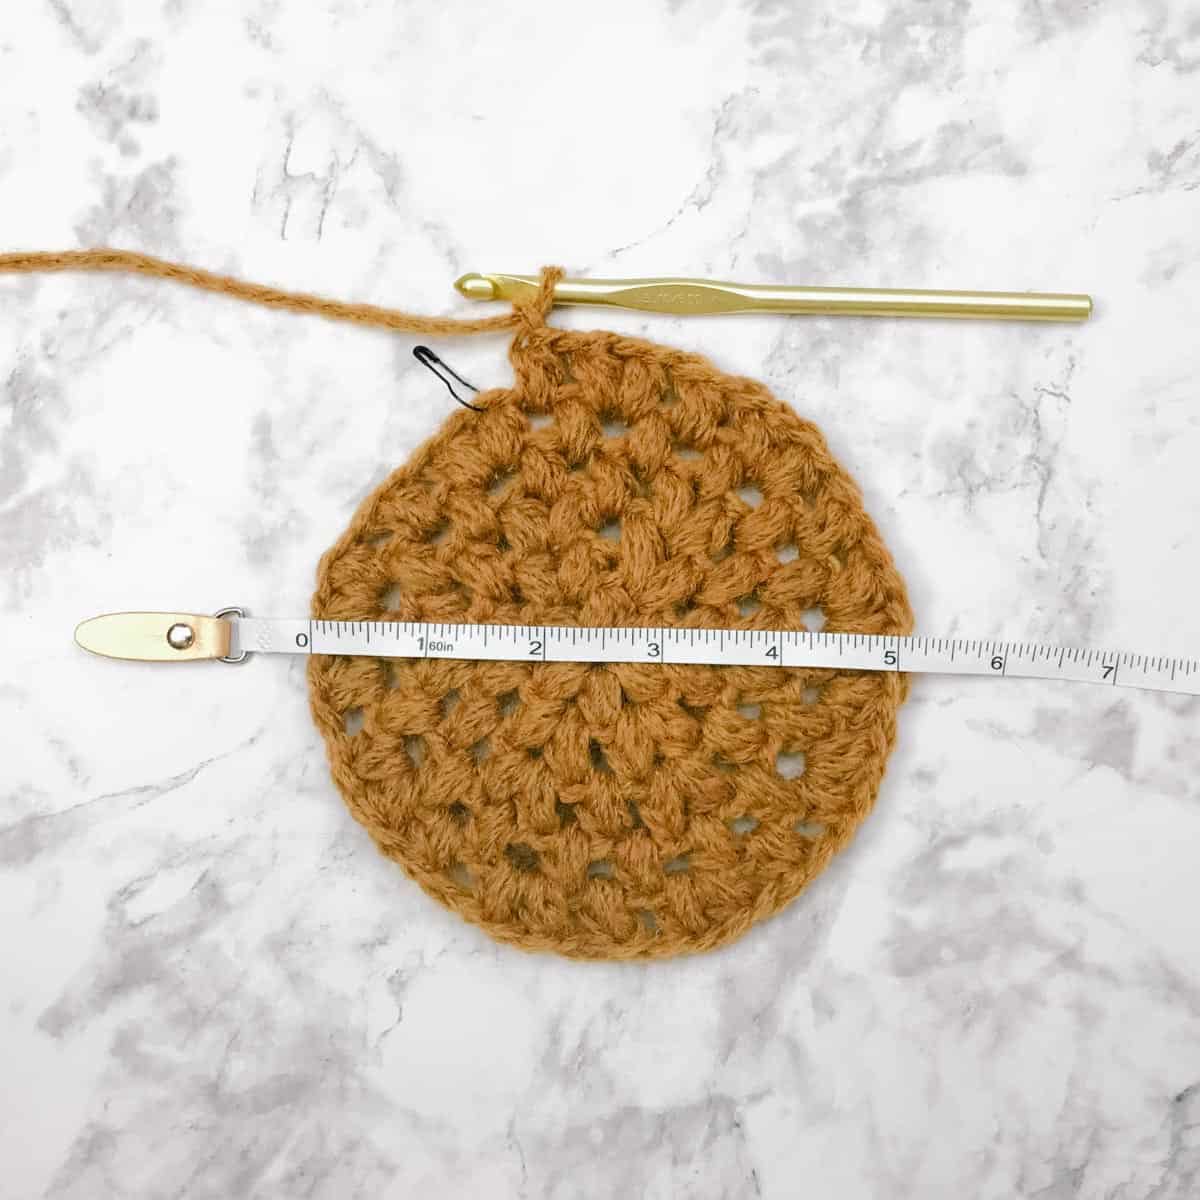
Beginning with a magic ring, you'll crochet a circle. Measuring your gauge after round 5 is important to ensure your hat turns out the expected size.
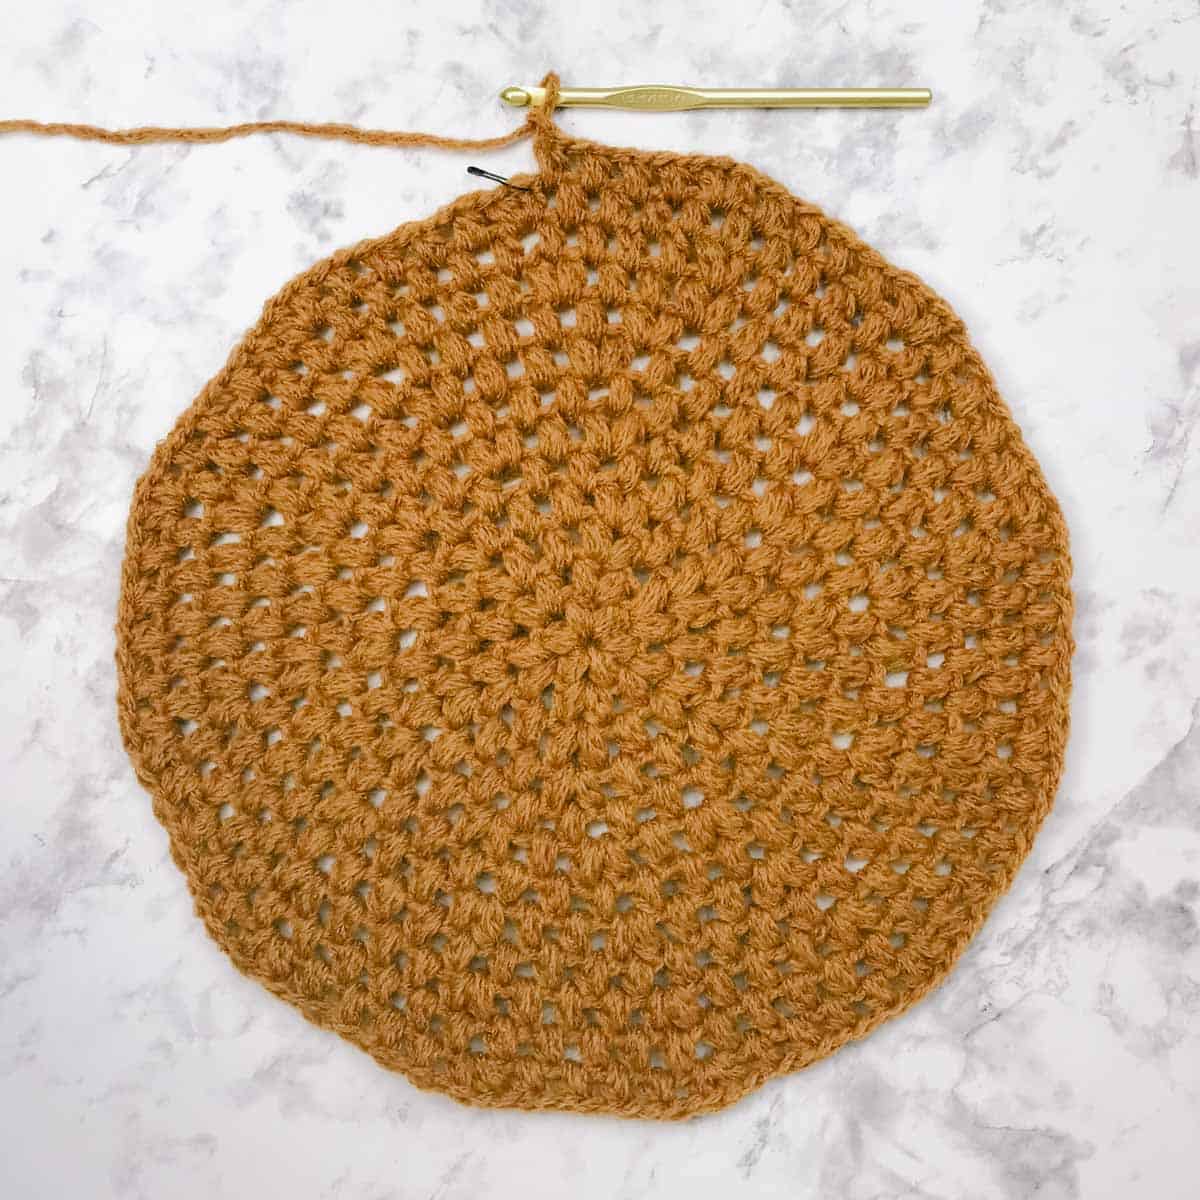
Once your beret "pancake" top is complete, you'll begin decreasing to make the hat fit your head.
If you'd prefer a slouchy beret, add a few rounds to your circle without increasing before you move onto decreasing.
Before finalizing the single crochet brim, you'll have another opportunity to decide how tight or loose you want your crocheted beret to fit.
Related: 35+ Easy Chunky Crochet Hat Patterns
Pattern Overview Video
Prefer to watch and listen instead of read? In the video below, I talk you through what you need to know before crocheting your beret slouch hat. Check it out to get the inside scoop on the written pattern instructions.
(If you have an ad-blocker running, you'll need to disable it to view the video.)
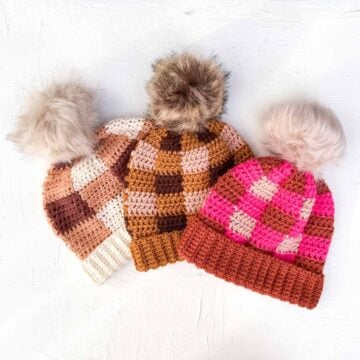
Best Yarn for a Beret Hat
I knew I wanted a fluffy worsted-weight yarn that wasn’t too heavy for this crochet beret pattern. Lion Brand Chainette came through big time.
This luxurious blend of baby alpaca, wool, and polyamide is spun with a “chainette” construction. This allows air to pass through, creating an extremely lightweight yarn with a nice halo. Perfect for a solid color three-season crochet hat!
See all the shades of Lion Brand Chainette.
Substitutions
If you can't get Chainette yarn, check YarnSub.com for similar options. Most worsted weight (medium) yarns can be substituted, but check your gauge after Round 5 and adjust your hook size if needed.
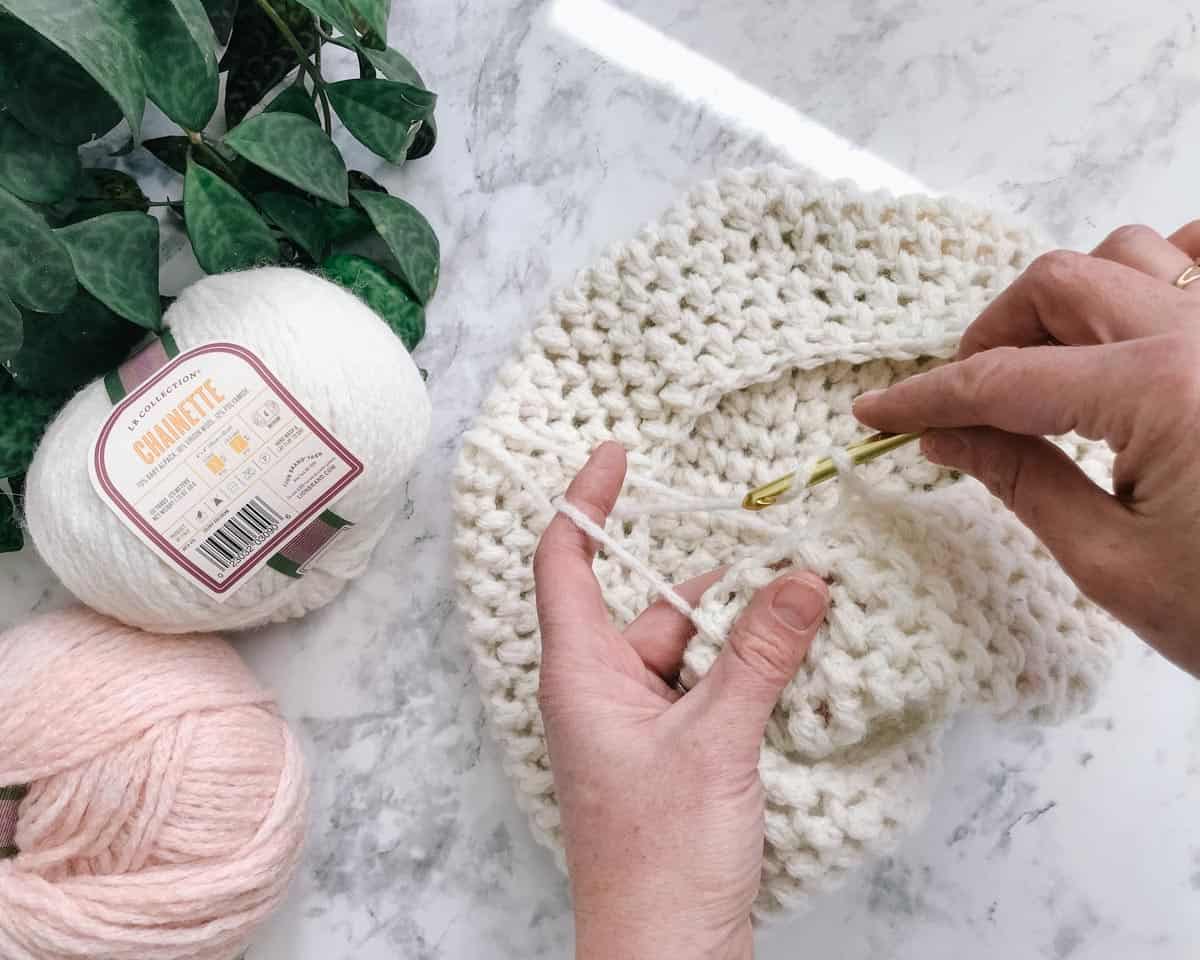
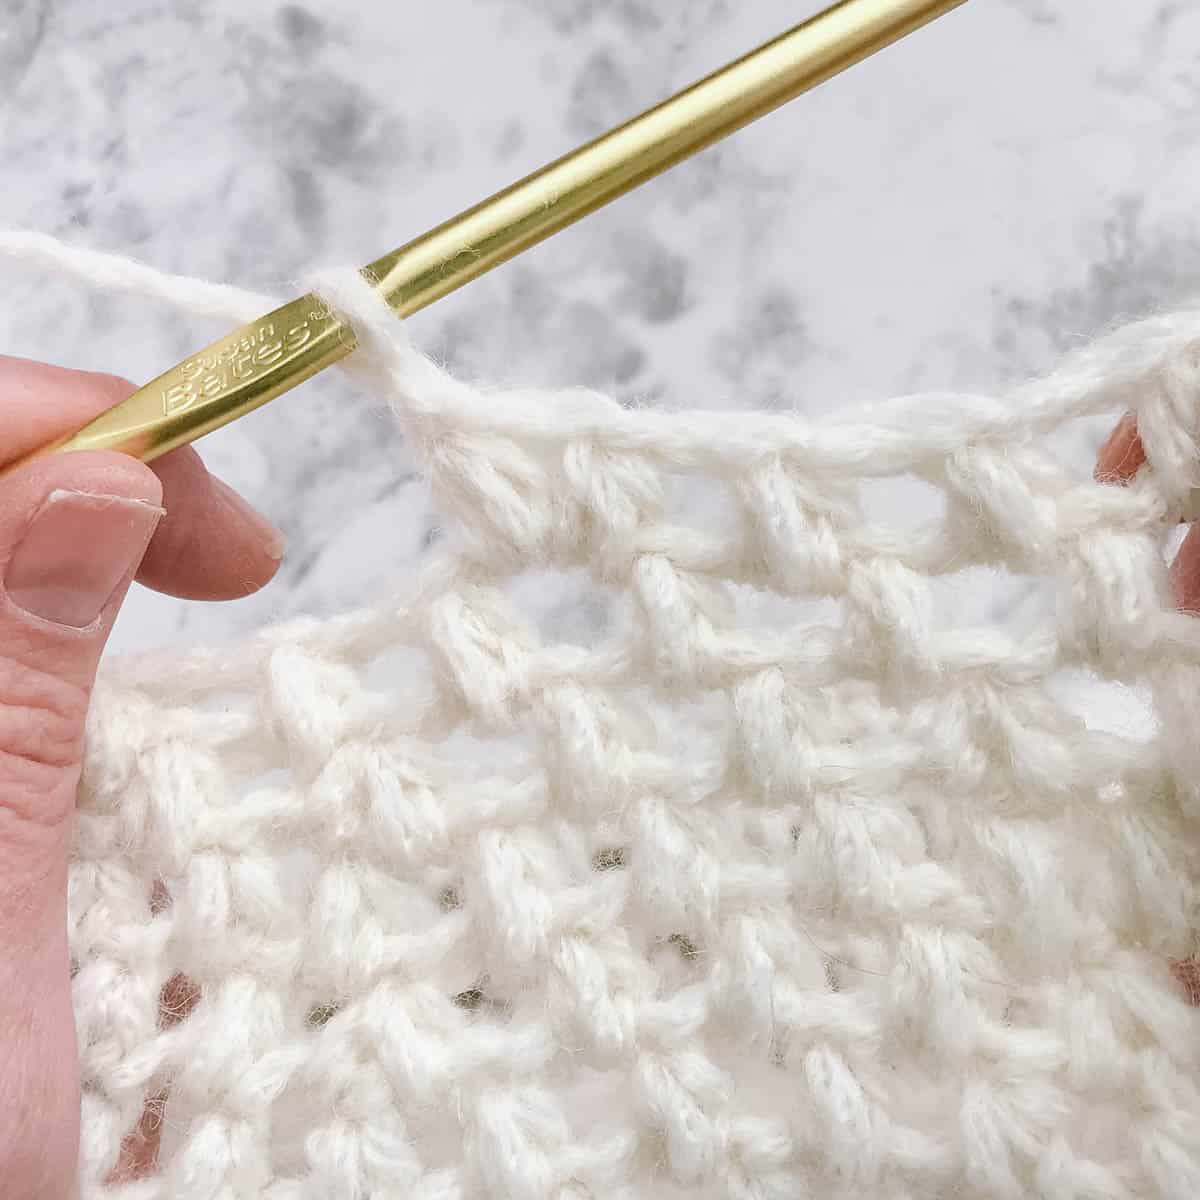
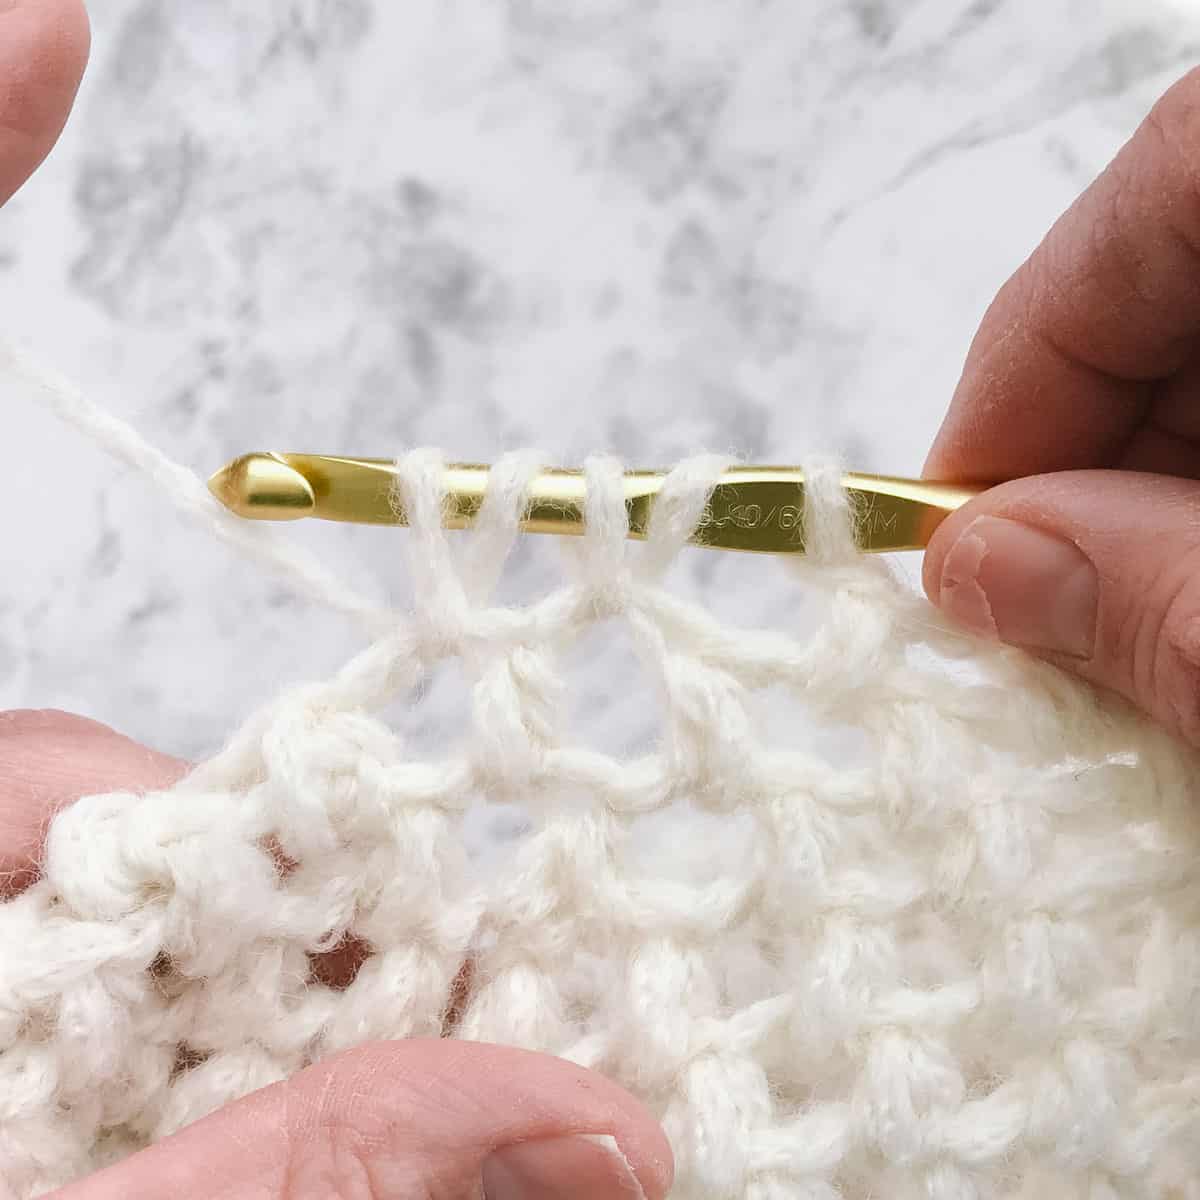
How to Crochet a Puff Stitch
The puff stitches used in this beret are fun and quick. The following photos will help you learn how to crochet the puff stitch, how to increase, and how to decrease.
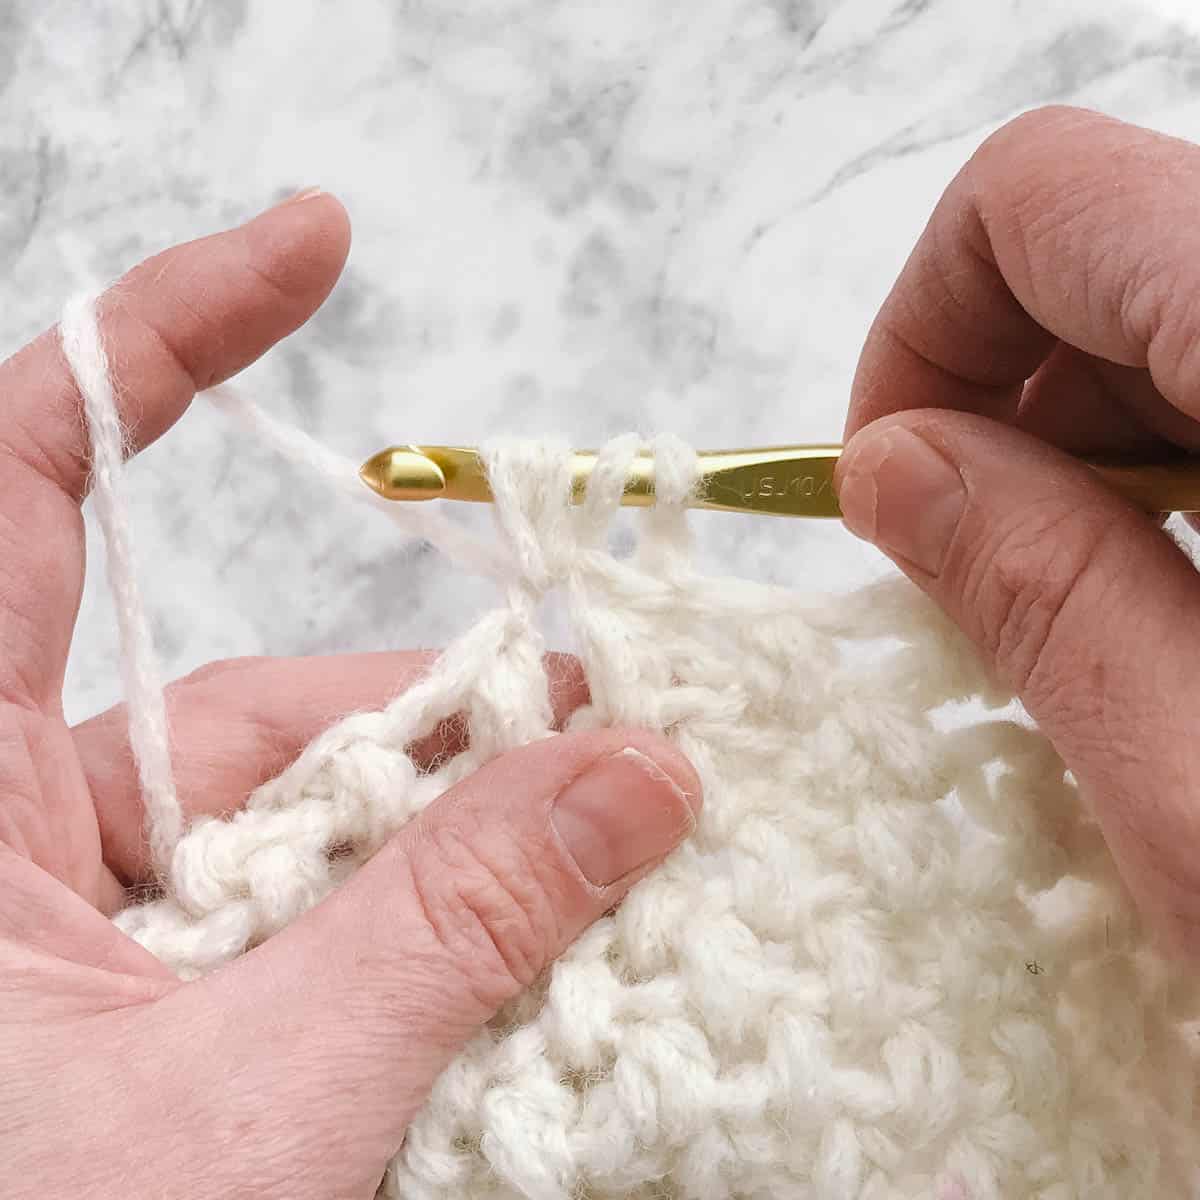
Puff Stitch: [Yarn over, insert hook in the chain space, yarn over and pull up a loop] twice in the same space, yarn over and pull through all 5 loops on hook, ch 1 to close puff.
Puff Stitch Increase: Repeat the process of a puff stitch twice in one space.
Decrease Step 1: Yarn over, insert hook in the first chain space, yarn over and pull up a loop] then [yarn over, insert hook in the next chain space, yarn over and pull up a loop].
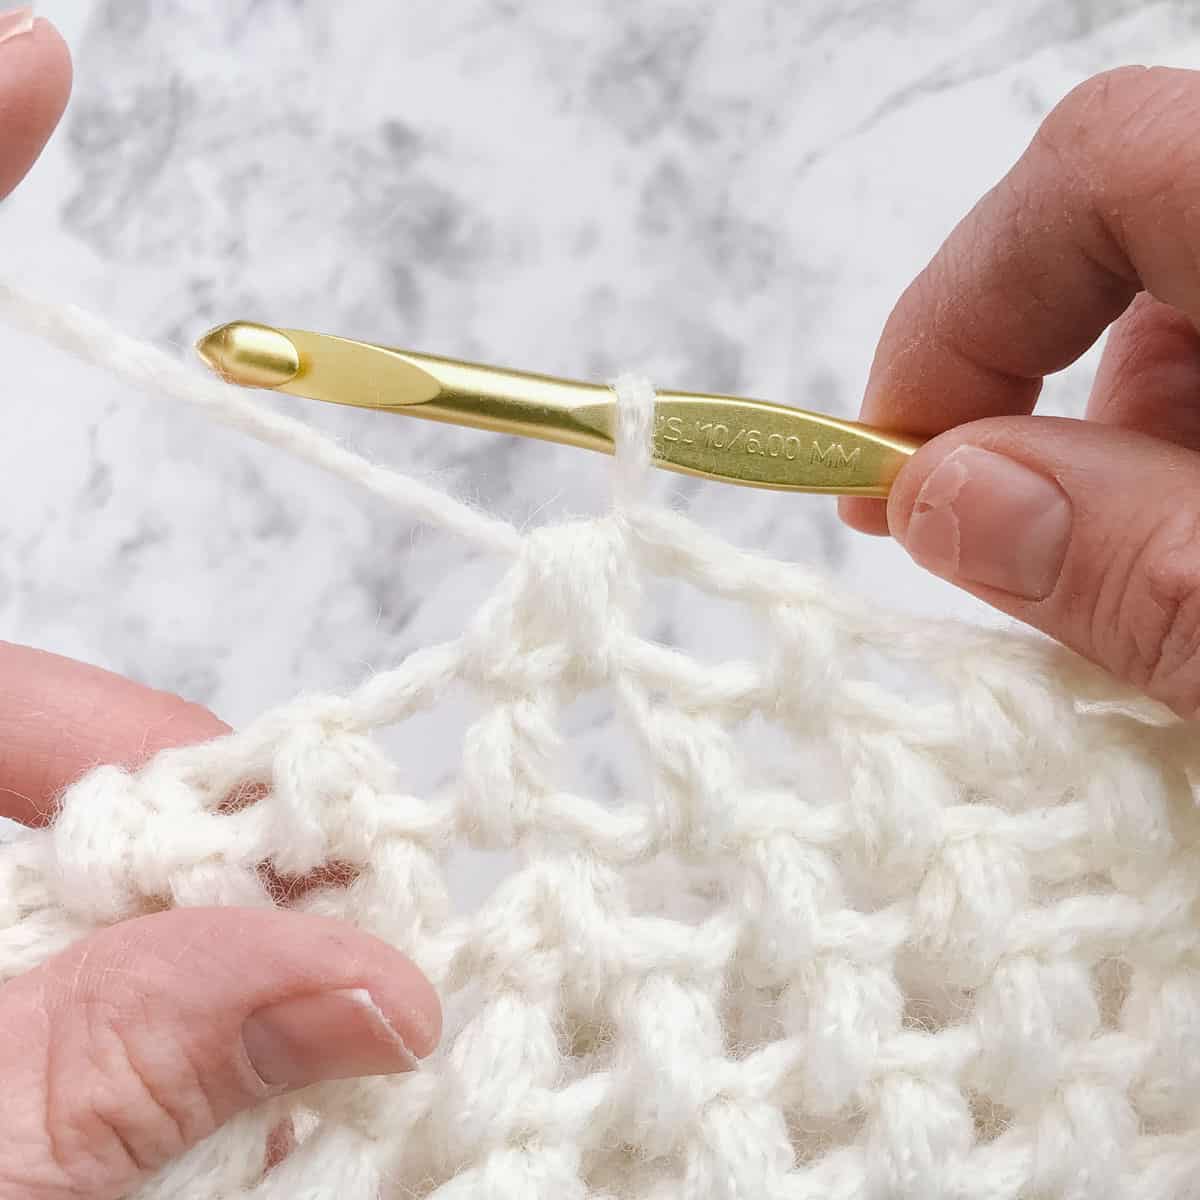
Decrease Step 2: Yarn over and pull through all 5 loops on hook, ch 1 to close puff. (This is the same as a Puff, just spread out over two chain spaces instead of one.)
All-in-One Crochet Kit
If you don't live near amazing yarn stores or if you just like to get fun packages in the mail, the all-in-one kit is a perfect way to make your Crochet All Day Beret. This bundle from Lion Brand includes all the Chainette yarn you'll need, plus a bonus printable PDF of the pattern (delivered digitally).
Beret Sizing
This simple beret pattern is designed to fit most adults. Instructions are given throughout the pattern for customizing the perfect fit. These modifications will work well for head circumferences between 21-24".
How to Ensure Your Hat Will Fit
With certain types of fitted crochet hats, like bucket hats and sun hats, meeting the pattern gauge is essential.
Ensure your beret fits as expected, and take the time to measure your gauge after Round 5 as instructed in the free pattern. It's always okay to increase or decrease your hook size to meet the gauge of a crochet pattern.
Classic French Beret Variations
It's easy to modify how big the "pancake" top of your beret is, but it requires changing the free pattern below slightly.
| Beret Top Sizing | Modification |
|---|---|
| For an exaggerated, extra-large top | Make the diameter of your main circle larger by continuing with additional increase rounds after Round 12 |
| For a more modest top | Eliminate a few increase rounds before moving to the Beret Shaping section of the pattern |
Tips on Personalized Sizing
In both cases, these modifications will change the number of stitches between the decreases in the Beret Shaping step.
This is easy to figure out, though. For the first decrease round, work the same number of stitches between your decreases as you did in your last increase round.
For example, as the pattern is written, Round 12 of increasing includes four stitches between increases. And Round 2 of Beret Shaping includes four stitches between decreases.
Related: 27+ Best Crochet Hat Patterns for Winter
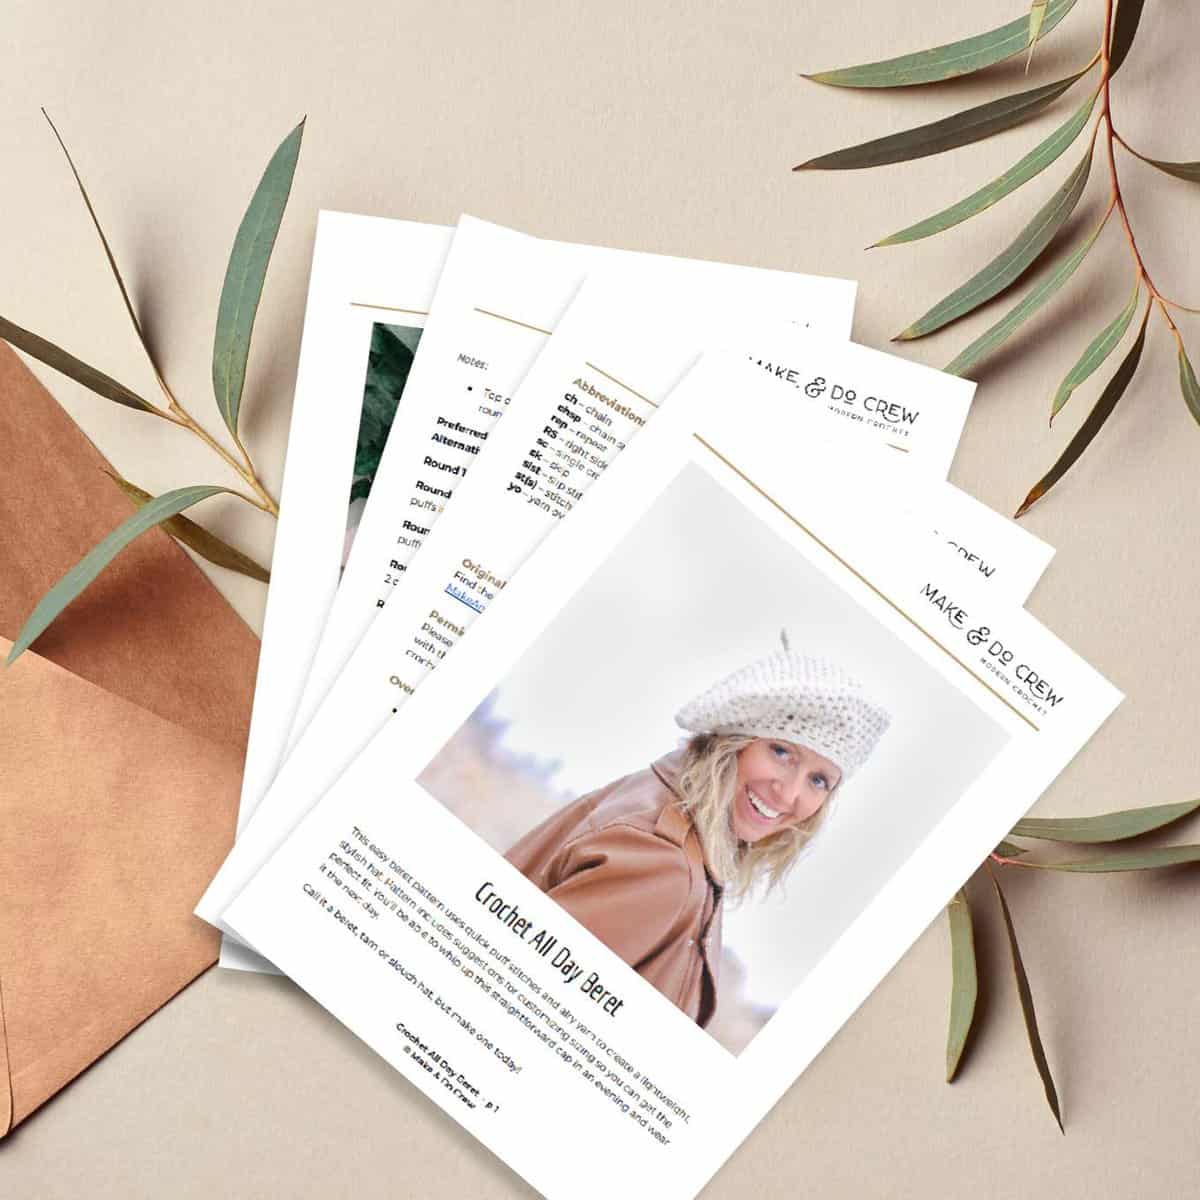
Print this Pattern
Prefer to crochet on the couch? Need a portable, printable pattern? You'll love the premium PDF! The instantly downloadable, ad-free file is formatted for easy printing and includes the complete pattern and the photo tutorials.
More Free Hat Patterns
If you can never get enough crochet hat patterns, we've got you–and your ears–covered.
more free hat patterns →
Crochet All Day Beret - Free Pattern
Explanation:
This easy beret pattern uses quick puff stitches and airy yarn to create a lightweight, stylish hat. Pattern includes suggestions for customizing sizing so you can get the perfect fit. You’ll be able to whip up this straightforward cap in one evening and wear it the next day.
Call it a beret, tam or slouch hat, but make one today!
Supplies + Materials
Order an all-in-one kit from Lion Brand.
• Lion Brand Chainette
(Weight: 4/medium - 115 yds, 1.75 oz/50 g) – 2 skeins [(approx. 85 g)]
Pictured:
• Size J (6.0 mm) crochet hook or size needed to obtain gauge
• Steamer or iron with steam function (alternative: use a spray bottle)
Measurements
Beret is designed to fit a head circumference of 21-24,” which means it will work for the vast majority of adults and some teens. Instructions are given throughout to achieve the perfect fit.
Gauge
5 rounds of beret top = 5” diameter across (see instructions on measuring gauge below)
Abbreviations + Glossary (US Terms)
ch – chain
chsp – chain space
rep – repeat
RS – right side
sc – single crochet
sk – skip
slst – slip stitch
st(s) – stitch(es)
yo – yarn over
Special Stitches
Puff – [yo, insert hook in the chain space, yo and pull up a loop] twice in the same space, yo and pull through all 5 loops on hook, ch 1 to close puff.
Dec-puff - [yo, insert hook in the first chain space, yo and pull up a loop] then [yo, insert hook in the next chain space, yo and pull up a loop], yo and pull through all 5 loops on hook, ch 1 to close puff. (This is essentially the same as a Puff, just spread out over two chain spaces instead of one.)
Skill Level
Advanced beginner
Techniques You'll Practice
- Double crochet puff stitches
- Crocheting in the round
- Increasing
- Decreasing
Permissions + Copyright:
Please do not publish or share this pattern as your own. You may make items to sell with this pattern. In exchange, please link back this post. Do NOT use our photos as your own sales photos.
Overall Pattern Notes
- Beret is worked in a spiral. This means that after Round 1, you will not slip stitch to join at the end of a round. Instead, you’ll carry on seamlessly with the next round. For this reason, it’s very important to place a stitch marker in the first stitch of the round and move it up with each round.
- Right side (RS) of your fabric should be facing you throughout. Do not turn work at end of round.
Print This Pattern: purchase the ad-free, printable PDF
Top of Beret
Notes:
- Top of beret is a flat circle. After Round 4, you’ll be increasing every other round and working the alternate rounds even with no increases.
Wanna save this pattern?
Preferred Foundation Round: Make a magic ring.
Alternative Foundation Round: Ch 4, slst to first ch to join into a circle.
Round 1 (RS): Ch 2, 6 puffs in circle; slst to top of first puff to join. (6 puffs)
Round 2: (Do not ch 2) 2 puffs in next chsp (place marker in first puff created), [2 puffs in next chsp] 5 times. (12 puffs)
✨Unlock this free subscriber-exclusive pattern ✨
Follow these steps to view the full free pattern below
Premium PDF
easier and faster with fewer mistakes.
- Complete pattern + photo tutorials
- Instant download
- Formatted for easy printing
Round 10: 2 puffs in first chsp, 1 puff in next 3 chsps, [2 puffs in next chsp, 1 puff in next 3 chsps] 11 times. (60 puffs)
Round 11: Puff in each chsp. (60 puffs)
For a less slouchy hat, skip Round 12 of this section and Rounds 2 and 3 of Beret Shaping section. Then proceed with Round 4 of Beret Shaping.
Round 12: 2 puffs in first chsp, 1 puff in next 4 chsps, [2 puffs in next chsp, 1 puff in next 4 chsps] 11 times. (72 puffs)
Diameter of circle should be approximately 12” across.
Our Latest Crochet Inspiration:
Here are a few more free crochet patterns and tutorials that are hot off the presses.


Beret Shaping
Round 1: 1 puff in each chsp. Stop with 1 chsp remaining in round. (71 puffs)
The beginning of the round has now shifted by one puff to accommodate upcoming decreases. For simplicity, we’re considering the next 72 puffs as one round, which means we’re ignoring the fact that this shift took place.
Round 2: Dec-puff over next 2 chsps (place marker in top of dec-puff), 1 puff in next 4 chsps, [dec-puff over next 2 chsps, 1 puff in next 4 chsps] 11 times. (60 puffs)
Round 3: 1 puff in first chsp, (move marker up to last chsp of previous round) puff in each chsp. (60 puffs)
Round 4: Dec-puff over next 2 chsps (place marker in top of dec-puff), 1 puff in next 3 chsps, [dec-puff over next 2 chsps, 1 puff in next 3 chsps] 11 times. (48 puffs)
Round 5: Rep Round 3. (48 puffs)
Round 6: Dec-puff over next 2 chsps (place marker in top of dec-puff), 1 puff in next 2 chsps, [dec-puff over next 2 chsps, 1 puff in next 2 chsps] 11 times. (36 puffs)
Round 7: Rep Round 3. (36 puffs)
Customizing the Size: At this point, try on the hat. Pinch the excess fabric in the last round. Count how many puffs are in the excess. Use this info to determine if you’d like to decrease by 12 puffs (tighter version) or 6 puffs (looser version) in the next round.
Round 8 tighter version: Dec-puff over next 2 chsps (place marker in top of dec-puff), 1 puff in next 2 chsps, [dec-puff over next 2 chsps, 1 puff in next 2 chsps] 11 times. (24 puffs)
Round 8 looser version: Dec-puff over next 2 chsps (place marker in top of dec-puff), 1 puff in next 4 chsps, [dec-puff over next 2 chsps, 1 puff in next 4 chsps] 5 times. (30 puffs)
Beret Brim
Notes:
- The purpose of this step is to give your beret a finished look. It’s also an opportunity to further customize the fit.
Round 1 (RS): Sc in first chsp, (move marker up to last chsp of previous round), ch 1, (sc, ch 1) in each chsp.
If you’d like to make beret slightly tighter: When completing Round 2, work one single crochet (instead of two) in a few of the chain spaces. Ideally, spread these “decreases” fairly evenly around hat brim.
Round 2 (RS): 2 sc in first chsp (move marker up to first sc created), 2 sc in next each chsp to end of round.
If you’d like a more substantial brim, continue in rounds of single crocheting in each stitch until you’re satisfied with the brim height. Doing this can help prevent your hat from slipping down your forehead if it’s slightly loose at this point.
Finishing: When your brim is complete, slip stitch into the first three stitches of round to “taper off.” Fasten off and weave in remaining ends.
Obsessed with finding the best free crochet patterns?
Check out these collections of handpicked patterns to find your next project.

Stem
Notes:
- The stem is optional, but a nice nod to the classic beret look.
Step 1: Fold a 36” span of yarn in half.
Step 2: Create a slip knot in the center of the folded yarn. (So there is about 9” of yarn on either side of the slip knot.)
Step 3: Insert hook in slip knot and tighten it down quite snuggly to hook.
Step 4: Using all (four) strands of yarn as if they are one thick piece, chain 4.
Step 5: Pull tail of yarn strand through last loop to fasten off the mini chain.
Step 6: Insert stem into center of beret. Use existing yarn tails to sew it to hat. Or simply tie it in if you’re the non-committal type.
If desired, lightly steam block your beret to get the perfect shaping. Do not over block by applying steam too close to crocheted fabric. Learn more about how to block crocheting here.
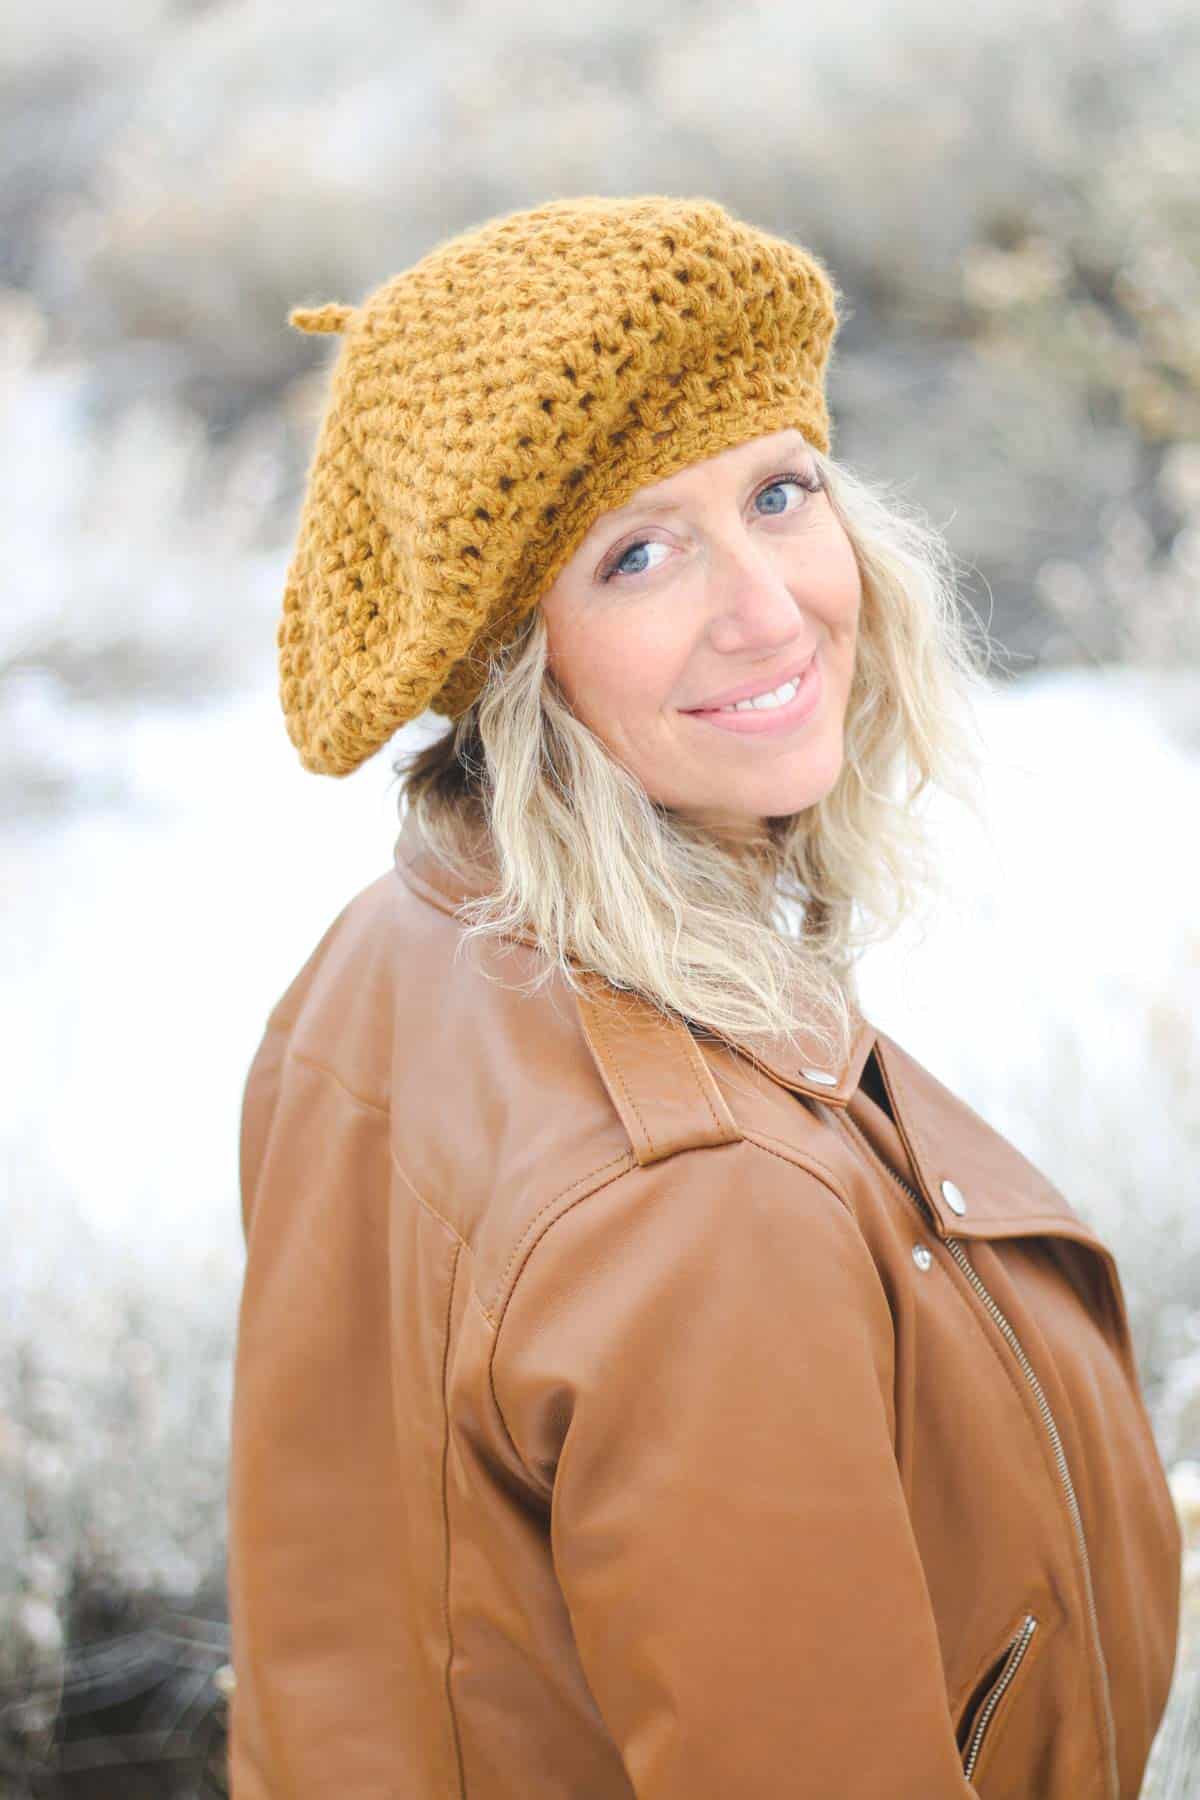
Pop on your Crochet All Day Beret and, well…crochet all day!
Crochet Beret FAQs
The diameter (width) of a crochet beret should be 30 - 44 inches (76 - 112 cm).
For a more exaggerated beret, increase the width of the hat top. For a more understated look, aim for a smaller diameter.
A crocheted beret should be snug but not too tight. If the hat brim is too loose, your beret may slide down your forehead. If this happens, add additional rounds to the brim to ensure it's substantial enough to hold the beret in place. You can also pin the beret to your hair if you prefer to wear it like a tilted slouch hat.


Learn a New Skill
When you're ready to master a new skill, check out our detailed guides that include everything you need to know to level up your crochet game.
- How to Corner to Corner (C2C) Crochet for Beginners - with video tutorials to get you started
- How to Crochet a Beginner Hat - make an entire beanie in 1.5 hours!
- How to Crochet Amigurumi for Beginners - the ultimate guide to making your own toys and plushies
- How to Tunisian Crochet - learn with this video and a standard hook
That was so fun! Now what?
Invitation to our Facebook group
Come discuss crocheting beret patterns and lots of other crochet projects and techniques in our Make & Do Crew Facebook group. Here thousands of helpful crocheters answer each others questions and share their stitches. Join us!
How to Crochet a Slouchy Beret - Summary
Materials
Yarn
- Color: Lion Brand Chainette Weight: 4/medium - 115 yds, 1.75 oz/50 g – 2 skeins [(approx. 85 g)]
- Cream [478-098D]
- Mustard [478-159C]
Additional Supplies
- Tapestry needle
- Size J 6.0 mm crochet hook or size needed to obtain gauge
- Tapestry needle
- 2-4 stitch markers
- Steamer or iron with steam function alternative: use a spray bottle
Abbreviations + Glossary (US Terms)
- ch – chain
- chsp – chain space
- rep – repeat
- RS – right side
- sc – single crochet
- sk – skip
- slst – slip stitch
- st(s) – stitch(es)
- yo – yarn over
- Puff – [yo, insert hook in the chain space, yo and pull up a loop] twice in the same space, yo and pull through all 5 loops on hook, ch 1 to close puff.
- Dec-puff - [yo, insert hook in the first chain space, yo and pull up a loop] then [yo, insert hook in the next chain space, yo and pull up a loop], yo and pull through all 5 loops on hook, ch 1 to close puff. (This is essentially the same as a Puff, just spread out over two chain spaces instead of one.)
Abbreviations and Glossary (US Terms):
Want some company while you crochet?
Get support (and camaraderie!) in the Make & Do Crochet Crew Facebook Group. Search “Make and Do Crochet Crew” on Facebook.com.
Permissions + Copyright
Please do not publish or share this pattern as your own. You may make items to sell with this pattern. In exchange, please link back to this page. Do NOT use my photos as your own sales photos.
Overall Pattern Notes
Instructions
Crochet All Day Beret Pattern Overview
- 1. Begin by making a magic ring.
- 2. Round 1 begins with 6 puff stitches worked into the magic ring.
- 3. Rounds 2-5 continue increasing so the number of puff stitches grows by 6 stitches/round.
- 4. Stop after Round 5. Measure the diameter of your circle to ensure you're meeting the pattern gauge. The circle should measure ___ at this point. If your circle is much smaller or larger, adjust your hook size and try again.
- 5. Rounds 2-12 continue in puff stitches, increasing every other round. Round 12 is the top of the beret's widest point.
Beret Shaping
- 6. Rounds 2-7 of the Shaping section include decreases ever other round. This reduces the size of the hat opening so it will fit your head.
- 7. Follow the detailed pattern instructions to customize the fit as desired.
Brim
- 8. The beret brim is worked in single crochet stitches. For a wider brim, work additional rounds.
Stem
- 9. Stem is made using four single crochet stitches. This step is optional, but really solidifies the classic French beret look.
Finishing
- 10. Lightly steam block the beret to get your ideal shaping.
- 11. Pop on your Crochet All Day Beret and, well…crochet all day!
Overall Pattern Notes
- Beret is worked in a spiral. This means that after Round 1, you will not slip stitch to join at the end of a round. Instead you’ll carry on seamlessly with the next round. For this reason, it’s very important to place a stitch marker in the first stitch of the round and move it up with each round.
- Right side (RS) of your fabric should be facing you throughout. Do not turn work at end of round.
- Top of beret is a flat circle. After Round 4, you’ll be increasing every other round and working the alternate rounds even with no increases.
- This is a pattern summary. Find the full step-by-step written instructions further up on this page.
Denise Briese says
Jess thank you for another wonderful hat. I purchased yarn to make two of these hats and Boy oh boy I am having the worst time with those puffs. The back of them is so loose. The front of them is great, but the back of them is so loose any tips on this ! Denise .
Gary says
Hi Jess,
Everything you do is 5 star, because you are 5 star.
Thank-you for another excellent pattern.
Gary.