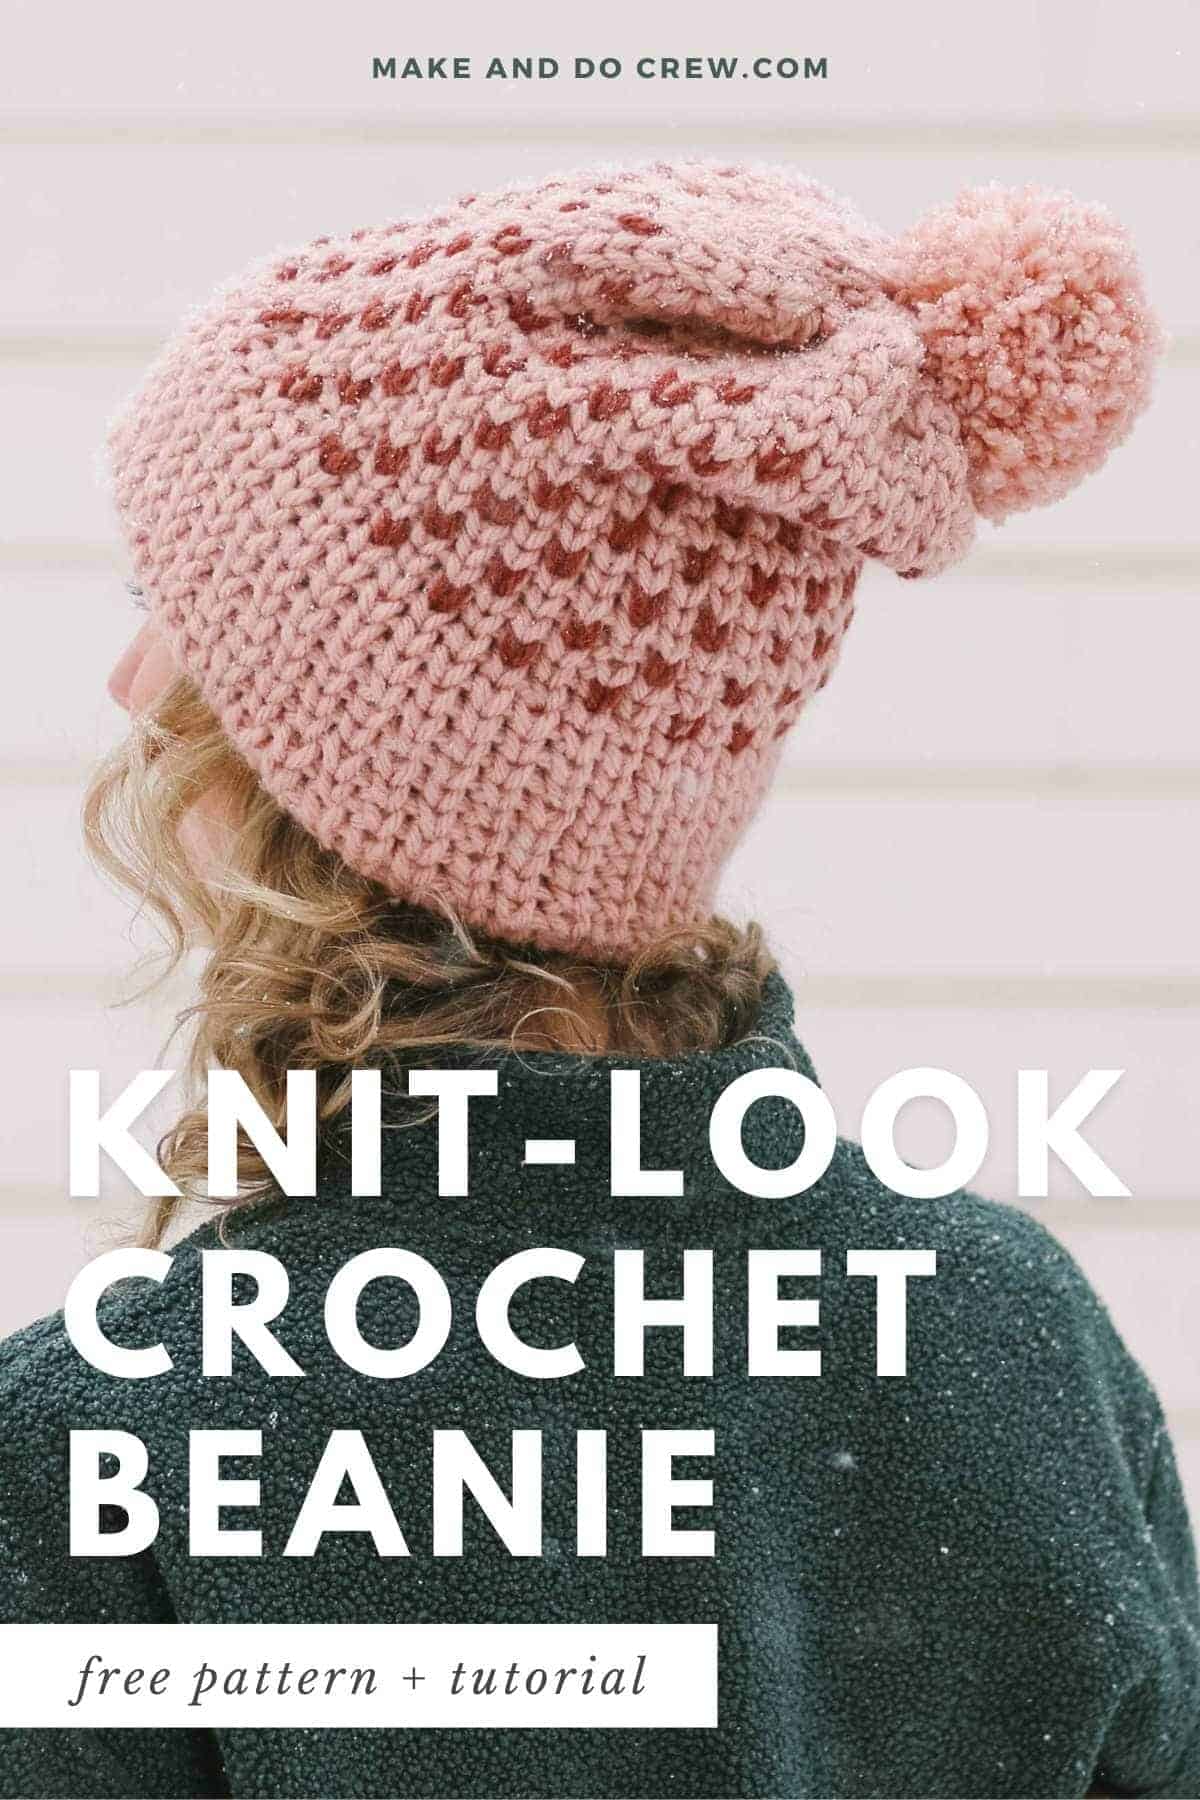
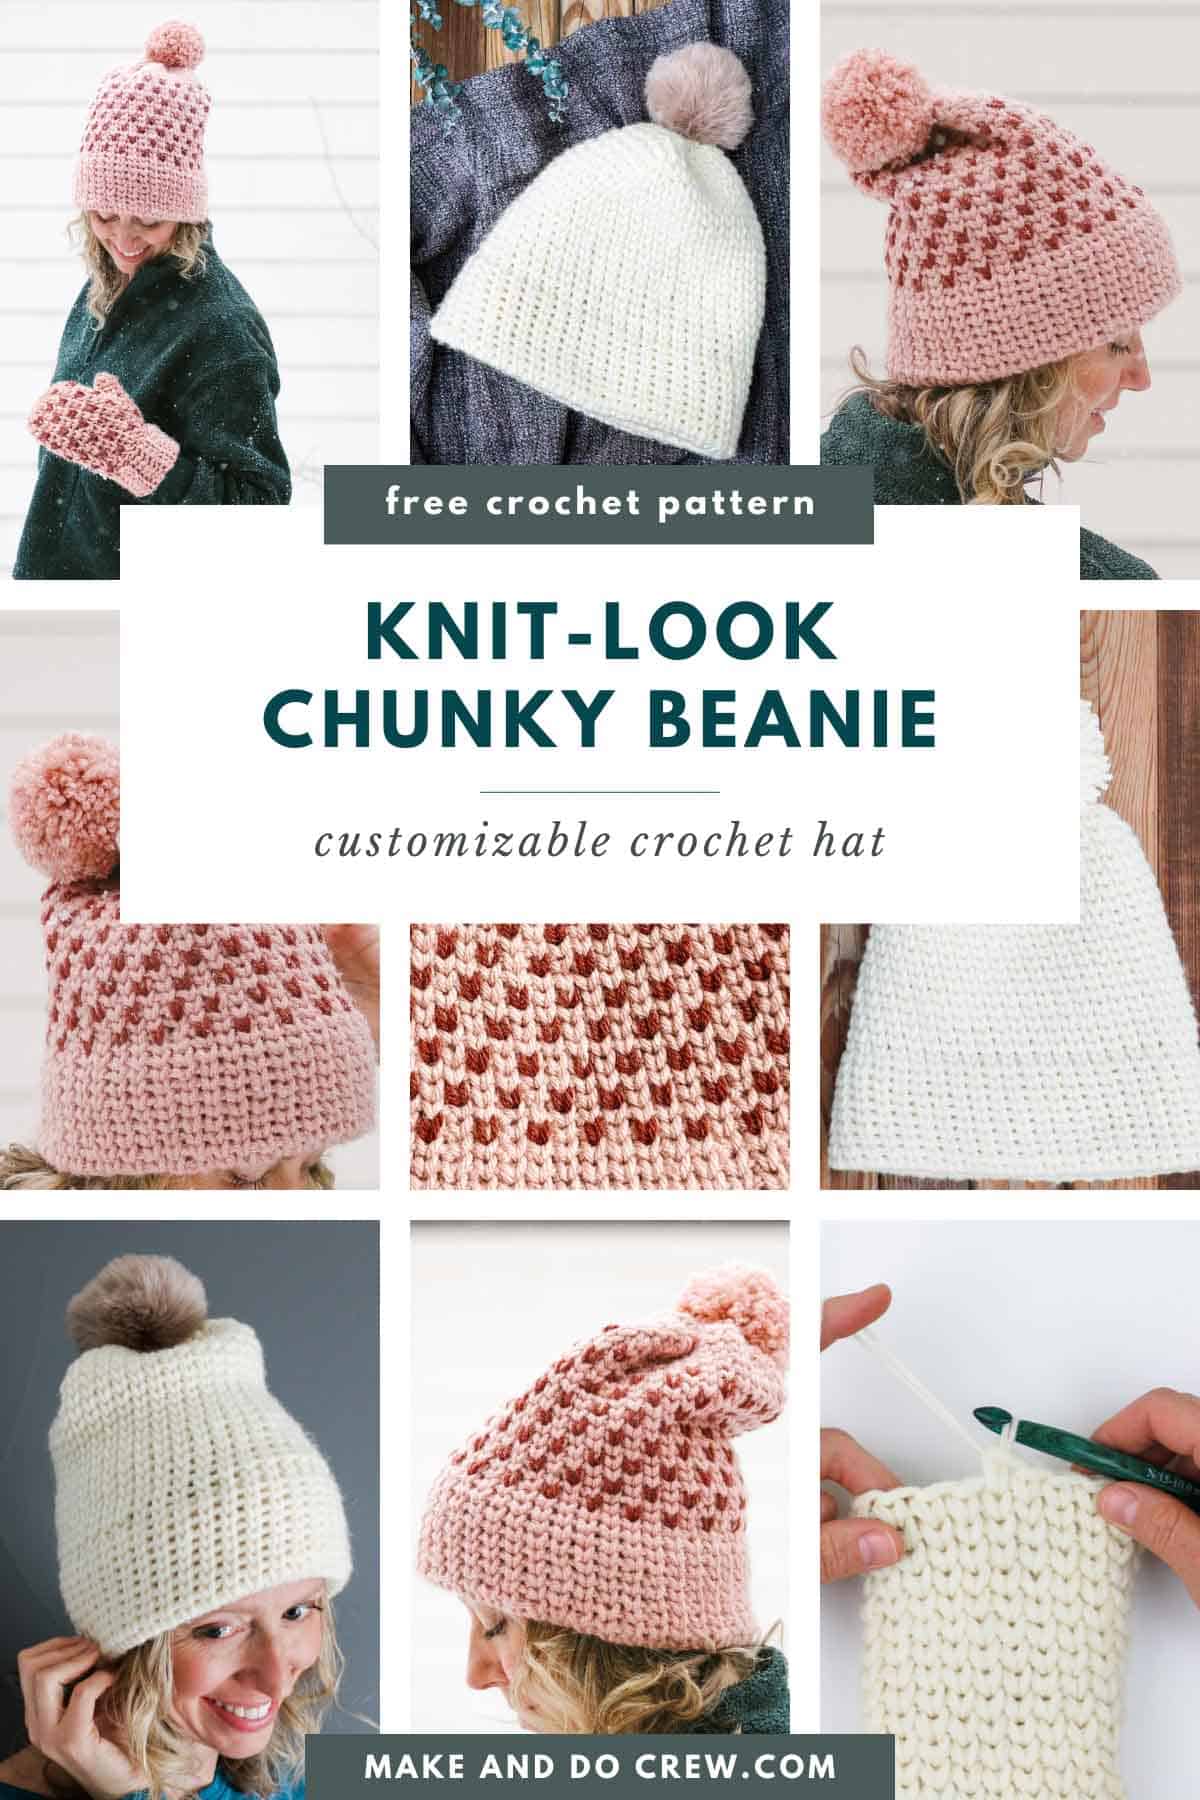
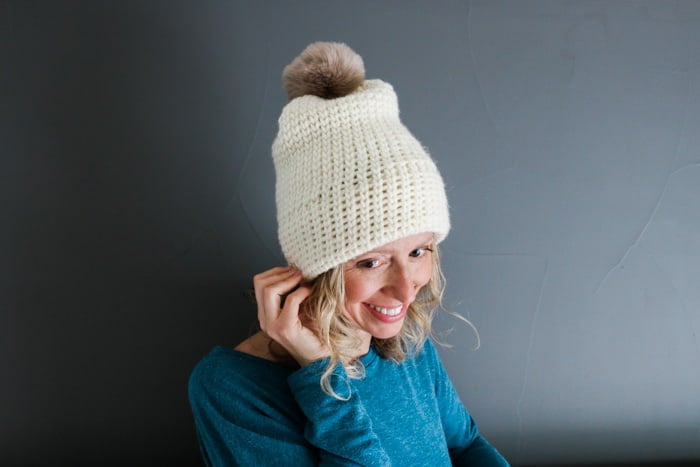
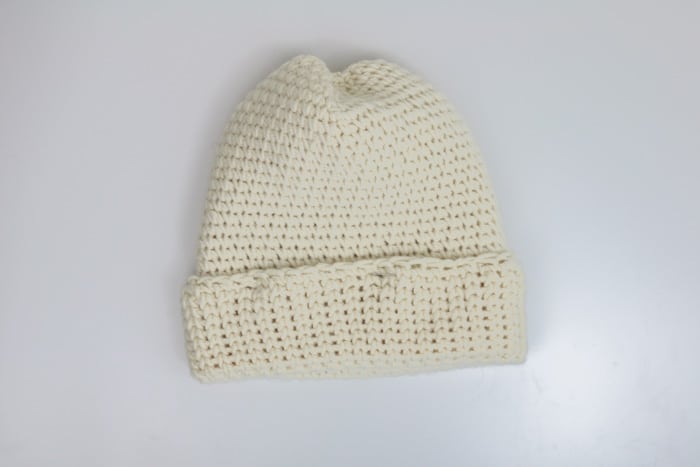
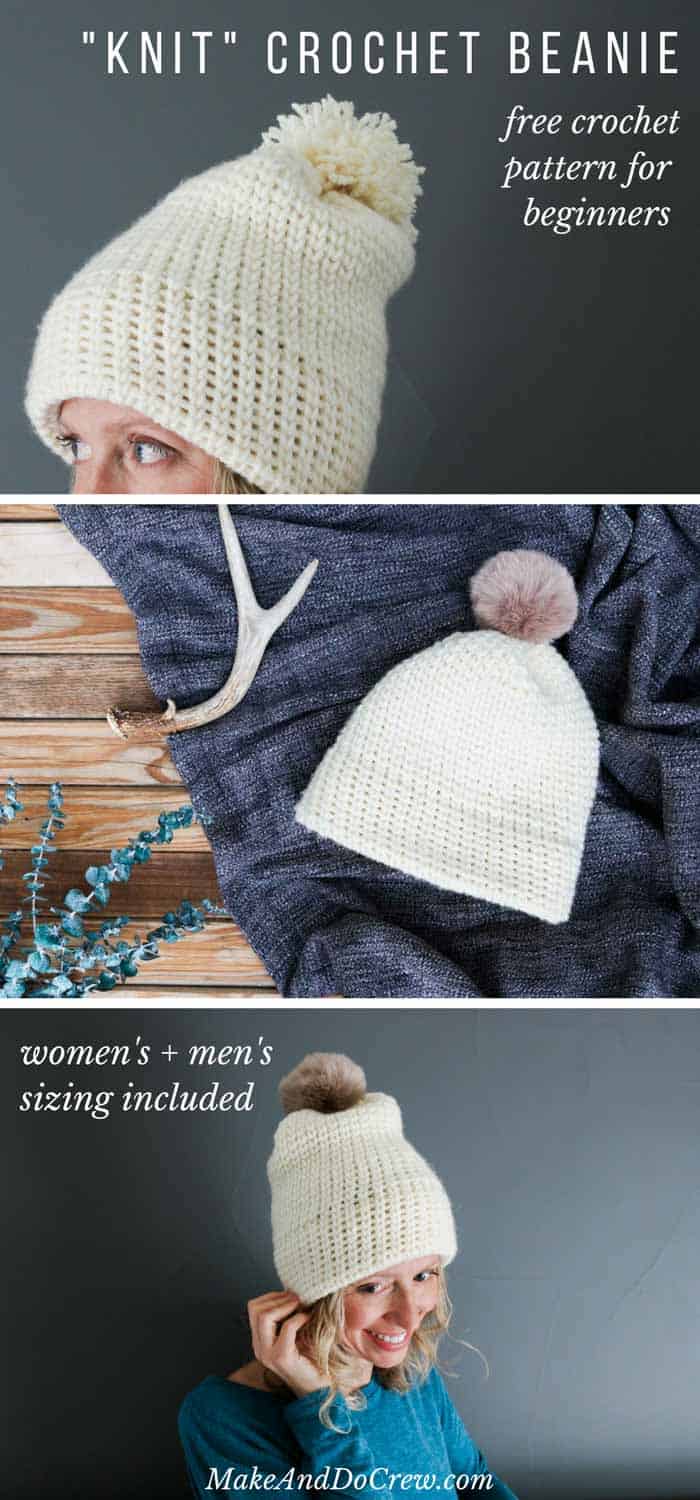
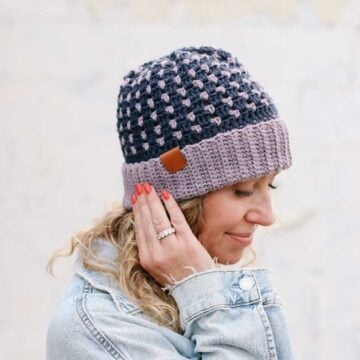
This waistcoat stitch crochet hat may look knit, but it's not! This free crochet pattern uses only single crochet stitches to create a modern, double-brimmed beanie.
When your hat is finished, use a simple trick to replicate the look of intarsia knit stitches without creating any extra ends to weave in.
Get the free waistcoat stitch beanie pattern below or purchase the ad-free, printable PDF.
This waistcoat stitch beanie pattern is part of a collaboration with Lion Brand Yarns. This post contains affiliate links.
Jump to:
- A Crochet Stitch That Looks Knit
- Intro to This Waistcoat Stitch Hat Pattern
- Crochet a Double-Brimmed Beanie
- Skills You'll Practice
- Yarn Suggestions
- All-in-One Crochet Kit
- Print this Pattern
- Waistcoat Crochet Stitch Video Tutorial
- The Everyday Beanie - Free Pattern
- That was so fun! Now what?
- Invitation to our Facebook group
A Crochet Stitch That Looks Knit
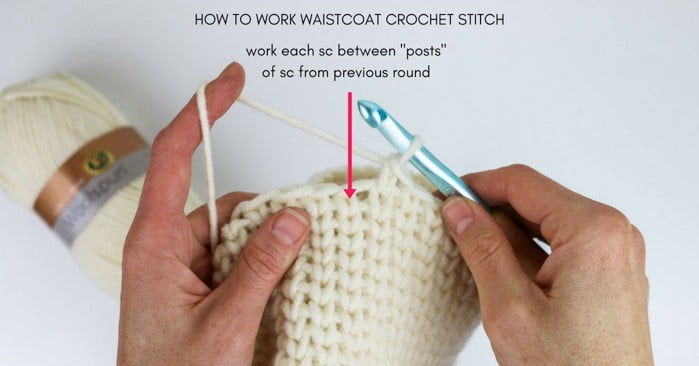
The crochet waistcoat stitch, also known as the center post stitch or center single crochet, resembles the look of knitting. It's worked by inserting the hook between the "V" of the stitch from the previous row rather than the top loops.
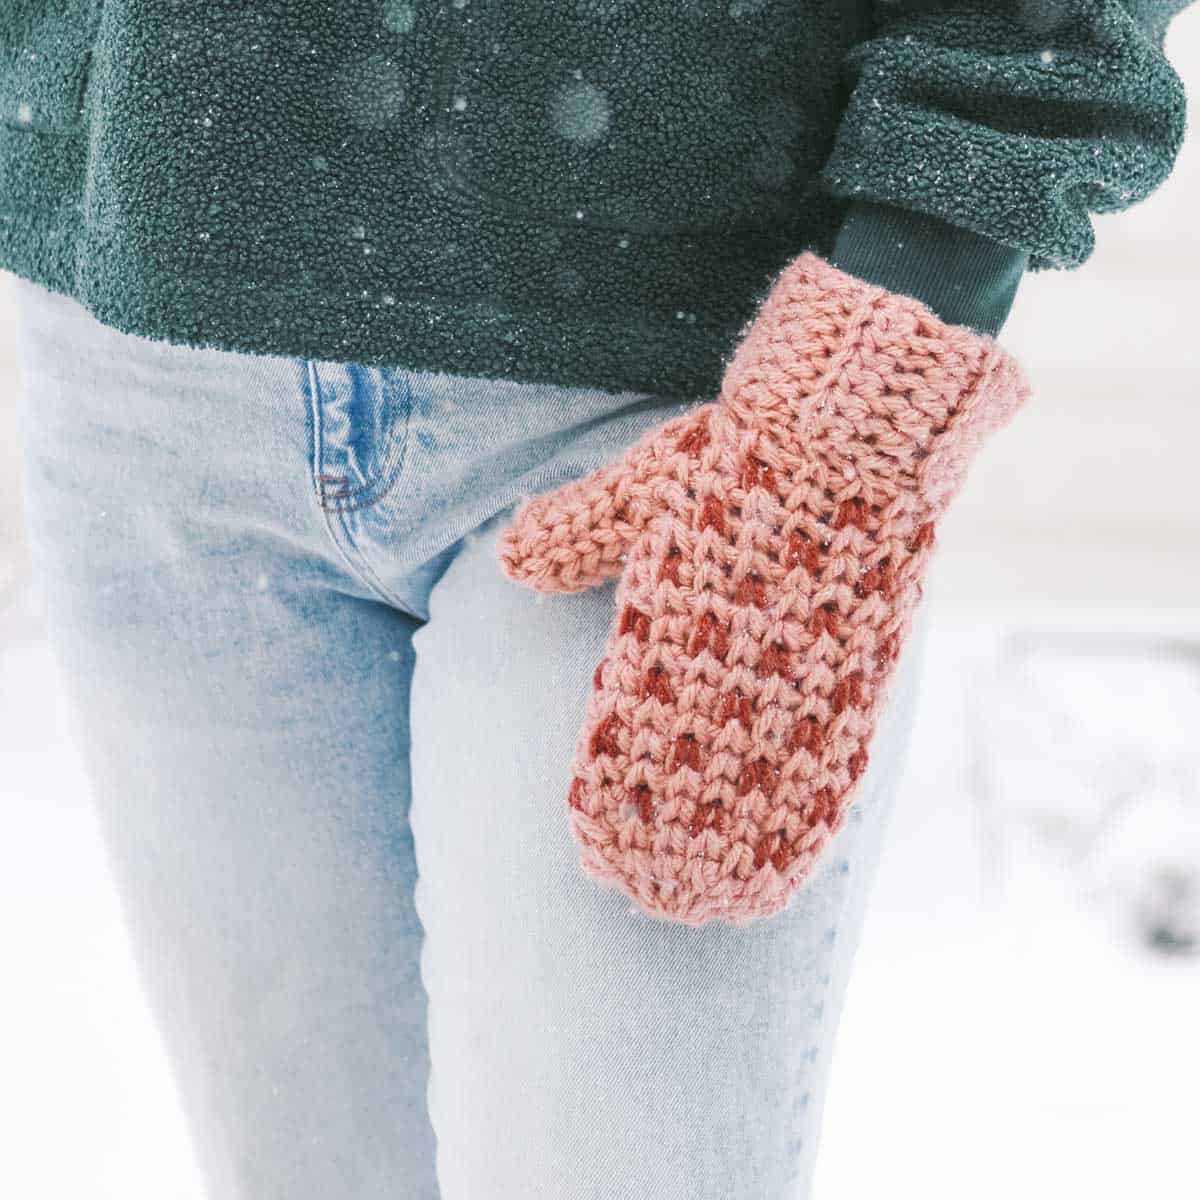
This creates a dense, knit-like fabric that works well for crocheting mittens, hats, and baskets.
If you want to create the look of classic knit stockinette with crochet stitches, this is the best way I've found to do it. Check out our full video tutorial on the waistcoat stitch for lots of helpful tips.
Complete beginner? Check out our guide on How to Crochet for Beginners
Intro to This Waistcoat Stitch Hat Pattern
Can we agree that the last few years were all about the bun beanie? Holy ponytails. Those topless hats sure struck a cord. (You can see my take on this style with my free Faux-Cabled Bun Beanie pattern.)
This year, I feel like a new, quieter trend is happening with the knit double-brimmed beanie. I see these classic knit hats all over Etsy and Instagram and in every outdoorsy-clothes-for-people-who-work-mostly-at-the-computer catalog we get in the mail.
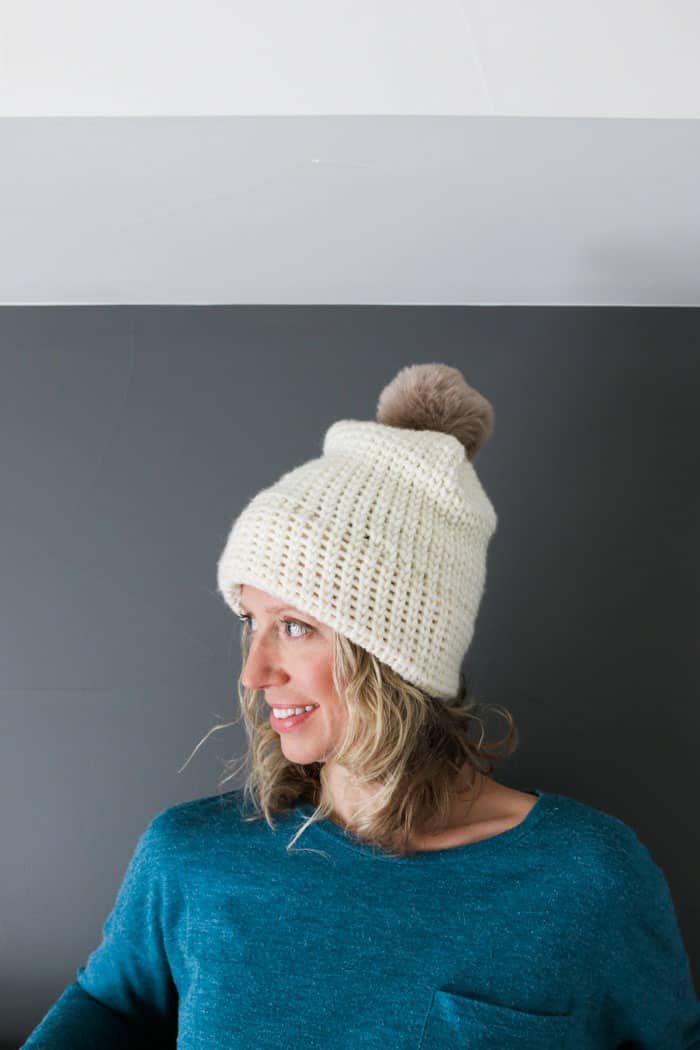
Double-brimmed hats are timeless. They keep your ears warm. And in the case of this easy hat pattern, they can be made with crochet basic stitches.
Why you'll love this knit-look beanie!

Crochet a Double-Brimmed Beanie
While I've seen a lot of double-brimmed hats made with knitting, I hadn't come across many crochet versions.
So when I was using the waistcoat stitch to design the free Morning Mittens pattern, I started dreaming up this knit-look beanie design.
And again in this crochet hat pattern for beginners, the waistcoat stitch proved the perfect way to achieve a knit-look with crochet stitches.
Skills You'll Practice
If you've never crocheted a hat, I suggest first starting with our 1.5 Hour Beginner Crochet Beanie pattern. Then come back and whip up a knit-look hat with the waistcoat stitch!
Here are the crochet techniques you'll practice in this pattern:
- Chain stitches (ch)
- Single crochet (sc)
- Single crocheting two stitches together (decreasing)
- Making a yarn pom pom
- Weaving in ends
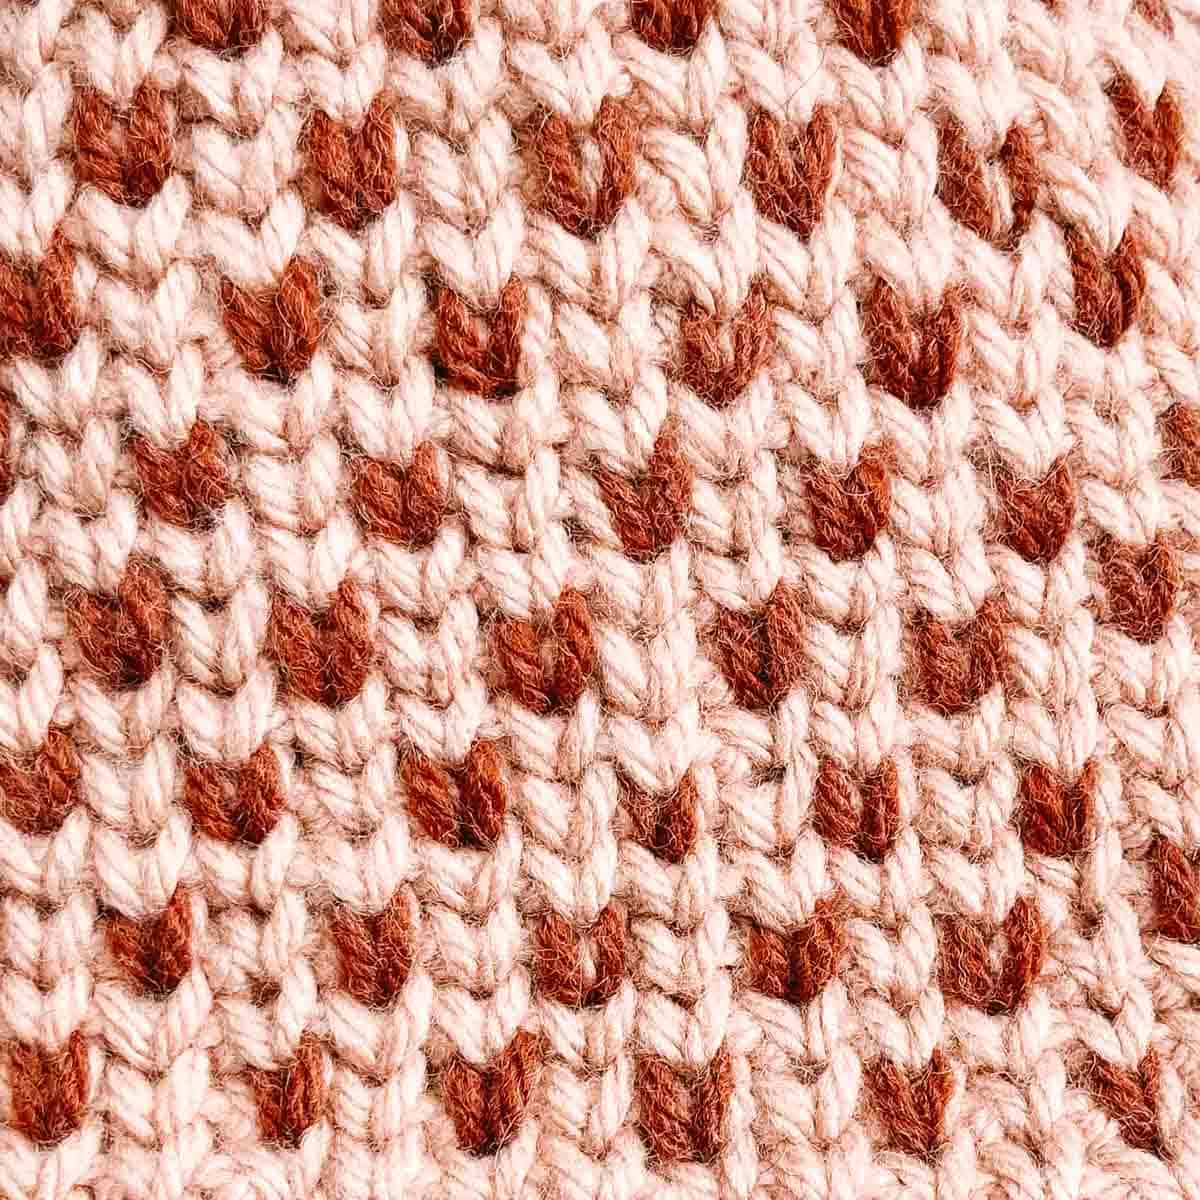
- Embroidering "double knit" stitches to create the look of knit intarsia
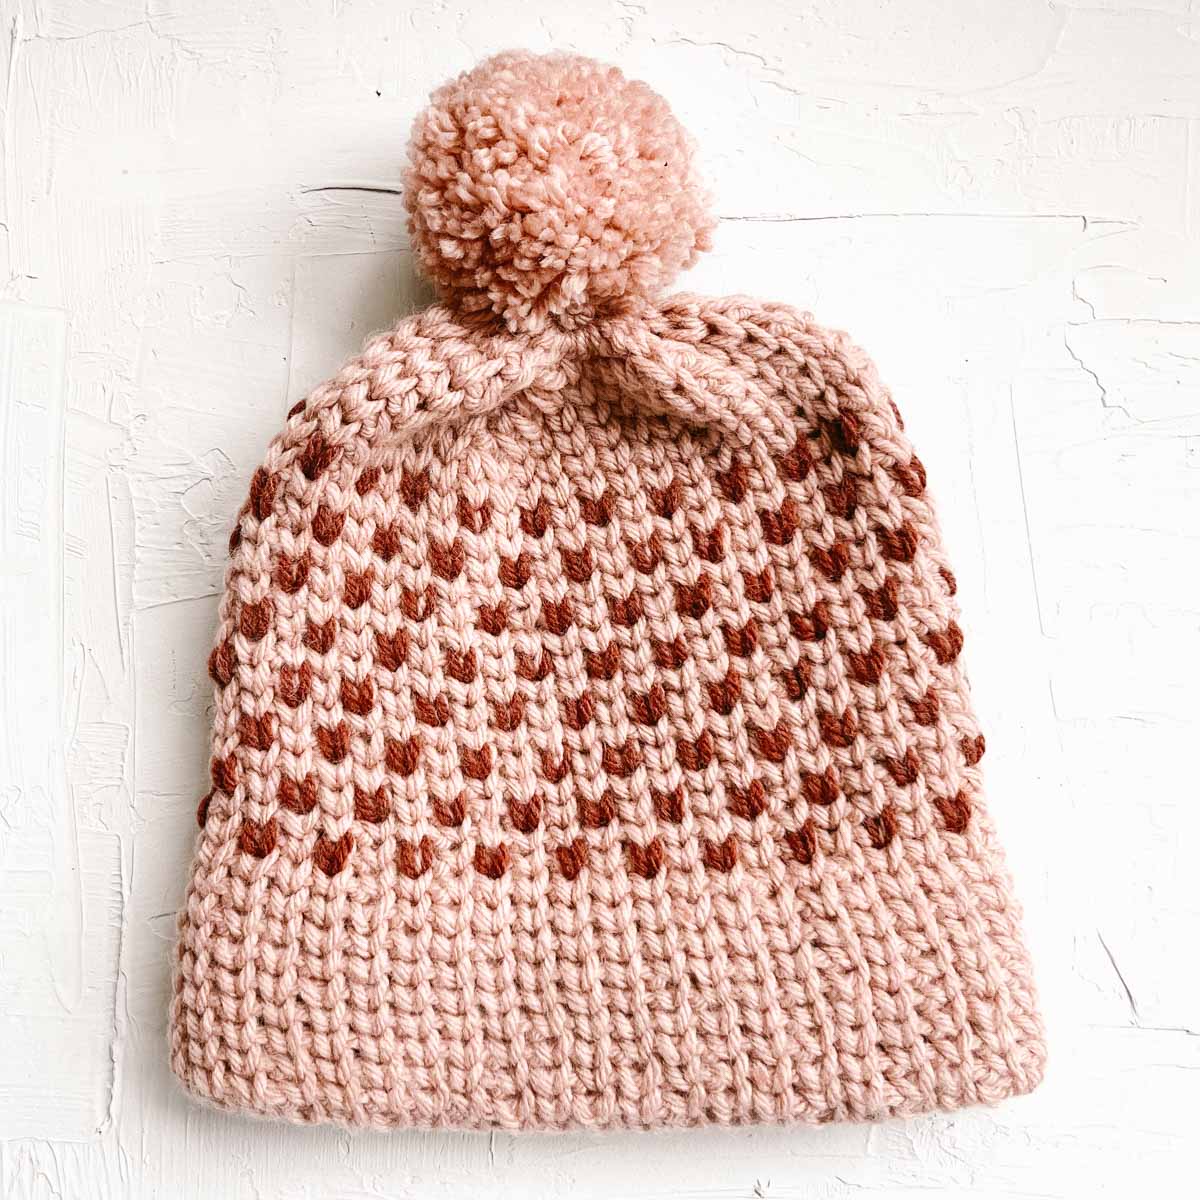
The little "hearts" are embroidered onto the hat at the end to avoid switching colors throughout.
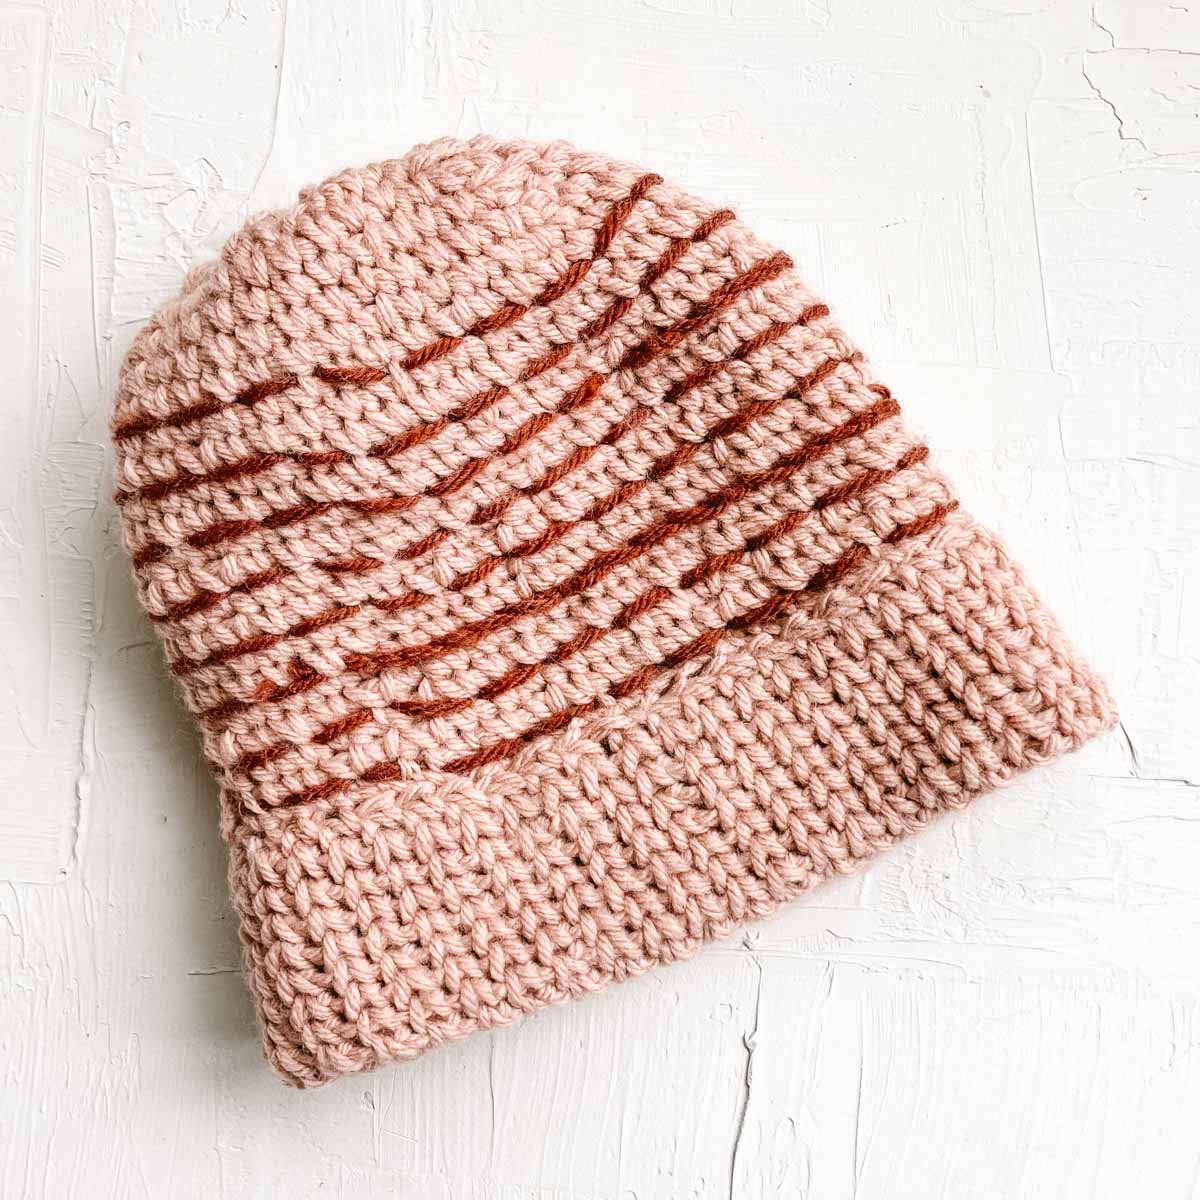
The embroidery yarn is carried on the inside of the hat, so there's no need to fasten off until you're finished.
Yarn Suggestions
To make this center single crochet hat, we used Lion Brand Hue + Me yarn. We love this chunky weight yarn and have used it in the Cinque Chunky Scarf and Nove Knit Blanket patterns too.
Hue + Me has a really nice range of colors available, making and ideal pallate to mix and match to achieve your perfect intarsia knit-look.
Substituting Yarns
If you'd like to use yarn from your stash, you have two great options:
- Use a category 5 chunky weight yarn similar to Hue + Me. You'll need about 260 yards of the main color.
- Hold two strands of category 4 worsted weight yarn together. You'll need double the amount of yarn for this approach (about 520 yards).
All-in-One Crochet Kit
If you don't live near amazing yarn stores or if you just like to get fun packages in the mail, the all-in-one kit is a perfect way to make your Everyday Beanie and Morning Mittens.
This bundle from Lion Brand includes all the Hue + Me yarn you'll need for both projects, plus bonus printable PDFs of the patterns (delivered digitally).
Print this Pattern
Prefer to crochet on the couch? Need a portable, printable pattern? You'll love the premium PDF! The instantly downloadable, ad-free file is formatted for easy printing and includes the complete pattern and all the photo tutorials.
Waistcoat Crochet Stitch Video Tutorial
The Everyday Beanie pattern uses the waistcoat stitch to create knit-looking fabric. Here's a video on how to work the stitch with some helpful tips that make it much easier to work.
I highly recommend watching these quick suggestions before getting started on the free beanie pattern below!
Tip: Ad-blockers must be disabled to view the video.
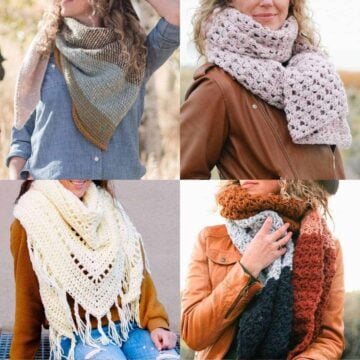
More Free Crochet Patterns
Add a few of our favorite free crochet patterns to your project queue!


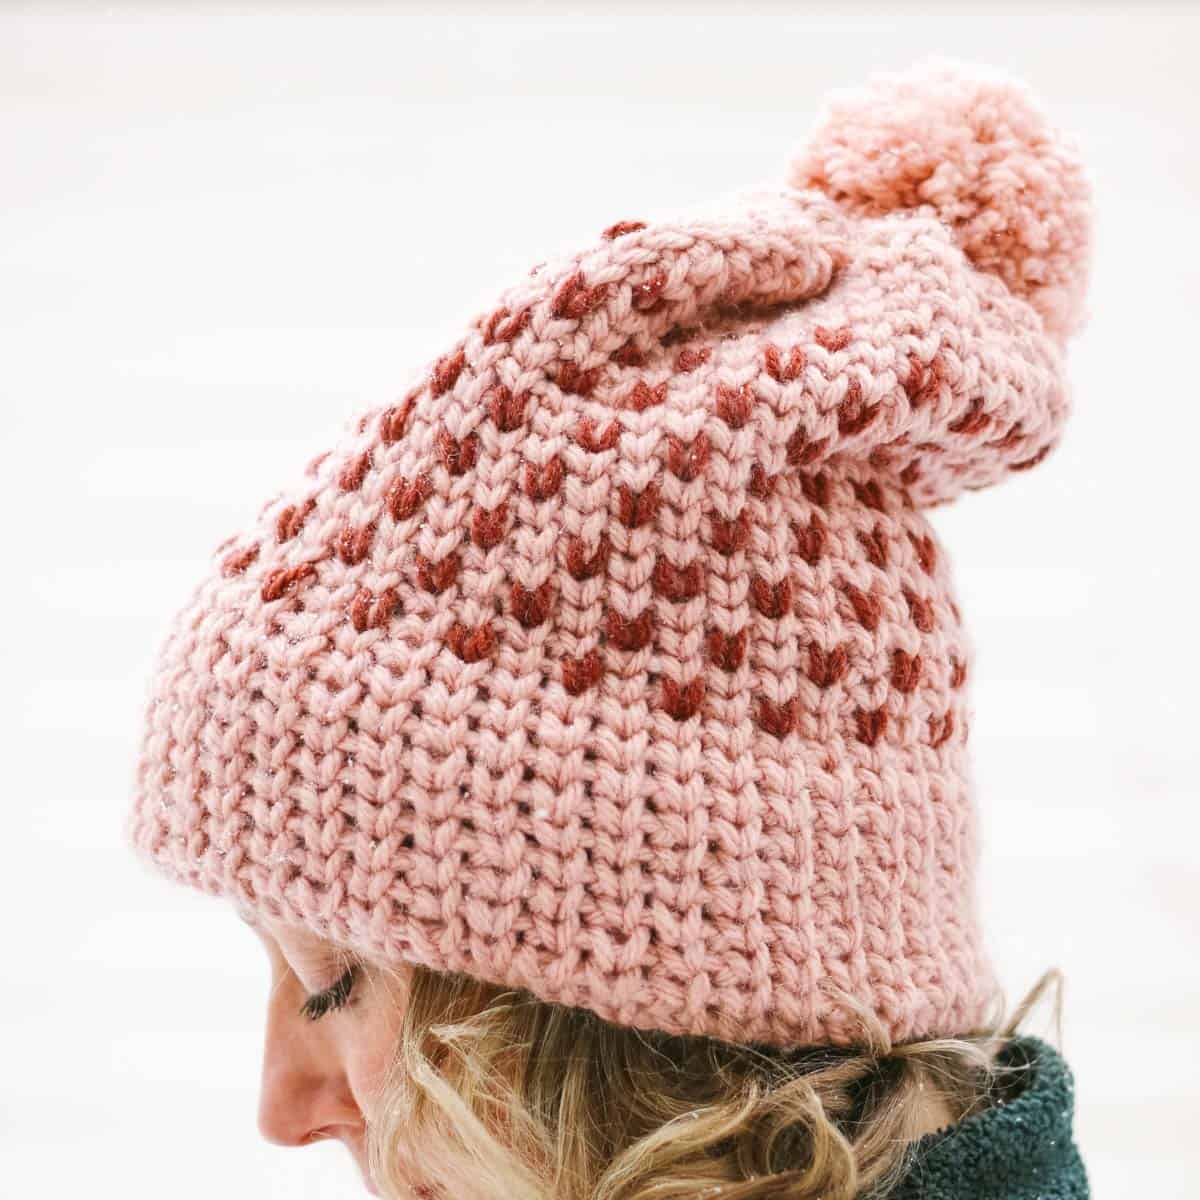
The Everyday Beanie - Free Pattern
Explanation:
Bad hair day? Below freezing temps? No worries here. This easy beanie pattern uses single crochet stitches to achieve the smooth, clean look of knitting.
The folded over double brim makes this basic hat feel modern and on trend, while keeping your ears extra toasty. After you’re done crocheting, add some simple embroidery stitches to create the look of intarsia with zero color changes. No one will believe your “knit” hat is actually crocheted!
Supplies + Materials
Order an all-in-one hat and mitten kit from Lion Brand.
• Lion Brand Hue and Me (Weight: 5/Bulky - 137 yds, 4.4 oz/125 g)
- Color A: Rose Water (617-101AZ) - 2 skeins (approx 240 g)
- Color B: Spicy (617-134R) - 1 skein (approx 8 g)
• Size M (9 mm) crochet hook (to make smaller size)
• Size N (10 mm) crochet hook (to make larger size)
• Stitch markers or safety pins
• Pom pom maker, toilet paper tube or fur pom pom
Beanie Measurements
The pattern is identical for the small and large sizes. Sizing is based on the hook size used.
Small size: appropriate for most women, snug fit
Larger size*: appropriate for most men, snug fit
If you like your hats looser/larger, size up one hook size*.
If you make a larger hat, you may need more yarn, especially if making a yarn pom pom.
Gauge
Size small: 8 sc x 11.5 rows = 4”
Size large: 7 sc x 11 rows = 4”
Abbreviations + Glossary (US Terms)
ch – chain
post – the vertical strands of yarn in a sc stitch (see photos below)
sc – single crochet
sc2tog – single crochet two together decrease
sk – skip
sl st – slip stitch
st(s) – stitch(s)
RS – right side
WS – wrong side
Skill Level
Confident Advanced Beginner: You should feel comfortable crocheting in the round and maintaining even stitch tension to make this hat pattern.
Permissions + Copyright:
Please do not publish or share this pattern as your own. You may make items to sell with this pattern. In exchange, please link back this post. Do NOT use our photos as your own sales photos.
Overall Pattern Notes
Wanna save this pattern?
- The pattern is written for one size. Follow notes within for appropriate hook size to make either S or L beanie
- Hat is worked in the round, using the spiral method. Do not ch 1 at the beginning of each round.
- Round 2 and beyond are worked into the middle of each single crochet stitch rather than the top loops. See photo below for hook placement. Besides inserting your hook in a slightly different location, you will still work regular single crochet stitches.
- Take care to keep stitches loose so that it’s easier to insert hook as described in the tutorial below. As you work each single crochet, it’s helpful to raise your hook a bit after picking up your second loop so as to ensure the two posts remain loose enough for next round.
Print This Pattern: purchase the ad-free, printable PDF
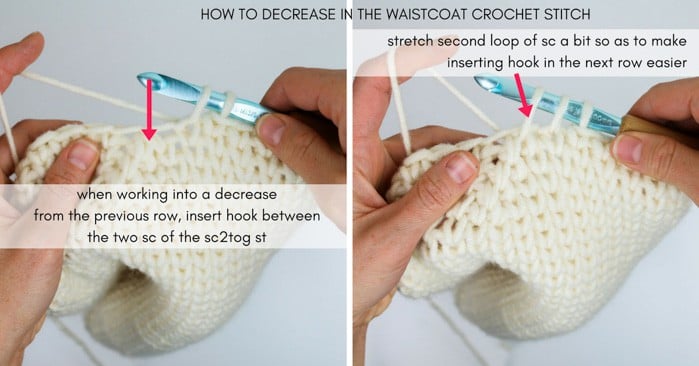
How to Decrease in the Waistcoat Stitch
We use single crochet decreases (sc2tog) to shape the top of the beanie. Here's how this is done when using the waistcoat stitch:
Step 1. Insert hook in center of next stitch.
Step 2. Yarn over and pull up a loop. (2 loops on hook)
Step 3. Insert hook in center of next stitch.
Step 4. Yarn over and pull up a loop. Keep this loop quite loose by pulling it higher than normal. (3 loops on hook.)
Step 5. Yarn over and pull through all three loops on hook. (Decrease complete)
Main Beanie Instructions
Notes:
- See photo above for hook placement in sc2tog stitches.
Size small: Use size M hook.
Size large: Use size N hook.
Foundation: Leaving a 35” tail at the beginning of the chain before the slip knot: ch 42, sl st to first ch to create a circle. (Tail will be used later for seaming.)
Premium PDF
easier and faster with fewer mistakes.
- Complete pattern + photo tutorials
- Instant download
- Formatted for easy printing
Round 1 (RS): Sc in each ch; do not turn. (42)
Rounds 2 - 34: Sc in each sc. (42)
✨Unlock this free subscriber-exclusive pattern ✨
Follow these steps to view the full free pattern below
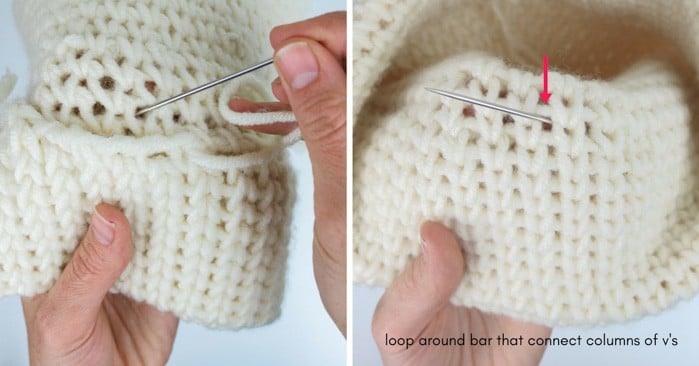
You may notice the rows of knit-looking stitches in your beanie have a slight slant in the direction of your non-dominant hand. You can remedy this while seaming the beanie brim, but it takes a little more focus. (If you’re not interested in straightening out the columns, just skip the step on aligning the stitches and move on to seaming the brim.)
Turn beanie inside out. Fold brim toward the outside until there is 3” of brim (about 9 rounds.)
Pin brim using stitch markers or safety pins. To straighten out the slanted rows, use your finger to trace a column of stitches from the beginning of the chain round to the st where the ch round will need to be sewed to secure the brim.
Pin these two sts together, thereby aligning each column of stitches with itself.
With a tapestry needle and yarn tail from initial chain, whip stitch around brim. For cleanest look, work whip stitch around horizontal strands of yarn that run between each column of ‘v’ sts. Fasten off and weave in tail. Turn hat back so RS is facing out.
Our Latest Crochet Inspiration:
Here are a few more free crochet patterns and tutorials that are hot off the presses.


Adding “Intarsia” Hearts
Notes:
- Using the duplicate stitch technique is an easy way to give an intarsia look to your beanie without the need to change colors as you crochet. The duplicate stitch is essentially basic embroidery on top of your finished crochet fabric.
- Work a duplicate stitch in every other stitch of round and every other round. This will create a staggered placement of duplicate stitches.
- Take care to keep the tension of your duplicate stitch yarn even as you carry it along the inside of the hat. This will ensure your hat has some stretch and doesn’t pucker anywhere.
- See photos below for step-by-step tutorial. Check out our article on how to cross stitch on crochet for extra tips.
Using a tapestry needle threaded with a strand of Color B yarn, place first round of duplicate stitches in the round just above the double brim.
Step 1: Insert needle from inside (WS) to outside (RS) through the bottom “V” point of the first stitch you would like to duplicate.
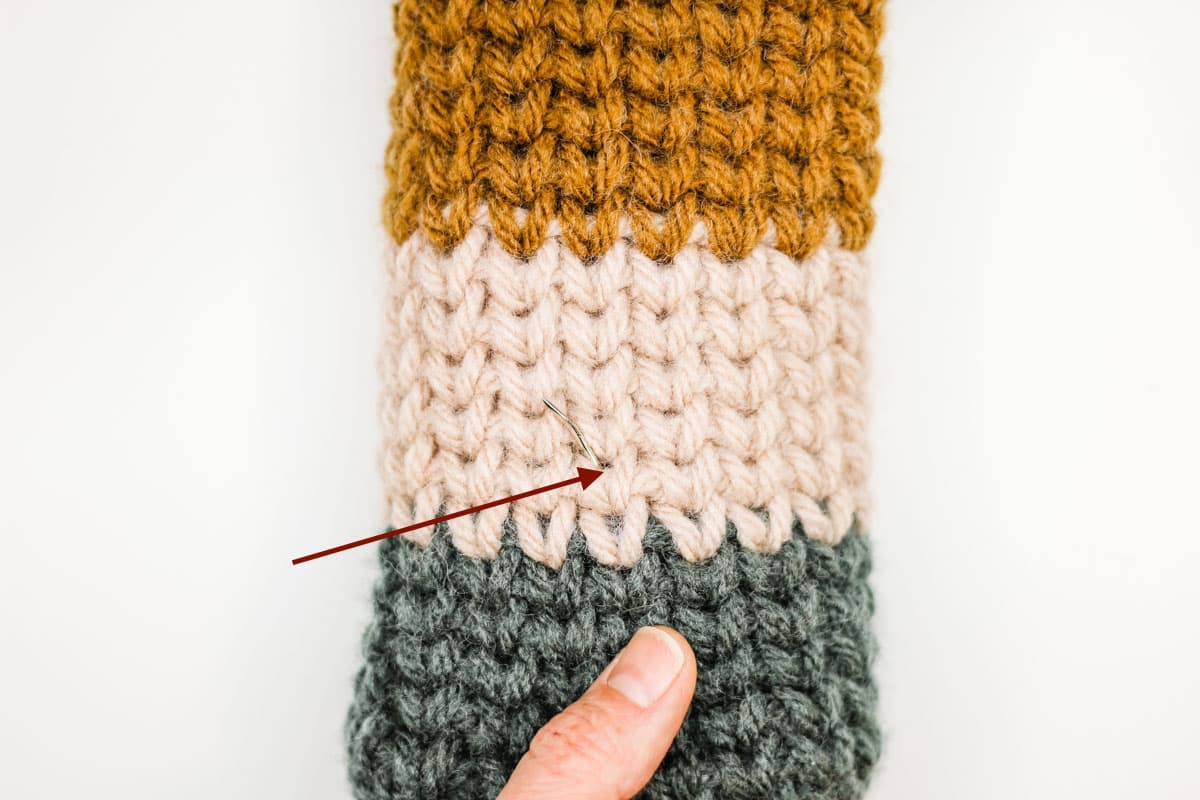
Step 2: Insert the needle under the bottom of the “V” point in the stitch above. Yarn should be outside at this point.
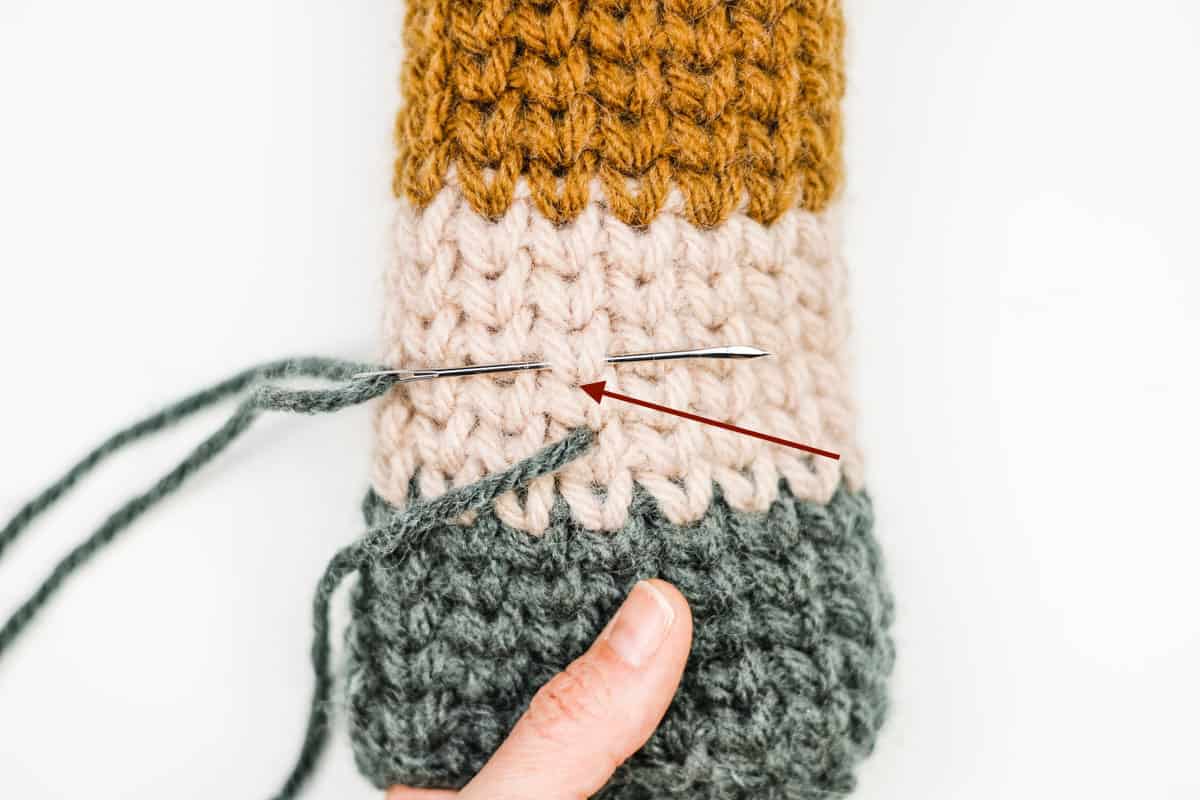
Step 3: Insert needle from outside (RS) to inside (WS) through the bottom of the “V” point you began in with Step 1. Yarn should be inside at this point.
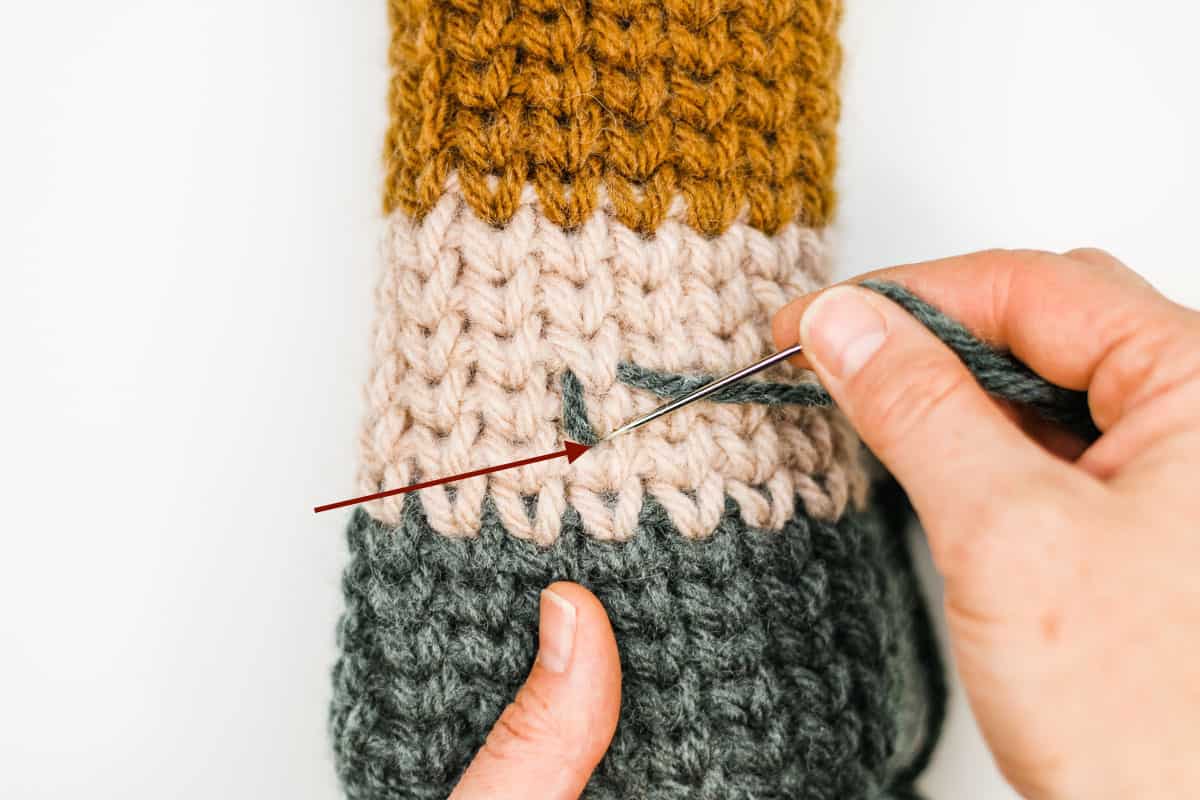
Step 4: Sk next st.
Repeat Steps 1-4 ten more times for a total of 11 duplicate stitches.
Note for the first round only: Because the beanie is worked in a spiral, you will need to drop down a stitch about half way around your beanie to ensure you end up in the same round you begin in. This will also follow the brim seam.
Rounds 2-8: Repeat steps 1-4 around hat, staggering first stitch of round between two stitches from previous round. Leave one row unworked between each round.
Fasten off and weave in ends.
Obsessed with finding the best free crochet patterns?
Check out these collections of handpicked patterns to find your next project.
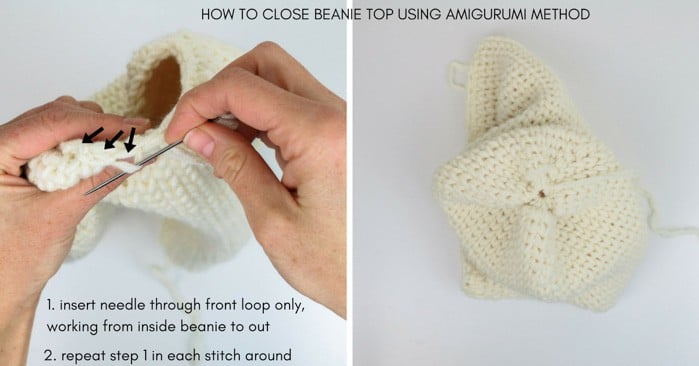
You must use the category name, not a URL, in the category field.Closing Beanie Top
Beanie top is closed using a technique commonly used in amigurimi stuffed animals where the yarn needle is worked through only the front loops of each single crochet stitch. Here’s a helpful tutorial with more details on this method of closing a crochet tube.
Thread tail from beanie top onto the tapestry needle. Insert needle from inside of beanie, under front loop of first sc, out toward you. Repeat in each single crochet around, taking care to always work from inside beanie to out. Do not tighten down as you go.
Once you return back to first sc stitch, gently cinch circle together until it closes as much as possible. Pom pom will cover any slight gap. Do not weave in the remaining tail yet.
Attaching a Pom Pom
Use remaining yarn to create a pom pom or purchase a fur pom pom. Yarn pom pom pictured in sample was created with a 5” pom pom maker. Learn how to make a pom pom with a toilet paper tube if you don’t have a pom pom maker.
Use the remaining tail from closing beanie top to attach pom pom to top of hat.
Pull your new ode to handmade style over your chilly ears and get to work making a beanie for everyone you know!
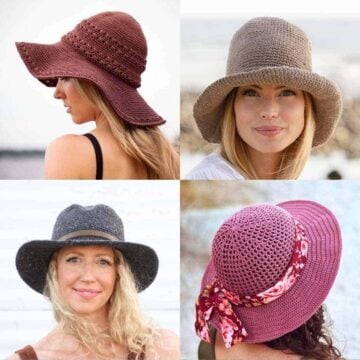
More Free Hat Patterns
We've got enough free crochet hat and headband patterns to ensure your ears are never cold again. Save a few chunky beanies, ear muffs, or berets to your Ravelry or Pinterest to load up your project queue.
That was so fun! Now what?
Invitation to our Facebook group
Come discuss crocheting hats that look knit and many other projects and techniques in our Make & Do Crew Facebook group. Here thousands of helpful crocheters answer each other's questions and share their stitches. Join us!

Jessica says
I simply love this beanie and would love to make it for my toddler! How would I adjust for a smaller toddler/child size? Maybe using worsted inverse in bulky with a smaller hook? Please help!!
June says
if I use a worsted weight yarn what size hook should I use for a men size? or could I use two strands together and use the N size hook ?
Jess @ Make and Do Crew says
Hey June,
I'm guessing you could use 2 strands of worsted and an N and get pretty close to the same gauge as the pattern. It would be worth trying a little gauge swatch to find out!
Jess
Daisy says
Just love your patterns! Wish I could knit thou.
Rose says
This is soooo cool!And those coloured mittens.... love 'em
Kim Ladouceur says
Hi Jess!
The Ravelry link to this pattern is broken 😀 I got here through your newsletter.
Jess @ Make and Do Crew says
Thank you so much for letting me know! 🙂
Betty Chop says
The model is as cute as the beanie!!
Jess @ Make and Do Crew says
Haha--thanks Grandma!
xoxoxo
Jess