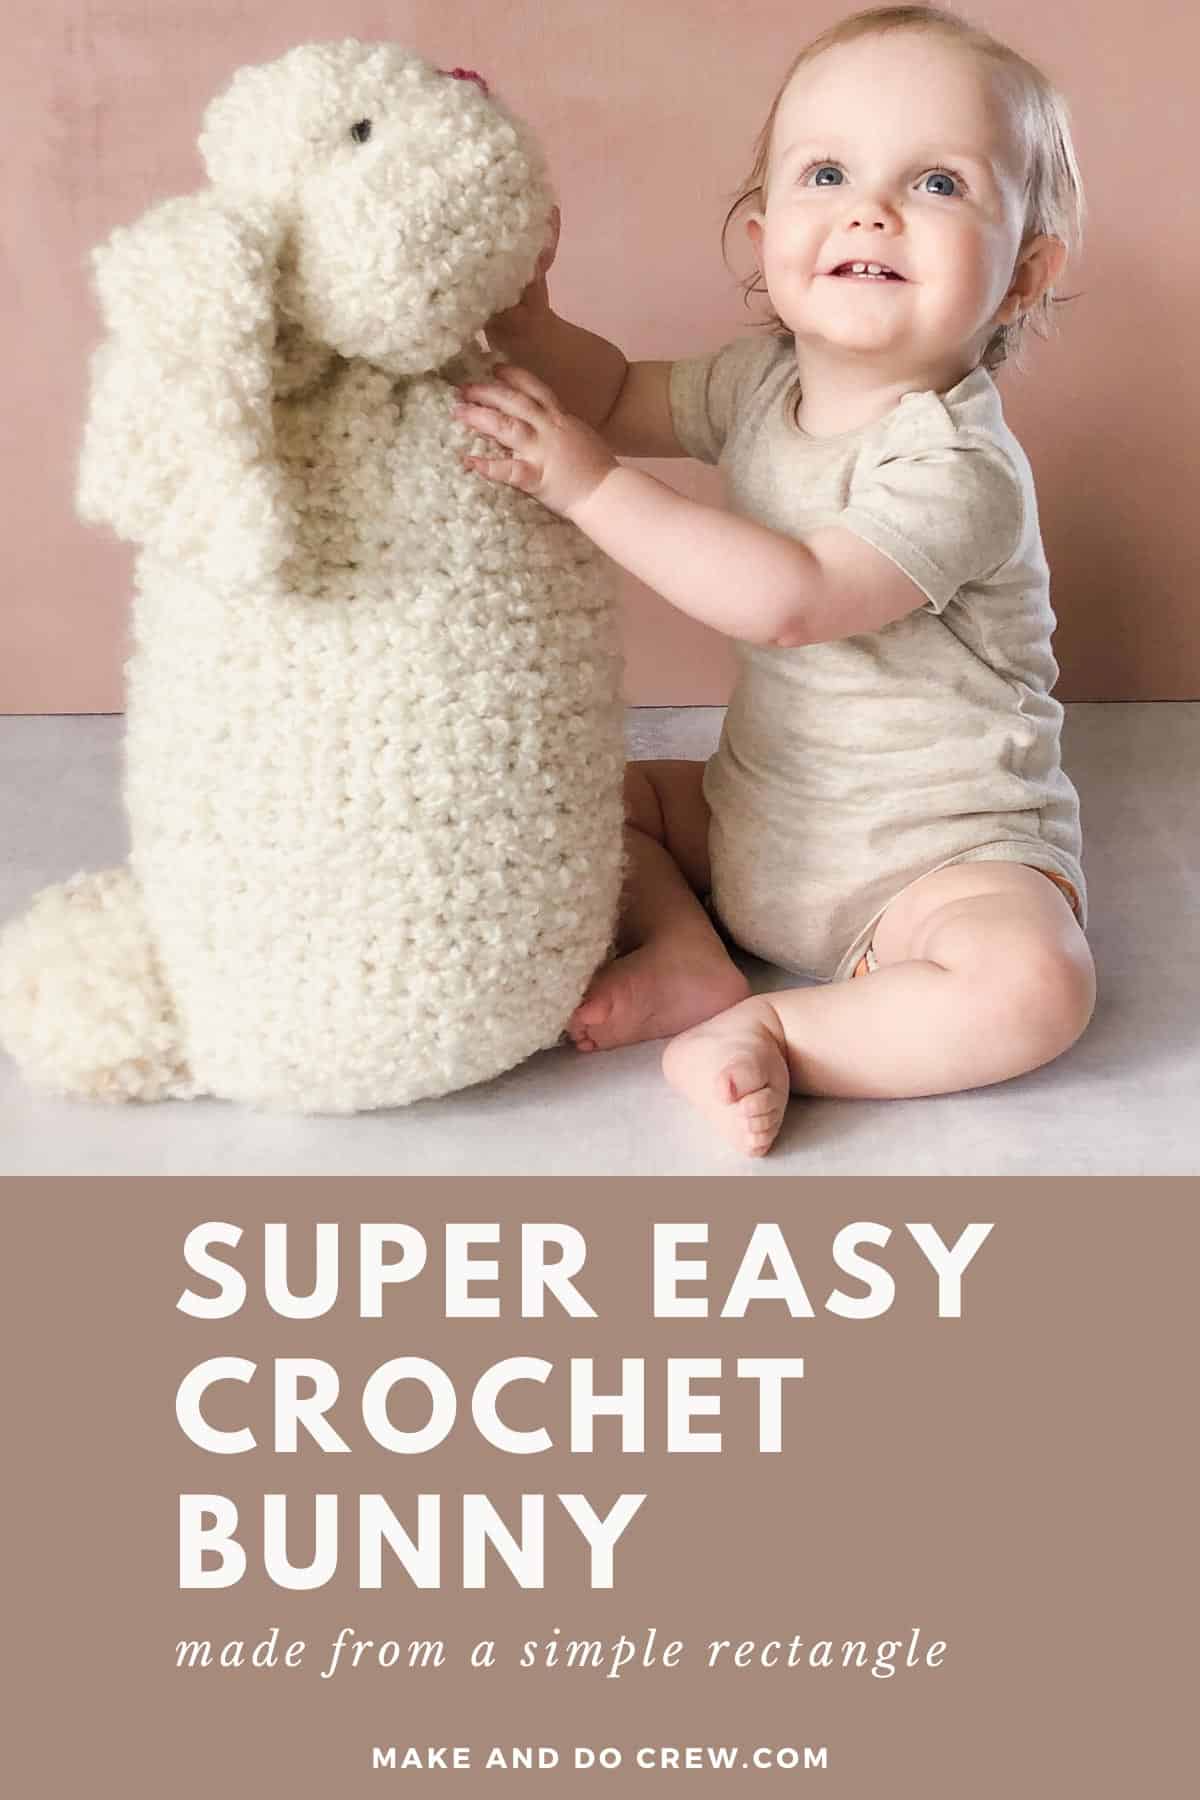
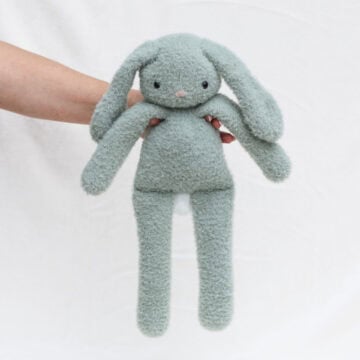
This extremely easy crochet bunny pattern is made from a simple rectangle so it can be finished in a couple of short hours!
Get the free pattern + tutorial below or purchase the ad-free, printable PDF here.
This easy rectangle bunny crochet pattern is part of a collaboration with Lion Brand Yarns. This post contains affiliate links.
If you need a quick crochet baby shower gift, an inexpensive Easter basket surprise or you just want a beginner-friendly project to use up some stash yarn, this simple amigurumi bunny is hop-py to help!
An Easy Crochet Bunny Made From a Rectangle
I know it might sound like there's some catch. A crochet bunny made from just a rectangle?
It's true.
For this project, I was inspired by this knit bunny made from a square as well as this Waldorf-style arm-knit bunny pattern.
Seeing these a while back got me thinking that I could figure out how to make a giant bunny from only a crochet rectangle.
click to pin this pattern for later ⇨
Beginner Amigurumi Crochet Bunny Pattern
I wanted this crochet bunny pattern to be great for amigurumi beginners. Like making-your-first-swatch beginners. And I'm happy to report these little rabbits fit the bill!
Bonus: your kids and grandkids will think you're something akin to Santa because you can whip up toys while they sleep!
If you're teaching a beginner how to crochet for the very first time, this Easter bunny pattern offers a fun way to turn a beginner rectangle swatch into something besides a washcloth.
Once you finish your realistic rabbit, browse our curated collection of easy amigurumi patterns for your next project!
Video: See How a Rectangle Bunny Comes Together
This process is so fun, I just had to show you in a video. Watch this quick :30 pattern overview to see how simple rectangle transforms into a squishy bunny toy (with some cute stop motion too!)

The Best Yarn to Use for Crochet Bunnies
For these bunnies I used Lion Brand's Homespun Thick and Quick which honestly worked out even better than I hoped. This yarn is nice and chunky which means even the large crochet bunny toy only took a few hours to make.
In the past, I've been hesitant to crochet with Homespun yarn because I thought finding my stitches would be more trouble than it's worth. Surprisingly though, it was no problem at all.
Tips for Working With Fuzzy Yarn
I think using a tension that was neither super tight nor super loose is pretty helpful. When in doubt, you can simply feel for the next stitch with your thumb before inserting your hook.
Another reason this pattern is a good use of fuzzy yarn (even for beginners!) is that it's not important to keep a perfect stitch count. If you lose a stitch or pick up an extra one along the way, your little bunny will be just fine.
Substitute Any Yarn From Your Stash
Luckily this crochet bunny pattern can easily be made with any yarn you have on hand.
Simply use a hook that will create fairly tight stitches (so as to better disguise the stuffing inside your bunny). I've included instructions in the tutorial below on how to customize this pattern to make any size crochet bunny you wish.
I'd love to see a really large crochet bunny toy with big long ears. Wouldn't that be cute? For a shorter, more squatty version, crochet a bunny from a square instead of a rectangle.
Crochet a Bunny From a Rectangle - Free Pattern
Purchase the ad-free, printable PDF here.
Save this pattern to your Ravelry here.
Pin it for later here.
Pattern Summary:
Whether you need a quick baby shower gift, an inexpensive Easter basket surprise or you just want a very beginner-friendly project to use up some stash yarn, this bunny is hop-py to help!
You’ll find this realistic crochet rabbit pattern extremely easy to customize and substitute yarns, making it simple to work up in many different sizes, colors and textures.
Since it requires only single crochet stitches and some very basic seaming, it's the perfect amigurumi for beginners who’d like to make something adorable with their first practice swatch.
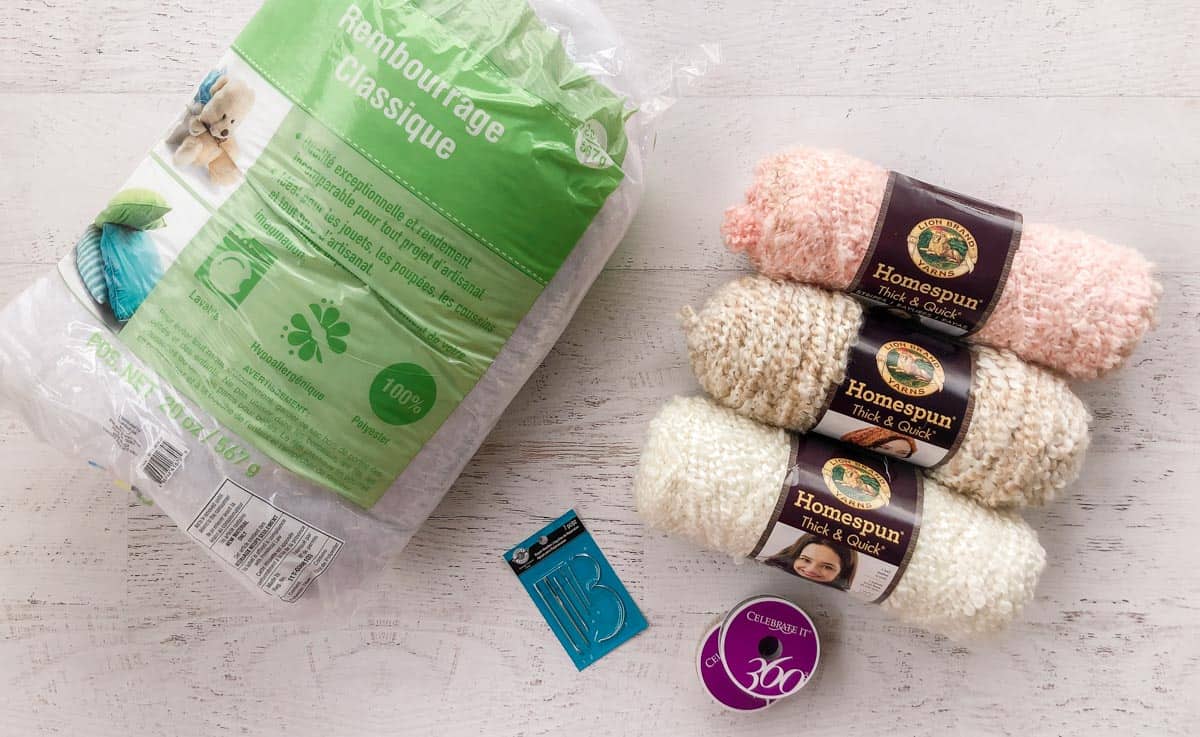
Supplies and Materials:
• Lion Brand Homespun Thick & Quick (Weight: 6/super bulky - 160 yds, 8 oz)
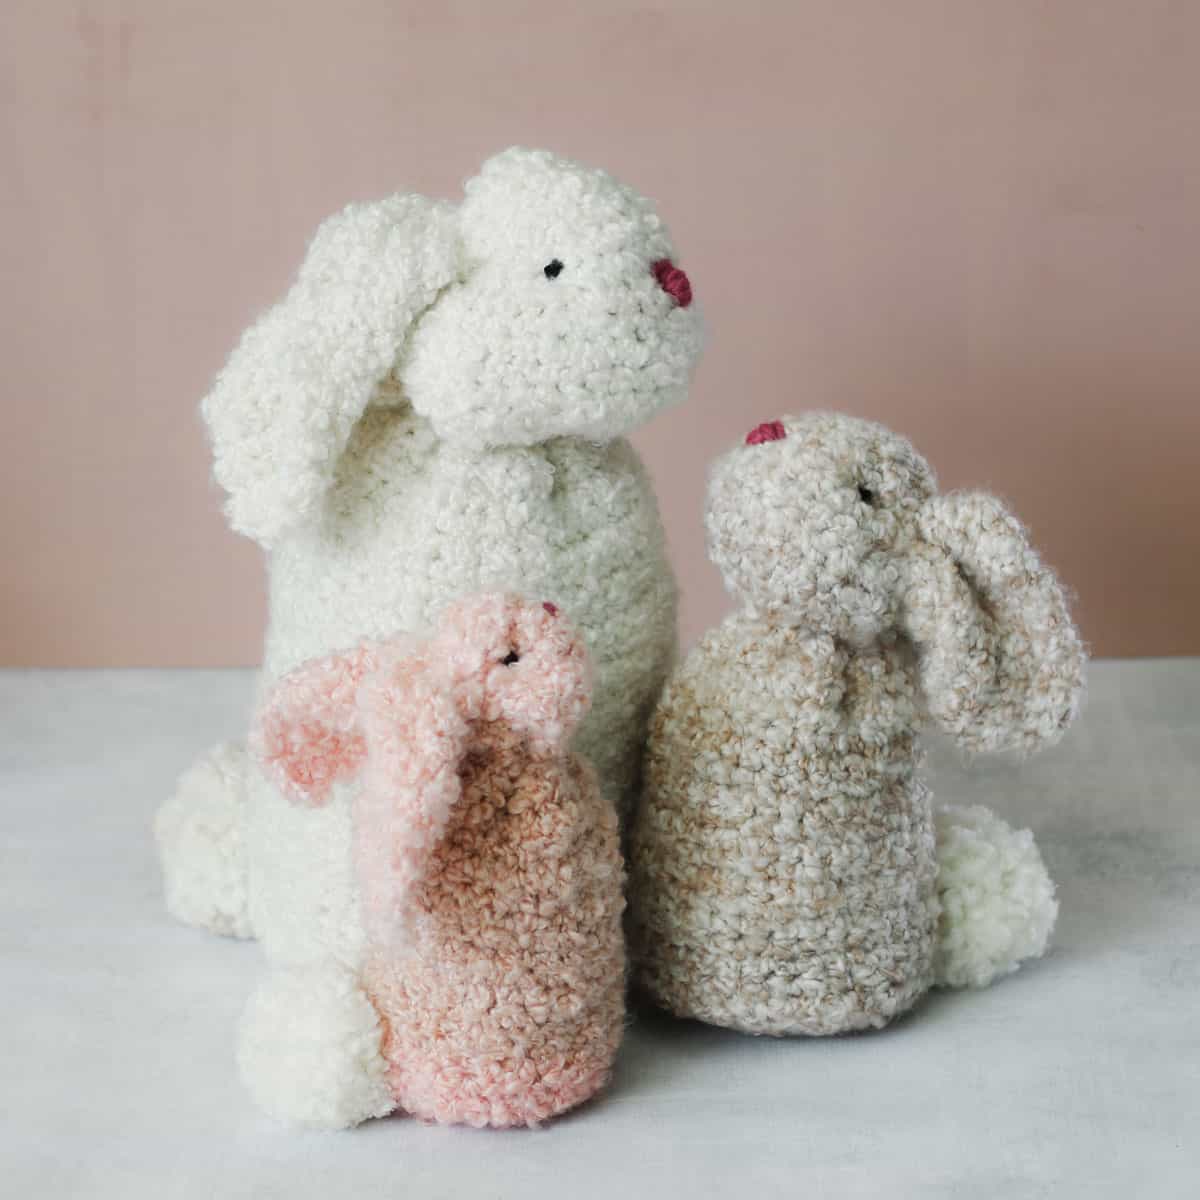
Colors pictured:
- Small Bunny: Coral Stripes (792-201) – ½ skein
- Medium Bunny: Pearls (792-412) – 1 skein
- Large Bunny: Dove (792-497) – 2 skeins
• 4 yds of worsted weight yarn for seaming (ideally in similar color to bunny color)
• 1 yd of dark-colored yarn for eyes
• 1 yd of pink yarn for nose
• Fiber fill
• Tapestry needle
• Size L (8.0 mm) crochet hook or size needed to obtain gauge
• Stitch markers or safety pins
• Pom pom maker or piece of cardboard
Helpful Resources + Tutorials
If you're new to learning how to crochet, check out these beginner guides that will level-up your skills.
- Crochet Supplies - what to buy and what you can skip
- How to Read Crochet Patterns - tackle your next project with confidence
- How to Check Your Crochet Gauge - skipping this step is a common beginner mistake
- How to Weave in Your Ends - make this necessary evil less painful with these tips
- Blocking Your Crochet - why it matters and how to do it
Bunny Sizes (measured from tail to head):
Small: approx. 10.5"
Medium: approx. 13.5"
Large: approx. 21"
Wanna save this pattern?
Gauge:
8 sc x 8 rows = 4”
Gauge is not critical and can be difficult to count if using the suggested fuzzy yarn. It’s more important to choose a hook that makes your stitches fairly tight.
Abbreviations and Glossary (US Terms):
ch – chain
PM – place marker
rep – repeat
sc – single crochet
st(s) – stitch(es)
WS – wrong side
Overall Pattern Notes:
• This pattern is easily modified to use whatever yarn you have on hand! Choose a hook size that will create fairly tight stitches so inner stuffing is better disguised.
• Similarly, you can really create any size bunny you wish. Simply crochet a square and then add about 20% more height. (For example, if your square is 10”, continue crocheting until you’ve formed a rectangle that’s 12” tall.)
• Pattern is written with smallest size first, followed by the larger sizes in parentheses. Small (Medium, Large) It can be helpful to go through the pattern and circle all numbers pertaining to your size before you begin. Alternatively, reference the chart above for an easy formula for this simple pattern.
• Bracketed numbers at end of row instructions are the number of stitches row should contain for each size. [Small, Medium, Large]
Main Rectangle
Foundation Row: Ch 26 (36, 47).
Row 1: Sc in second ch from the hook, sc in each remaining ch; turn. [26, 36, 47]
Row 2: Ch 1, sc in each sc to end of row; turn.
Rep Row 2 until rectangle measures approximately 14.5 (19.5, 22)”. Fasten off. Weave in ends with a tapestry needle.
Follow instructions on next page to transform your rectangle into a bunny.
✨Unlock this free subscriber-exclusive pattern ✨
Follow these steps to view the full free pattern below
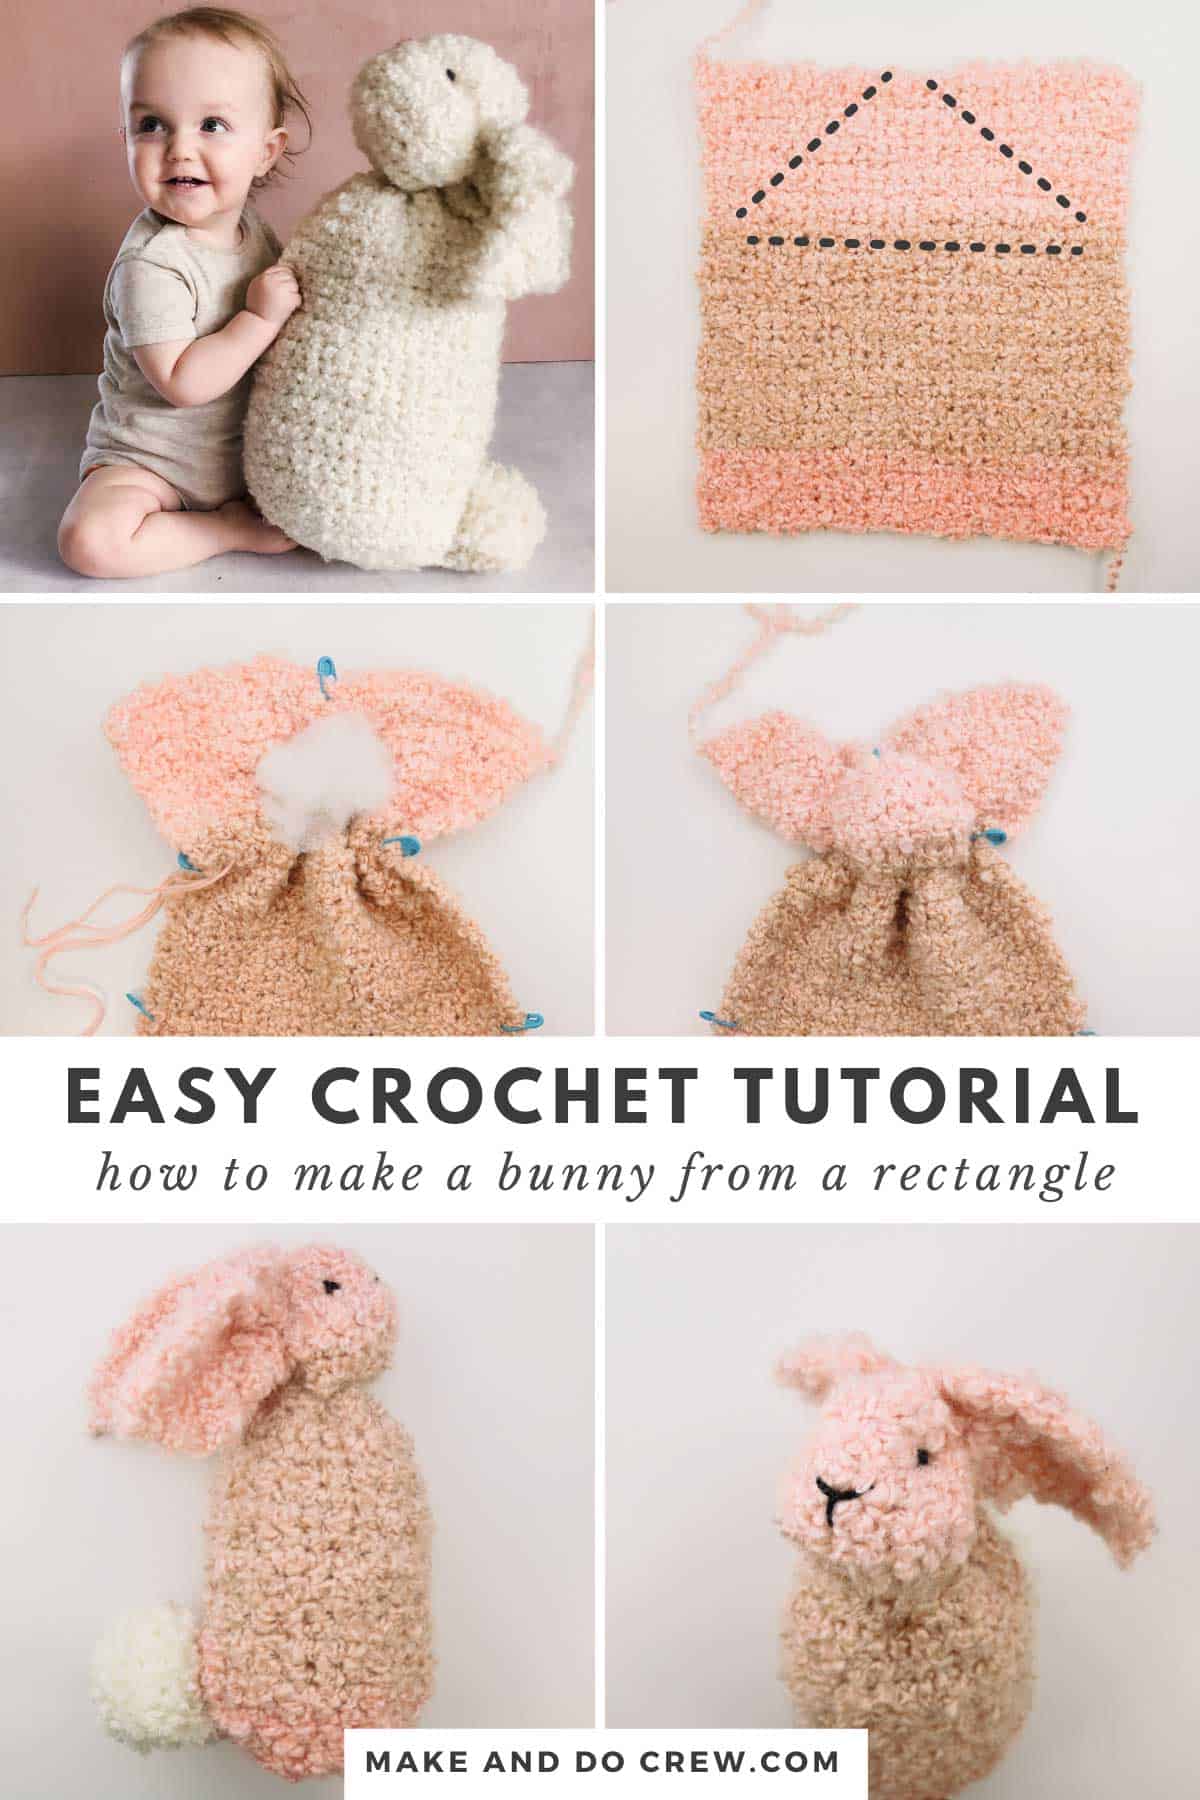
How to Crochet a Bunny Step by Step Tutorial
The photo tutorial below shows how to turn a crochet rectangle into a bunny stuffed animal.
1. Once Rectangle is Complete
The following steps can be completed with a tapestry needle any yarn that’s a similar color to your rectangle. If available, choose a yarn doesn’t break easily.
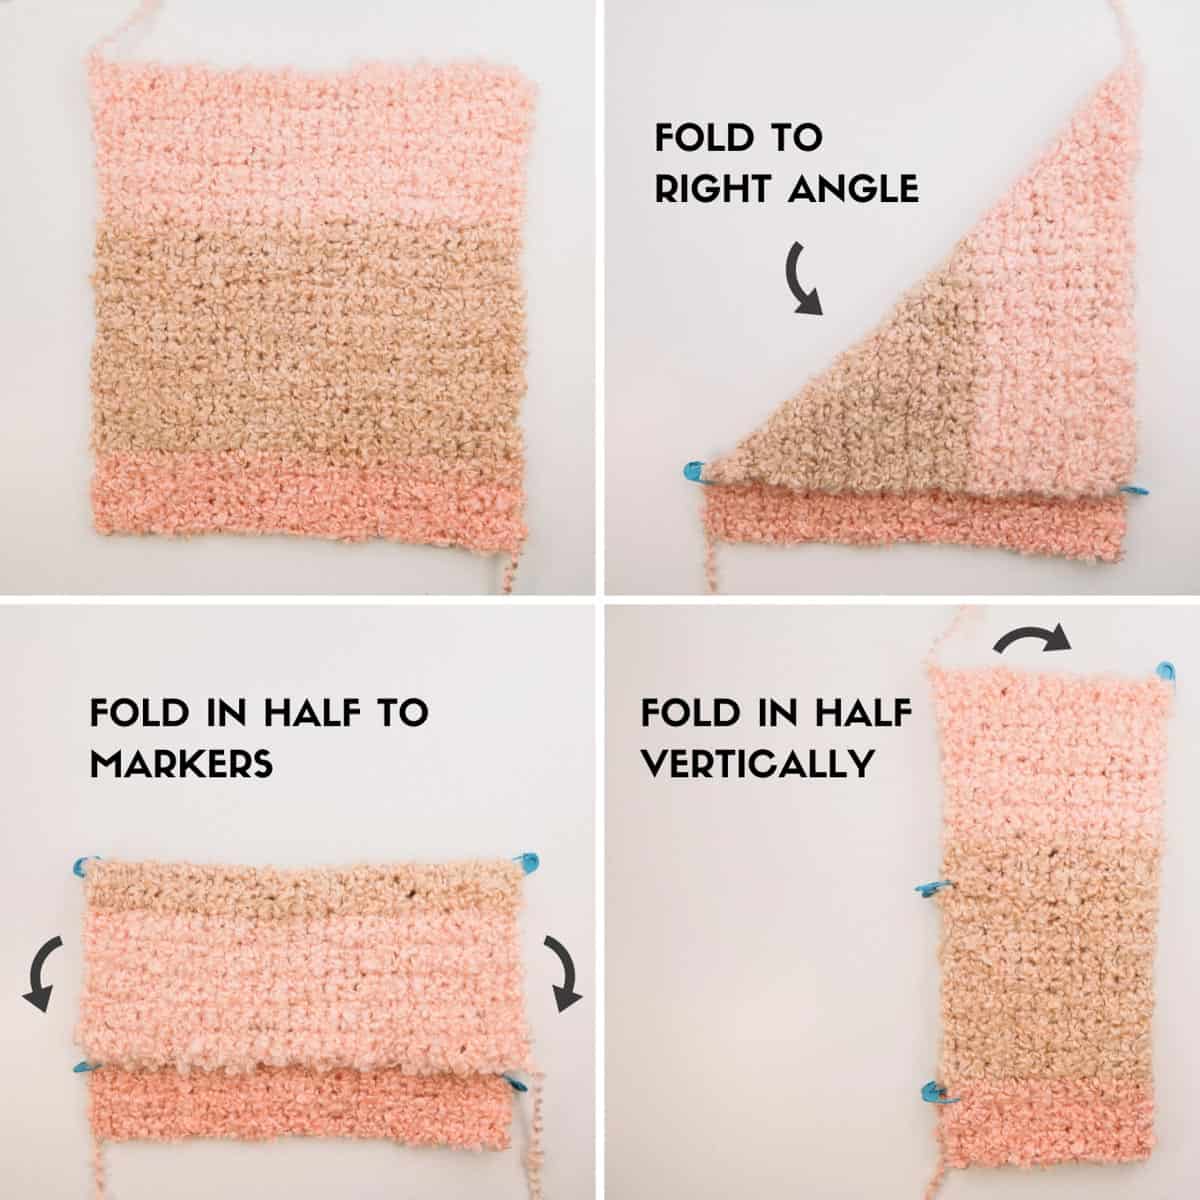
2. Fold to A Right Angle
Fold one top corner down until it is flush with the opposite rectangle side. Place a stitch marker (or safety pin or scrap of yarn) to mark where top edge hits rectangle.
3. Fold In Half To Markers
With rectangle flat again, fold top edge toward markers. Place stitch markers at edges of crease.
4. Fold In Half Vertically
With rectangle flat again, fold in half vertically. Place marker in top edge at crease. You should now have 5 stitch markers places.
The crochet bunny tutorial photos below shows where to fold your rectangle and where to add the stitch markers.
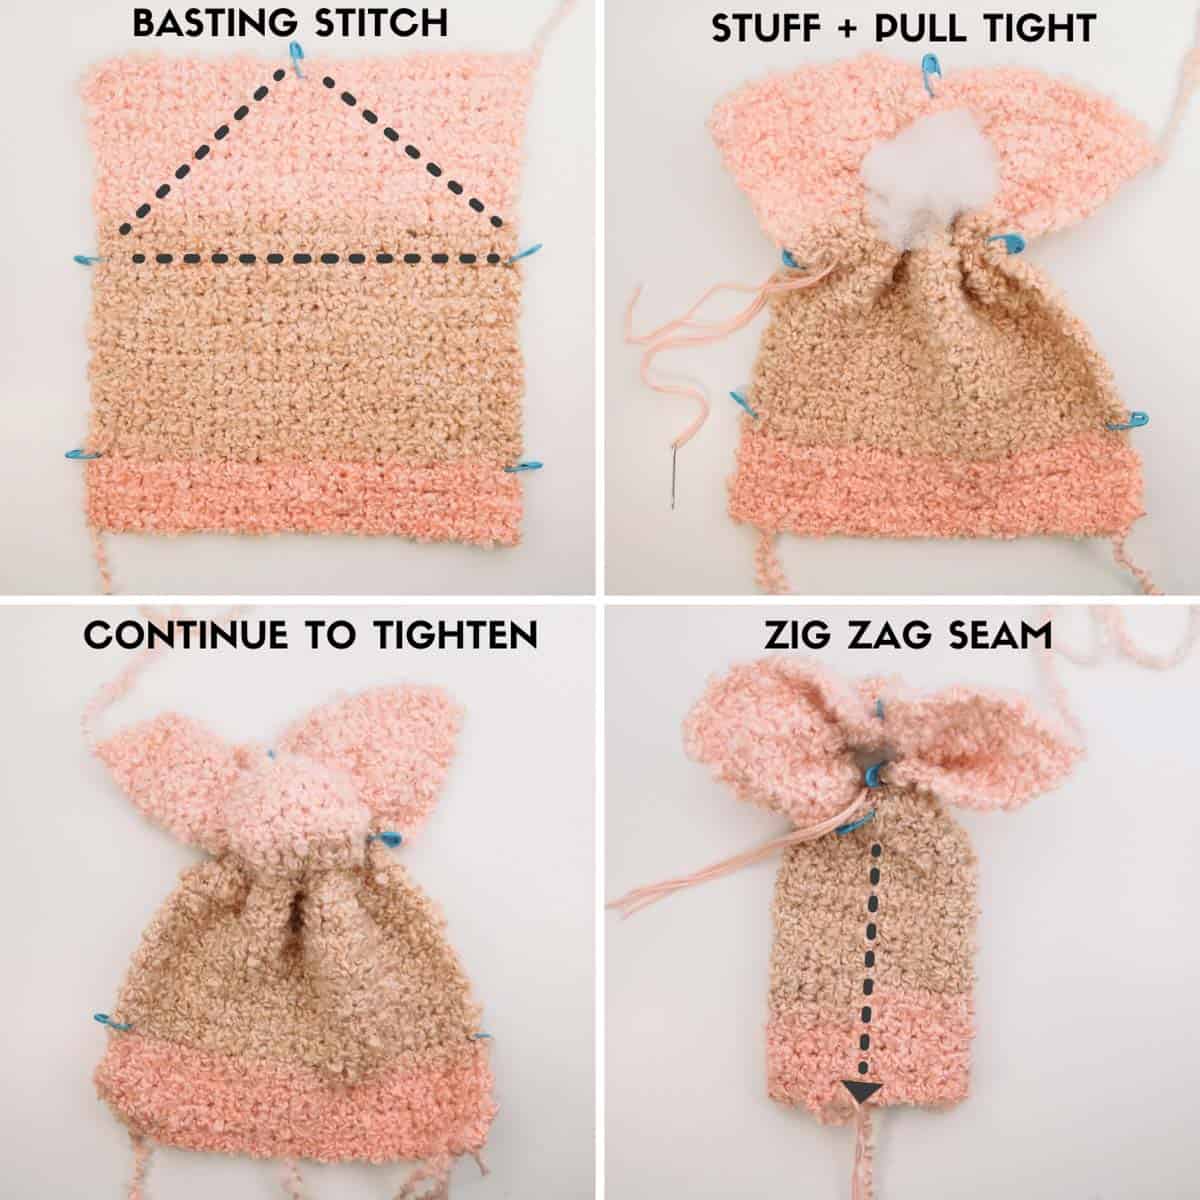
5. Form the Head
With tapestry needle and doubled over strand of yarn, begin at top stitch marker and sew with a basting stitch toward one side marker. Continue across rectangle to opposite side marker and then back up to top marker. Cut off needle keeping yarn tails as long as possible.
6. Stuff + Scrunch
Begin pulling stitching around the face tight, attempting to scrunch each side of your triangle evenly. Meanwhile, add a handful of fiber fill as you scrunch.
7. Tighten Some More
Once stitching is as tight as possible, simply leave as is and move onto step 8. (Do not tie knot yet.)
8. Seaming Back
Use stitch markers to pin sides of rectangle together. Beginning at top of head, use a new doubled over strand of yarn to zig zag seam to bottom of rectangle.
Tie a simple sewing knot but do not fasten off yarn. (This prevents back seam from puckering when bottom of bunny is pulled tight.)
The photos below show how to stuff and stitch the bottom of your rectangle bunny, where to add the pom pom, and the potential faces you can add to the bunny.
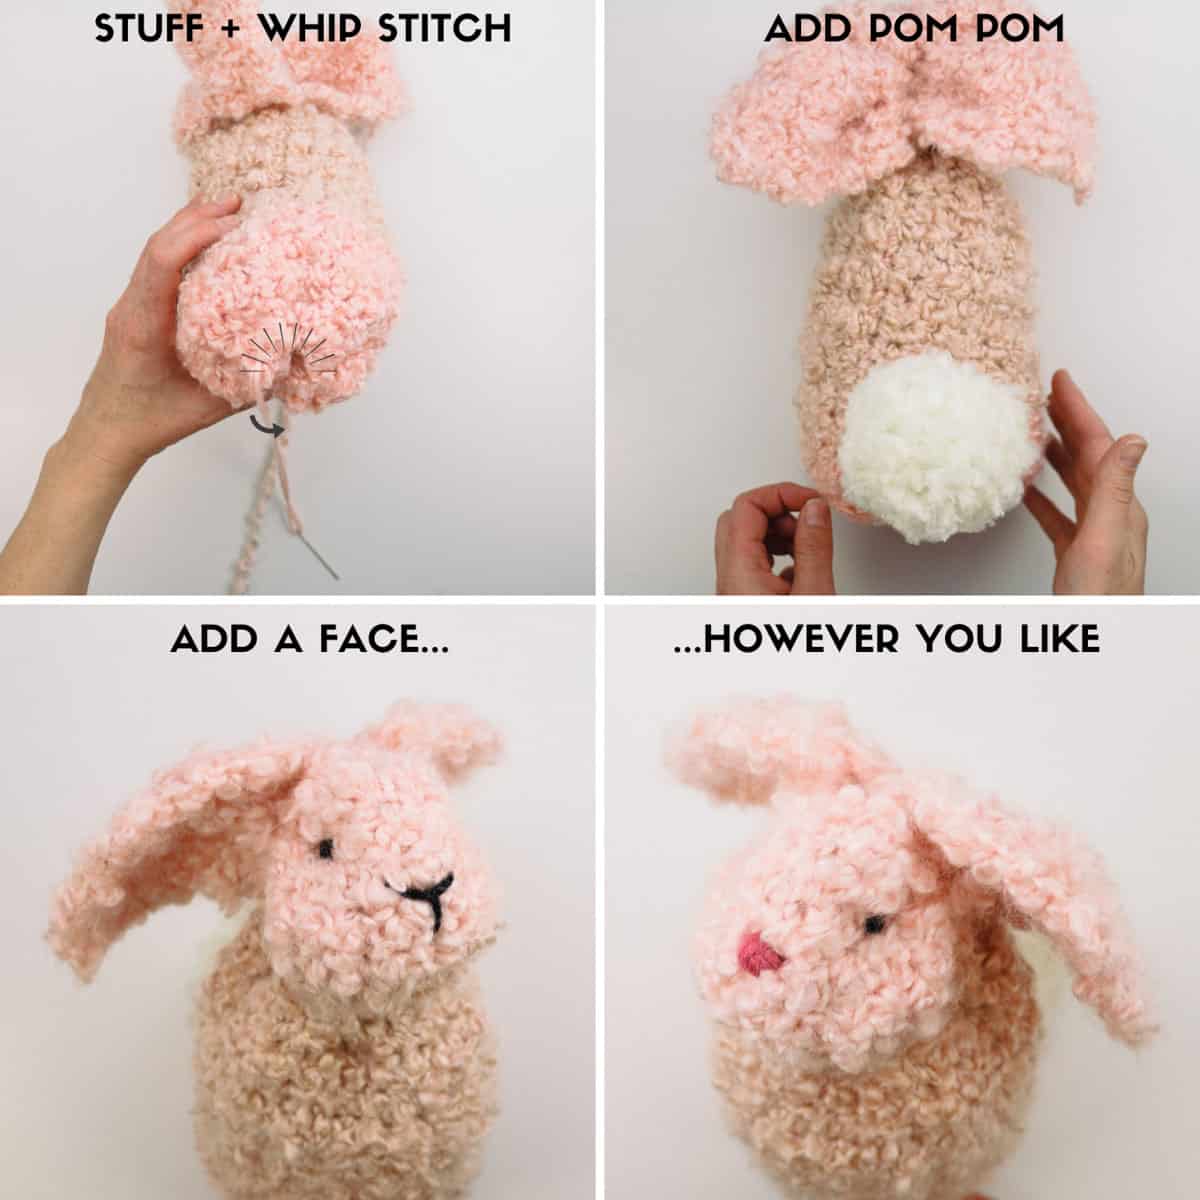
9. Stuff + Seam Bottom
Fill body with as much fiber fill as desired. Using attached yarn and needle, whip stitch around rectangle bottom. Pull as tight as possible, using a few stitches to close bottom hole if visible. Fasten off.
10. Add a Pom Pom
Using either a piece of cardboard or a pom pom maker, create a pom pom tail and join it to your bunny. Learn how to make a pom pom here.
11. Add Eye Dimples
Using yarn desired eye color yarn, tack bunny cheeks together. To do this, tie a knot in your yarn, insert it into the bunny’s face and fiddle with the knot until it’s been absorbed into the face.
Next, make a small stitch near the first eye, insert needle back through bunny head and make a small stitch near the second eye. Pull tight. Do this as many times as necessary to indent the eye “sockets” slightly.
12. Finish Face
With yarn still attached, sew eyes in place however you’d like. Try buttons as an alternative. (Of course, avoid buttons if gifting to a baby or toddler because they can be a choking hazard.)
Add a triangle nose using a scrap of pink yarn. Try a “Y” shaped nose for a different look.
You know what they say about bunnies...grab some stash yarn and make a dozen more!
More Free Crochet Patterns for Easter
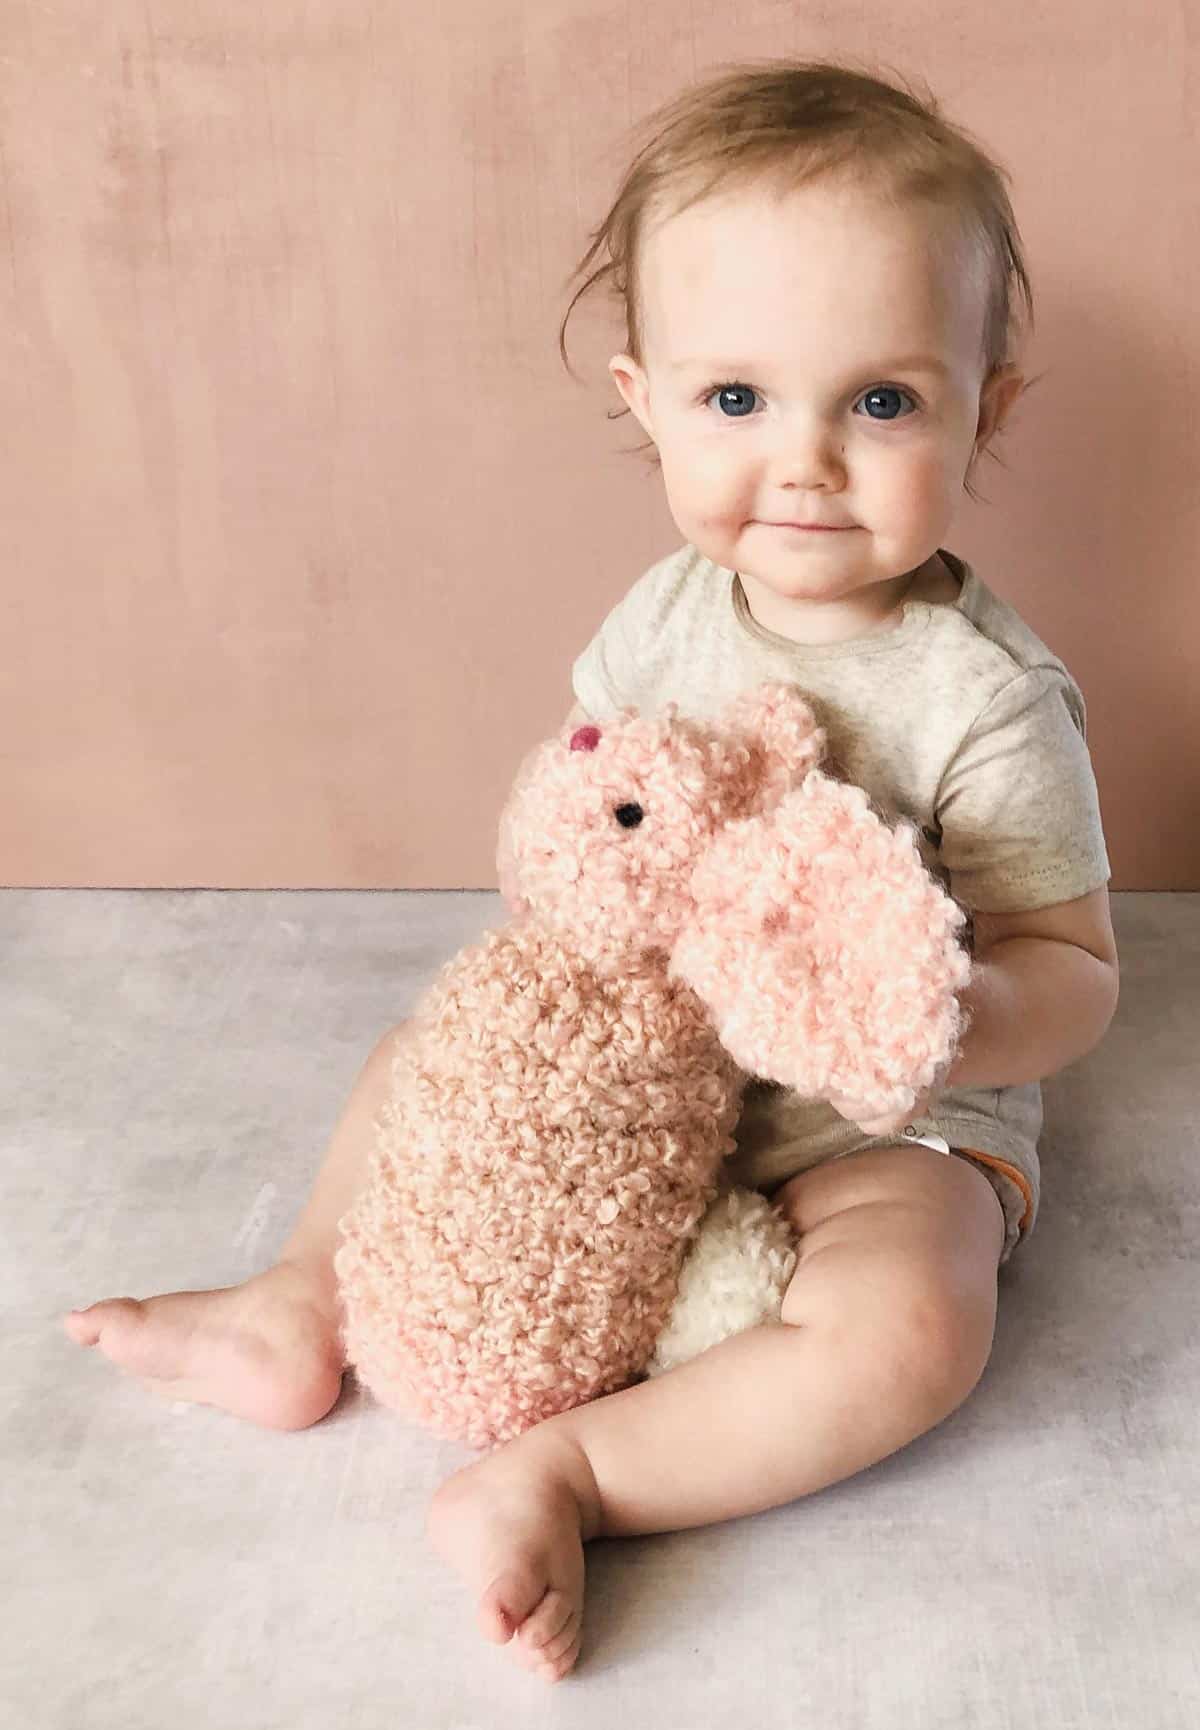
These easy crochet bunnies are great if you need an affordable, last minute crochet Easter gift idea. I think they would also work well for baby shower gifts.
If you'd like more free bunny crochet patterns, you're in luck! You can always find all our patterns for babies and kids here.
More Amigurumi Patterns You Might Like
Once you've learned the basics of crocheting amigurumi, you're ready to tackle this fun and creative plushie patterns.
- 30 Loveable Easy Crochet Animal Patterns
- 30 Amigurumi Halloween Patterns
- 30 Octopus Patterns to Crochet
- Cutest Crochet Cow Patterns
- How to Crochet an Amigurumi Cupcake
- Cute Koala Lovey Blanket
- Llama / Alpaca Stuffed Animal
That was so fun! Now what?
Invitation to our Facebook group
Come discuss crocheting amigurumi bunnies and lots of other projects and techniques in our Make & Do Crew Facebook group. Here thousands of helpful crocheters answer each other's questions and share their stitches. Come join us here.
Cheryl Benedick says
Just wondering.....I tried to watch the video for the bunny but it goes so fast I can't follow it. Do i need to adjust something?
Thanks
Beth A McMichen says
I do not understand this part:
Using yarn desired eye color yarn, tack bunny cheeks together. To do this, tie a knot in your yarn, insert it into the bunny’s face and fiddle with the knot until it’s been absorbed into the face.
Is this using the tails of the yarn I used for the head? Otherwise, I cannot figure out what I am suppoted to do with those tails, as the instructions say do not tie a knot yet. So I am assuming they must be used later, but I cannot see where, other than right here?
Jennifer R says
OMG! This is the cutest bunny ever. Can't wait to start one...
Thank you!!!
Karen Hilliard says
Wow so cute and easy! Yeah!!! BTW, your baby is adorable! I've been using that very yarn lately that I got on sale to make tote bags for a friend's church that donates and feeds the homeless in Pittsburgh.