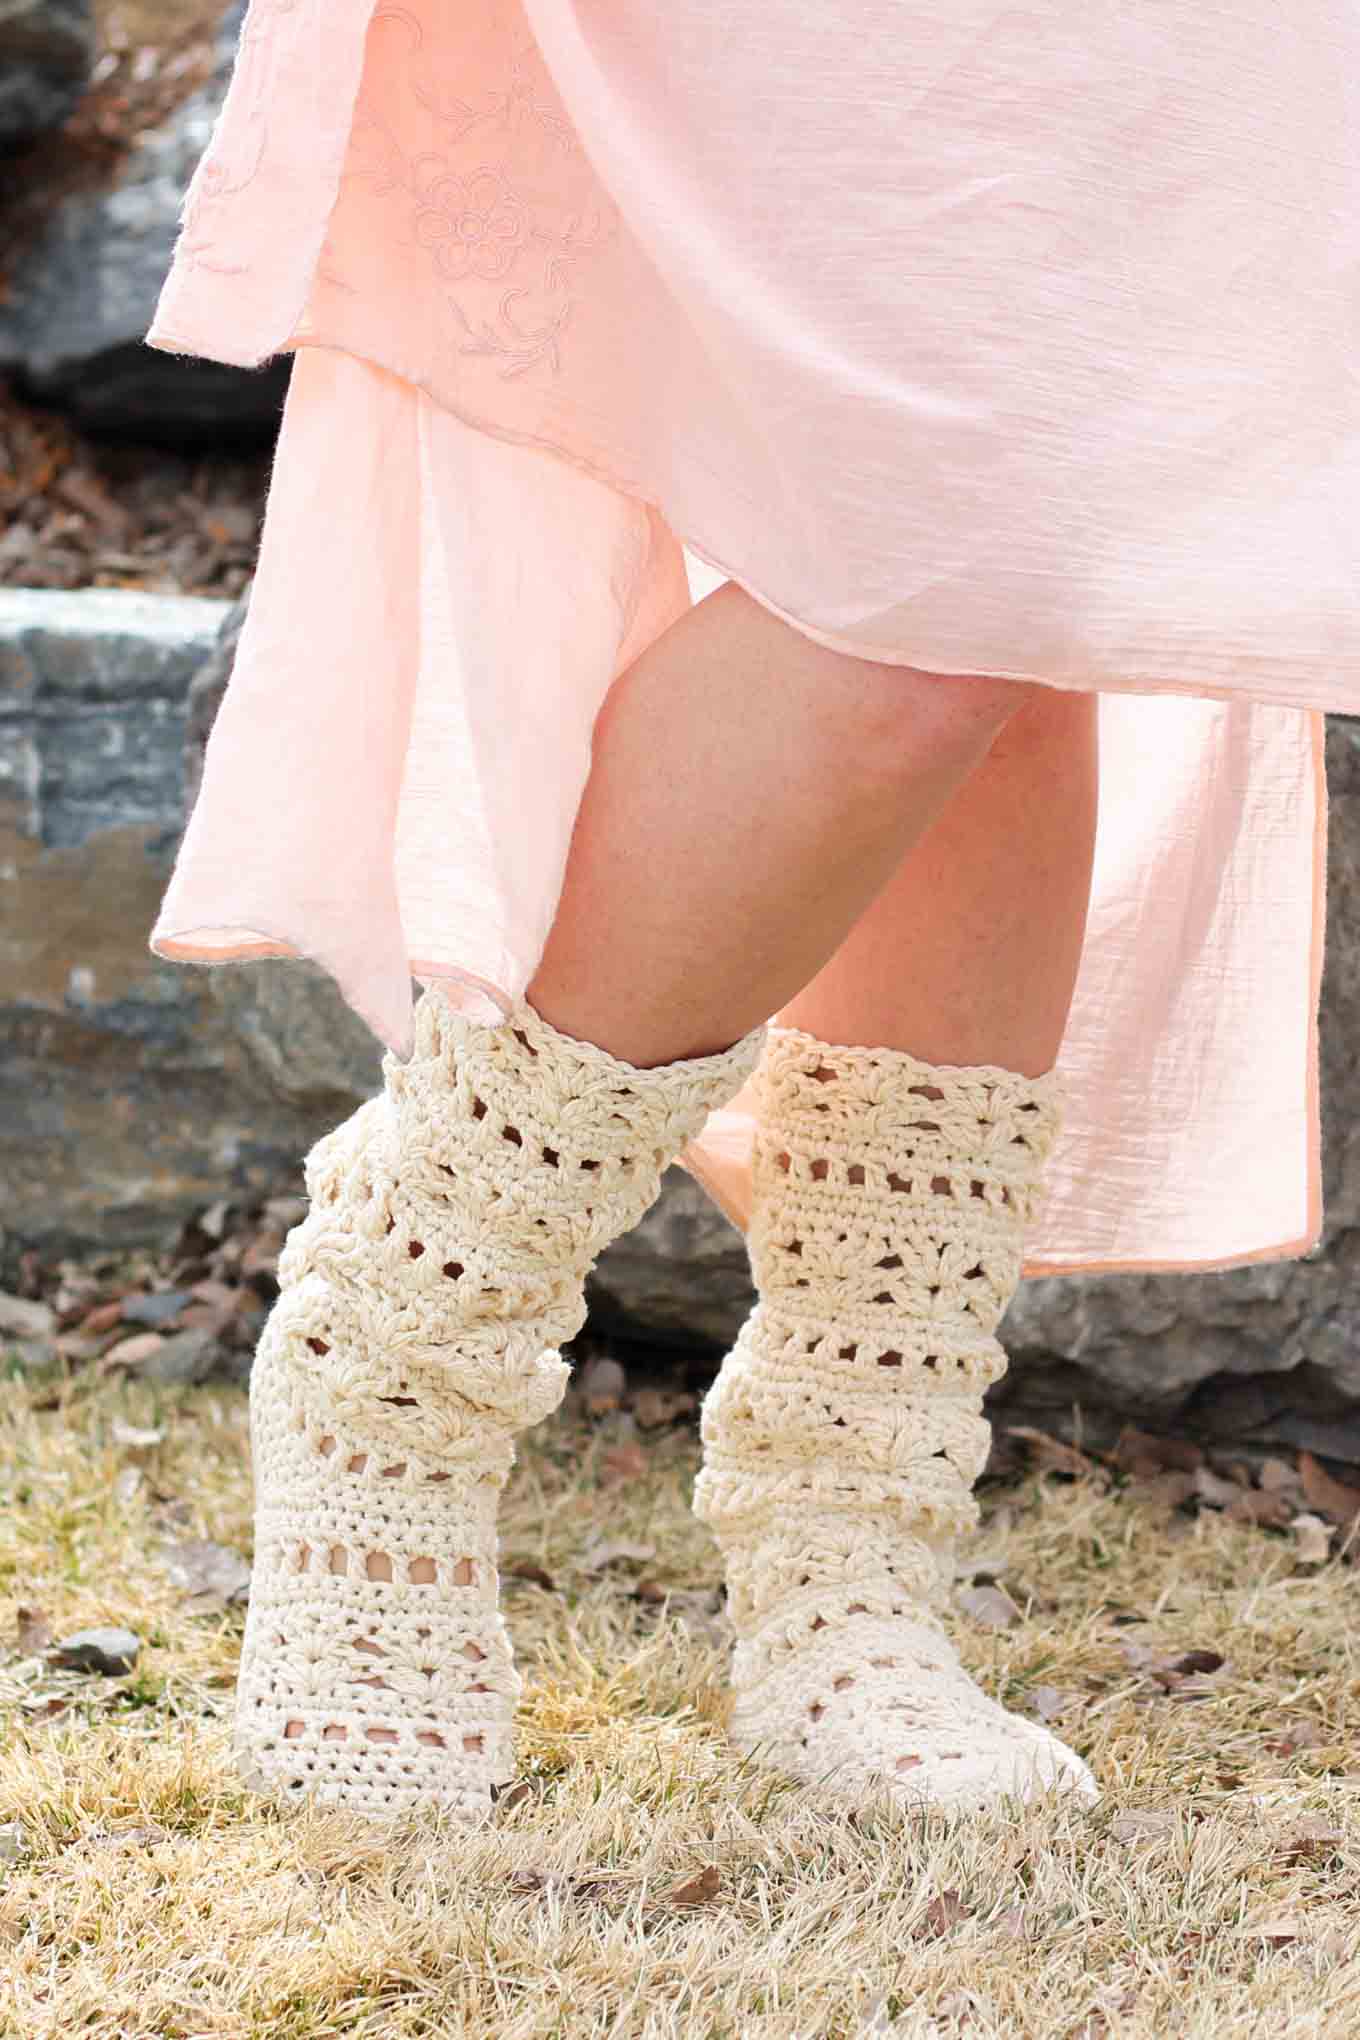
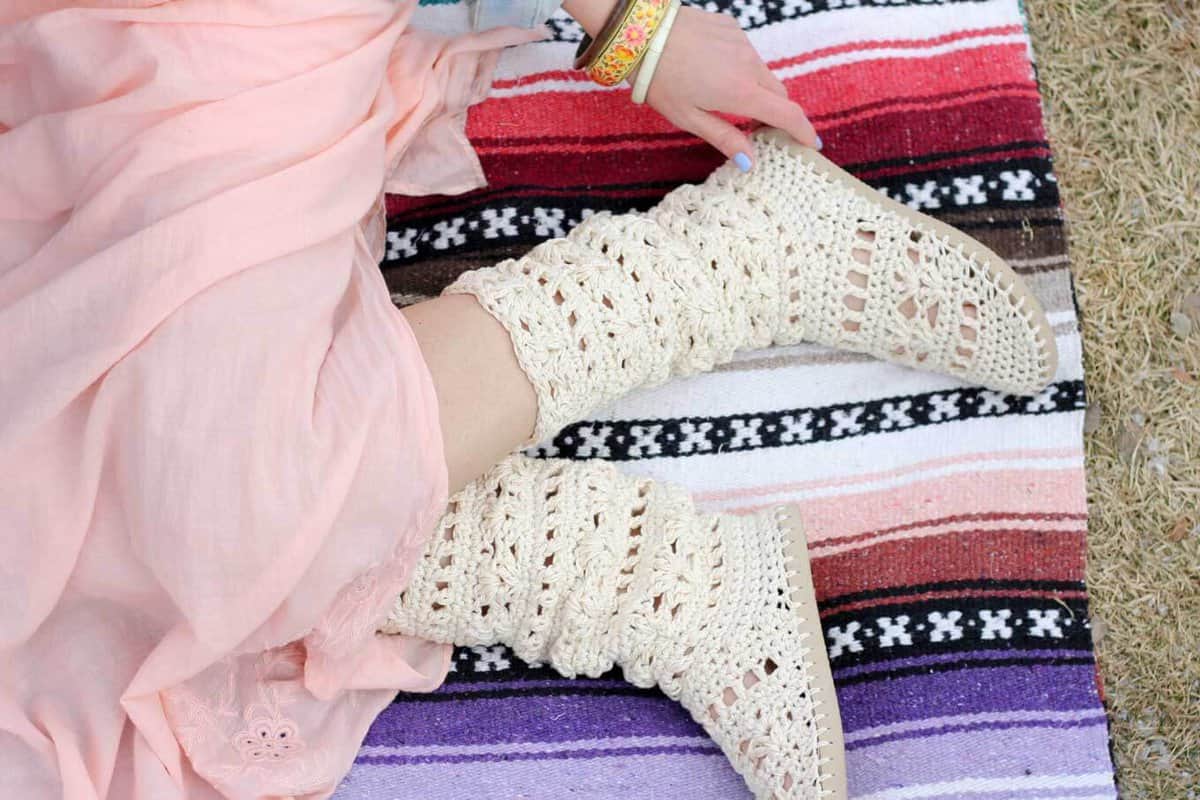
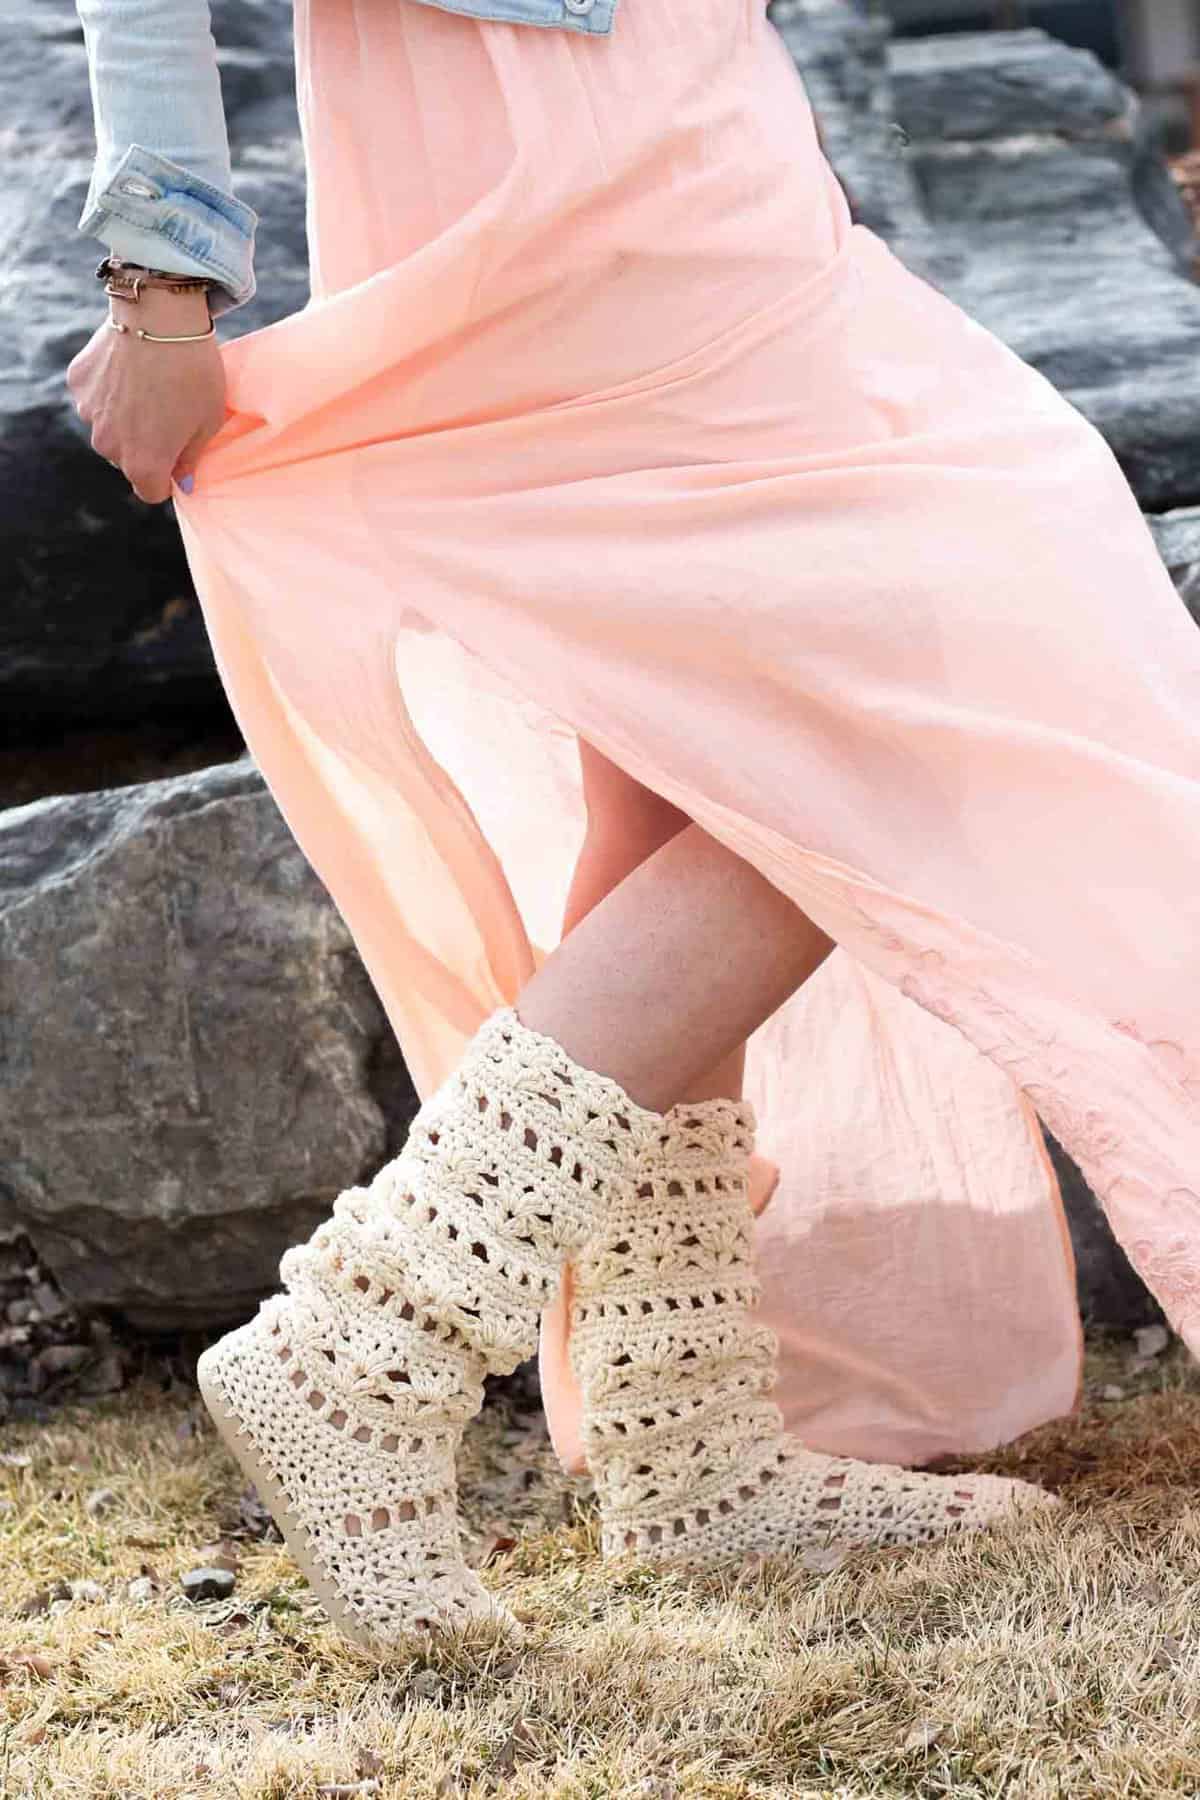
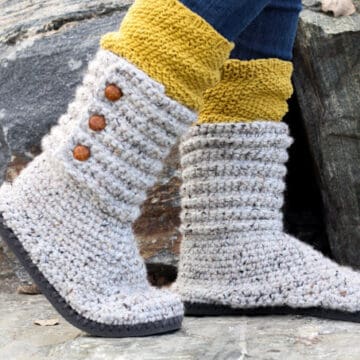
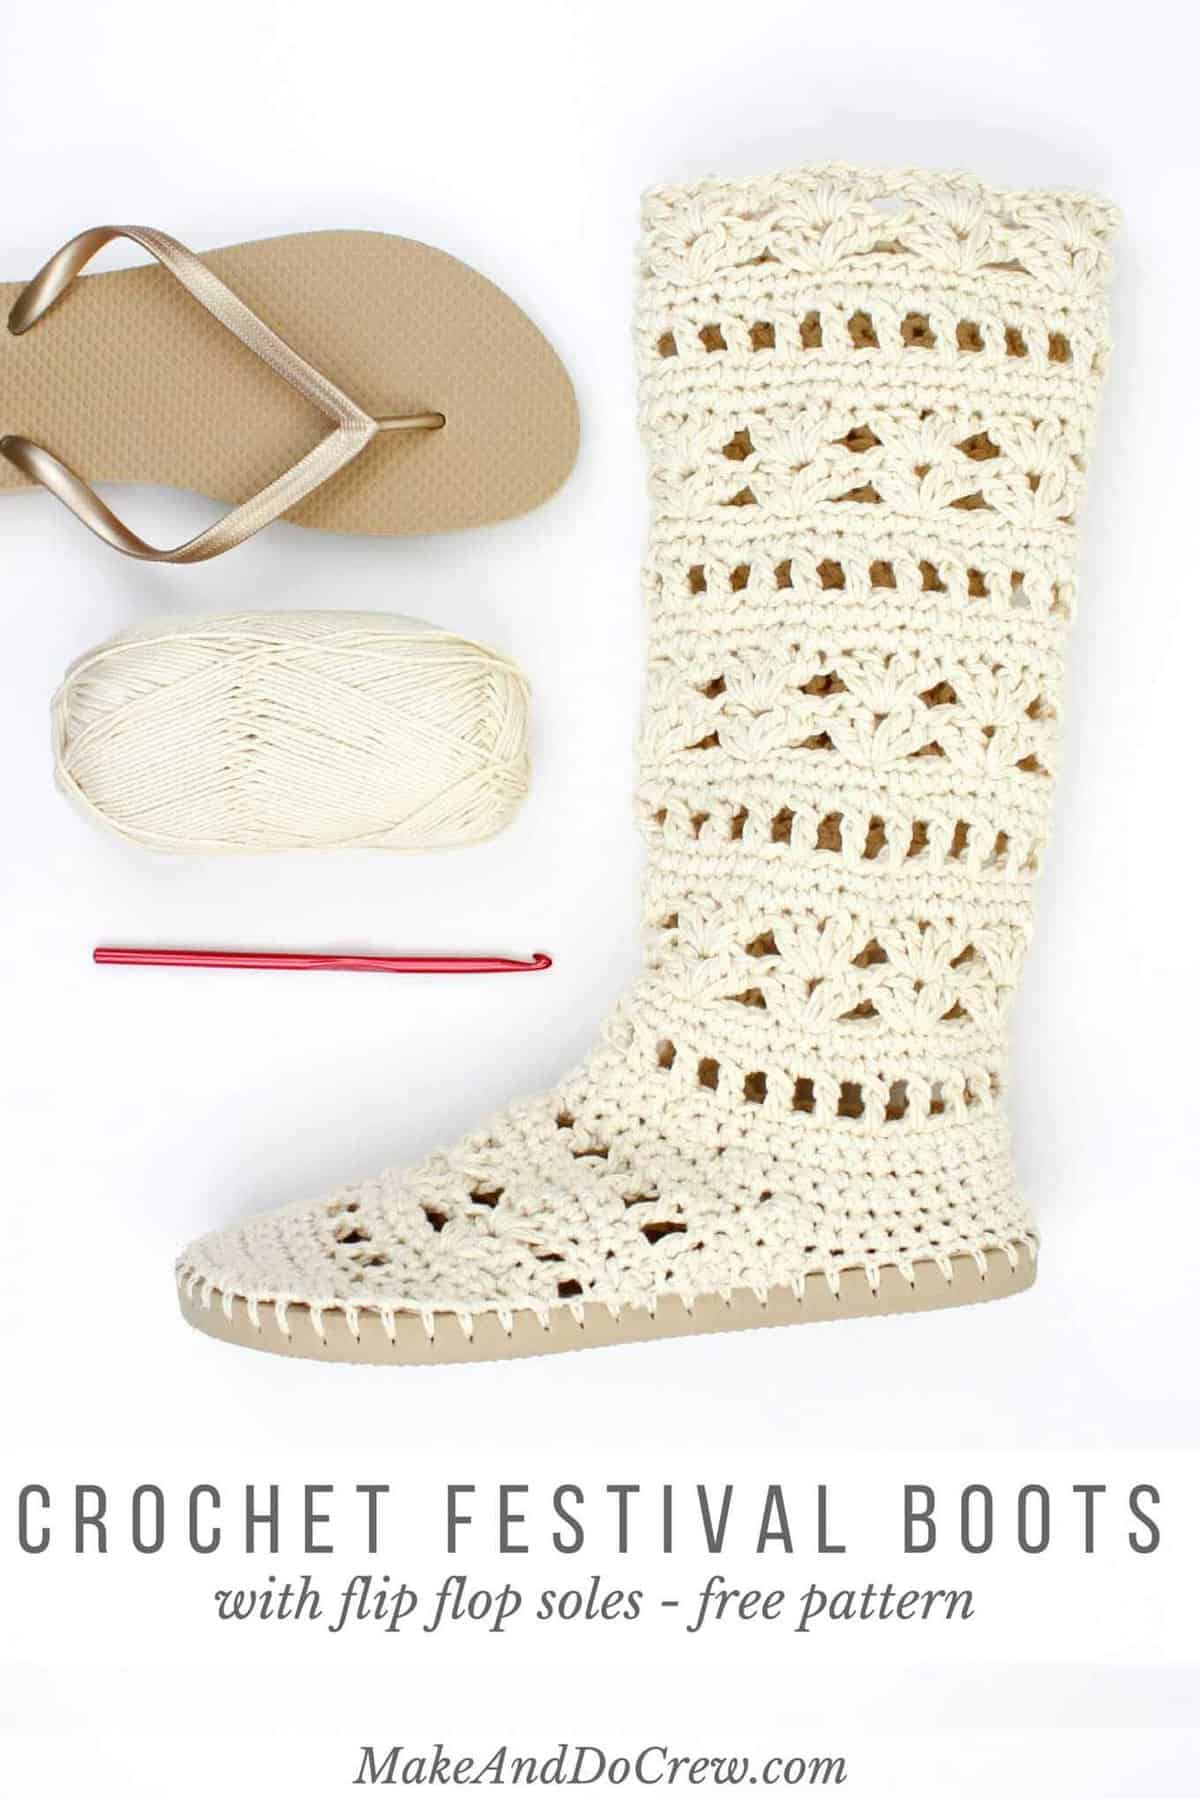
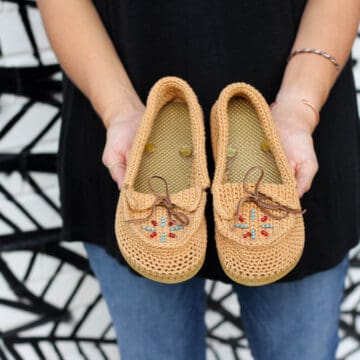
Whether you're headed to Coachella or your local concert in the park, this crochet boots pattern for adults will complete your boho-inspired outfits all season long! The free pattern is below or you can purchase the ad-free PDF with printable hole-poking guide here.
This crochet boots with flip flop soles pattern is a collaboration with my friends at Lion Brand Yarn. This post contains affiliate links.
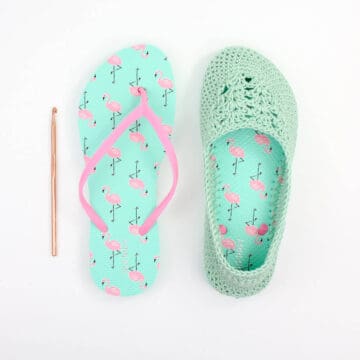
If a gladiator sandal and a Fry boot had a baby, I think it might look something like these Coachella Boots with flip flop soles. They're airy and lacy like crochet sandals, but they offer the style impact of boots. Sounds like a win to me.
 It's about this time every year that my inner free spirit comes out and I can't get enough bohemian everything. And there's really no modern day event that encapsulates bohemian style better than Coachella, the music festival in California next month. (If you're unfamiliar with Coachella style, this New Yorker article sums it up with a nice dose of realism.)
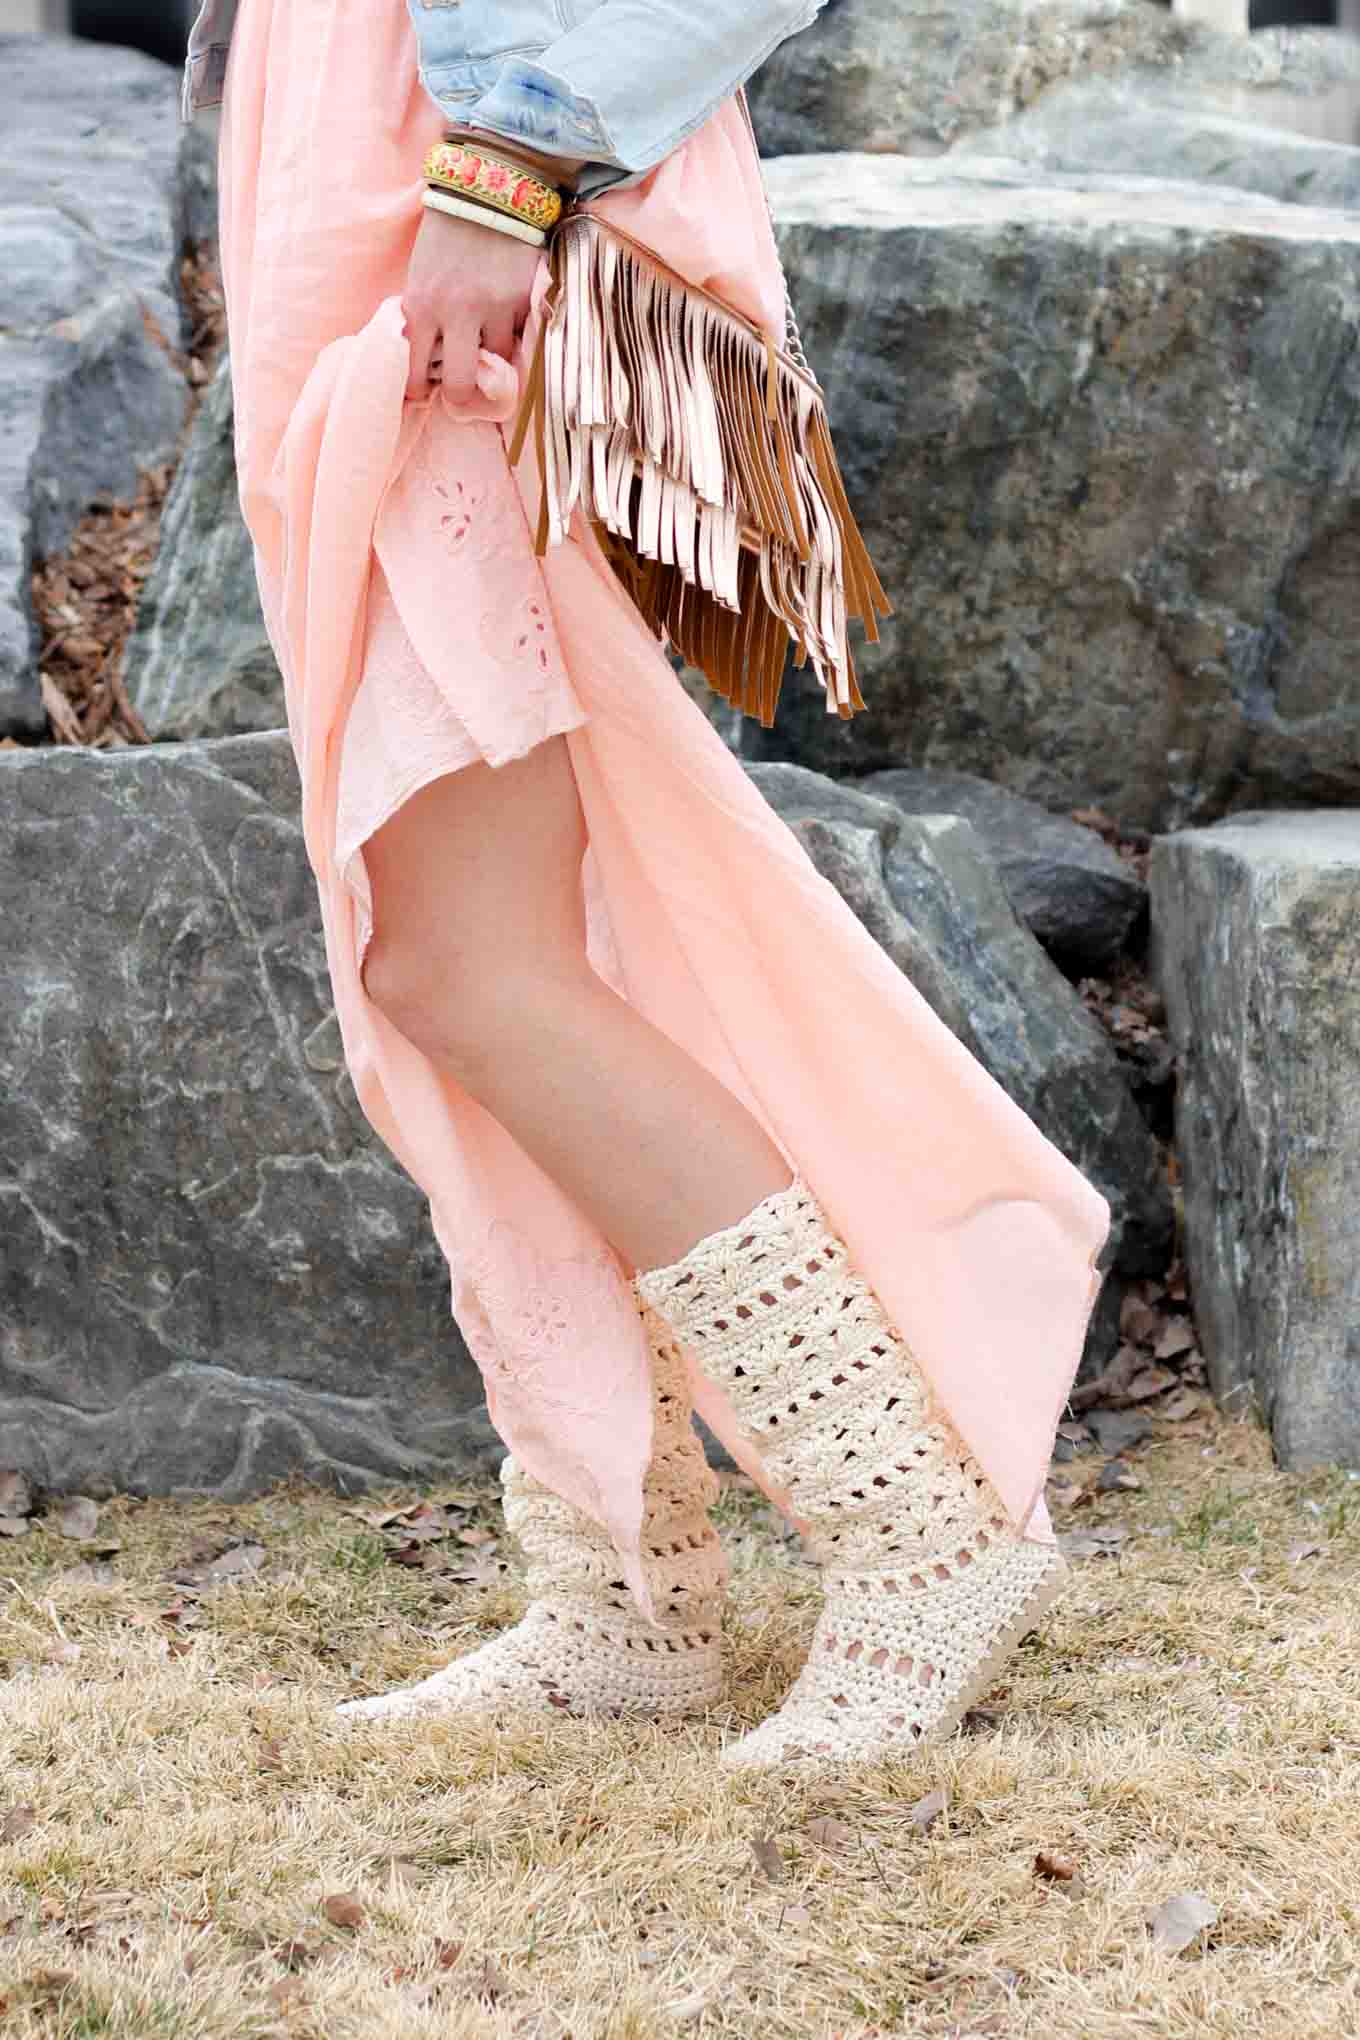 While I won't be dragging a double stroller and 9,000 sippy cups to Coachella this year (you're welcome, carefree 20-something festival goers), I can still channel the vibe my designing my own boho crochet patterns. This crochet boots pattern for adults is meant to nurture the free spirit in you, even if that free spirit is obligated to arrive at work at 8:00am tomorrow.
 If you haven't tried one of my crochet patterns using flip flops previously, you can get the answers to all your question in this Flip Flops FAQs post, including how they hold up over time.
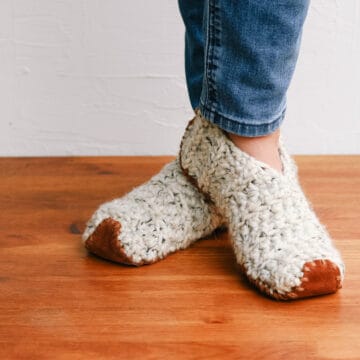
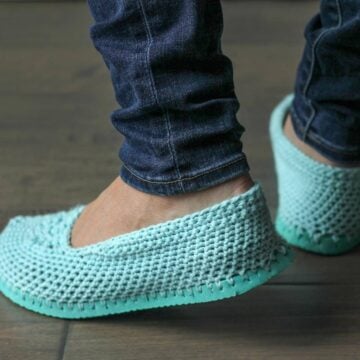
In a nutshell though, crochet flip flop shoes are the most comfortable thing that will have ever graced your feet and they work really well as outdoor shoes or indoor slippers. (You can even wash them, which is quite a perk after attending a week long music festival.)
Find Your Next Crochet Pattern on Flip Flop Soles
Crocheting on flip flops can fast track your feet straight to comfort-ville. Flip flops offer functional, non-slip soles for your crochet slippers. They also allow you to crochet shoes customized for your particular feet.
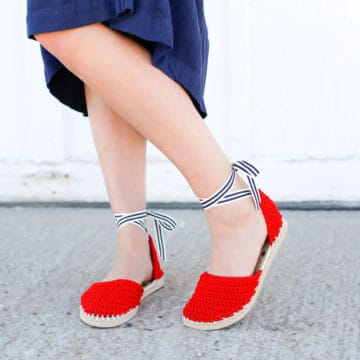
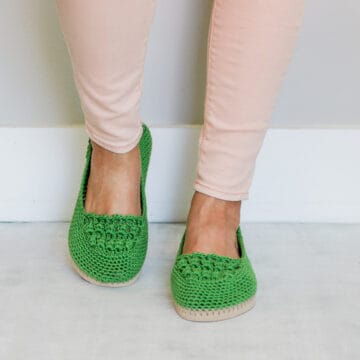
See more free crochet flip flops patterns →
How to Ensure Your Boho Boots Fit
The trickiest part of following a crochet flip flop pattern is achieving the gauge, since it's so dependent on how far apart you poke the holes in your flip flop sole. That's why I've started including "rulers" in my printable patterns that take all the guesswork out of spacing your holes.
The printable pattern is also handy because it has all of the instructional photos separated from the written pattern so you can choose to print them or conserve ink. You can purchase the Coachella Boots ad-free, printable PDF here on LoveCrafts and here on Etsy.
 This particular crochet boots pattern fits adult sizes 5-10, but you can make bigger sizes by just working a few additional rows at the end of the "boot foot base" section of the pattern. I'm always thrilled when you customize my patterns to fit your needs and body, so feel free to experiment!
Thanks to Lion Brand Yarn for sponsoring this post and enabling more free patterns on Make and Do Crew!
Please do not publish or share this pattern as your own. You may make items to sell with this pattern. In exchange, please link back to this post. Do NOT use my photos as your own sales photos. You can read my policies here. Now let’s make something awesome!
Coachella Crochet Boots Pattern For Adults
Purchase the ad-free, printable PDF with hole guide here on LoveCrafts and here on Etsy.
Add this pattern to your Ravelry favorites here.
Pin this pattern for later here.
Adult Sizes (see Overall Pattern Notes):
Small – women’s shoe size 5-6 (flip flop length approx. 9.5)"
Medium – women’s shoe size 7-8 (flip flop length approx. 10)"
Large – women’s shoe size 9-10 (flip flop length approx. 10.5)"
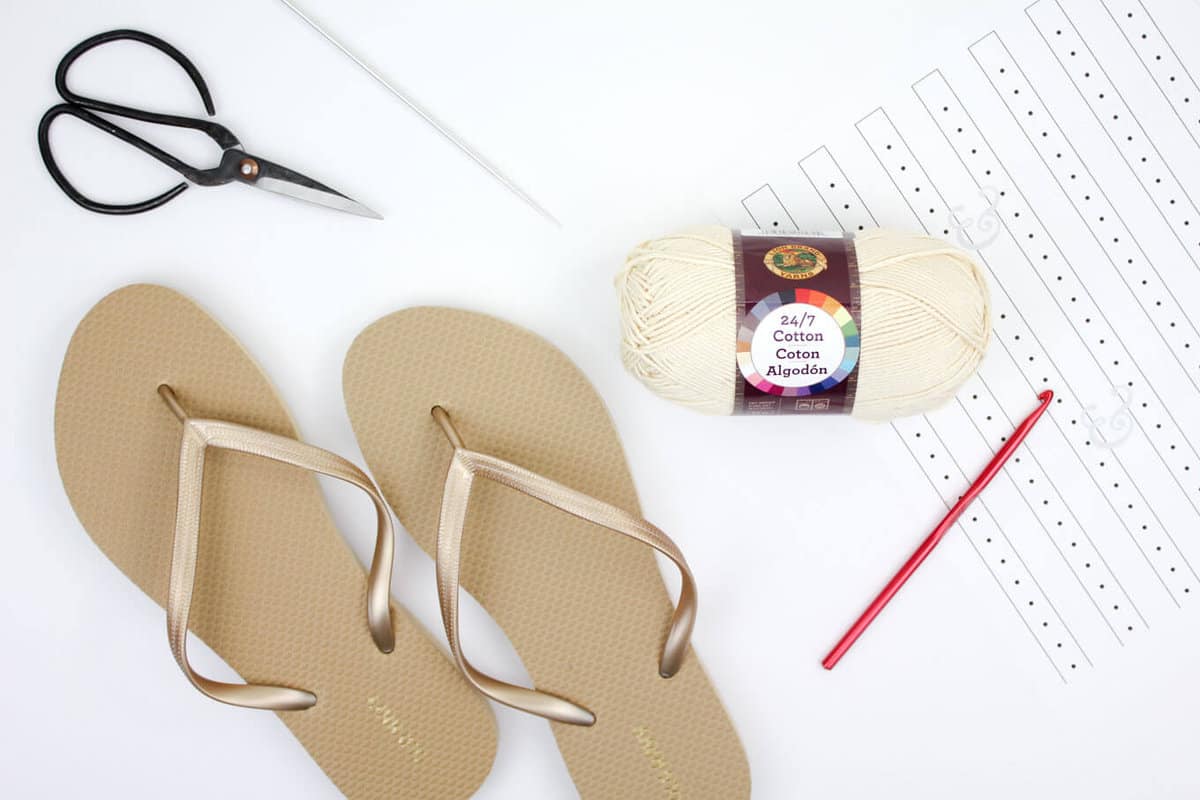
Supplies:
So you can spend more time making boots and less time shopping, this pattern contains affiliate links at no extra cost to you.
• Lion Brand 24/7 Cotton – 4 skeins (744 yards total) – color: Ecru (MC) (Size 9 sample made with approx. 625 yards)
• If Ecru color doesn’t match flip flops color, you’ll want about 20 yards of 24/7 Cotton that does• Tapestry needle
• Size B [2.25 mm] crochet hook or size needed to fit through flip flop holes
• Size H [5.0 mm] crochet hook
• 1-2 printed copies of the “ruler” at end of printable pattern + tape (optional)
• 1 pair of flip flops (One size smaller than you wear normally. See pattern notes.)
• Sharp tool to poke holes (I use this clay tool. You can also try a skewer, thin drill bit or awl.)
• Sharp scissors
• Strong glue such as E6000 (optional)
• Stitch markers (optional)
Gauge:
13 st = 4”, just under 9 rows = 4” worked in ankle shaft pattern
Abbreviations and Glossary:
sc – single crochet
dc – double crochet
sk – skip
sl st – slip stich
ch – chain
WS – wrong side
RS – right side
MC – main color
Sc2tog (single crochet 2 together)– [Insert hook into next st and pull up a loop] two times, yarn over and pull through all 3 loops on hook.
Overall Pattern Notes:
- Transforming flip flops into slippers isn’t an exact science! Unlike other crochet patterns, these slippers have some variables. Keep an open mind and don’t be afraid to customize the boots to your liking. Check out this Flip Flop FAQs post for answers to commonly asked questions.
- You’ll likely want to size down when buying your flip flops. Look for a flop flop that offers about .25" of sole around your foot (more like the fit of a normal shoe). In the pattern sizing, the shoe sizes mentioned describe the shoe size you normally wear and not the sized-down size of your flip flops.
- The flip flops in the sample are from Old Navy--they have a great selection of colors. Find $1 flip flops on Amazon or at Walmart. Dollar Tree’s $1 flip flops tend to be a bit too flimsy, but can work if you are careful.
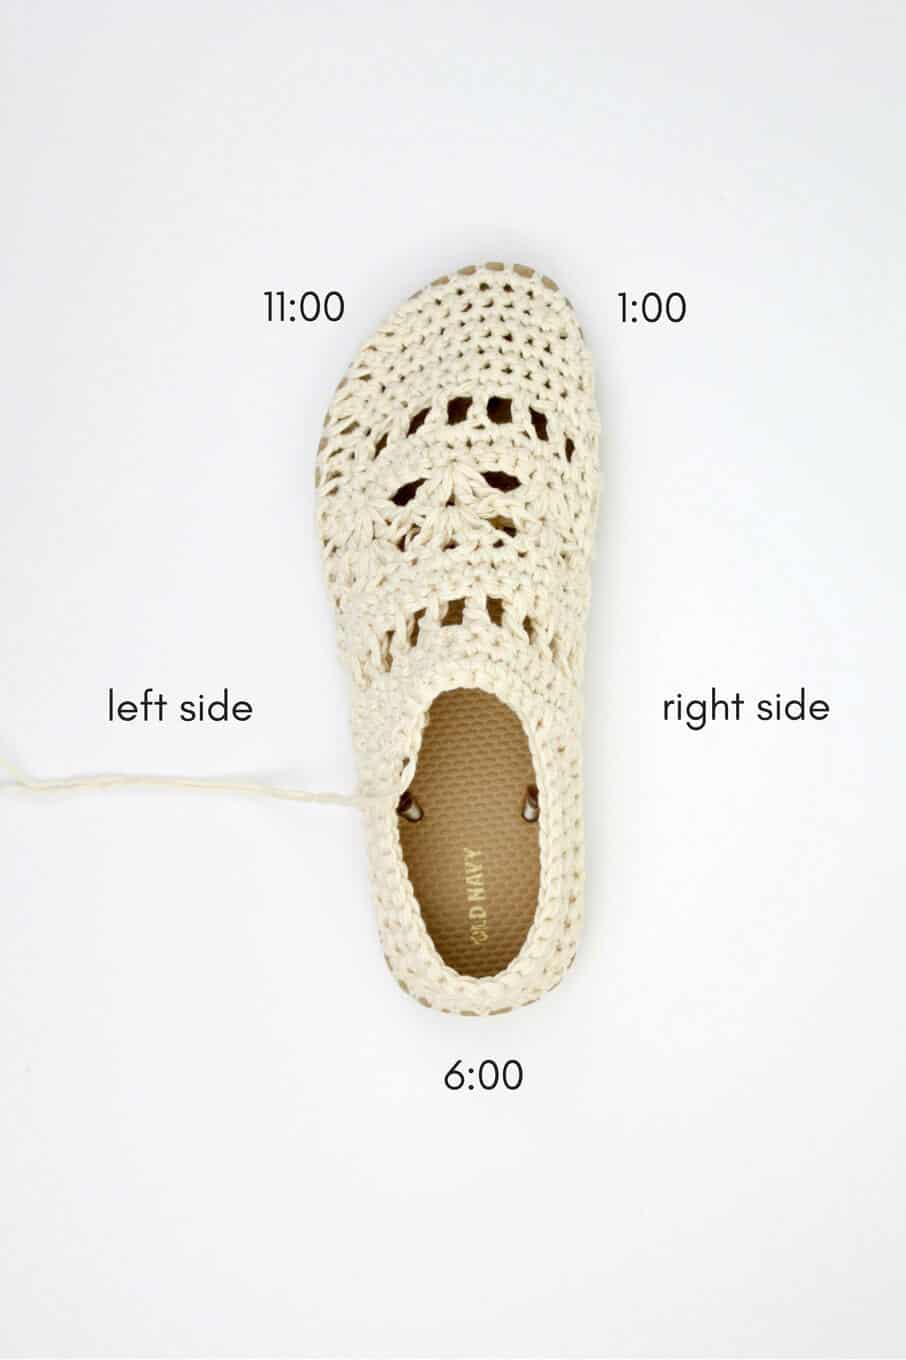
- Pattern explains locations on the flip flop as if it’s a clock where the top of the toe is 12:00 and the heel is 6:00. See photo below.
- Pattern describes size small instructions with size medium and large in parentheses.
Left and right boots are identical.
Find Your Next Crochet Slippers Pattern
See more free crochet slippers & socks patterns →
Boot Foot Base
Notes:
- The foot of the boot is crocheted tightly, similar to amigurumi. Make a deliberate effort to keep your stitches tighter than normal. Check your gauge if you’re unsure.
- When working sc2tog stitches on the sole, keep yarn fairly tight so as to create a smooth edge around the sole of the boot. It may take a couple of attempts to get the sc2tog stitch to look how you’d like it to.
- Pattern is worked with two strands of yarn held together throughout, except for the foundation round which is worked with one strand.
- Be sure to poke the same number of holes in the second flip flop as in the first. (The printable ruler makes this pretty straightforward, but it’s still a good idea to count and double check.)
To begin:
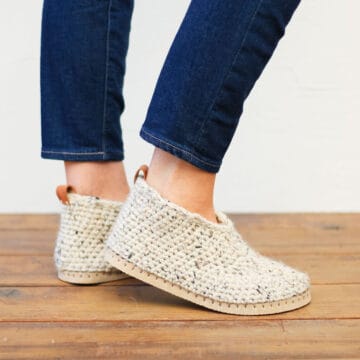
Trim straps off flip flops. If you’d like to wear your boots outside, trim the mid-foot straps at an extreme angle so you can keep them in place without feeling them inside the boot. (See photo above.) Save the rubber plug from the strap between your toes.
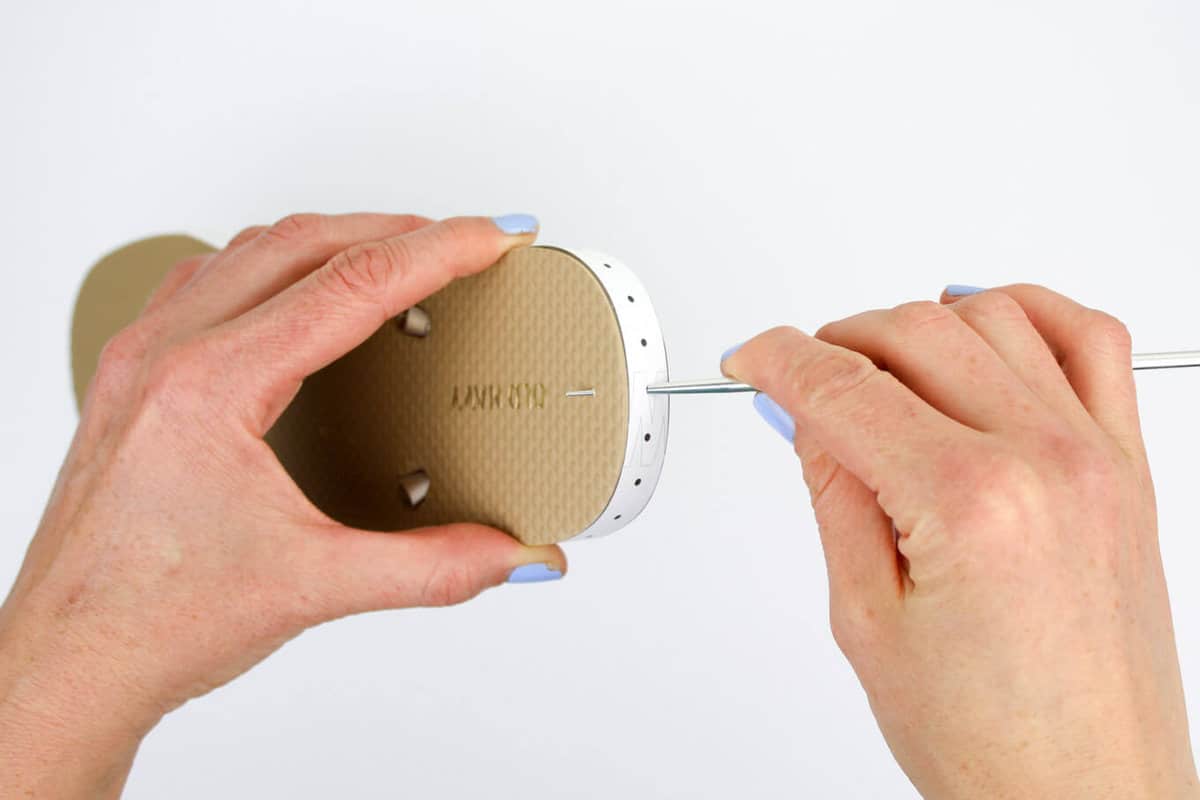
Print “ruler” on page 15 of printable pattern (optional). Trim, tape pieces together and tape ruler around flip flop sole. With your sharp instrument, poke holes in each dot on the ruler. (If you're not using the printable guide, poke holes slightly less than 1 cm apart.)
You want the hole to go at an angle from about the middle of the way down the sole to about .25” into the top of the sole. Ensure your holes are far enough from the edge so that the yarn won’t rip through the rubber when you create your first row of crochet. Reference the Breckenridge Boots video tutorial for help.
Using one strand of MC, tie slip knot around smaller hook. Insert hook at back of heel (6:00 position) from the top of the flip flop toward the bottom of the sole, grabbing the yarn and pulling through to the top of the flip flop and through the slip knot to attach the yarn to the flip flop. See photos below.
All sizes (make 2):
Foundation Round: Continuing with size B hook and single strand of MC, ch1, sc in each hole around sole, join with a sl st to first sc. Fasten off. You will work over yarn tails in the heel section of the pattern.
Place stitch markers at 11:00 and 1:00 positions with 8 stitches in between. Using larger hook and two strands of MC, make a slip knot on hook. Insert hook at the 11:00 marked st of Foundation Round (1:00 marked st for left-handed crocheters), yarn over and pull loop through slip knot to join yarn at toe. Begin Row 1 in next st between markers and work over the tail of yarn you just attached. See photo below.
Row 1 (RS): Ch 1, sc in next 8 sc; turn. (10)
Row 2 (WS): Ch 1, sc in next 8 sc, sc 2 on sole; turn. (10)
Row 3 (RS): Ch 1, sc2tog, sc in next 8 sc, sc 2 on sole; turn. (11)
✨Unlock this free subscriber-exclusive pattern ✨
Follow these steps to view the full free pattern below
Row 13 (RS): Ch 1, sc2tog, sc in next 18 sc, sc 2 on sole; turn. (21)
Row 14 (WS): Ch 1, sc2tog, sc in next 19 sc, sc 2 on sole; turn. (22)
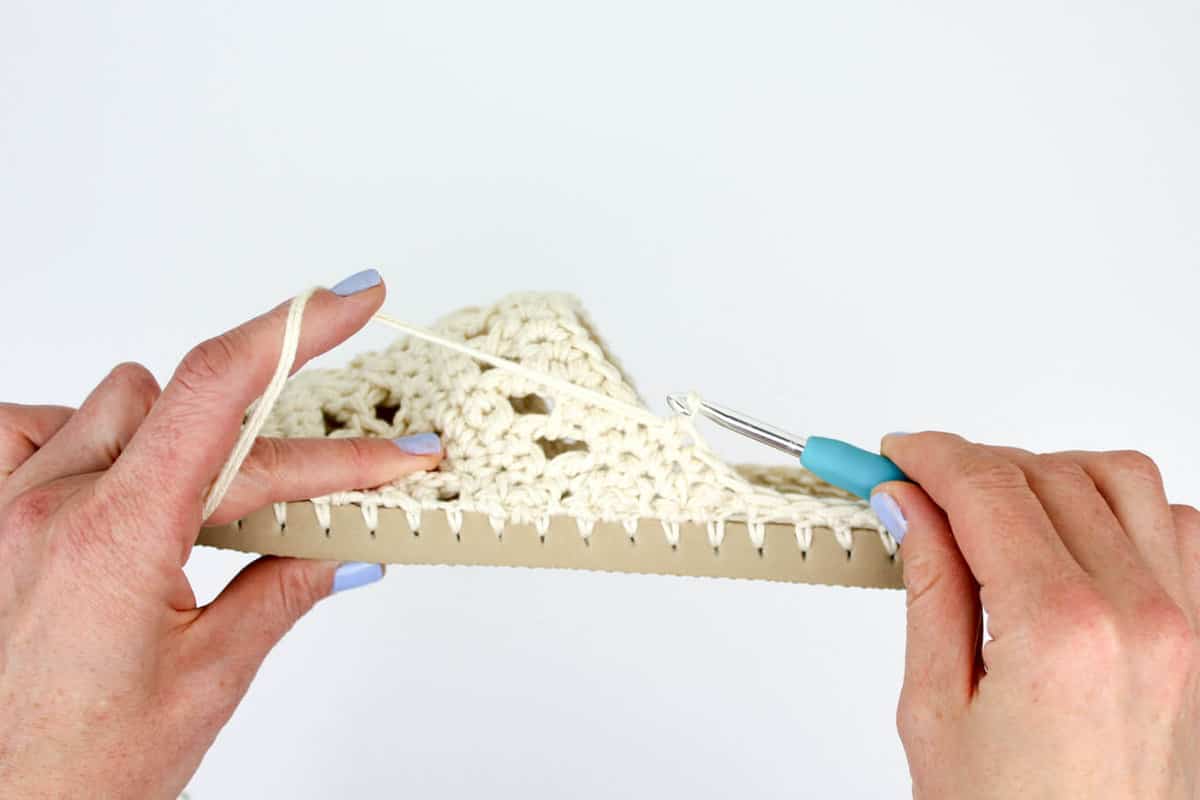
Note: The next round continues onto the sole and back around the heel, ending with a slight overlap of where it began. See photo above.(Yours will look slightly different because of the size you're making.)
Round 15 (RS): Ch 1, sc2tog, dc in next sc [ch 1, sk 1 sc, dc in next sc] 9 times, sc in next sc, continue onto sole working 1 sc in each sc of the foundation round crocheting over tails at 6:00 position as you go; sc in first sc of this round, sc in next dc, sc in next ch-1 sp; turn. (stitch count will vary based on number of holes in flip flop sole)
Do not fasten off. Move on to heel section.
SIZE 9-10:
Row 13 (RS): Ch 1, sc2tog, sc in next 18 sc, sc 2 on sole; turn. (21)
Row 14 (WS): Ch 1, sc2tog, sc in next 19 sc, sc 2 on sole; turn. (22)
Wanna save this pattern?
Row 15 (RS): Ch 1, sc2tog, dc in next sc [ch 1, sk 1 sc, dc in next sc] 9 times, sc in next sc, sc 2 on sole; turn. (23)
Row 16 (WS): Ch 1, sc2tog, sc in next 21 dc and ch-1 sps, sc 2 on sole; turn. (24)
Note: The next round continues onto the sole and back around the heel, ending with a slight overlap of where it began. See photo above.
Round 17 (RS): Ch 1, sc2tog, sc in next 22 sc; continue onto sole working 1 sc in each sc of the foundation round crocheting over tails at 6:00 position as you go; sc in first sc of this round, sc in next 2 sc; turn. (stitch count will vary based on number of holes in flip flop sole)
Do not fasten off. Move on to heel section.
Heel
Notes:
- The heel is worked back and forth in rows, beginning with a WS row. Left-handed crocheters, reverse mentions of “right” and “left."
- If working a size Medium, each dc or ch-1 sp from Row 15 of the previous section counts as one stitch. (Relevant when working up the sides of the foot top at the end of each row.)
Row 1 (WS): Ch 1, sc2tog, sc in each sc around heel to right side of foot top; sc in next 3 st of Round 13 (15, 17); turn. (stitch count will vary based on number of holes in flip flop sole)
Row 2 (RS): Ch 1, sc2tog, sc in each sc around heel to left side of foot top; sc in next 3 st of Round 13 (15, 17); turn.
Row 3 (WS): Repeat Row 1.
Row 4 (RS): Repeat Row 2.
Note: The next row is worked in a round, single crocheting in any remaining stitches from round 13 (15, 17) on the foot top . See photo below.
Round 5 (WS): Ch 1, sc2tog, sc in each sc around heel to right side of foot top; sc in any remaining sc of Round 13 (15, 17); sl st into first st of this round to join. Fasten off.
Ankle Shaft
Notes:
- This section is worked in rounds with RS always facing out. Sl st into first st of round to join each round. (Do not count sl st at end of each round as a stitch.)
- Place a marker in the first st of round if you find it helpful.
- Count your stitches around the ankle now. You’ll need 36 (40, 40) stitches at the end of Round 1. In Round 1, plan to work as many sc decreases (sc2tog) or sc increases (2 sc in one st) as necessary to meet the stitch count. Attempt to space them fairly evenly around Round 1.
- If you’re making a size S, but tend to have more muscular calves, you can work the size M/L ankle shaft by increasing until you have 40 st at the end of Round 1.
- Stitch count should remain consistent throughout.
- If you’re making a size M or L, but tend to have very thin calves, you can work the size S ankle shaft decreasing until you have 36 st at the end of Round 1.
Using larger hook and two strands of MC, make a slip knot on hook. Insert hook at 6:00 position of Round 5, yarn over and pull loop through slip knot to join yarn at back of heel. Crochet over these yarn tails as you work Round 1.
Round 1: Ch 1, sc in each sc increasing or decreasing as necessary to achieve 36 (40, 40) stitches, sl st to join. (36, 40, 40)
Continue with the shaft according to the shoe size you’re making.
SMALL:
Round 2: Ch 4 (counts as 1 dc and 1 ch), *sk 1 sc, dc in next sc, ch 1; repeat from * to end of round leaving last st of round unworked; sl st into third ch from beginning of round. (36)
Round 3: Ch 1, sc 2 in first ch-1 sp, 1 sc in each dc and ch-1 sp around; sl st to join.
Round 4: Ch 1, sc in each sc, sl st to join.
Round 5: Ch 3, sk 2 sc, [(2 dc, ch 1, 2 dc) in next sc, sk 4 sc] 7 times; sk 2 sc, dc in last sc, sl st to join.
Round 6: Ch 3, [(2dc, ch 1, 2 dc) in next ch-1 sp] 7 times, sk 2 sc, dc in last dc, sl st to join.
Round 7: Ch 1, sc in first dc, sc in each dc and ch-1 sp around, sl st to join.
Round 8: Ch 1, sc in each sc around, sl st to join.
Rounds 9-22: Repeat Rounds 2-8 twice more.
Rounds 23-27: Repeat rounds 2-6.
Fasten off and weave in ends.
MEDIUM/LARGE:
Round 2: Ch 4 (counts as 1 dc and 1 ch), *sk 1 sc, dc in next sc, ch 1; repeat from * to end of round leaving last st of round unworked; sl st into third ch from beginning of round. (40)
Round 3: Ch 1, sc 2 in first ch-1 sp, 1 sc in each dc and ch-1 sp around; sl st to join.
Round 4: Ch 1, sc in each sc, sl st to join.
Round 5: Ch 3, sk 2 sc, [(2 dc, ch 1, 2 dc) in next sc, sk 4 sc] 8 times; sk 2 sc, sl st to join.
Round 6: Ch 3, [(2dc, ch 1, 2 dc) in next ch-1 sp] 8 times, sl st to join.
Round 7: Ch 1, sc in first dc, sc in each dc and ch-1 sp, sl st to join.
Round 8: Ch 1, sc in each sc around, sl st to join.
Rounds 9-22: Repeat Rounds 2-8 twice more.
Rounds 23-27: Repeat rounds 2-6.
Fasten off and weave in ends.


Finishing
Plugging Flip Flop Holes: If you plan to wear your boots outside, replace the small rubber circle that connected your flip flop straps to the sole between your toes. Glue it in place. In my experience, the other two mid-foot strap plugs stay in place without glue as long as they’re cut at an angle like in the photo at the top of the pattern.
Fancy Feet: Grab your favorite cutoffs and flower crown—you are going to be the belle of the bohemian ball!

That was so fun! Now what?
Invitation to our Facebook group
Come discuss crocheting boots patterns and lots of other crochet projects and techniques in our Make & Do Crew Facebook group. Here thousands of helpful crocheters answer each others questions and share their stitches. Come join us here.
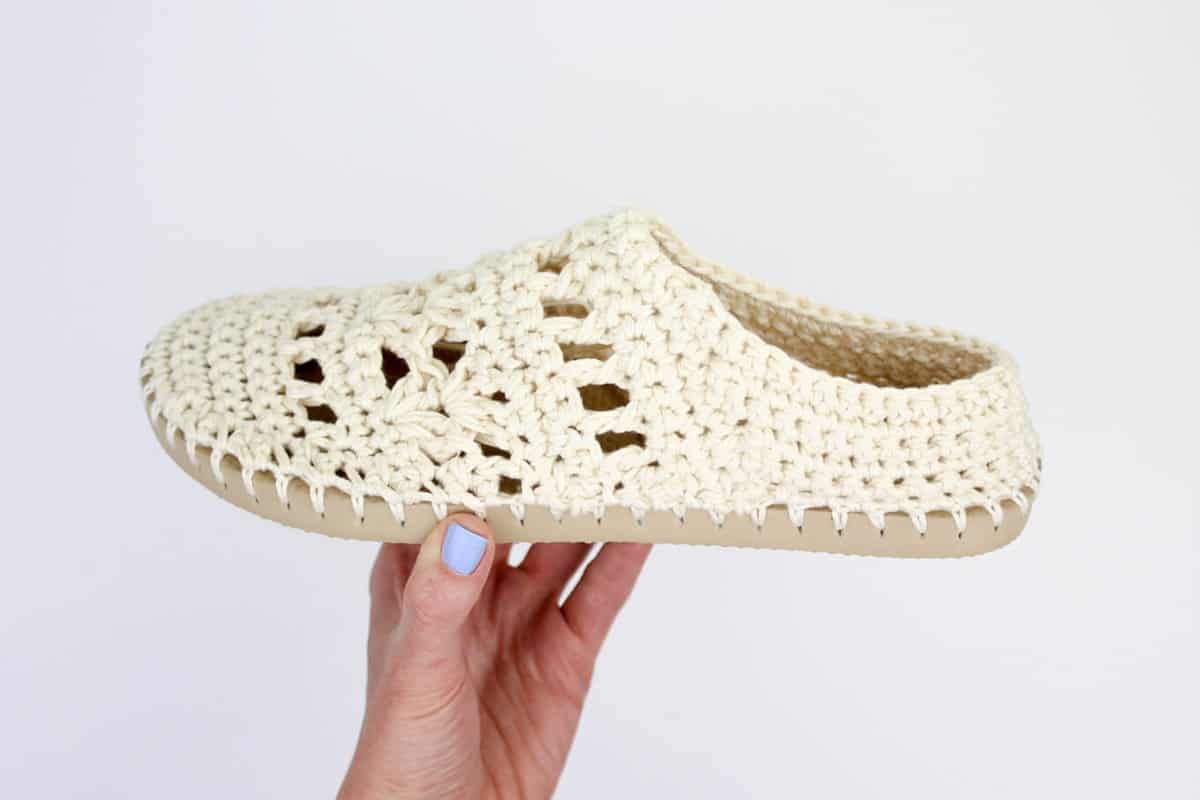
More Free Crochet Patterns Using Flip Flop Soles
- FAQS: How to Crochet on Flip Flops - and will they fall apart?
- Crochet Boots With Flip Flops Soles
- Lightweight Crochet Slippers with Flip Flop Soles
- Free Crochet Ugg Boot Pattern
- Crochet Slip On Shoes Pattern
- Crochet Mukluk Slipper Pattern
- Crochet Slipper Boots Pattern
- Lacy Crochet Sandals Pattern
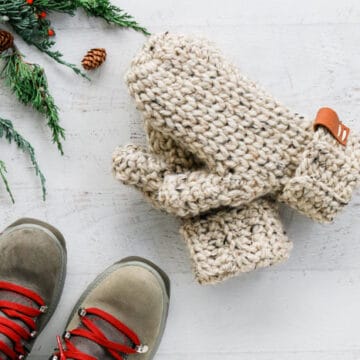
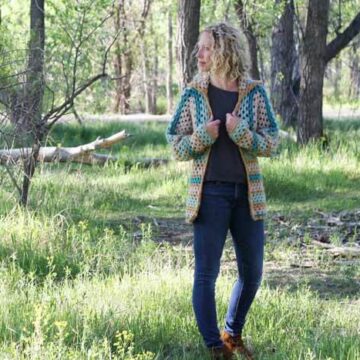
If you like the boho crochet and knit look, you'll love these free patterns too!
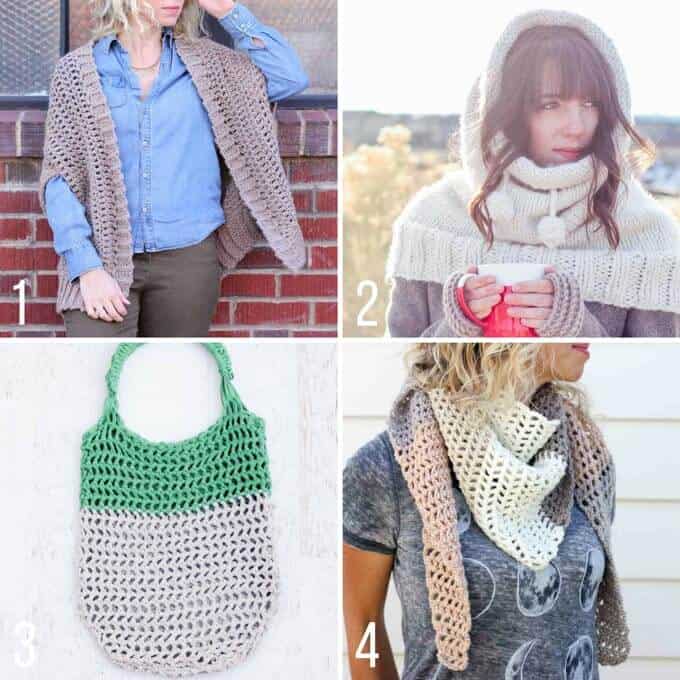
1. Crochet Cocoon Cardigan (made from two simple rectangles!)
2. The Knit Huggle Hooded Cowl
3. Finger Crochet Market Tote Bag (video tutorial!)
4. Crochet Desert Winds Triangle Scarf
Dawn Colbert says
I bought the kit from Lion Brand yarn and did not receive the hole poking guide. Would be nice if it were added into the kit.
Jess @ Make and Do Crew says
Hey Maria!
I'm sorry--I think the knit mitts must be an old pattern because I can't remember what you're referring to! 🙂 Please feel free to share the link here and I'll let you know if I have anything similar.
Regarding the pattern PDFs--they should all be on Love Crochet with the exception of the Taos Slipper Boots. (With those I was just experimenting with using Craftsy for sales and haven't gotten them switched over to Love Crochet yet.)
If you'd like to buy them directly from me, you can do so with PayPal. Please just send me an email at Jess@makeanddocrew.com and put "I want to buy patterns!" in the subject line. 🙂
Thanks,
Jess
Lisa says
My 13 year old daughter loves these boots but she wears a size 12 shoe (she is super tall). We can never find cute shoes in her size, so I'd really like to make these for her. I'm overwhelmed with the thought of trying to adapt your pattern to a larger size. Any guidance you can give me would be greatly appreciated!!!
Jess @ Make and Do Crew says
Hey Lisa,
This should actually be pretty easy to adapt! Since the number of holes always varies based on the flip flop size anyhow, just follow all the instructions as written in the pattern for the largest size to begin. Then I think you could repeat this row twice to add approx the appropriate amount of length to the toe section.
Row 16 (WS): Ch 1, sc2tog, sc in next 21 dc and ch-1 sps, sc 2 on sole; turn. (24)
If your daughter has fairly average sized calves, everything else about the ankle should work as written for the largest size. If you give that a try and have questions, just let me know!
Jess
Sara says
Your projects arelated so beautiful and amazing, but I find them so hard to follow. I normally follow patterns from Yarnspirations or crochetcrowd and rarely have to watch video, I like written instructions best, and try to avoid videos. Some reason though your wonderful projects are harder for me to follow and I end up winging a lot, which will give me two different boots ?
Jess @ Make and Do Crew says
Hey Sara,
Thanks a lot for the feedback! I'm always trying to make my patterns clearer and easier to understand, so if there's ever a specific aspect that trips you up, feel free to let me know so I can take a look at clarifying it. Are there any other patterns of mine that have you've found challenging to sort through?
I do think that my specifically my flip flop crochet patterns tend to differ a bit from something from Yarnspirations, etc. because I try to offer a sort of "education" on how to customize them so that crocheters can make something that works well for their specific feet. I realize though, that for dedicated pattern readers, this could be too much information and detract from the essentials of the pattern. I really appreciate hearing what your experience with them has been.
Jess
Sara Mullaney says
Actually I just finished thus set, I purchased the instructions, for an easier read, and both boots came out beautiful! The one I had the hard time following was the wool winter boots, but now that I've tackled these no problem I think that I may revisit the wool boots again. After doing this pattern with no trouble, I think it was more of a me problem than a your direction problem. Part of what tripped me up with the wool boots was the video, I'd keep referencing back to it and seeing mine looking different than yours.
I noticed part way thru the wool boot design too that if you stopped at one point you'd have a perfect slide on slipper, I'm sure you noticed whole making yours. How about a soft slide on slipper patten? I'd love to see one!
Oh and thank you for the patterns, they're so cool, so creative and just so awesome!
Jess @ Make and Do Crew says
Thank you, Sara, for such a kind note and for telling me about how you've used my patterns! I love hearing that you expanded your skills and figured something tricky out--isn't that the best feeling?
I totally agree! I think the foundation of this pattern could make a wonderful slide-on house slipper. That could be a great pattern for the fall. Thanks for the idea and for following along with Make & Do Crew!
xx
Jess
romain says
Hi Jess,
I know barely nothing about crochet, knitting and all this stuff .. but so far i've managed to translate some patterns.
I'm trying to translate your pattern for the COACHELLA BOOTS and i have some trouble :
my problem is that i dont get the number of stitches ....
for the 1st row, if i'm correct, the slip knot count as stitch right ?
and for the second row you count 10 stitches and for me 1 ch, 8 MS plus 2 MS on the sole = 11 stitches .. i dont want to mess the pattern so please can you lend me your help ?
Kathy says
Hi, I just love your patterns!! I have been using the Cream and Sugar cotton yarn brand. My local stores don't carry the Lyon Brand. Comparing the pictures of your shoes to what I have made, it looks like the yarn I use is somewhat thicker. Just wondering if I'm using a thicker yarn, should I just go with one strand of yarn instead to the two as stated this pattern? I would also lie to add my request for a video of this pattern. I find the videos really are helpful. Thank you for sharing your wonderful talent!
Jess @ Make and Do Crew says
Hey Kathy,
Hmm. I'm not exactly sure about this. My guess would be to say use one strand because two might just be too bulky. I'd go with one and see how it's going after the first 10 or so rows. (That first toe section is intended to be tight because it'll stretch a bit with wear.) If it looks or feels REALLY tight though, you might want to size up your hook to get a similar gauge as what I had with two strands of 24/7 Cotton.
Hope that makes sense. Good luck and happy crocheting!
Jess
Kathy says
Thank you, Jess. You are right. I tried using two strands, but it was rather bulky, so I redid it with one strand. It looks much better, but as you stated it's a bit tight. I will try using a larger hook for the next pair. The yarn I used was a variegated light turquoise/green/blue combination. They turned out so great. I have also made two pair of the slippers with this yarn and I love them. I love the variegated yarns and one of the slippers is made from the red, white and blue yarn. Perfect for the summer holidays..
Kathy says
My local stores don't have the Lyon brand of cotton yarn, they only carry the Sugar and Cream brand. It's the one most people use to make dishcloths from. It looks like it's thicker than the Lyon brand, if this is so, should I only be using one strand of the thicker yarn instead of two as the pattern calls for/
Sam says
Just thought of something...should I be skipping 4 stitches again and basically doing a row 11 again for row 12? That's what the picture looks like to me...with the 4 dc ending up in the middle of the previous row...
Jess @ Make and Do Crew says
Yes, you're essentially doing a row 11 again. It just needed to be a separate, spelled out row in the pattern because you're working into a row of clusters and not the row of sc in row 10. 🙂
Sam says
Hi! I love all the patterns! So far, I've made the cabin boots, Breckinridge boots, and the lightweight crochet slippers. There was a confusing spot in the Breckinridge boots that was hard to read, and the video was a very nice help, as it went differently then the written words (I think someone else commented, and noticed there was a mistake) It would be nice to see a video for the Coachella boots! They have been the hardest to make of any of the patterns, I have found some spots truly confusing. I'm on the first Coachella boot right now, just starting row 12. It says this:
Row 12 (WS): Ch 1, sc2tog, dc in next sc, [(2 dc, ch 1, 2 dc) in next ch-1 sp] 3 times, sk 2 st, sc in next sc, sc 2 on sole; turn. (20)
For the part that is double bracketed, is it supposed to be done in the next stitch AFTER the first dc? Or in the same stitch as the dc? I kind of had to guess my way through Row 11 as well...though I did find it was worded a bit better. I'm trying to look at the picture, and see if it's turning out the same way...just frustrating to rip out a row a couple of times...im using a different yarn too, as I couldn't find any 24/7 at any stores in my town. Any help would be much appreciated, thank you!!! ?
Jess @ Make and Do Crew says
Hey Sam,
I'm glad to hear you've gotten some use out of my patterns! The video tutorials are super time intensive (usually 30-40 hours to create), but I really wish I could make one for every pattern!
I think I understand your question...let's see if I do. 🙂 The (2 dc, ch 1, 2 dc) should all be done in its own stitch/space, which is the ch-1 sp. Essentially, you're working (2 dc, ch 1, 2 dc) in each of the ch-1 spaces from row 11.
Does that make sense? 🙂
I'm curious to hear how your alternative yarn works out. It would be great to know for other reader too.
Jess
Courtney says
Would other types of worsted weight cotton work for making these boots? I bought 4 pairs of flip flops yesterday to make these boots and some of your other patterns (EXCITED!!!) Lion Brand 24/7 is not available in store at any of my local craft stores, although I discovered it on walmart.com and it might be in store. A.C. Moore had a great deal of 10 for $10 on the cotton yarn, and the colors match the flip flops really well. I just want to make sure a cotton or cotton blend that is not mercerized will work before beginning.
Thanks for the awesome patterns and tutorials. I'm excited to begin poking holes in some flip flops!
Jess @ Make and Do Crew says
Hey Courtney!
I'm sorry it's taken me a while to find your buried comment! The 24/7 Cotton is a pretty thin worsted weight yarn (I'd say it's more like a DK), so I'm guessing your worsted weight cotton is thicker. I'd try making the boots with one strand and just see how it's working after 10-15 rows. (The toe is intended to be tight because it'll stretch a little with wear, but if it's super tight, you might want to size up your hook a bit to achieve my gauge.)
Mercerized isn't mandatory either, it just makes them a little sturdier. I'm guessing the cotton you got though on the 10/$10 yarn is pretty sturdy too.
I hope that's helpful. Have fun!
Jess
Donna webb says
I have ordered the pattern and yarn through Lion Brand and as stated above the ruler is not included.
Can you please email me the ruler so I can start on this project?
Jess @ Make and Do Crew says
Hey Donna,
I'm sorry your kit didn't include the ruler. It should have. I just emailed it to you! 🙂
Jess
Stephanie says
Hi Jess... am wondering about how these stretch out over time. Can you add a little elastic to the tops? Or are there certain yarns that may help them retain their shape over time?
Jess @ Make and Do Crew says
Hey Stephanie!
I actually find that this 24/7 Cotton holds its shape really well because it's mercerized. It's just a little less stretchy than other cottons. Also, the pattern is intended to be a little tight on your feet at first to accommodate a bit of stretch with wear. I have also heard of people washing the flip flop crochet shoes they've made to clean them and tighten them up again.
I hope all those thoughts are helpful! 🙂
Jess