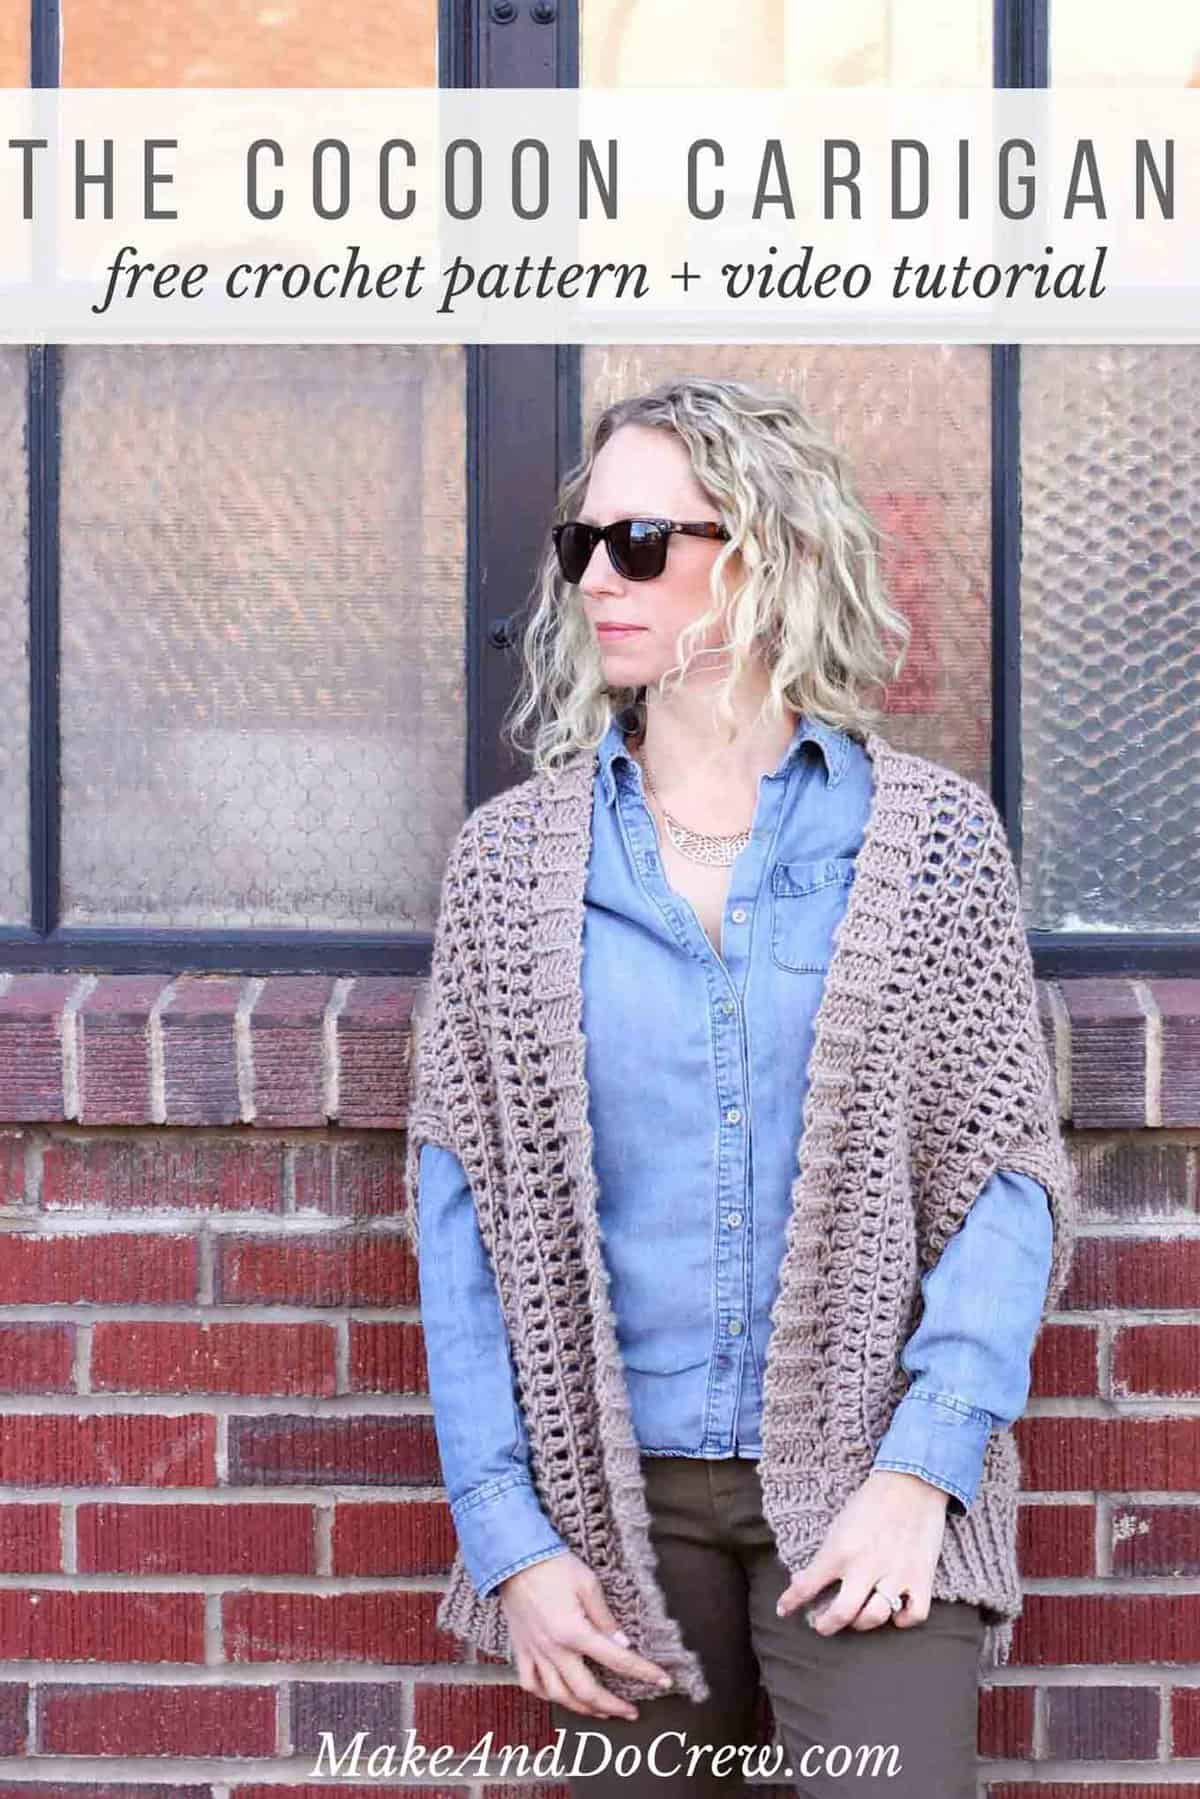
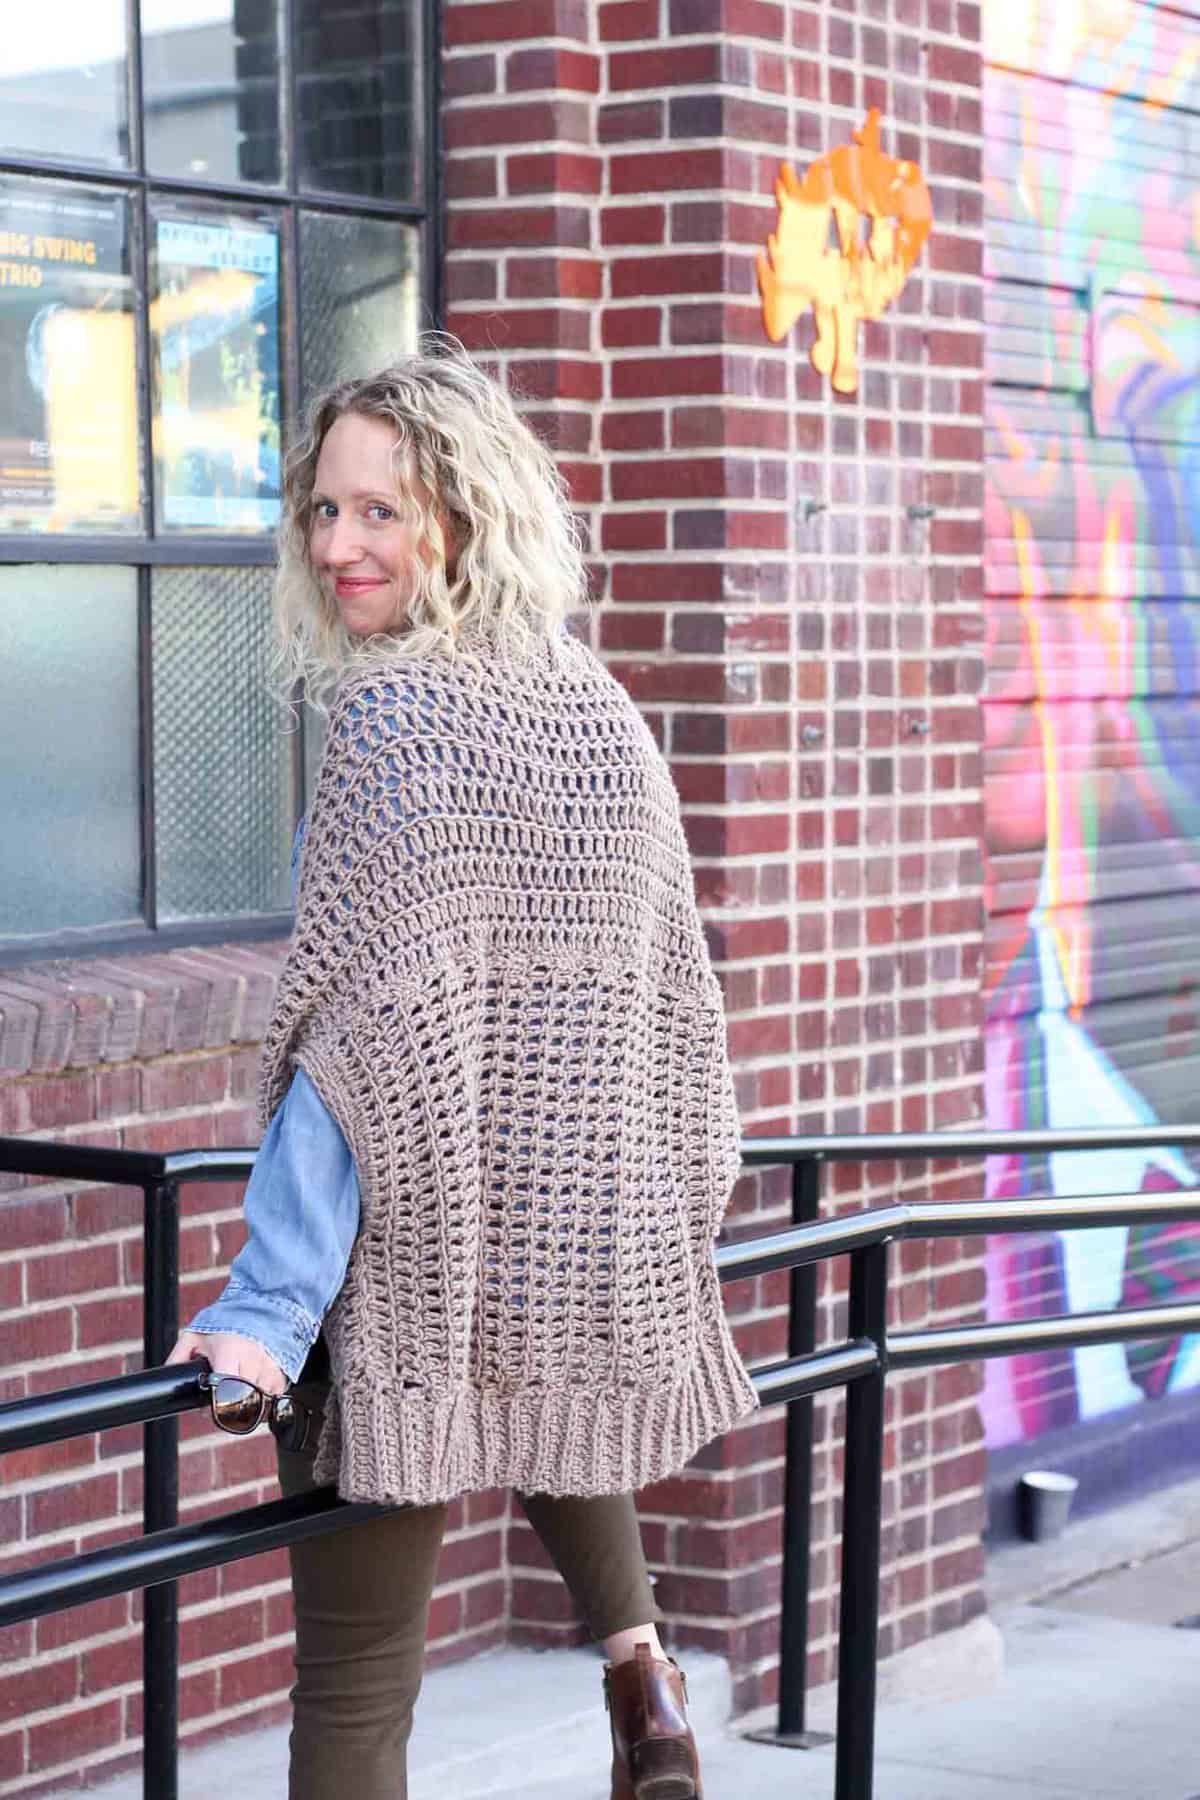
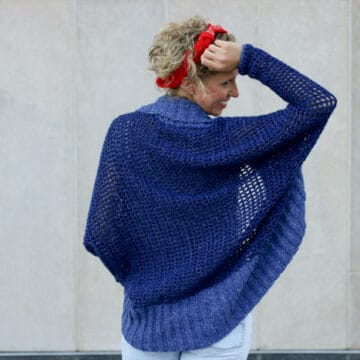
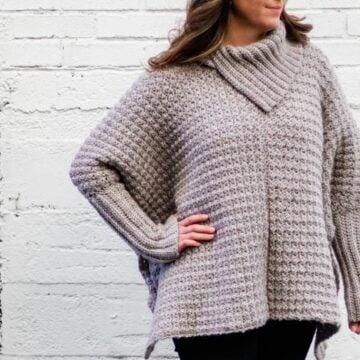
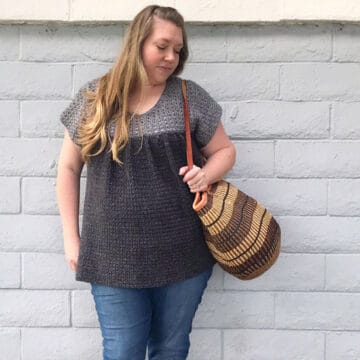
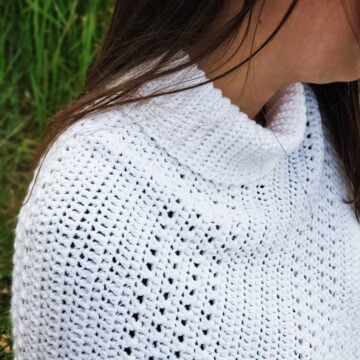
You'd never guess by looking at this sweater that it's made from two simple rectangles! The "Cocoon Cardigan" free crochet pattern is great for beginners who are looking to expand their skills or advanced crocheters who want a quick, stylish project. As always the free pattern is below or you can purchase the printable, ad-free PDF here.
 This beginner crochet sweater pattern is a collaboration with my friends at Lion Brand Yarn. This post contains affiliate links.
Is there anything that you think you're just intellectually incapable of doing? Like, you just couldn't do enough brain yoga to attain a certain skill or achieve a desired result?
I'll give you some of mine: designing a decent looking and functional spreadsheet, cleaning up one project before starting another and designing a crochet sweater.
 Well, I haven't made a spreadsheet (even an ugly one), I'm still sitting amidst a dozen 97% finished projects, but I HAVE designed a crochet sweater!
I was just always so intimidated by figuring out the mechanics of a sweater. Sleeves? Drape? Sizing? Ugh. Where do you even begin?
With two rectangles that's where. I'm so excited about this "Cocoon Cardigan" free crochet pattern because it's literally made from two super basic shapes. If you can crochet a scarf, I think I can teach you how to make this simple sweater pattern.
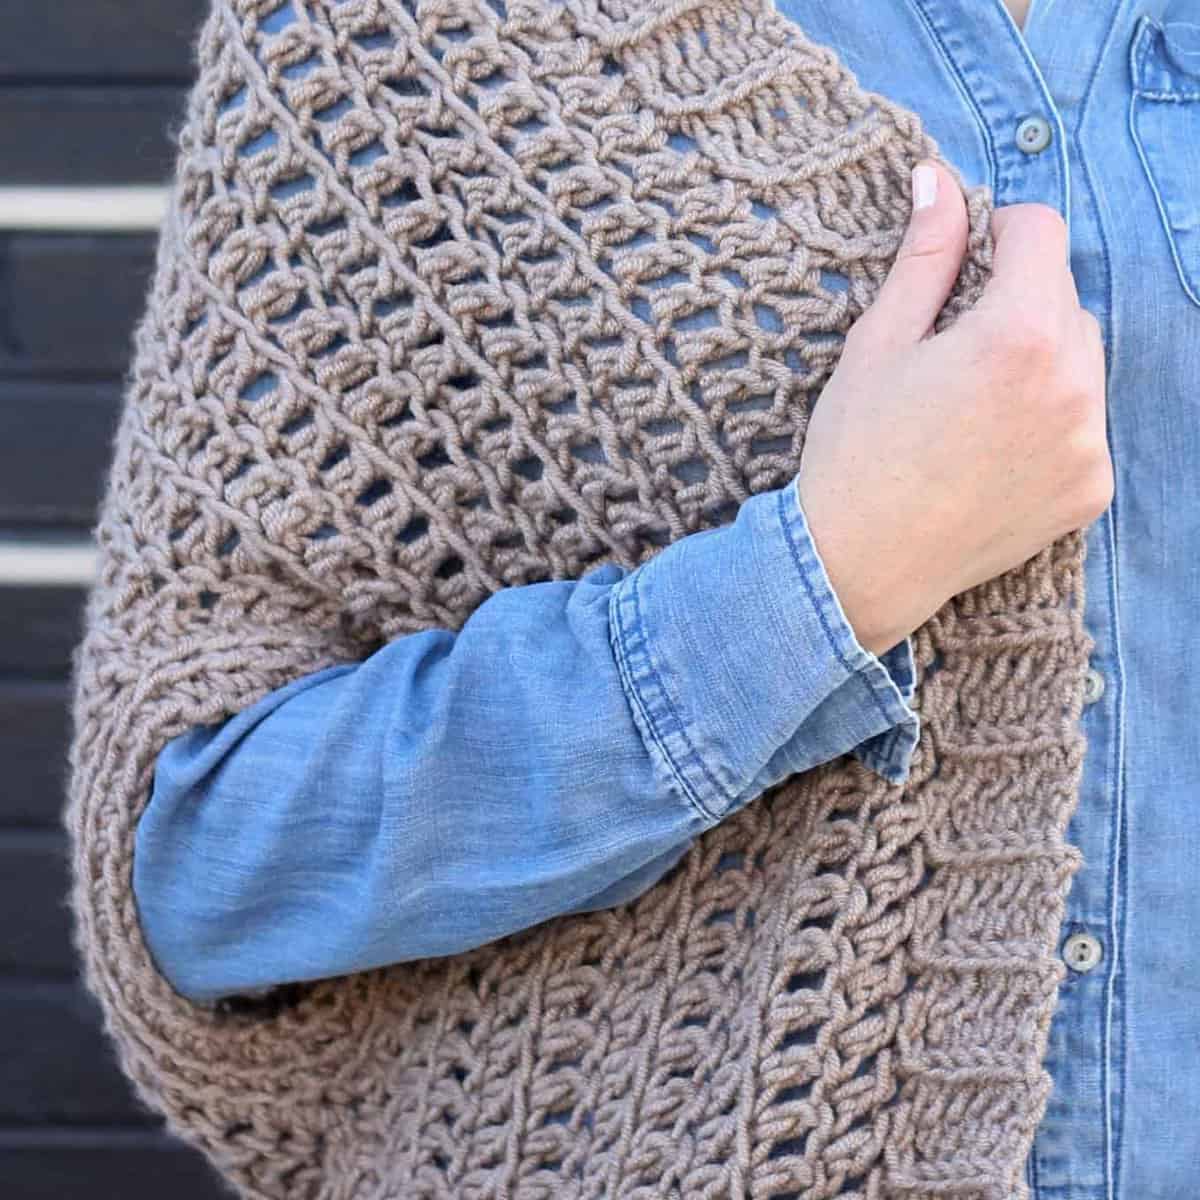
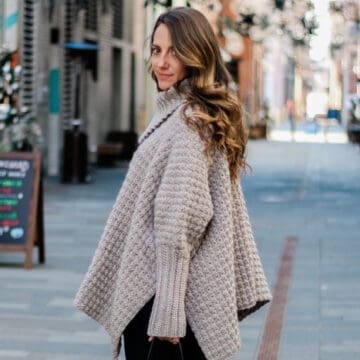
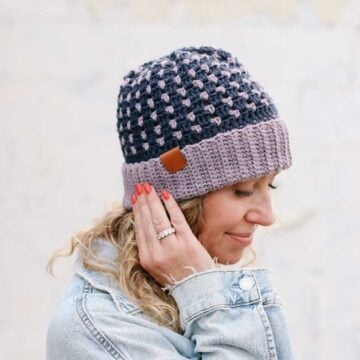
 For this "Cocoon Cardigan" free crochet pattern, I used Lion's Pride Woolspun yarn. (Remember this Faux Cabled Bun Beanie or the fingerless mitts project in my Modern Crochet 101 course, both made with Woolspun? Clearly I love this yarn!) The reason I chose Woolspun yarn for this project is because it's surprisingly light for how nice and chunky it is. The result is a quick cardigan project that has beautiful drape and almost a certain "bounce" from the light, yet substantial, yarn.
UPDATE: Lion Brand has created a kit that includes all the yarn you need to make this cardigan as well as a copy of the printable pattern. You can score the kit for 20% off through March 14, 2017! Check out the Cocoon Cardigan kit here.
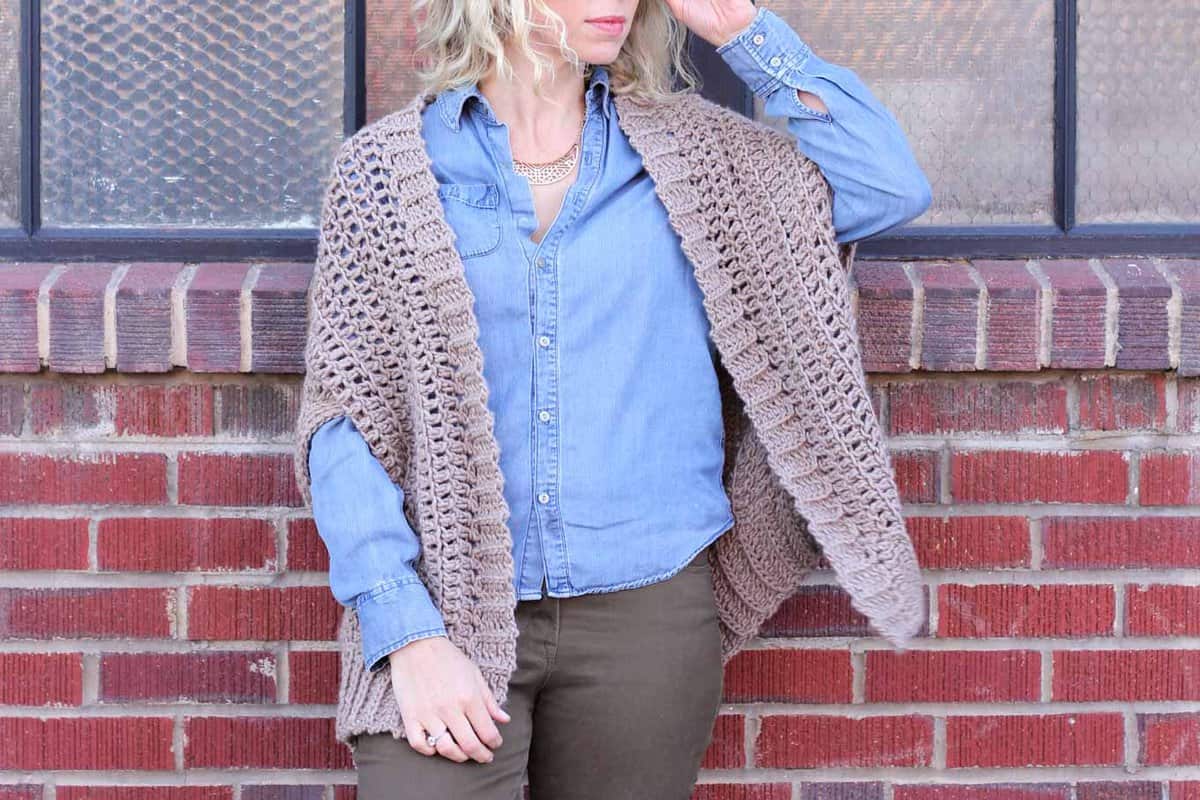
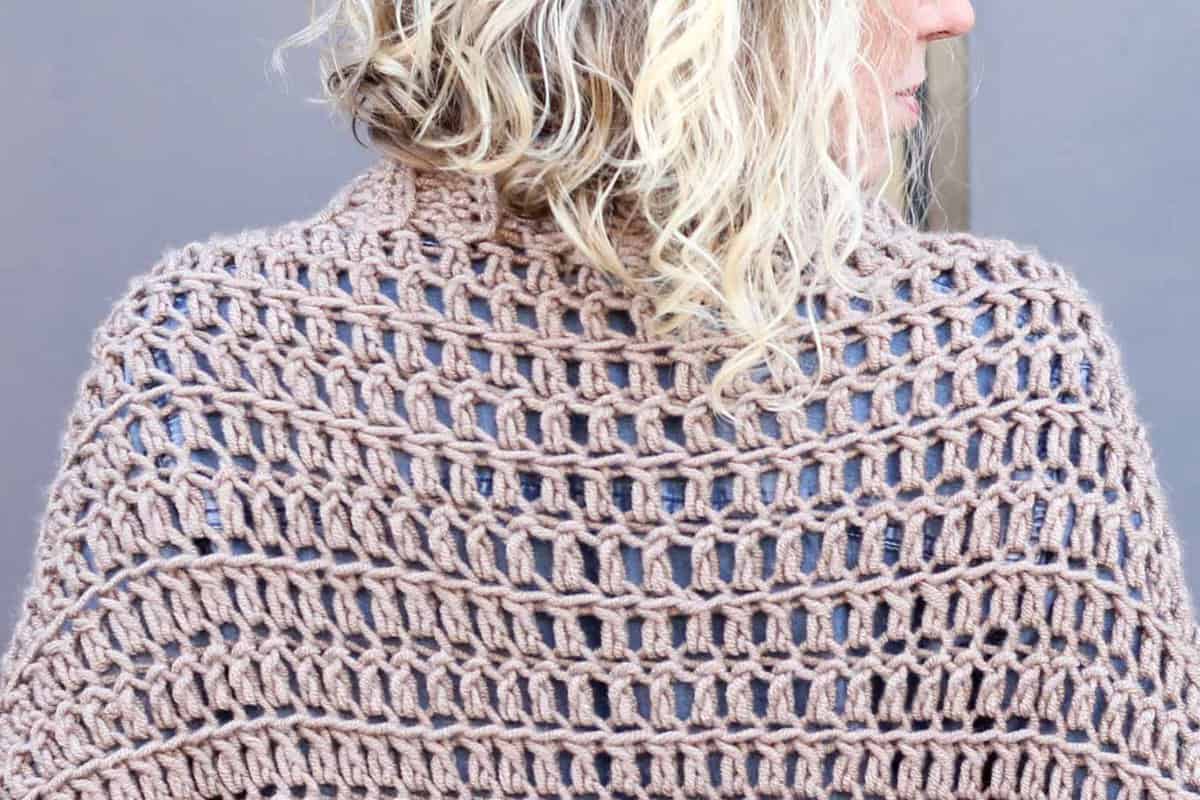
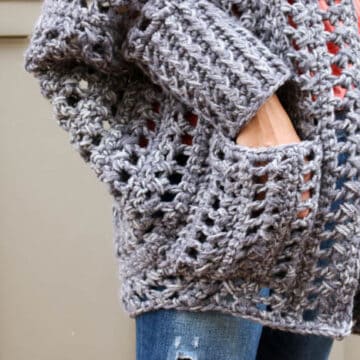
 I love that I can roll this cardigan up and carry it in my purse for if I get cold at a restaurant, movie or let's be honest, anywhere I ever go because I always seem to be cold. The "Cocoon Cardigan" free crochet pattern is quite like it sounds--a cozy cocoon to wrap up in on a chilly day.
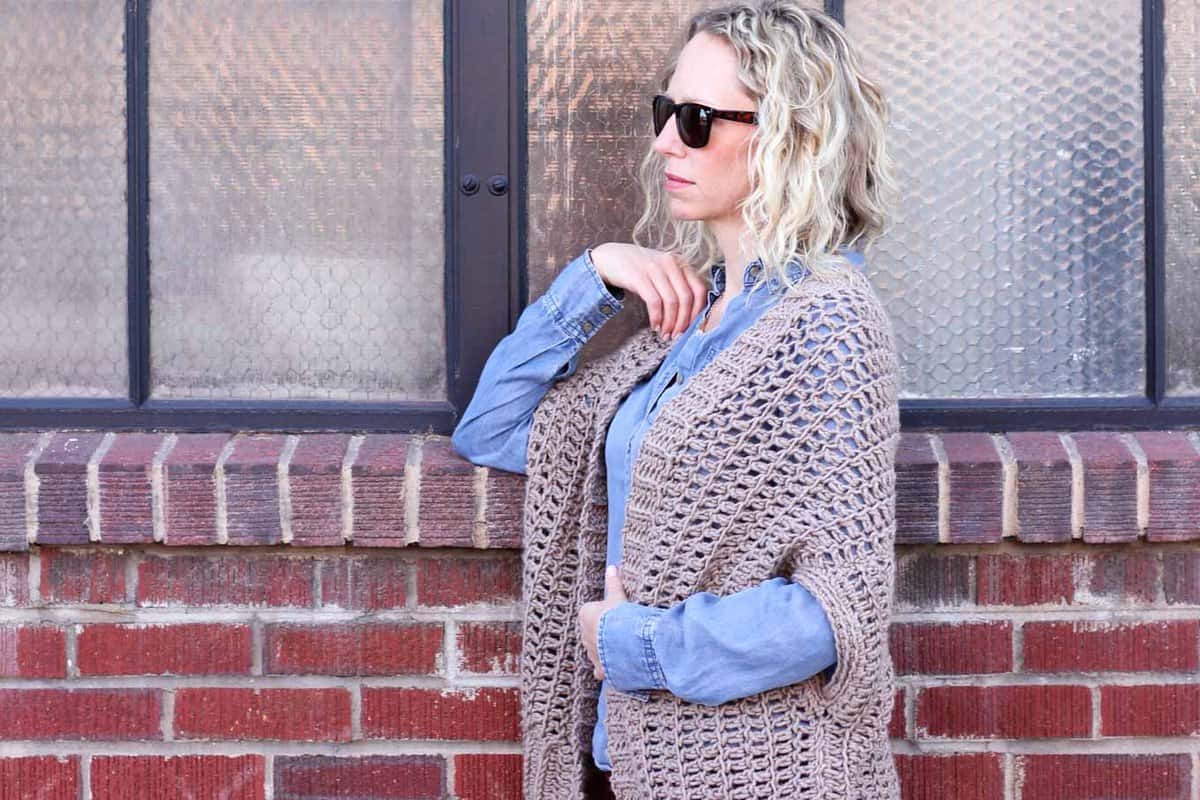
 (This is apparently the face I make when trying to teach my husband how to use the "fancy" camera while also looking like a natural "model," which feels extremely unnatural for me.)
 This cardigan free crochet pattern and tutorial includes a lot of photos. It's always my goal to include enough information for a newer crocheter to be able to successfully dive into my projects. To this end, I put together a quick tutorial below on how to work the ribbing on this sweater pattern. I definitely recommend taking a gander at it as it's so much easier to comprehend some of this fairly straightforward techniques in video than in writing.
And of course, if you'd like this crochet cardigan pattern in one nice, tidy printable package, you can always purchase the downloadable PDF here. (All of the helpful photos are grouped at the back of the pattern so you can choose to print them or conserve ink.)
 Please do not publish or share this pattern as your own. You may make items to sell or donate with this pattern. In exchange, please link back to this post and credit me as the designer. You can view all my policies here. Do NOT use my photos as your own sales photos. Now go make something awesome!
Thanks to Lion Brand Yarn for sponsoring this post and enabling more free patterns on Make & Do Crew. All opinions and ideas are my own.
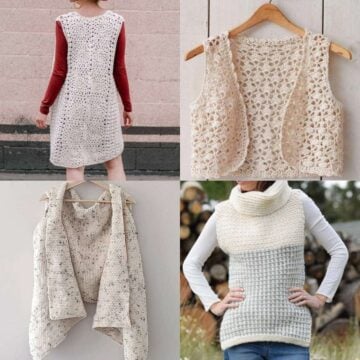
More Free Crochet Sweater Patterns
Crochet sweater patterns don't need to be difficult. In fact, most of ours are made with very simple shapes. Dive into the wonderful world of crochet garments with cardigans, pullovers, ponchos, shrugs and more!


See more free crochet sweater patterns →
The Cocoon Cardigan Free Crochet Pattern
Purchase the ad-free, printable PDF here.
Add this pattern to your Ravelry favorites or queue here.
Sizes + Measurements:
One size fits most adult women. The draped nature of this cardigan accommodates a wide range of body sizes.
Laying flat, the blocked measurements are as follows:
Height - collar to bottom ribbing: Approx. 31"
Width - left armhole to right armhole: Approx. 24"
To adjust the pattern size, reduce or increase the width (the number of rows worked) of the top rectangle by the same number of inches as you increase or decrease the length (the number of stitches in one row) of the bottom rectangle. (See photo E.)
Supplies:
So you can spend more time crocheting and less time shopping, this pattern contains affiliate links at no extra cost to you.
• (5) Lion Brand Lion’s Pride Woolspun in “Taupe” - approx. 635 yards/500 g (purchase the kit here!)
• Tapestry needle
• Size N [10.0 mm] crochet hook
• Size L [8.0 mm] crochet hook
• Scissors
• Iron for blocking
• T-pins for blocking
Gauge:
• Sweater after blocking: 7 dc = 4”, 4.5 rows = 4”
• Ribbing: 6 hdc = 2”, 4 rows = 2”
Abbreviations (US Terms):
sc – single crochet
dc – double crochet
scblo – single crochet through the back loop only
ch – chain
hdc – half double crochet
dcflo – double crochet through the front loop only
st – stitch
tch – turning chain
sl st – slip stitch
sk – skip
yo – yarn over
tch – turning chain
Notes:
• Cardigan is worked in two large rectangles that are joined and then finished with ribbing.
• When attaching yarn to work a new section of the sweater, my preference is to use a slip knot. To do this, make a slip knot and insert your hook. Then insert your hook in sweater where yarn will be attached. Yo and pull loop through slip knot on hook. Tighten slip knot.
Bottom Sweater Panel
Notes:
• After row 1, the double crochets are all worked into the front loop of the previous row of stitches.
• Beginning in row 2, instead of chaining 3 at the beginning of each row, you’ll be working two single crochet on top of each other. This minimizes the gap usually created by the chains in a row of double crochet. See photo below this section for a tutorial in how to do this technique.
(Make one.)
Using larger hook, Ch 28.
Row 1: Sk first 3 dc (counts as 1 dc), dc in each ch; turn. (25 dc)
Row 2: Sc in front loop of first dc, sc in front post of the previous sc (counts as 1 dc), dcflo in each remaining dc, turn. (25 dc) (See photo A for help.)
Repeat row 2 until piece measures 27.5” (approx. 25 rows). Fasten off.
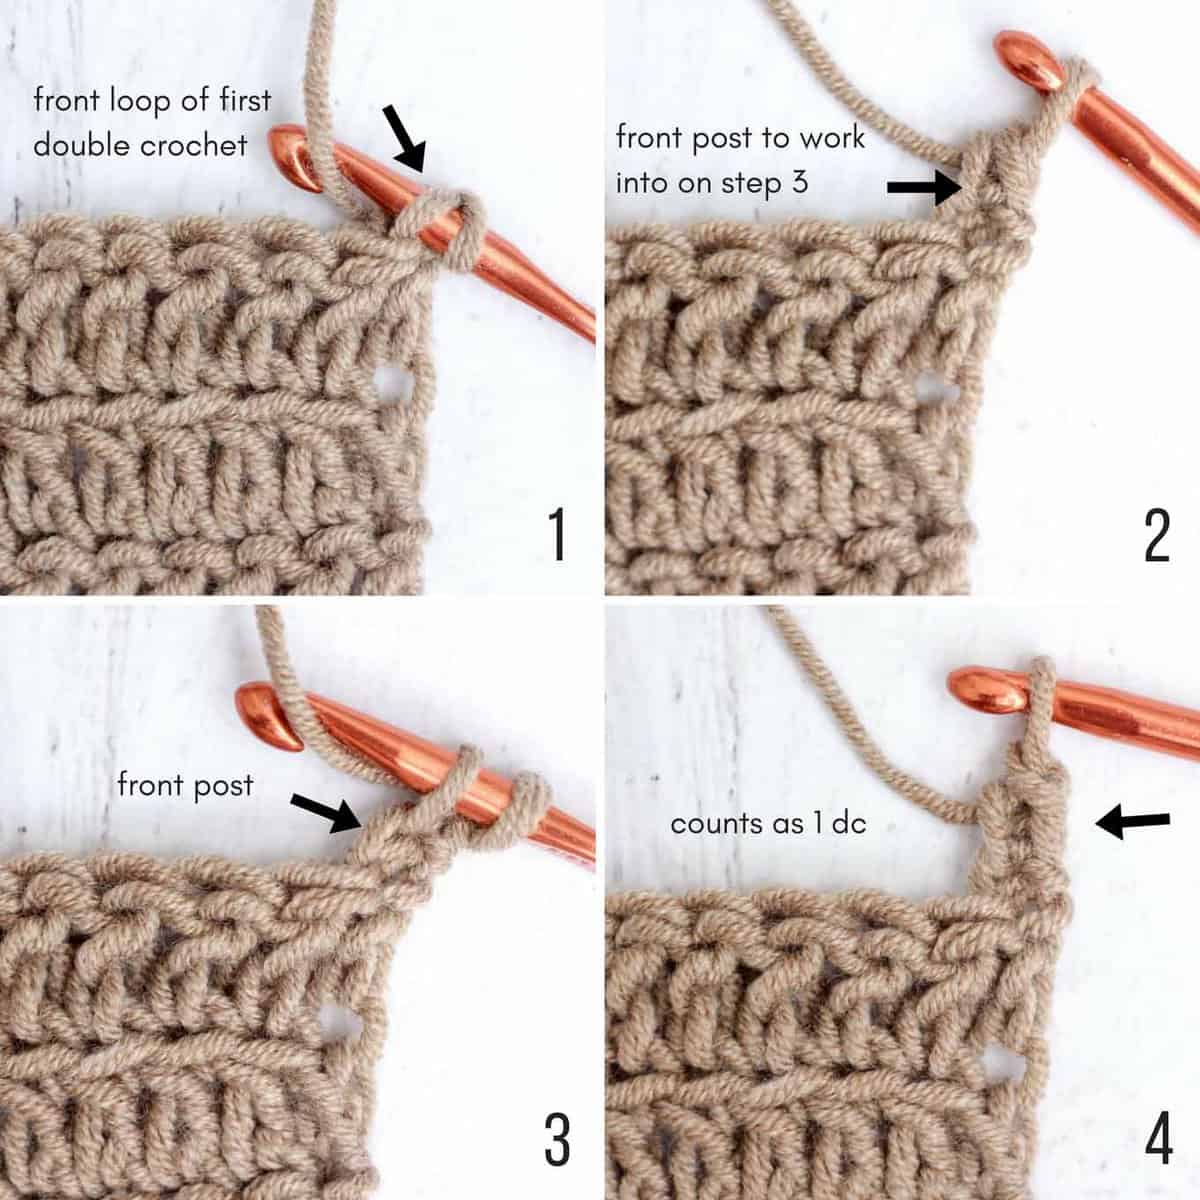 Technique for avoiding gap in turning chain for double crochet stitches:
1. (Do not chain.) Insert hook in front loop of first double crochet.
2. Complete normal single crochet.
3. Insert hook under front post of single crochet from step 2.
4. Complete normal single crochet.
(The resulting double decker single crochet counts as one dc.)

Top Sweater Panel
(Make one.)
Using larger hook, Ch 103.
Row 1: Sk first 3 dc (counts as 1 dc), dc in each ch; turn. (100 dc)
Row 2: Sc in front loop of first dc, sc in front post of the previous sc (counts as 1 dc), dcflo in each remaining dc, turn. (100)
Rows 3-10: Repeat row 2.
Fasten off.
Blocking Both Panels
Pin and block the sweater panels to the following measurements. (This step is essential to getting the correct sizing and drape for your sweater.)
Top Panel: 55”x11”
Bottom Panel: 26”x14”
Wanna save this pattern?
If you’re using Lion’s Pride Woolspun yarn for this (or any yarn with an acrylic component), you can block your pieces by spritzing them with the steam of an iron from about 5” away. Be cautious not to get the steam super close to the yarn or touch the iron to the yarn because this will “kill” the acrylic and change the texture of the yarn.
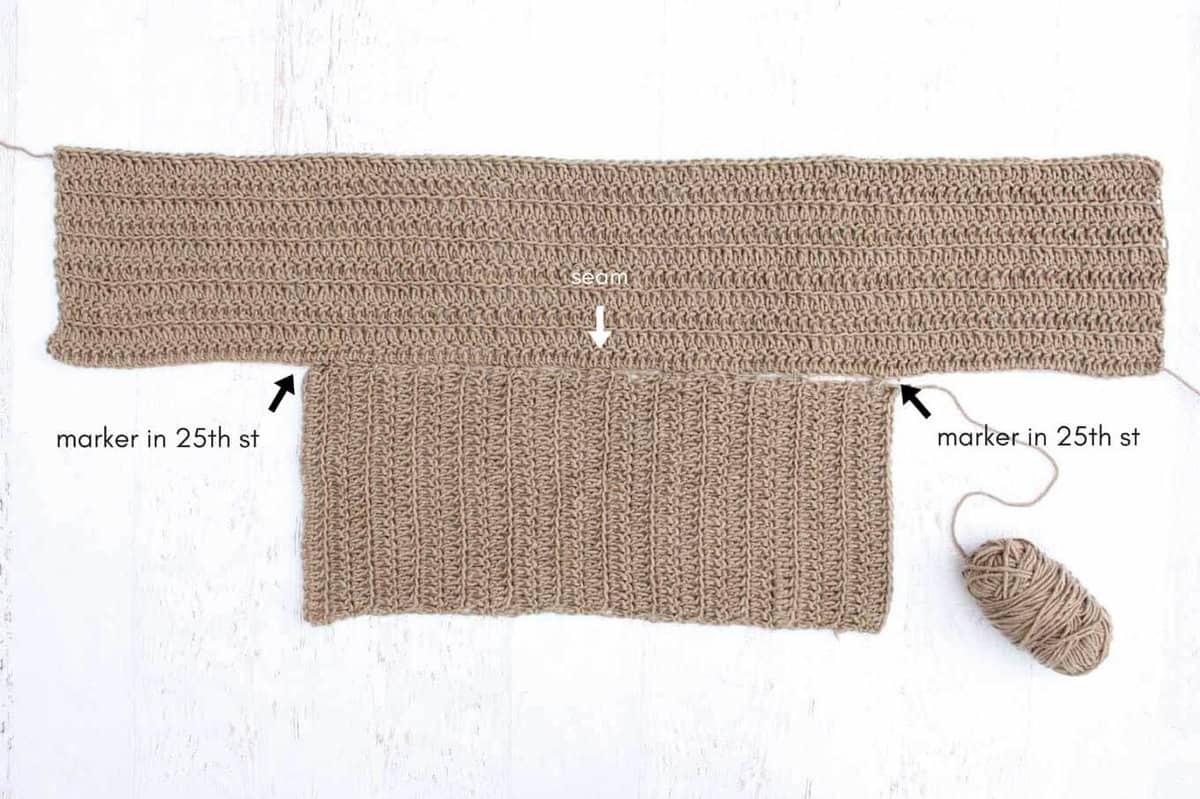
Sewing the Panels Together
On the bottom side of the top panel, mark the 25th stitch from left edge. Mark the 25th stitch from the right edge. (See photo B for placement.)
Using safety pins or stitch markers, pin the bottom panel to the top panel being sure to attach the upper corners of the bottom panel between the stitch markers on the top panel. (See photo below for clarification.)
Sew pieces together along pinned edge using the mattress stitch.
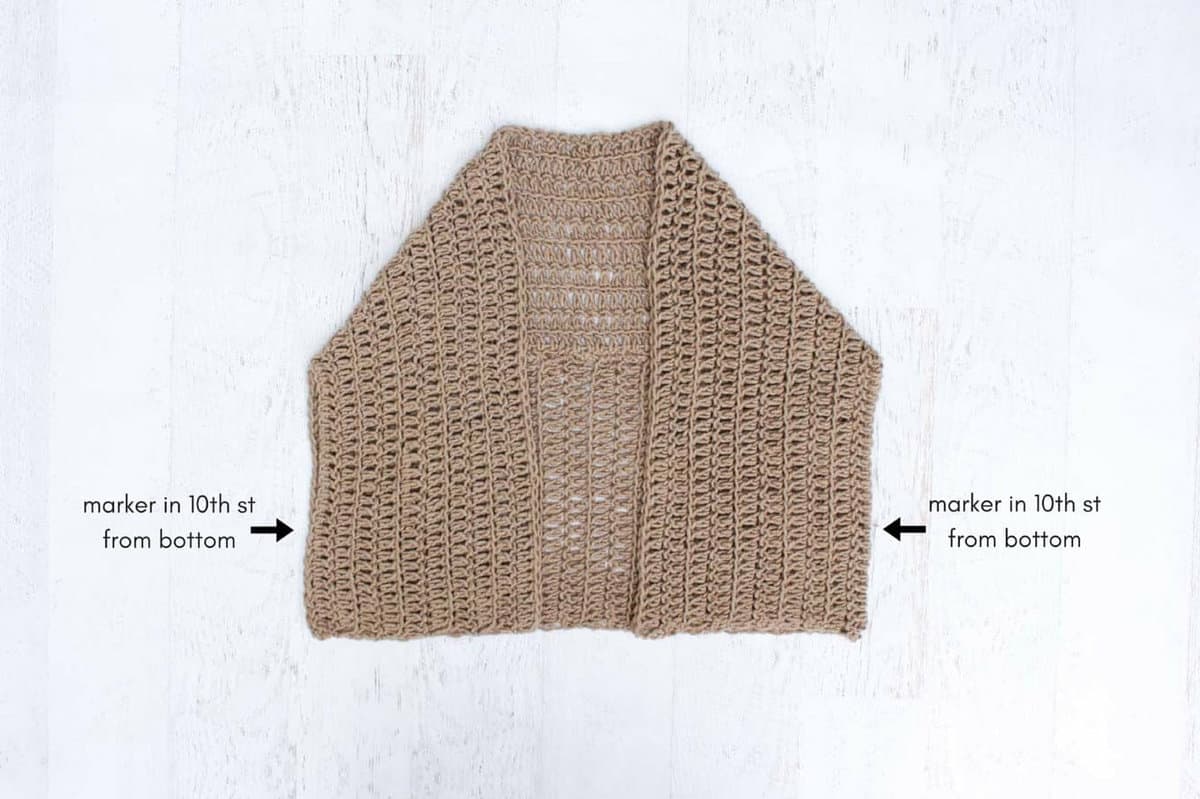
Fold sides of top panel down to meet the bottom edge of bottom panel. Mark 10th stitch from the bottom of the sweater on both the front and back (top and bottom panels). Repeat for second side of sweater. (See second photo below.)
Attach yarn at side seam at the sweater bottom. With RS of sweater facing you, seam upward using the mattress stitch. Stop once marked stitch has been seamed. Fasten off. Repeat for second side. (See mattress stitch video tutorial here. Note that for this instance, instead of sewing only through one loop of each stitch as in the video, you should sew through both loops of each stitch.)

Ribbing at Bottom of Sweater
Notes:
• See the ribbing tutorial video above for a demonstration of this technique. Note that the video is in reference to adding the collar ribbing, but the technique is the same for this section.
• In addition, 1DogWoof has an excellent video that illustrates this technique of adding ribbing. Note that the stitch counts for her ribbing are different than what is included here, but the basic concept is the same.
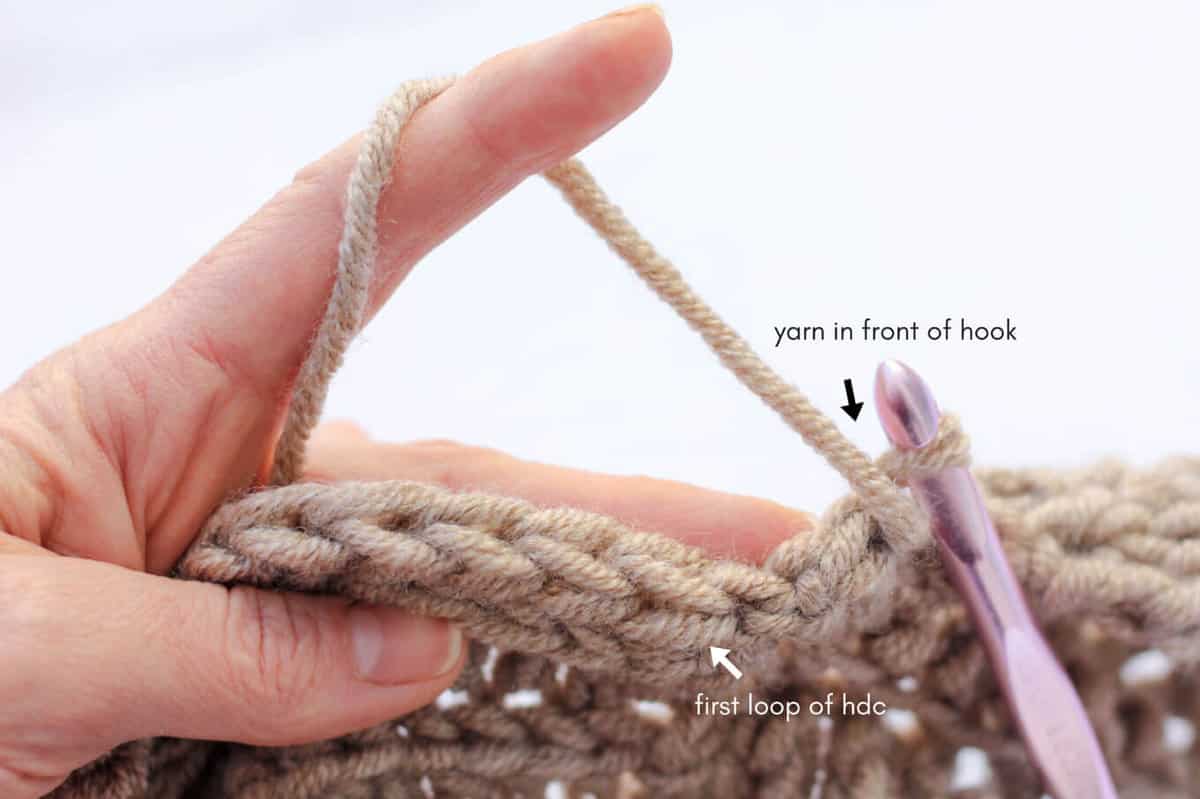
• The ribbing is worked in the first (front) of three possible loops in a half double crochet stitch. (See photo below.)
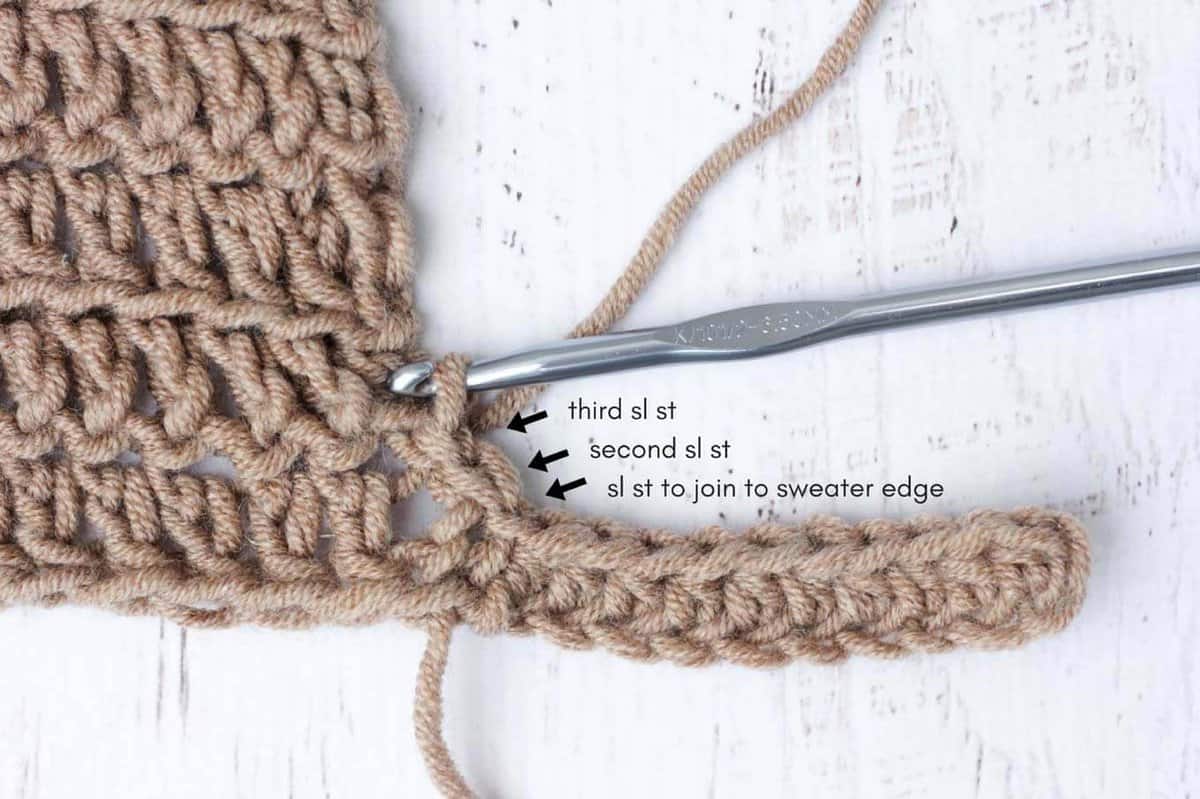
• When you’re slip stitching into the bottom edge of the sweater to attach the ribbing, insert your hook under the nearest two strands of yarn in the sweater bottom panel. One strand will not be strong enough to support the weight of the ribbing and three strands will begin to make a bulky seam where the ribbing meets the sweater. See video tutorial above this pattern for more information.
• The chain 2 at the beginning of row 3 and subsequent odd numbered rows doesn’t count as a stitch.
• Important! For even number rows, be certain to keep working yarn in front of the row you’re working and not behind it as you usually might. (See photo below.)
 Attach yarn with a slip knot at bottom front corner of sweater on what would be the left side when wearing it.
Using smaller (L) hook, ch 11.
Row 1: Hdc in second chain from hook, hdc in each ch, sl st onto bottom edge of sweater, 2 sl sl along sweater edge; turn. (10 hdc) (See photo below or video tutorial above.)
Row 2: (Keep yarn in front of hook.) Hdc in fourth st from hook working only through the first loop, hdc in first loop of each hdc; turn. (10 hdc)
Row 3: Ch 2, hdc in first loop of each hdc, sl st onto bottom edge of sweater, 2 sl sl along sweater edge; turn. (10 hdc)
Repeat rows 2 and 3 around entire sweater bottom. If ending with a row 2, do not fasten off yarn. If ending with a row 3, fasten yarn off.


Collar Ribbing
Notes:
• For the first and last approx. 4” of collar ribbing (while working along bottom ribbing section), the slip stitches to join the ribbing to the sweater edge are worked at a slightly different interval than for the rest of the collar ribbing. In row 3, for example, work first sl st into the stitch directly above stitch row 1 was attached in. (Therefore, each stitch along sweater edge should be slip stitched into once.) See the ribbing tutorial video above for a demonstration of this technique.
For the remainder of the collar ribbing that isn’t worked into the bottom ribbing, work the first sl st of a row 3 into the same st the previous row 3 was attached in. (Therefore, every third stitch along the sweater edge should be slipped into twice.) See video for far clearer instructions!
• The chain 2 at the beginning of row 3 and subsequent odd numbered rows doesn’t count as a stitch.
• Important! For even number rows, be certain to keep working yarn in front of the row you’re working and not behind it as you usually might. (See photo E.)
With RS of sweater facing out, use a slip knot to attach yarn at bottom corner of ribbing at what is the right side of the sweater when wearing it.
Using smaller (L) hook, ch 6.
Row 1: Hdc in second chain from hook, hdc in each ch, sl st onto edge of sweater, 2 sl sl along sweater edge; turn. (5 hdc)
Row 2: (Keep yarn in front of hook.) Hdc in fourth st from hook working only through the first loop, hdc in first loop of each hdc; turn. (5 hdc)
Row 3: Ch 2, hdc in first loop of each hdc, sl st onto edge of sweater, 2 sl sl along sweater edge; turn. (5 hdc)
Repeat rows 2 and 3 around entire collar. Fasten off.
Sleeves
Notes:
• If you’re right-handed, work the sleeve clockwise. If you’re left-handed, work it counter clockwise.
• For rounds 2 and 3, work first sc in the same sc you sl st into at the end of the previous round. When ending a round, do not work a sc in the sl st from the previous round.
With RS facing, attach yarn at bottom of sleeve.
Round 1: Using smaller (L) hook, ch 1, sc in same st yarn attached in, sc around sleeve working 1 sc in each st, sl st to first sc of round to join. Do not turn.
Round 2: Ch 1, scblo in each sc, sl st to first sc of round to join. Do not turn.
Round 3: Repeat round 2.
Fasten off. Repeat for second sleeve.

Finishing and Final Blocking
Weave in ends. Lightly block cardigan ribbing using the same steam technique used previously. There is no need to pin the finished sweater to block it this time unless there is an area you want to stretch or smooth out.
Curl up in your new cocoon cardigan like a cozy little caterpillar!
That was so fun! Now what?
Invitation to our Facebook group
Come discuss crocheting cocoon cardigan patterns and lots of other crochet projects and techniques in our Make & Do Crew Facebook group. Here thousands of helpful crocheters answer each others questions and share their stitches. Come join us here.
Find Your Next Sweater Project
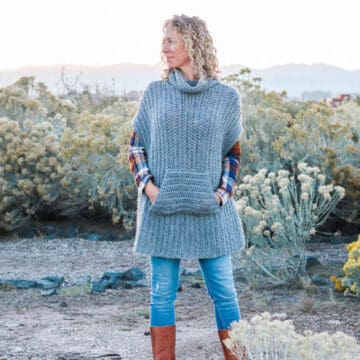
- Poncho With Pockets - slim cut + kangaroo pocket
- The Dwell Sweater - with plus sizes + video tutorials
- Beginner Cardigan - made from rectangles
- Pullover Yoke Sweater - nearly seamless
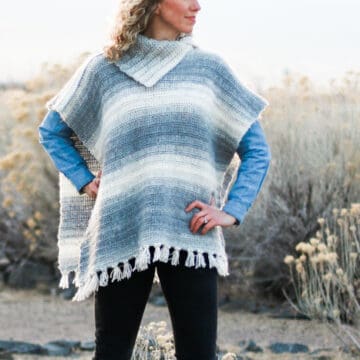
- Long Boho Cardigan Pattern - with fringe!
- Summer Crochet Cardigan Pattern - short sleeved topper
- Lightweight Cardigan - made from hexagons
- Color Block Cardi Pattern - drapey and soft
More Free Patterns + Tutorials
Can't get enough free crochet patterns!? Me either. You'll definitely want to breeze through these collections to find your next project.
- 55+ Free Crochet Sweater and Cardigan Patterns - our most popular garments
- 40+ Free Crochet Blanket Patterns - baby blankets, throws + c2c graphgans
- 36+ Granny Square Patterns + tips for the perfect square
- 30+ Crochet Animal Patterns - adorable amigurumi stuffed animals
- Crochet Gift Ideas - easy patterns to make for others
- Fast Crochet Projects - start to finish in less than a day
Learn a New Skill
And when you're ready to master a new skill, check out our detailed guides that include everything you need to know to level up your crochet game.
- How to Corner to Corner (C2C) Crochet for Beginners - with video tutorials to get you started
- How to Crochet a Beginner Hat - make an entire beanie in 1.5 hours!
- How to Crochet Amigurumi for Beginners - the ultimate guide to making your own toys and plushies
- How to Tunisian Crochet - learn with this video and a standard hook
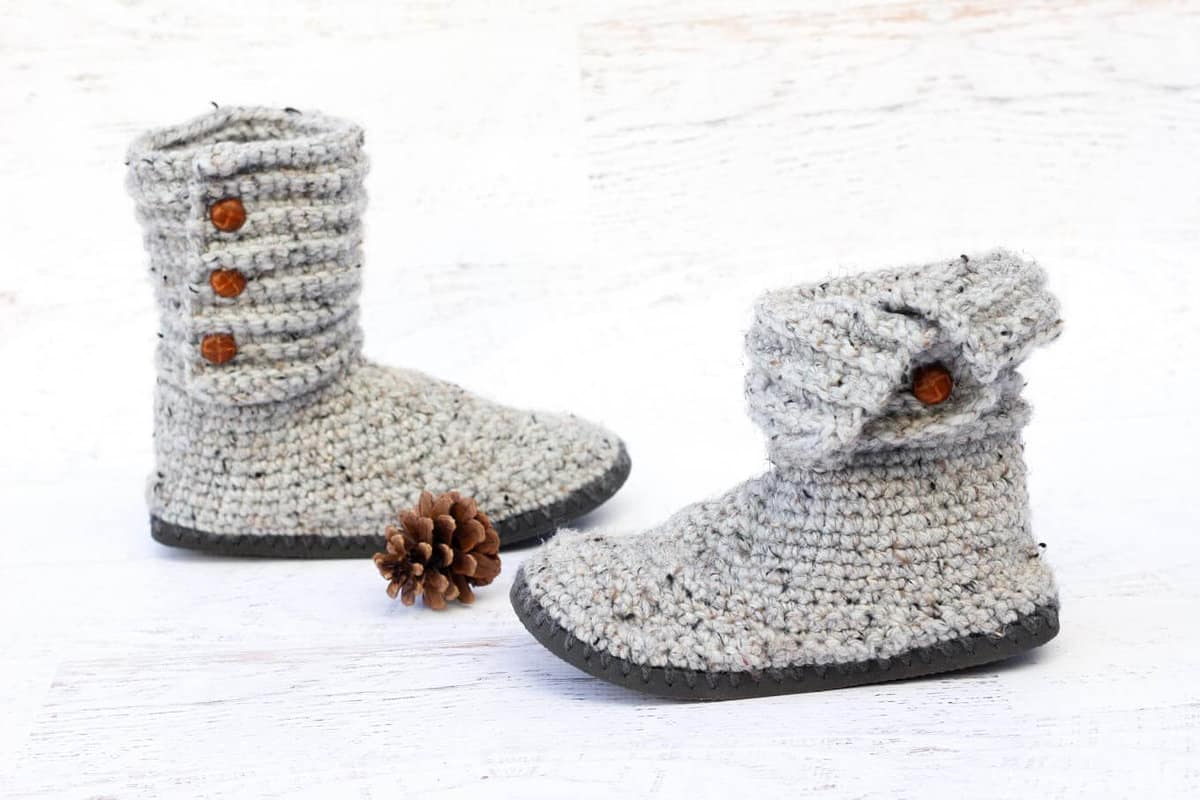
You might also like my "Cabin Boots" free crochet pattern that uses flip flops for soles!


Angela says
would love to know where this free pattern is located. The heading says free pattern!
Jess @ Make and Do Crew says
Hey Angela,
The free pattern is right above this comment area, right below the pink heading that says "Cocoon Cardigan".
Happy crocheting!
Jess
Emilce says
Hi! Today I finished this cardigan! You did a great job with the pattern! Very easy to make and to understand. I´m so proud I made the whole of it all by myself!
Thank you, thank you, thank you!
Cheers from Argentina
Jess @ Make and Do Crew says
Emilce! I am so proud of you too! That's fantastic! I really hope you enjoy wearing it. 🙂
Jess
Madonna says
I can't understand what you mean in this "Sleeves
Notes:
• If you’re right-handed, work the sleeve clockwise. If you’re left-handed, work it counter clockwise.
• For rounds 2 and 3, work first sc in the same sc you sl st into at the end of the previous round. When ending a round, do not work a sc in the sl st from the previous round."
Can you explain it to me?
With RS facing, attach yarn at bottom of sleeve"