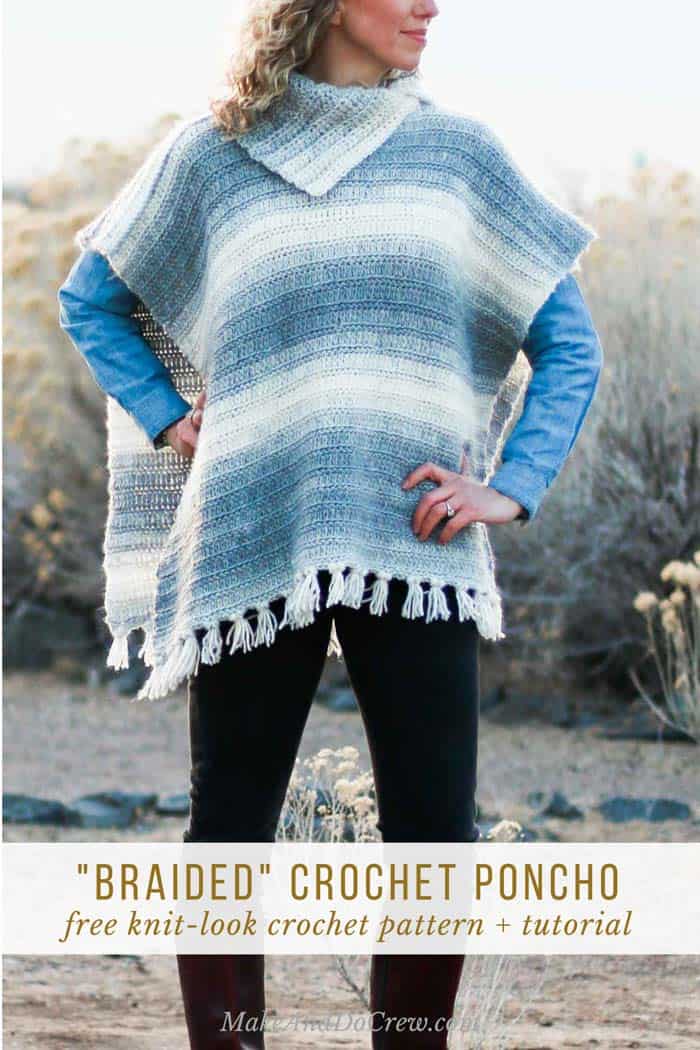
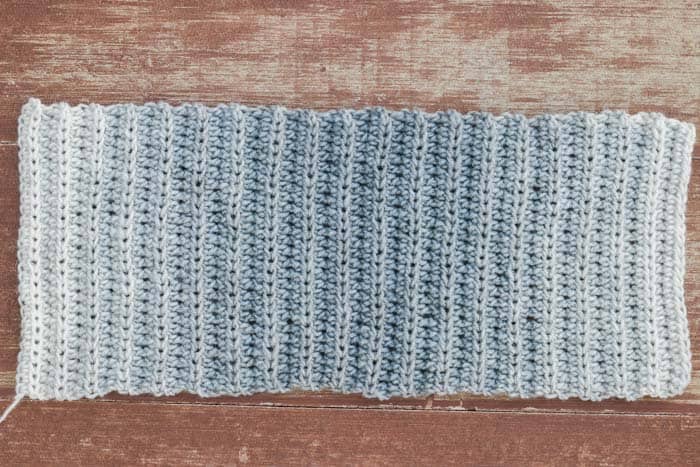
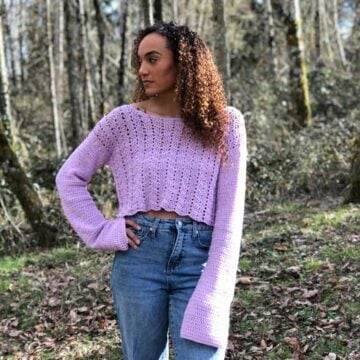
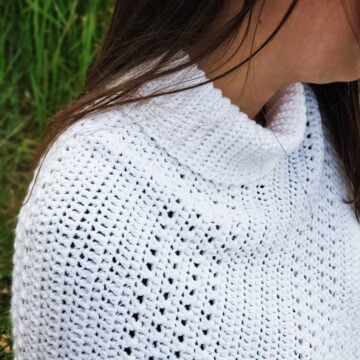
A simple combination of extended half double crochet and slip stitches make for a knit-looking “braided” texture in this free women's crochet poncho pattern. Get the full free pattern below or purchase the ad-free, printable PDF here.
This free women's crochet poncho pattern is part of a collaboration with my friends at Lion Brand Yarn. This post contains affiliate links.
On my way home from visiting Lion Brand in New York a few weeks ago, I found myself on a plane, sleep deprived with one ball of Scarfie yarn and (gasp!) no internet access.
Without any way to look up stitch tutorials or even peruse Pinterest for texture inspiration, I was left with only a hook and my imagination.
The Stitch
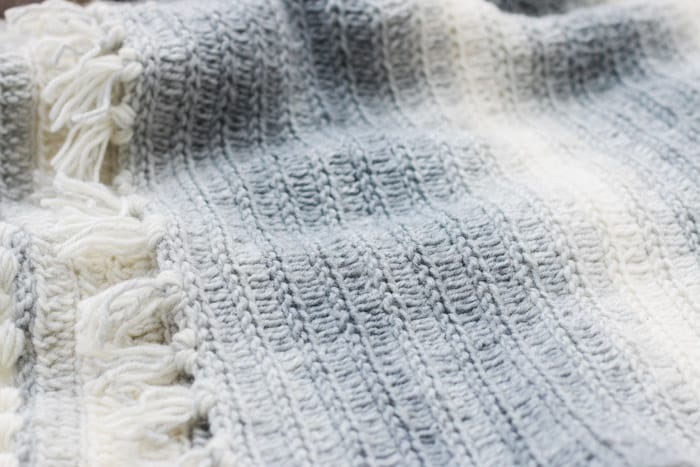
Three and a half hours later, I touched down in Denver with a new (or at least new to me) combination of crochet stitches that looks quite knit or even braided.
I've been loving crochet projects that look knit lately (see a bunch of my faves here), so I had been thinking about how a slip stitch looks a bit like a knit stitch when worked a certain way.
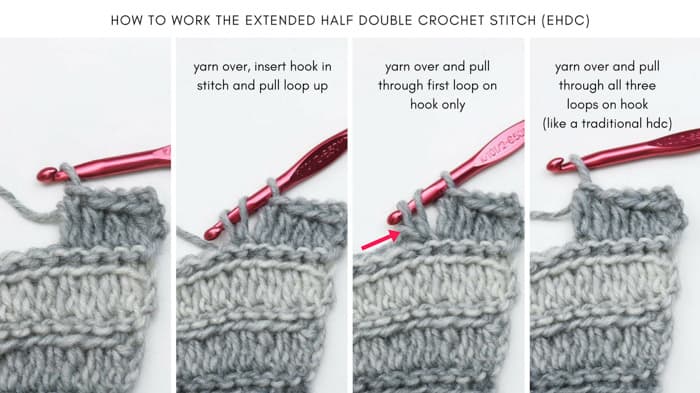
Throw in some extended half double crochet stitches so the thing doesn't take f-o-r-e-v-e-r, and you've got a pretty stitch pattern that's super easy to execute. UPDATE: You can find the step-by-step video tutorial for this stitch here.
The Construction
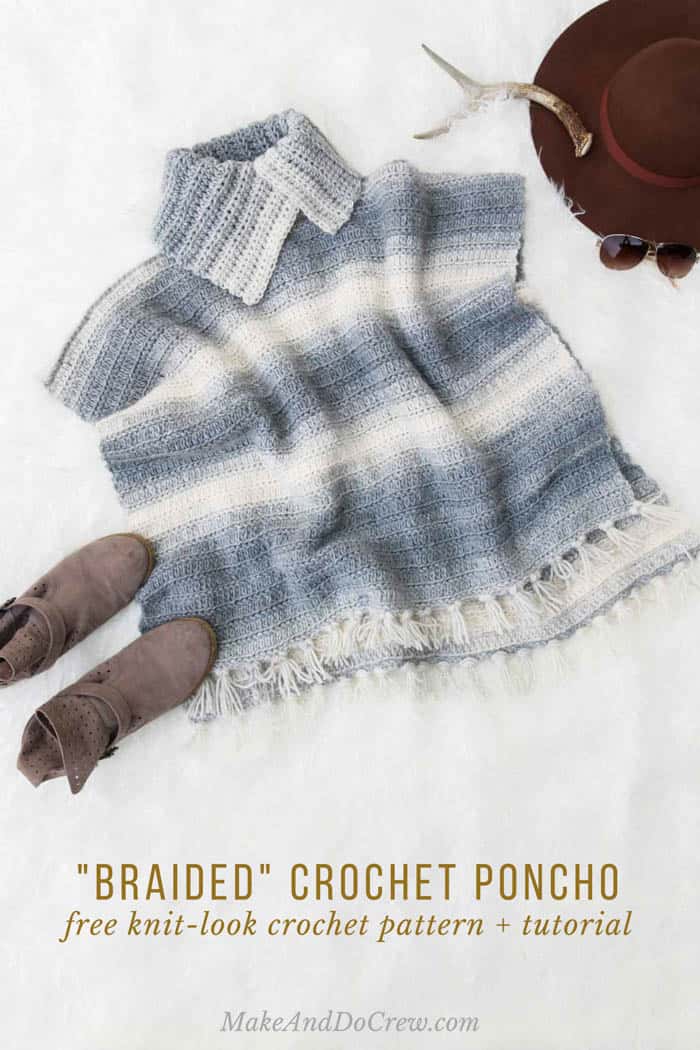
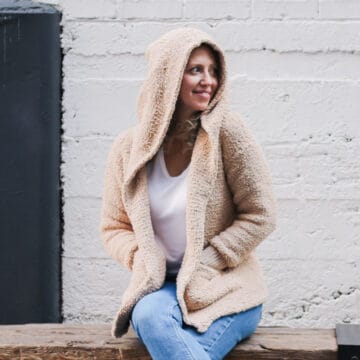
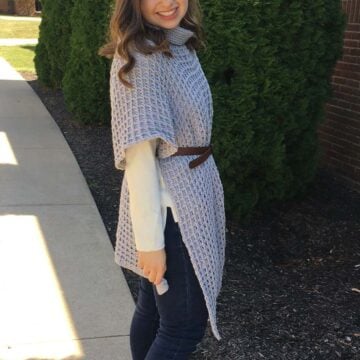
Like many of my projects, this free women's crochet poncho pattern is constructed from two simple rectangles. Make a third rectangle for the collar, add a dash of fringe and you've got yourself a southwestern-inspired garment that looks like an intentional style decision--and feels like pajamas!
The Yarn
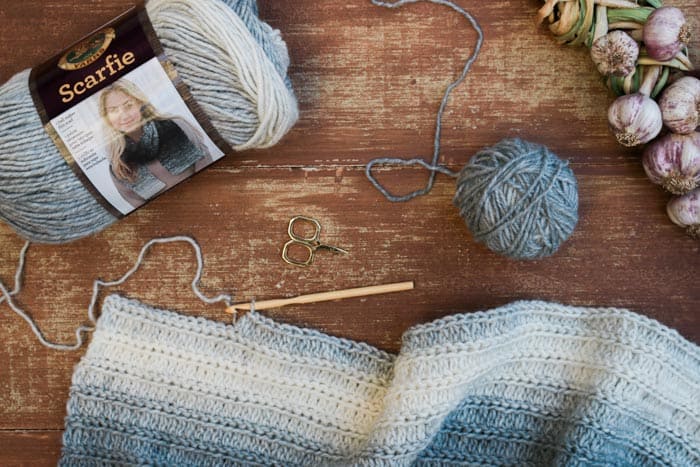
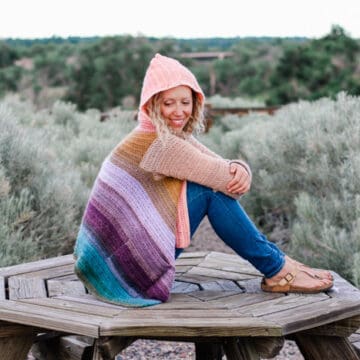
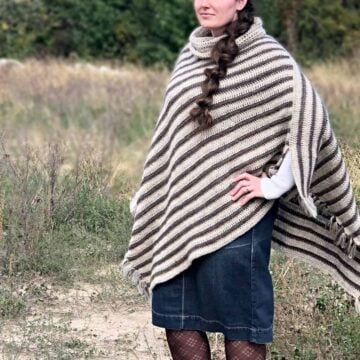
The Lion Brand Scarfie yarn used in the sample has been on my list to try for a long time. I love how its slightly roving-looking texture is a category 5 yarn (one heavier than worsted weight) because it makes projects quicker to make without becoming super bulky.
And the stripes! Well, the stripes are really cool to watch develop because the color changes are so gradual and gentle. I really love how Scarfie gives this crochet poncho an organic, cozy and bohemian vibe.
Related: 30+ Free Poncho Patterns - for winter and beyond
The Detour
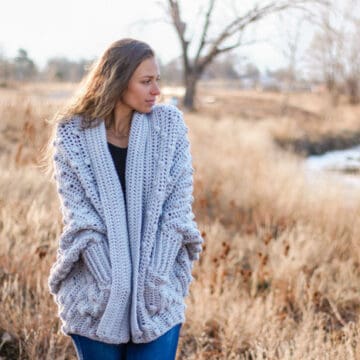
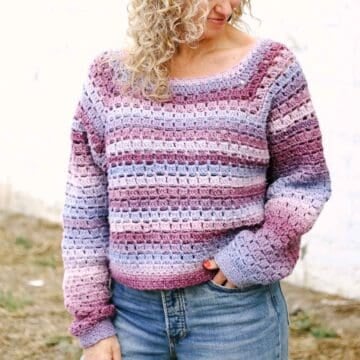
I feel like I should admit that when I started this project, I had every intention of it becoming a women's pullover sweater, but after about halfway through my first rectangle, it was clear that the shape I was making was much better suited for a poncho. Ironically, I really love how this sweater-turned-poncho eventually turned out and I hope you do too!
So while you only usually see the finished items on the blog here, know that there are many twists and turns in the journey any project takes to becoming a finished pattern on the site. If like me, you ever find yourself with a big piece of crochet fabric you've spent hours on but don't know what to do with, just keep wrapping it around your body in different configurations until you get an idea! That is my strategy at least. 😉
New to crocheting garments? Don't miss our Step-By-Step Guide To Sweater Success
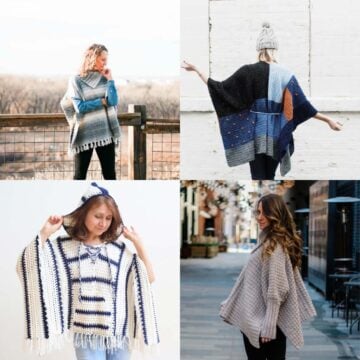
More Free Crochet Sweater Patterns
Crochet sweater patterns don't need to be difficult. In fact, most of ours are made with very simple shapes. Dive into the wonderful world of crochet garments with cardigans, pullovers, ponchos, shrugs and more!


See more free crochet sweater patterns →
Braided Boho Poncho
Free Women's Crochet Poncho Pattern
Purchase the ad-free, printable PDF here.
Add this pattern to your Ravelry favorites or queue here.
Pin it for later here.
Explanation:
Feel like you’re wrapped in a fireside woven blanket sweater when you wear this perfectly simple crochet poncho. The self-striping yarn does all the color work and a combination of extended half double crochet and slip stitches make for a knit-looking “braided” texture. A ribbed turnover collar completes this unfussy, but intentional look.
This pattern is made from three basic rectangles and is perfect for a confident beginner. Sizes include S-3x.

Don't spend hours for a "meh" result!
Tired of crocheting garments that don't fit? Learn our C.R.A.F.T. Framework to make sweaters that fit and feel amazing!
Supplies:
• Lion Brand Scarfie (Weight: 5/bulky - 312 yds, 5.3 oz)
- Cream/Silver (#826-216) – 4 (4, 5, 5, 5) skeins
• Tapestry needle
• Size K (6.5 mm) crochet hook
• Stitch markers or safety pins
Sizes:
S/M, M/L, L/XL, 1X/2X, 2X/3X
Gauge:
13 sts = 4”
4.5 rows ehdc + 4 rows sl st = 4”
Abbreviations and Glossary (US Terms):
ch – chain
hdc – half double crochet
edhc – extended half double crochet (see photo below)
sl st – slip stitch
tch – turning chain
st(s) – stitch(es)
RS – right side
WS – wrong side
rep – repeat
PM – place marker
Overall Pattern + Sizing Notes:
• Pattern is written in size S/M with M/L, L/XL, 1X/2X and 2X/3X following in parenthesis. S/M (M/L, L/XL, 1X/2X, 2X/3X)
• When using Scarfie yarn, be mindful of how attaching a new skein will influence the self-striping pattern. Consider breaking yarn and reattaching if skeins don’t naturally create desired striping effects.
• To adjust the width of the poncho, chain any number of sts + 3 for the foundation ch on both the front and the back pieces.
• The ch 3 at the beginning of each row does not count as a stitch.
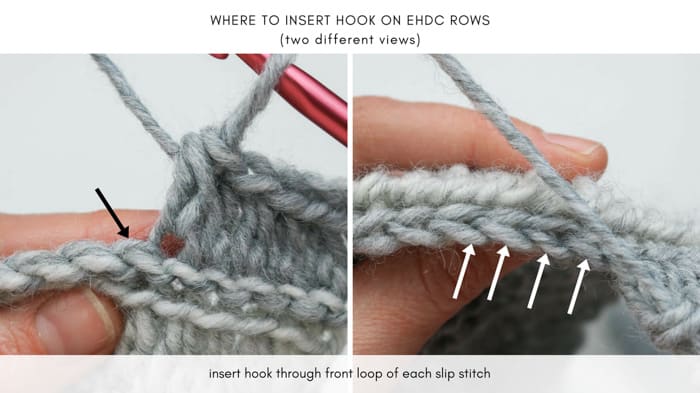
• See photos below for the hook placement in each row.
• View the step-by-step video tutorial for the stitch used in this pattern here.
✨Unlock this free subscriber-exclusive pattern ✨
Follow these steps to view the full free pattern below
Back
Notes:
• Front and back are worked identically except for total number of rows.
Wanna save this pattern?
Foundation Row: Ch 100 (106, 112, 118, 124).
Row 1 (RS): Sk first 3 ch, ehdc in each ch to end of row; turn. (97 (103, 109, 115, 121)
Row 2 (WS): Ch 1, loosely sl st through the middle loop only of each hdc; turn. (97 (103, 109, 115, 121)
Row 3 (RS): Ch 3, ehdc in front loop of each sl st; turn. (97 (103, 109, 115, 121)
Row 4 (WS): Ch 1, loosely sl st through the middle loop only of each hdc; turn. (97 (103, 109, 115, 121)
Rows 5-54 (56, 56, 58, 58): Repeat Rows 3 and 4 25 (26, 26, 27, 27) more times, ending with a WS row. There should be a total of 27 (28, 28, 29, 29) rows of ehdc and 27 (28, 28, 29, 29) rows of sl sts.
Row 55 (57, 57, 59, 59) (RS): Repeat Row 4 once more.
Fasten off. Weave in ends.
Rectangle should measure approximately:
S/M: 30”x 26”
M/L: 31.75 x 26.75”
L/XL: 33.5 x 26.75”
XL/2XL: 35.5 x 27.75”
2XL/3XL: 37.25 x 27.75”

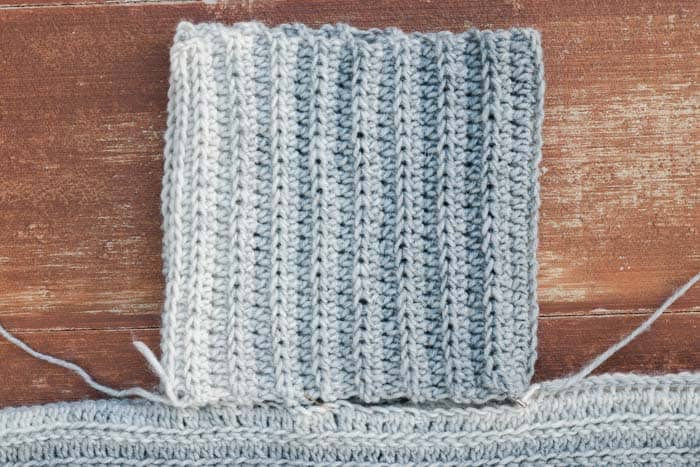
Collar
Notes:
• The collar is worked sideways. To achieve the look of the sample using Scarfie yarn, find a place in working yarn where yarn is about to finish one color and transition to next color. This will help ensure balanced gradient look at both edges of collar. (See photo below.)
Foundation Row: Ch 28 (all sizes).
Row 1 (RS): Sk first 2 ch, hdc in each ch to end of row; turn. (26)
Rows 2 (WS): Ch 2, hdc through back loop only of each hdc; turn. (26)
Rows 3 - 39: Ch 2, hdc through back loop only of each hdc; turn. (26)
Fasten off leaving a 24” tail for seaming.
Seaming Front & Back
IMPORTANT: Keep poncho front facing you as you sl st seam pieces together.
Lay front piece on top of back piece, with RS facing out on both pieces. The foundation ch edges should be oriented toward top of poncho. Join yarn in upper right corner (left corner for lefties).
Working into one ch st of both pieces so as to keep front and back aligned, sl st through 38 (41, 44, 47, 50) foundation chain sts. Fasten off.
Beginning at upper left corner of rectangle (right corner for lefties), count 38 (41, 44, 47, 50) foundation ch sts and PM.
Attach yarn in marked st and sl st along pieces in same direction as first seam until end of row.

Seaming Collar
Fold collar as pictured in photo below. Folded collar should measure approximately 18” wide. Pin collar to poncho keeping overlapping collar pieces in front.
Using collar tail and tapestry needle, seam collar to neck opening.
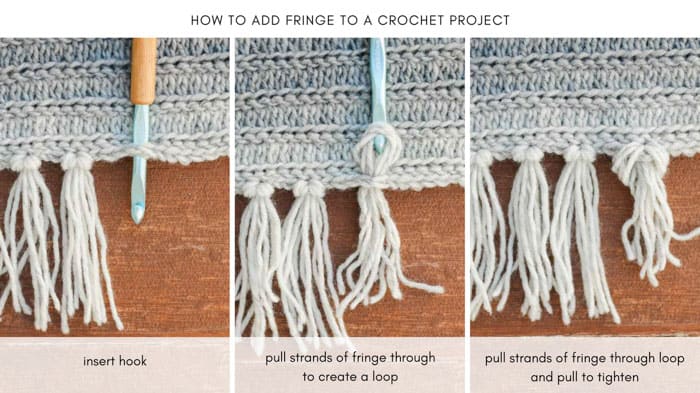
Adding Fringe
Notes:
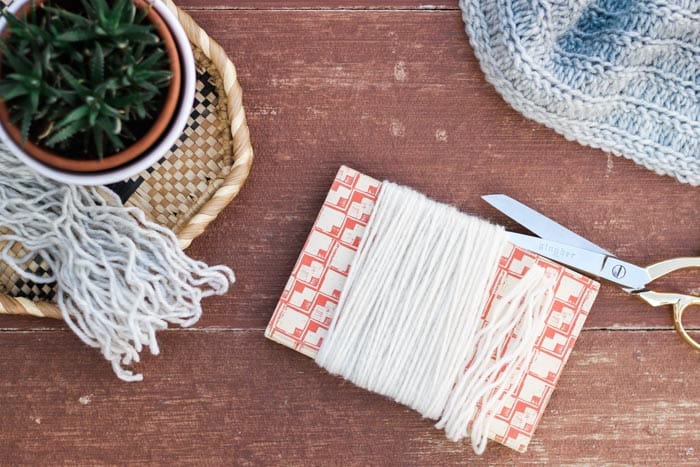
• To quickly cut fringe pieces of all same length, wrap yarn dozens of times around a small book and insert scissors between front and back cover to cut as pictured above pattern.
Cut approximately 210 (220, 240, 250, 260) pieces 8” fringe. With RS of poncho facing up, insert hook from the top down and grab five strands of fringe. Pull fringe partially up to top of fabric. Insert fingers through resulting loop of fringe and pull fringe tails through loop. (See photo below.)
Attach fringe at approximately 1.5” intervals along poncho bottom. Rep on second side.
Trim fringe as desired.
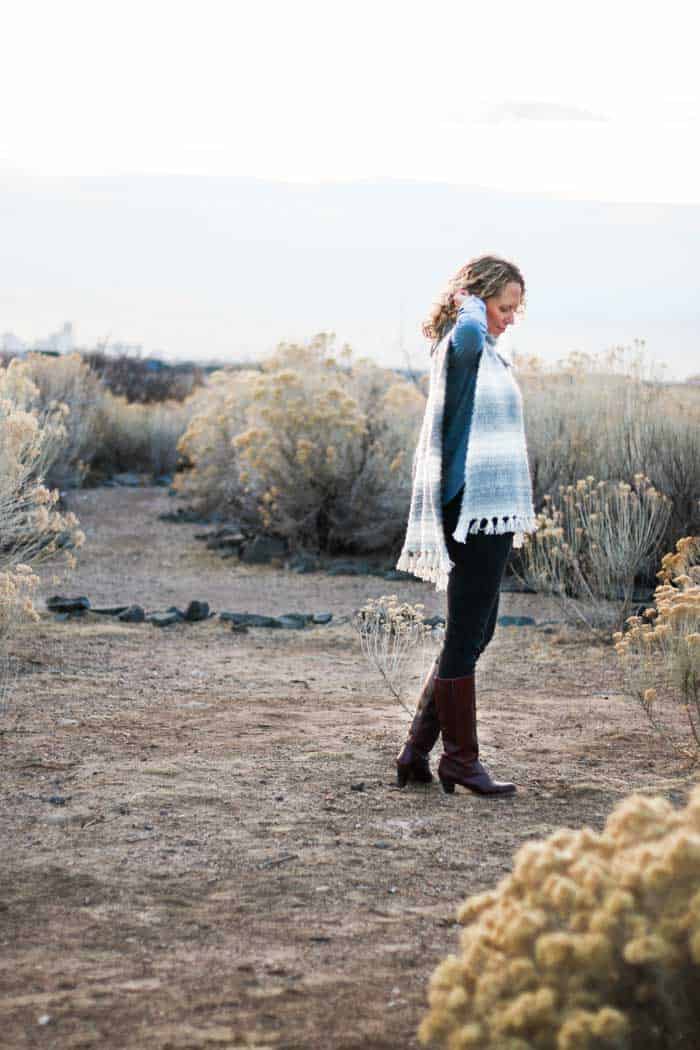
Toss on your new braided poncho for your next moonlit desert hike amongst the cacti!
More Free Crochet Sweater Patterns
Crochet sweater patterns don't need to be difficult. In fact, most of ours are made with very simple shapes. Dive into the wonderful world of crochet garments with cardigans, pullovers, ponchos, shrugs and more!
See more free crochet sweater patterns →
That was so fun! Now what?
Invitation to our Facebook group
Come discuss poncho patterns and lots of other crochet projects and techniques in our Make & Do Crew Facebook group. Here thousands of helpful crocheters answer each others questions and share their stitches. Come join us here.
Find Your Next Sweater Project
- Summer Crochet Cardigan Pattern - short sleeved topper
- Lightweight Cardigan - made from hexagons
- Color Block Cardi Pattern - drapey and soft
- Easy Tunisian Crochet Cardigan - clever reversible cardi
- Casual Pullover Sweater - with exposed seams
- Simple Everyday Cardigan - using the easy V-stitch
- Lightweight Jacket Pattern - seamless + beginner-friendly
- V-Neck Sweater -simple, easy striped design
More Free Patterns + Tutorials
Can't get enough free crochet patterns!? Me either. You'll definitely want to breeze through these collections to find your next project.
- 55+ Free Crochet Sweater and Cardigan Patterns - our most popular garments
- 40+ Free Crochet Blanket Patterns - baby blankets, throws + c2c graphgans
- 36+ Granny Square Patterns + tips for the perfect square
- 30+ Crochet Animal Patterns - adorable amigurumi stuffed animals
- Crochet Gift Ideas - easy patterns to make for others
- Fast Crochet Projects - start to finish in less than a day
Learn a New Skill
And when you're ready to master a new skill, check out our detailed guides that include everything you need to know to level up your crochet game.
- How to Corner to Corner (C2C) Crochet for Beginners - with video tutorials to get you started
- How to Crochet a Beginner Hat - make an entire beanie in 1.5 hours!
- How to Crochet Amigurumi for Beginners - the ultimate guide to making your own toys and plushies
- How to Tunisian Crochet - learn with this video and a standard hook
Deborah Borne says
On the slip stich rows I am not sure what you mean by the middle loop?
Jess @ Make and Do Crew says
Take a look at the photo tutorial above. Does that make it clearer to you? It's not the front loop or the loop furthest back from you, but the one between those. Kinda hard to explain, but the photos should help.:)
Jess
Jacqueline says
Missing Row 5 on the back panel - or is it simply a numbering error?
Jess @ Make and Do Crew says
It's a numbering error. Thanks so much for pointing that out, Jacqueline!
Jess
DaVerne says
This is the loveliest poncho pattern I have seen! You are quite brilliant! 🙂 Looking forward to creating this. Thanks for sharing your creativity with all of us!
Shannon says
I've been crocheting for 40 years and have never seen a stich like it. You are amazing!
Jess @ Make and Do Crew says
I'm so glad you like it, Shannon!
Happy crocheting!
Jess
Marcia Woolf says
I am in LOVE with this project! Thank you so much!
Marcia Woolf says
P.S. Any tips for matching up the new skein? That idea makes me nervous as a new crocheter.... Thank you!
Jess @ Make and Do Crew says
Hey Marcia,
I think once you work with this yarn for a full skein, you'll get a sense of the "rhythm" of the color transitions. I found that most skeins started in the perfect place to just connect to the finished yarn, but in the case you need to adjust it, just wind off the new ball of yarn until you get to the place in the color transition that you're at with the skein you're finishing.
Hope that makes sense! This is a really great first garment for a beginner!
Jess
Marcia Woolf says
Totally makes sense. Thanks, Jess!
Jess @ Make and Do Crew says
Yay! I'm so happy to hear that!
Michelle Anne Wesley says
I love your patterns! I made many and this one is going to get done next week! Thank you soooo very much?
Jess @ Make and Do Crew says
I love hearing that you're getting use out of my patterns! Thanks so much for letting me know. I hope you enjoy this one. 🙂
Jess
Tracy King says
Interesting stitch to learn, yay! I really love how you are so encouraging and always point out that even though we see finished items, doesn’t mean there is no frustration or frogging! Thanks Jess.
Jess @ Make and Do Crew says
Ah, thanks, Tracy. There is SOOOOO much frogging in my process. Sometimes I look at these finished projects on the blog and feel like it's a tiny miracle they ever made it that far. Thanks for letting me know you go through that too. It's all part of the process, but it's my least favorite part! 😉
Jess
Eva says
Jess
Thank you for new Project will make for my Sis- in
=law she love this
Lili says
Lovely stitch, I have not seen it before like this, will definitely try it out and use it. I think it will work great on cushion covers and modern blankets as well, looking forward to how you will use it next Thanks!
Jess @ Make and Do Crew says
I'm so glad you like it, Lili! I agree--I think it would look beautiful on homewares projects. If you make something with it, I'd love for you to send me a pic or tag me on Instagram so I can see what you make! (@makeanddocrew)
Lili says
I will Jess ;-).
Sheltie Times says
Great project and so practical. This would be great for outings.
Jess @ Make and Do Crew says
Thanks Sheltie! I think so too. 🙂
Jess