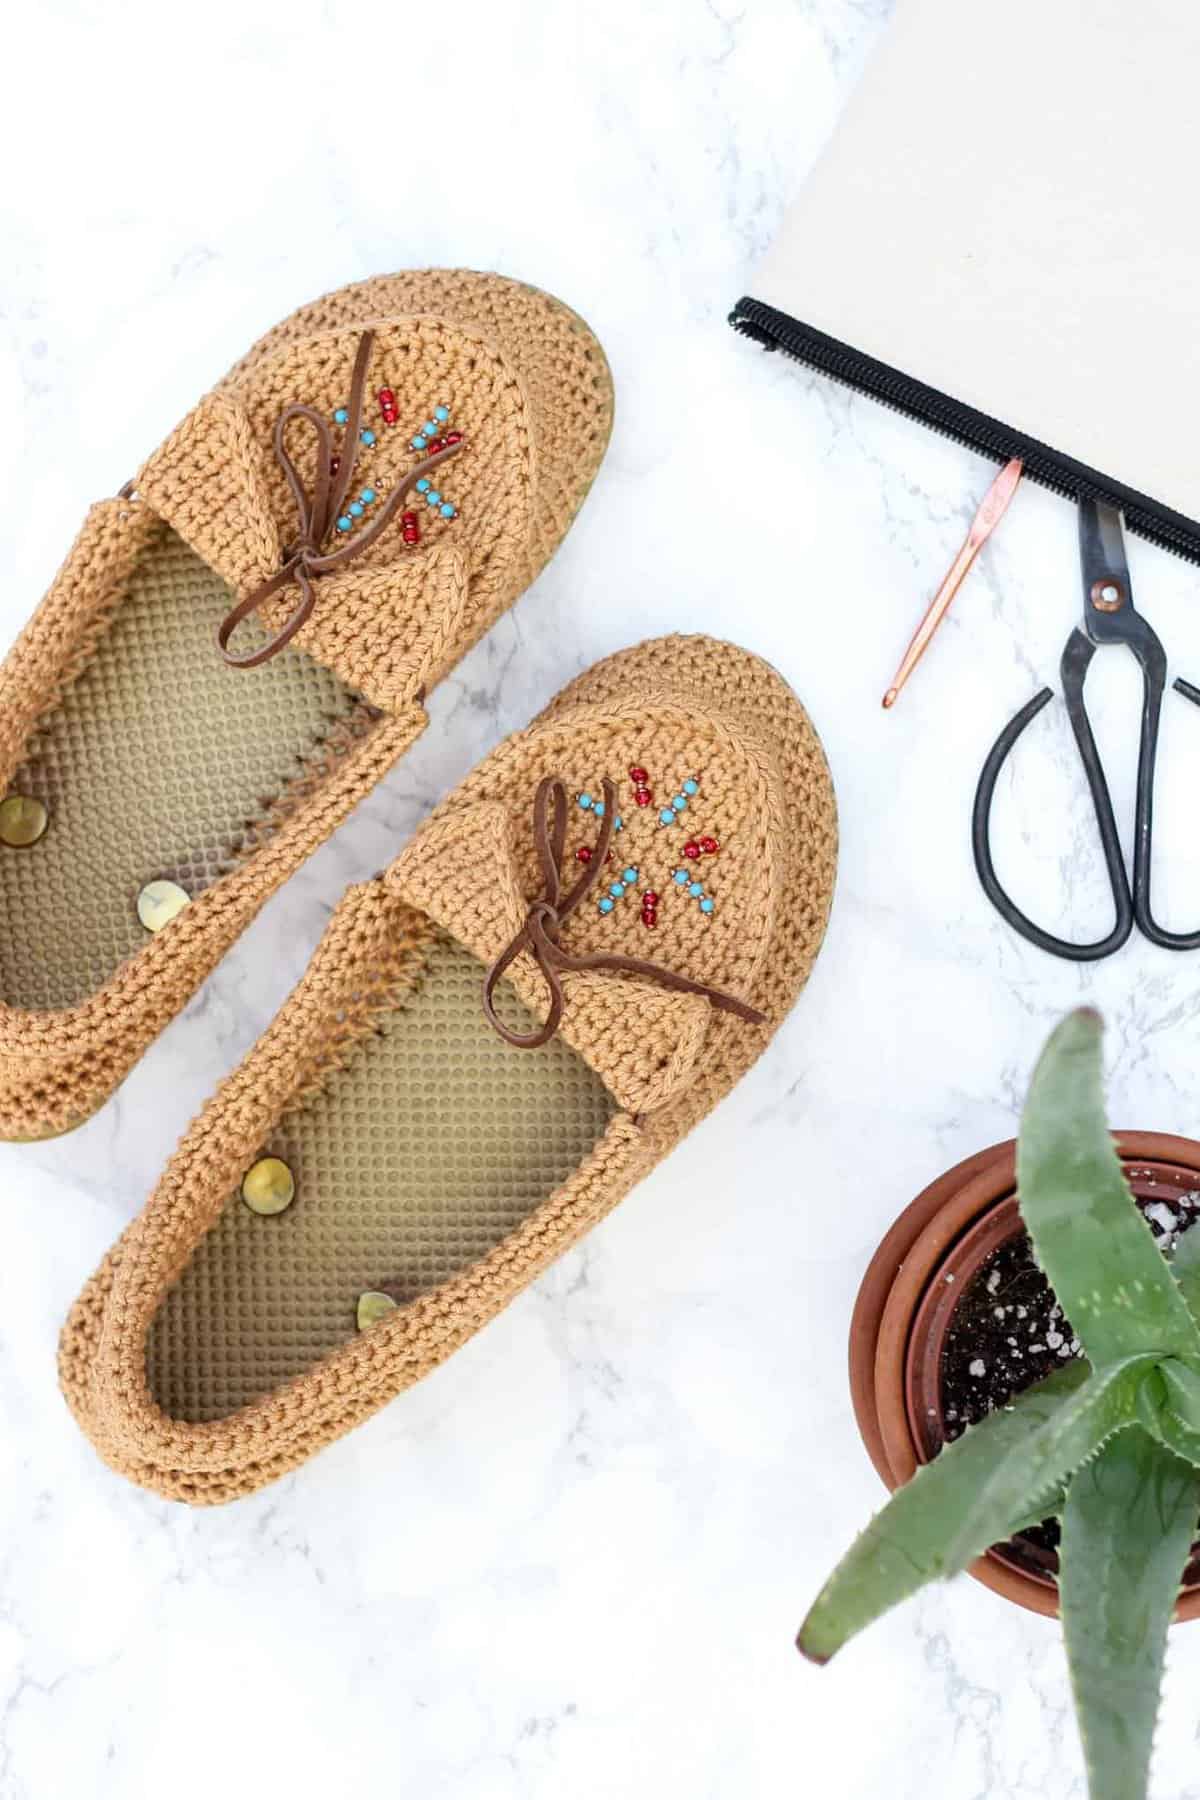
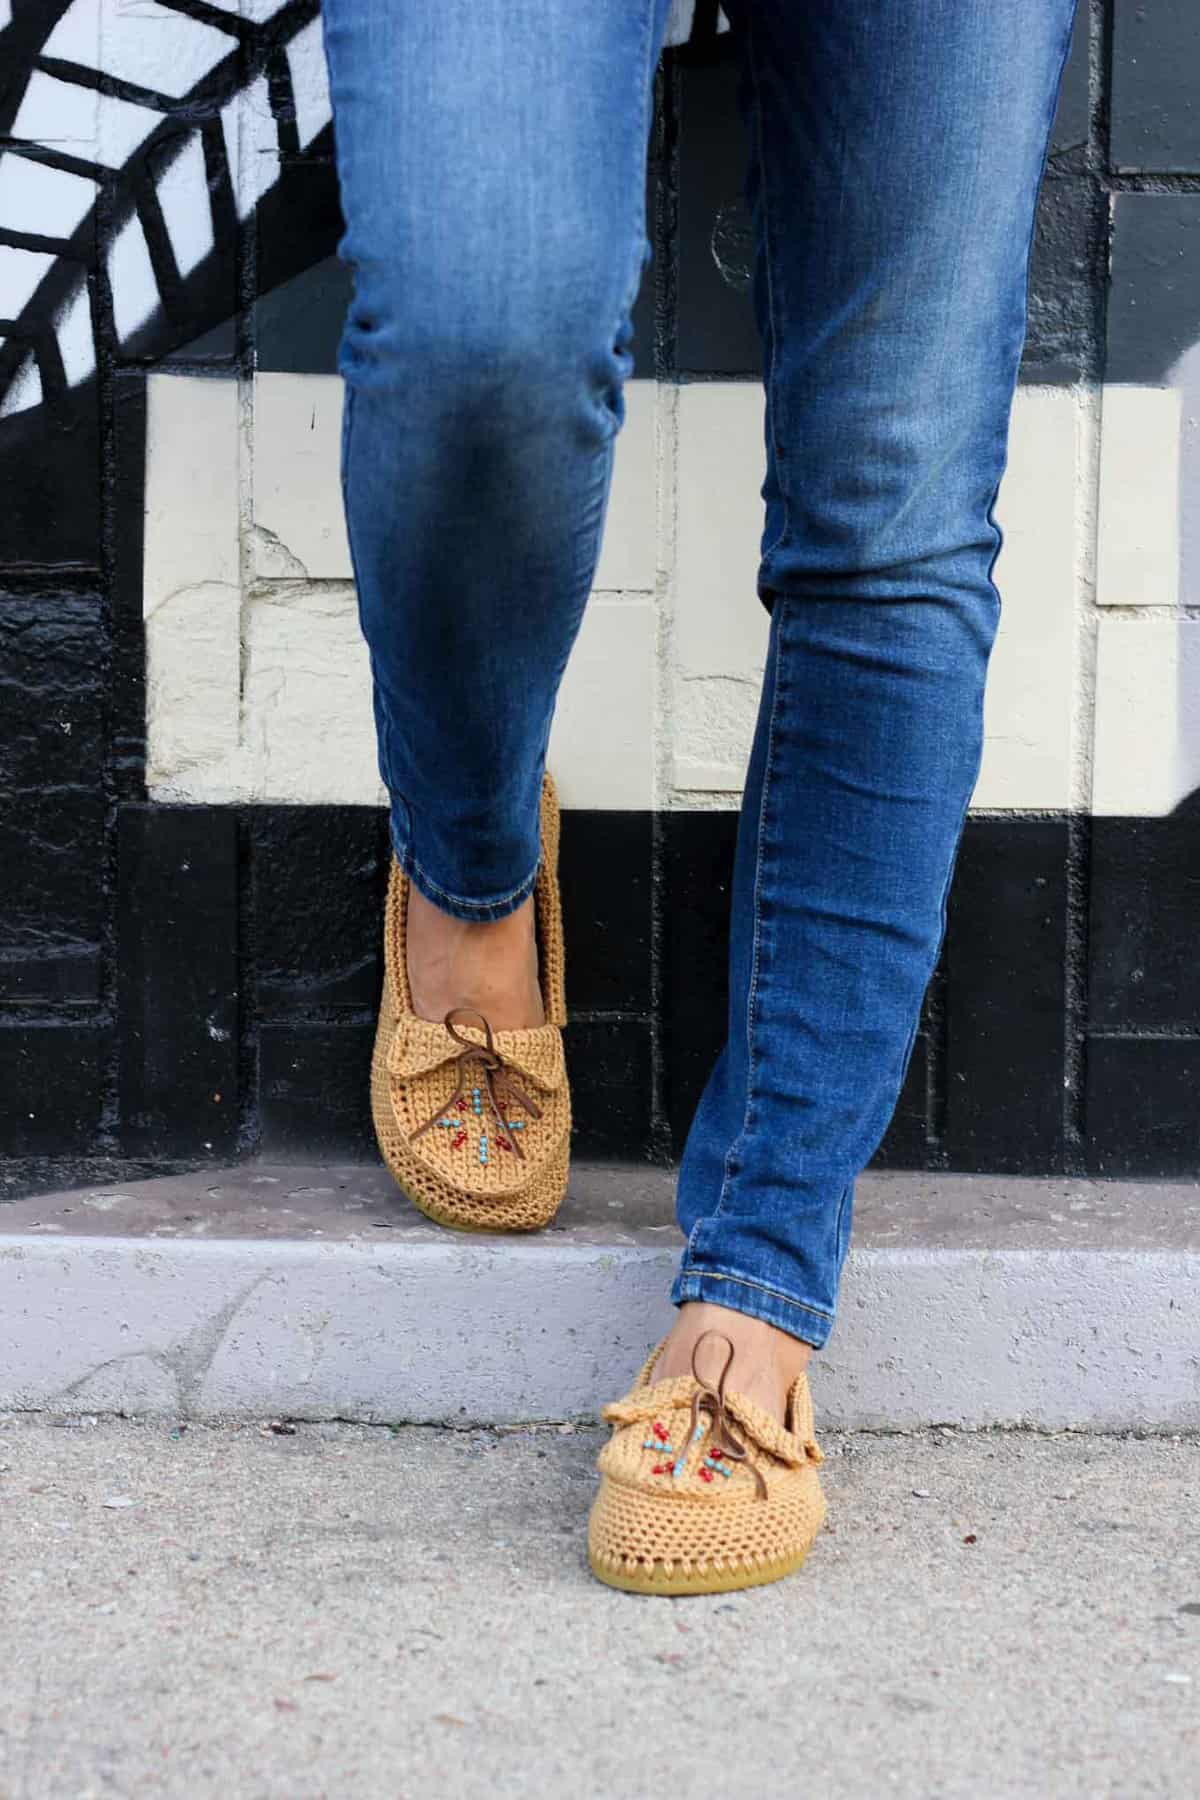
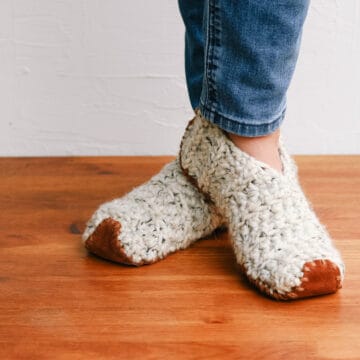
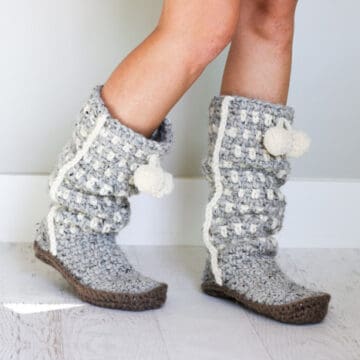
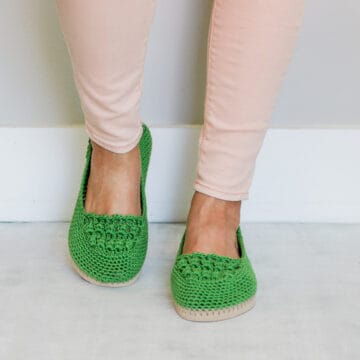
Are you ready for some flip-flop-moccasin super shoes!? In this free pattern and video tutorial, I’ll show you how to crochet shoes with flip flop soles that are super comfortable, function as shoes and/or slippers and can be customized to adult shoe size.
As always, the free pattern and video tutorial are below, or you can purchase an ad-free, printable pdf of this pattern here.
 When I was a kid, we’d go to the mountainy tourist town near where we lived and in the midst of all the candy apples, weird keychains and ubiquitous screen printed t-shirts, the only thing I desperately longed for was a pair of “real” native American moccasins. The beads. The fringe. All of it. I was obsessed. For years.
But alas, moccasins in mountainy tourist towns don’t come cheap. It wasn’t until I was about 28 that I got my first pair on a trip through New Mexico. My feet have rarely been moccasin-free since.
 But in all my moccasin ownership, not a single pair has been crocheted. (Hard to believe, I know!)
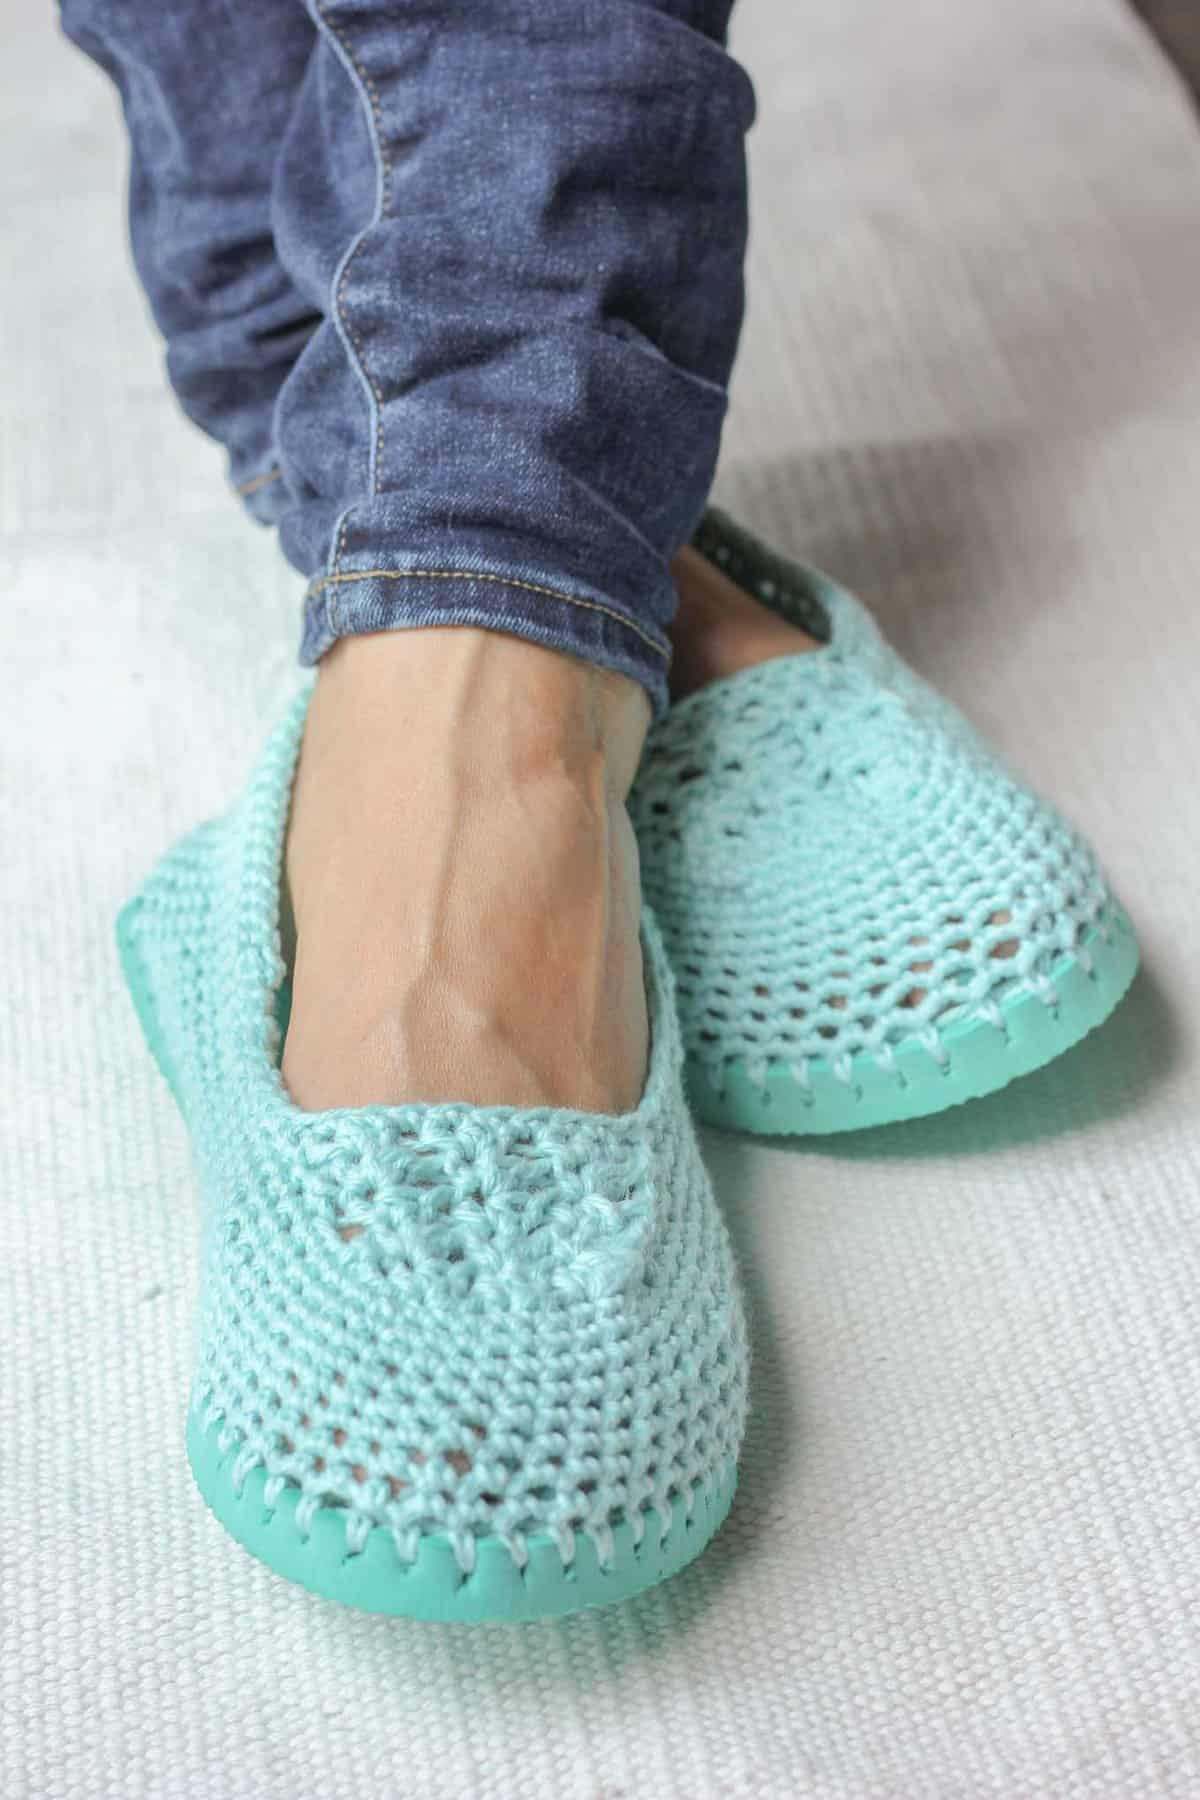
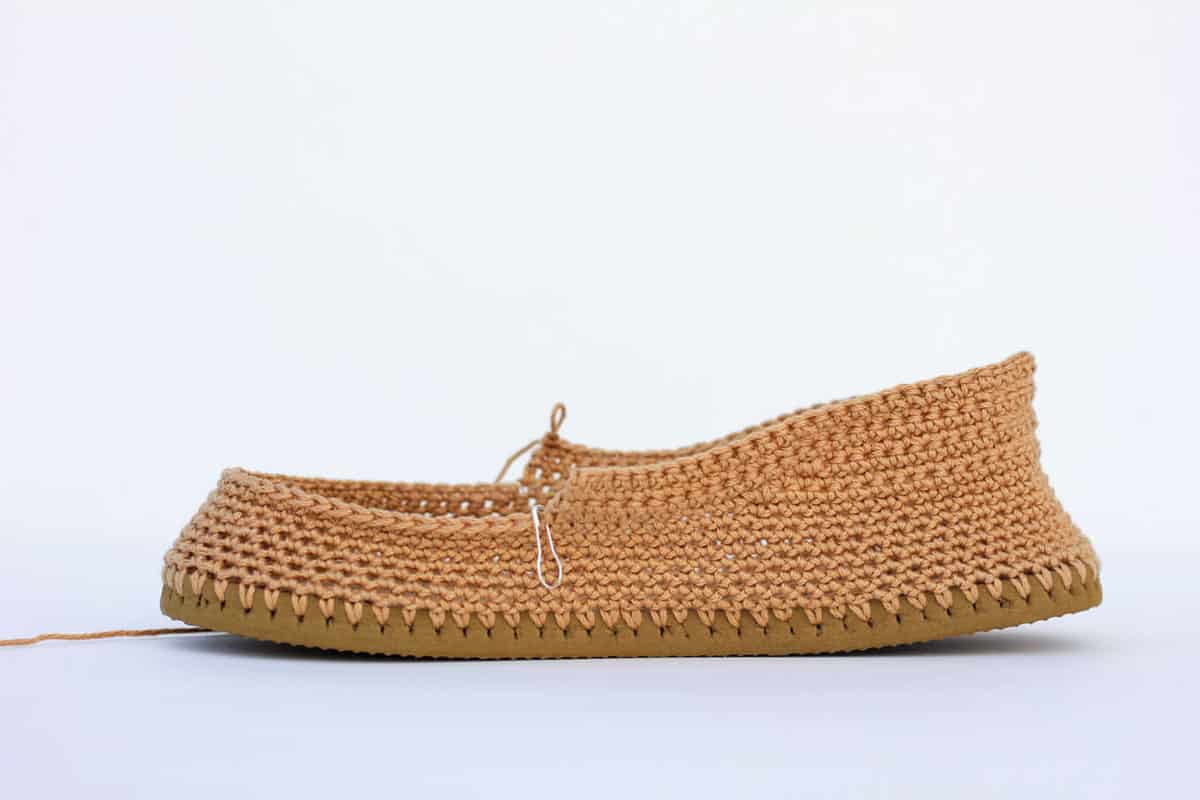
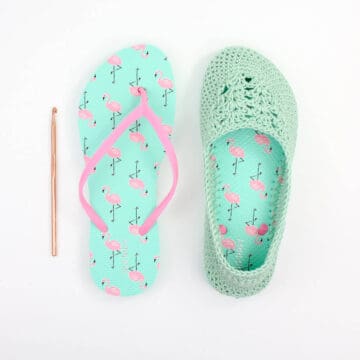
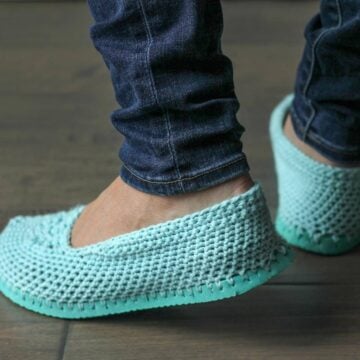
 After I designed these crocheted summer slippers using flip flops for the sole, I knew a pair of crocheted flip flop moccasin hybrid super shoes was in my future.
 So when my sister recently arrived home from a year of traveling abroad with her husband, a pair of crocheted shoes seemed like a perfect welcome home present. (Because, why not?!)
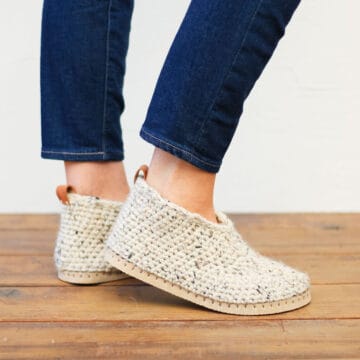
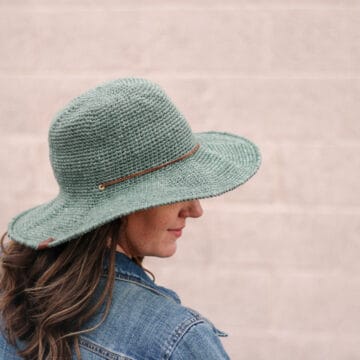
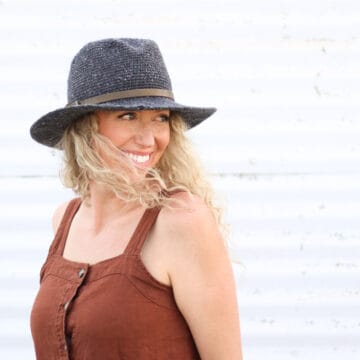
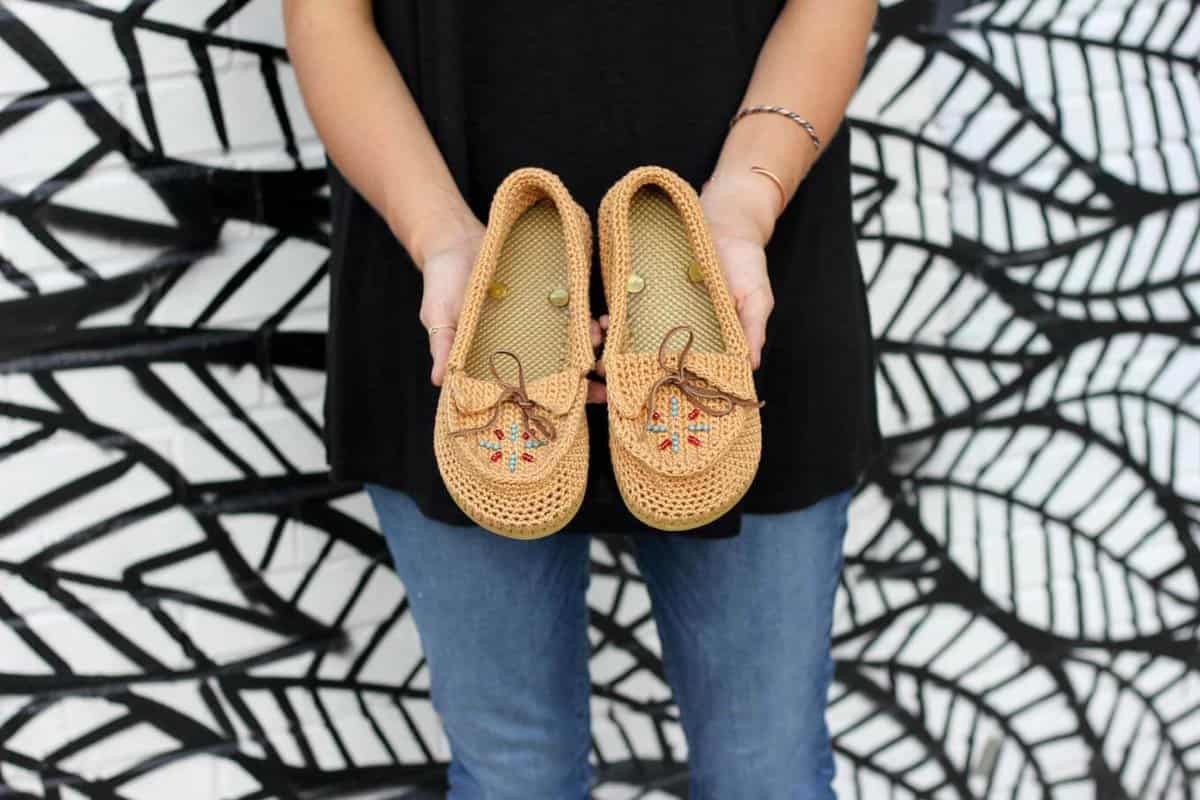 I am so psyched on how they turned out. And I’m even more excited that I have a written pattern AND a detailed video tutorial to help you learn how to make your own pair of crochet shoes with flip flop soles.
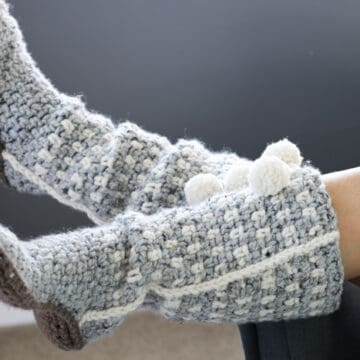
They’re comfortable. They’re bohemian. They’re inexpensive. They give you some serious hipster street cred.
 I’m just going to be honest and say that editing this video took about 150 million times longer than I thought it would. This is a pretty thorough video tutorial. In it, I walk you through exactly how to make these crochet shoes.
 So if you’re the type of person who prefers to learn visually or doesn’t have a lot of pattern-reading experience, you should be able to watch these videos and make yourself some totally awesome crochet shoes with flip flop soles.
(And you can check out my other video tutorials here!)
UPDATE: Many readers have asked how these crochet moccasins with flip flop soles hold up over time. I’ve answered that question and many more in my FAQs about crocheting on flip flops.
Find Your Next Crochet Pattern on Flip Flop Soles
Crocheting on flip flops can fast track your feet straight to comfort-ville. Flip flops offer functional, non-slip soles for your crochet slippers. They also allow you to crochet shoes customized for your particular feet.
See more free crochet flip flops patterns →
If you’re the traditional-pattern-reading type, scroll down for the full written pattern!
Crochet Moccasins with Flip Flop Soles – Free Written Pattern
Download the printable, ad-free pdf.
Add this pattern to your Ravelry queue.
Sizes: Adult women’s 5 and up (Pattern provides details to make any women’s shoe size.)
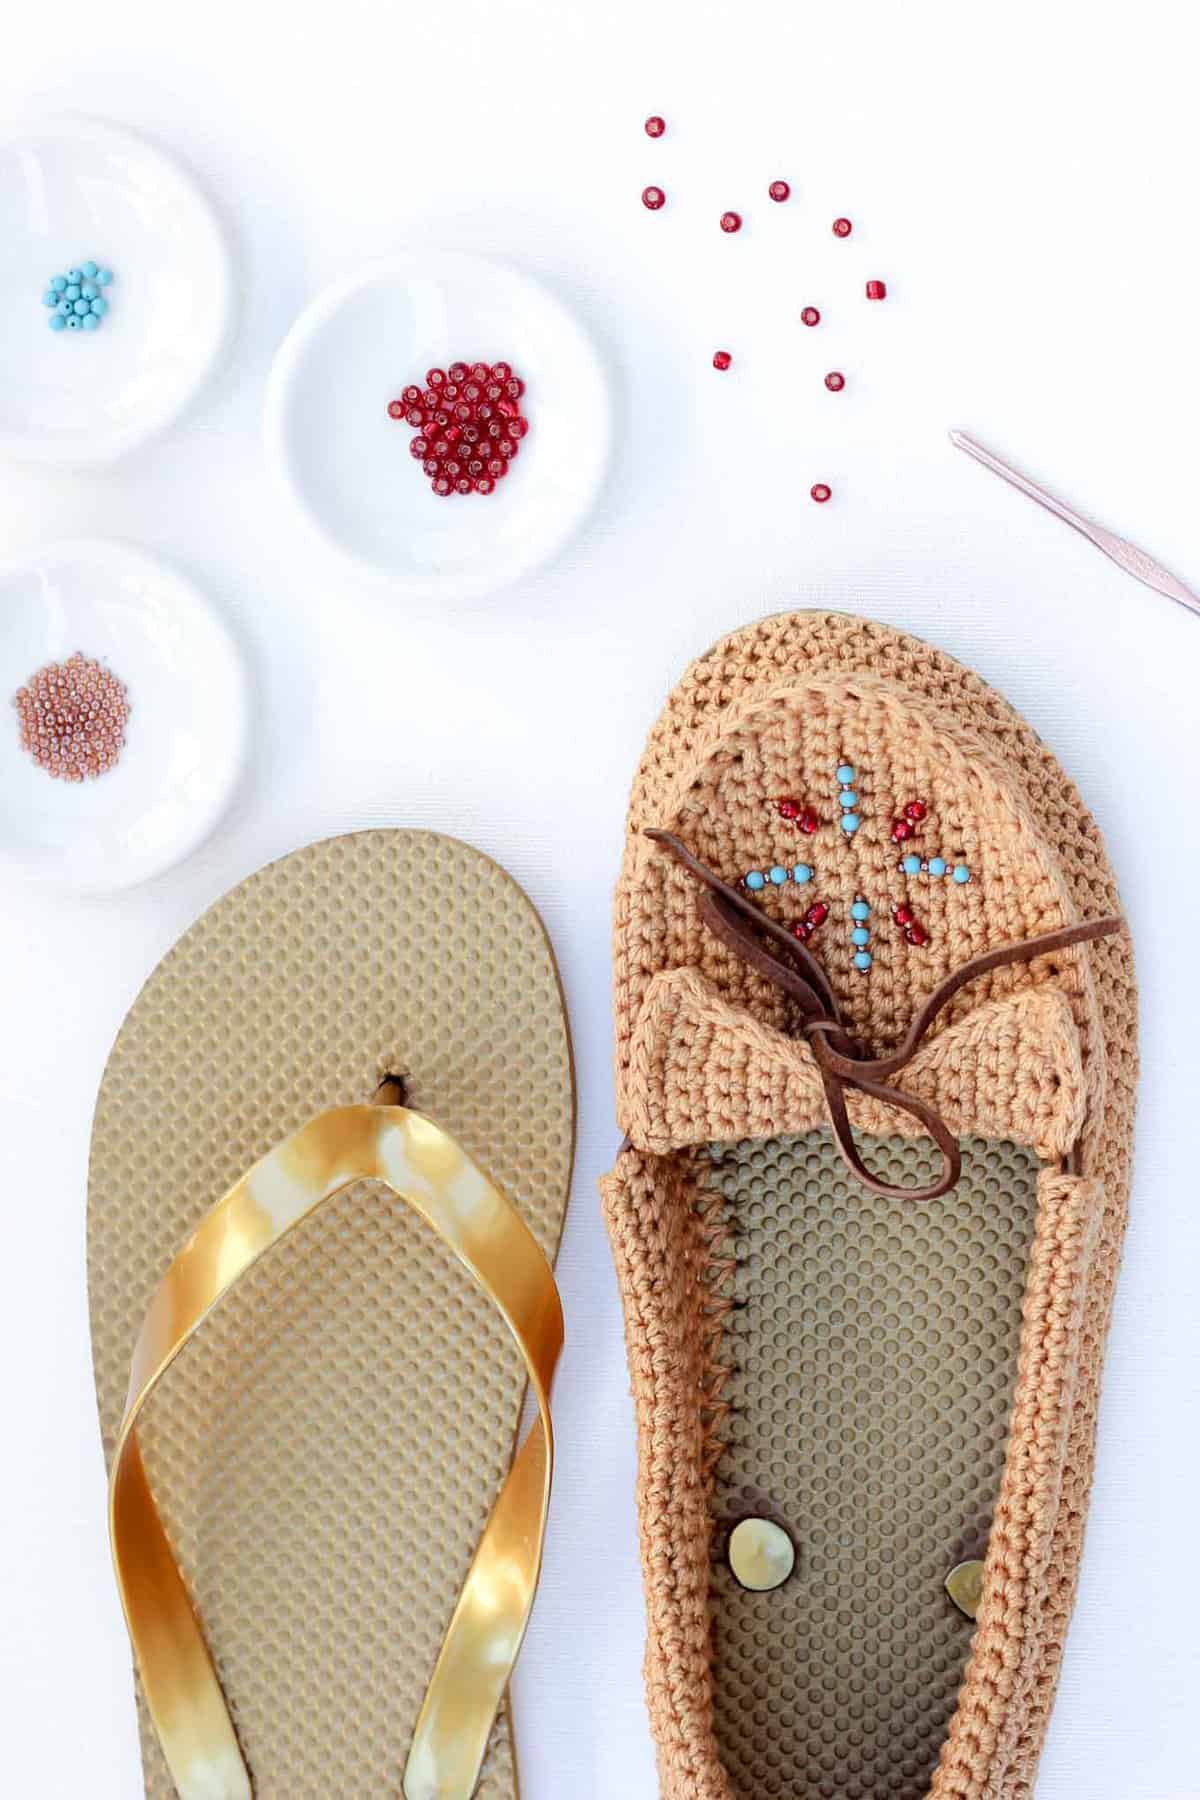
Supplies:
So you can spend more time making mocs and less time shopping, this post contains affiliate links at no extra cost to you.
• Lion Brand 24/7 Cotton – 1 skein (100g/186 yds) – color: Camel
• Tapestry needle
• 1 pair of flip flops (One size smaller than you wear normally. See pattern notes.)
• Stitch markers
• Size B [2.5 mm] crochet hook or size needed to fit through flip flop holes
• Size E [3.5 mm] crochet hook (I really like this affordable set!)
• Sewing needle
• Sharp tool to poke holes in flip flops (skewer, thin drill bit or tapestry needle)
• Approx 2 yards leather laces cut into 1-yard pieces
• Sharp scissors
• Monofilament (fishing line) – optional
• Seed beads – optional
Gauge:
8 sts and 7 rows/rnds = 1 inch [2.5 cm] in single crochet
Gauge will vary a bit based on distance between poked holes on flip flop sole.
Abbreviations:
sc – single crochet
sk – skip
sl st – slip stich
st – st
MC – main color
cont – continued
Overall Pattern Notes:
- Transforming flip flops into slippers isn’t an exact science! Unlike other crochet patterns, these slippers have some variables, most significant of which is the size of flip flops used and the number of holes poked. This pattern provides general guidelines and some troubleshooting tips to help keep the process fun. 🙂
- You might want to size down when buying your flip flops. Since your foot won’t be held in by the flip flop strap, your normal size of flip flops might feel a bit roomy as crocheted shoes.
- The shoes pictured are a women’s size 8-9 and they have 89 holes poked on each sole. To make shoes with bigger or smaller flip flops, just adjust the number of holes, poking them about every .25 inches. The moccasin top pattern should fit most women’s sizes. See notes in “moccasin top” section on making it wider if necessary.
- Find $1 flip flops on Amazonor at Walmart. Dollar Tree’s $1 flip flops tend to be a bit too flimsy, but can work if you are careful.
Moccasin Sides and Heel
Notes:
This section is worked in a spiral. Therefore there is no need to join or ch 1 at the beginning of each round.
To begin:
Use sharp instrument to poke holes every ¼ inch (.25”) around each flip flop sole. You want the hole to go at an angle from about the middle of the way down the sole to about a ¼ inches into the top of the sole. Make your holes far enough from the edge that the yarn won’t rip through the rubber. (See this pattern for more photos on this process.)
With smaller hook, attach MC yarn at the back of the heel by inserting your hook from the top of the flip flop toward the bottom of the sole, grabbing the yarn and pulling through to the top of the sole. Ch 1 through the loop you’ve created. (See Photo B.) The resulting tail inside the flip flop marks first st of this and subsequent rows. Add a proper stitch marker here if desired.
Round 1: (using smaller hook) sc into each hole on the flip flop sole, sl st to join. Do not turn.
Wanna save this pattern?
Rounds 2-3: (switch to larger hook) sc in each sc around. Do not turn.
✨Unlock this free subscriber-exclusive pattern ✨
Follow these steps to view the full free pattern below
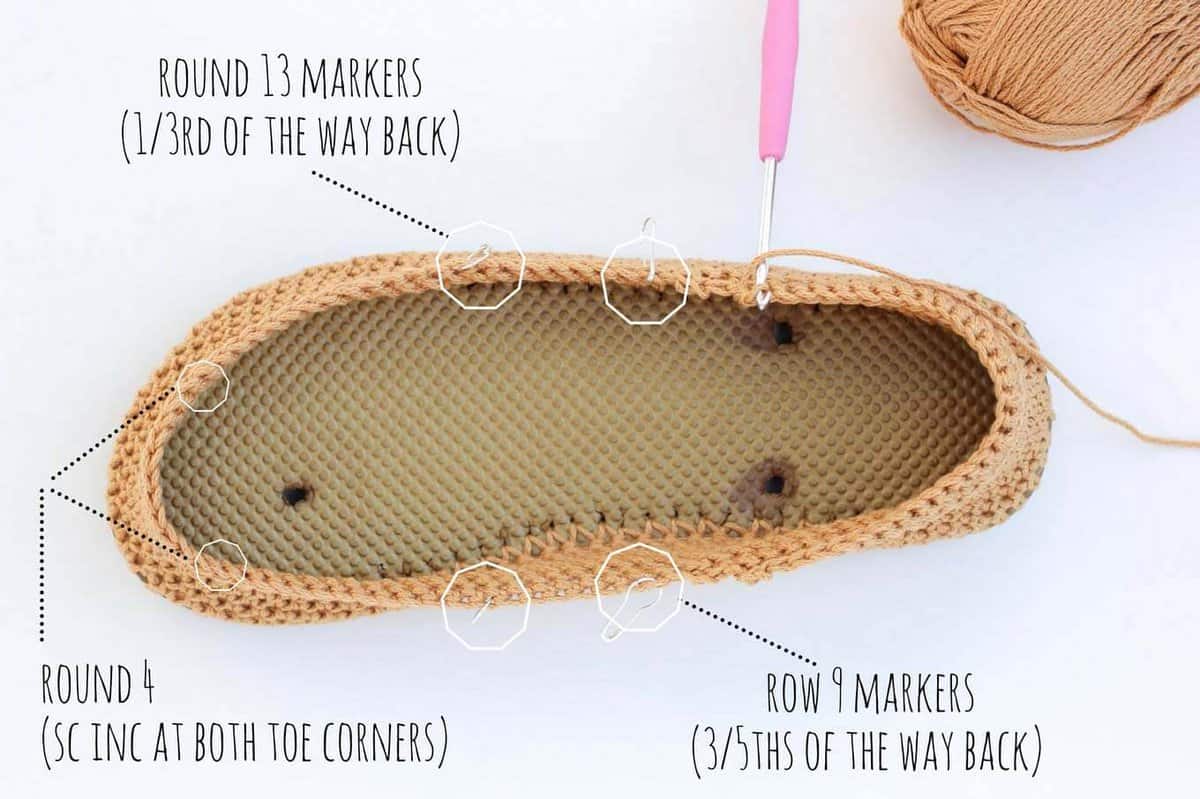
Rounds 4: (See diagram below for rough placement of increases. Exact location not impt.) sc in each st until front toe area, sc 2 in one of the st near where your pinky toe will go, sc in each st, sc 2 in one of the st where your big toe will go, sc in each sc to back of heel. Do not turn.
Rounds 5-8: sc in each sc around. Do not turn.

Begin Short Rows for Heel Shaping
Notes:
Place a stitch marker on either side of the moccasin, ⅗th of the way back toward the heel. (See diagram above for placement.) The following rows are worked back and forth around back of heel. Pattern notes assume flip flop is positioned with the heel toward you and the toe away from you when the “right” or “left” stitch marker is mentioned.
Row 9: (Without turning work) sc in each st until left marked st, sl st into marked st, turn.
Row 10: ch 1, sk first st, sl st into next st, sc in each st until right marked st, sl st into marked st, turn.
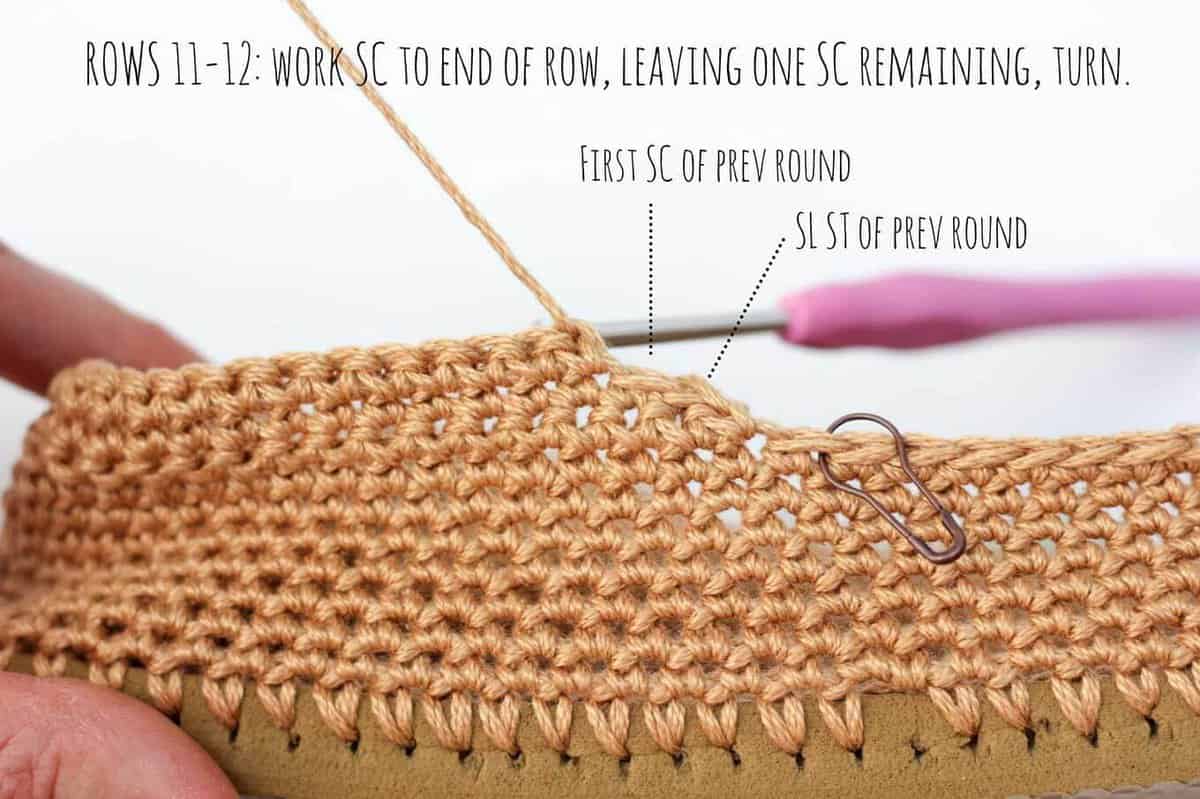
Row 11: (work toward left marker) ch 1, sk first st, sl st into next st, sc in each st until 1 sc of previous round remains, turn.
Row 12: (work toward right marker) ch 1, sk first st, sl st into next st, sc in each st until 1 sc of previous round remains , turn.
Begin Rows for Leather Laces “Tube”
Notes:
Remove original markers for short rows. Place markers ⅓rd of the way back from the toe on either side of the moccasin. (See diagram above for placement.) The following round is worked in the round as 1-8 were.
Work sc stitches in an even density to create a smooth edge over the “bump” where the short rows taper. Round 13 is a total of approx 1.25 laps around the flip slop sole.
Round 13: (work toward left marker and cont counterclockwise) ch 1, sk first st, sl st into next st, sc in each st around entire moccasin, ending at original marked st at back of heel. Do not turn.
Notes:
The following rows are worked back and forth. Pattern notes assume flip flop is positioned with the heel toward you and the toe away from you when the “right” or “left” stitch marker is mentioned.
Rows 14, 16, 18: (work counterclockwise) ch 1, sc in each st ending in left marked st, turn.
Row 15, 17, 19: ch 1, sc in each st ending in right marked st, turn.
Row 20: sc in each st ending at marked st at back of heel. Fasten off yarn and weave in ends.
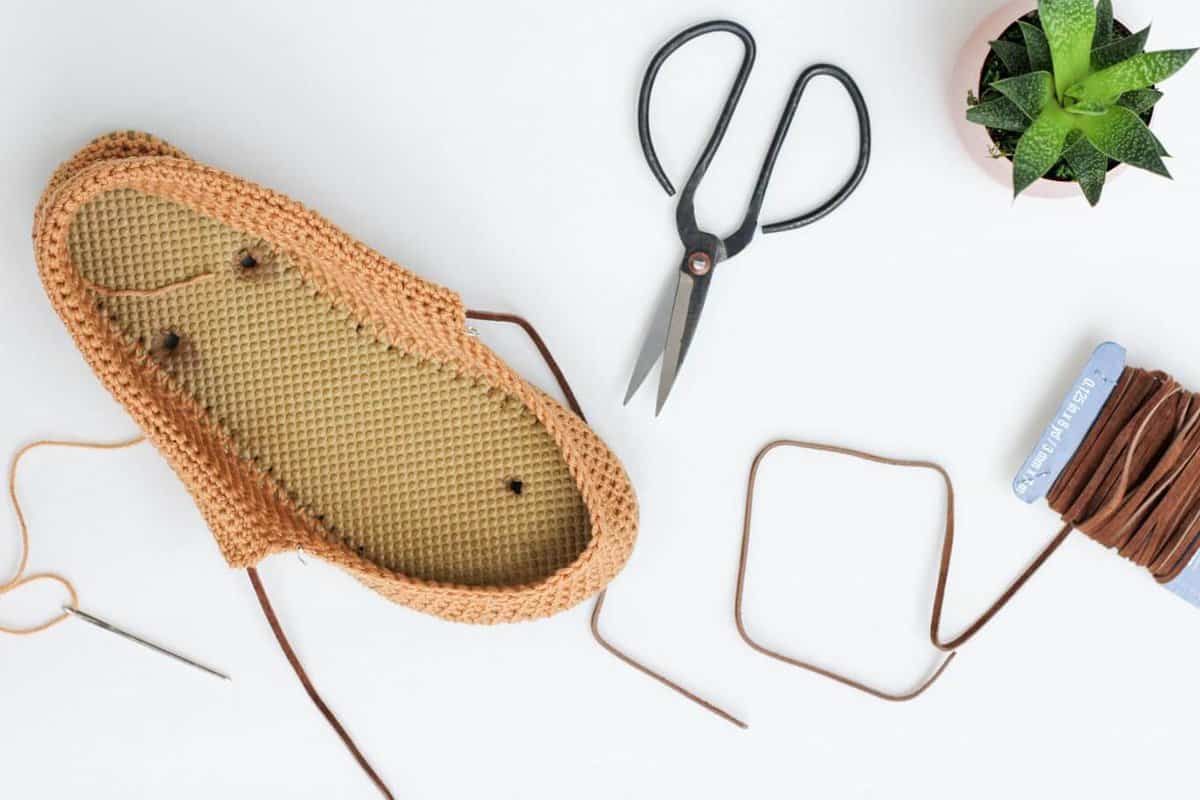
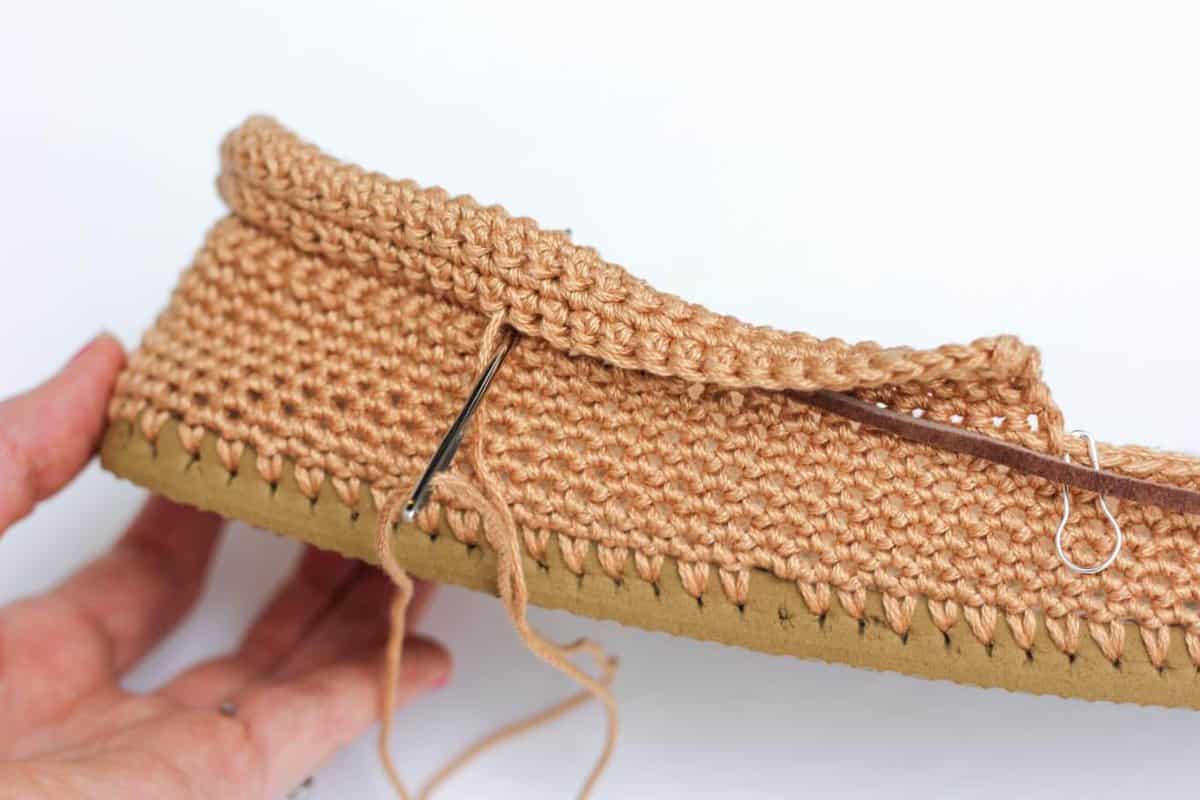
Finishing leather laces “tube”:
Fold the flap just created over and tuck one yard of the leather laces inside. With MC yarn and a tapestry needle, sew the laces into the tube using a whip stitch. (Reference video for more detail.)
Moccasin Top
Row 1: (using larger hook) ch 19, turn.
Row 2: working into second ch from the hook, sc in each ch, turn.
Rows 3, 5, 7: ch 1, sk first sc, sc in next st, sc in each st until 1 st remains, sc 2 in last st, turn.
Row 4, 6, 8: ch 1, sc 2 in first st, sc in each st, turn.
Row 9: ch 1, sk first st, sc in next sc, sc in each st, turn.
Row 10: ch 1, sc in each st, turn.
Row 11: repeat row 9.
Row 12: repeat row 10.
Sizing Note:
If your foot is on the wider side, add 2 or 4 rows of sc here to make the top toe section wider. (Simply repeat row 10 twice or four times.)
Row 13: ch 1, sc 2 in first sc, sc in each st, turn.
Rows 14, 16, 18, 20: ch 1, sk first sc, sc in next st, sc in each st until 1 st remains, sc 2 in last st, turn.
Rows 15, 17, 19: ch 1, sc in each st until 2 st remain, sk 1 st, sc in last st, turn.
Row 21: ch 1, sc in each st until 2 st remain, sk 1 st, sc in last st. Do not turn. Place marker in last st of this row.
Note:
The follow round is worked around the entire top piece. Take care to keep stitches loose enough that the fabric doesn’t pucker. 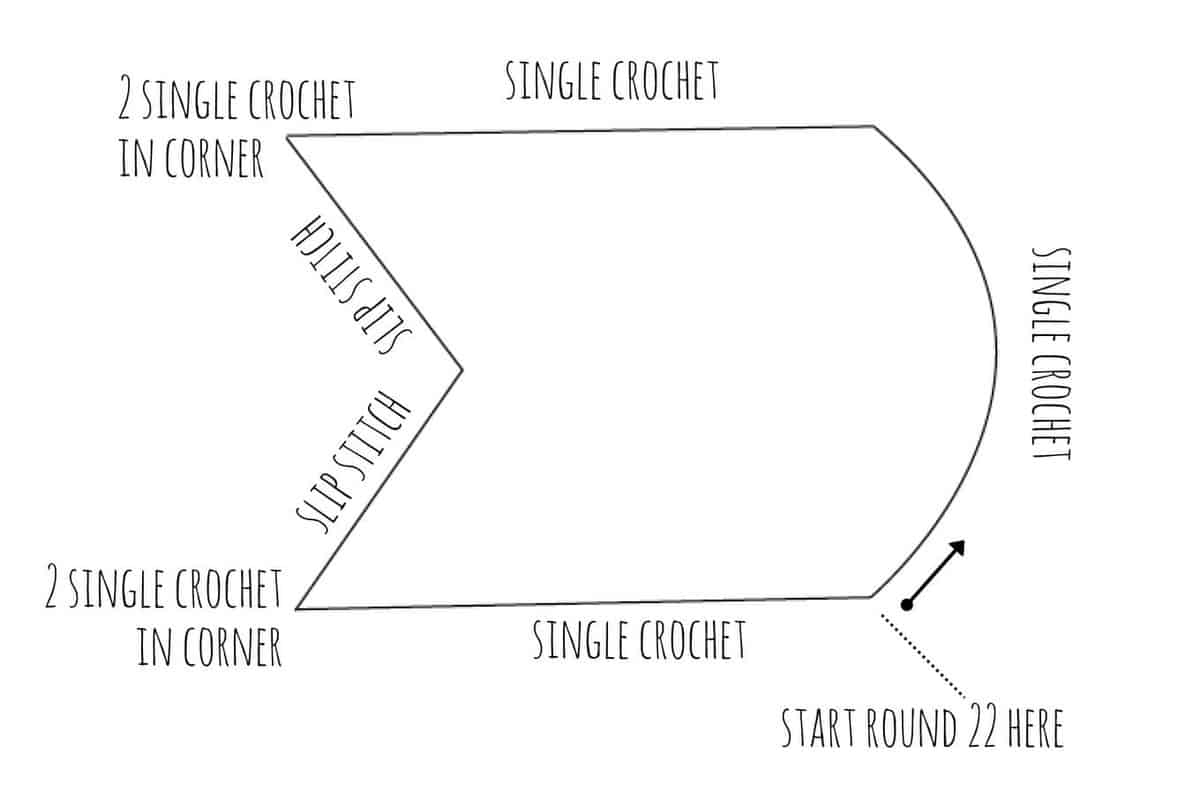 Round 22: (Without turning) work in sc around curved toe section and up the flat side of the piece. At the corner of the moccasin “point,” sc 2 in the corner and sl st down the slant of the point and back up the other slant, sc 2 in the other “point,” sc in each sc across the last flat side ending in st before marker. (See Diagram F.) Fasten off and weave in ends.


Finishing
Sewing Together:
Block the top piece if desired. Identify the best looking side of your top piece–specifically look at the points because one edge should be smoothest due to the slip stitching. This side should face your foot—the points will be folded over, revealing the smoothest edge.
 Align the toe with the shoe rim and pin using stitch markers or safety pins. Using one strand of yarn (not doubled up), attach yarn inside the shoe at right corner side of the top piece.
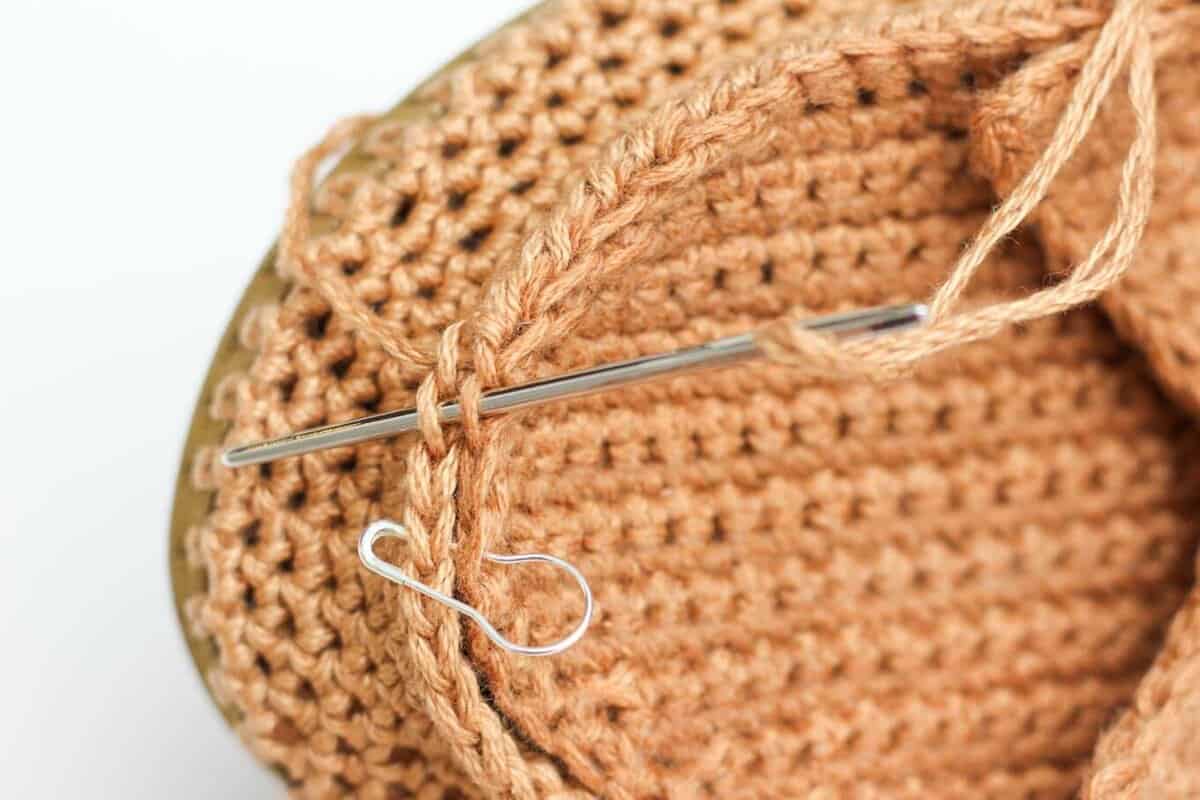
Whip stitch around toe, working from the top piece into the shoe rim as pictured. (See Photo G.) Work from the top down, going through the bottom loop of the top piece and the bottom loop of the shoe rim.)
Before tying off yarn, do one stitch through the moccasin top into each folded over “point” to keep them tacked down. Fasten off yarn.
Adding Beads:
Using a sewing needle, attach monofilament inside moccasin with a knot. Pull monofilament to outside top of slipper and add beads (you may, unfortunately, have to remove the needle for this and then rethread after adding the beads), putting the needle back into the shoe once one strand of beads has been added. Repeat for each spoke of the design. (See Photo H.)
 Party Time:
Do a little jig—you just crocheted your own shoes! High five!
That was so fun! Now what?
Invitation to our Facebook group
Come discuss crocheting Moccasin slipper patterns and lots of other crochet projects and techniques in our Make & Do Crew Facebook group. Here thousands of helpful crocheters answer each others questions and share their stitches. Come join us here.
More Free Crochet Patterns Using Flip Flop Soles
- FAQS: How to Crochet on Flip Flops – and will they fall apart?
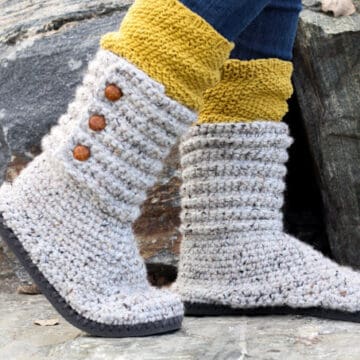
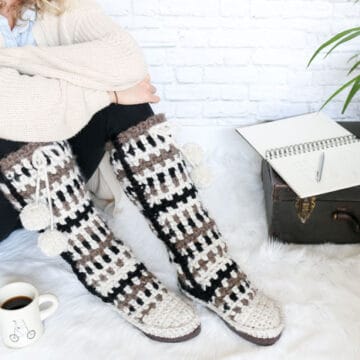
- Crochet Boots With Flip Flops Soles
- Lightweight Crochet Slippers with Flip Flop Soles
- Free Crochet Ugg Boot Pattern
- Crochet Mukluk Slipper Pattern
- Crochet Slipper Boots Pattern
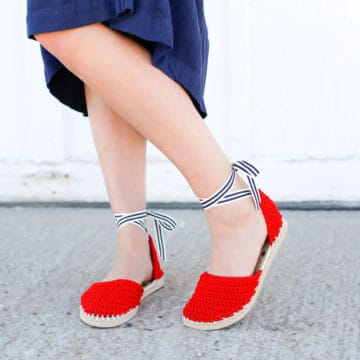
- Lacy Crochet Sandals Pattern
- Boho Crochet Sandals Pattern
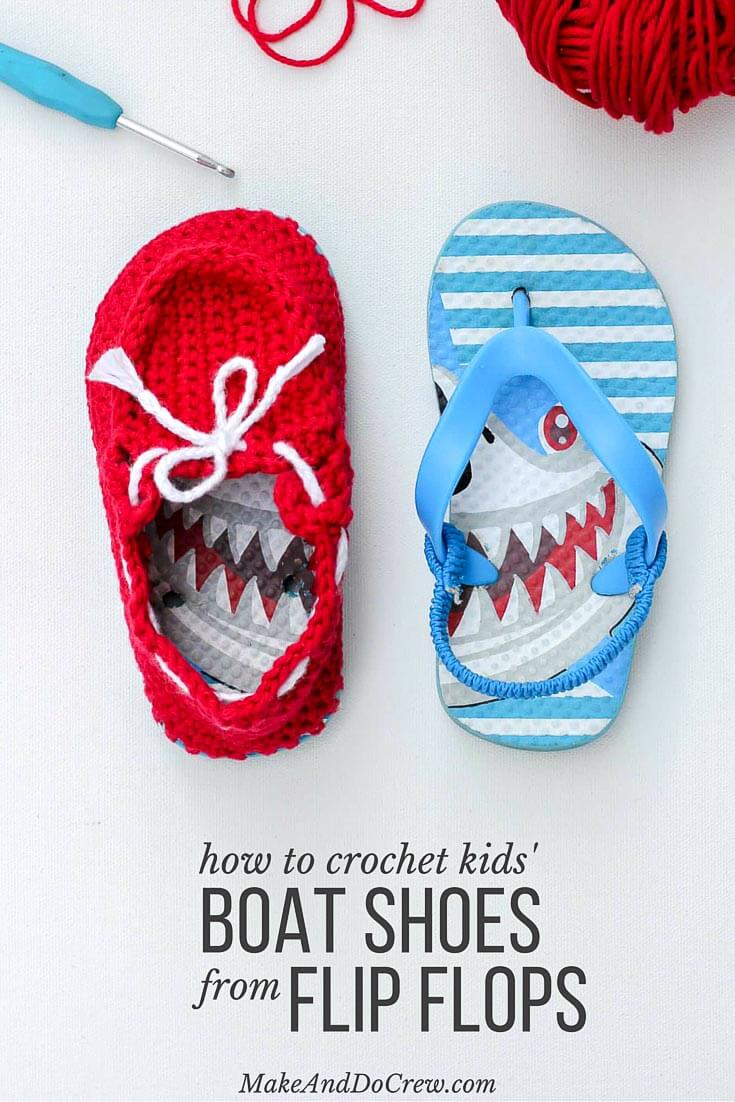
Got a kid who also has feet? They might enjoy this crocheted boat shoe slipper pattern (using flip flops, of course!)
[convertkit form=4869877]
Brenda Gaboni says
I love to crochet, but I have rheumatoid arthritis and it makes my hands sore. I can only do it for short periods at a time. So the simpler the pattern the better for me.
Jess @ Make and Do Crew says
Hey Brenda,
I understand how that could make crocheting hard. Does this pattern seem too daunting for your hands? What kinds of patterns have you had good luck with?
I’d love to point you in the direction of some that would work for you if you’d like.
Jess
Kathryn Lester says
Oh my goodness! These are an answer to my prayers. I belong to a group of ladies that knit and crochet for our local community. It includes the Budget Challenged Families with the School Backpack Program, babies, the homeless shelter/soup kitchen, providing Chemo hats for locals going through treatments and we provide a Christmas gift to be opened on Christmas morning to our local nursing homes. It is unbelievable just how many do not have gifts from loved ones to open on that special day. We have provided slippers in the past, but the issue and concern has been the residents slipping while wearing them. I know, I know they are called slippers after all, but that is supposed to be from the ability to slip them on, not slipping while they are on. This should work for our group, and we should be able to also make them for the men. Thank you so much for sharing your talent.
marichu chapman says
please can you tell me width leather lace is used
Jess @ Make and Do Crew says
Hey Marichu,
I’m not exactly sure the width. It’ve quite thin, maybe like 1/8th of an inch. The length needed is about 2 yards (1 yard per shoe).
Does that help?
Jess
Carol says
Very nice!! Thanks for the pattern!!
Jess @ Make and Do Crew says
My Pleasure, Carol! Hope you enjoy it!
darla coffman says
these moccasins are so cute. I made the flip-flop slippers from your pattern for my husbands daughter-in-law and she has told me time and time again how she loves them, so I was thrilled to see these moccasins here before Christmas. Love, love these. Thanks!
Jess @ Make and Do Crew says
I’m so happy to hear that, Darla! I think these would make a lovely gift, and they’re really affordable because you can make them with one skein of yarn. (I don’t like it when DIY gifts cost more than buying something in a store. :))
Happy crocheting!
Jess
Helen d says
I was having trouble seeing the words in the video for the instructions. You used white on white and sometimes blue on blue. Very hard to see but I did get the pair done. Why do you use cotton yarn and not regular yarn? I am having trouble finding the color of yarn I wont in cotton. can you help me.
Jess @ Make and Do Crew says
Hey Helen,
Yes, I understand that issue. I’m not an expert in video creation, so I learned a lot from making this one. Next time, I’ll figure out a better way to do the type on the screen. I thought it would be okay because I’m always including voice over that describes the words on the screen. I appreciate your feedback!
I use cotton yarn because I tend to prefer it and it makes for a breathable shoe. That said, you don’t have to use cotton if you prefer something else. This yarn is slightly thinner than a worsted weight yarn, so if you’d like to sub yarns, just keep that thickness in mind.
Hope that helps!
Jess
gene hitchcock says
I love your pattern for the house shoes and caint waie to try the monscons . soe for i have made six pair for christmas . i am 79 years old and have ben doing corchet about two years now to pass the time . keep sending stuf out and i will keep trying thanks .p. s. I dont sell i give away.
Jess @ Make and Do Crew says
Hey Gene,
How generous you are to make crocheted items for everyone! I bet they love it! I hope you enjoy the moccasin pattern. 🙂
Happy continued crocheting!
Jess
Carla says
These are awesome. Thank you for sharing this with us, can’t wait to try to make them.
Jess @ Make and Do Crew says
Thanks so much, Carla! I really enjoyed making these. I hope you do too!
Lynne Clark says
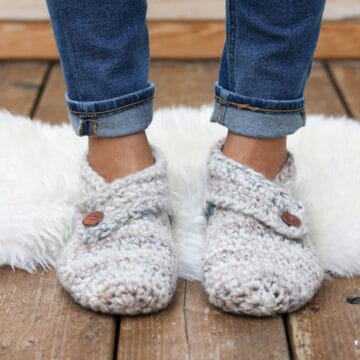
What did you use to cover over the holes from the flip-flop straps? Looks really finished that way
Jess @ Make and Do Crew says
Hey Lynne,
I just saved the pieces from the rubber straps and then trimmed off the straps so just the rubber circles were left. Then I glued them into the holes.
This is my first time trying it this way and I like how it looks too!
Jess
Lynne Clark says
Good Idea!! I didn’t like leaving them open. I made 1 flip-flop shoe, but I was unable to get them in my size so it was just for practice. Next season I will be looking for ones that fit so I can make the mocs.
Carol Zinn says
Check out Amazon.com. You can get them for as little as 59 cents or more if you want a better quality. They have hundreds of different sizes, etc.
Jennifer says
What kind of glue do you use to do this portion?
Jess @ Make and Do Crew says
Hi Jennifer!
I used a glue called E6000. It’s essentially a multipurpose, really strong glue. You can find it at Michael’s and potentially even somewhere like Walmart.
Hope that helps!
Jess
Jennifer Borchert says
Yes thank you so much!
Andre C. Howell says
It’s so cute. Thank your guide, I will try to do a small size for my child can use in the home.
Jess @ Make and Do Crew says
I think these would make great house shoes! My daughter loves wearing her crochet flip flop slippers around our house.
Happy crocheting!
Jess
E White says
I love this idea. My question is …. how well do they hold up? I don’t understand how they wouldn’t pull off the flip flop.
Bethany Simpson says
Ooo this pattern is fab and the video is really great. My cat sat and watched it intently with me! I am going to share it on my facebook page so my followers can watch too!