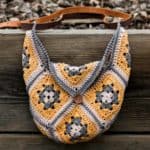
Learn how to crochet a granny square bag with this free pattern and step-by-step tutorial. The complete free Halcyon Granny Square Bag pattern is below or you can purchase the ad-free, printable PDF here.
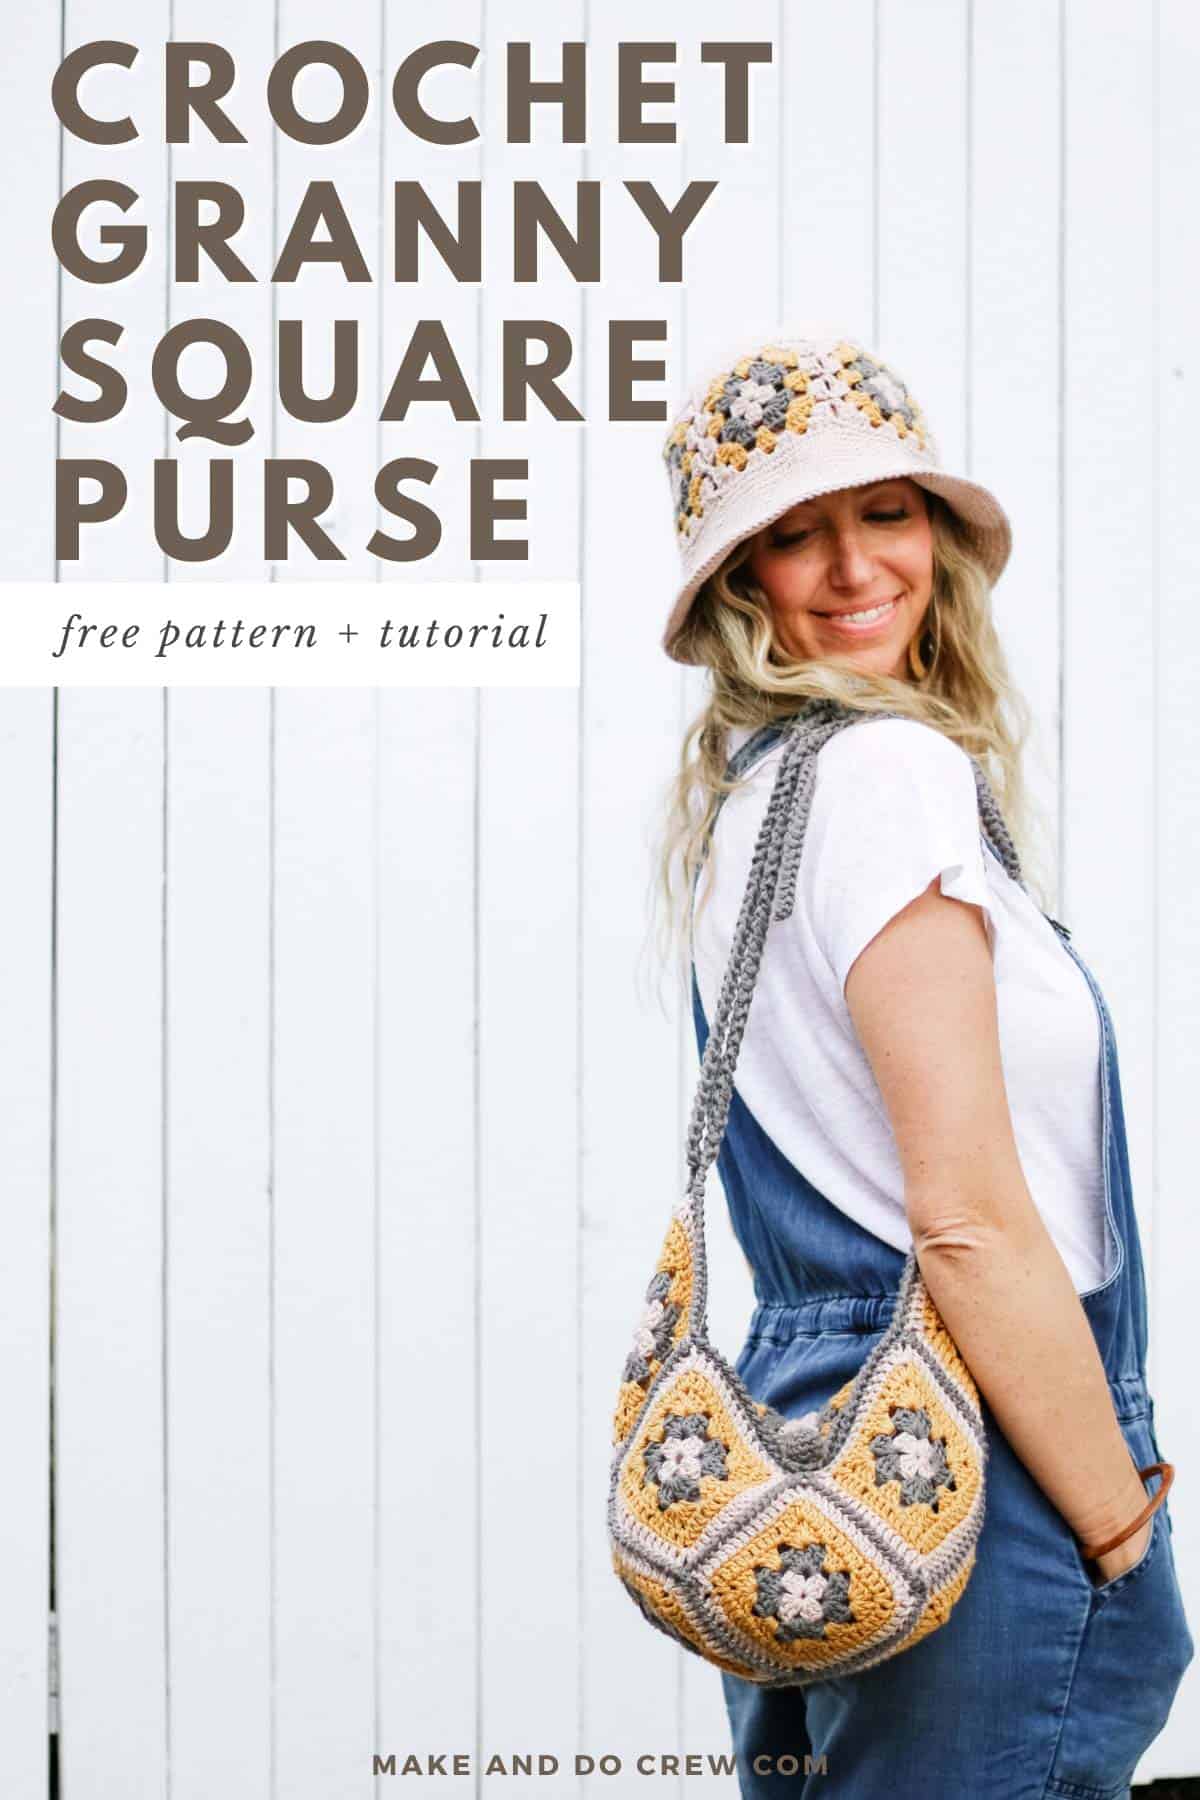
This free crochet granny square bag pattern is part of a collaboration with Lion Brand Yarns. This post contains affiliate links.
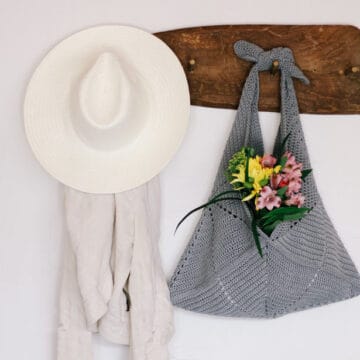
Eleven iconic granny squares join together in this modern nod to the classic motif. A perfect quick and portable project, you’ll find the Halcyon Granny Square Sling Bag just the right size for your essentials. A sturdy strap guarantees your cargo will be well-supported.
Don't miss the coordinating free Halcyon Granny Square Bucket Hat pattern!
Keep reading for more frequently asked questions and yarn details or jump down to the free pattern.
Jump to:
- Brief Video Tutorial
- Pattern overview
- Granny Square Bag FAQs
- More Free Crochet Bag + Purse Patterns
- Customization ideas
- Yarn + substitutions
- Matching bucket hat
- All-in-one crochet kit
- Print this pattern
- Free Pattern
- That was so fun! Now what?
- Invitation to our Facebook group
- More Free Crochet Patterns for Bags + Purses
- How to Crochet a Granny Square Bag
Brief Video Tutorial
Learn how to crochet a granny square bag in the brief tutorial below. You'll see some crochet geometry in action as you prepare to crochet your own sling bag.
(If you have an ad-blocker running, you'll need to disable it to view the video.)
Pattern overview
All it takes is a little creative geometry to learn how to crochet a granny square bag. If you're a visual learner, watching the video above will help get you oriented as you begin to put your bag together.
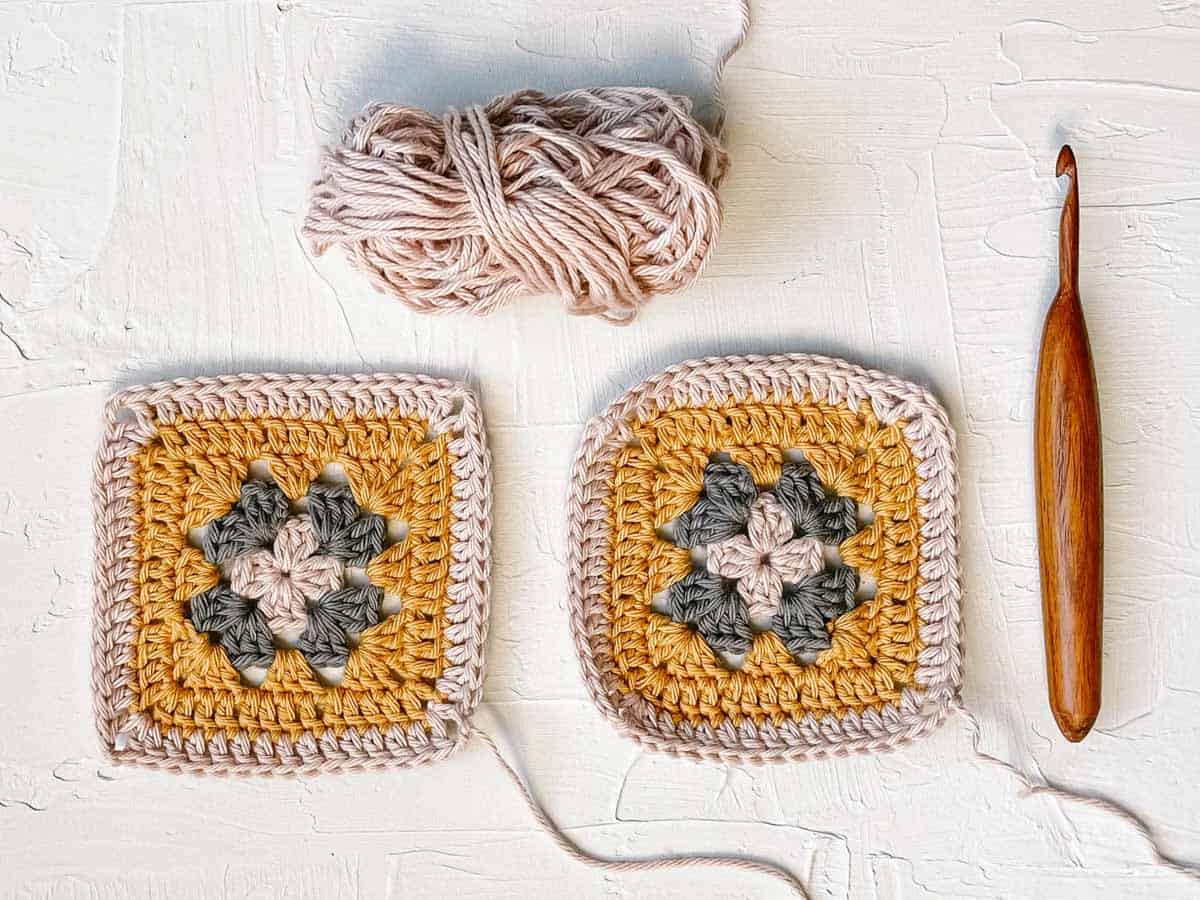
First, you'll crochet 11 granny squares.
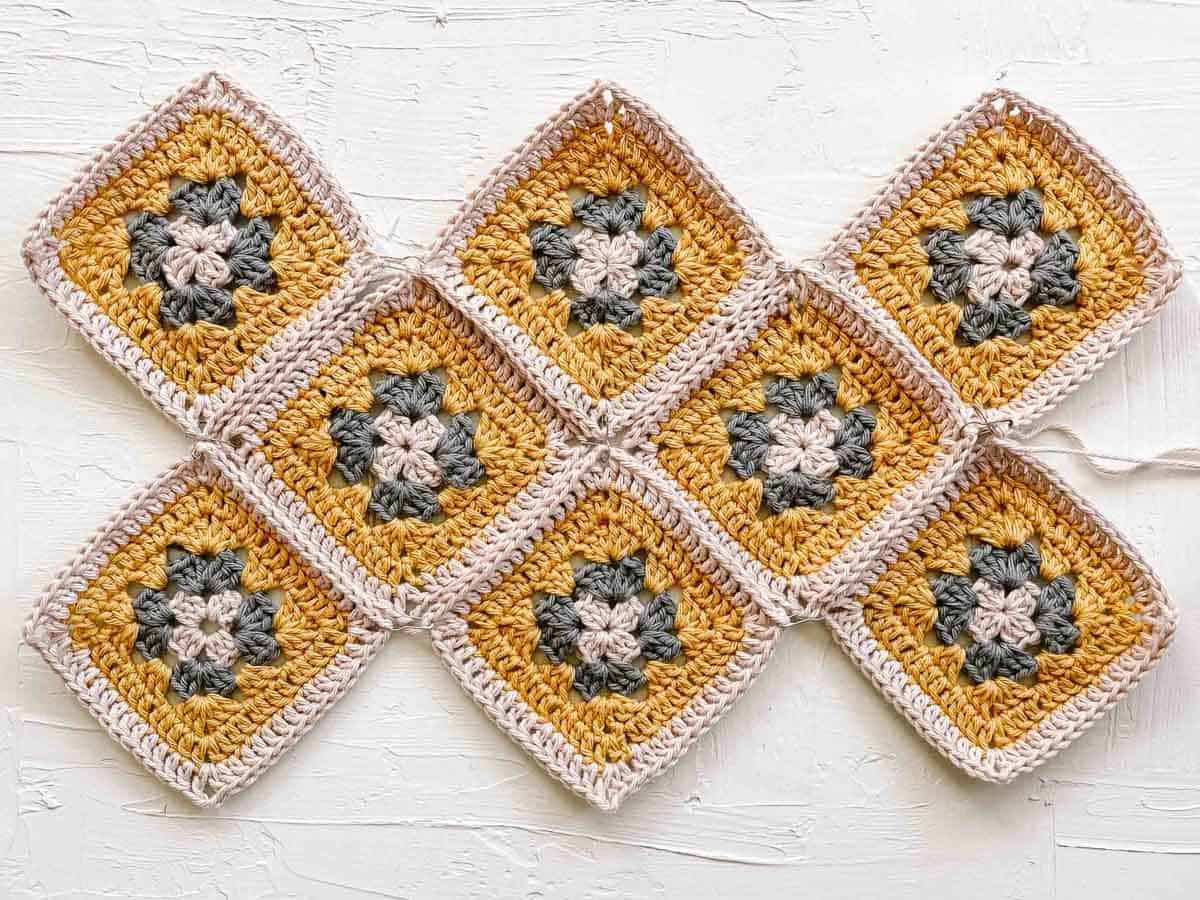
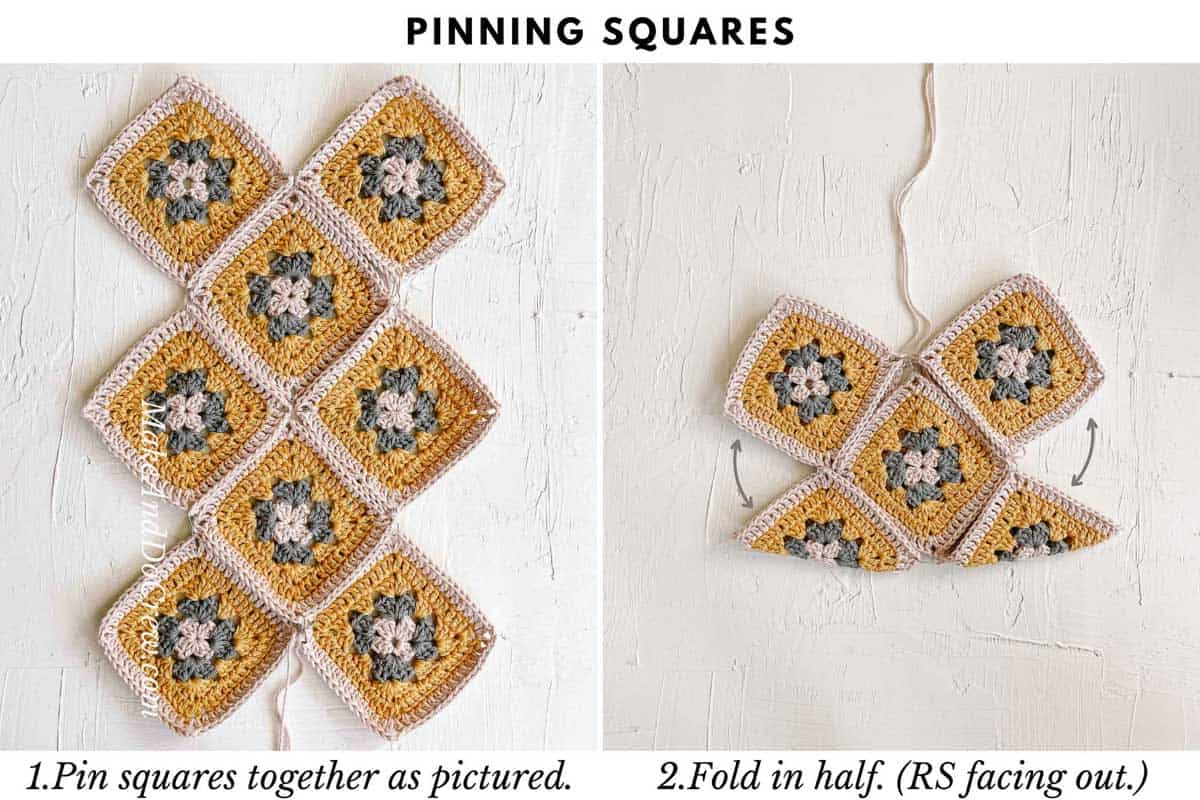
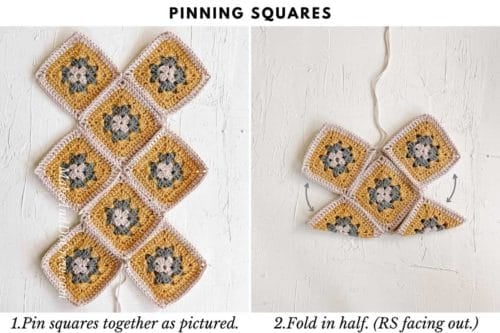
Next, you'll begin to pin them together.
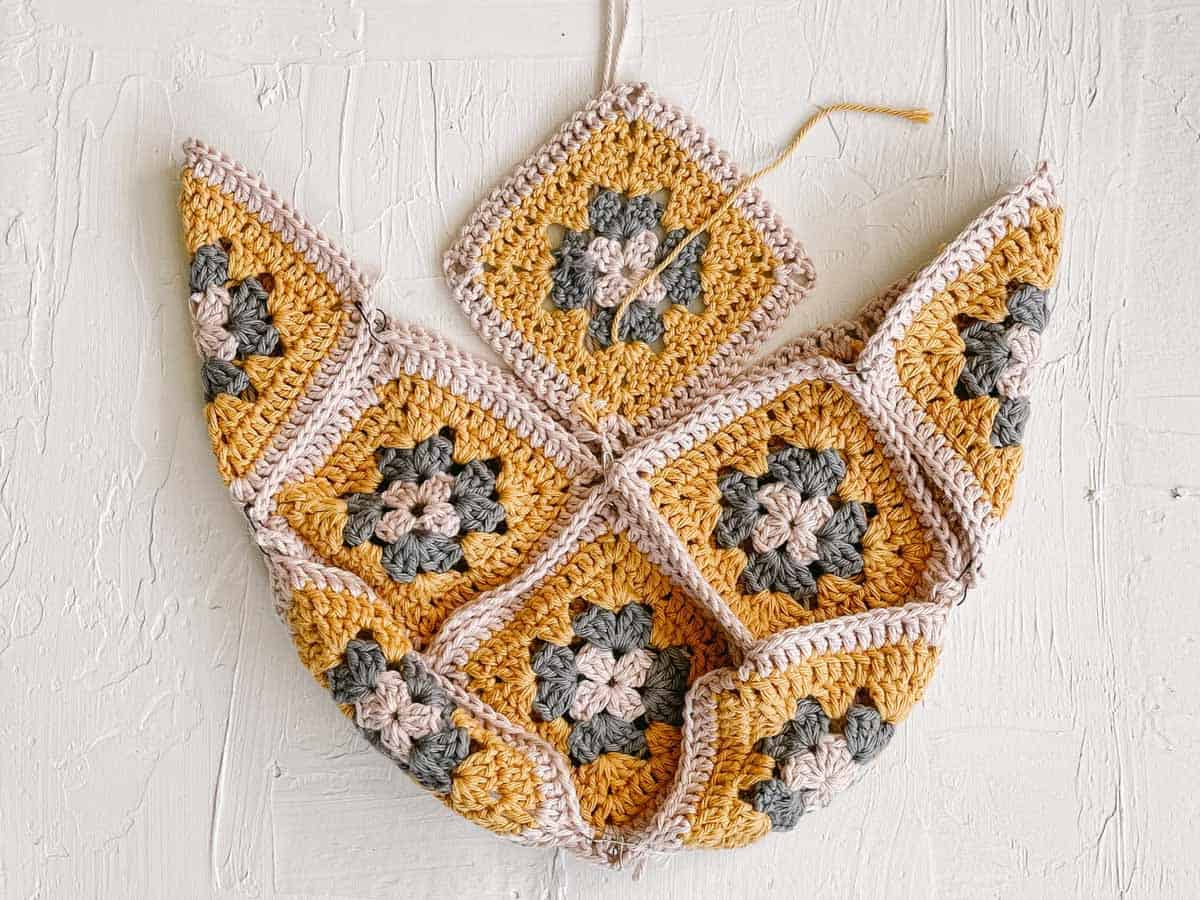
And fold your pinned piece of fabric together.
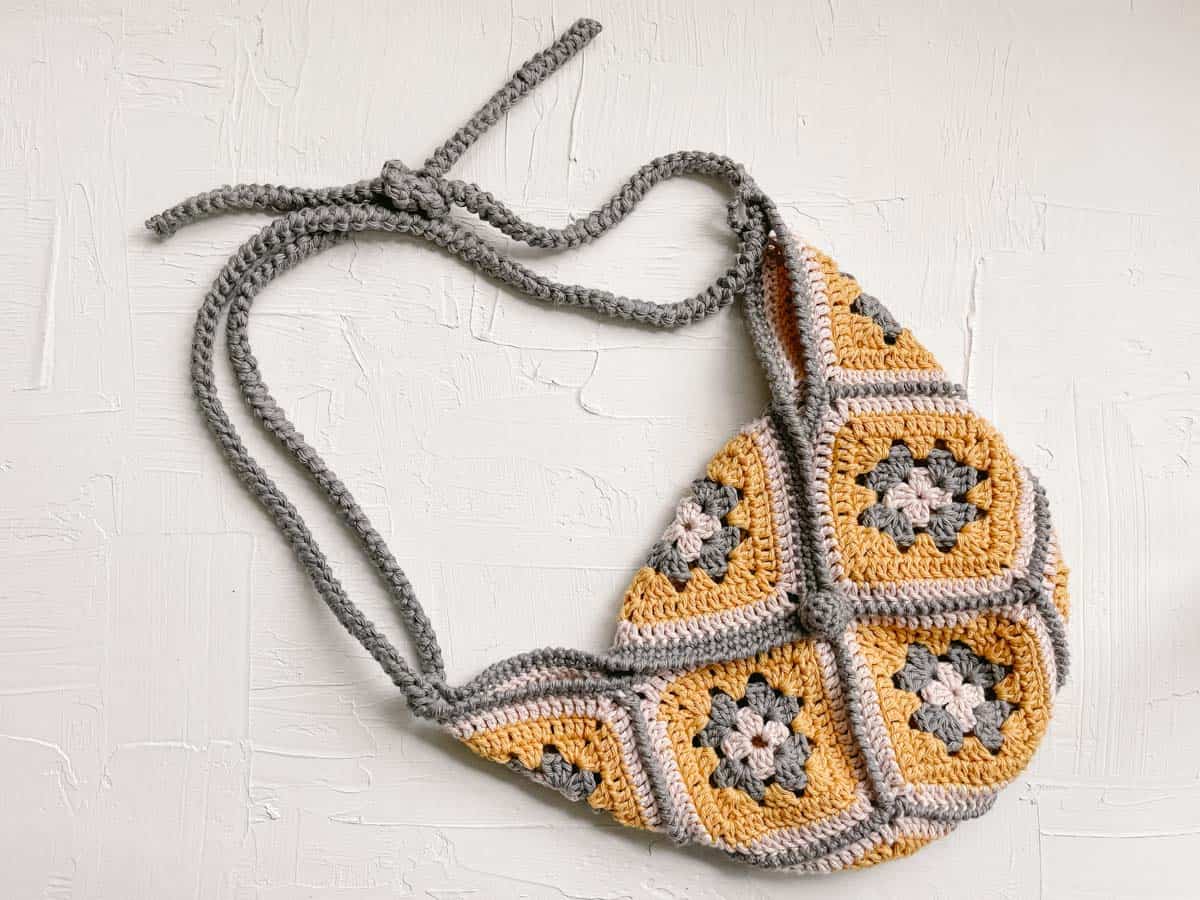
After using a join-as-you-go technique to seam your squares, you'll add a strap and button.
Related: Don't miss our daisy granny square tutorial for a cute variation on the classic
Why you'll love this!
Granny Square Bag FAQs
Here are the answers to a few questions you've asked about how to crochet a granny square bag.
In this pattern, you'll get to practice crocheting a traditional granny square motif, reverse single crochet to join the squares without seaming and a fun Romanian Cord technique to make the sturdy strap.
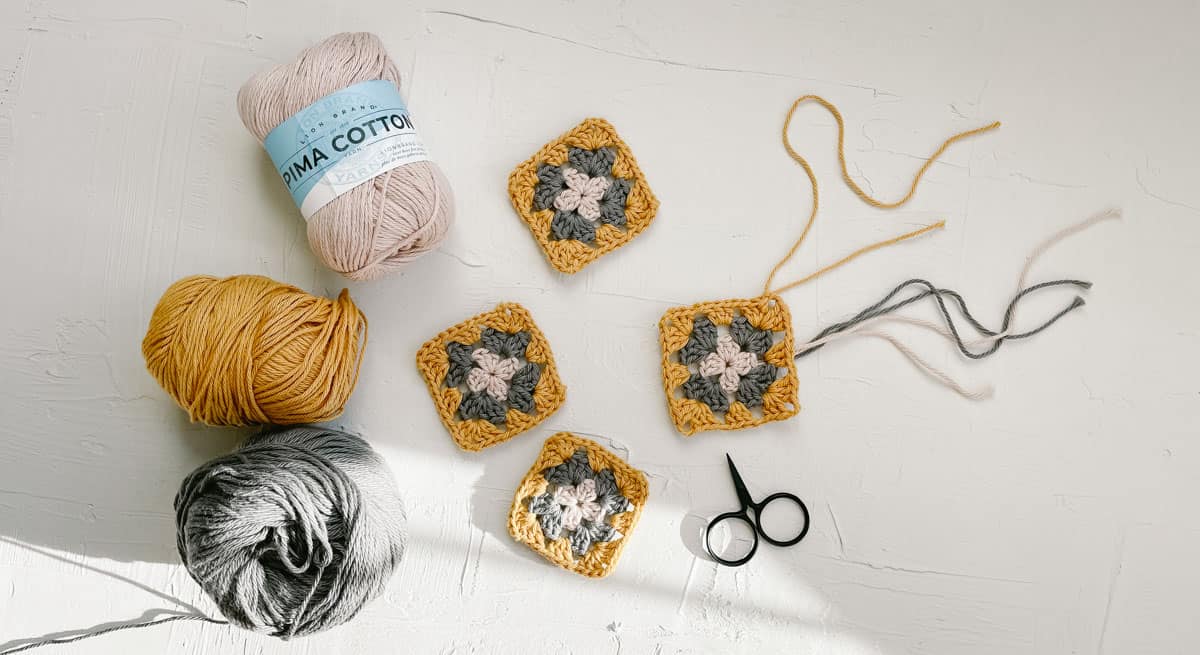
The Halcyon granny square bag uses Lion Brand's Pima Cotton, which we also used in the Halcyon Bucket Hat. Cotton yarn is great for crochet bags because it's sturdy and washable. The muted colors of Pima Cotton are really beautiful and sophisticated and pair effortlessly together.
Yes. The easiest way to modify the size of this granny square bag is to add extra rounds to your granny squares before joining them together. This would mean repeating Round 5 until you're happy with the size of your granny square.
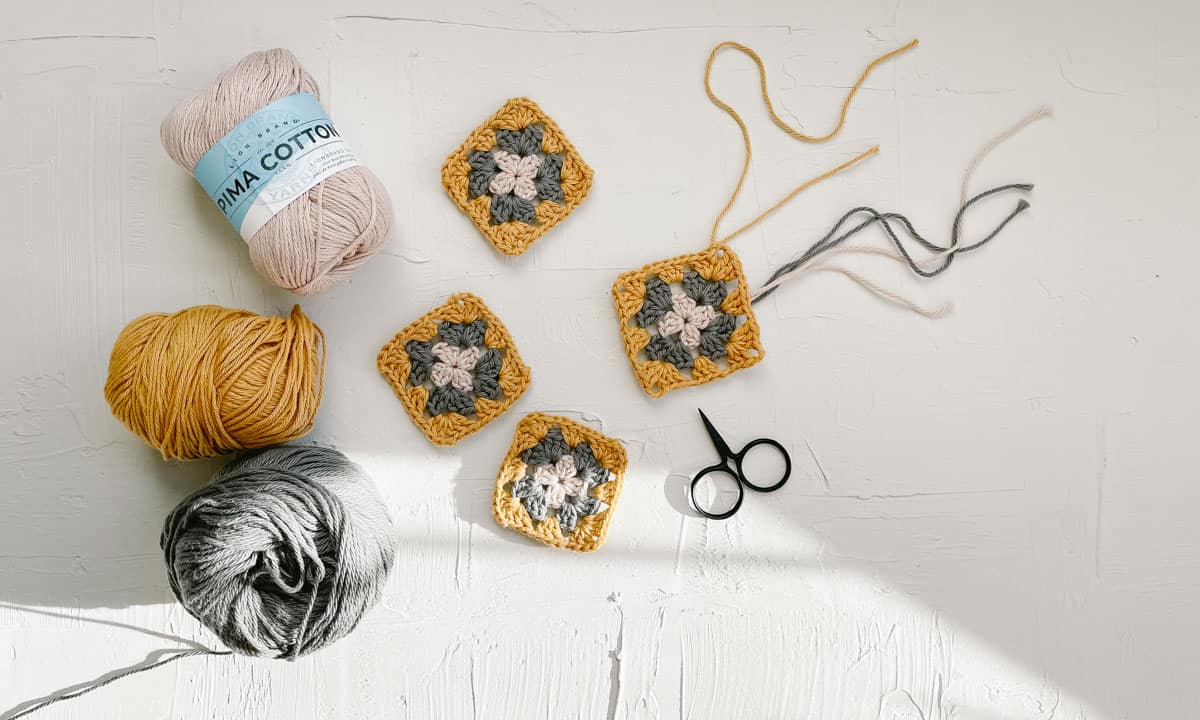
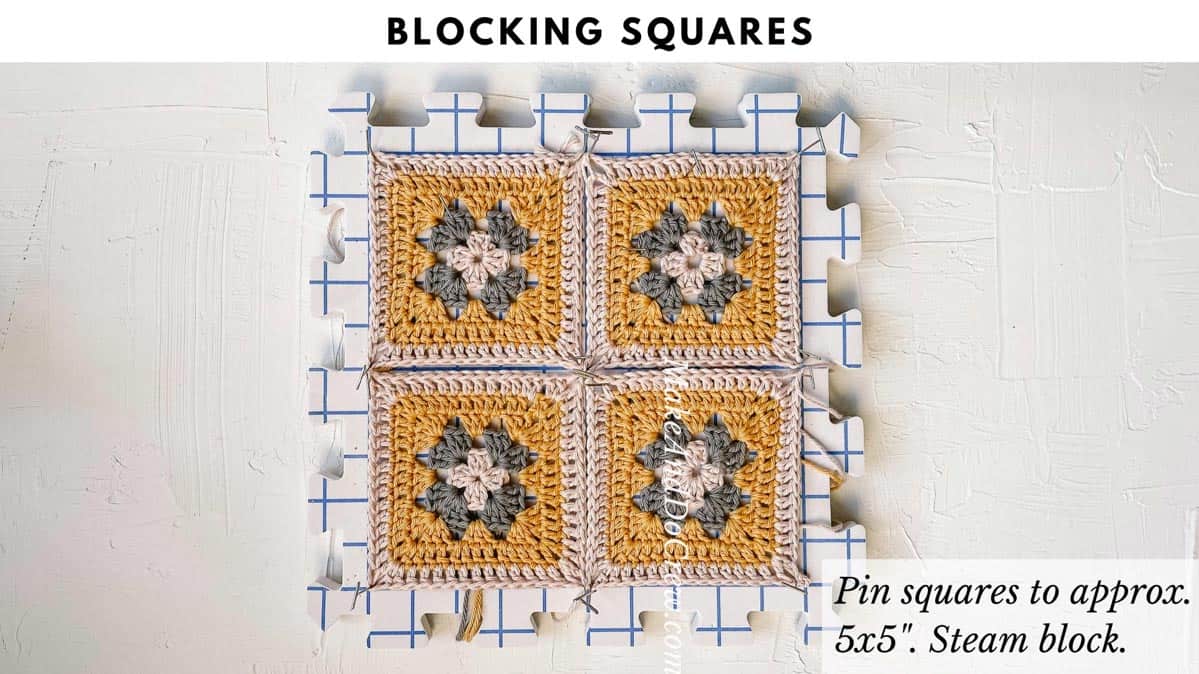
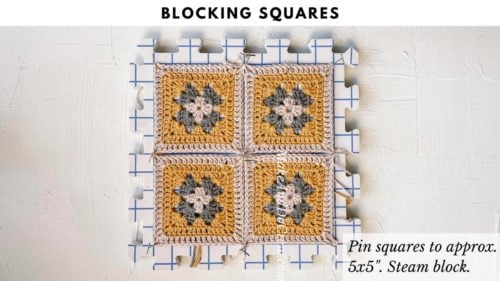
If your granny squares are slightly round or wonky, simply blocking them can help square the out before joining them together. Use t-pins to pin your squares to a blocking board or other piece of foam, spritz them with some steam from an iron and let them dry.
Because the bag is not reversible, you can choose to tie off your ends inside instead of weaving them in if you'd like to save time.
More Free Crochet Bag + Purse Patterns
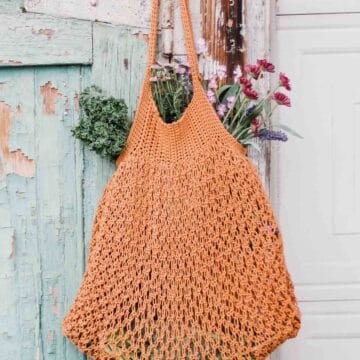
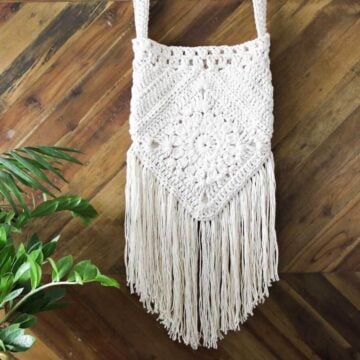
From modern granny square bags to mesh market totes to circle purses, we've got lots more free crochet bag patterns for you to enjoy. With sturdy straps and stylish details, you might just become a crochet bag-a-holic.
See more free crochet bags & purses patterns →
Customization ideas
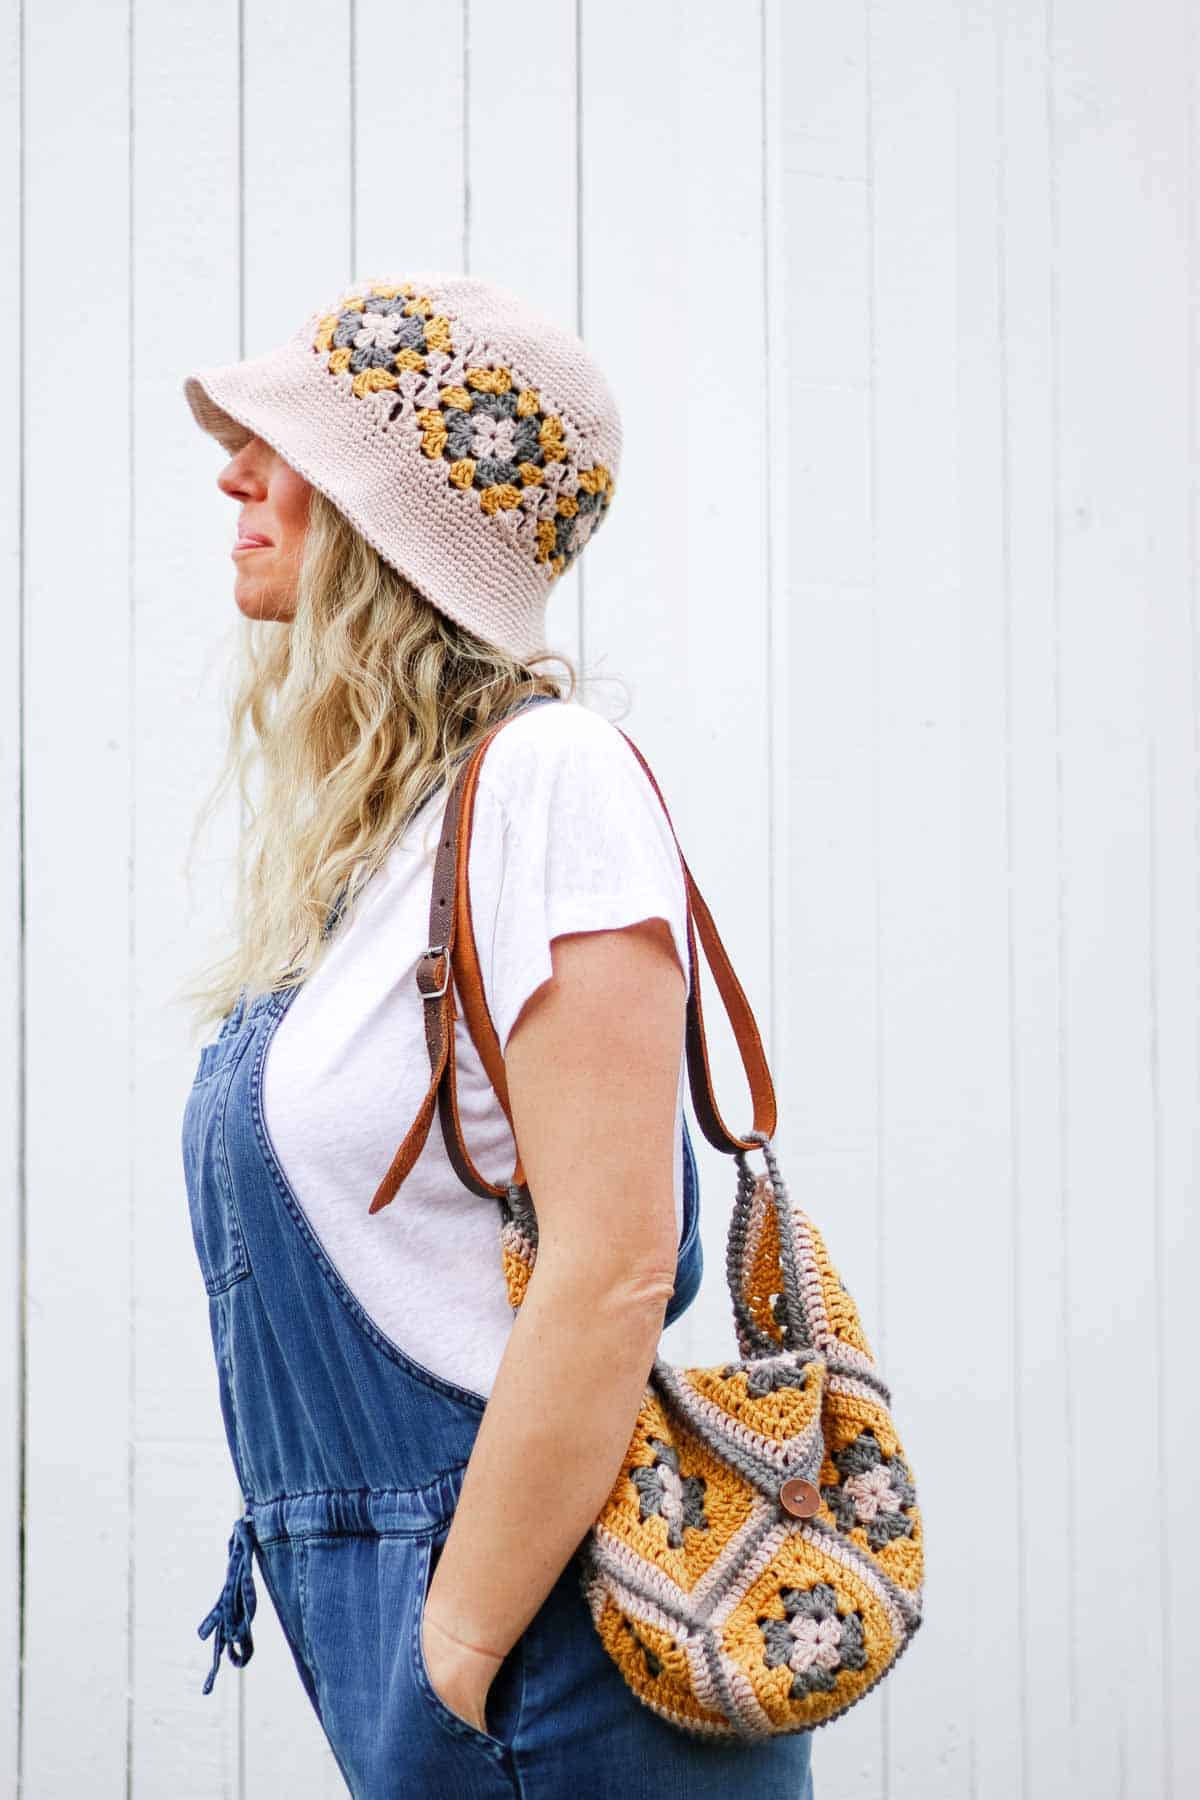
The Halcyon Granny Square tote bag is quite easy to customize. Here are some ideas:
Yarn + substitutions
The Halcyon Granny Square Bag uses a 100% cotton yarn from Lion Brand called Pima Cotton. This yarn is a lot softer than traditional dishcloth cotton and glides really smoothly when you're crocheting. And the colors of Pima Cotton are my favorite part. The palette of muted, contemporary colors makes it really easy to combine shades until you find the perfect granny square mix!
If Pima Cotton is not available near you, you can check YarnSub.com for similar suggestions.
Matching bucket hat
This Halcyon pattern set was intentionally designed to make the most of your yarn purchase. So if you're considering making the Halcyon Granny Square Bucket Hat as well, you'll want to know that it only takes four total balls of Pima Cotton total to crochet both projects! Check out the Lion Brand kit option below to get a PDF of both patterns, plus all the yarn you'll need.
All-in-one crochet kit
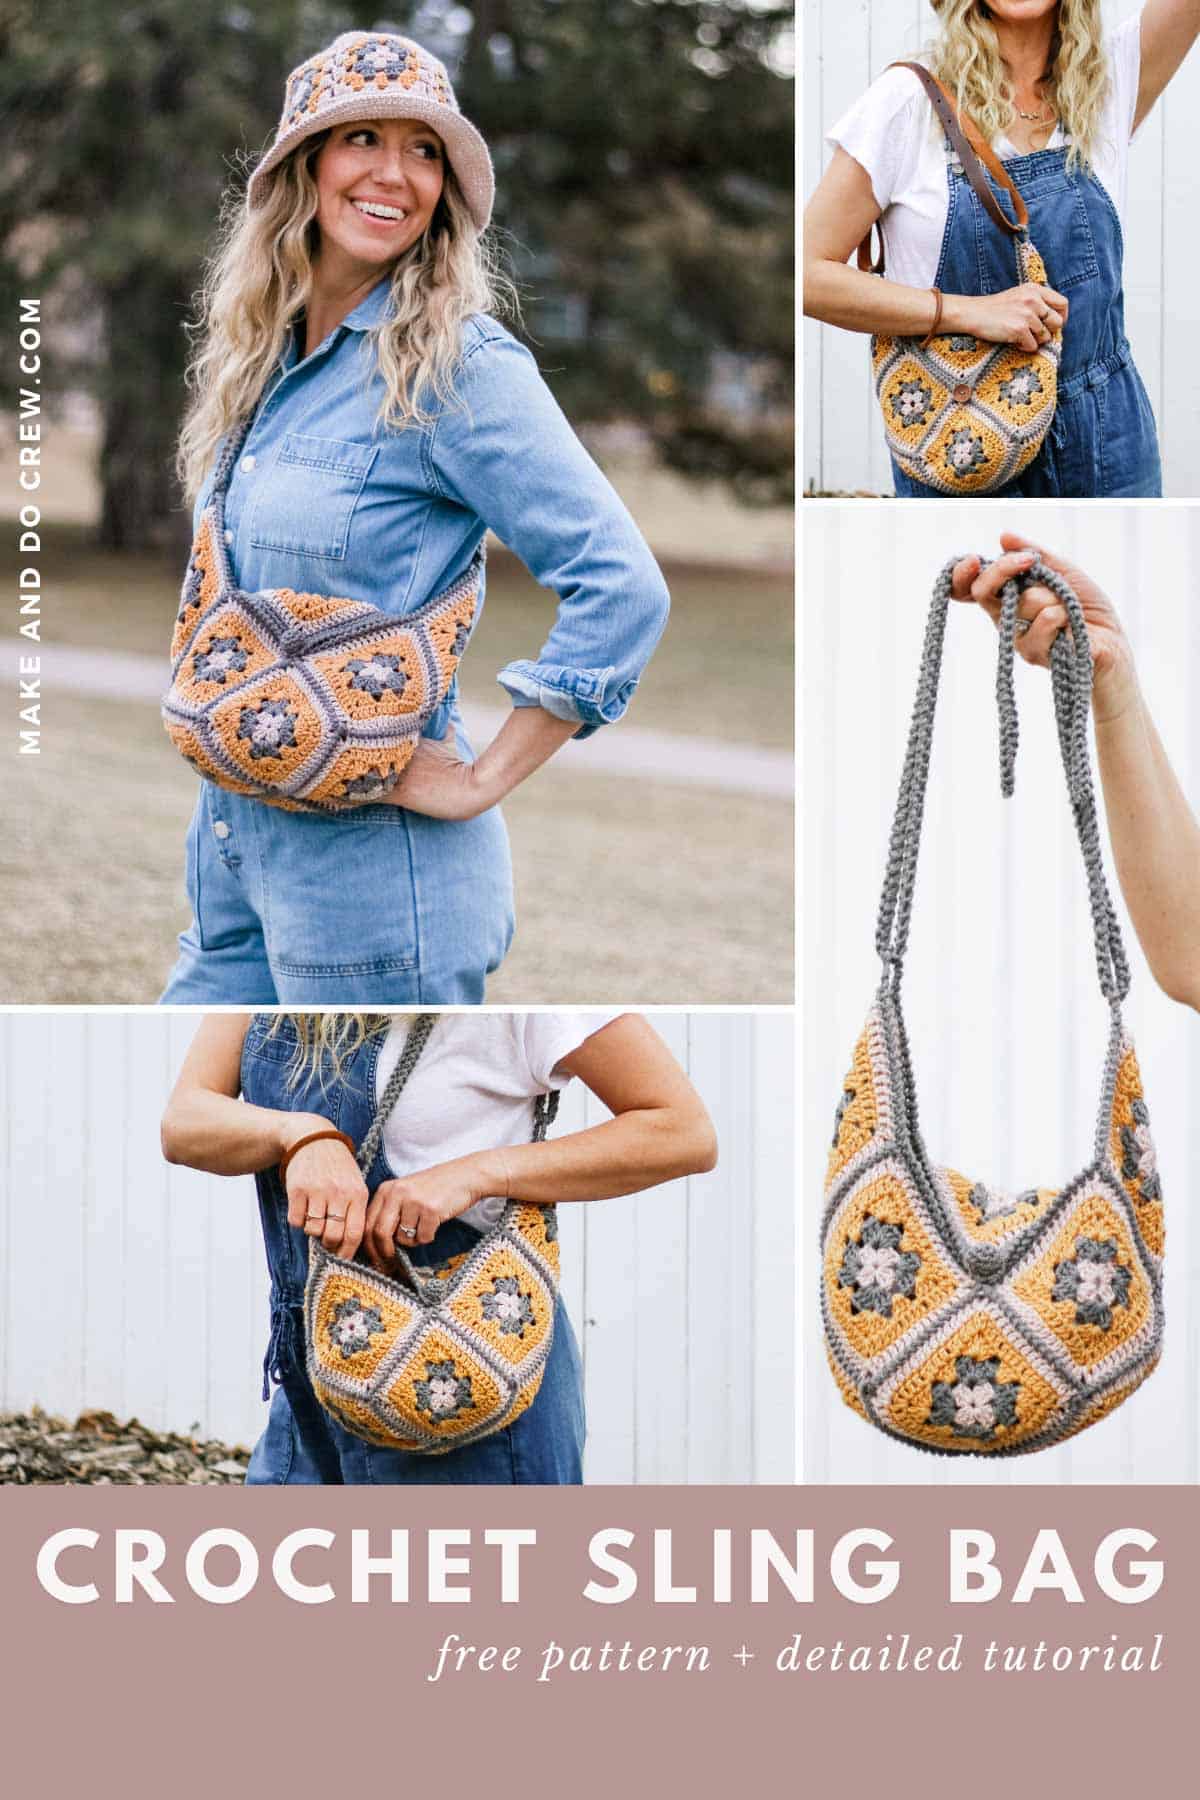
If you don't live near amazing yarn stores or if you just like to get fun packages in the mail, the all-in-one Halcyon crochet kit is a perfect way to make your coordinating granny square bag and bucket hat.
This bundle from Lion Brand includes all the Pima Cotton you'll need for BOTH projects, plus a free printable PDF of each pattern (delivered digitally).
Print this pattern
We know many people like to work from a paper copy of their crochet pattern. This is why we love offering our patterns in large-type, ad-free PDFs that are formatted for easy printing and note taking.
Purchase the complete pattern with tutorial images in the Halcyon Bag PDF. If you'd like to bundle both the Halcyon Bag and Bucket Hat patterns, you can purchase that double pattern PDF here.
Halcyon Crochet Granny Square Bag
Free Pattern
Explanation: Eleven iconic granny squares join together in this modern nod to the classic motif. A perfect quick and portable project, you’ll find this crochet granny square bag just the right size for your essentials. A sturdy strap guarantees your cargo will be well-supported.
Supplies:
Order an all-in-one kit from Lion Brand.
• Lion Brand Pima Cotton (Weight: 4/medium - 186 yds, 3.5 oz/100 g)
- Color A: Mademoiselle [762-184P]* – 1 ball (approx. 80 g)
- Color B: Pewter [762-152B] – 1 ball (approx. 88 g)
- Color C: Mineral Yellow [762-159S] – 1 ball (approx. 82 g)
* If also crocheting the Halcyon Bucket Hat, two total skeins of Color A and 1 skein each of Color B and C will be enough to make both projects.
• Tapestry needle
• Size I (5.5 mm) crochet hook or size needed to obtain gauge
• Size J (6.0 mm) crochet hook or one size up from smaller hook
• 20 Stitch markers
• T-Pins
• Steamer or iron with steam function (alternative: use a spray bottle)
• Blocking board
• Wooden button (optional)
• Leather strap or thrifted belt (optional)
Permissions + Copyright:
Please do not publish or share this pattern as your own. You may make items to sell with this pattern. In exchange, please link back this post. Do NOT use our photos as your own sales photos.
Granny Square Bag Measurements:
12.5” at tallest point
15” at widest point
Strap length is adjustable
Gauge:
Finished granny squares should measure approx 4.75 x 4.75” before blocking
Abbreviations and Glossary (US Terms):
ch – chain
chsp – chain space
cluster – set of three stitches
dc – double crochet
hdc – half double crochet
rep – repeat
sc – single crochet
sk – skip
slst – slip stitch
st(s) – stitch(es)
WS – wrong side
Want some company while you crochet?
Get support (and camaraderie!) in the Make & Do Crochet Crew Facebook Group.
Overall Pattern Notes:
• If substituting yarn of a different weight, follow measurement notes throughout instead of the number of rounds given. Simply work as many rounds for each square as it takes to meet the approximate pattern measurements.
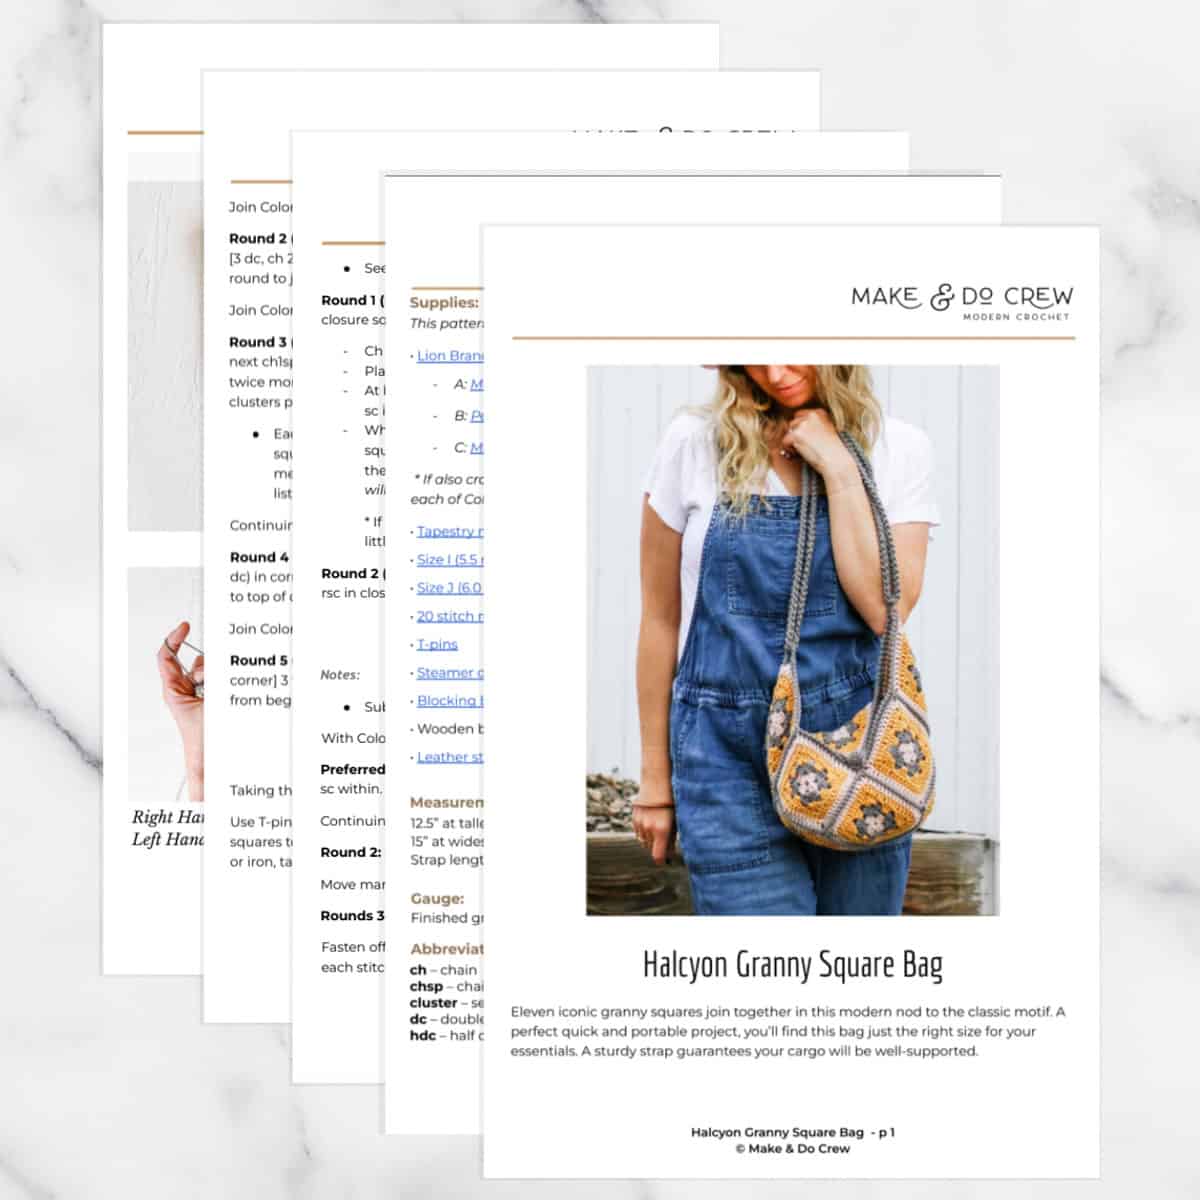
Print the premium pattern!
Granny Squares
Notes:
• Granny squares are worked in the round with the RS facing throughout.
• Ch 3 counts as 1 dc.
• Because bag is not reversible, consider tightly tying yarn tails together and fastening off instead of weaving in ends. (That is unless you’re a purist, in which case, grab your tapestry needle and go for it!)
Make 11 squares.
With color A:
Preferred Foundation: Create a magic loop.
Alternative Foundation: Ch 4, slst to join into a loop.
Round 1 (RS): Ch 3 tightly, 2 dc in loop, ch 1, [3 dc in loop, ch 1] three times; slst to top of ch from beginning of round to join. Fasten off. (1 cluster per side)
Wanna save this pattern?
Join Color B in any ch1sp.
Round 2 (RS): Ch 3 tightly, 2 dc in same sp, ch 2, 3 dc in same sp (corner made), ch 1, [3 dc, ch 2, 3 dc, ch 1] in three remaining ch1sps, slst to top of ch from beginning of round to join. Fasten off. (2 clusters per side)
Join Color C in any ch2sp.
✨Unlock this free subscriber-exclusive pattern ✨
Follow these steps to view the full free pattern below
Joining Squares
Notes:
• To avoid orientation mistakes, it can be very helpful to pin all squares together using stitch markers before beginning.
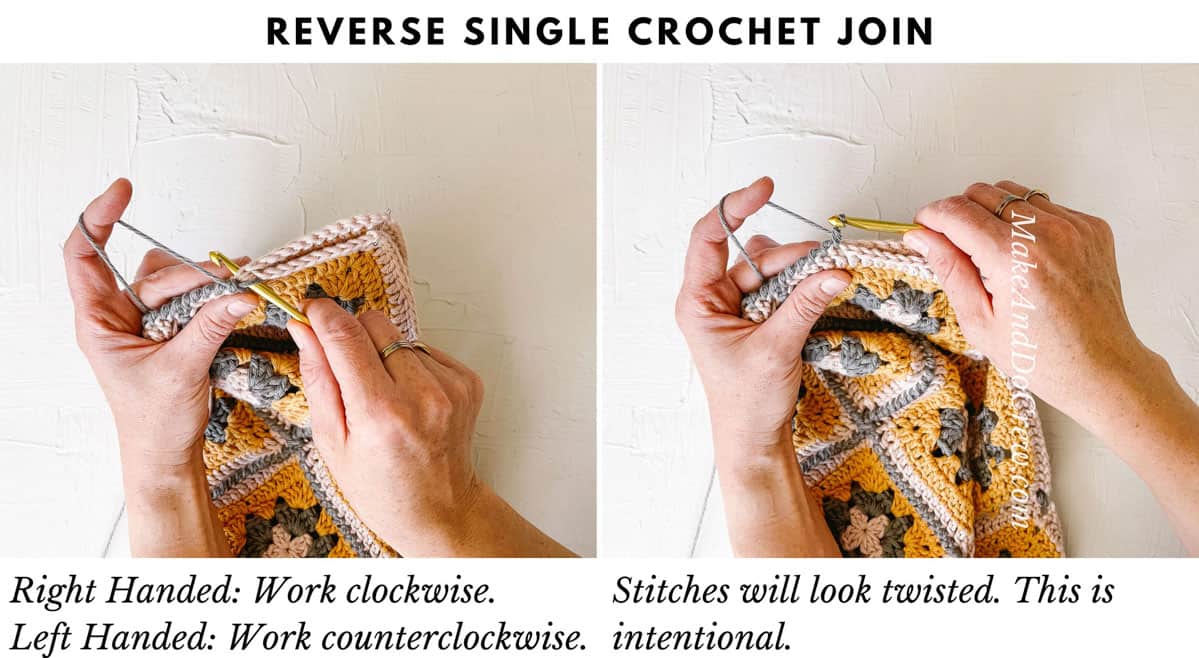
• Squares are joined using reverse single crochet stitches (also known as the crab stitch.) Reverse single crochet is worked in the opposite direction of typical crochet. Therefore if you’re right handed, you’ll crochet left to right. If you’re left-handed, you’ll crochet right to left. See video tutorial above for a visual example.
The orientation of this can take a bit of getting used to. If you find yourself picking up your work and trying to work in the typical direction, just flip everything over and your hook will be in the correct position. If the orientation repeatedly causes you trouble, typical single crochet stitches (worked in the expected direction) can be used to join squares as well.
Arrange squares as pictured below With RS facing out, pin together using stitch markers.
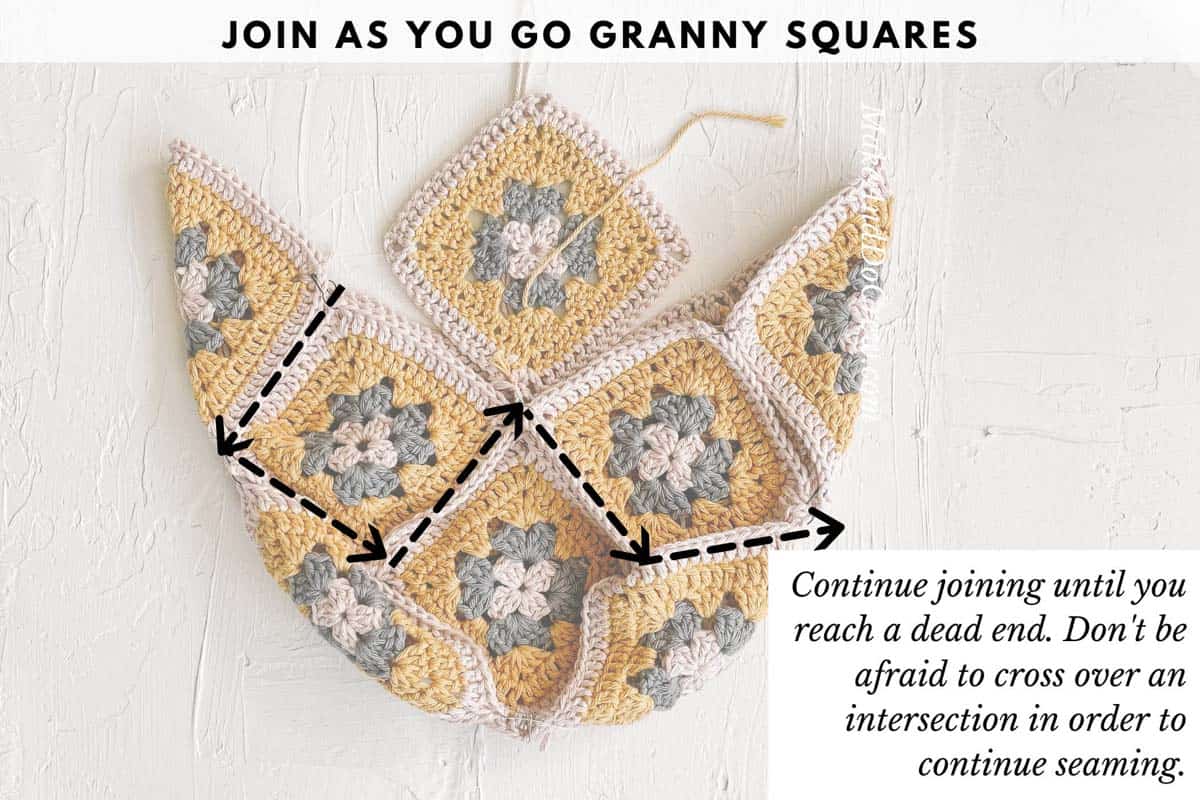
The path to joining all squares does not need to involve a lot of fastening off. Attach yarn toward the top bag and work continuously around upper squares until you reach a dead end. Then reattach yarn in a new square and continue joining. Don’t be afraid to cross over previously joined intersections to continue joining.
Attach Color B yarn as described above.
To Join: Ch 1, rsc though both squares in each chsp and dc to join squares with as few new seams as possible. Exact placement and number of stitches is far less important than achieving a smooth, consistent join. When all squares are joined, fasten off.
Finishing Border
Notes:
• Border is worked around top of bag with RS of bag facing continuously.
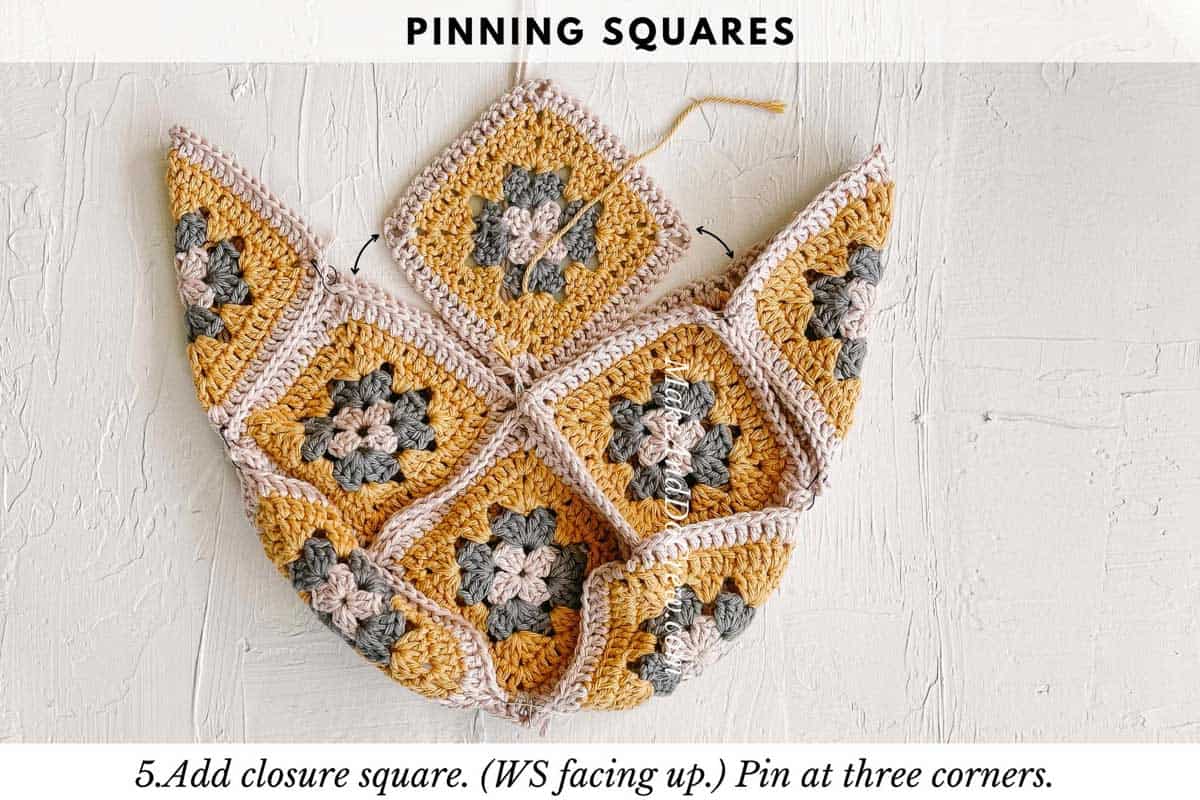
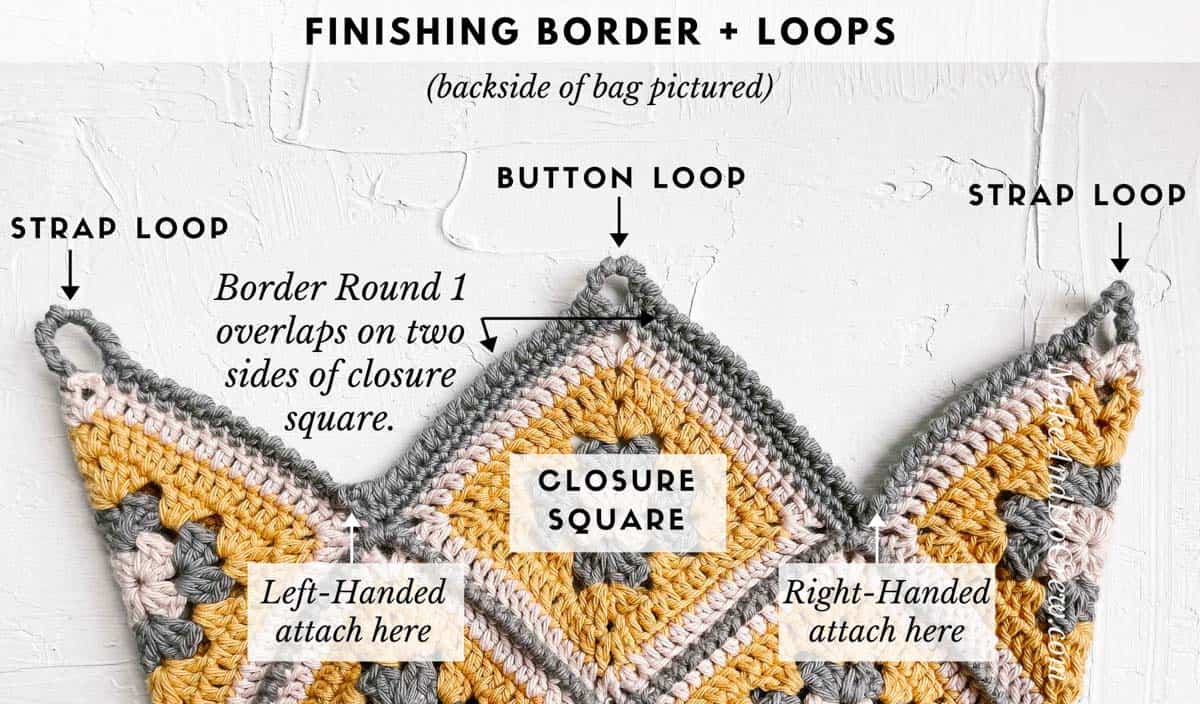
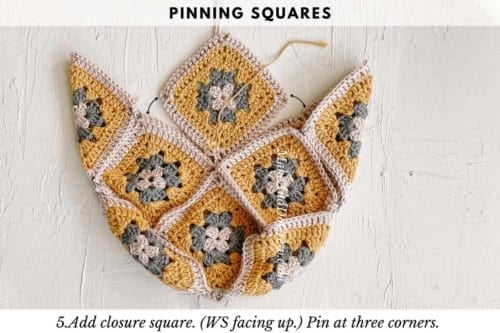
• Round 1 overlaps itself on the sides of the “closure” square. (The center square then folds in half to close the bag.)
• See photos below for visual illustration of what is described below.
Round 1 (RS): With backside of bag facing you, attach yarn in right intersection of closure square. (Left-Handed: attach yarn in left intersection of closure square.)
- Ch 1, sc in each dc and chsp intersection around top of bag.
- Place (sc, ch 1, sc) in corner of closure square.
- At both side corners, sc in each dc up to corner, then ch 7 and continue with sc in each dc on next square side. (This is where strap will attach.)
- When back to where round began, sc in each sc on both sides of closure square. On second pass of closure square corner, sc in each sc up to corner, then ch 6* and continue with sc in each sc on last square side. (This ch loop will fasten with button.) Do not turn.
*If using a wooden button, modify chain length to fit around button with a little bit of stretching.
Round 2 (RS): Ch 1, rsc in each sc around Round 1. Work 7 rsc in side ch loops and 6 rsc in closure square button loop. Slst to first rsc to join. Fasten off.
Crocheted Button
Notes:
• Substitute a wooden button or toggle if preferred.
With Color B and smaller hook:
Preferred Foundation Round: Create a magic loop, leaving a 12” tail. Ch 1 and work 6 sc within. (6)
Continuing in spiral:
Round 2: 2 sc in first st (PM in first sc made), 2 sc in each st. (12)
Move marker to first st of each round from here forward.
Rounds 3-4: Sc in each sc. (12)
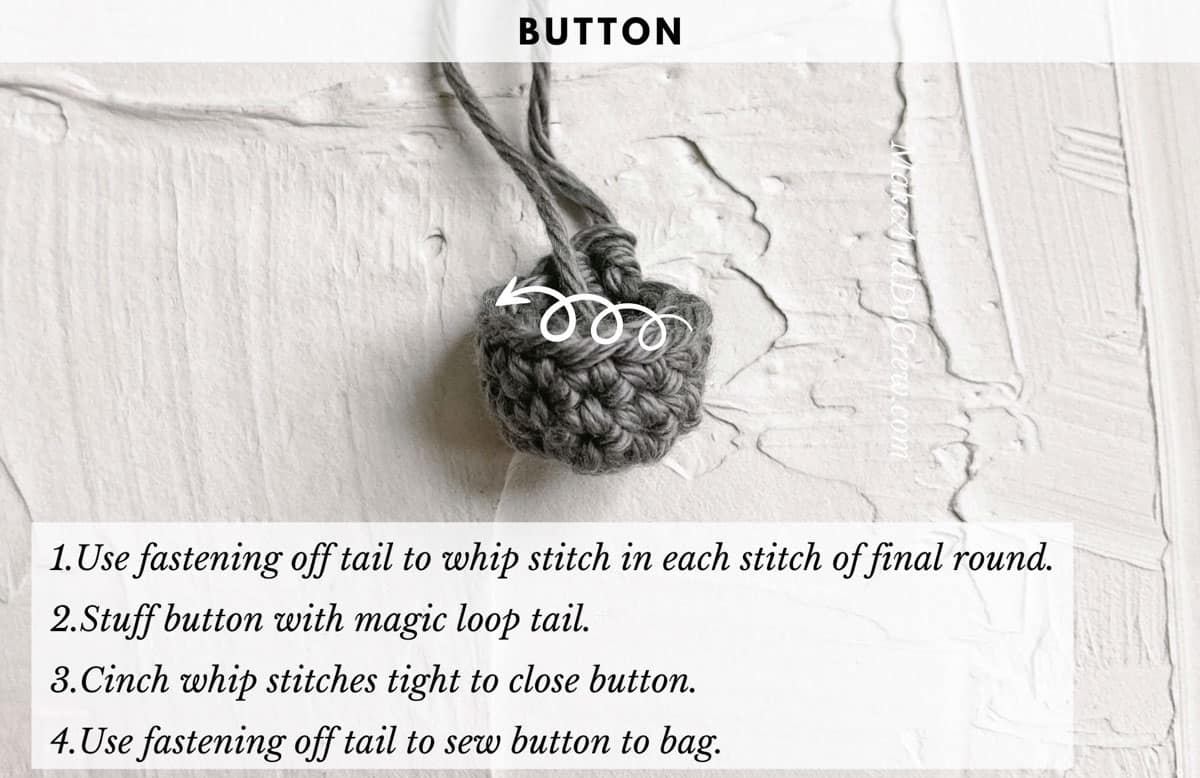
Fasten off leaving a 15” tail. Thread this tail on a tapestry needle and whip stitch in each stitch of Round 4. Use excess foundation loop tail to stuff button until round and firm. Pull on final tail, cinching whip stitches and closing button. Keep tapestry needle threaded and attach button to bag where desired.
Roman Cord Strap
Notes:
• Strap is made using two strands held together of Color B. Before beginning, separate remaining Color B yarn into two equal balls. (Note: If also crocheting the Halcyon Hat, reserve about 15g of Color B to complete that pattern.)
• Alternatively, try using a long leather belt as a strap. Learn more about adding leather straps to crochet bags here.
• This cord requires you to continually turn your crocheting clockwise (left-handed crocheters: counter-clockwise). It may feel awkward at first, but it becomes quite quick. See photos below or Roman Cord video tutorial here for a visual demonstration.
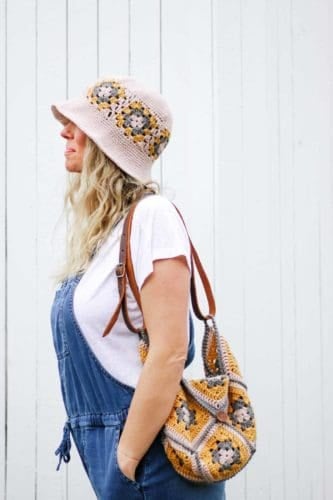
• Once complete, strap can be tied in a variety of ways to adjust length. (See throughout blog post.)
• One size larger hook is suggested here to make it easier to work with two strands of yarn held together. Given that you want as sturdy of a cord as possible though, feel free to continue with original hook if it’s working for you.
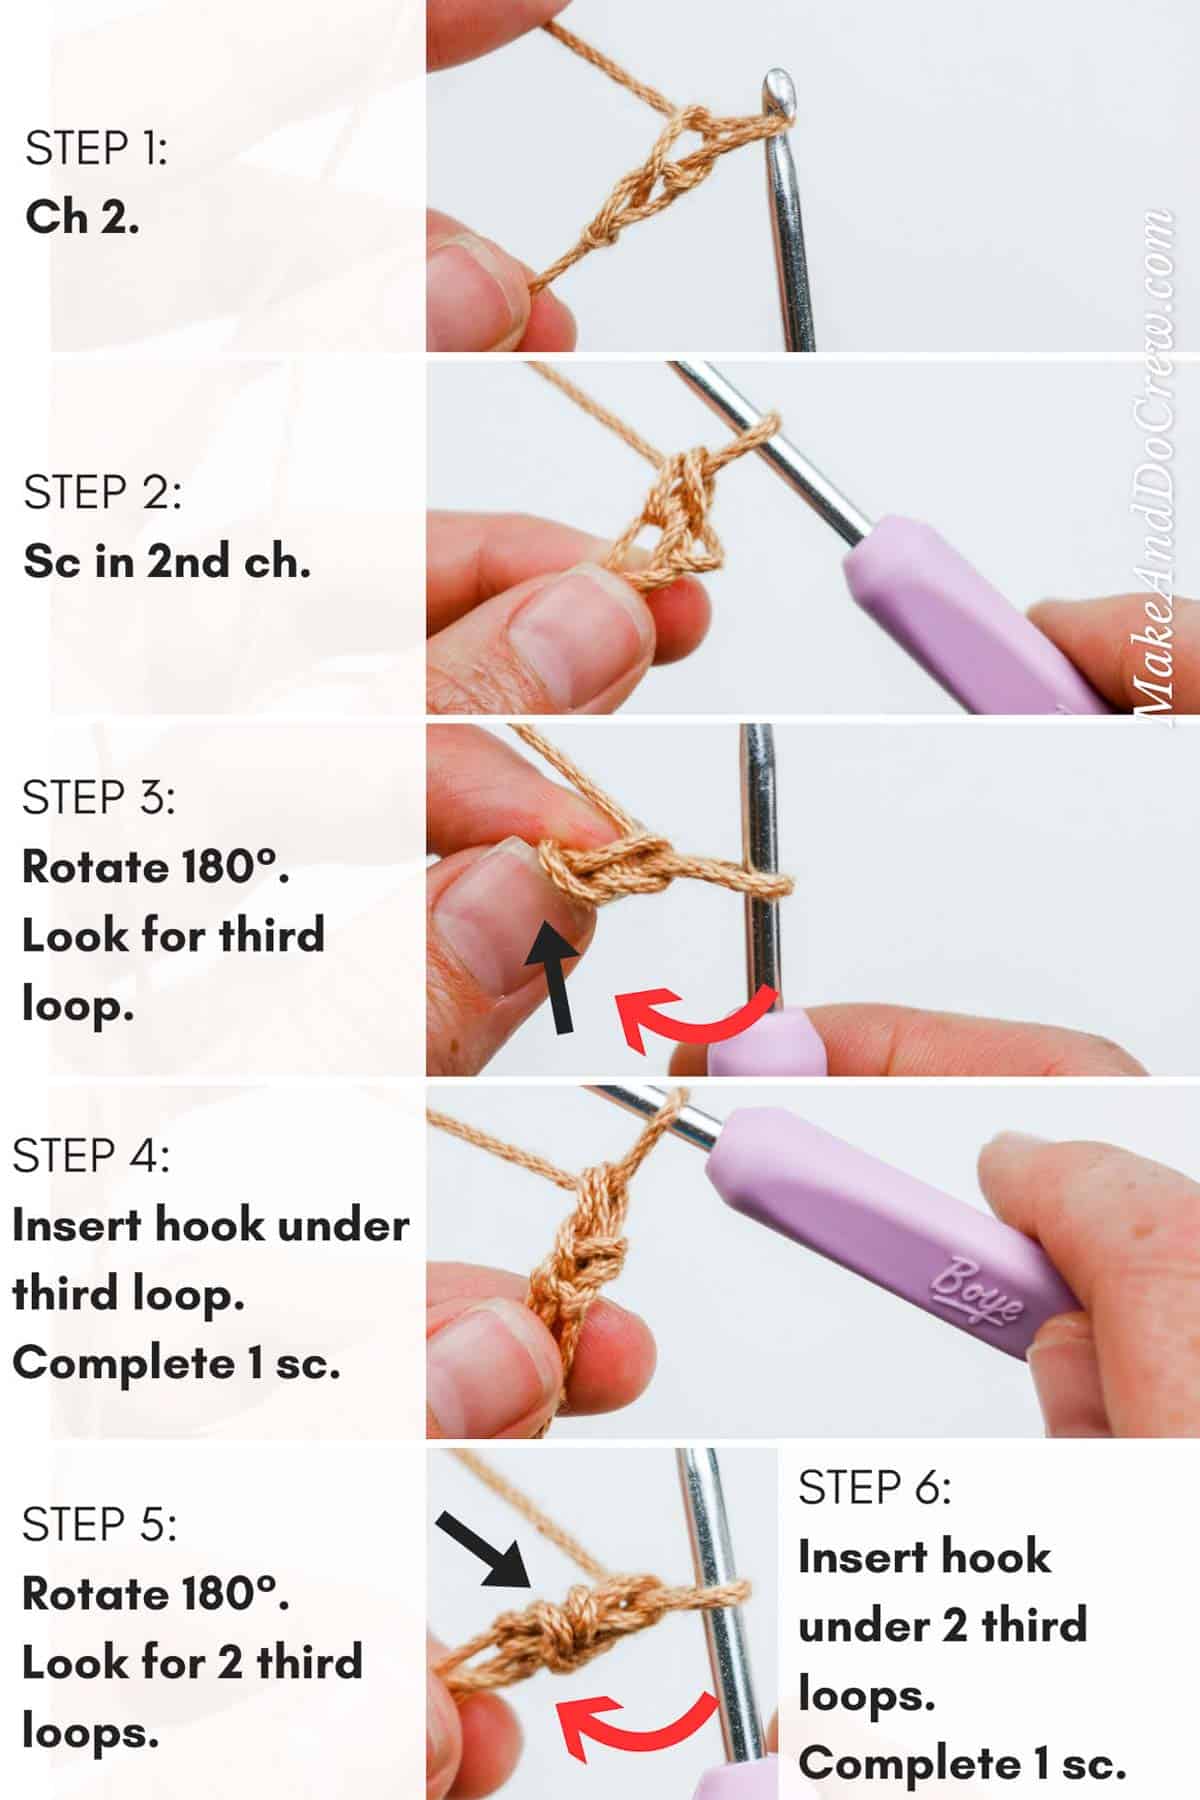
With larger hook and two strands of Color B held together:
Foundation Row: Ch 2.
Row 1: Sc in second ch from hook; rotate stitch clockwise.
Row 2: Insert hook under loop at “back” of stitch were two “V”s point to. Work 1 sc under this loop; rotate stitch clockwise.
Row 3 and beyond: Insert hook under two loops at “back” of stitch were two “V”s point to. Work 1 sc under these loops; rotate stitch clockwise.
Rep Row 3 until cord measures as long as you’d like or you run out of Color B yarn. Cord is quite sturdy, but will stretch a bit once worn.
Fasten off and use tapestry needle to weave in ends of strap. Thread strap through both side loops and tie in a square knot. Strap is intended to be doubled over when carried.
Share your stitches!
Tag us (@MakeAndDoCrew) and use #HalcyonBag to show off your makes!
That was so fun! Now what?
Invitation to our Facebook group
Come discuss crocheting granny square bag patterns and lots of other crochet projects and techniques in our Make & Do Crew Facebook group. Here thousands of helpful crocheters answer each others questions and share their stitches. Come join us here.
More Free Crochet Patterns for Bags + Purses
- Crochet Festival Purse Pattern - circle purse with style galore
- Mesh Crochet Market Bag Pattern - perfect for the farmer's market
- Crochet Bag Made From Squares - dead simple, yet so fun
- Urban Nomad Boho Bag - creative construction + style
- Crochet Lunch Bag Pattern - also fun gift for kids
- Lacy Crochet Shoulder Bag Pattern - summery tote bag
- Fringe Crochet Purse Pattern - bohemian flare!
- How to Add Leather Handles to Any Crochet Bag - easy upgrade
How to Crochet a Granny Square Bag
Materials
- Lion Brand Pima Cotton - Weight: 4/medium - 186 yds, 3.5 oz/100 g * If also crocheting the Halcyon Bucket Hat, two total skeins of Color A and 1 skein each of Color B and C will be enough to make both projects.
- COLOR A: Mademoiselle 762-184P* – 1 skein (approx. 80 g)
- COLOR B: Pewter 762-152B – 1 skein (approx. 88 g)
- COLOR C: Mineral Yellow 762-159S – 1 skein (approx. 82 g)
- Tapestry needle
- Size I (5.5 mm) crochet hook or size needed to obtain gauge
- Size J (6.0 mm) crochet hook or one size up from smaller hook
- 20 stitch markers
- T-pins for blocking
- Steamer or iron with steam function alternative: use a spray bottle
- Blocking board
Abbreviations + Glossary (US Terms)
- ch – chain
- chsp – chain space
- cluster – set of three stitches
- dc – double crochet
- gutter – space between granny square join
- hdc – half double crochet
- rep – repeat
- RS – right side
- rsc – reverse single crochet
- sc – single crochet
- sk – skip
- slst – slip stitch
- st(s) – stitch(es)
- WS – wrong side
Abbreviations and Glossary (US Terms):
Want some company while you crochet?
Get support (and camaraderie!) in the Make & Do Crochet Crew Facebook Group. Search “Make and Do Crochet Crew” on Facebook.com.
Permissions + Copyright
Please do not publish or share this pattern as your own. You may make items to sell with this pattern. In exchange, please link back to this page. Do NOT use my photos as your own sales photos.
Overall Pattern Notes
Instructions
Constructing the Bag
- 1. Make 11 total granny squares following the free pattern above.
- 2. Steam block your squares.
- 3. Arrange eight squares at a diagonal as pictured in below. Pin together at corners.
- 3. Fold piece in half, as pictured above. Keep right side facing out.
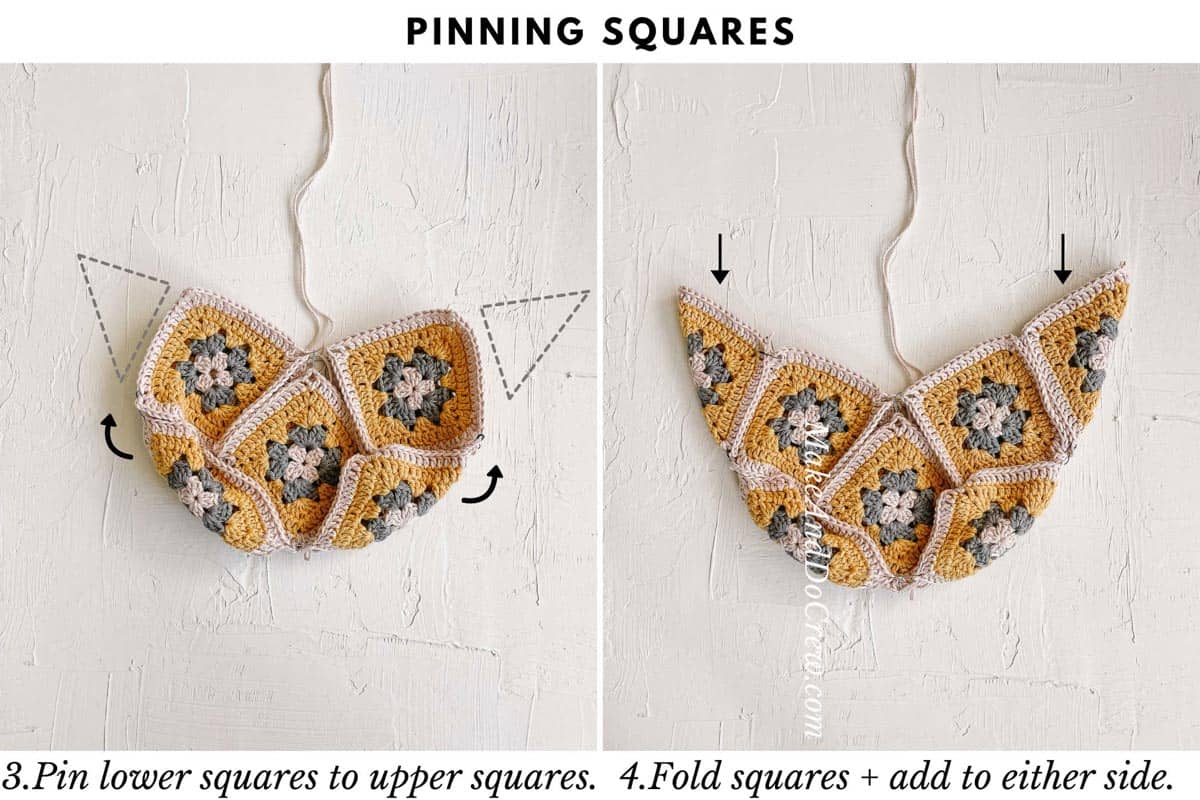
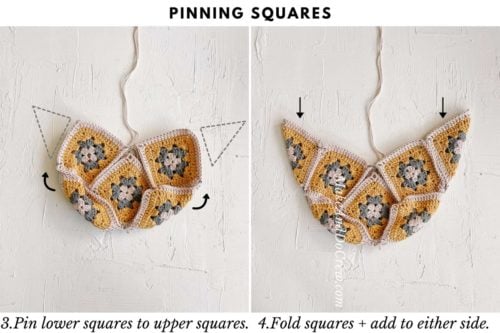
- 4. Bring lower corners to upper corners as pictured below. Pin in place.
- 5. Fold two additional squares in half and pin to either side of bag at top, as pictured above.
- 6. Add final square to top center of bag as pictured below. This serves as the closure flap.
Joining the Granny Squares
- 1. Beginning at one of the top corners, reverse single crochet to seam two granny squares together.
- 2. Continue in reverse single crochet to join as many squares as possible, until you hit a "dead end." At that point fasten off.
- 3. Reattach yarn at a new corner and continue in reverse single crochet until all squares are joined.
Strap
- 1. Use the Roman Cord tutorial shown above in free pattern to crochet a sturdy, adjustable strap.
- Alternatively, use a leather belt or leather bag strap to add an additional boho texture to your granny square bag.
Button
- 1. Use the instructions above to learn how to crochet a button for your granny square bag.
- Alternatively, use a wooden or bone button.
- 2. Attach yarn on "closure flap" corner and chain stitches until you've formed a loop that will fit over your button. Attach to closure flap and fasten off.
Add a Coordinating Hat
- Don't forget to try the free Halcyon Granny Square Bucket Hat pattern to crochet a coordinating cap!
Overall Pattern Notes
Ready to find your next project?
Whether you're into crochet sweaters, C2C crochet blankets, Tunisian or crocheting your own fedora hat, we've got you covered. You can find all our free crochet patterns here.


Leave a Reply