Without the need to join anything but the pockets, even beginners can enjoy this seamless lacy crochet cardigan pattern. Breathable bamboo yarn means you'll love layering this lightweight lace sweater year-round!
The free cardigan pattern is below, or you can purchase the ad-free, printable PDF.
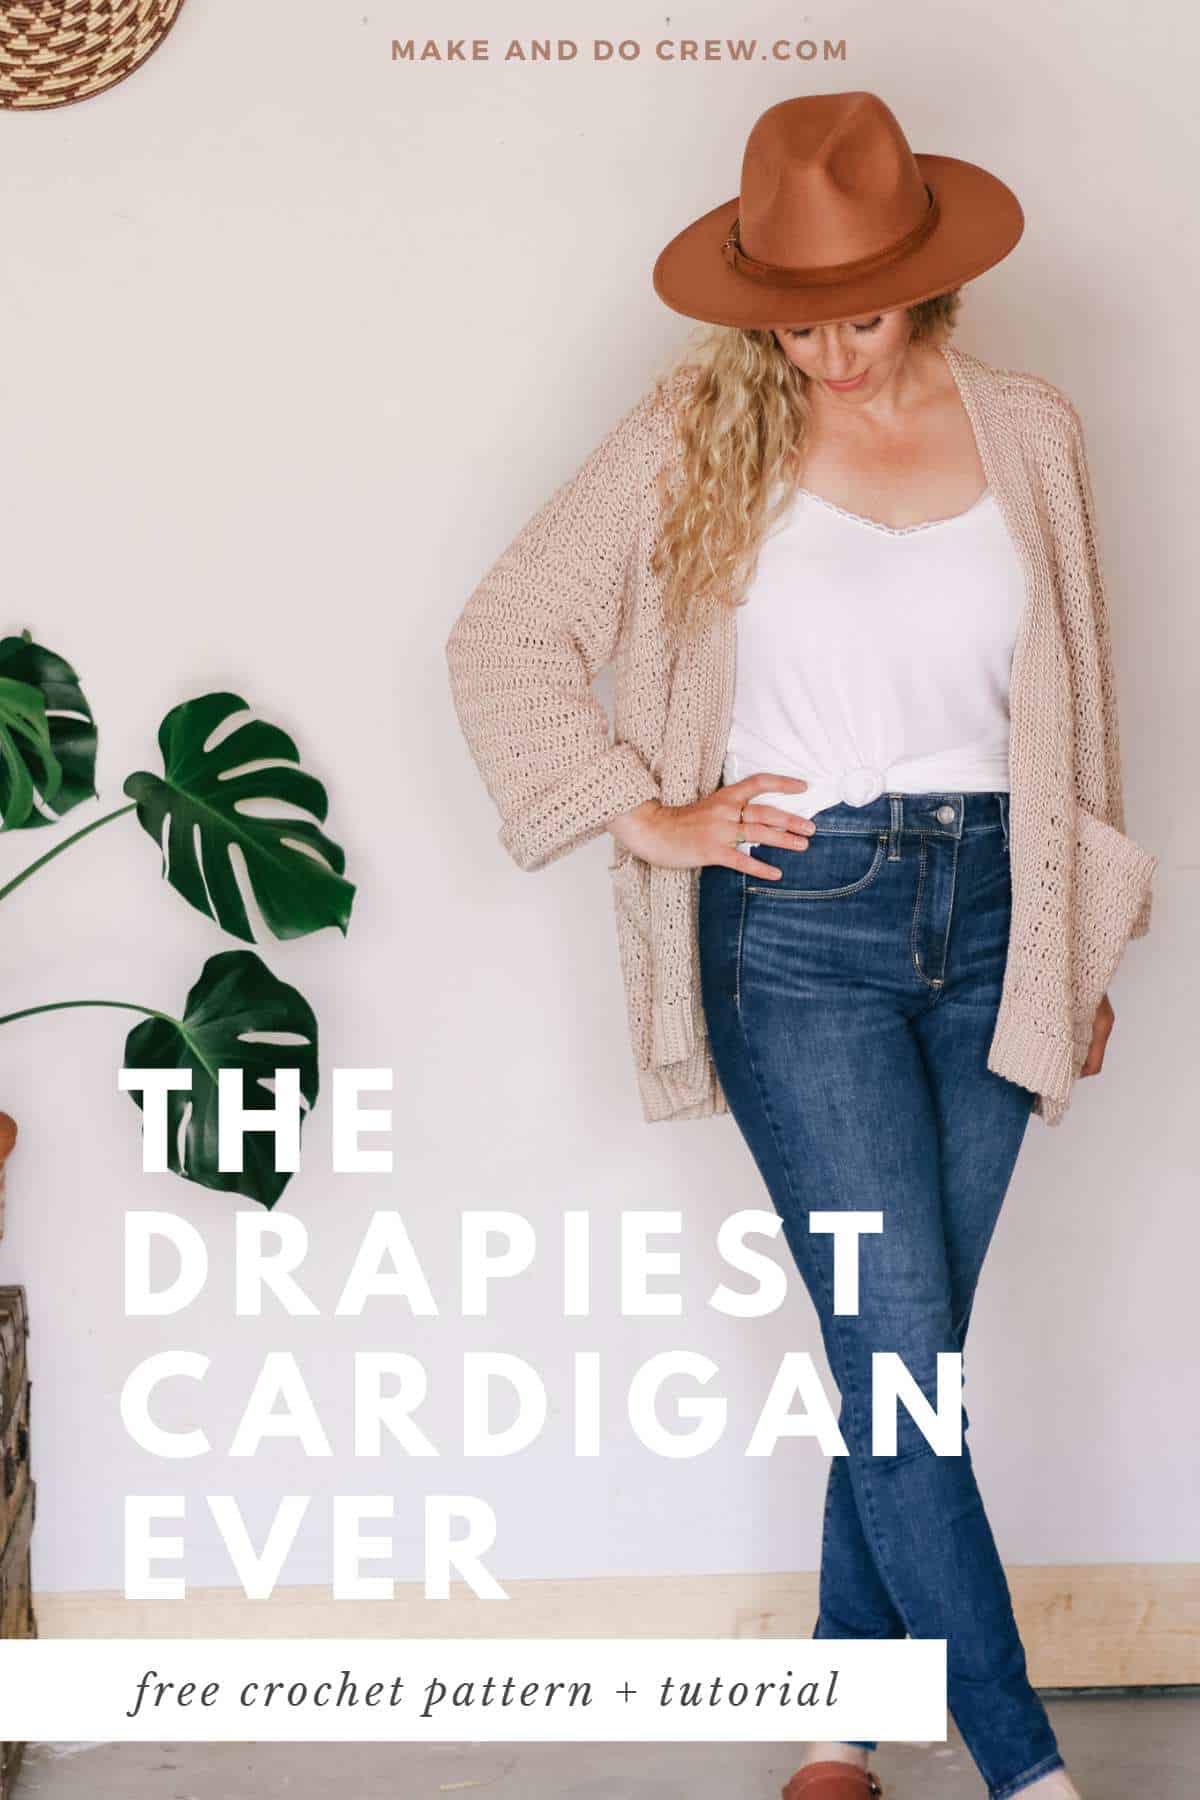
This lacy cardigan crochet pattern is part of a collaboration with Lion Brand Yarns. This post contains affiliate links.
Jump to:
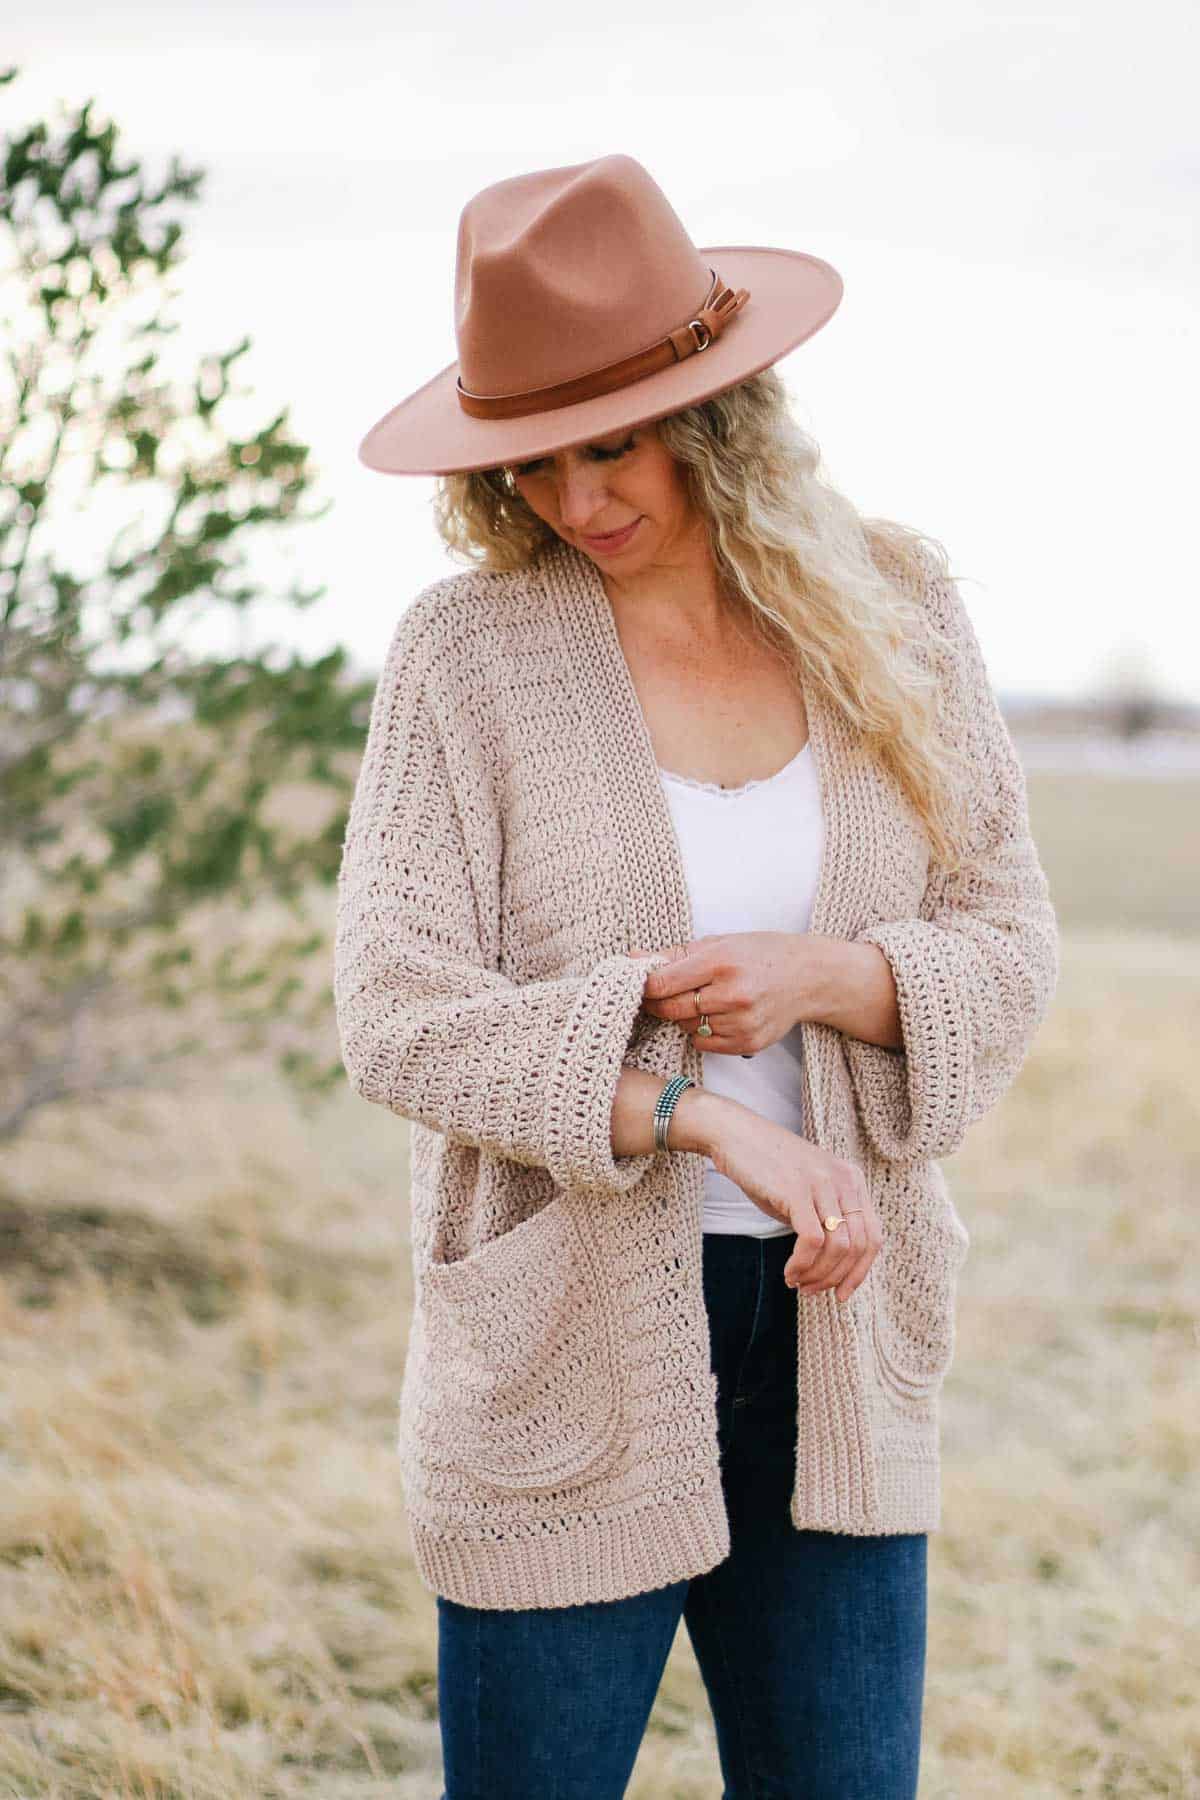
Lacy Crochet Cardigan Pattern
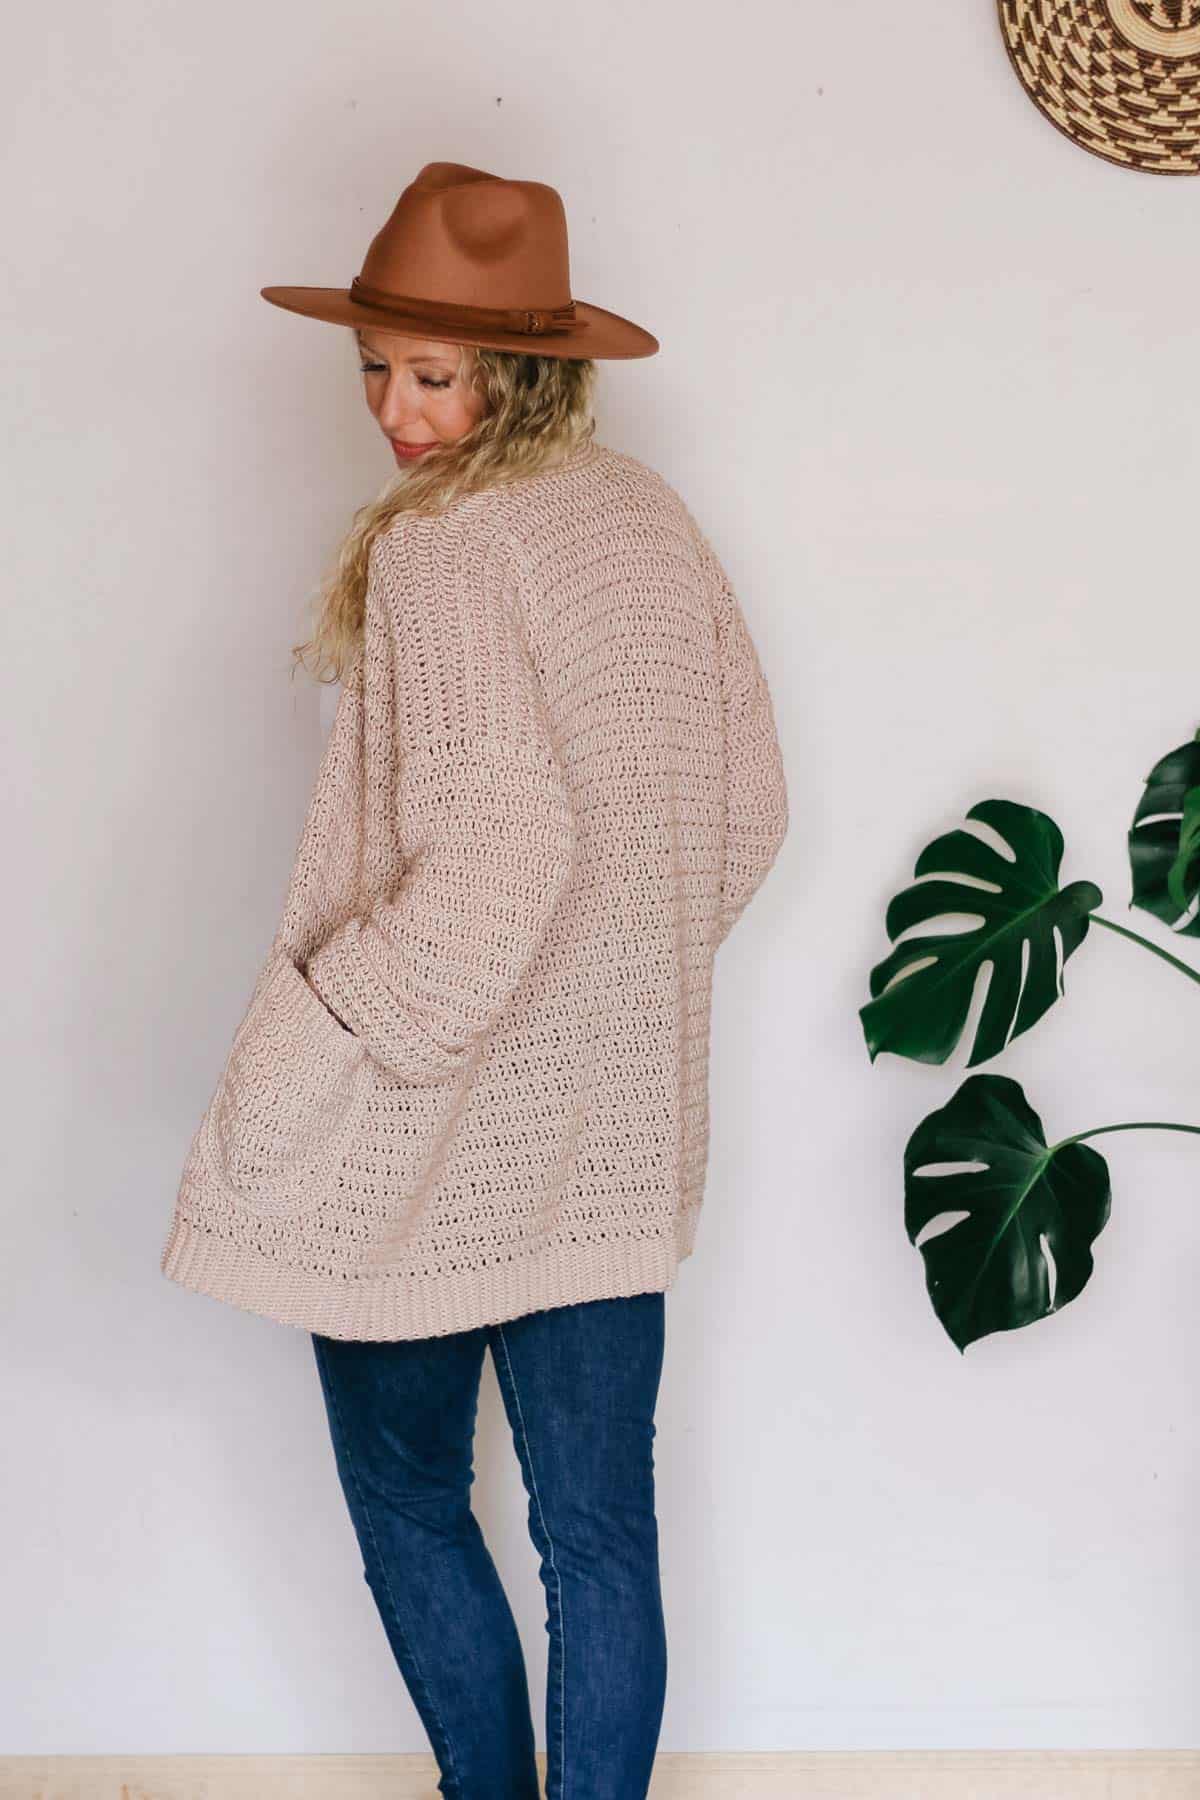
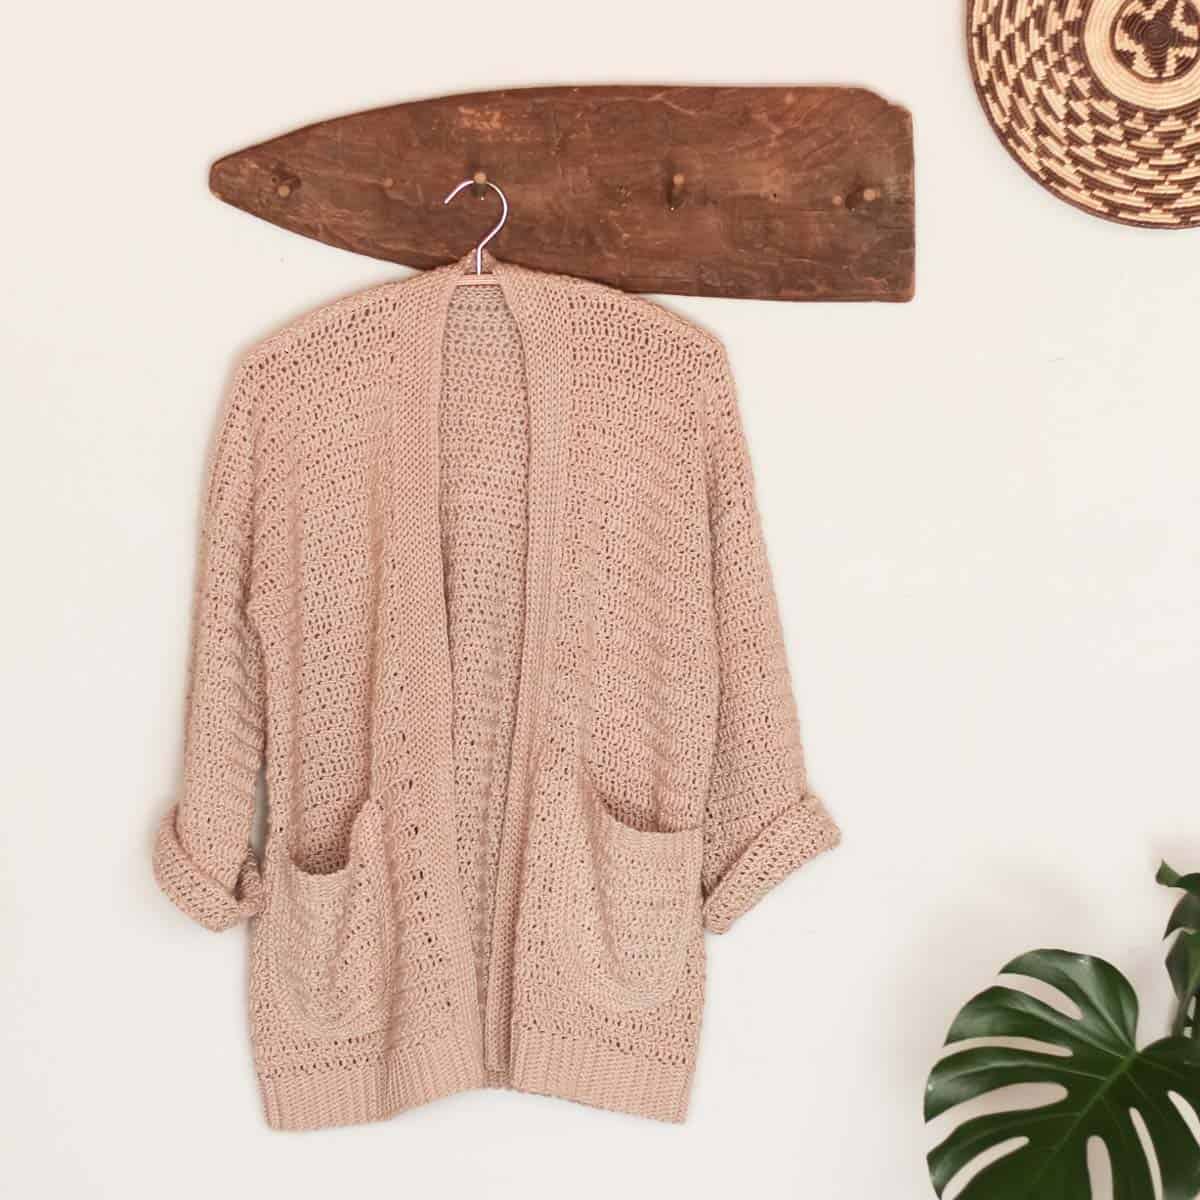
Cuffed sleeves, breezy drape, and seamless construction make this casual lacy cardigan the easiest bang for your crochet buck!
Whether you’re new to garment making and want an easy, wearable win or an old pro looking for a vacation project, this topper is as fun to make as it is to wear.
You’re sure to fall in love with this lace cardigan's unique U-shaped pockets, delicate texture, and slinky crochet lightweight fabric!
Related: If you can't get enough free crochet sweater patterns, check out our favorites for inspiration.
Why you'll love this lacy topper!
How This Easy Cardigan Comes Together
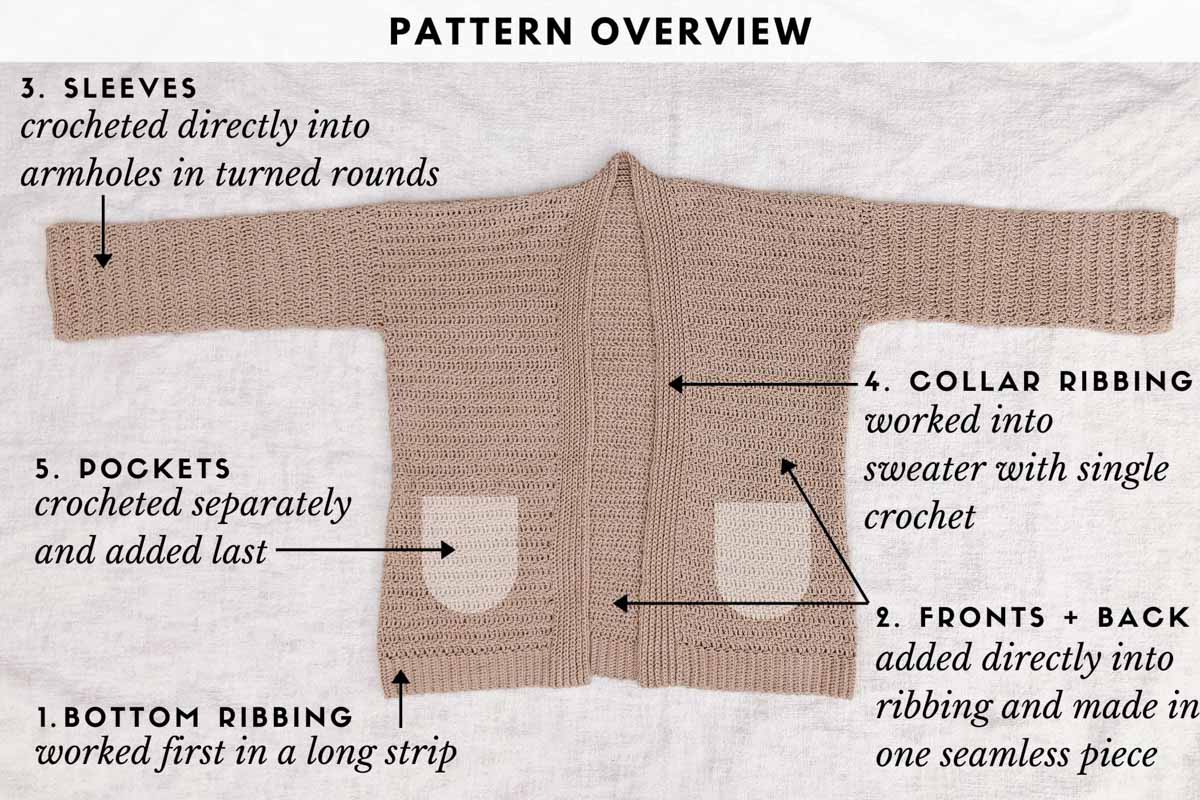
Here is the process we'll follow to crochet this seamless lace cardigan.
- The bottom ribbing is crocheted first as a long strip of short rows.
- The fronts and back of the cardigan pattern are worked into the raw edge of the bottom ribbing. You'll continue in even rows until dividing for the armholes.
- Once the shoulders are complete, the sleeves are worked directly into the arm holes. The sleeves are crocheted in the round so there is no need to seam them at any point.
- You'll add the collar ribbing by single crocheting long rows into the front edges of the sweater.
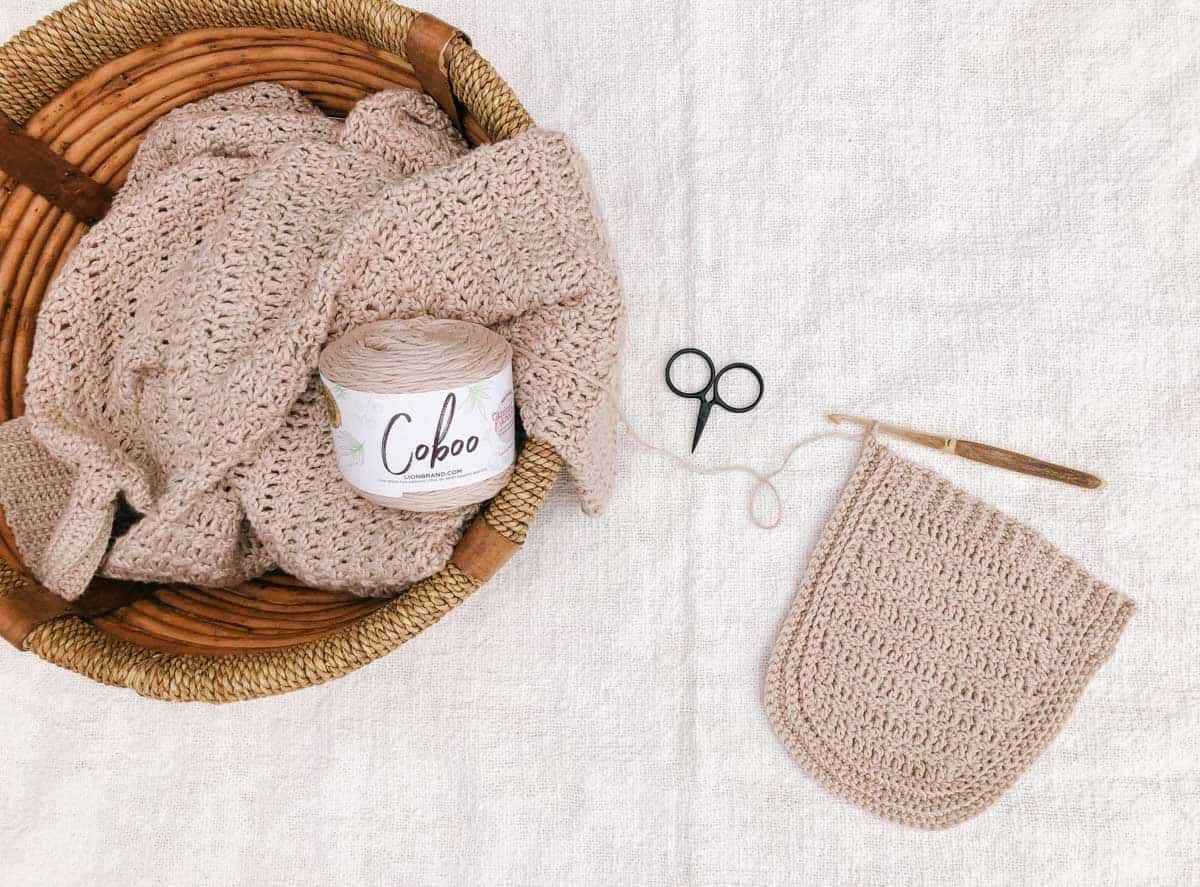
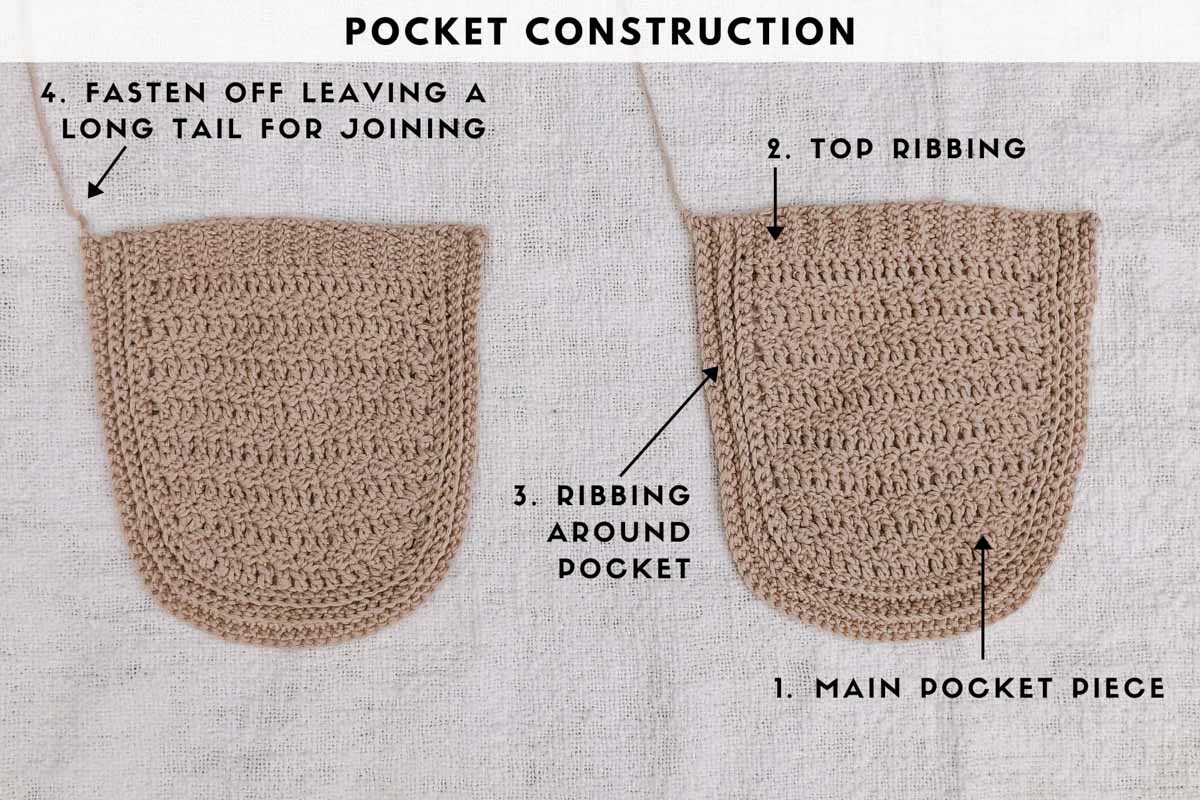
- The U-shaped pockets are crocheted separately and added last.
I love that 90 percent of this pattern is mindless and relaxing, with a few cool techniques that will expand your crochet skills. It's the perfect type of project to take along on a road trip, flight, or simply through the carpool line at school.
Print this Pattern
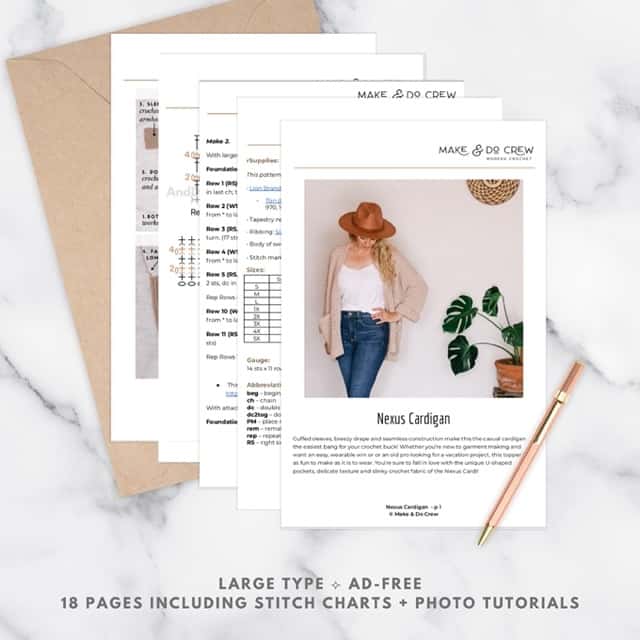
Prefer to crochet on the couch? Need a portable, printable pattern? You'll love the premium PDF! The instantly downloadable, ad-free file is formatted for easy printing and includes the complete pattern, all the photo tutorials and a bonus stitch chart.
Check out our guide to reading stitch charts here.
All-in-One Sweater-Making Kit
If you don't live near amazing yarn stores or if you just like to get fun packages in the mail, the all-in-one crochet kit is a perfect way to make your Nexus Cardigan in any color you'd like.
This bundle from Lion Brand includes all the Coboo you'll need, plus a bonus printable PDF of the pattern (delivered digitally).
Nexus Cardigan - Free Pattern
Supplies + Materials
Order an all-in-one kit from Lion Brand.
• Lion Brand Coboo (Weight: 3/light - 232 yds, 3.5 oz, 100 g)
- Tan (835-123) – 9 (9, 9, 9, 10, 10, 11, 11) skeins [(approx. 810 (820, 860, 900, 930, 970, 1040, 1050) g)]
• Tapestry needle
• Ribbing: Size G (4 mm) crochet hook or size needed to obtain gauge
• Body of sweater: Size H (5 mm) crochet hook or size needed to obtain gauge
• Stitch markers or safety pins
Permissions + Copyright:
Please do not publish or share this pattern as your own. You may make items to sell with this pattern. In exchange, please link back this post. Do NOT use our photos as your own sales photos.
Garment Measurements
This pattern is intended to have an oversized fit with lots of positive ease. For a more fitted look, size down. Sample pictured is on a 5'9" model with a 39" bust.
| Cardigan bust | Cardigan length | |
| S | 45.5” | 27” |
| M | 50” | 27” |
| L | 53.5” | 27.5” |
| 1X | 55” | 29.5” |
| 2X | 58” | 29.5” |
| 3X | 60.5” | 30” |
| 4X | 63” | 32” |
| 5X | 65.5” | 32” |
Abbreviations + Glossary (US Terms)
beg – beginning
ch – chain
dc – double crochet
dc2tog – double crochet two together
PM – place marker
rem – remaining
rep – repeat
RS – right side
sc – single crochet
scblo – single crochet back loop only
sk – skip
sl st(s) – slip stitch(es)
st(s) – stitch(es)
tch – turning chain
tog - together
WS – wrong side
Main Sweater Body Gauge
14 sts x 11 rows = 4”
Overall Pattern Notes
• Ch 1 is NOT counted as a stitch throughout.
• Ch 3 is counted as a dc throughout.
!! Gauge Check !!
Please don’t skip this step or you will risk your sweater not fitting as expected.
With yarn and larger hook:
Foundation: Ch 35.
Row 1 (RS): Dc in 4th ch from hook and in each ch to end of row; turn. (33 sts)
Row 2 (WS): Ch 1, (1 sc, 1 dc) in first st, sk next st, *(1 sc, 1 dc) in next st, sk next st; rep from * to end of row, sc in tch; turn.
Row 3 (RS): Ch 3, sk first st, dc in next st and in each rem st to end of row; turn.
✨Unlock this free subscriber-exclusive pattern ✨
Follow these steps to view the full free pattern below
[Repeat Row 2] 157 (173, 185, 191, 201, 209, 219, 227) more times for a total of 159 (175, 187, 193, 203, 211, 221, 229) rows. Ribbing should measure approximately 45.5 (50, 53.5, 55, 58, 60.5, 63, 65.5)” long. Keep yarn attached, place smaller hook aside.
Want some company while you crochet?
Get support (and camaraderie!) in the Make & Do Crew community. Join for free here.
Cardigan Body (Fronts + Back)
Rotate ribbing horizontally to work in each row end of ribbing. Row 1 will set the foundation for the lace cardigan's two front panels and one back panel. With larger hook and attached yarn:
Row 1 (RS): Ch 3, sk first row edge, dc in top of next row and in each rem row to end of ribbing; turn. [159 (175, 187, 193, 203, 211, 221, 229) dc]
Row 2 (WS): Ch 1, (1 sc, 1 dc) in first dc, sk next dc, *(1 sc, 1 dc) in next dc, sk next dc; rep from * to tch, sc in tch; turn. [159 (175, 187, 193, 203, 211, 221, 229) sts]
Row 3 (RS): Ch 3, sk first sc, dc in next st and in each rem st to end of row; turn. [159 (175, 187, 193, 203, 211, 221, 229) dc]
Repeat Rows 2 and 3 until piece measures 20 (20, 20, 21, 21, 21, 22, 22)” including ribbing and ending after a RS row.
Divide for Armholes:
With RS facing:
First Front: Count 33 (39, 39, 39, 41, 43, 45, 47) sts from end of row where yarn is attached, PM in 33rd (39th, 39th, 39th, 41st, 43rd, 45th, 47th) st.
Sk 3 (3, 7, 9, 11, 13, 15, 17) sts after marked st, PM in next st; there will be 3 (3, 7, 9, 11, 13, 15, 17) sts between the markers.
Second Front: Count 33 (39, 39, 39, 41, 43, 45, 47) sts in from beg of row on opposite side, PM in 33rd (39th, 39th, 39th, 41st, 43rd, 45th, 47th) st.
Sk 3 (3, 7, 9, 11, 13, 15, 17) sts after marked st, PM in next st; there will be 3 (3, 7, 9, 11, 13, 15, 17) sts between the markers.
Back: Center sts in between inner markers and including inner marked sts: 87 (91, 95, 97, 99, 99, 101, 101) sts
Left Front:
Row 1 (WS): Ch 1, (1 sc, 1 dc) in first st, sk next st, *(1 sc, 1 dc) in next st, sk next st; rep from * to first marker, sc in marked st; turn. [33 (39, 39, 39, 41, 43, 45, 47) sts]
Row 2 (RS): Ch 3, sk first st, dc in next st and in each rem st to end of row; turn. [33 (39, 39, 39, 41, 43, 45, 47) dc]
Row 3 (WS): Ch 1, (1 sc, 1 dc) in first st, sk next st, *(1 sc, 1 dc) in next st, sk next st; rep from * to tch, sc in tch; turn.
[Repeat Rows 2 and 3] 8 (8, 9, 10, 10, 11, 12, 12) more times for a total of 19 (19, 21, 23, 23, 25, 27, 27) rows. Fasten off leaving a(n) 18 (20, 20, 20, 20, 22, 22, 24) inch tail to seam shoulders.
Right Front:
With WS facing, join yarn in last marker on opposite side (after back).
Row 1 (WS): Ch 1, (1 sc, 1 dc) in same marked st as join, sk next st, *(1 sc, 1 dc) in next st, sk next st; rep from * to tch, sc in tch; turn. [33 (39, 39, 39, 41, 43, 45, 47) sts]
Row 2 (RS): Ch 3, sk first st, dc in next st and in each rem st to end of row; turn. [33 (39, 39, 39, 41, 43, 45, 47) sts]
Row 3 (WS): Ch 1, (1 sc, 1 dc) in first st, sk next st, *(1 sc, 1 dc) in next st, sk next st; rep from * to tch, sc in tch; turn.
[Repeat Rows 2 and 3] 8 (8, 9, 10, 10, 11, 12, 12) more times for a total of 19 (19, 21, 23, 23, 25, 27, 27) rows. Fasten off leaving a(n) 18 (20, 20, 20, 20, 22, 22, 24) inch tail to seam shoulders.
Back:
With WS facing, join yarn at second marked st. There will be 3 (3, 7, 9, 11, 13, 15, 17) unworked sts between the front and the st you are joining to. These sts will be used for the sleeve.
Row 1 (WS): Ch 1, (1 sc, 1 dc) in same marked st as join, sk next st, *(1 sc, 1 dc) in next st, sk next st; rep from * to next marked st, sc in marked st; turn. Remove all markers. [87 (91, 95, 97, 99, 99, 101, 101) sts]
Row 2 (RS): Ch 3, sk first st, dc in next st and in each rem st to end of row; turn. [87 (91, 95, 97, 99, 99, 101, 101) dc]
Row 3 (WS): Ch 1, (1 sc, 1 dc) in first st, sk next st, *(1 sc, 1 dc) in next st, sk next st; rep from * to tch, sc in tch; turn. [87 (91, 95, 97, 99, 99, 101, 101) sts]
[Repeat Rows 2 and 3] 8 (8, 9, 10, 10, 11, 12, 12) more times for a total of 19 (19, 21, 23, 23, 25, 27, 27) rows. Do not fasten off. PM in 33rd (39th, 39th, 39th, 41st, 43rd, 45th, 47th) st from right-side edge of Back, PM in 33rd (39th, 39th, 39th, 41st, 43rd, 45th, 47th) st from left-side edge of Back.
Note: Back shoulders (below) include one additional row than fronts to keep visible row repeat consistent when shoulders are joined.
Left Back Shoulder:
With WS facing and using attached yarn:
Shoulder Row (RS, short row): Ch 3, sk first st, dc in next st and in each rem st to marked st, dc in marked st, remove marker. Fasten off leaving a 50” tail. [33 (39, 39, 39, 41, 43, 45, 47) sts]
Right back shoulder:
With WS facing, join yarn in next marked st.
Shoulder Row (RS, short row): Ch 3, sk marked st, remove marker, dc in next st and in each rem st to end of row; turn. Fasten off leaving a 50” tail. [33 (39, 39, 39, 41, 43, 45, 47) sts]
Sewing Shoulder Seams:
With RS together, align back shoulder sections with left and right fronts. Use existing yarn tails and larger crochet hook to slip stitch along each shoulder. Fasten off at each shoulder.
Sleeves
Sleeves are worked directly into armholes in turned rounds from shoulder to wrist.
With RS facing, join yarn in the center st of the skipped sts, which is the [2nd, (2nd, 4th, 5th, 6th, 7th, 8th, 9th) st].
Right Sleeve:
(Left Handed - Left Sleeve:)
For Foundation Round, you will work 1 dc in each Row 1 (WS) row and 2 dc in each Row 2 (RS) row.
Foundation Round (RS):
Working up back of armhole: Ch 3, sk st with join, dc in each of the next 1 (1, 3, 4, 5, 6, 7, 8) skipped sts, dc in first row of armhole back, *2 dc in next row of armhole back, dc in next row; rep from * to last row before shoulder seam, dc2tog in last row… [29, (29, 32, 35, 35, 38, 41, 41) dc across back]
...1 dc in middle of shoulder seam…
Working down front of armhole: 1 dc in first row of armhole front, *2 dc in next row of armhole front, dc in next row; rep from * to rem skipped st(s)... [28 (28, 31, 34, 34, 37, 40, 40) dc across front]
In bottom of armhole: dc in last 1 (1, 3, 4, 5, 6, 7, 8) skipped sts of armhole, sl st to top of ch 3 to join; turn. [61 (61, 71, 79, 81, 89, 97, 99) dc around armhole]
Round 1 (WS): Ch 1, sc in first st, dc2tog over first and next st, sk next (third) st, *(1 sc, 1 dc) in next st, sk next st; rep from * to end of round, sl st to first sc to join; turn. [60 (60, 70, 78, 80, 88, 96, 98) sts]
Follow the sequence for your size using the Reference Rounds below: Rounds A, B and C (and Round D for some sizes).
Round A (even): Ch 3, sk first st, dc in next st and in each rem st to end of round, sl st to top of ch3 to join; turn.
Round B (even): Ch 1, (1 sc, 1 dc) in first st, sk next st, *(1 sc, 1 dc) in next st, sk next st; rep from * to end of round, sl st to first sc to join; turn.
Round C (dec): Ch 3, dc2tog over next 2 sts, dc in next st and in each st to last 3 sts, dc2tog over next 2 sts, dc in last st, slst to top of ch 3 to join; turn. (2 sts decreased)
Round D (extra dec): Ch 3, dc2tog over next 2 sts, dc in next 2 sts, dc2tog in next 2 sts, dc in next st and in each st to to last 7 sts, dc2tog over next 2 sts, dc in next 2 sts, dc2tog over next 2 sts, dc in last st, sl st to top of ch 3 to join; turn. (4 sts decreased)
Size S
*Work [Round A, Round B] 3 times. (6 rounds added for 8 rounds total)
Work Round C.
Work Round B**.
Work Round C.
Work Round B.
Rep between * and ** 3 times. (24 rounds added for 36 rounds total)
Work Round A.
Work Round B.
Work Round A.
Size M
*Work [Round A, Round B] 3 times. (6 rounds added for 8 rounds total)
Work Round C.
Work Round B**.
Rep between * and ** 3 times. (24 rounds added for 32 rounds total)
Work [Round A, Round B] 3 times. (6 rounds added)
Size L
Work [Round A, Round B] twice. (4 rounds added for 6 rounds total)
Work Round C.
Work [Round B, Round A, Round B, Round C] twice. (8 rounds added for 15 rounds total)
Work [Round B, Round C, Round B, Round A] 5 times. (20 rounds added for 35 rounds total)
Work [Round B, Round A] twice. (4 rounds added for 39 rounds total)
Work Round B.
Size 1X
Work [Round A, Round B] twice. (4 rounds added for 6 rounds total)
Work Round C.
Work [Round B, Round C, Round B, Round A] twice. (8 rounds added for 15 rounds total)
Work [Round B, Round D] twice. (4 rounds added for 19 rounds total)
Work [Round B, Round C, Round B, Round A] 3 times. (12 rounds added for 31 rounds total)
Work Round B.
Work Round C.
Work [Round B, Round A] twice. (4 rounds added)
Size 2X
Work [Round A, Round B] twice. (4 rounds added for 6 rounds total)
Work Round C.
Work [Round B, Round A, Round B, Round C] twice. (8 rounds added for 15 rounds total)
Work Round B.
Work Round D.
Work [Round B, Round C, Round B, Round A] 5 times. (20 rounds added for 37 rounds total)
Work Round B.
Work Round C.
Work Round B.
Size 3X
Work [Round A, Round B, Round C, Round B] twice. (8 rounds added for 10 rounds total)
Work [Round D, Round B, Round A, Round B, Round C, Round B] 4 times. (24 rounds added for 34 rounds total)
Work Round C, Round B.
Work [Round A, Round B] twice. (6 rounds added for 40 rounds total)
Work Round A.
Wanna save this pattern?
Sizes 4X and 5X
Work Round A.
Work Round B.
Work [Round C, Round B, Round A, Round B, Round D, Round B] 6 times. (36 rounds added for 40 rounds total)
Work [Round A, Round B] twice. (4 rounds added)
All Sizes
There are a total of 39 (38, 40, 37, 40, 41, 44, 44) rounds.
There are 50 (52, 54, 56, 58, 58, 60, 62) sts.
Last Round (RS): Slst in first st and each rem st around bottom of sleeve; slst in first slst to join. Fasten off. 50 (52, 54, 56, 58, 58, 60, 62) sts
Left Sleeve:
(Left Handed - Right Sleeve:)
Foundation Round (RS):
Working up front of armhole: Ch 3, sk st with join, dc in each of the next 1 (1, 3, 4, 5, 6, 7, 8) skipped sts, dc in first row of armhole front, *2 dc in next row, dc in next row of armhole front; rep from * to shoulder seam…[28 (28, 31, 34, 34, 37, 40, 40) dc across front]
...1 dc in middle of shoulder seam…
Working down back of armhole: Dc2tog in first row of armhole back, dc in next row, *2 dc in next row, dc in next row; rep from * to skipped sts... [29, (29, 32, 35, 35, 38, 41, 41) dc across back]
In bottom of armhole:...dc in last 1 (1, 3, 4, 5, 6, 7, 8) skipped sts of armhole, sl st to top of ch 3 to join; turn. [61 (61, 71, 79, 81, 89, 97, 99) dc around armhole]
Round 1 (WS): Ch 1, sc in first st, dc2tog over first and next st, sk next (third) st, *(1 sc, 1 dc) in next st, sk next st; rep from * to end of round, sl st to first sc to join; turn. [60 (60, 70, 78, 80, 88, 96, 98) sts]
Follow the sequence for your size from Right Sleeve for remainder of Left Sleeve.
Can't get enough free crochet patterns?
Neither can we! Check out these collections of handpicked patterns to find your next project.
Collar
Left-handed crocheters: Reverse all mentions of right and left in this section.
Pro Tip: Since the fronts were worked up to the armhole to a certain length for each size, the st counts given for the fronts are approximate. If the st counts given for those sections doesn’t match your count, that is ok as long as you worked the sts as given.
With WS facing and larger hook, join yarn at bottom of left front.
Foundation Row (WS):
Working into bottom ribbing: Ch 1, scblo in first sc of ribbing, scblo in each rem st of ribbing… (12 sc for all sizes)
Working up left front: Sc in first row edge, 2 sc in each of next 2 rows, *1 sc in next row, 2 sc in each of next 2 rows; rep from * to neck (ending repeat when you reach the seam)… [approximately 102 (102, 105, 113, 113, 117, 124, 124) sc]
Working in back of neck: ...Sc in shoulder first shoulder seam, 2 sc in extra shoulder row, sc in each st across back of neck, 2 sc in extra shoulder row, sc in second shoulder seam… [27 (19, 23, 25, 23, 19, 17, 13) sc]
Working down right front: ...Sc in first row edge, 2 sc in each of next 2 rows, *1 sc in next row, 2 sc in each of next 2 rows; rep from * to bottom ribbing… [approximately 102 (102, 105, 113, 113, 117, 124, 124) sc]
Working into bottom ribbing: ...Scblo in each sc of ribbing; turn. (12 sc for all sizes)
Row 1 (RS): Ch 1, scblo in each sc to end of row; turn.
Rows 2-12: Rep Row 1. Fasten off.
Round Pockets
Make 2.
With larger hook:
Foundation Row: Ch 14.
Row 1 (RS): (1 sc, 1 dc) in second ch from hook, dc in each rem ch to last ch, (1 dc, 1 sc) in last ch; turn. (15 sts, all sizes)
Row 2 (WS): Ch 1, (1 sc, 1 dc) in first st, sk next st, *(1 sc, 1 dc) in next st, sk next st; rep from * to last st, sc in last st; turn.
Row 3 (RS, inc): Ch 1, (1 sc, 1 dc) in first st, dc in each st to last st, (1 dc, 1 sc) in last st; turn. (17 sts)
Row 4 (WS): Ch 1, (1 sc, 1 dc) in first st, sk next st, *(1 sc, 1 dc) in next st, sk next st; rep from * to last st, sc in last st; turn.
Row 5 (RS, inc): Ch 3, dc in first st and in each rem st to last st, dc in sp between last 2 sts, dc in last st. (19 sts)
Rep Rows 4 and 5 two more times for a total of nine rows. (23 sts)
Row 10 (WS): Ch 1, (1 sc, 1 dc) in first st, sk next st, *(1 sc, 1 dc) in next st, sk next st; rep from * to last st, sc in last st; turn. (23 sts)
Row 11 (RS): Ch 3, sk first st, dc in next st and in each rem st to end of row; turn. (23 sts)
Rep Rows 10 and 11 two more times for a total of 15 rows. Do not fasten off.
Pocket Top Ribbing
- This video tutorial covers how to attach ribbing to pocket top:
With attached yarn and smaller hook:
Foundation Row: Ch 6.
Row 1: Sc in second ch from hook, sc in next 4 chs, slst in first 2 sts of pocket; turn. (5 sts)
Row 2: Skip 2 sl sts, scblo in next 5 sc; turn.
Row 3: Ch 1, scblo in first st, sc in next 4 sts, slst in next 2 sts of pocket; turn.
Rep Rows 2 and 3 ten more times for a total of 23 rows (last row will have only one sl st at the end of row). Keep yarn attached.
Ribbing Around Pocket
Note: Ribbing is worked around the sides and bottom of pocket, working down one side, across the bottom and up the other side. Work 2 sc in each Row 1 raw edge (with dc at end of row) and 1 sc in each Row 2 raw edge (with sc at end of row). Increases are worked in the bottom ch sts of pocket.
With attached yarn and larger hook:
Row 1 (WS inc):
First side of pocket: Ch 1, scblo in first 5 sts of ribbing, 21 sc down side of pocket…
Bottom of pocket: [2 sc in next ch, 1 sc in next ch] 6 times, 2 sc in last ch,
Second side of pocket: 21 sc up side of pocket, scblo in last 5 sts of top ribbing; turn. (72 sts)
Row 2 (RS): Ch 1, scblo in first sc and in each rem sc to end of row; turn. (72 sts)
Row 3 (WS inc): Ch 1, 24 scblo, [2 scblo in next st, scblo in next 2 sts] 8 times, 24 scblo; turn. (80 sts)
Rows 4 and 5: Rep Row 2 two more times. Fasten off leaving a 36” tail to sew pocket to sweater. Sew pocket using whip st on each front.
Weave in ends. Block according to fiber. (My preferred method is lightly steam blocking using an iron or steamer. Do not touch iron to yarn though as doing so can cause it to melt.)
Read more about blocking your crochet projects here.
Roll your sleeves up (or don’t!) and head out into the wild blue yonder in your new lacey cardigan.
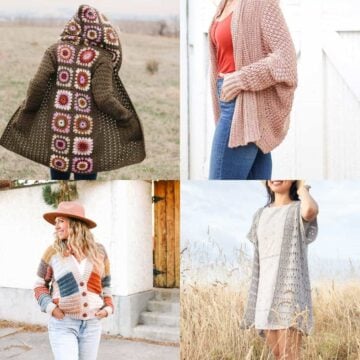
More Free Cardigan Patterns
Here are a few more modern crochet cardigans to add to your handmade wardrobe. Don't miss our pullover patterns and favorite crochet tops too.
- 3 Day Chunky Crochet Cardigan Pattern + Video
- Nearly Seamless Crochet Cardigan - Easy Free Pattern
- Easy C2C Crochet Cardigan Pattern Made From Rectangles
- Modern Crochet Granny Square Cardigan - Free Pattern + Videos
- How to Crochet a Patchwork Cardigan Free Pattern + Tutorial
- Child's Crochet Hexagon Cardigan Pattern With Toddler Sizes
That was so fun! Now what?
Invitation to our Facebook group
Come discuss crocheting lacy cardis and lots of other projects and techniques in our Make & Do Crew Facebook group. Here thousands of helpful crocheters answer each other's questions and share their stitches. Come join us here.
How to Crochet a Lacy Cardigan - Pattern Overview
Materials
Yarn
- Color: Lion Brand Coboo Weight: 3/light - 232 yds, 3.5 oz, 100 g
- Tan 835-123 – 9 (9, 9, 9, 10, 10, 11, 11) skeins [(approx. 810 (820, 860, 900, 930, 970, 1040, 1050) g)]
Additional Supplies
- Tapestry needle
- Ribbing: Size G 4 mm crochet hook or size needed to obtain gauge
- Body of sweater: Size H 5 mm crochet hook or size needed to obtain gauge
- Stitch markers or safety pins
Abbreviations + Glossary (US Terms)
- beg - beginning
- ch – chain
- dc – double crochet
- dc2tog – double crochet two together
- PM – place marker
- rem - remaining
- rep – repeat
- RS – right side
- sc – single crochet
- scblo – single crochet back loop only
- sk – skip
- sl st(s) – slip stitch(es)
- st(s) – stitch(es)
- tch – turning chain
- tog - together
- WS – wrong side
Abbreviations and Glossary (US Terms):
Want some company while you crochet?
Get support (and camaraderie!) in the Make & Do Crochet Crew Facebook Group. Search “Make and Do Crochet Crew” on Facebook.com.
Permissions + Copyright
Please do not publish or share this pattern as your own. You may make items to sell with this pattern. In exchange, please link back to this page. Do NOT use my photos as your own sales photos.
Overall Pattern Notes
Instructions
1. Check Your Gauge
- Before starting, check your gauge to make sure your cardigan will turn out the size you expect.
- With yarn and a larger hook, 35.
- Work Rows 1-3 in the free pattern above. Repeat Rows 2-3 seven more times.
- Adjust hook size up or down and re-swatch if necessary.
2. Bottom Ribbing
- Skip first chain, sc in second ch from hook, sc in each rem ch to end of row. Repeat Row 2 more times for a total of 159 rows.
3. Body of Sweater
- Working into the raw edge (longer edge) of the ribbing, complete Row 1 of the sweater body. Continue working back and forth in rows before dividing for the armholes.
Sleeves
- Crochet sleeves directly into armholes in turned rounds.
Collar
- The collar ribbing is worked into cardigan front and neck with edges with single crochet.
Pockets
- Lastly, crochet two rounded pockets and join them to your lacy cardigan.
- Blocking
- Lightly steam block or wet block your sweater to smooth out any inconsistencies in the stitches.
Overall Pattern Notes
- Ch 1 is NOT counted as a stitch throughout.
- Ch 3 is counted as a dc throughout.
- Scroll up for the complete free Nexus Lace Cardigan crochet pattern.








Leave a Reply