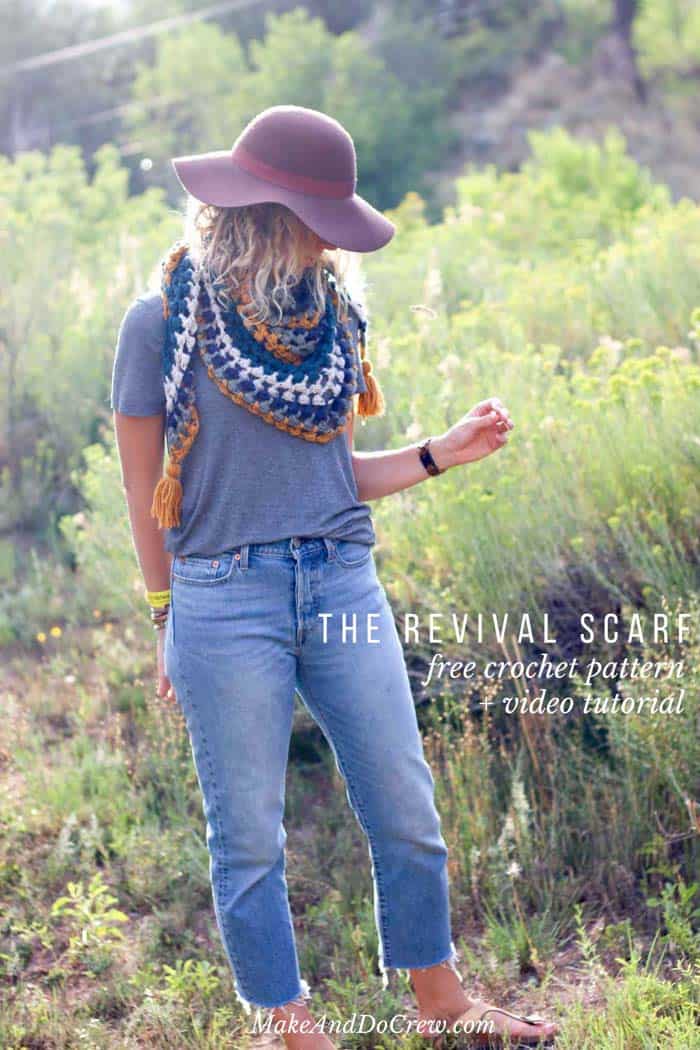
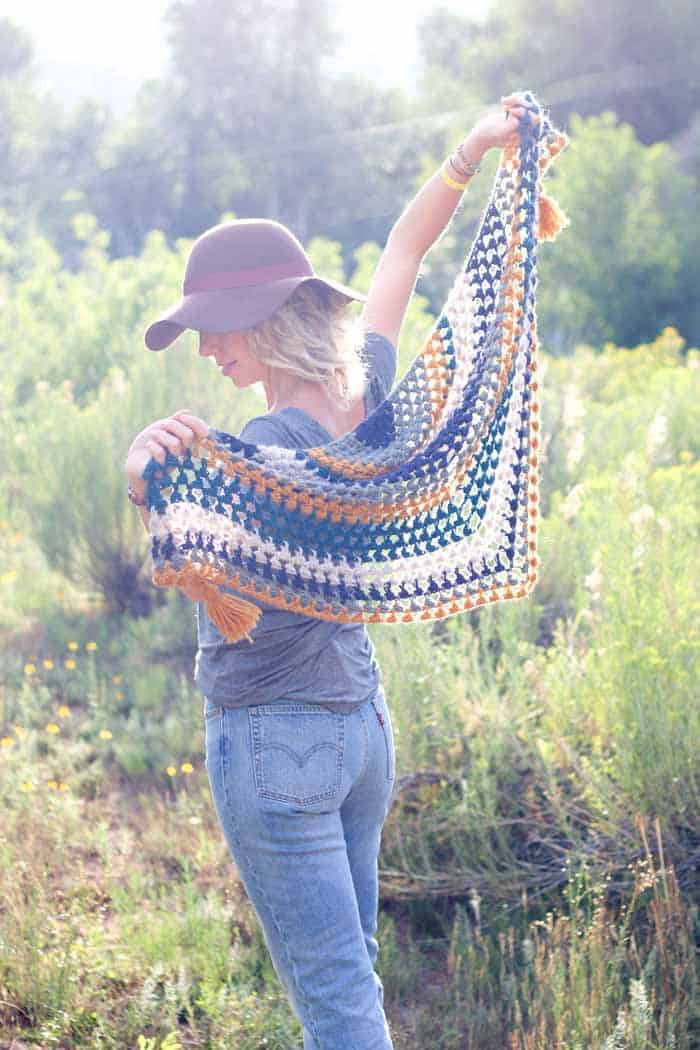
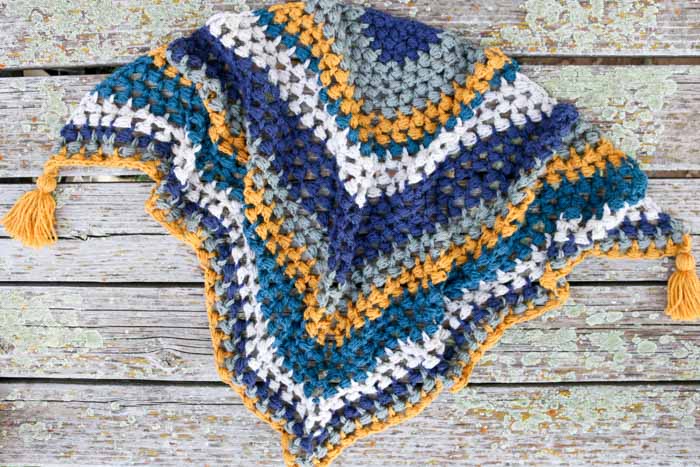
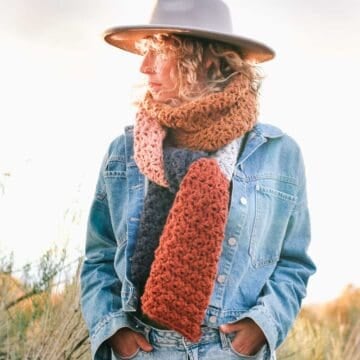
Worked in a muted, vintage color palette, this crochet triangle scarf free pattern is a versatile piece that’ll keep you cozy until the tulips start blooming again. Get the free pattern below or purchase the ad-free, printable PDF here.
There's something about back-to-school season that gets me thinking about crisp autumn days. And there's just something about crisp autumn days that gets me thinking about mustard yellow. It really is the best condiment-inspired color, isn't it?!
 This crochet triangle scarf free pattern is part of an ongoing partnership with Lion Brand Yarn. This post contains affiliate links.
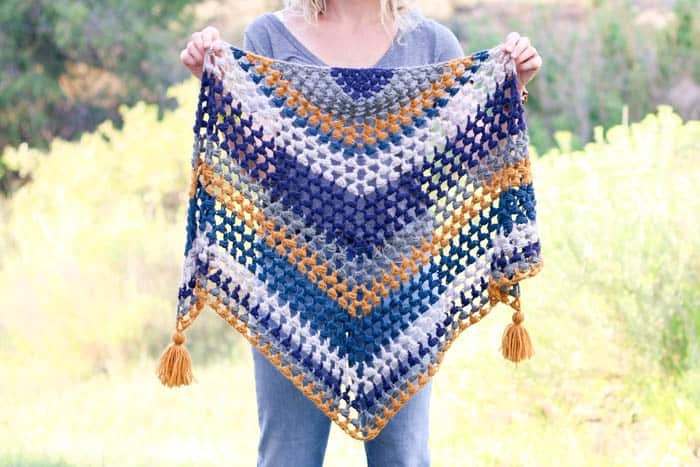
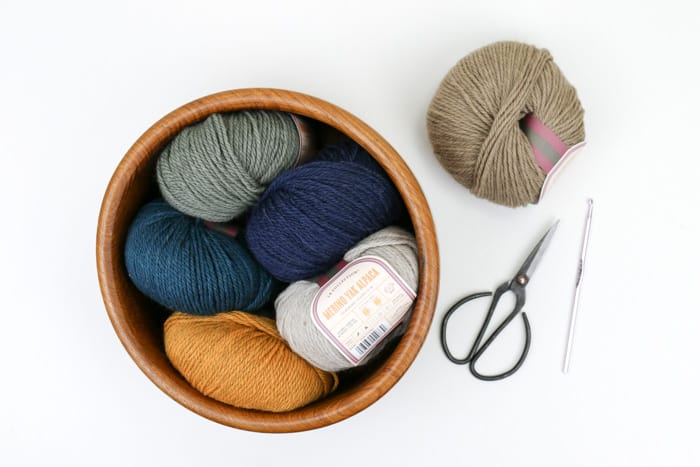
For this crochet triangle scarf free pattern, I got to try Lion Brand's Merino Yak Alpaca yarn, which is filled with beautiful, nature texture and comes in a color palette that just sings "pumpkin spice latte season!" I had a really hard time deciding which color to leave out of this design, but once I began working, these five colors felt perfect together.
A Bead Stitch Variation
While the stitch of this triangle scarf might look sort of like a granny stitch-bobble hybrid, it's actually a variation on the bead stitch.
This stitch lends just enough squishiness to this scarf to keep it warm and comfy, while still maintaining a casual drape to give you that "Oh this? Yeah, I-just-whipped-it-up-and-then-threw-it-on" vibe.
RELATED: Floret Lacy Crochet Scarf - a surprisingly easy intro to lace

This crochet triangle scarf free pattern is one of those that is really quite simple once you get the hang of it, but it might look a bit intimidating to some. That's where the video tutorial comes in! I put this together because I know some of you far prefer to learn through watching. So take a peek at the video below and then just reference the written pattern under the video for when to change colors.
I'm always working on making my teaching more helpful to more people, so if you have any feedback on this video or types of instructions you like to see, please feel free to leave a comment! And you can always check out all my crochet video tutorials here.
Please do not publish or share this pattern as your own. You may make items to sell with this pattern. In exchange, please link back to this post. Do NOT use my photos as your own sales photos. You can read my policies here.
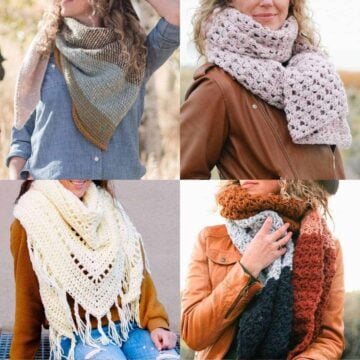
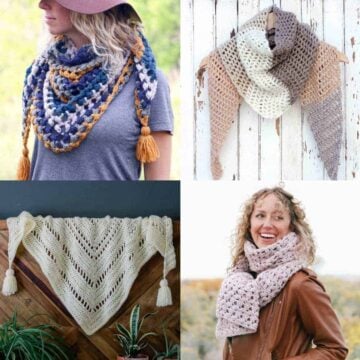
More Free Crochet Scarves + Shawls Patterns
Whether you adore c2c crochet scarves, Tunisian crochet shawls or gorgeous lace scarves, we've got you covered. Many of these patterns make quick gifts to crochet and great gift ideas for Mother's Day.


See more free crochet scarves + shawls patterns →
The Revival
Crochet Triangle Scarf - Free Pattern
Purchase the ad-free, printable PDF here.
Add this pattern to your Ravelry favorites here.
Pin it for later here.
Explanation:
Worked in a muted, vintage-inspired color palette, this crochet triangle scarf free pattern is a versatile piece that’ll keep you cozy until the tulips start blooming again. You’ll find the pattern quite easy to memorize after a few rows and the bobble-like stitches combine for a speedy little project with beautiful drape. Follow the pattern as written or add additional rows to create a larger wrap.
Supplies:
So you can spend more time crocheting and less time shopping, this pattern contains affiliate links at no extra cost to you.
• Lion Brand LB Collection Merion Yak Alpaca (Weight: 4/medium - 126 yds, 1.75 oz)
- Color A: Navy (1 skein)
- Color B: Sage (1 skein)
- Color C: Mustard (1 skein)
- Color D: Teal (1 skein)
- Color E: Oatmeal (1 skein)
• Tapestry needle
• Size K (6.5 mm) crochet hook
• Stitch markers or safety pins
• Small piece of cardboard or toilet paper tube
Measurements:
57” wide (not including tassels)
26” tall
Gauge:
4 (bead stitch + ch 1) pairings = 4”
5 rows = 4”
Abbreviations and Glossary (US Terms):
ch – chain
dc – double crochet
ch1sp – space created by chaining one
ch4sp – space created by chaining four
tch – turning chain
sk – skip
st – stitch
yo – yarn over
rep – repeat
PM – place marker
Slcl (slanting cluster) – [yo, insert hook from right to left around post of previous dc, yo, pull loop through] 3 times in same place, yo, pull through all 7 loops on hook (see video tutorial for help)
Overall Pattern Notes:
• Reference the video tutorial above if you need additional help with any aspect of the pattern.
• In each row, the pattern increases by one bobble (cluster) on either side of the triangle.
• Work the final dc of each row loosely so as to ensure your triangle has fairly straight lines.
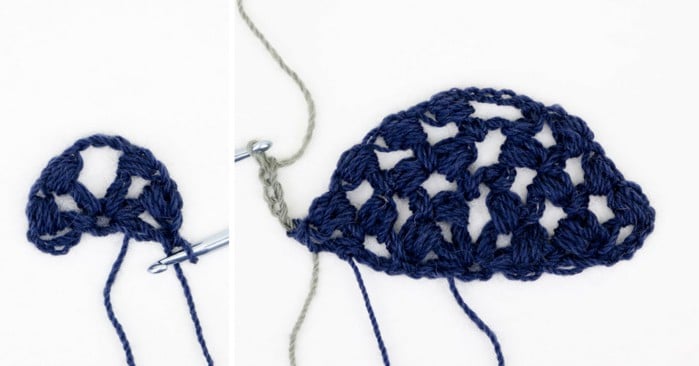
• To change colors between rows, complete the final yo of the last dc of the row with the new color. Pattern is written with the assumption that the last dc before a color change will be worked this way. (See video or photo below for help.)
• The ch 4 at the beginning of each row counts as 1 dc and 1 ch throughout. Therefore the turning chain from the previous row is always the first ch1sp of the next row.
• Optional: place a marker in the ch4sp that will form the triangle point to easily keep track of where to work a ch 4 on the next row.
Triangle Scarf
Foundation Round: Using Color A, ch 4, join to first ch with a sl st to form a circle. (Alternatively, use a magic circle.)
Row 1: Ch 4, 1 dc in circle, 1 slcl, ch 1, 1 dc in circle, 1 slcl, ch 4 (PM), [1 dc in circle, 1 slcl, ch 1] twice, 1 dc in circle; turn. (2 bobbles per side)
Row 2: Ch 4, [1 dc in next ch1sp, 1 slcl, ch 1] twice, [1 dc,1 slcl, ch 4, 1 dc,1 slcl, ch 1] all in ch4sp, [1 dc in next ch1sp, 1 slcl, ch 1] twice, 1 dc in same ch1sp; turn. (3 bobbles per side)
Row 3: Ch 4, [1 dc in next ch1sp, 1 slcl, ch 1] 3 times, [1 dc,1 slcl, ch 4, 1 dc,1 slcl, ch 1] all in ch4sp, [1 dc in next ch1sp, 1 slcl, ch 1] 3 times, 1 dc in same ch1sp; turn. (4 bobbles per side)
Switch to Color B. Fasten off Color A.
✨Unlock this free subscriber-exclusive pattern ✨
Follow these steps to view the full free pattern below
Row 15: Ch 4, [1 dc in next ch1sp, 1 slcl, ch 1] 15 times, [1 dc,1 slcl, ch 4, 1 dc,1 slcl, ch 1] all in ch4sp, [1 dc in next ch1sp, 1 slcl, ch 1] 15 times, 1 dc in same ch1sp; turn. (16 bobbles per side)
Row 16: Ch 4, [1 dc in next ch1sp, 1 slcl, ch 1] 16 times, [1 dc,1 slcl, ch 4, 1 dc,1 slcl, ch 1] all in ch4sp, [1 dc in next ch1sp, 1 slcl, ch 1] 16 times, 1 dc in same ch1sp; turn. (17 bobbles per side)
Row 17: Ch 4, [1 dc in next ch1sp, 1 slcl, ch 1] 17 times, [1 dc,1 slcl, ch 4, 1 dc,1 slcl, ch 1] all in ch4sp, [1 dc in next ch1sp, 1 slcl, ch 1] 17 times, 1 dc in same ch1sp; turn. (18 bobbles per side)
Switch to Color B. Fasten off Color A.
Wanna save this pattern?
Row 18: Ch 4, [1 dc in next ch1sp, 1 slcl, ch 1] 18 times, [1 dc,1 slcl, ch 4, 1 dc,1 slcl, ch 1] all in ch4sp, [1 dc in next ch1sp, 1 slcl, ch 1] 18 times, 1 dc in same ch1sp; turn. (19 bobbles per side)
Row 19: Ch 4, [1 dc in next ch1sp, 1 slcl, ch 1] 19 times, [1 dc,1 slcl, ch 4, 1 dc,1 slcl, ch 1] all in ch4sp, [1 dc in next ch1sp, 1 slcl, ch 1] 19 times, 1 dc in same ch1sp; turn. (20 bobbles per side)
Switch to Color C. Fasten off Color B.
Row 20: Ch 4, [1 dc in next ch1sp, 1 slcl, ch 1] 20 times, [1 dc,1 slcl, ch 4, 1 dc,1 slcl, ch 1] all in ch4sp, [1 dc in next ch1sp, 1 slcl, ch 1] 20 times, 1 dc in same ch1sp; turn. (21 bobbles per side)
Row 21: Ch 4, [1 dc in next ch1sp, 1 slcl, ch 1] 21 times, [1 dc,1 slcl, ch 4, 1 dc,1 slcl, ch 1] all in ch4sp, [1 dc in next ch1sp, 1 slcl, ch 1] 21 times, 1 dc in same ch1sp; turn. (22 bobbles per side)
Switch to Color D. Fasten off Color C.
Row 22: Ch 4, [1 dc in next ch1sp, 1 slcl, ch 1] 22 times, [1 dc,1 slcl, ch 4, 1 dc,1 slcl, ch 1] all in ch4sp, [1 dc in next ch1sp, 1 slcl, ch 1] 22 times, 1 dc in same ch1sp; turn. (23 bobbles per side)
Row 23: Ch 4, [1 dc in next ch1sp, 1 slcl, ch 1] 23 times, [1 dc,1 slcl, ch 4, 1 dc,1 slcl, ch 1] all in ch4sp, [1 dc in next ch1sp, 1 slcl, ch 1] 23 times, 1 dc in same ch1sp; turn. (24 bobbles per side)
Row 24: Ch 4, [1 dc in next ch1sp, 1 slcl, ch 1] 24 times, [1 dc,1 slcl, ch 4, 1 dc,1 slcl, ch 1] all in ch4sp, [1 dc in next ch1sp, 1 slcl, ch 1] 24 times, 1 dc in same ch1sp; turn. (25 bobbles per side)
Switch to Color E. Fasten off Color D.
Row 25: Ch 4, [1 dc in next ch1sp, 1 slcl, ch 1] 25 times, [1 dc,1 slcl, ch 4, 1 dc,1 slcl, ch 1] all in ch4sp, [1 dc in next ch1sp, 1 slcl, ch 1] 25 times, 1 dc in same ch1sp; turn. (26 bobbles per side)
Row 26: Ch 4, [1 dc in next ch1sp, 1 slcl, ch 1] 26 times, [1 dc,1 slcl, ch 4, 1 dc,1 slcl, ch 1] all in ch4sp, [1 dc in next ch1sp, 1 slcl, ch 1] 26 times, 1 dc in same ch1sp; turn. (27 bobbles per side)
Switch to Color A. Fasten off Color E.
Row 27: Ch 4, [1 dc in next ch1sp, 1 slcl, ch 1] 27 times, [1 dc,1 slcl, ch 4, 1 dc,1 slcl, ch 1] all in ch4sp, [1 dc in next ch1sp, 1 slcl, ch 1] 27 times, 1 dc in same ch1sp; turn. (28 bobbles per side)
Switch to Color B. Fasten off Color E.
Row 28: Ch 4, [1 dc in next ch1sp, 1 slcl, ch 1] 28 times, [1 dc,1 slcl, ch 4, 1 dc,1 slcl, ch 1] all in ch4sp, [1 dc in next ch1sp, 1 slcl, ch 1] 28 times, 1 dc in same ch1sp; turn. (29 bobbles per side)
Switch to Color C. Fasten off Color B.
Row 29: Ch 4, [1 dc in next ch1sp, 1 slcl, ch 1] 29 times, [1 dc,1 slcl, ch 4, 1 dc,1 slcl, ch 1] all in ch4sp, [1 dc in next ch1sp, 1 slcl, ch 1] 29 times, 1 dc in same ch1sp; turn. (30 bobbles per side)
Fasten off Color C.
Finishing
Blocking:
Because we’re working with natural fibers, I recommend taking the time to gently block the scarf to clean up any shaping inconsistencies and help it drape nicely. You may find that the longest (top) side of your triangle is a bit curved, which is fine and will make it wrap well around your neck.
Weaving in Ends:
I find it easiest to weave the yarn ends into the nearest bobble, which hides them and keeps them secure at the same time. I promise the weaving will go faster than you think!
Adding Tassels
Using Color C and a cardboard tube cut to 3.5”, wrap yarn approximately 35 times around the tube lengthwise. Insert 10” strand of yarn underneath wrapped yarn on one end of the tube. Tie a few secure knots, but do not trim these pieces. Use sharp scissors to cut the wrapped yarn at the other end of the tube. Fold the resulting strands of yarn in half and wrap a 10” piece of yarn around the top of the strands to create a small sphere of yarn. Trim the excess of these pieces. Use the tails from the first 10” piece of yarn to tie the tassel onto the corner of the scarf and weave in ends. Repeat once more for the opposite corner. (See video tutorial above for a quick visual lesson.)
Toss your new triangle scarf around your neck, grab a warm apple cider and start planning the next revival!
That was so fun! Now what?
Invitation to our Facebook group
Come discuss crocheting bobble scarf patterns and lots of other crochet projects and techniques in our Make & Do Crew Facebook group. Here thousands of helpful crocheters answer each others questions and share their stitches. Come join us here.
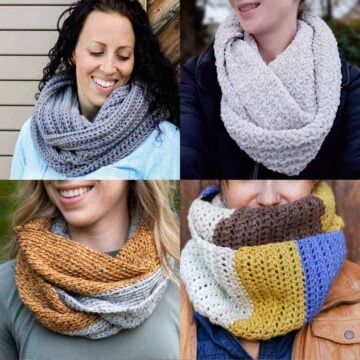
More Free Scarves + Shawls Crochet Patterns
- Logan Coffee Shop Wrap Crochet Pattern
- Bixby Endless Crochet Cowl Pattern
- Chunky Yarn Cowl Crochet Pattern
- Caron Cakes Crochet Cowl Pattern
- Lightweight Tunisian Crochet Shawl Pattern
- Tunisian Fade Crochet Scarf - Video Tutorial
- Brick Stitch Tunisian Crochet Cowl Pattern
- Tunisian Crochet Neck Warmer Pattern
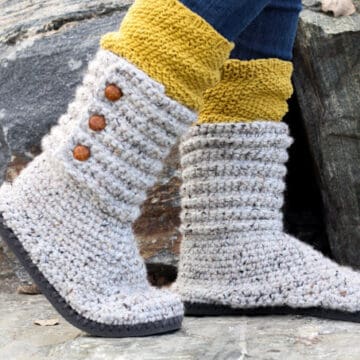
Now that you've got the perfect triangle scarf, you might enjoy adding these pieces to your handmade home and wardrobe!

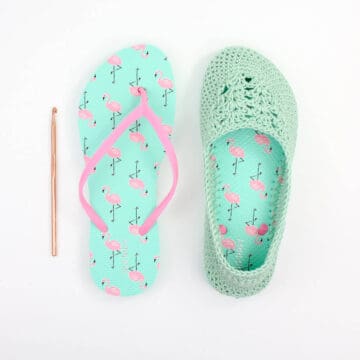
2. Coachella Boots with Flip Flop Soles free crochet pattern
SJ says
If I wanted to make this pattern with only two colors how many skeins of yarn do you think would be needed?
Jess @ Make and Do Crew says
My best guess would be 4 skeins, assuming you're using the same yarn as the pattern lists. 🙂
Jax says
Thanks for the tutorial! I'm well into my scarf and notice it's more diamond shaped then triangle. Any advice to correct the shape?
Jess @ Make and Do Crew says
Hey Jax,
My sample scarf had somewhat of a similar shape, although it sounds like maybe the curve at the top was less pronounced. I mention in the pattern (I think it's in the blocking section?), that you scarf might have a bit of a curve at the top, but that most of it will smooth out with blocking. You can see in the photos that the slight curve gives it a nice drape near your your chin when it's wrapped around your neck.
If you're very dissatisfied with the shape though, you might be able to try adding an extra chain between each bobble to make each row longer. This might result in the opposite problem of a curve the other direction, but you may decide that's fine with you as I don't think it'll show when you wear the scarf.
Similarly, you might try just exaggerating the size of each chain between the bobbles in order to make each row slightly longer.
Hope that's helpful!
Jess
Tammy Lewis says
Thank you, Jess!! I'm a tight crocheter, and I was having the "diamond-shape" issue too... but exaggerating the size of the chains between the bobbles helped a lot! Thank you for this pattern - it's fantastic! So squishy and comfy too!!
Jess @ Make and Do Crew says
I'm so glad that helped!
Regina Zimmer says
I have finished up the scarf but i have never blockked an item do you have suggestions for blocking ?
Jess @ Make and Do Crew says
Hey Regina,
Congrats on finishing your scarf! If your yarn contains some wool, you can simply pin it down and then spritz it with water and let it dry for 24 hours. (I just lay it on top of a towel on my carpet and pin it there using T-pins--I'm not sure that's totally approved by the carpet gods though. 🙂
If you're using acrylic, you can pin it down and then gently steam it with the steam setting on your iron. Just be sure not to actually touch the iron to the yarn or it will melt it!
Jess
Marie says
Hello, I'm having trouble getting the video to play. Once I click on it it go blank.
Jess @ Make and Do Crew says
I'm so sorry to hear that Marie. Perhaps try just refreshing the page to see if that works. And if not, you might want to just try a different internet browser. I know it's been working for most people, so it might just be a little glitch with your browser. 🙂
Jess
Bobbi says
Love this pattern, and really appreciate the video tutorial. Can't wait to get started!
Jess @ Make and Do Crew says
Yay! Hope you enjoy it, Bobbi!
Jess
Heather says
I can't wait to make this but can't find this particular yarn in Canada. Do you have any suggestions for alternate yarn? Thanks!!
Jess @ Make and Do Crew says
Hey Heather,
I believe Lion Brand can ship this yarn to Canada from LionBrand.com. (Also, it's 20% off right now!) If you don't end up going that way though, another worsted weight yarn would work well. 🙂
Jess
Heather says
Thanks Jess! Just trying to avoid the crazy shipping, exchange, and possible duty! It's such a nice looking yarn. I will continue the hunt!
jewey says
cool! definitely making this next! thanks for sharing. 🙂
Jess @ Make and Do Crew says
I hope you enjoy it, Jewey!
Jess
Joan says
You keep sending crochet patternsi knit please correct thank you
Jess @ Make and Do Crew says
Hey Joan,
Are you referencing my emails? I do usually send crochet patterns, so if you'd prefer not to receive them, you an always click the "unsubscribe" button at the bottom of any of my emails. 🙂
Jess
Iola Zinn says
The pattern says it's a 6 bulky yarn but the yarn says it's a 4. So my question is what size yarn is it???
Jess @ Make and Do Crew says
Thanks for catching that, Iola. 🙂 It is actually a size 4/worsted yarn. I've corrected it above now. Happy crocheting!
Jess
Jess says
I'm so excited to get started on this. I have a question though. Is this pattern made using worsted? Under supplies it says the yarn is a super bulky, but the link shows that it's worsted, it didn't quite look bulky to me but I just wanted to double check before I get started. Thanks for all the great patterns!!!
Jess @ Make and Do Crew says
Yes! Thank you so much for catching that. It is indeed worsted. I've corrected it now.
Happy crocheting!
Jess
Michele says
Love the video (super helpful) and love that this yarn is on sale right now!
Jess @ Make and Do Crew says
Isn't that so awesome that the yarn happens to be on sale!? I love serendipity like that. 🙂
Happy crocheting!
Jess
kathy says
Hi! The revival scarf looks beautiful, but I can't find the free tutorial. Can you please guide me.
Thank you!!!
Jess @ Make and Do Crew says
Hey Kathy!
The video tutorial is directly above the free pattern. You can tell where the pattern starts because there's some pinky type that says "The Revival Scarf". Look for the video player right above that. 🙂
Jess