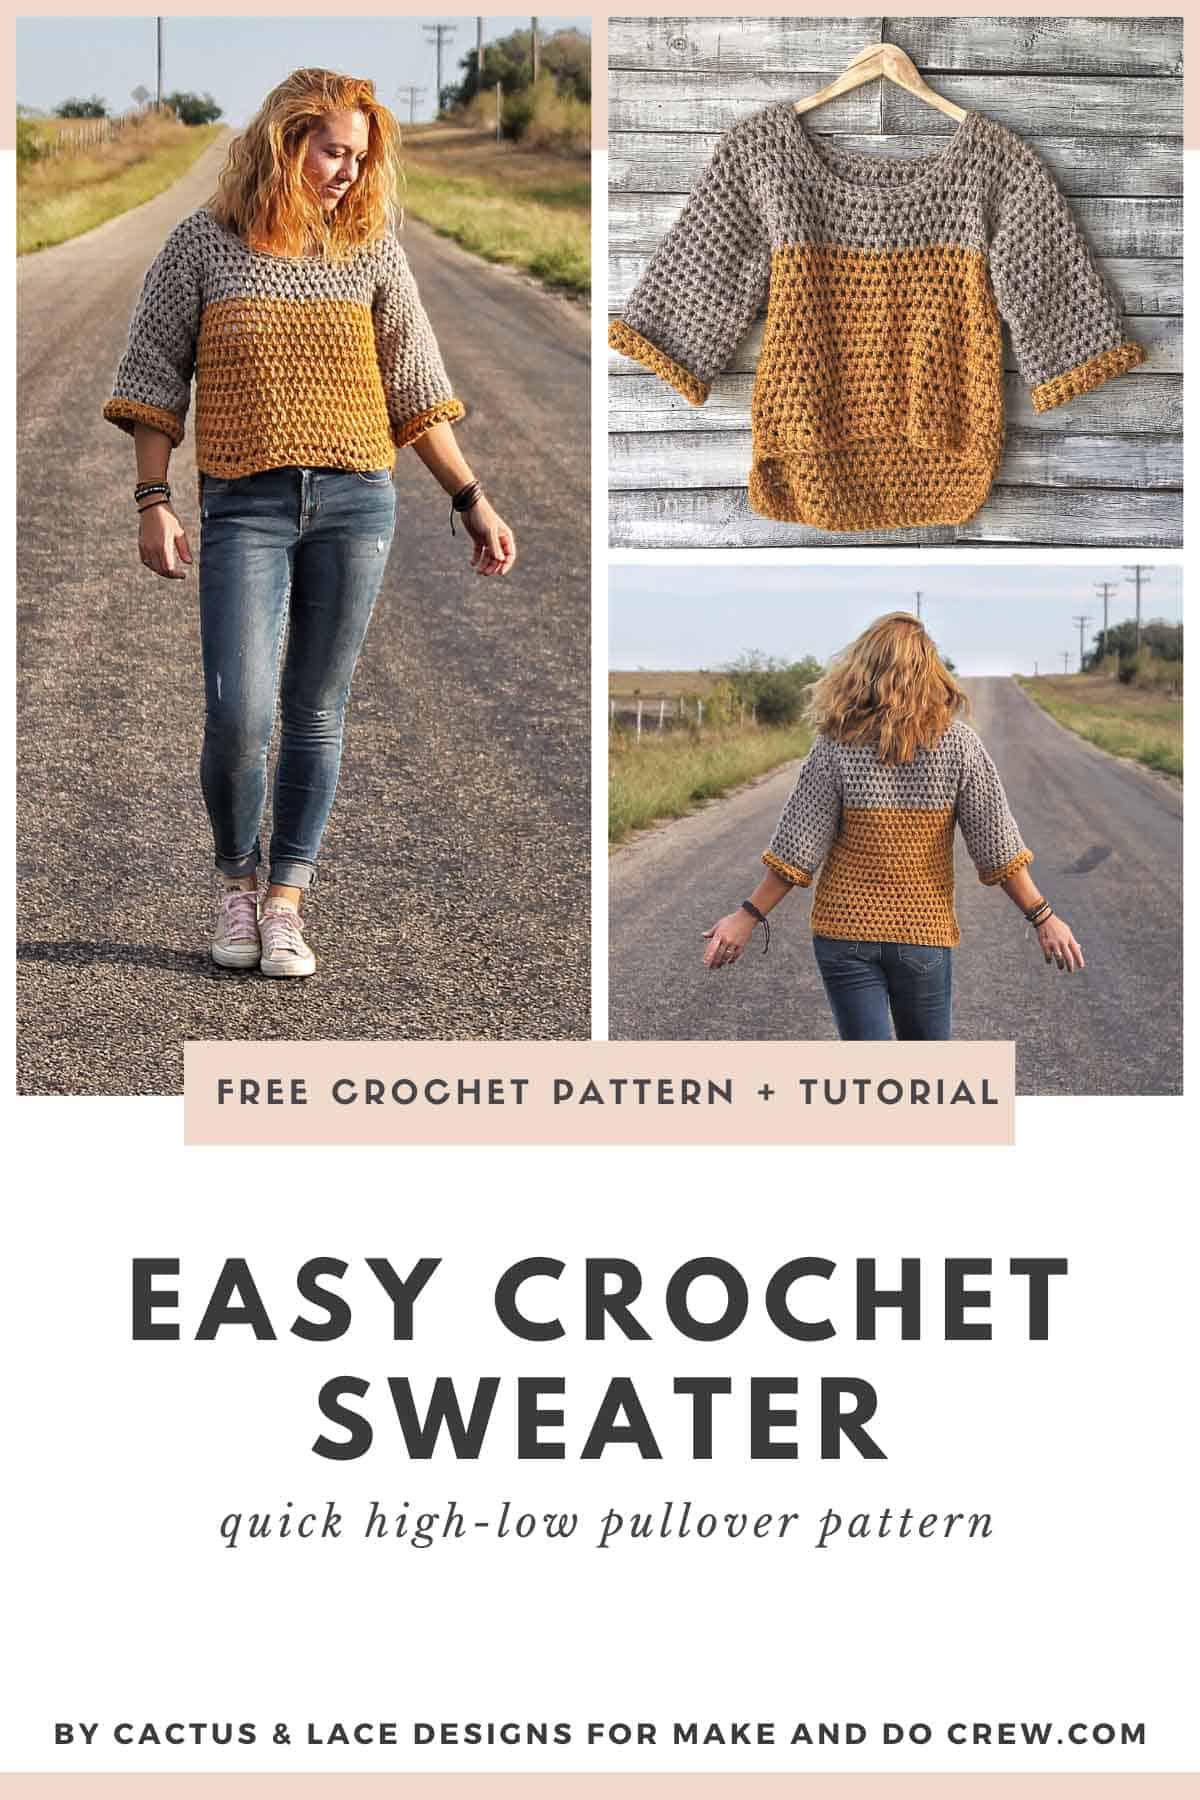
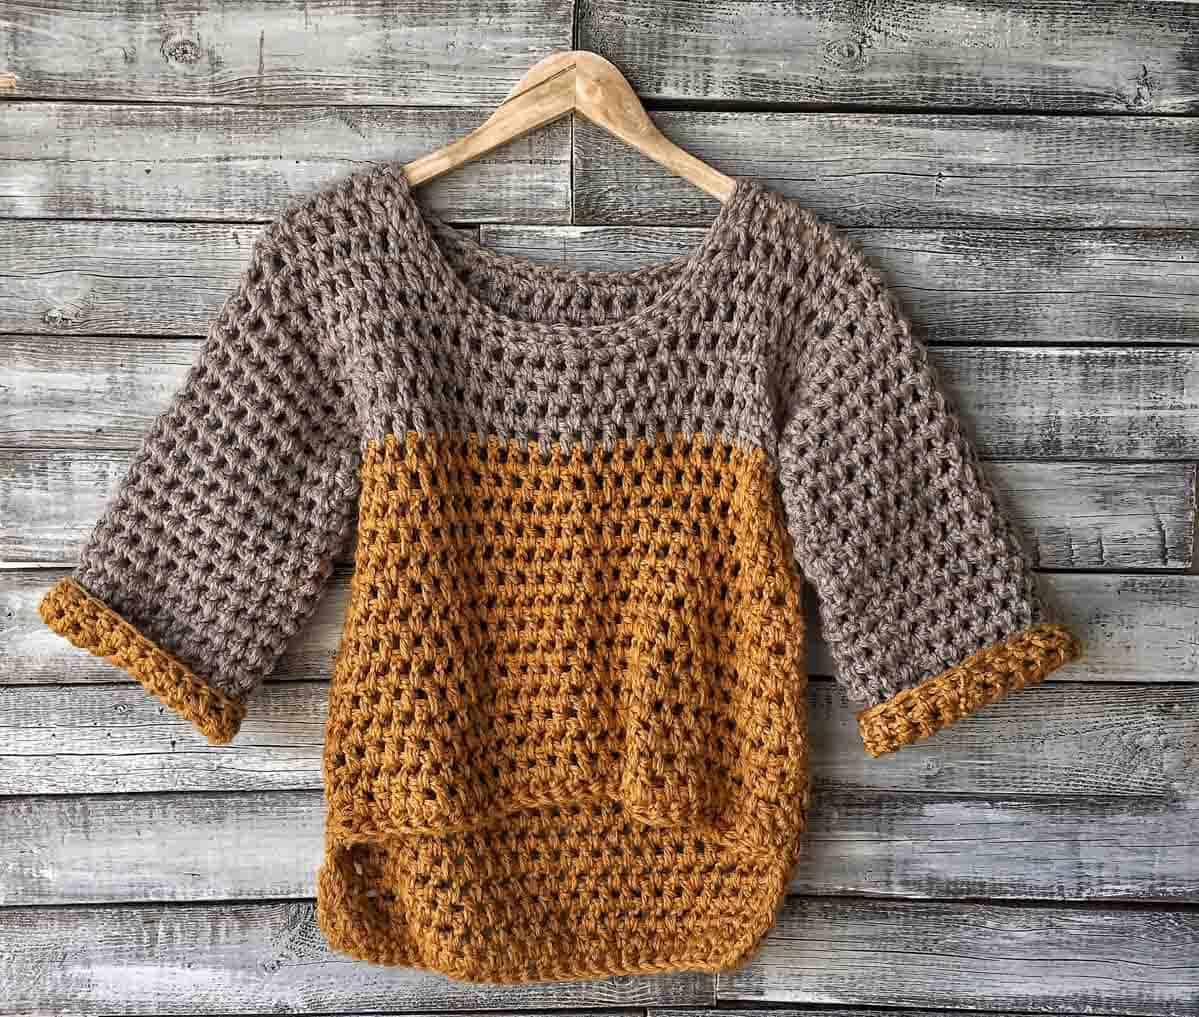
This super fast crochet sweater pattern features a stylish high-low design and can be finished in a single weekend! Get the free pattern below or purchase the ad-free, printable PDF here.
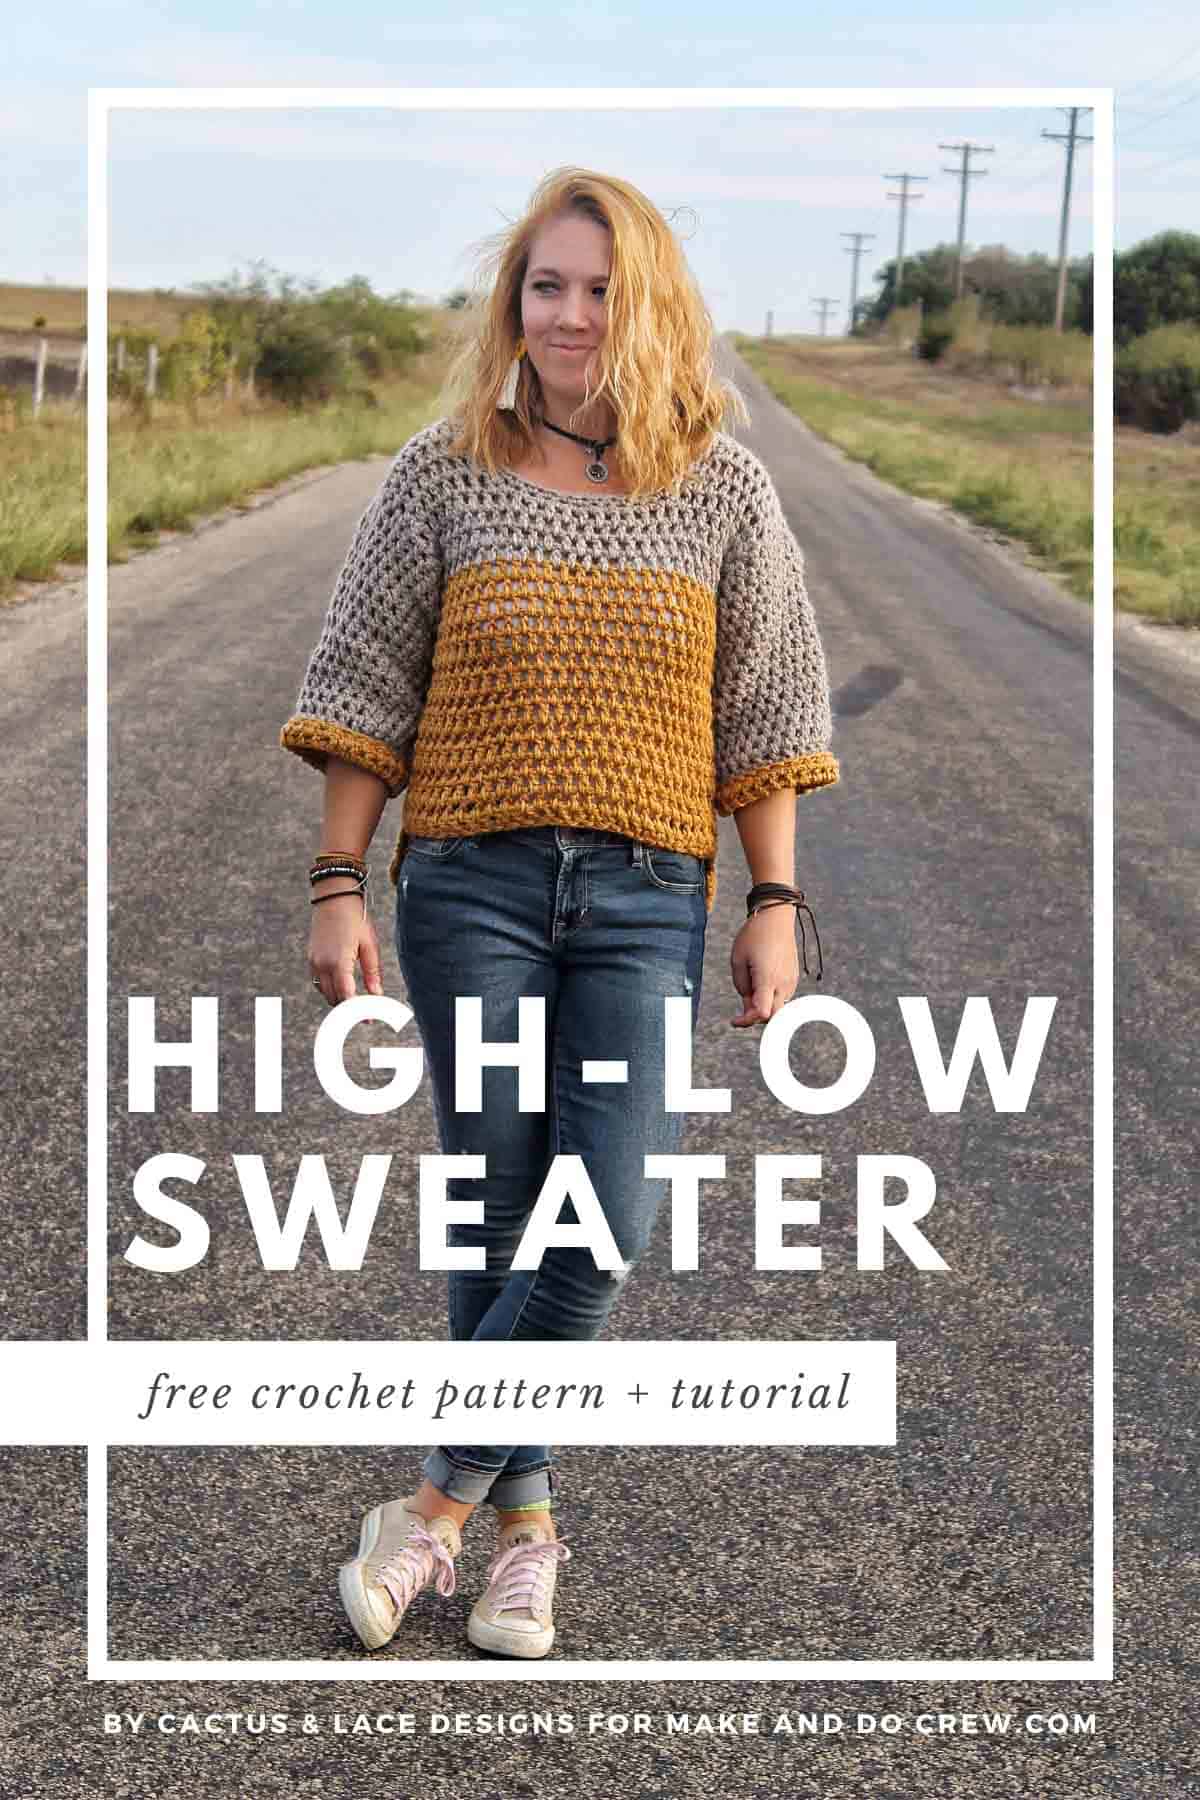
Thanks to Lion Brand Yarns for supplying the yarn for this fast crochet sweater pattern. This post contains affiliate links.
Jump to:
- The Inspiration For My Fast Crochet Sweater Pattern
- A Speedy Sweater That’s Not Too Chunky
- Basic Sweater Construction With a Few Bells + Whistles
- Why You’ll Love This Crochet Pullover
- Crochet a Sweater in a Weekend
- The Weekender Crochet Crop Sweater – Free Pattern
- Final Thoughts on This Easy Pullover Sweater
- Frequently Asked Questions
- That was so fun! Now what?
- Invitation to our Facebook group
Today Ashley from Cactus & Lace Designs is here with her free speedy crochet pullover pattern! You can see lots of of Ashley’s crochet patterns on her blog, in her Etsy shop and Ravelry. And be sure to check her out on social media too: Instagram and Pinterest. Ashley, take it away!
The Inspiration For My Fast Crochet Sweater Pattern
Hey guys, Ashley from Cactus & Lace Designs here! When I first received the email saying I was chosen as a guest designer for the incredible Make & Do Crew, to say I was ecstatic is a huge understatement! I immediately got to work on my new design.
Having recently discovered my love for designing garments and knowing that I wanted to create something that even a new crocheter would feel confident making, I began swatching and trying out all the different stitches.
New to making garments? Check out our step-by-step guide to crocheting your first sweater.
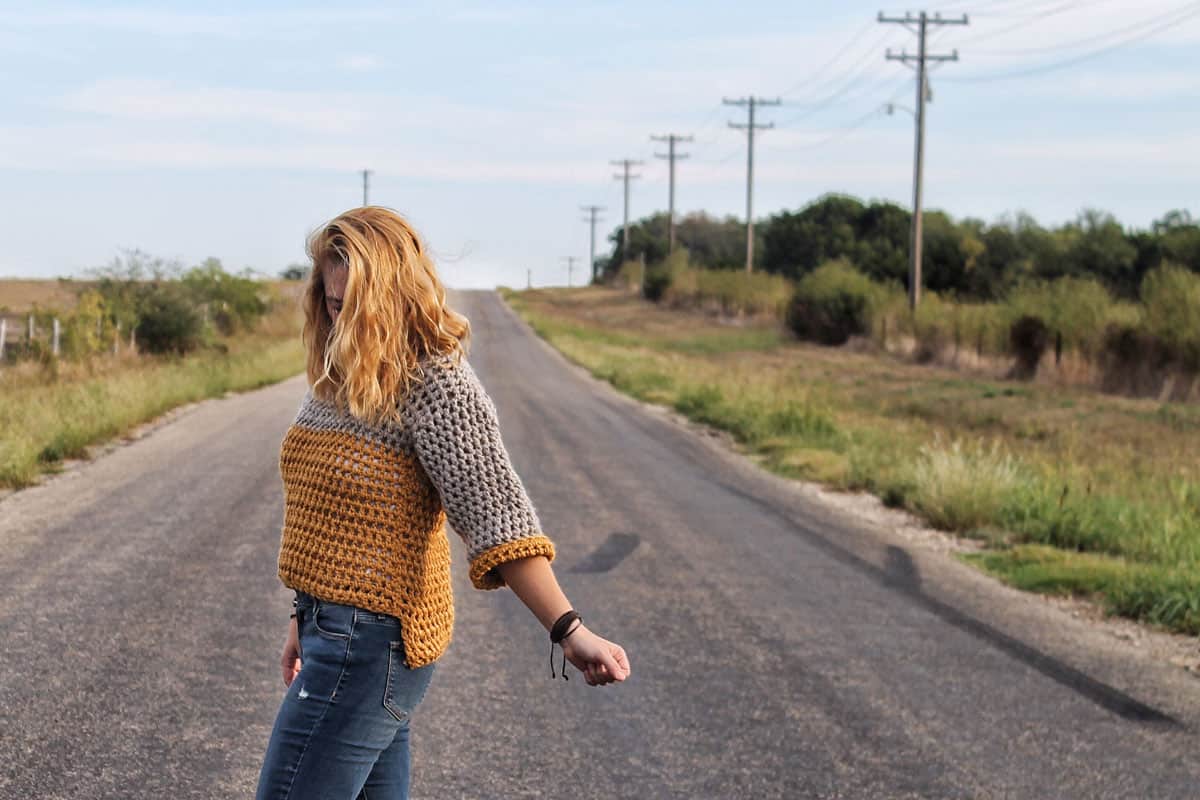
After a few days of swatching and frogging, thats when it dawned on me, and I realized that I was way overthinking everything, which is something I do very well.
I knew I needed to keep it simple, because simplicity is always the best answer. That’s when the Weekender Cropped Sweater was born!
Ever since I taught myself to crochet, designing patterns was a huge goal of mine. I started out small, with simple designs like hats and scarves, thinking that garment design was something way out of my league! Which it was at that time (you should have seen some of my earliest work)!
Related: 30+ Easy Poncho Patterns to Crochet
A Speedy Sweater That’s Not Too Chunky
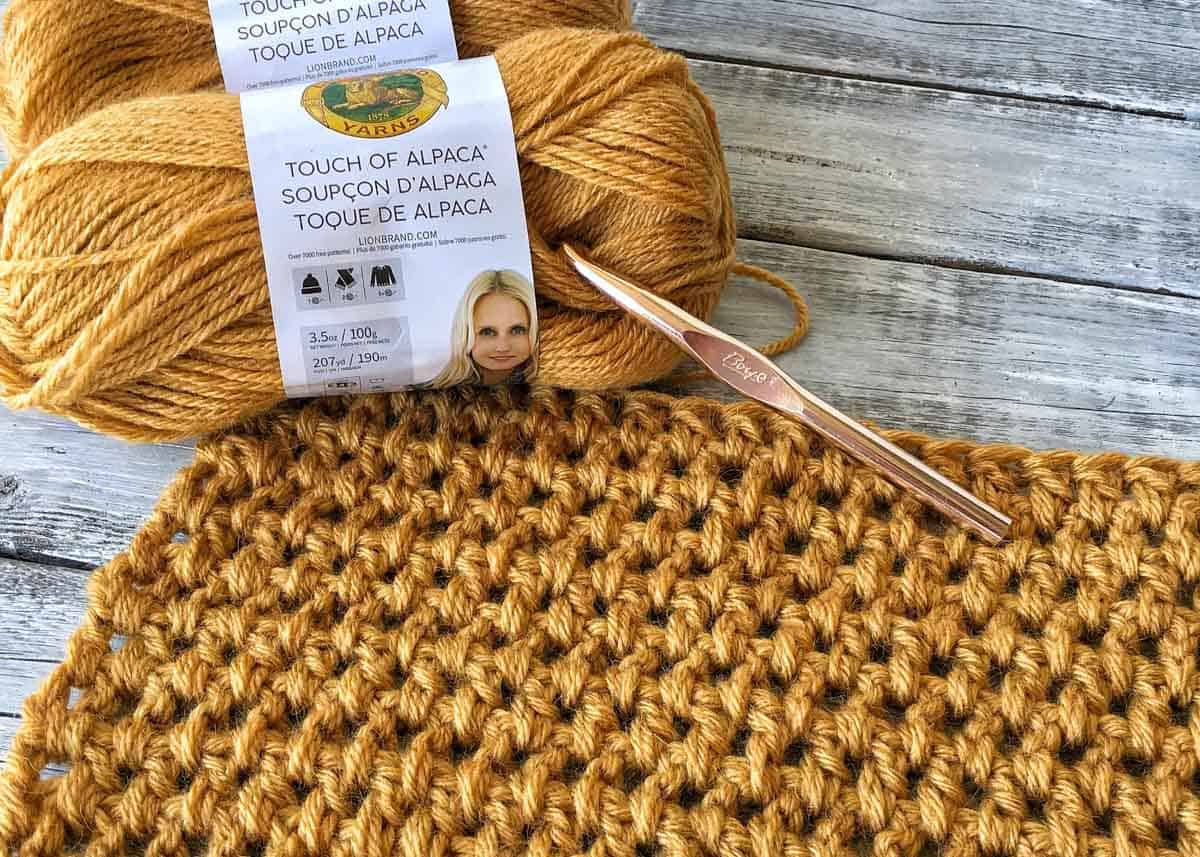
I used Lion Brand Touch of Alpaca for this project. It is a medium size 4 yarn, made of 90% Acrylic and 10% Alpaca.
When I was trying to decide on which yarn to choose, the only thing I knew was that I wanted a worsted weight yarn and Lion Brand has so many amazing yarns that it was so hard to choose.
I had a pretty good idea of the types of colors that I wanted to use, so when I saw the beautiful color choices that Touch of Alpaca came in, I was hooked!
To add to the overall appeal of Touch of Alpaca is its cozy, curl up with a cup of hot cocoa, feel and its gorgeous texture. Add it all together and you have the perfect yarn for your perfect new comfy sweater.
click to pin this pattern for later ⇨
Basic Sweater Construction With a Few Bells + Whistles
Keeping in mind that I wanted this project to be very beginner friendly, I really tried to stick to the basics and then added a few unique touches to enhance the beauty of the design.
All you need to know to be able to crochet this sweater, is double crochet and single crochet, its that easy! One of the things that really makes this design stand out is that it is created holding two stands of yarn together, instead of the standard one strand.
Why You’ll Love This Crochet Pullover
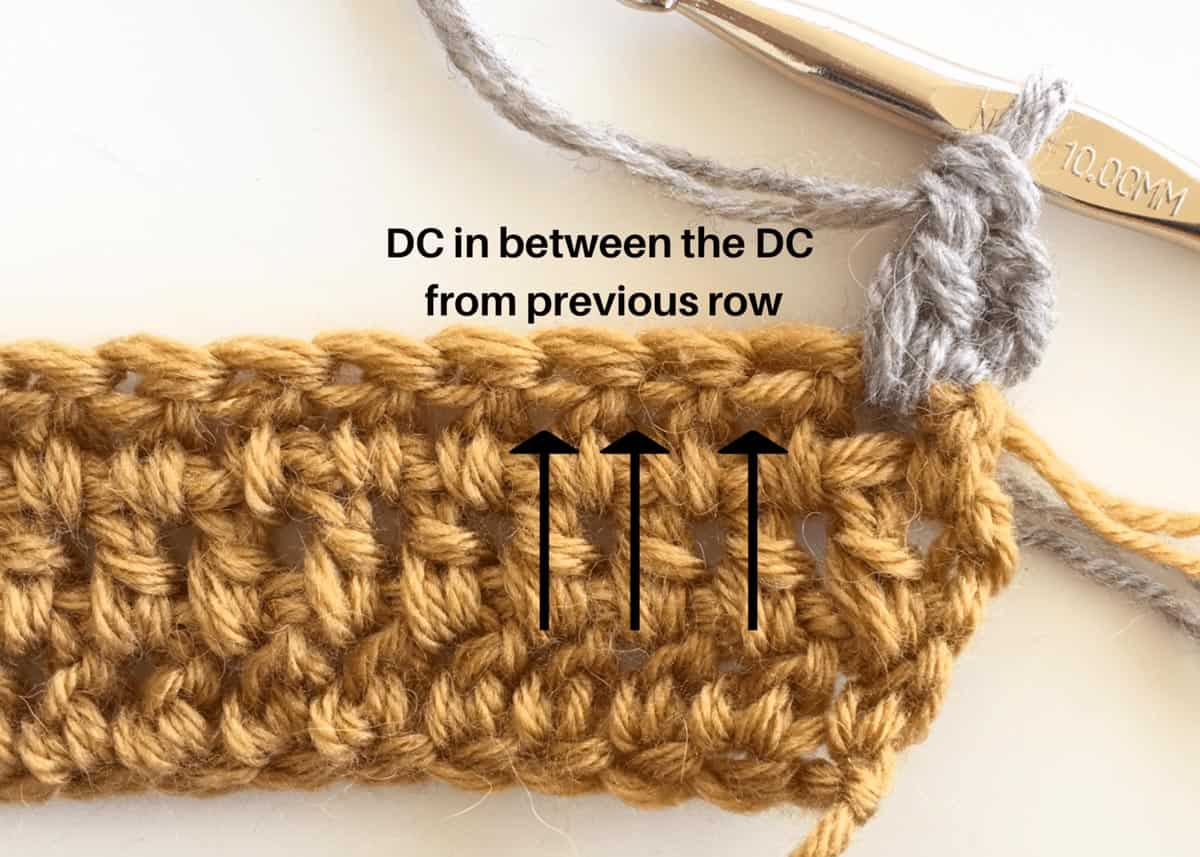
Also all of the double crochet stitches are placed in between the stitches from the previous row instead of into the normal top 2 loops. This gives the sweater a chunky knit-like look, without the extra weight of using a bulky yarn!
And, since I know that cropped sweaters aren’t everyone’s cup of tea, I added some variations to this pattern. The length of the top can easily be adjusted by adding a row or two to the main body piece!
Crochet a Sweater in a Weekend
Why the name the Weekender Cropped Sweater? Simple, because this sweater can easily be worked up in a single weekend! As this pattern was tested for me, I was surprised at how quick everyone was finishing their sweaters.
Then one of my amazing testers suggested that I name this design the Weekender because of how quick it works up, and I kind of loved it!
So if you are looking for a quick and stylish new garment to add to your collection, The Weekender Sweater is the one for you!
(You can see photos of my testers’ versions here!)
More Free Crochet Sweater Patterns
Crochet sweater patterns don’t need to be difficult. In fact, most of ours are made with very simple shapes. Dive into the wonderful world of crochet garments with cardigans, pullovers, ponchos, shrugs and more!
See more free crochet sweater patterns →
The Weekender Crochet Crop Sweater – Free Pattern
Purchase the ad-free, printable PDF here.
Save this pattern to Ravelry here.
Pin it for later here.
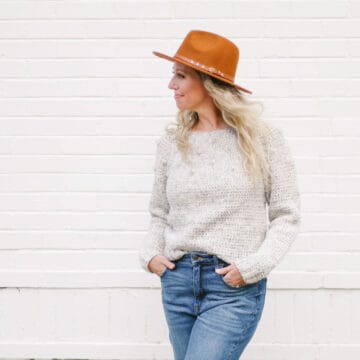
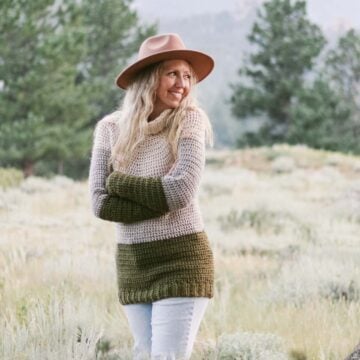
Explanation: The Weekender sweater is a chunky, knit-like, cropped sweater that will pair perfectly with all of your favorite outfits. This sweater is designed to be slightly oversized with a high/ low length, but if crop tops aren’t your thing, the length can be easily modified.
Pair it with your favorite skinny jeans, a maxi skirt, or even your leggings! It is so versatile and looks great with everything in your closet. Made up of simple double crochet and single crochet stitches, this sweater is something that even an inexperienced crocheter could confidently whip up in a weekend!
Supplies:
• LionBrand Touch of Alpaca (weight: 4/Medium – 207 yards, 3.5 oz)
– Goldenrod (#674-158) – 3 (3, 3, 3, 3, 4) balls
– Taupe (#674-123) – 3 (3, 3, 4, 4, 4) balls
• US O/P (11.5mm) crochet hook
• Yarn needle
• Stitch markers (optional)
• Scissors
Sizes/Measurements:
• XS – 17” wide each panel, 17” Long
• S – 18” wide each panel, 18” Long
• M – 19” wide each panel, 19” Long
• L – 20” wide each panel, 19.5” Long
• XL – 22” wide each panel, 20” Long
• 2XL – 23” wide each panel, 21” Long
Gauge:
• 6 DC and 5.5 DC rows = 4”
• Holding two strands of yarn together and working your DC stitches IN BETWEEN the stitches from the previous row. (See photo below.)
Abbreviations and Glossary (US Terms):
CH- Chain
YO- Yarn Over
SL ST- Slip Stitch
SC- Single Crochet
DC- Double Crochet
FDC- Foundation Double Crochet
DC2TOG- Double Crochet Two Together

Overall Pattern Notes:
• Sweater is worked from the bottom up, holding two strands of worsted weight yarn together throughout entire pattern.
• ALL the DC stitches are worked in BETWEEN the DC stitches from the previous row, not into the top loops as normal. (See photo below.)
• Color A is the bottom color (Goldenrod), Color B is the top color (Taupe)
CH 2 does NOT count as a stitch throughout.
• This sweater is made in 2 panels and seamed along the sides. The sleeves are worked in the round and added last.
• Pattern is written for more of a “cropped” fit, add rows where indicated for a longer top.
• Sleeve length and width can be modified where indicated.
The back panel is 4 rows longer than the front, creating a high/low look.
• Color A pictured is Goldenrod, Color B pictured is Taupe
– XS – 400-450 yards of color A & 500-530 yards of color B
– S – 450-480 yards of color A & 540-580 yards of color B
– M – 480-520 yards of color A & 600-625 yards of color B
– L – 550-575 yards of color A & 625-650. Yards of color B
– XL – 575-600 yards of color A & 700-725 yards of color B
– 2XL – 650-675 yards of color A & 725- 750 yards of color B
Wanna save this pattern?
Front Panel
With color A:
Row 1: Holding 2 strands of yarn, FDC 25 (27, 29, 31, 33, 35). CH 2, Turn. 25 (27, 29, 31, 33, 35)
*If you are uncomfortable with the FDC, you can CH 27 (29, 31, 33, 35, 37), DC in the 3rd CH from the hook and in each CH across*
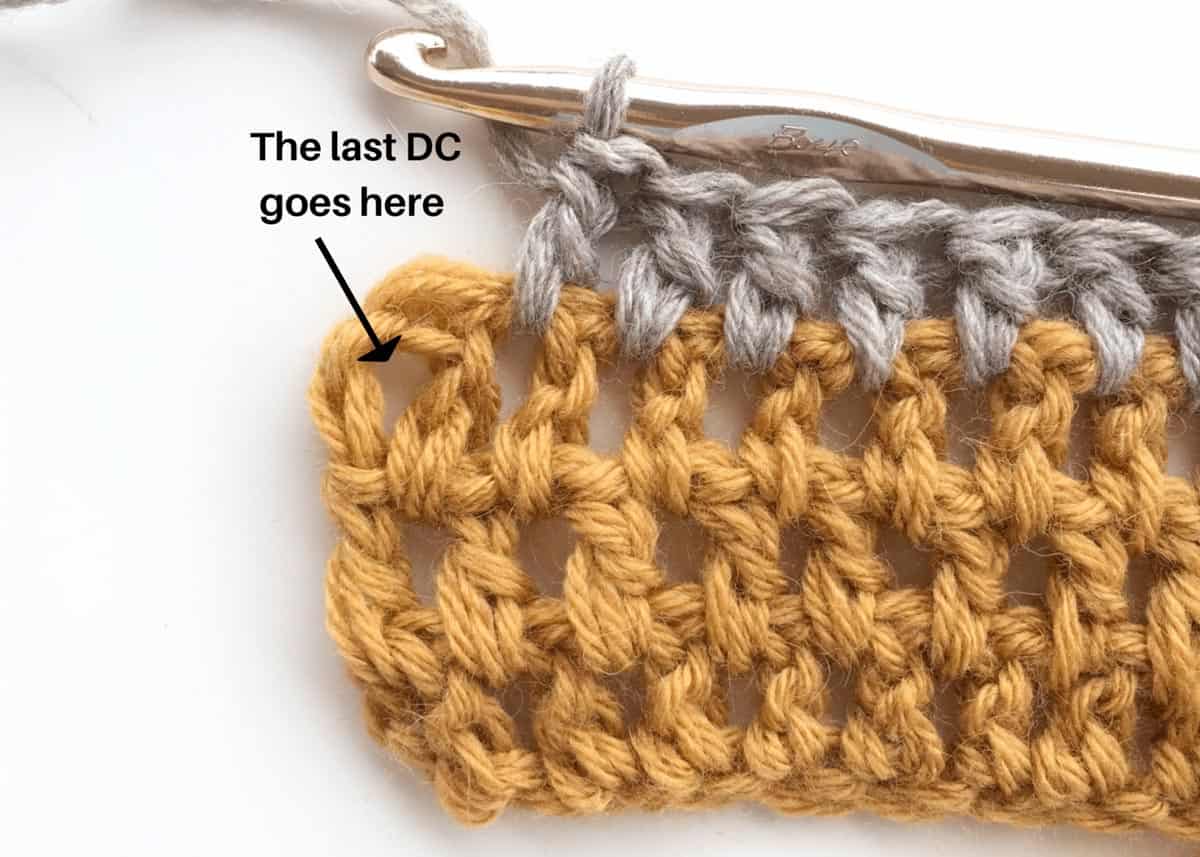
Row 2: DC (in between) each ST, making sure that the last ST is in between the last post and the CH 2 turning chain. CH 2, Turn. 25 (27, 29, 31, 33, 35)
✨Unlock this free subscriber-exclusive pattern ✨
Follow these steps to view the full free pattern below
***Now we will make the second shoulder piece, using color B and holding 2 strands of yarn together***
Row 1: Attach yarn with a slip stitch to the last ST from row 18 (19, 20, 21, 22, 23) (the stitch that is farthest to your right) CH 2, DC (in between) the first 6 (7, 8, 9, 10, 11) ST, then DC2TOG (in between) the next 2 ST. CH 2, Turn. 7 (8, 9, 10, 11, 12)
Row 2: DC (in between) each ST. CH 2, Turn. 7 (8, 9, 10, 11, 12)
Row 3: DC (in between) 5 (6, 7, 8, 9, 10) ST, then DC2TOG (in between) the last 2 ST. CH 2, Turn. 6 (7, 8, 9, 10, 11)
Row 4: DC (in between) each ST. CH 2, Turn. 6 (7, 8, 9, 10, 11)
Row 5: DC (in between) 4 (5, 6, 7, 8, 9) ST, then DC2TOG (in between) the last 2 ST. CH 2, Turn. 5 (6, 7, 8, 9, 10)
Row 6: DC (in between) each ST. 5 (6, 7, 8, 9, 10)
Finish Off, leaving a long tail (approximately 12”) for sewing up the shoulders
Back Panel
***With color A and holding 2 strands of yarn together***
Row 1: FDC 25 (27, 29, 31, 33, 35). CH 2, Turn. 25 (27, 29, 31, 33, 35)
Row 2-18 (19, 19, 20, 20, 21): Repeat row 2 from front panel. 25 (27, 29, 31, 33, 35)
At the end of row 18 (19, 19, 20, 20, 21) change to color B.
***If you added or omitted rows to the front panel to add length, add or omit the same amount of rows to the back panel in color A and then change to color B.***
Row 19 (20, 20, 21, 21, 22)-28 (29, 30, 31, 32, 33): Repeat row 2 from front panel. 25 (27, 29, 31, 33, 35)
Finish off.
Construction
Lay your two panels on top of one another with the right sides facing each other. Make sure to line up row 1 of the front panel to row 5 of the back panel. (Place stitch markers if desired.) Using your yarn needle, sew the two shoulder straps together along the edges.
Then, starting from the bottom, sew up along the outside edges, stopping when you have stitched up to row 14 (15, 15, 16, 16, 17). Tie off, turn your work correct sides out so that your seams are now on the inside and begin making the sleeves.
Sleeves
Repeat for both sleeves with color B and holding 2 strands of yarn together.
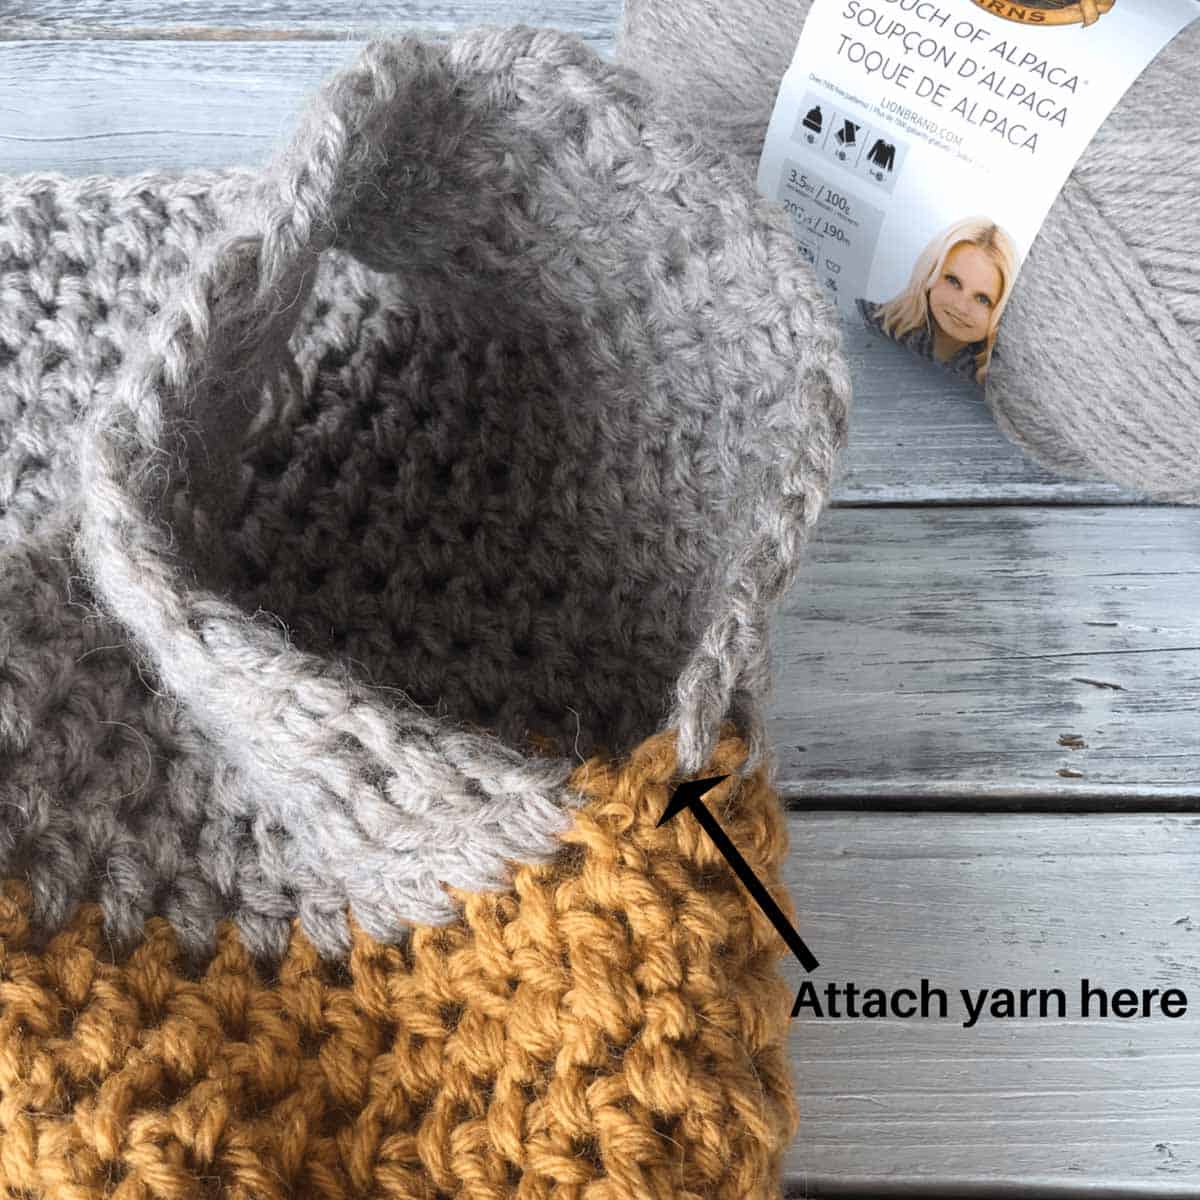
Round 1: Attach yarn in the armpit area and CH 2. You will now be working around the arm hole opening into the end spaces of each row of your body piece. DC into the same space as your CH 2, then DC 24 (26, 28, 28, 30, 30) evenly around. SL ST to join. 24 (26, 28, 28, 30, 30)
Round 2-3: CH 2, DC (in between) each ST. SL ST to join. 24 (26, 28, 28, 30, 30)
Round 4: CH 2, DC2TOG (in between) the first 2 ST, then DC (in between) 10 (11, 12, 12, 13, 13), DC2TOG (in between) the next 2 ST, then DC (in between) the last 10 (11, 12, 12, 13, 13) ST. SL ST to join. 22 (24, 26, 26, 28, 28)
Round 5-16: CH 2, DC. (In between) each ST. SL ST to join. 22 (24, 26, 26, 28, 28)
At the end round 16, change colors.
Round 17-19: CH 2, DC (in between) each ST. SL ST to join. 22 (24, 26, 26, 28, 28)
Finish off.
For Narrower Sleeves
Round 1: Attach yarn in the armpit area and CH 2. You will now be working around the arm hole opening into the end spaces of each row of your body piece. DC into the same space as your CH 2, then DC 24 (26, 28, 28, 30, 30) evenly around. SL ST to join. 24 (26, 28, 28, 30, 30)
Round 2: CH 2, DC (in between) each ST. SL ST to join. 24 (26, 28, 28, 30, 30)
Round 3: CH 2, DC2TOG (in between) the first 2 ST, then DC (in between) 10 (11, 12, 12, 13, 13), DC2TOG (in between) the next 2 ST, then DC (in between) the last 10 (11, 12, 12, 13, 13) ST. SL ST to join. 22 (24, 26, 26, 28, 28)
Round 4: CH 2, DC2TOG (in between) the first 2 ST, then DC (in between) 9 (10, 11, 11, 12, 12), DC2TOG (in between) the next 2 ST, then DC (in between) the last 9 (10, 11, 11, 12, 12) ST. SL ST to join. 20 (22, 24, 24, 26, 26)
Round 5-16: CH 2, DC. (In between) each ST. SL ST to join. 20 (22, 24, 24, 26, 26)
At the end round 16, change colors.
Round 17-19: CH 2, DC (in between) each ST. SL ST to join. 20 (22, 24, 24, 26, 26)
Finish off.
Neckline
Attach yarn with a SL ST (still holding 2 strands of yarn together) to the shoulder seam at the neckline. CH 1, SC evenly around the entire neckline. Joining back to your first SC with a SL ST.
Repeat this for as many rounds as you wish. I did two rounds of SC around my neckline.
Final Thoughts on This Easy Pullover Sweater
Wow, you crocheted your own knit-look crop sweater – and in record time! Style this high-low sweater with jeans for a casual look. Or throw it on over a summer top or comfortable sundress for an extra layer.
Then give your hook a high five and start planning your next project.
Thanks again to Ashley of Cactus & Lace Designs for sharing this free high low crochet sweater pattern! Be sure to check out Ashley’s Etsy shop for lots more modern crochet patterns!
Frequently Asked Questions
Still have questions about easy crochet sweater patterns? Read on to find the answers.
If you want to make a sweater quickly, crochet is much faster than knitting. That’s because crochet stitches are taller than knit stitches, meaning a crochet sweater grows more quickly than a knit one.
The time it takes to crochet a sweater depends on how complex the pattern is, as well as your own level of experience. An experienced crocheter might need around 20 hours to make a simple sweater, while the same project might take a beginner 30 hours instead.
Find Your Next Sweater Project
Easy crochet sweaters are our absolute fave. Level up your handmade wardrobe with some of our most loved cardigan, pullover, and hoodie patterns.
You must use the category name, not a URL, in the category field.Learn a New Skill
When you’re ready to master a new skill, check out our detailed guides that include everything you need to know to level up your crochet game.
- How to Corner to Corner (C2C) Crochet for Beginners – with video tutorials to get you started
- How to Crochet a Beginner Hat – make an entire beanie in 1.5 hours!
- How to Crochet Amigurumi for Beginners – the ultimate guide to making your own toys and plushies
- How to Tunisian Crochet – learn with this video and a standard hook
That was so fun! Now what?
Invitation to our Facebook group
Come discuss fast crochet sweater patterns and lots of other crochet projects and techniques in our Make & Do Crew Facebook group. Here thousands of helpful crocheters answer each others questions and share their stitches. Come join us here.




Debbie Hawes says
Would this work using one strand of Yarn 🧶
Elisabeth Petruskie says
Hi Ashley. I’m just about to start your weekender sweater. I am excited! Thank you for giving us this pattern . I looked in Etsy as I have a cart full of items to order and could not find your pattern. I’ll keep searching for it though as I love it. I want to purchase for my collection. It is an awesome and refreshing sweater. I’ve been working on other sweaters and want something like this. Simple and sweet. And made in a weekend ! So happy! Sincerely Elisabeth
Harry says
Looking like a coat looking like a sweater a good combination or the crochet. Hand knitted and very good design.
These gorgeous crochet cardigan patterns from Make and Do Crew are all free and beginner-friendly!
Emma says
Hello there,
Would this pattern work with the Lion Brand Re-Up cotton yarn? If not, is there another yarn you could suggest that was natural with no man-made fibres in.
Many thanks,
Emma
Carol Cover says
If there is a wool allergy, can you suggest a substitute yarn instead of the Alpaca?
Acara says
Oh man…..my plan was to put in more work on my Backcountry Cardigan this weekend, but this is too quick and easy (and lovely!) to pass up! Plus I’m sure I already have some great yarn for this.
Yeah, I’m gonna start on this tonight!