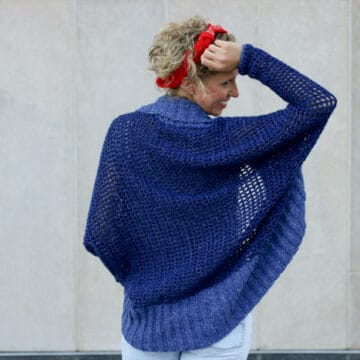
If you’re ready to hibernate inside a cozy yarn hug and not come out until the first sign of spring, this crochet hoodie pattern is for you! Get the free pattern below or purchase the ad-free, printable PDF here.
This free crochet hoodie pattern is part of a collaboration with Lion Brand Yarns. This post contains affiliate links.
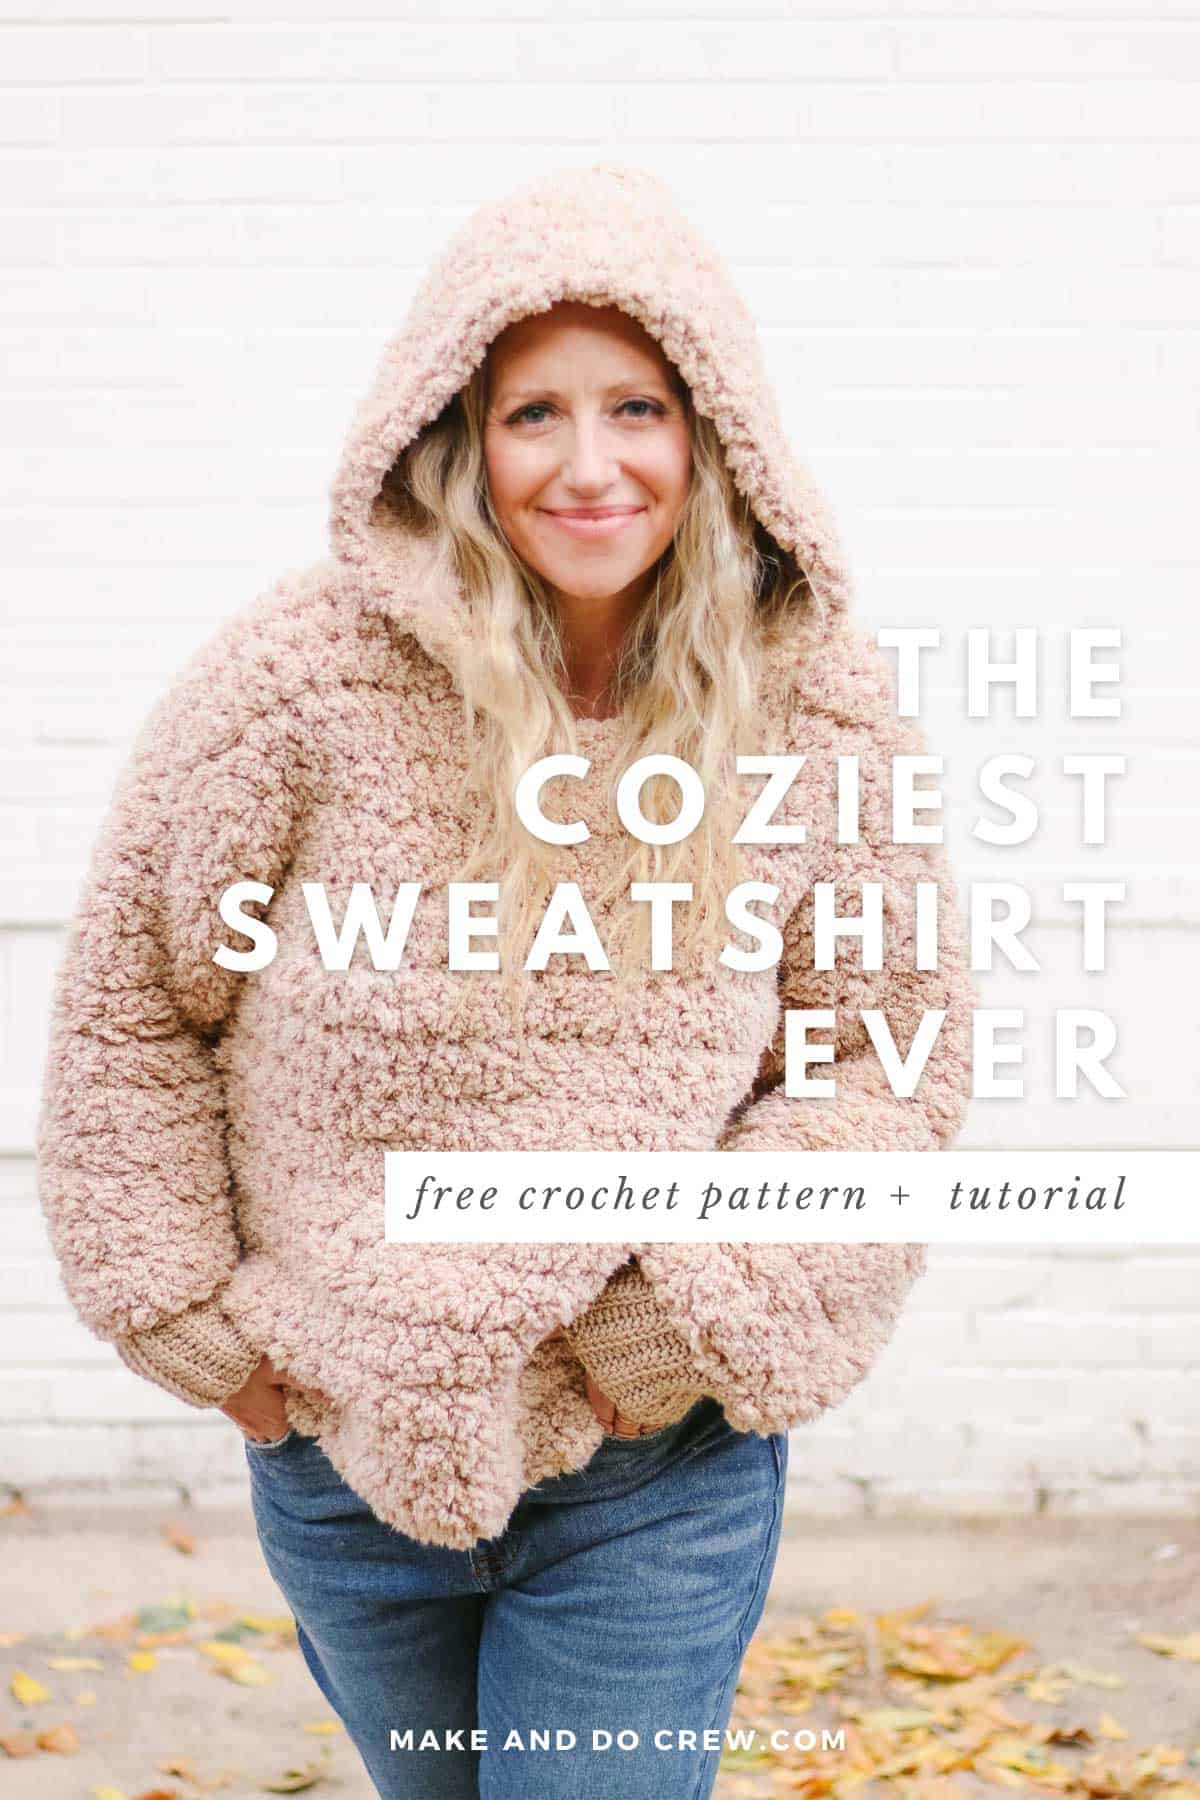
In this gleefully fast crochet hoodie pattern, you'll magically create sherpa-style fabric using only simple stitches and furry yarn. Don’t let the yarn fluff intimidate you though--feeling for your stitches will become second nature and you’ll appreciate the speed at which this project comes together.
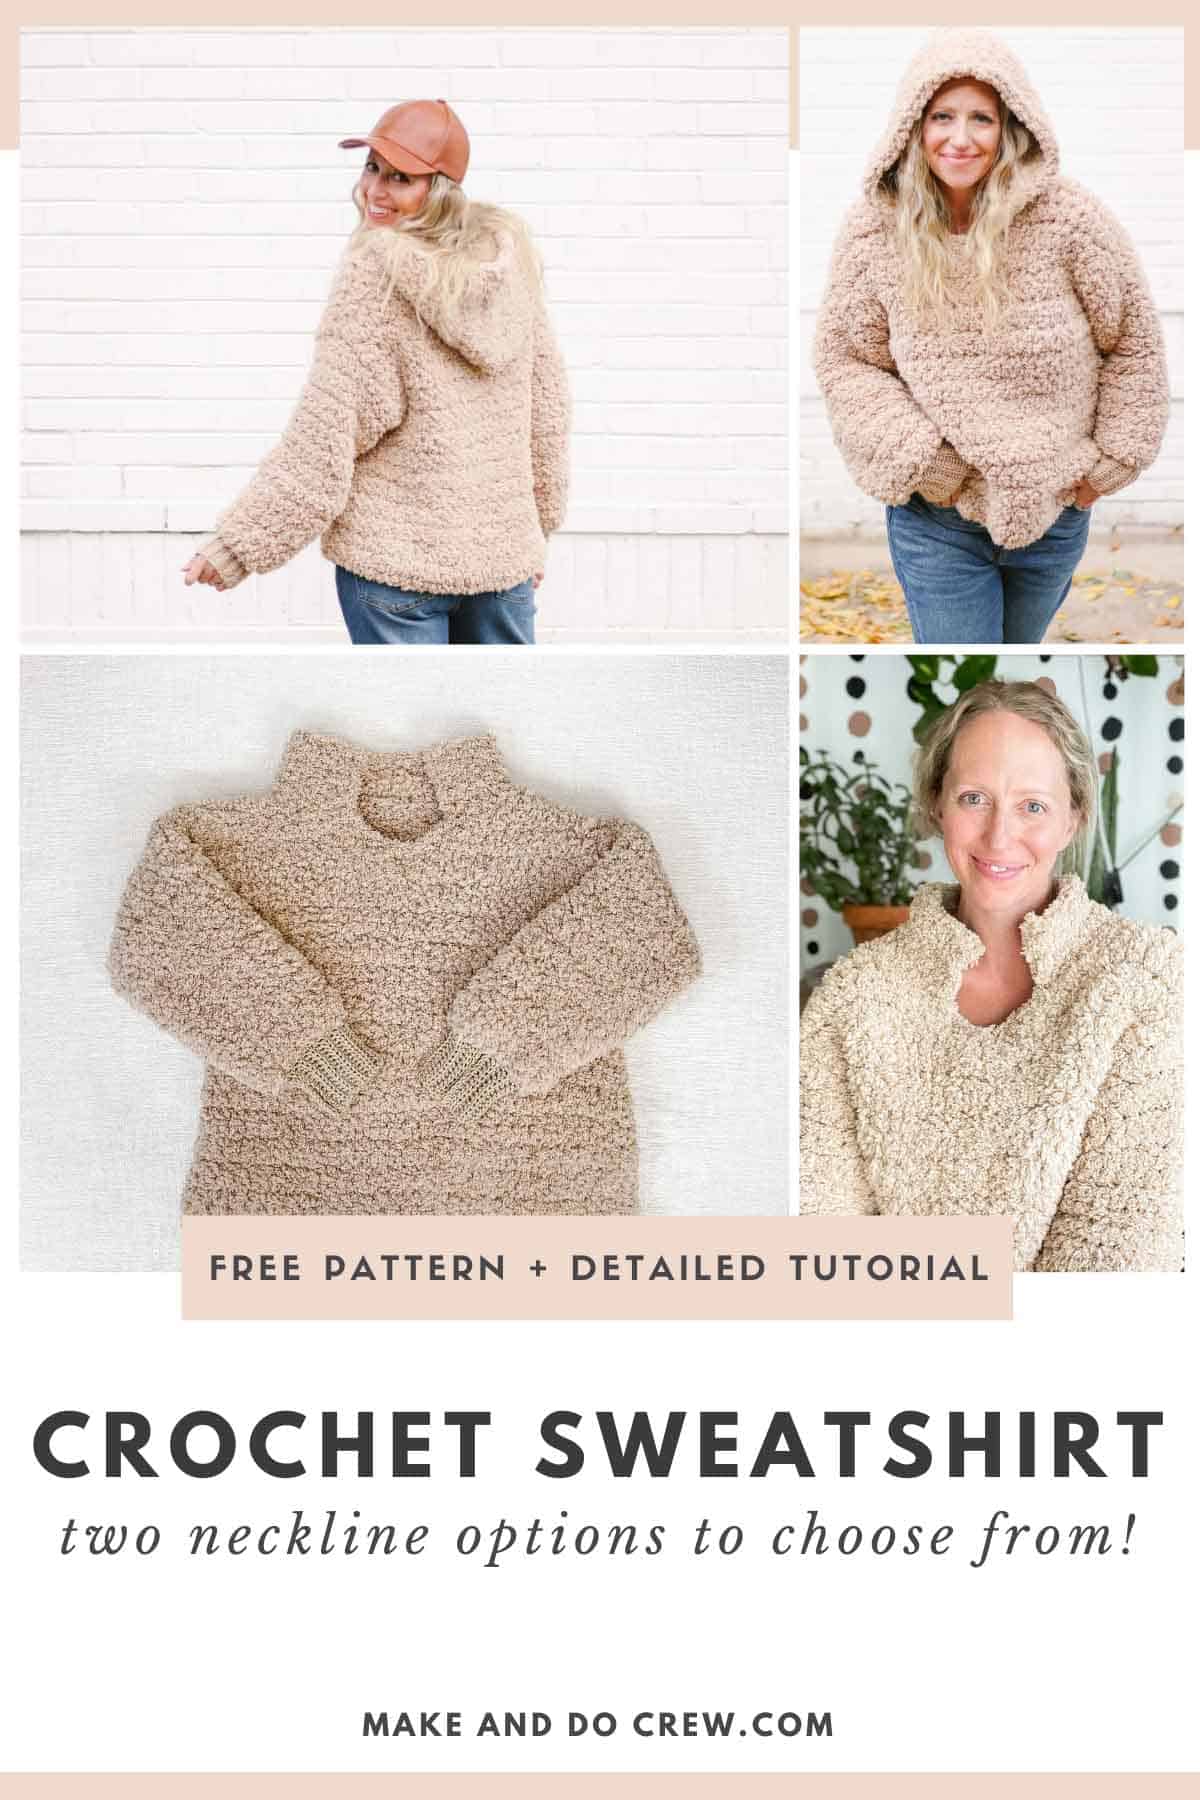
With notes on adjusting the length and the option for a split mock turtleneck collar or an oversized hood, you’ll find many ways to make the Sherpa Hoodie your own.
Keep reading for more yarn and inspiration details or scroll down for free pattern.
Crochet Sherpa Hoodie Pattern - Video Overview
In this brief video, you can see how the pattern comes together as you prepare to crochet your own hoodie! You won't be able to resist this pattern after watching all the the cozy, fleece vibes in action!
(If you have an ad-blocker running, you'll need to disable it to view the video.)
The Coziest Crochet Hoodie
For some designs, the concept leads the way and for others, the yarn takes center stage. This crochet hoodie pattern though is a magical balance of both. The fluffy fleece yarn gives this sweater an authentic sherpa feel, while the oversized silhouette screams cozy-fest!
New to making garments? Check out our step-by-step guide to crocheting your first sweater.
Like Store-Bought Sherpa, Only Better
A couple years ago, we released the Sherpa Sweater pattern which used Lion Brand's Baby Soft Boucle yarn and Tunisian crochet to create the most fuzzy, "non-crochet" fabric I had ever seen. Soon after, the yarn was discontinued and I assumed the days of crocheting fleece fabric were over.
So this year, I was thrilled to see Lion Brand release Go For Fleece Sherpa as a followup to their popular Go for Faux yarn. Go for Fleece is a chunky, cloud-like yarn that really does mimic the look and feel of fabric. (Just look how beautifully it works in All About Ami's crochet bear and bunny patterns!)

But How Do I See My Stitches?!
I know, I know. It's the first question I had too when I started crocheting with similarly-fluffy Go For Faux yarn. And the truth is--you don't! (See Go for Faux in action in the Hibernation Bear Blanket Rug pattern.)
You'll likely find it much faster and easier to feel for your stitches instead of actually looking for them. I like to use my middle finger of my non-hook hand to feel for each stitch before I insert my hook. I understand that might sound cumbersome, but it's really not. I put together a quick video below that demonstrates this technique in action. I use this same method when counting my stitches, although then I sort of "walk" my pointer and middle fingers from stitch to stitch counting as I go.
I promise the gorgeous fleece fabric you're able to crochet makes it worth it. Don't just take my word for it though, read the Go for Fleece reviews here to see how much other makers love it too!
Substitutions + Customizations
Many of our patterns are designed to easily allow for yarn substitution. Because this crochet hoodie relies heavily on the sherpa-look though, I recommend using the prescribed Go for Fleece Sherpa yarn. If it's not available near you in stores, you can order any color of it from LionBrand.com. If that's not an option, check YarnSub.com for similar yarn suggestions.
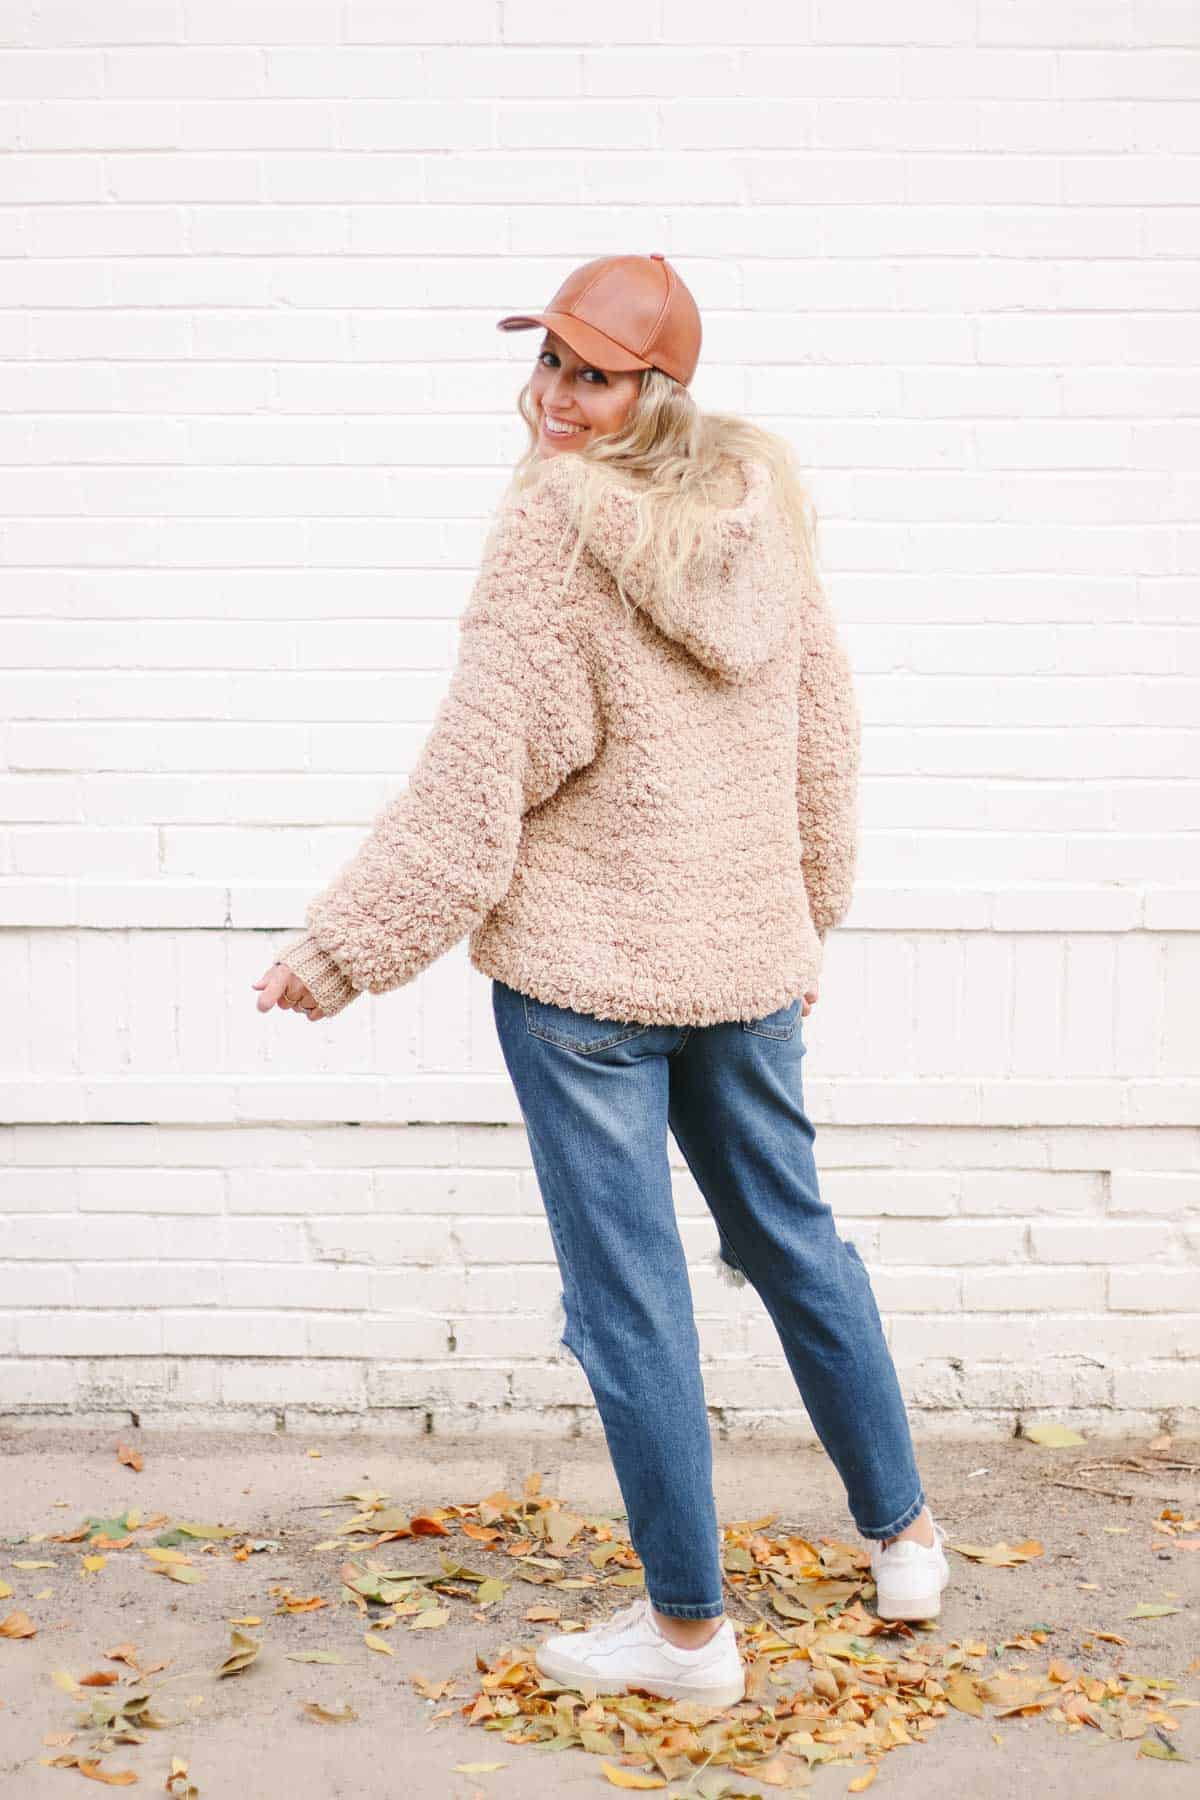
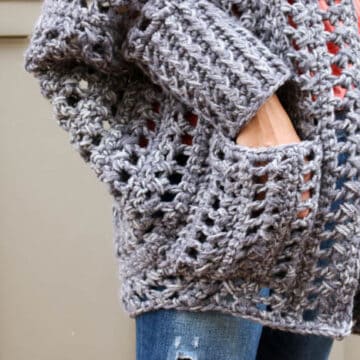
This nearly seamless hoodie pattern really lends itself to length customization because you're just working in a tube until dividing for the armholes. Eliminate a few inches for a cropped crochet hoodie or add several inches to create your own comfy cocoon to pair with leggings.
The pattern also includes the option to add a hood or a split turtleneck collar.
Related: 30+ Free Crochet Poncho Patterns - for all seasons
Pin it! Click to pin this pattern for later ⇨
Get an All-In-One Crochet Kit
As mentioned above, this crochet hoodie pattern really benefits from using Lion Brand's Go for Fleece Sherpa yarn. If you can't get it locally though if you just like to get fun packages in the mail, the all-in-one crochet kit is a perfect way to make your Sherpa Hoodie. This bundle from Lion Brand includes all the yarn you'll need, plus a free printable PDF of the pattern (delivered digitally).
Deliver it! Click to purchase the an all-in-one crochet kit ⇨
How Do I Print This Crochet Pattern?
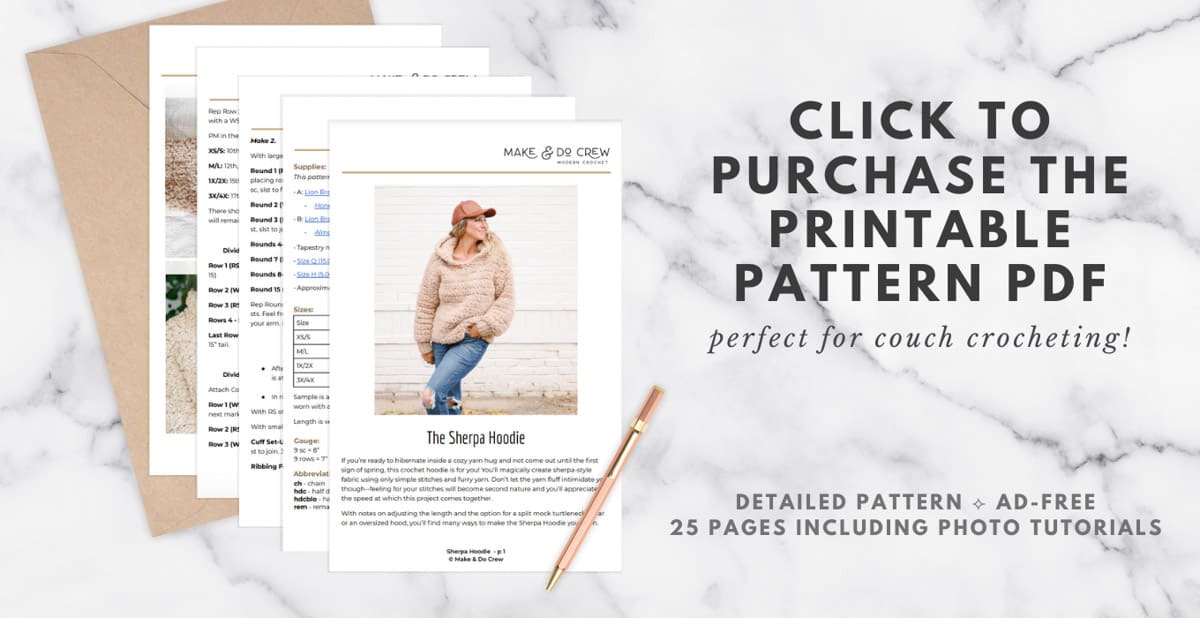
We know many people like to work from a paper copy of their crochet pattern. This is why we love offering our patterns in large-type, ad-free PDFs that are formatted for easy printing.
We are so grateful to those of you who support our small business by upgrading to the premium printable versions of our patterns, as your purchases help us continue to keep designing. (And we hope our printable PDFs give you comfortable way to couch crochet!)
The Sherpa Hoodie printable PDF includes the complete pattern and all the photo tutorials to get you from fleece yarn to hibernation hoodie!
Print it! Purchase the ad-free PDF ⇨
More Free Crochet Sweater Patterns
Crochet sweater patterns don't need to be difficult. In fact, most of ours are made with very simple shapes. Dive into the wonderful world of crochet garments with cardigans, pullovers, ponchos, shrugs and more!


See more free crochet sweater patterns →

Don't spend hours for a "meh" result!
Tired of crocheting garments that don't fit? Learn our C.R.A.F.T. Framework to make sweaters that fit and feel amazing!
Sherpa Sweatshirt
Free Crochet Hoodie Pattern
Purchase the ad-free, printable PDF on Etsy here and on LoveCrafts here.
Save this pattern to your Ravelry here.
Pin this pattern for later here.
Explanation: If you’re ready to hibernate inside a cozy yarn hug and not come out until the first sign of spring, this crochet hoodie is for you! You’ll magically create sherpa-style fabric using only simple stitches and furry yarn. Don’t let the yarn fluff intimidate you though--feeling for your stitches will become second nature and you’ll appreciate the speed at which this project comes together.
With notes on adjusting the length and the option for a split mock turtleneck collar or an oversized hood, you’ll find many ways to make the Sherpa Hoodie your own.
Supplies:
Order an all-in-one kit from Lion Brand here.
• A: Lion Brand Go For Fleece (Weight: 7/jumbo - 89 yds, 6.5 oz)
- Honey (937-158) – 6 (7, 9, 11) balls [(approx. 848 (1188, 1542, 1880 g)]
• B: Lion Brand Basic Stitch Anti Pilling (Weight: 4/medium - 185 yds, 3.5 oz)
- Almond (202-121) – 1 ball [(approx. 20 (22, 26, 30 g)]
• Tapestry needle
• Size Q (15.00 mm) crochet hook or size needed to obtain gauge
• Size H (5.00 mm) crochet hook for ribbing
• Approximately 10-15 stitch markers, depending on sweater size
Measurements:
| Size | Fits Actual Bust |
| XS/S | 28-34" |
| M/L | 34-44" |
| 1X/2X | 44-54" |
| 3X/4X | 54-64" |
Sample is a size M/L pictured on a model with a 38” bust. Hoodie is intended to be worn with approximately 10” of positive ease.
Length is very easy to customize and instructions are included within pattern.
Gauge:
9 sc = 8”
9 rows = 7”
Abbreviations and Glossary (US Terms):
ch - chain
hdc - half double crochet
hdcblo - half double crochet through the back loop only
rem - remain
rep - repeat
RS - right side
sc - single crochet
sc2tog - single crochet 2 together
sc3tog - single crochet 3 together
sk - skip
slst - slip stitch
st(s) - stitch(es)
WS - wrong side
Overall Pattern Notes:
• Pattern is written for smallest size, with stitch counts for larger sizes following in parentheses. XS/S (M/L, 1X/2X, 3X/4X). It can be helpful to highlight all numbers related to your size before beginning. When only one number is given, it pertains to all sizes.
• Fuzzy yarn does not need to be intimidating! Get in the habit of using your middle finger on your non-dominant hand to feel for the hole of the next stitch. View a brief video of this technique on our Instagram here.

• There is no right side or wrong side to fabric. The RS/WS designation only matters once you begin dividing for the armholes, at which point it is only noted for clarity and to help you stay oriented.
• Work beginning chain 1 of each round fairly tightly to keep it better disguised when joining.
• It can be helpful to crochet over yarn tails as you go so they don’t need to be woven in at the end. Thanks to the fuzzy yarn, they can be really well hidden using this simple method.
!! Gauge Check !!
Please don’t skip this step or you will risk your sweater not fitting as expected.
To check gauge, with color A and largest hook:
Foundation Row: Ch 10.
Row 1: Sc in second ch from hook, sc each ch to end; turn. (9)
Row 2: Ch 1, sc in each sc; turn.
Rep Row 2 seven more times. Swatch should now measure 8” horizontally and 7” vertically.
• If swatch is measuring too small horizontally, increase your hook size and re-swatch.
• If swatch is measuring too large horizontally, decrease your hook size and re-swatch.
• If swatch is measuring too small vertically, make a deliberate effort to pull loops up a bit higher before completing each single crochet.
• If swatch is measuring too large vertically, make an effort to work the loops of each single crochet a little tighter.
• This video is incredibly helpful if you’re having trouble achieving the correct vertical gauge.
Main Sweater Body
Notes:
• This section is worked in turned rounds, meaning each round ends with a slip stitch to the first stitch of the round. The work is then turned to crochet back in the opposite direction for the next round.
• You’ll want to use a stitch marker to keep track of where your round ends. Move marker up as each round is worked.
• Pull the slst at the end of each round quite tightly so that it’s less likely to be mistaken for a single crochet in the next round.
With color A and larger hook:
Foundation Row: Ch 42 (54, 66, 76), slst to first ch to join into a circle. Do your best not to twist the chain, although this yarn is quite forgiving even if chain is not flat.
Round 1: Ch 1, sc in first ch, PM in created st, sc in each ch around, slst to first sc to join; turn. “Walk” your fingers along the stitches in Round 1 to count them. You should have 42 (54, 66, 76) sc at this point.
Round 2: Ch 1, sc in each ch around, slst to first sc to join; turn. 42 (54, 66, 76) sc
It can be helpful to place markers in every 10th stitch at this point so you can more easily make sure your stitch count is remaining accurate. Once you feel confident working with the fuzzy yarn, feel free to remove all markers except the one in the first stitch of the round.
✨Unlock this free subscriber-exclusive pattern ✨
Follow these steps to view the full free pattern below
Repeat Round 2, turning at the end of each round, until piece measures 12 (13, 14, 15)”. If a longer or shorter sweatshirt is desired, this is where you can customize the length by eliminating or adding rounds.
With this yarn, it can be easy to miscount stitches. Before dividing for the armholes, count stitches and ensure proper count before proceeding.
If count is off, go back and re-work the last round of the Main Body, adding increases (2 sc in the same stitch to increase by 1 stitch) or decreases (sc2tog to decrease by 1 stitch) as required in order to get the proper count.
These increases and decreases will not be visible due to the nature of the yarn, but if more than one is needed, make sure to space them out evenly around your work.


Dividing For Armholes
Notes:
• RS/WS designation is now noted to help you keep track of rows, although fabric remains reversible.
Make sure you've turned your work after the final round of the Main Body.
Placing Markers:
Because work was turned at the end of last round, marker should now be in the last stitch of the round. Keep it in place and mark the following additional stitches for your size, counting from the first stitch of the round:
XS/S: 21st st
M/L: 26th, 27th, and second-to-last st
1X/2X: 32nd, 33rd, and second-to-last st
3X/4X: sts 36-38, third-to-last and second-to-last sts
Marked stitches are left unworked and will become armholes. There should be 1 marked st on each side for size XS/S, 2 on each side for M/L and 1X/2X, and 3 on each side for 3X/4X.
You will work the Front panel first, using the yarn attached and starting in the first unmarked stitch.
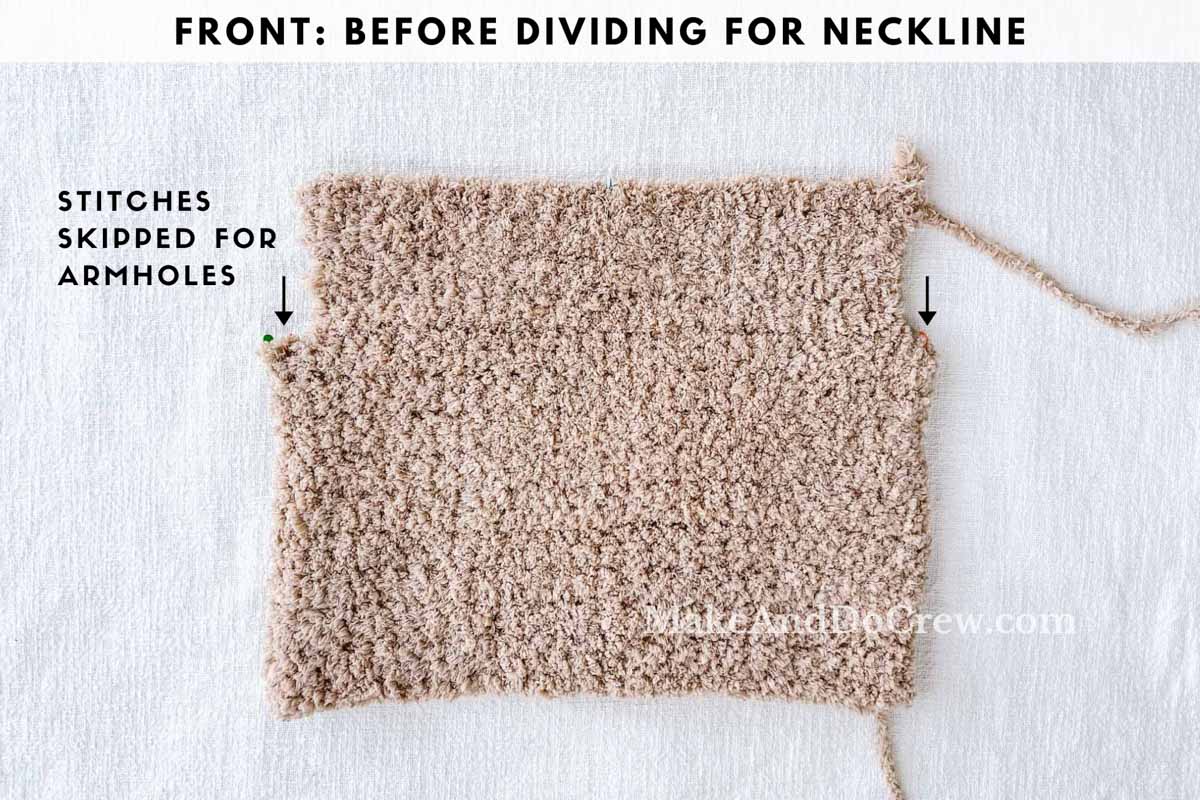
Front:
Before Dividing for Neckline:
With attached yarn and larger hook, work between markers only:
Row 1 (RS): Ch 1, sc in each sc to last st before next marker; turn. 20 (25, 31, 35)
Row 2 (WS): Ch 1, sc in each sc to end of row; turn. 20 (25, 31, 35)
Rep Row 2 6 (6, 8, 8) more times to create a total of 8 (8, 10, 10) FRONT rows, ending with a WS row. Keep yarn attached.
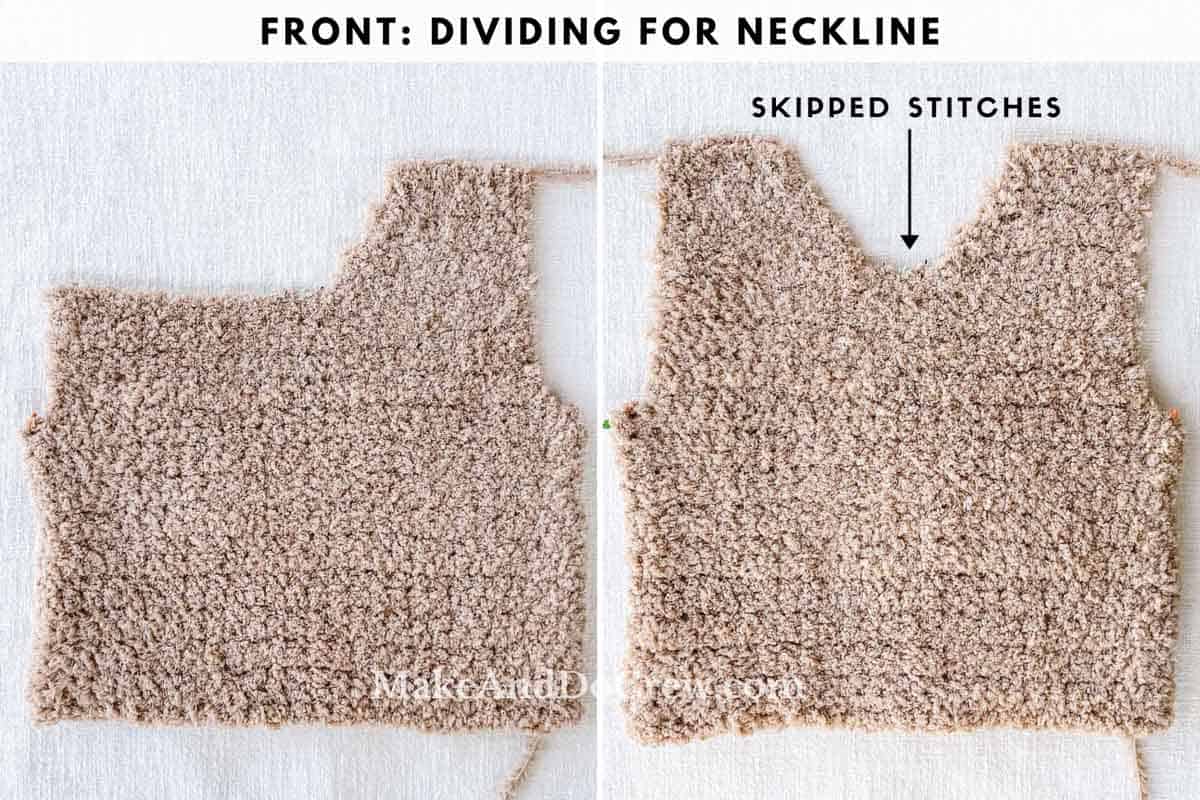
PM in the following stitches:
XS/S: 10th and 11th sts
M/L: 12th, 13th and 14th sts
1X/2X: 15th, 16th and 17th sts
3X/4X: 17th, 18th and 19th sts
There should be 2 (3, 3, 3) marked stitches in the middle of the Front panel. These sts will remain unworked and form the front of the neckline.
Wanna save this pattern?
Dividing for Neckline - LEFT FRONT as worn (Left-handed: RIGHT FRONT)
Row 1 (RS): Ch 1, sc in each sc until 2 sts rem before next marker, sc2tog; turn. 8 (10, 13, 15)
Row 2 (WS): Ch 1, sc2tog, sc in each sc; turn. 7 (9, 12, 14)
Row 3 (RS): Ch 1, sc in each sc until 2 sts rem, sc2tog; turn. 6 (8, 11, 13)
Rows 4 - 5 (5, 7, 7): Rep Rows 2 and 3. 4(6, 7, 9)
Last Row (WS): Ch 1, sc in next 2 (3, 4, 5) sc, slst in remaining sts. Fasten off leaving a 15” tail.
Dividing for Neckline - RIGHT FRONT as worn (Left-handed: LEFT FRONT)
Attach Color A in first unmarked st at armhole edge.
Row 1 (WS): Ch 1, sc in same st yarn attached in, sc in each sc until 2 sts rem before next marker, sc2tog; turn. 8 (10, 13, 15)
Row 2 (RS): Ch 1, sc2tog, sc in each sc; turn. 7 (9, 12, 14)
Row 3 (WS): Ch 1, sc in each sc until 2 sts rem, sc2tog; turn. 6 (8, 11, 13)
Rows 4 - 5 (5, 7, 7): Rep Rows 2 and 3. 4 (6, 7, 9)
Last Row (RS): Ch 1, sc in next 2 (3, 4, 5) sc, slst in remaining sts. Fasten off leaving a 15” tail.
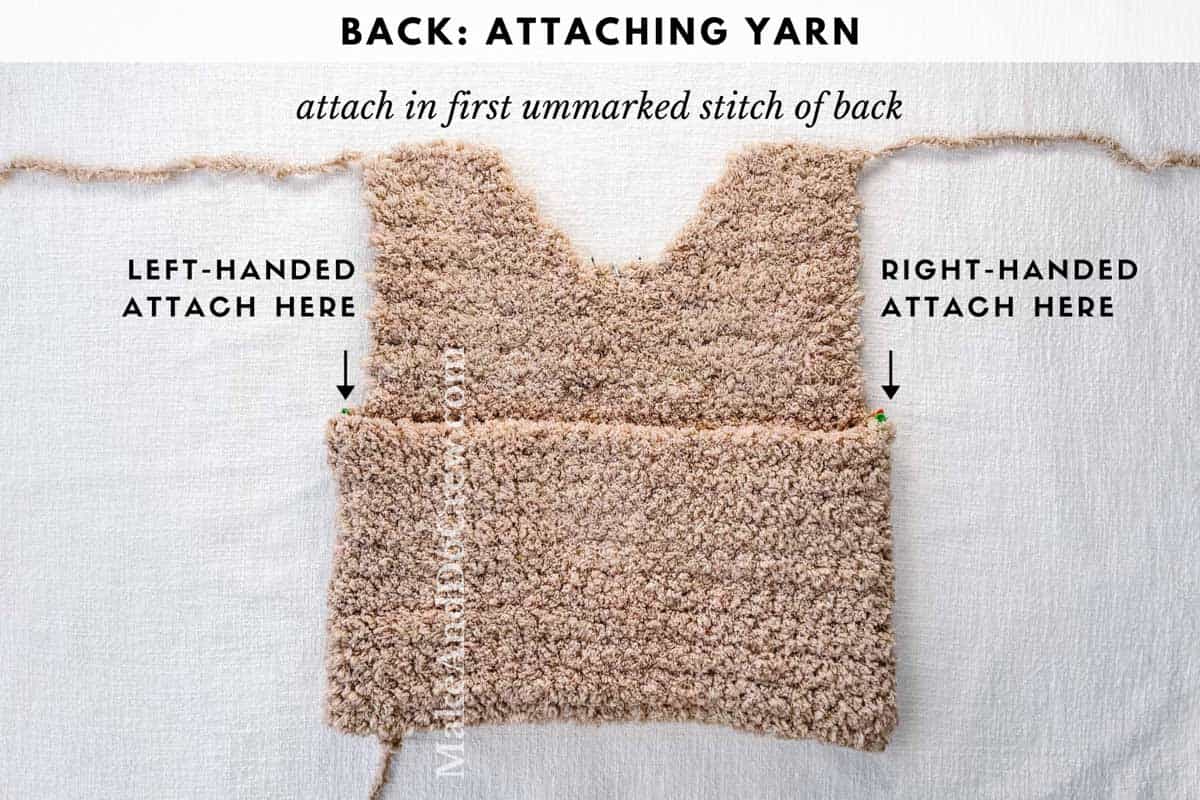
Back:
With sweater laying flat, backside up, attach Color A in first unmarked stitch next to right armhole (Left-handed: left armhole).
Row 1 (RS): Ch 1, sc in same st yarn attached in, sc in each sc to next marker; turn. 20 (25, 31, 35)
Row 2 (WS): Ch 1, sc in each sc; turn. 20 (25, 31, 35)
Row 3 (RS): Ch 1, sc in each sc; turn. 20 (25, 31, 35)
Rep Rows 2 and 3 3 (3, 4, 5) more times to create a total of 9 (9, 11, 13) rows.
Rep Row 2 once more.
Final Row (RS): Do not ch 1, slst in next 2 (3, 4, 5) sc, sc in each sc until 2 (3, 4, 5) sts rem, slst in last 2, (3, 4, 5) sc. Fasten off.
BACK should now contain 11 (11, 13, 15) total rows, which is intentionally fewer than the total number of FRONT rows.
Shoulder Seaming:
With RS facing, use existing yarn tails and tapestry needle to zig zag stitch fronts and backs together, joining the slip stitches and single crochet stitches of the final Front row to the corresponding stitches on the Back.


Sleeves
Main Sleeve:
As with main body, sleeves are worked in turned rounds. PM in first st of round and move up with each round.
With RS of armhole facing, attach Color A in right marked stitch (Left-Handed: left marked stitch.)
Make 2.
With larger hook:
Round 1 (RS): Ch 1, sc in same st yarn attached in, PM in created st, sc evenly around, placing roughly 1 sc per raw row edge, sc in last marked st to create 26 (27, 31, 36) total sc, slst to first sc to join; turn. 26 (27, 31, 36)
Round 2 (WS): Ch 1, sc in each sc, slst to first sc to join; turn. 26 (27, 31, 36)
Round 3 (RS dec): Ch 1, sc in next st, sc2tog, sc in each sc until 3 rem, sc2tog, sc in last st, slst to join. 24 (25, 29, 34)
Rounds 4-6: Rep Round 2. 24 (25, 29, 34)
Round 7 (RS dec): Rep Round 3. 22 (23, 27, 32)
Rounds 8-14: Rep Round 2. 22 (23, 27, 32)
Round 15 (RS dec): Rep Round 3. 20 (21, 25, 30)
Rep Round 4-7 twice more, ending with a total of 23 sleeve rounds and 16 (17, 21 26) sts. Feel free to adjust the number of rows worked to achieve the proper length for your arm. (Note that Cuff will add an additional 3”.) Fasten off.
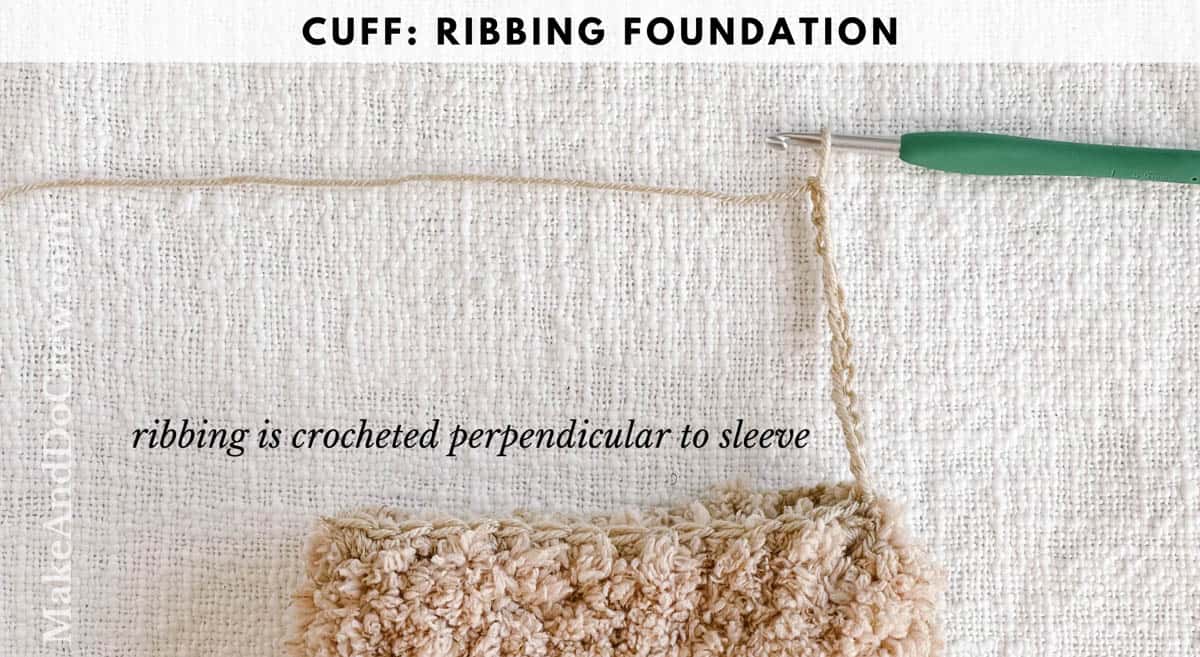
Cuff:
After set-up round, ribbing is worked in rows perpendicular to sleeve. Ribbing is attached as it’s crocheted by slip stitching to sleeve.
• In ribbing rows, ch 1 does not count as a half double crochet.
With RS of sleeve facing, attach color B in any st of last sleeve round.
With smaller hook:
Cuff Set-Up Round (RS): Ch 1, 2 sc in same st yarn attached in, 2 in each st, slst to first st to join. 32 (34, 42, 52)
Ribbing Foundation: With attached yarn, ch 13.
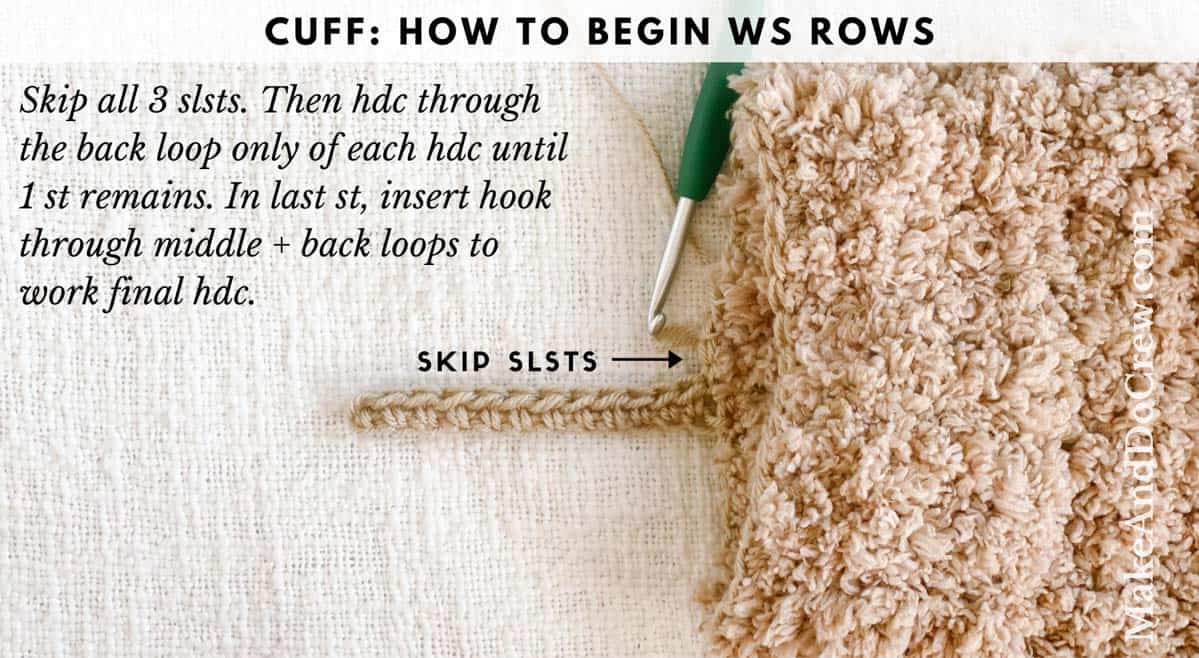
Row 1 (RS): Hdc in second ch from hook, hdc in each ch, slst to next available st of Cuff Set Up Round, slst in next 2 sts along sleeve edge; turn. (12 hdc + 3 slst)
Row 2 (WS): (Do not ch 1), sk slsts along sleeve edge, hdcblo in each st until 1 remains, hdc through both loops of the last st; turn. (12 hdc)
Row 3 (RS): Ch 1, hdcblo in each st, slst to next available st of Cuff Set Up Round, slst in next 2 sts along sleeve edge; turn. (12 hdc + 3 slst)
Row 4 (WS): Rep Row 2.
Row 5 (RS): Rep Row 3.
Rep Row 4 and 5 until 2 (1, 0, 1) sts remains in Cuff Set Up Round.
Slst into any remaining sts on the sleeve edge. Fasten off leaving a 15” tail for seaming.
Seaming:
Place final row over foundation chain, aligning stitches and pinning if necessary.
Using tapestry needle and existing yarn tail, seam stitches together.


Hood / Collar
Notes:
• Customize your sweatshirt by adding either a collar or a hood.
• Hood/Collar is worked in turned rows into existing neckline edge.
Main Hood / Collar:
Remove all but center marker (center two markers for size XS/S) at front of neckline.
Counting from center marked stitch (either marked st for size XS/S), PM in fifth stitch* to the left and fifth stitch* to the right of marker. (3 total markers, 4 for size XS/S)
*When counting, you’ll be feeling for both stitches and then raw row edges. Each row edge counts as one stitch. This does not have to be perfect to be successful, so focus more on getting the outer markers equidistant from center rather than the exact number of “stitches”.
Attach Color A in right (as worn) marked stitch. (Left-Handed: Attach Color A in left marked stitch.)
With larger hook:
Foundation Round (WS): Ch 1, sc in marked st yarn attached in, sc in each st down front of neck to left marked stitch (Left-Handed: right marked st). XS/S only, work a sc2tog over the two marked stitches in the center, and replace one marker into this stitch. Continue around working an additional 20 (25, 33, 35) sc around remainder of neckline, slst to first st to join; turn. 31 (36, 44, 46) sc
Move markers up to newly created stitches. Hood/Collar is now worked along back of neck between right and left marked stitches. Do not remove center marker.
Row 1 (RS): Ch 1, sc in each sc to marker on opposite side; turn. 20 (25, 33, 35)
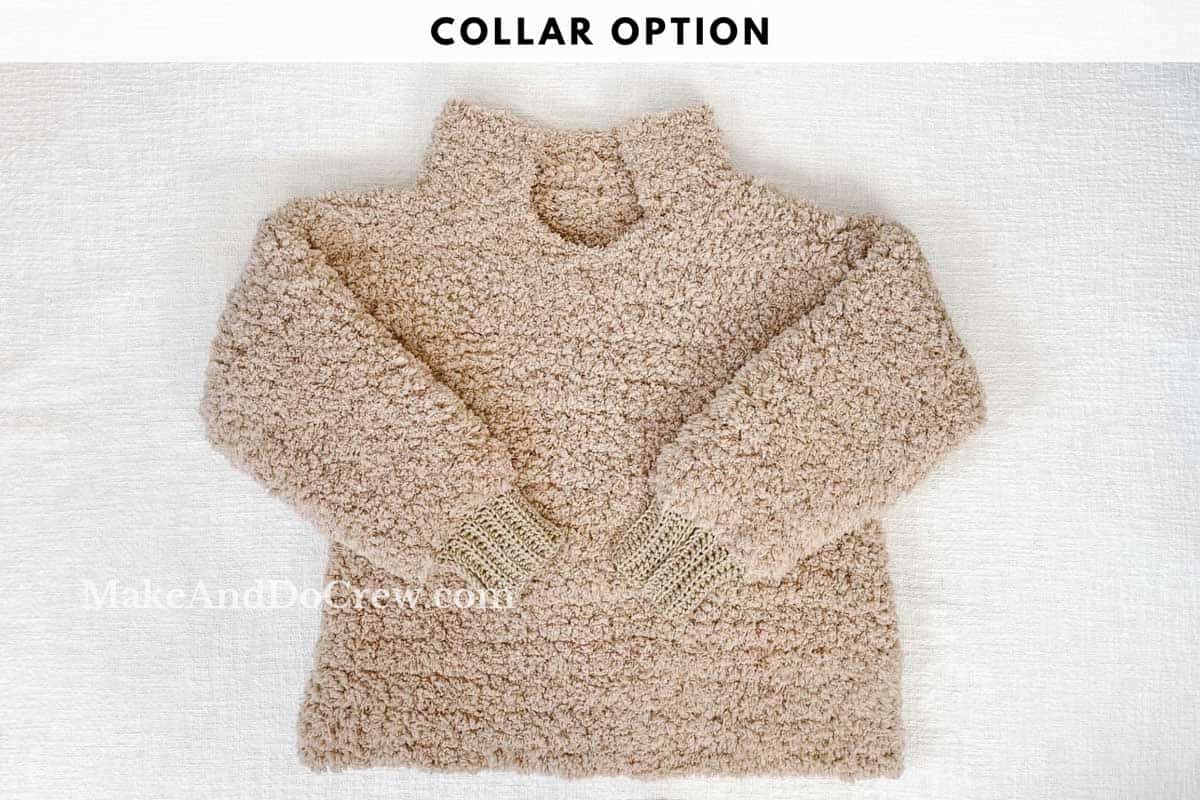
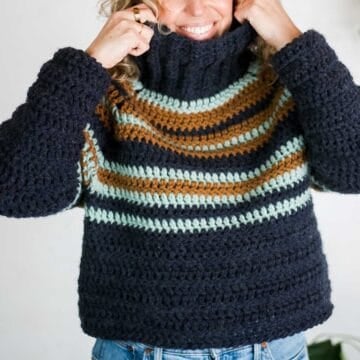
Collar Option:
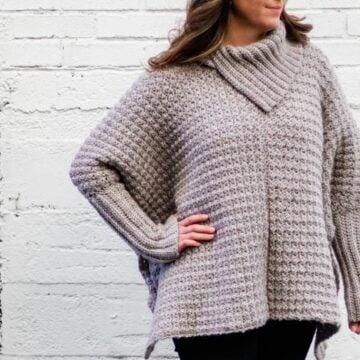
• See photo in blog post above to see collar option modeled.
Rep Row 1 four more times. Last row should be a RS row. Keep yarn attached.
Finishing Border: With attached yarn and RS facing, continue in sc sts down front neckline placing 1 sc in each raw row edge, when 1 st rem before center marker sc3tog over center marked st, continue in sc up opposite side placing 1 sc in each raw row edge, then across the back of collar. Slst to first st of round to join. Fasten off.
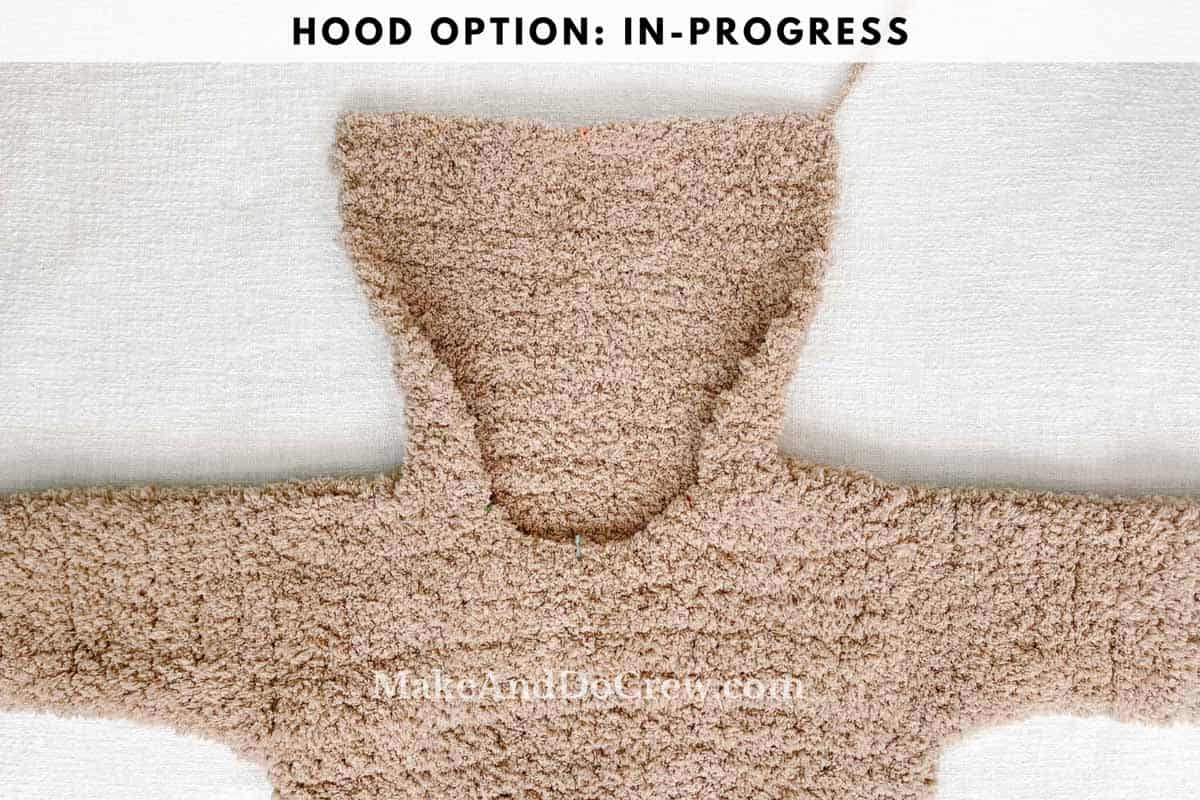
Hood Option:
Rep Row 1 until Hood measures 13”. Direction of last row is unimportant.
PM in center hood stitch (center 2 stitches for XS/S). 10th and 11th (13th, 17th, 18th) sts
Finishing Row 1: Working in opposite direction of last row, ch 1, sc in each sc until 0 (1, 1, 1) st rem before marker. XS/S: sc2tog over next two marked sts. Remaining sizes: sc3tog over next 3 sts. All sizes: Move marker to created st, sc in each sc to end of row; turn. 19 (23, 31, 33)
Finishing Row 2: Sc in each sc until 1 st rem before marker. Sc3tog over next 3 sts, move marker to created st. Sc in each sc to end of row. 17 (21, 29, 31)
Fasten off leaving a 24” tail. With RS facing out, fold hood at center marked stitch.
Using attached tail and tapestry needle, zig zag seam into each stitch to join hood at top. Weave in end.
Attach Color A in any raw row edge along front of hood. Final Border begins with WS facing.
Final Border (WS): Ch 1, sc in same row yarn attached in, sc in each raw row edge until 1 st rem before center marker, sc3tog, (move marker to created st). Continue in sc up opposite side, placing 1 sc in each raw row edge, slst to first st of round to join; turn.
Row 2 (RS): Ch 1, sc in each sc until 1 st rem before center marker, sc3tog, sc in each sc to round, slst to first st of round to join. Fasten off.
Weave in any remaining ends.
Hibernate in your new sherpa hoodie and don’t come out until the groundhog looks for his shadow!
Share your work! Mention @MakeAndDoCrew and tag #MakeAndDoCrew to show off your stitches ⇨
Ready to Find Your Next Project?
Whether you're into crochet sweaters, C2C crochet blankets, Tunisian or crocheting your own fedora hat, we've got you covered. You can find all our free crochet patterns here.
That was so fun! Now what?
Invitation to our Facebook group
Come discuss crocheting hoodie patterns and lots of other crochet projects and techniques in our Make & Do Crew Facebook group. Here thousands of helpful crocheters answer each others questions and share their stitches. Come join us here.
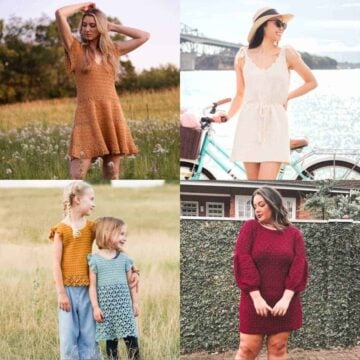
Find Your Next Sweater Project
- Hooded Sweater Pattern - Self, striping Mandala yarn pattern
- Tapestry Crochet Pattern - classic fisherman's sweater
- Seamless Cardigan Pattern - doable first sweater for beginners
- How to Crochet a Top Down Sweater - stylish, slim fit
- Lightweight Cropped Sweater - stylish 3 season top
- Easy Poncho With Sleeves - made entirely from rectangles
- Beginner Cardigan with Video - uses only half double crochet stitches
- Mandala Cardigan with Hood - crochet your own rainbow
More Free Patterns + Tutorials
Can't get enough free crochet patterns!? Me either. You'll definitely want to breeze through these collections to find your next project.
- 55+ Free Crochet Sweater and Cardigan Patterns - our most popular garments
- 40+ Free Crochet Blanket Patterns - baby blankets, throws + c2c graphgans
- 36+ Granny Square Patterns + tips for the perfect square
- 30+ Crochet Animal Patterns - adorable amigurumi stuffed animals
- Crochet Gift Ideas - easy patterns to make for others
- Fast Crochet Projects - start to finish in less than a day
Learn a New Skill
And when you're ready to master a new skill, check out our detailed guides that include everything you need to know to level up your crochet game.
- How to Corner to Corner (C2C) Crochet for Beginners - with video tutorials to get you started
- How to Crochet a Beginner Hat - make an entire beanie in 1.5 hours!
- How to Crochet Amigurumi for Beginners - the ultimate guide to making your own toys and plushies
- How to Tunisian Crochet - learn with this video and a standard hook

Susan says
What is PM in round 1? It is not listed in Glossary
Jess Coppom says
PM = place marker 🙂