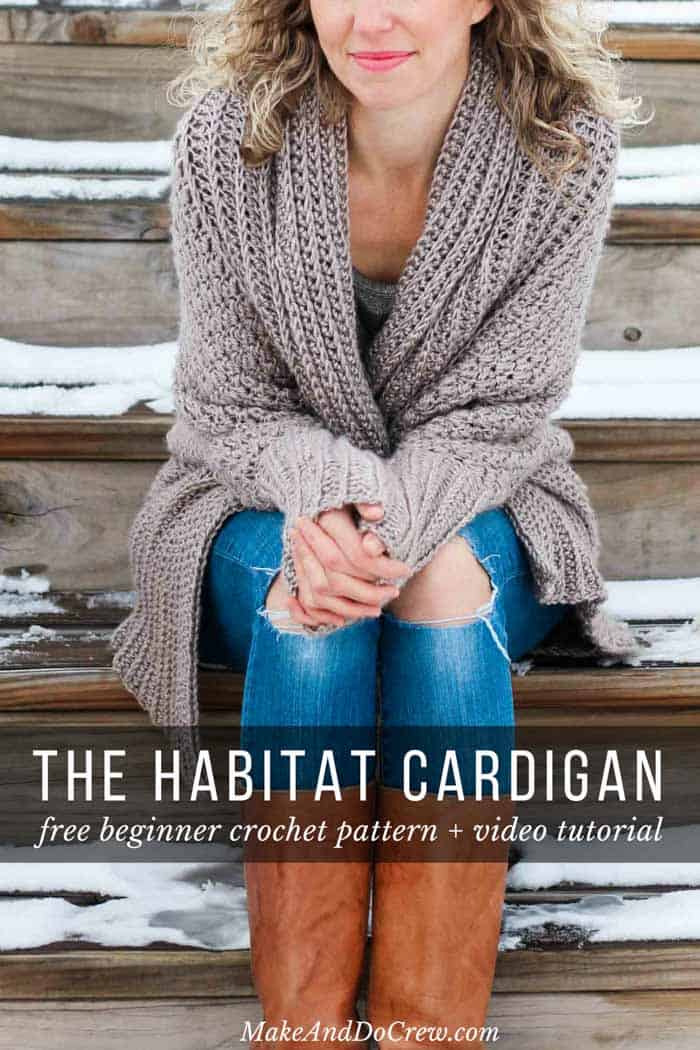
Learn how to make the Habitat Cardigan step-by-step in this beginner crochet sweater video tutorial! Reference Part 1 and Part 2 of the free pattern while you work along with the free video lesson. Alternatively, you can purchase the ad-free, printable PDF of the complete pattern here.
This beginner crochet sweater video tutorial is part of an ongoing collaboration with my friends at Lion Brand Yarn. This post may contain affiliate links.
I've loved seeing so many of you get started on your Habitat Cardigans since I shared the free pattern. (If you'd like to show off your stitches too, tag me on Instagram (@makeanddocrew) and use #habitatcardigan.)
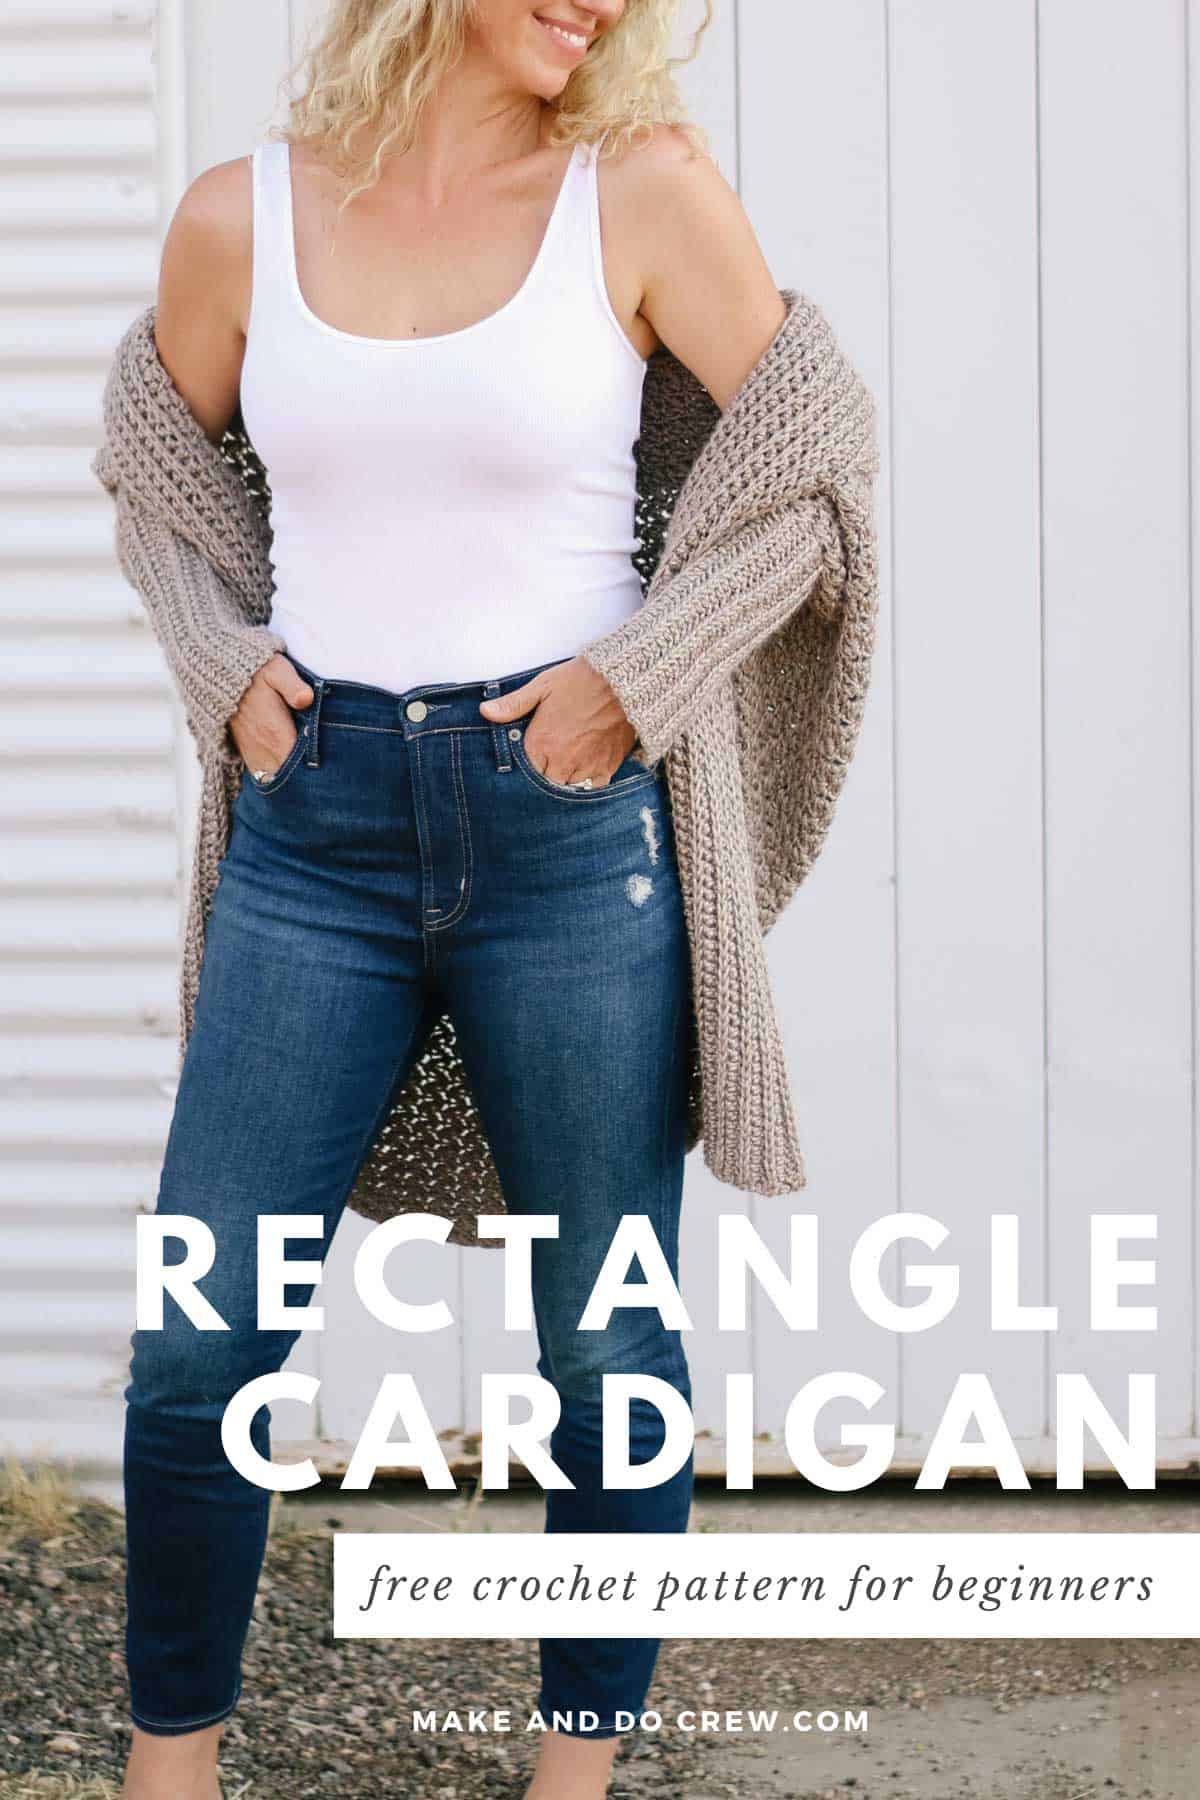
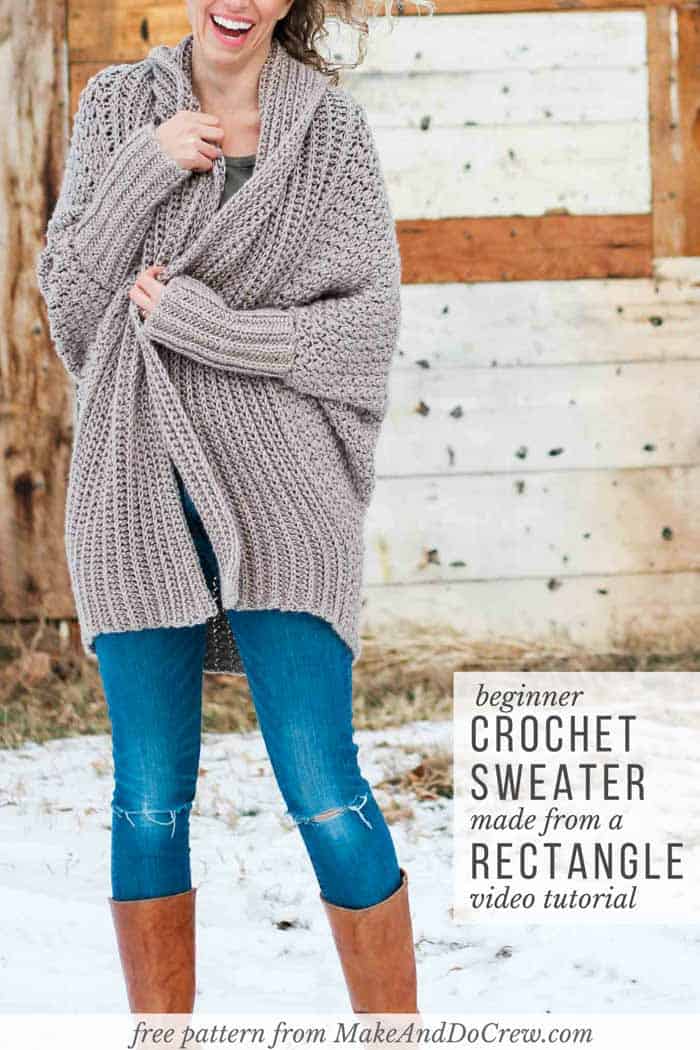
As I was editing the video tutorial this weekend, I was reminded of how legitimately simple this crochet cardigan is. A series of basic rectangles come together to form a super comfy, drapey, effortlessly cool sweater--and it's no harder than crocheting a scarf!
Based on a few questions I've received about the Habitat Cardigan, I thought I'd run through a couple of FAQs before we get started with this beginner crochet sweater video tutorial. (And if you like to learn by watching video tutorials, you can find all my crochet video tutorials here!)
What if my gauge isn't the same as what's listed in the pattern?
Getting the right gauge is what will ensure your cardigan is the same size as the measurements listed in the pattern. This sweater has a significant amount of positive ease, so if you're off by a smidge, it'll likely still work out. If you're off by more than a stitch or so though, I recommend changing your hook size to adjust the tightness or looseness of your stitches.
Keep in mind that the sweater will stretch a bit once worn, so if necessary, I recommend erring on the side of a slightly smaller rather than larger gauge.
RELATED for your furry friends - easy crochet dog sweater pattern for small and large dogs
Can I substitute a lighter/heavier yarn?
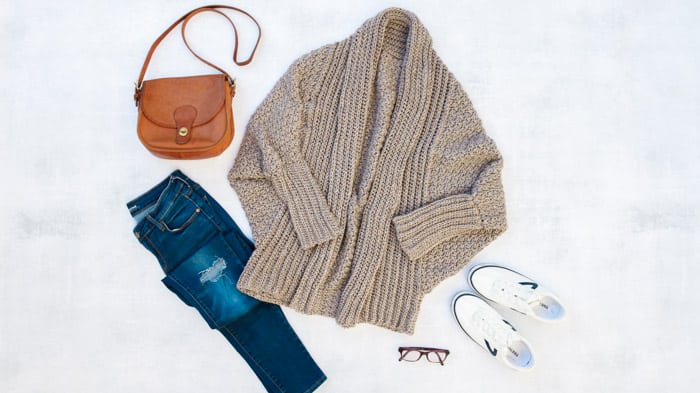
I chose Lion Brand Heartland yarn for this pattern because it's washable, has beautiful drape and is quite affordable for a larger project like this. If you'd like to use a yarn that's a different weight, I suggest doing a gauge swatch to determine how many stitches you need in your initial rectangle chain in order to achieve the rectangle dimensions listed in the pattern. (Then be sure to chain an odd number of stitches to begin.)
Deliver it! Click to purchase a kit with all the yarn you'll need ⇨

Don't spend hours for a "meh" result!
Tired of crocheting garments that don't fit? Learn our C.R.A.F.T. Framework to make sweaters that fit and feel amazing!
Can I work extra rows to make it longer?
Sure! If you finish your rectangle rows and see that your rectangle is a bit shorter than the dimmensions listed in the pattern, feel free to work some extra rows until it's the correct size. Or if you just want a longer overall sweater, work extra rows of the "tush extension," just make sure to crochet an odd number of rows so that you end with a RS row.
Will this crochet sweater fall off my shoulders?
Some shrug-type sweaters tend to be a bit back heavy and therefore fall off your shoulders easily. The Habitat Cardigan has a pretty substantial collar in the front though that helps serve as a effective counterweight to keep the sweater comfortably in place. (Unless of course, it's 90 degrees like it was when I took the photo at the top of this post. Then it can easily drape off your shoulders intentionally in a casual, sexy way. Ha.)
More Free Crochet Sweater Patterns
Crochet sweater patterns don't need to be difficult. In fact, most of ours are made with very simple shapes. Dive into the wonderful world of crochet garments with cardigans, pullovers, ponchos, shrugs and more!


See more free crochet sweater patterns →
Alright, I really hope you make something you're proud of with this beginner crochet sweater video tutorial! I wore my sweater around NYC recently for my visit to Lion Brand and it felt like a great big hug--a hug that I MADE MYSELF! Woohoo!
New to making cardigans? Don't miss How to Crochet a Sweater for our best beginner tips
Wanna save this pattern?
The Habitat Cardigan
Beginner Crochet Sweater Video Tutorial
Purchase the ad-free, printable PDF of the complete pattern here on LoveCrafts.com or here on Etsy.
Add this pattern to Ravelry here.
Pin this easy crochet sweater video tutorial for later here.
Links mentioned in the video:
Habitat Cardigan Free Crochet Pattern - Part 1
Habitat Cardigan Free Crochet Pattern - Part 2
If you enjoyed this pattern or found the video helpful, I'd love for you to pin it or share it on Facebook so more crochet addicts can find it too. Thank you!
That was so fun! Now what?
Invitation to our Facebook group
Come discuss crocheting rectangle cardigan patterns and lots of other projects and techniques in our Make & Do Crew Facebook group. Here thousands of helpful crocheters answer each others questions and share their stitches. Come join us here.
Find Your Next Sweater Project
- Easy Poncho With Sleeves - made entirely from rectangles
- Beginner Cardigan with Video - uses only half double crochet stitches
- Mandala Cardigan with Hood - crochet your own rainbow
- Poncho With Pockets - slim cut + kangaroo pocket
- The Dwell Sweater - with plus sizes + video tutorials
- Pullover Yoke Sweater - nearly seamless
- Long Boho Cardigan Pattern - with fringe!
- Summer Crochet Cardigan Pattern - short sleeved topper
More Free Patterns + Tutorials
Can't get enough free crochet patterns!? Me either. You'll definitely want to breeze through these collections to find your next project.
- 55+ Free Crochet Sweater and Cardigan Patterns - our most popular garments
- 40+ Free Crochet Blanket Patterns - baby blankets, throws + c2c graphgans
- 36+ Granny Square Patterns + tips for the perfect square
- 30+ Crochet Animal Patterns - adorable amigurumi stuffed animals
- Crochet Gift Ideas - easy patterns to make for others
- Fast Crochet Projects - start to finish in less than a day
Learn a New Skill
And when you're ready to master a new skill, check out our detailed guides that include everything you need to know to level up your crochet game.
- How to Corner to Corner (C2C) Crochet for Beginners - with video tutorials to get you started
- How to Crochet a Beginner Hat - make an entire beanie in 1.5 hours!
- How to Crochet Amigurumi for Beginners - the ultimate guide to making your own toys and plushies
- How to Tunisian Crochet - learn with this video and a standard hook
More Free Crochet Cardigan Patterns With Video Tutorials
Are you ready to crochet another cozy sweater? Here are some more free crochet sweater patterns, all with video tutorials included!
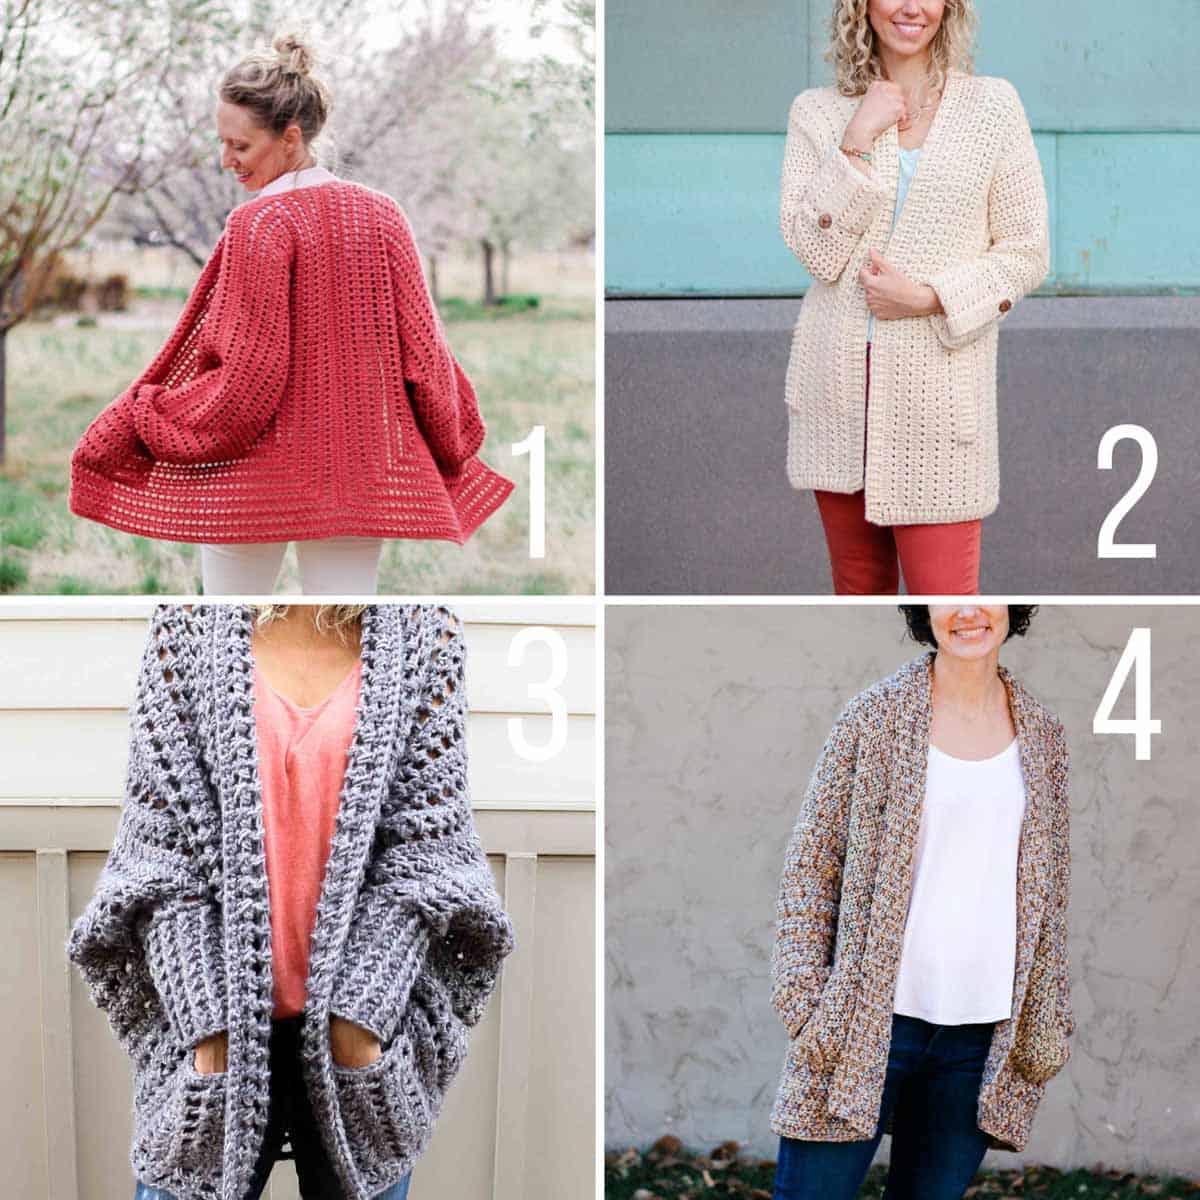
1. Day Date Cardigan - Two simple crochet hexagons transform into a lightweight, on-trend cardigan complete with cozy pockets and roomy bishop sleeves.
2. Alchemy Cardigan - This lightweight sweater is perfect to toss on for some summer stargazing or layer with a long-sleeve shirt in the colder months.
3. Dwell Sweater - Creatively constructed from a simple rectangle, this flattering chunky crochet sweater comes together easily with zero shaping, increasing or decreasing.
4. Up North Cardigan - This easy, cotton crochet cardigan pattern for beginners uses a very simple construction to create a show-stopping look with entry level skills.


Kelly Cofield says
I am stuck: The tush cover is another rectangle the same size as the body? Or am I missing something?
Does it say it is the collar and the hem? Somehow something doesn't click
HELP kELLY
Linda says
I’m an experienced crocheted, but I still missed something. I’ve made this, slightly modified, out of Lion Brands “Jean’...and I love it! But when I went back to the video for the sleeves, I noticed that you were crocheting in (what you called the front loop). I know that as the THIRD loop. The FRONT loop would be on the top stitch closest to you. Front loop, back loop and THIRD loop. So of course my oversized collar will look a little different than my cuffs, which is fine,. Just wish I would have caught that sooner! Love the pattern and all the work that you and the ‘crew’ have put in! Thanks!
Ana says
Hi! I'm from Brazil!
I'm a begginner and very excited to star!
Thanks so much for this video, it's very complet and easy to understand!
You're great!
Thanks a lot!
Heather Allerton says
Hi
Stupid question when you say elbow to elbow do you mean arms by your side ?
Jess @ Make and Do Crew says
Hey! That's not a stupid Q at all. I mean more like the elbow of the sweater to the elbow of the sweater, so it's more like if you had your arms spread out like a bird. 🙂
Happy crocheting!
Jess