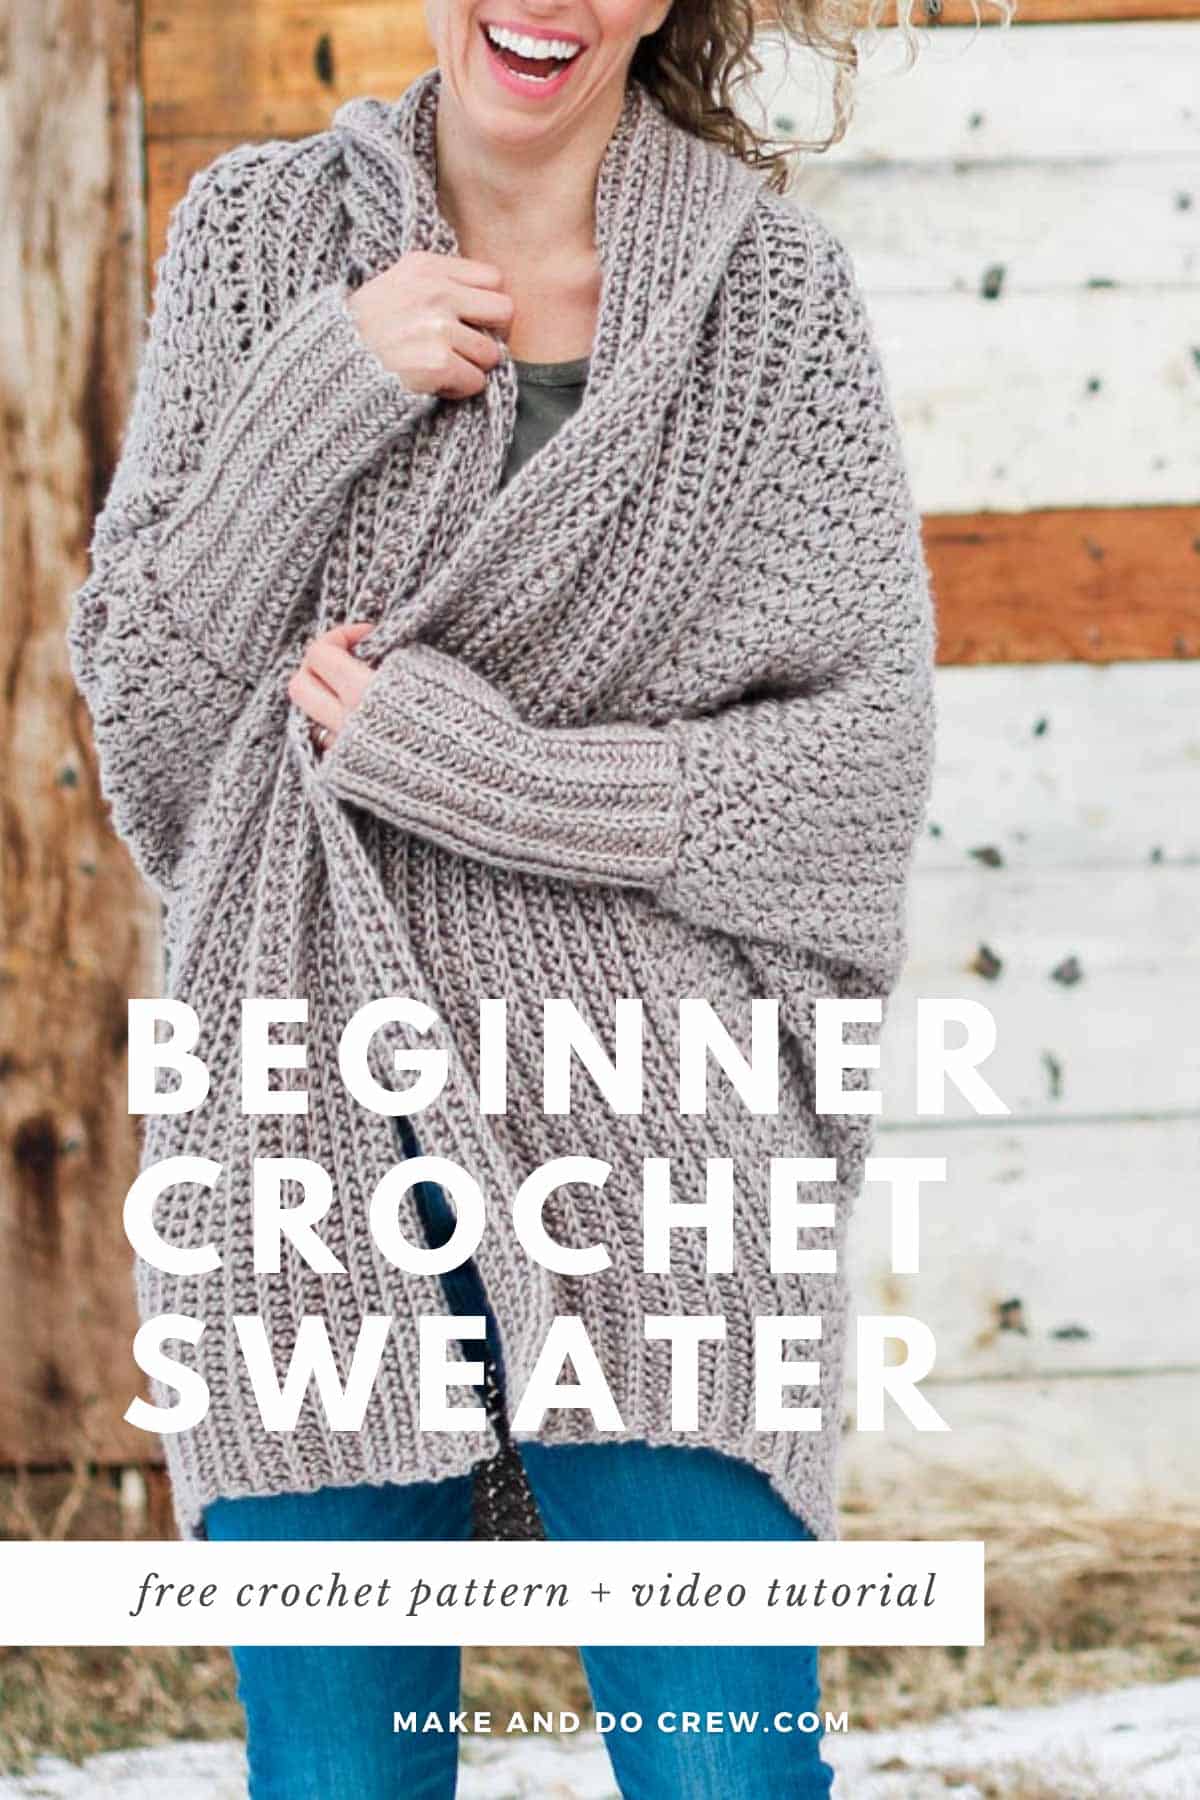
In Part 2 of the Habitat Cardigan free crochet pattern, we'll add the ribbed collar and sleeves to complete this very simple flowy sweater featuring Lion Brand Heartland yarn. View Part 1 of the free pattern here or purchase the complete ad-free, printable PDF with Parts 1 & 2 here.
The Habitat Cardigan free crochet pattern is part of an ongoing collaboration with my friends at Lion Brand Yarn. This post contains affiliate links.
It brings me so much joy to see how many of you have already started your Habitat Cardigans since I shared the first half of this free crochet pattern. You guys are go-getters with some serious cro-jo (crochet mojo)!
If you're not already part of our little yarn party on Instagram, I'd love for you to follow along and share your stitches by tagging me (@makeanddocrew) and using the hashtag #makeanddocrew and #habitatcardigan.
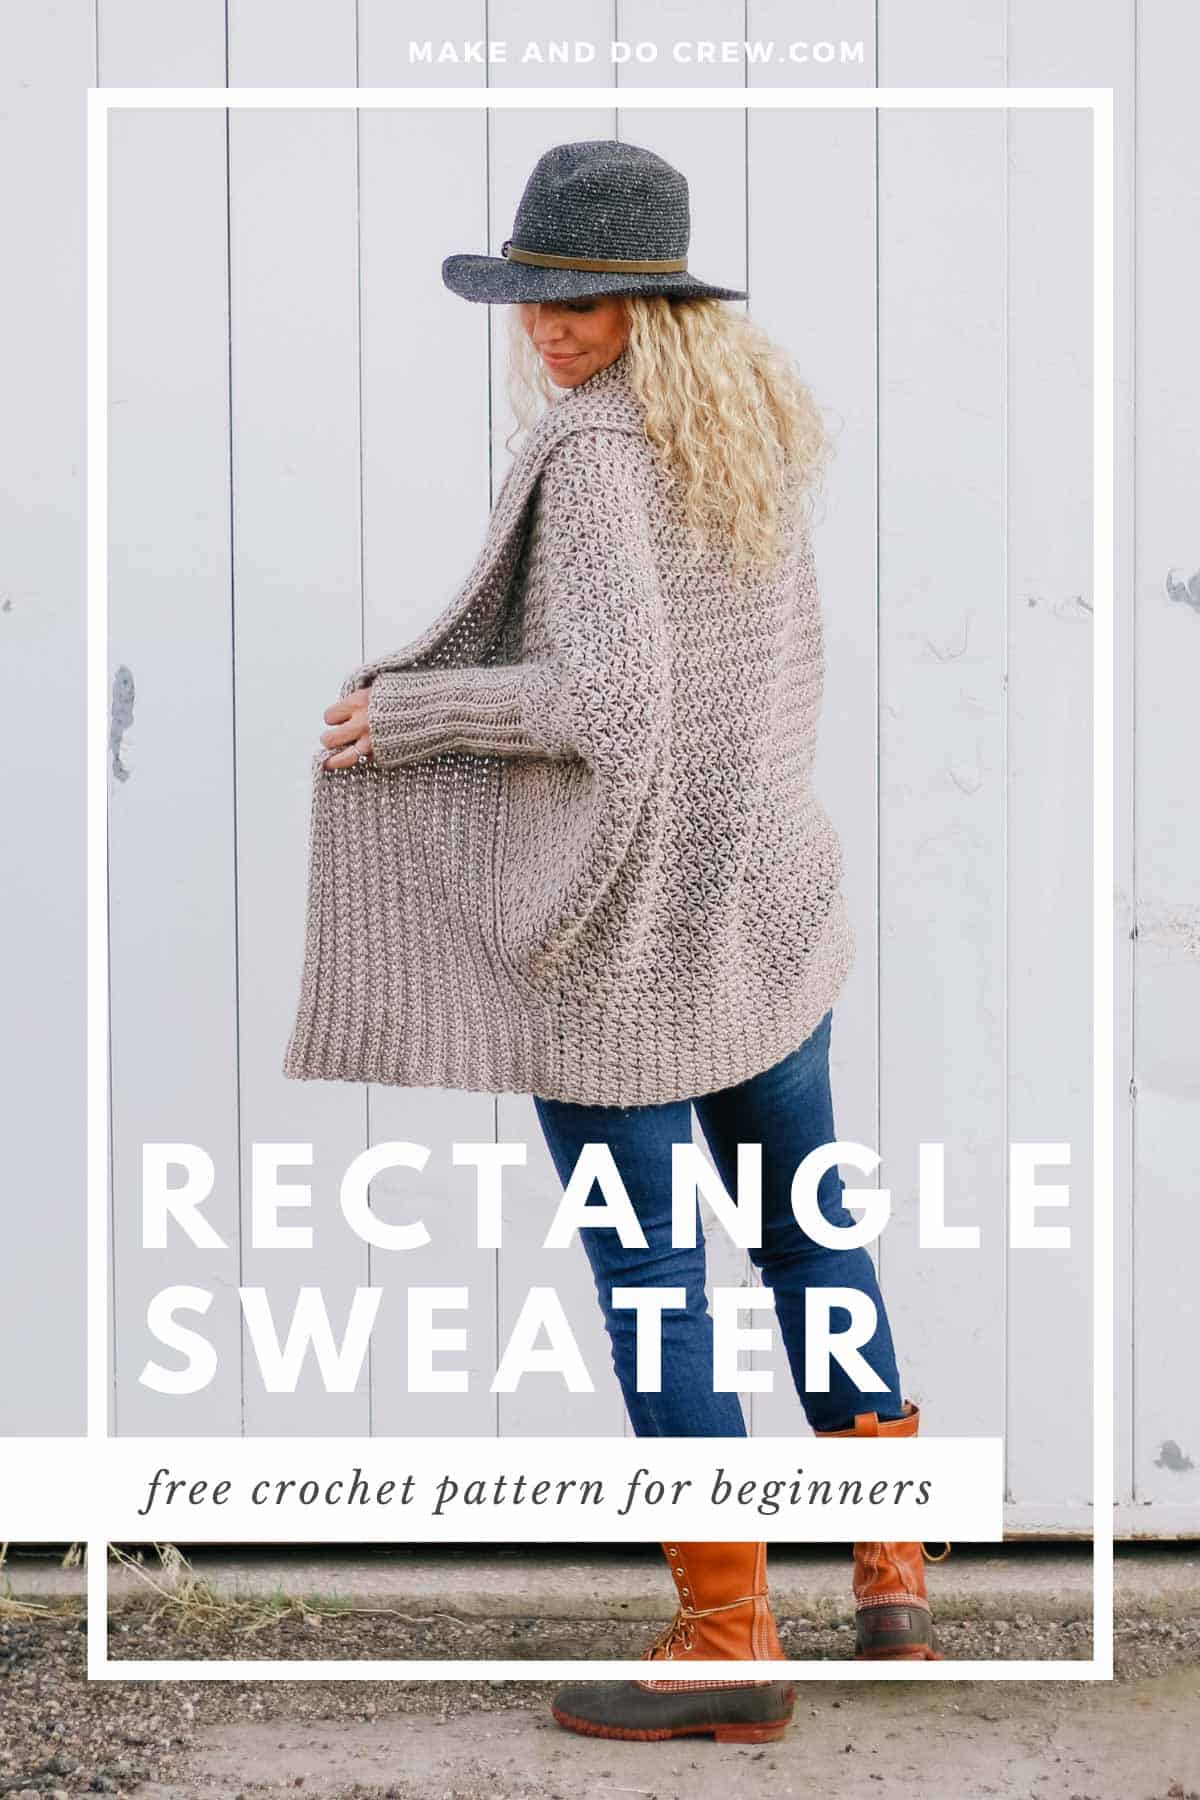
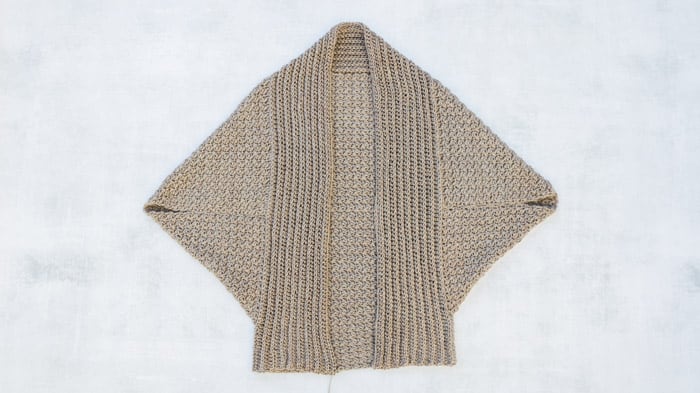
As I mentioned in Part 1 of the Habitat Cardigan free crochet pattern, this simple, drapey, extremely comfy sweater is nothing more than a simple rectangle with a collar and sleeves--and not complicated, tapered, lots-of-counting sleeves. Just like the rest of the sweater, these extra long sleeves are made from simple rectangles. (And if you're into the idea of crocheting cool sweaters from simple shapes, you'll LOVE the free Campfire Cardigan pattern!)
This sweater is perfect for beginners who want to tackle a larger, yet deceptively easy project and feel like a craft rockstar in the process. If, like me, you're looking for ways to dress your mom bod and feel confident doing it, I think you'll love wearing this flattering sweater.

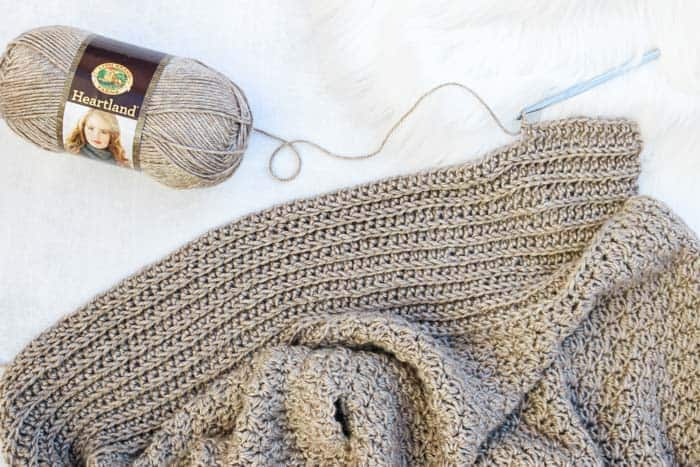
The overall effect of this beginner crochet sweater is very flowy, figure-flattering and super soft, thanks to the Lion Brand Heartland yarn. This is the first time I've used this yarn and I just loved it! (In fact, I've already started another project using it.) Heartland is machine washable and just has a certain floppiness that works beautifully to create the nice soft drape in the Habitat Cardigan.
You can find the complete Habitat Cardigan video tutorial here. And if you haven't yet, you can order your yarn and get started on the main rectangle section of the sweater (included in Part 1 of the pattern).
New to making cardigans? Don't miss How to Crochet a Sweater for our best beginner tips.
Pin it! Click to pin this pattern for later ⇨
More Free Crochet Sweater Patterns
Crochet sweater patterns don't need to be difficult. In fact, most of ours are made with very simple shapes. Dive into the wonderful world of crochet garments with cardigans, pullovers, ponchos, shrugs and more!


See more free crochet sweater patterns →

Don't spend hours for a "meh" result!
Tired of crocheting garments that don't fit? Learn our C.R.A.F.T. Framework to make sweaters that fit and feel amazing!
The Habitat Cardigan - Part 2
Free Crochet Pattern Featuring Lion Brand Yarn
Purchase the ad-free, printable PDF of the complete pattern here on LoveCrafts.com or here on Etsy.
Add this pattern to your Ravelry queue here.
Pin it for later here.
Explanation:
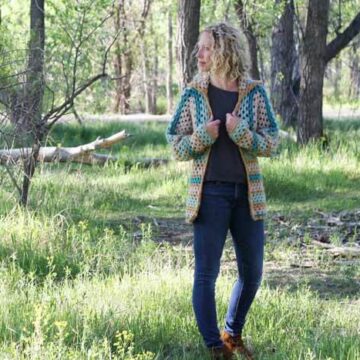
Welcome to the world of beautiful, drapey fabric and tush-covering cardigans—made by YOU! No one will guess that this figure-flattering cardigan was made from a simple rectangle. The basic stitch pattern and very easy construction of this sweater make it perfect for beginners who want to make their first wearable garment. Made with extremely soft yarn for a cozy-but-not-too-bulky look, you’ll find yourself reaching for the Habitat Cardigan over and over again.
Supplies:
• Lion Brand Heartland (Weight: 4/medium - 251 yds, 5 oz)
- Grand Canyon (#136-122) – 6 (6, 7, 7, 8) skeins
• Tapestry needle
• Size K (6.6 mm) crochet hook
• Size J (6.0 mm) crochet hook
• Stitch markers or safety pins
Sizes:
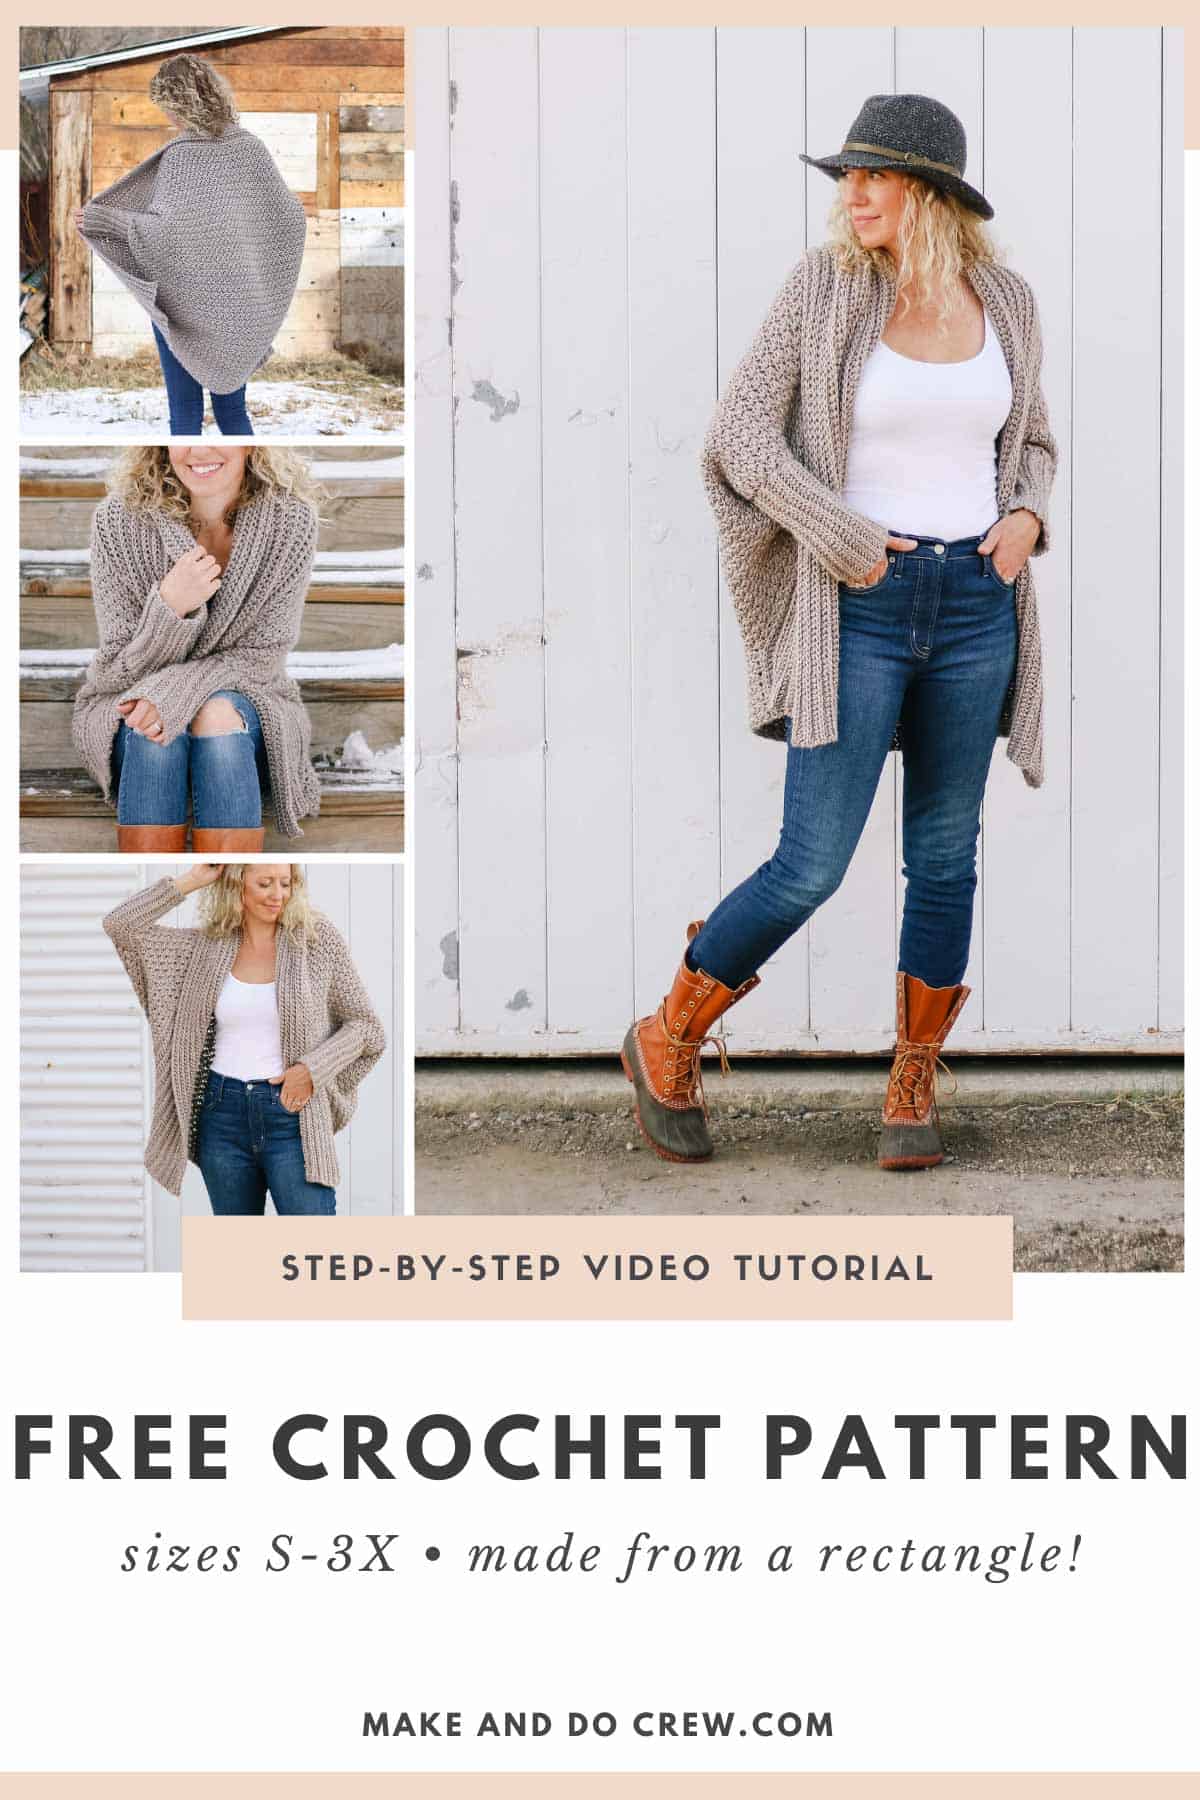
The oversized nature of this sweater will accommodate many body types. The sample pictured is a M/L on a 5’9” model with a 36” bust.
Bust Size*:
S/M: 33-36”
M/L: 36-40.5”
L/XL: 40.5”-44.5”
XL/2XL: 44.5”-48.5”
2XL/3XL: 48.5”-51”
* See additional details in Overall Pattern Notes in Part 1 to determine sizing.
Gauge:
10 sts x 10 rows = 4”
Abbreviations and Glossary (US Terms):
ch – chain
sc – single crochet
dc – double crochet
tch – turning chain
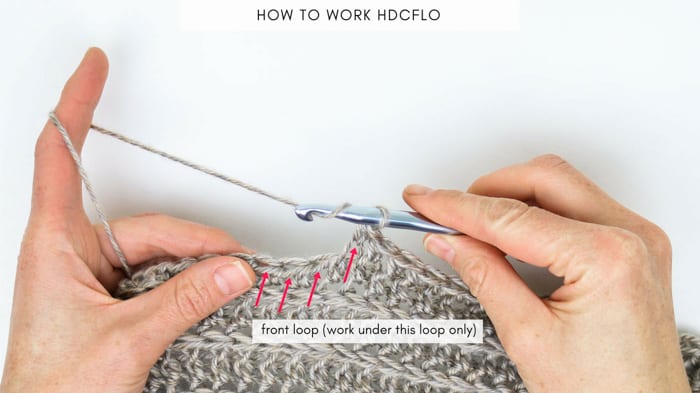
hdcflo - half double crochet through the front loop only (see photo below for explanation)
st – stitch
sp – space
sk - skip
RS – right side
WS – wrong side
rep – repeat
Overall Pattern + Sizing Notes:
• View Part 1 of the Habitat Cardigan free crochet pattern here.
• A complete video tutorial for this pattern is available here.
• Pattern is written in size S/M with M/L, L/XL, XL/2XL and 2XL/3XL following in parenthesis. S/M (M/L, L/XL, XL/2XL, 2XL/3XL)
Adding Ribbed Cocoon Collar
Notes:
• Collar is worked along the edge of the shrug/tush extension back and forth in rows starting at the bottom front corner of the sweater, working around the back of the neck and returning to the bottom front corner on the other side. (See first photo above.)
Wanna save this pattern?
• When working Row 1, be more concerned with evenly spacing the hdc stitches so that the resulting collar looks smooth rather than the total stitch count. (See second photo above.)
• Ch 2 at the beginning of each row does not count as a hdc.
Use larger hook. With RS of fabric facing you, continue using yarn strand from tush extension.
Row 1: Ch 2, work hdc stitches evenly from bottom collar corner to opposite corner. To to this: hdc in each row of the tush extension, then hdc in each st along collar edge and again hdc in each row of the tush extension of the opposite side (be certain to work into final sc of last tush extension row as it can be hard to see); turn.
Row 2: Ch 2, hdcflo in each hdc to end of row; turn. (See photo below.)
Rep Row 2 22 (24, 24, 26, 26) more times to create a total of 12 (13, 13, 14, 14) visible ribbing “bumps” or rows of “V’s” running along collar. Fasten off.

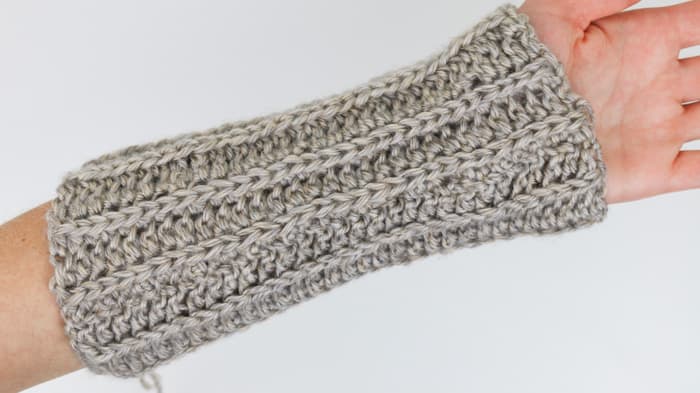
Sleeves
Notes:
• Sleeves are worked flat and then seamed into tubes.
• As in collar, ch 2 at beginning of row does not count as a stitch.
Use smaller hook. Make 2.
Foundation Row: Ch 28 (32, 32, 32, 32).
Row 1: Sk 2 ch, hdc in each ch; turn. 26 (30, 30, 30, 30)
Row 2: Ch 2, hdcflo in each hdc; turn.
Rep Row 2 16 (18, 18, 20, 20) more times to create a total of 9 (10, 10, 11, 11) visible ribbing “bumps” or rows of “V’s” running in sleeve rectangle. Fasten off leaving 24” tail for seaming.
Seaming Sleeves
Lay sleeve rectangle with WS facing you (this will become RS of sleeves when sweater is finished) and the foundation ch oriented to the top of the rectangle. Fold sleeve so foundation ch and final row of sleeve are touching.
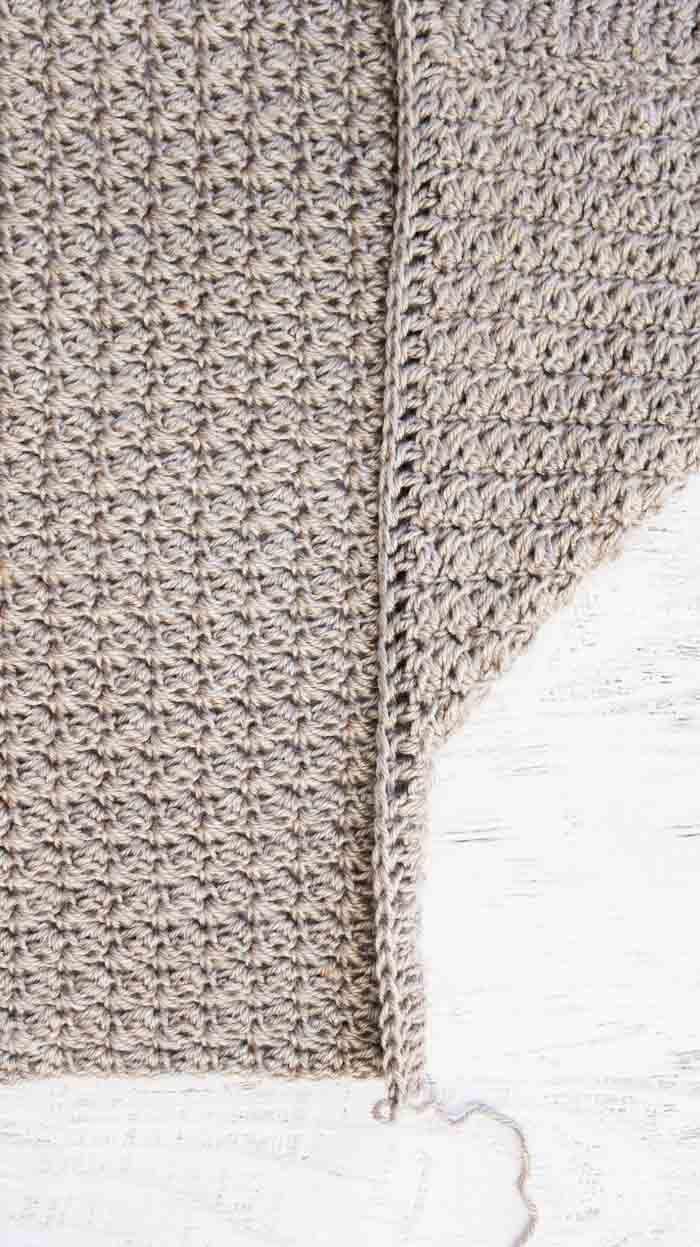
Use single strand tail from fastening off and a tapestry needle. Seam sleeve by sewing through the two vertical posts of each st in Row 1 and the two back loops of each hdc st of the last row. (See photo below.) The purpose of seaming this way is to best hide the seam within the sleeve ribbing. Do not fasten off yarn. Repeat with second sleeve. Do not turn sleeves inside out.
Attaching Sleeves
Turn main sweater inside out. If you’re confused by what is the RS and WS at any point, look at the place where the hdc collar edge meets the sweater. It should look like a smooth transition on the RS of the sweater and a little rougher on the WS.
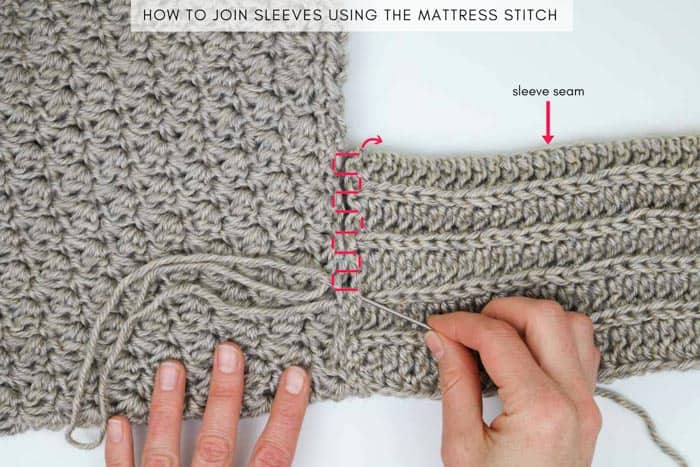
Lay sweater and sleeve as pictured in photo above. Pin with stitch markers if desired. With tail left over from seaming sleeve, use the mattress stitch to join sleeve to sweater. Fasten off. Repeat with second sleeve. Turn sweater right side out.
Pin it! Click to pin this pattern for later ⇨
That was so fun! Now what?
Invitation to our Facebook group
Come discuss crocheting rectangle cardigan patterns and lots of other crochet projects and techniques in our Make & Do Crew Facebook group. Here thousands of helpful crocheters answer each others questions and share their stitches. Come join us here.
Find Your Next Sweater Project
- Lightweight Cardigan - made from hexagons
- Color Block Cardi Pattern - drapey and soft
- Easy Tunisian Crochet Cardigan - clever reversible cardi
- Casual Pullover Sweater - with exposed seams
- Simple Everyday Cardigan - using the easy V-stitch
- Lightweight Jacket Pattern - seamless + beginner-friendly
- V-Neck Sweater -simple, easy striped design
- Crochet Wrap Sweater Pattern - unique take on a raglan
More Free Patterns + Tutorials
Can't get enough free crochet patterns!? Me either. You'll definitely want to breeze through these collections to find your next project.
- 55+ Free Crochet Sweater and Cardigan Patterns - our most popular garments
- 40+ Free Crochet Blanket Patterns - baby blankets, throws + c2c graphgans
- 36+ Granny Square Patterns + tips for the perfect square
- 30+ Crochet Animal Patterns - adorable amigurumi stuffed animals
- Crochet Gift Ideas - easy patterns to make for others
- Fast Crochet Projects - start to finish in less than a day
Learn a New Skill
And when you're ready to master a new skill, check out our detailed guides that include everything you need to know to level up your crochet game.
- How to Corner to Corner (C2C) Crochet for Beginners - with video tutorials to get you started
- How to Crochet a Beginner Hat - make an entire beanie in 1.5 hours!
- How to Crochet Amigurumi for Beginners - the ultimate guide to making your own toys and plushies
- How to Tunisian Crochet - learn with this video and a standard hook
More Free Crochet Sweater Patterns
Now that you're a crochet sweater-making machine, you might enjoy these other simple free crochet sweater patterns from Make & Do Crew:
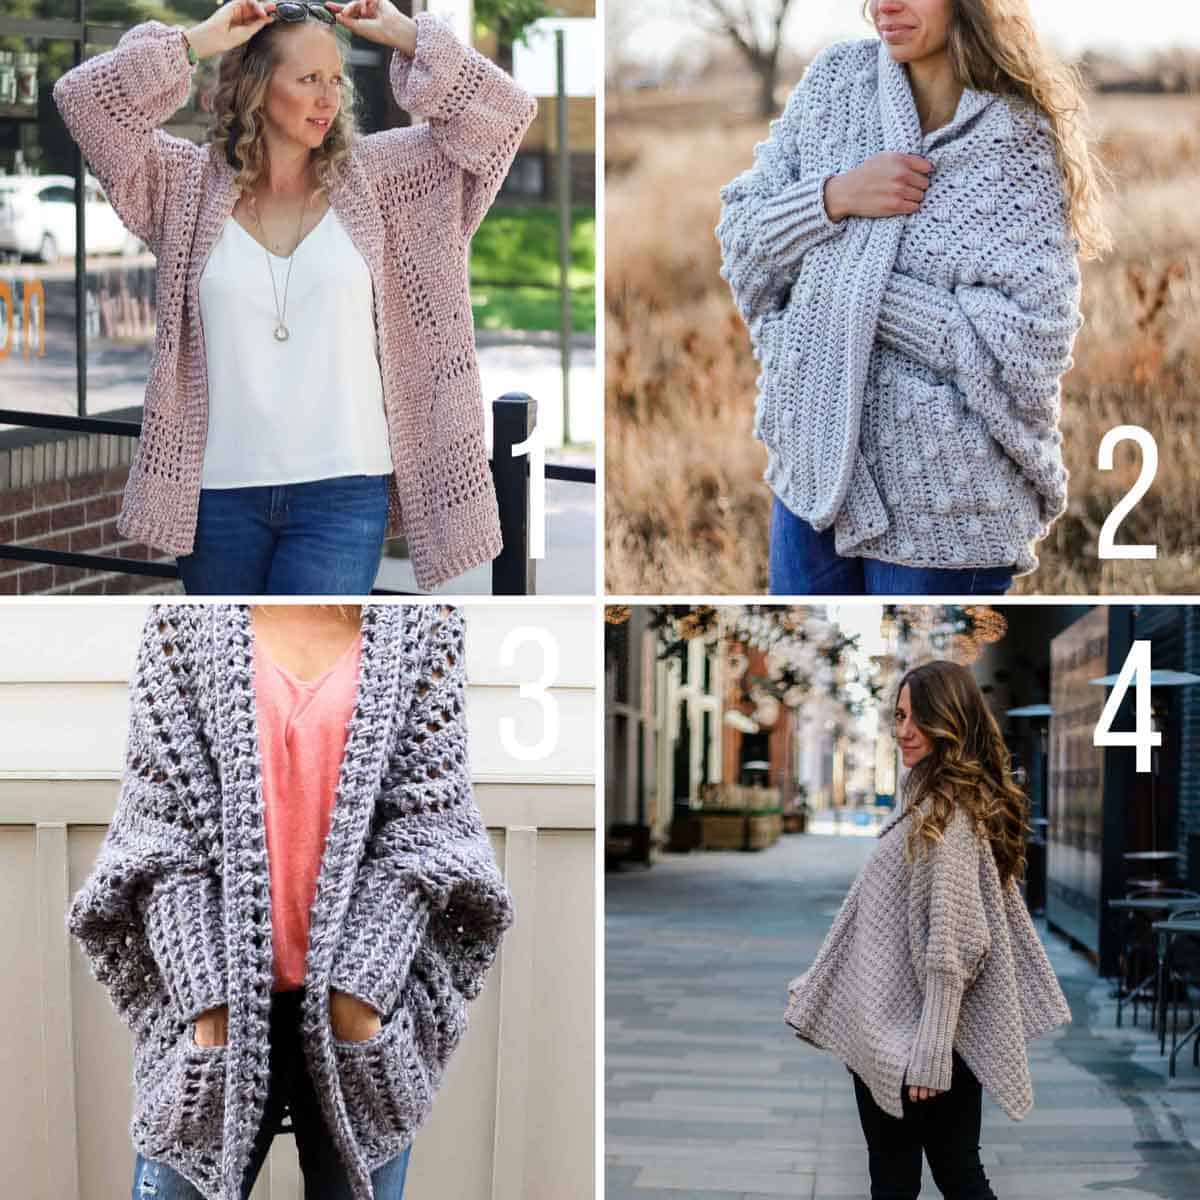
1. Brunch Cardigan - This incredibly comfortable crochet cardigan sweater is simpler than it looks. Made from two basic hexagons, you’ll love watching your new favorite cardigan take shape!
2. Haven Bobble Cardigan - With a super easy construction based on a rectangle, this free crochet sweater pattern is playful, fast and perfect for beginner to advanced crocheters.
3. Dwell Sweater - Creatively constructed from a simple rectangle, this flattering chunky crochet sweater comes together easily with zero shaping, increasing or decreasing.
4. Alpine Poncho - This stylish crochet poncho with sleeves is very easy because it’s made from five simple rectangles.


Janie Felix says
Could you send specs for making pockets on the habitat sweater?
Srinithi says
is 300 grams enough for making this sweater?is aryclic yarn ok ? if say i couls start doing this beautiful sweater
Zia says
Hey, by front loop of hdc you mean the third loop right?
Jess @ Make and Do Crew says
I mean the loop that's closest to your body when you're crocheting. Does that make sense? 🙂