Learn how to make the back piece of this modern, lightweight cardigan in Part 1 of the Alchemy Cardigan Crochet Along. Part 1 of the free pattern and video tutorial are below, or you can purchase the ad-free, easily printable PDF with stitch chart and schematic here.
The Alchemy Cardigan pattern is part of a collaboration with my friends at LoveCrochet.com. This post contains affiliate links.
Welcome to the first week of the Alchemy Cardigan Crochet Along! I'm so excited to finally share the first section of the pattern with you and teach you exactly how to crochet it in this week's step-by-step video tutorial.
If you're new to this pattern and looking for some specific tutorials, here's where to find them:
Week 1: Kickoff, explanation of project, pattern and video tutorial for cardigan back is released. (You're here now. Scroll down for video and pattern.)
Week 2: Pattern and video tutorial for cardigan fronts is released. (Find Part 2 here.)
Week 3: Pattern and video tutorial for sleeves is released. (Find Part 3 here.)
Week 4: The grand finale! Pattern and video tutorial for seaming it all together and adding pockets and ribbing is released. (Find Part 4 here.)
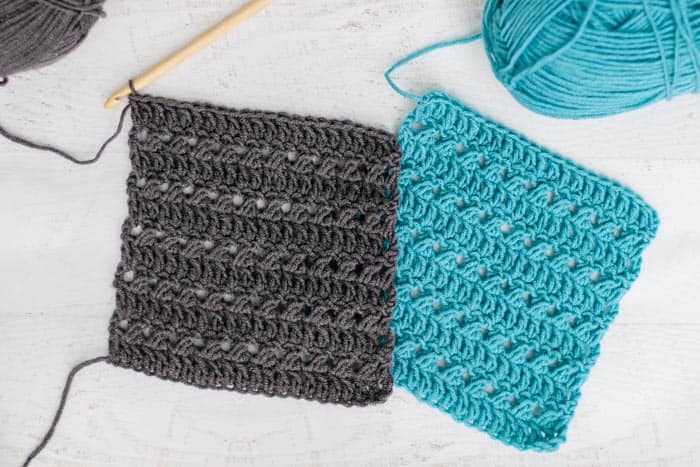
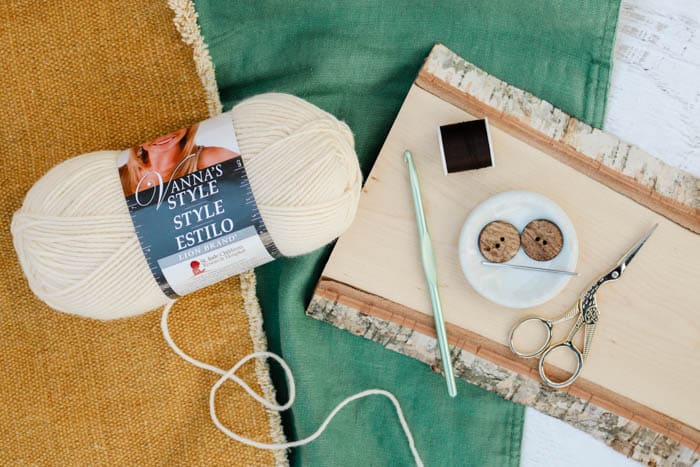
• YARN: The recommended yarn for the pattern is Lion Brand Vanna's Style. It's a category 3/DK weight yarn and you can grab it in a few beautiful colors at a great price here from LoveCrochet.com. (Teal and charcoal are pictured below.)
• PATTERN: If you're a couch crocheter or a visual learner, I highly recommend investing in the PDF version of the pattern. The PDF contains two clear crochet diagrams and a schematic with more detailed sweater measurements, plus a few additional charts that are super helpful to less experienced pattern readers. You can grab your printable PDF here on LoveCrafts or here on Etsy.
• SHARE: When you're ready to show off your progress, please share your pics on Instagram with #AlchemyCAL so we're sure to see your stitches. We'd also love for you to hop into the Love Crochet CAL Facebook group and join in on the crochet along festivities. If you have questions about the pattern, this is a great place to get support too.
• WHAT'S NEXT: Next week, we'll learn how to crochet the front two pieces of the Alchemy Cardigan. If you have a busy week or fall behind, don't worry--the pattern and tutorials will still be available after the crochet along concludes. Let this be a fun journey of crochet sweater making and skill building!
This Critical Step Will Make or Break Your Sweater
How many of you regularly check your gauge or tension when you start a pattern? Yeah, I never did either! Until I invested dozens of hours in to a few knit projects that ended up way too big/small/wide/tall and then I wised up to the importance of gauge. Especially when making something that you want to be a particular size, like a garment, taking the 15-20 minutes to check your gauge is critical.
If you're a newly reformed gauge-checker, I share instructions on how to check your gauge a few minutes into the video tutorial below. Pop over to the Love Crochet CAL group on Facebook to ask any gauge questions as they come up.
Okay, let's do this thang! The video tutorial is directly below and Part 1 of the free pattern is right below the video player. If you prefer a printed pattern, grab the pattern PDF with stitch chart and schematic here.
Get your supplies, purchase the pattern PDF and read more about the crochet along here on LoveCrochet.com.
More Free Crochet Sweater Patterns
Crochet sweater patterns don't need to be difficult. In fact, most of ours are made with very simple shapes. Dive into the wonderful world of crochet garments with cardigans, pullovers, ponchos, shrugs and more!


See more free crochet sweater patterns →
The Alchemy Cardigan Crochet Along
Free Pattern - Part 1
Purchase the ad-free, printable PDF with schematic and stitch chart here on LoveCrafts.com or here on Etsy.
Pin it for later here.
You can find the other pattern stages here: Part 2, Part 3, Part 4
Explanation:
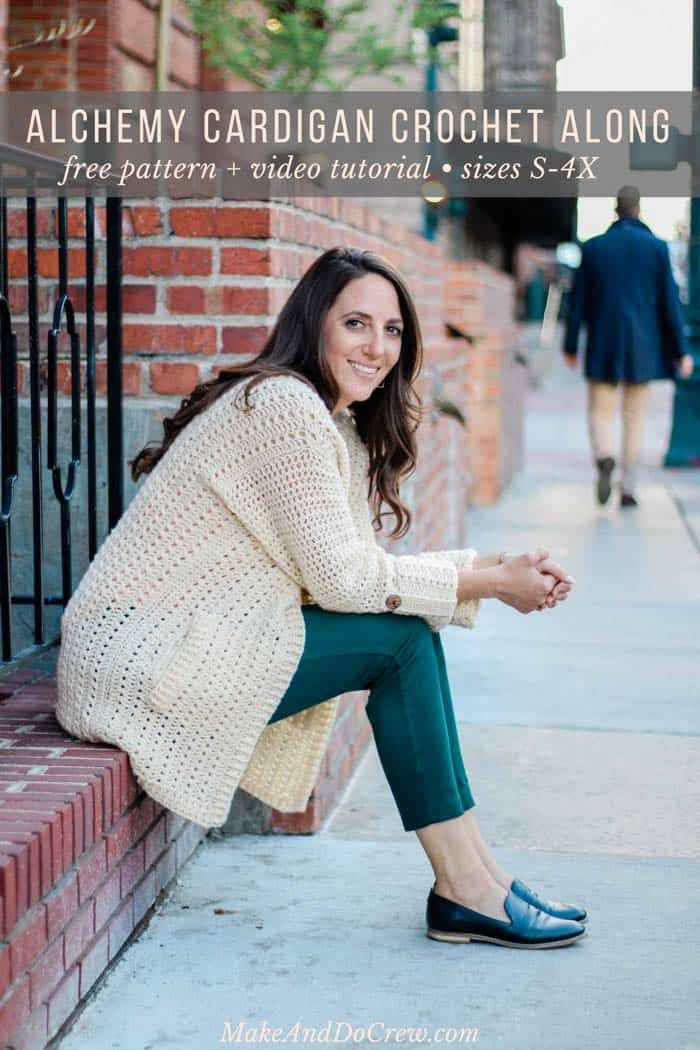
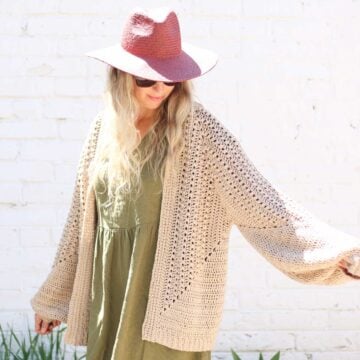
Whether you’re new to garment crocheting or an old pro, the Alchemy Cardigan will transform what you think is possible with a hook, some yarn and your own two hands. This lightweight sweater is perfect to toss on for some summer stargazing or layer with a long-sleeve shirt in the colder months.
Worked sideways to create flattering vertical rows, the entire sweater is made with different applications of a simple double crochet stitch (U.K: treble crochet). A few modern details, like cuffed sleeves and wooden buttons, ensure this cardigan will be a wardrobe staple for years to come. Released in four separate manageable stages, in this crochet along, you’ll learn some new intermediate-level techniques and then have a chance to master them with plenty of step-by-step practice.
Supplies:
• Lion Brand Vanna’s Style (Weight: 3/light - 254 yds, 3.5 oz)
- Ecru (#867-098) – 6 (7, 8, 8, 9, 10, 11) skeins [(approx. 570 (640, 710, 790, 900, 975, 1060) g)]
• Tapestry needle
• Size I (5.5 mm) crochet hook
• Stitch markers or safety pins
• (2) ¾” or 1” buttons
• Sewing needle and thread to match buttons
Sizes:
S, M, L, XL, 2X, 3X, 4X
Fits Bust:
S: 32-34”
M: 36-38”
L: 40-42”
XL: 44-46”
2X: 48-50”
3X: 52-54”
4X: 56-58"
See schematic in the printable, ad-free PDF for additional measurements.
Gauge:
Main Pattern:
14 sts = 4”
7.5 rows = 4”
Please check your gauge and adjust your hook size accordingly! This is critical to making a sweater that meets the sizing listed in the pattern. See first few minutes of video tutorial for explanation of how to do this.
Abbreviations and Glossary (US Terms):
bpdc - back post double crochet
ch – chain
dc – double crochet
dc2tog – double crochet two together
fpdc - front post double crochet
PM – place marker
rep – repeat
RS – right side
sc - single crochet
sp – space
sl st – slip stitch
st(s) – stitch(es)
tch – turning chain
WS – wrong side
Overall Pattern Notes:
• Ch 3 at beginning of a row always counts as a dc.
Cardigan Back
Notes:
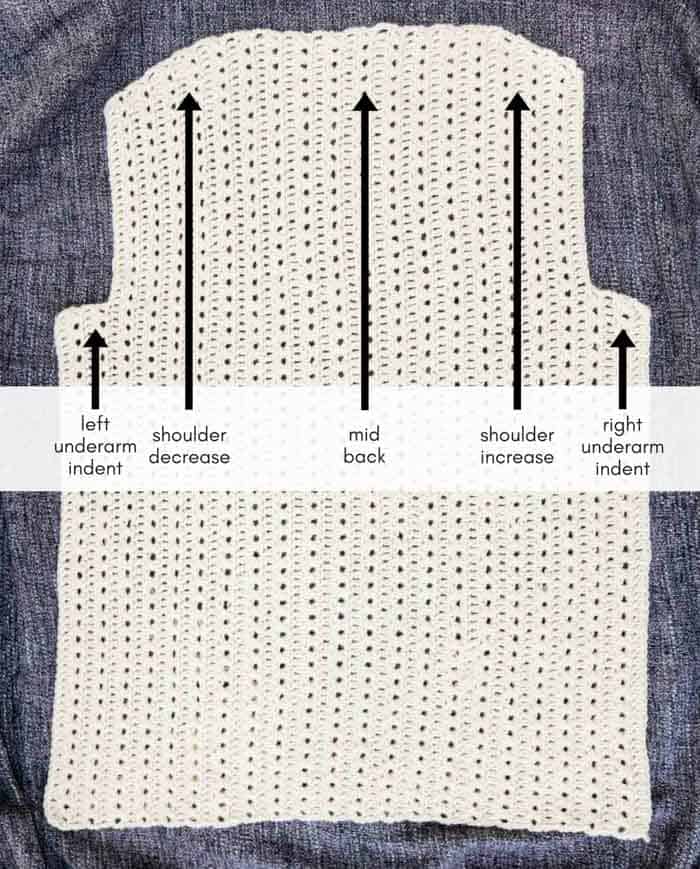
• Sweater back is worked vertically from one underarm side to the other. (See photo above.)
Wanna save this pattern?
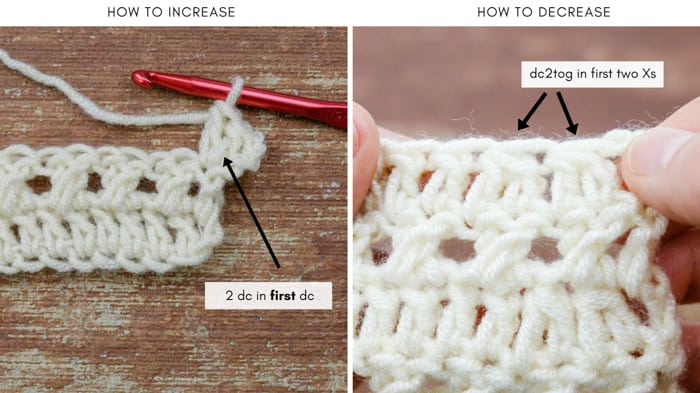
• See photo below for details on how to increase and decrease in the shoulder sections.
Make 1.
First Underarm Indent:
Foundation Row: Ch 66 (68, 68, 70, 70, 72, 72).
Row 1 (RS): Sk 3 ch (counts as 1 dc), dc in each ch to end; turn. (64 (66, 66, 68, 68, 70, 70) dc))
Row 2 (WS): Ch 3, sk first dc, *sk next dc, dc in next dc, working behind last dc made, dc in last skipped dc (X made); rep from * until tch remains; dc in third ch of tch; turn (31 (32, 32, 33, 33, 34, 34) Xs)
Row 3 (RS): Ch 3, sk first dc, dc in each dc to end of row; turn. (64 (66, 66, 68, 68, 70, 70)
✨Unlock this free subscriber-exclusive pattern ✨
Follow these steps to view the full free pattern below
XL:
Row 4: X row
Row 5: dc row
Row 6: X row
Row 7: dc inc row
Row 8: X row
Row 9: dc non inc row
Row 10: X row
Row 11: dc inc row
2X:
Row 4: X row
Row 5: dc inc row
Row 6: X row
Row 7: dc non inc row
Row 8: X row
Row 9: dc inc row
Row 10: X row
Row 11: dc non inc row
Row 12: X row
Row 13: dc inc row
3X:
Row 4: X row
Row 5: dc non inc row
Row 6: X row
Row 7: dc inc row
Row 8: X row
Row 9: dc non inc row
Row 10: X row
Row 11: dc inc row
Row 12: X row
Row 13: dc non inc row
Row 14: X row
Row 15: dc inc row
4X:
Row 4: X row
Row 5: dc inc row
Row 6: X row
Row 7: dc non inc row
Row 8: X row
Row 9: dc inc row
Row 10: X row
Row 11: dc non inc row
Row 12: X row
Row 13: dc inc row
Row 14: X row
Row 15: dc non inc
Row 16: X row
Row 17: dc inc row

Mid Back:
Row 1 (WS): Ch 3, sk first dc, *sk next dc, dc in next dc, working behind last dc made, dc in last skipped dc (X made); rep from * until tch remains; dc in third ch of tch; turn (46 (49, 50, 52, 54, 56, 58) Xs)
Row 2 (RS): Ch 3, sk first dc, dc in each dc and ch to end of row; turn. (94 (100, 102, 106, 110, 114, 118) dc)
Rep Rows 1 and 2 (9 (9, 9, 9, 10, 10, 10)) more times each.
Work one additional rep of Row 1.
Shoulder Decreasing:
Row 1 (RS dec): Ch 3, sk first dc, dc2tog twice over next 4 dc, dc in each dc and ch to end of row; turn. (92 (98, 100, 104, 108, 112, 116) dc)
Row 2 (WS): Ch 3, sk first dc, *sk next dc, dc in next dc, working behind last dc made, dc in last skipped dc (X made); from from * until tch remains; dc in third ch of tch; turn (45 (48, 49, 51, 53, 55, 57) Xs)
Rows 3 (5, 7, 9, 11, 13, 15): Continuing in established pattern, rep a RS dec Row every other RS row, 0 (0, 1, 2, 2, 3, 3) time(s), then rep a RS dec Row every RS row, 1 (2, 1, 0, 1, 0, 1) time(s). At the end of Row 3 (5, 7, 9, 11, 13, 15, 17), there are 90 (94, 96, 100, 102, 106, 108) dc.
Second Underarm Indent:
Counting from bottom edge of sweater, place marker in 64th (66th, 66th, 68th, 68th, 70th, 70th) st.
Row 1 (WS): Ch 3, sk first dc, *sk next dc, dc in next dc, working behind last dc made, dc in last skipped dc (X made); from from * until marked st remains, dc in marked st; turn (31 (32, 32, 33, 33, 34, 34) Xs)
Row 2 (RS): Ch 3, sk first dc, dc in each dc to end of row; turn. (64 (66, 66, 68, 68, 70, 70) dc)
Row 3 (WS): Rep Row 1.
Row 4 (RS): Rep Row 2.
Fasten off, leaving a 24” tail for seaming.
You’re amazing! In Part 2, we’ll make the cardigan fronts using many of these same skills. Find Part 2 here.
That was so fun! Now what?
Invitation to our Facebook group
Come discuss crocheting alchemy cardigan patterns and lots of other crochet projects and techniques in our Make & Do Crew Facebook group. Here thousands of helpful crocheters answer each others questions and share their stitches. Come join us here.
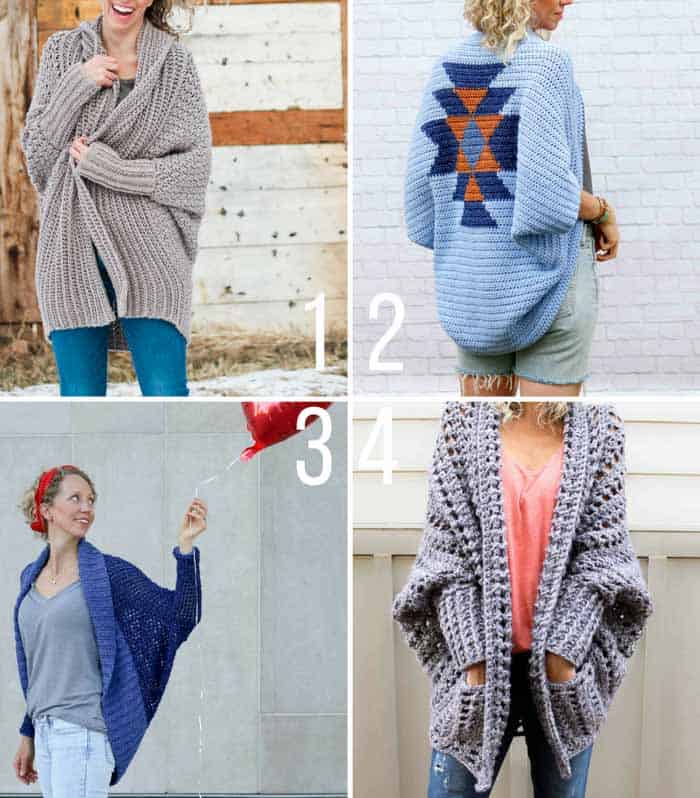
Find Your Next Sweater Project
- Granny Square Cardigan - modern take on a classic motif
- Seamless Crochet Poncho - a great first garment for beginners
- Basic V-Neck Pattern - classic styling
- High Low Jumper Pattern - finish in one weekend
- Rectangle Crochet Poncho - made from two simple pieces
- Oversized Cardi - with fur collar
- Sherpa Fleece Sweater Jacket - extremely cozy cardi
- Raglan Baby Sweater - cute for Christmas
More Free Patterns + Tutorials
Can't get enough free crochet patterns!? Me either. You'll definitely want to breeze through these collections to find your next project.
- 55+ Free Crochet Sweater and Cardigan Patterns - our most popular garments
- 40+ Free Crochet Blanket Patterns - baby blankets, throws + c2c graphgans
- 36+ Granny Square Patterns + tips for the perfect square
- 30+ Crochet Animal Patterns - adorable amigurumi stuffed animals
- Crochet Gift Ideas - easy patterns to make for others
- Fast Crochet Projects - start to finish in less than a day
Learn a New Skill
And when you're ready to master a new skill, check out our detailed guides that include everything you need to know to level up your crochet game.
- How to Corner to Corner (C2C) Crochet for Beginners - with video tutorials to get you started
- How to Crochet a Beginner Hat - make an entire beanie in 1.5 hours!
- How to Crochet Amigurumi for Beginners - the ultimate guide to making your own toys and plushies
- How to Tunisian Crochet - learn with this video and a standard hook
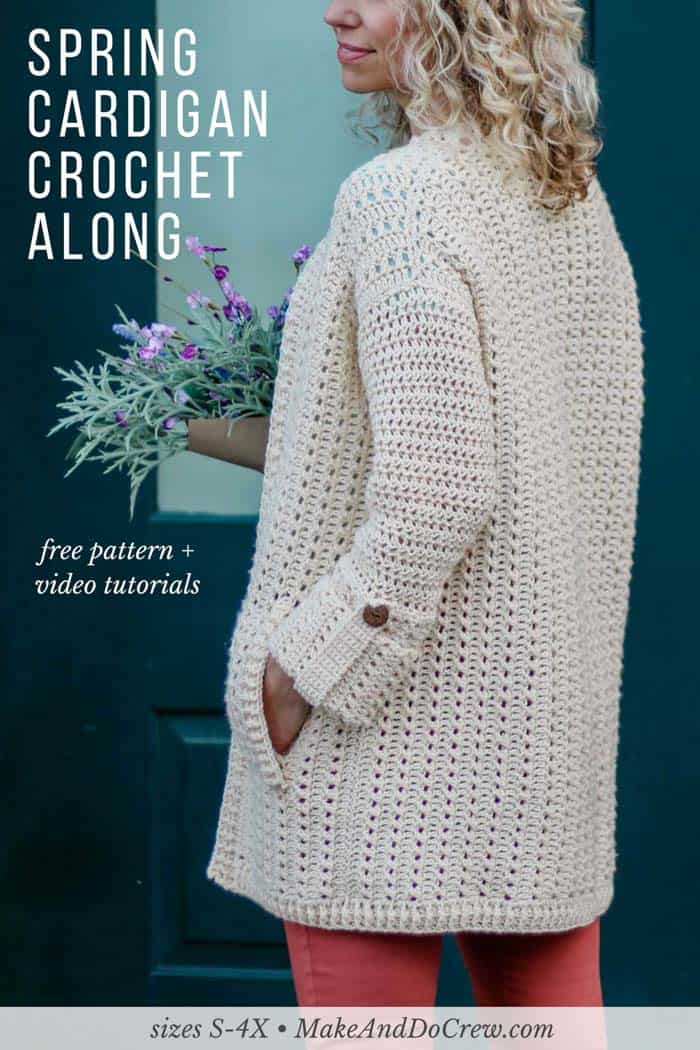
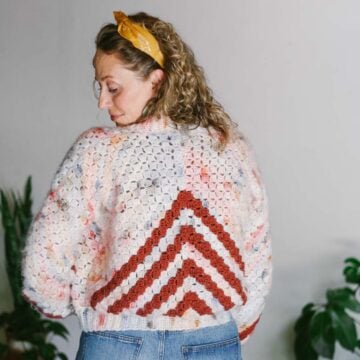
While you're finishing Part 2 of the Alchemy Cardigan pattern, fill up your Pinterest boards with these free crochet sweater patterns! (You can always find all my free sweater patterns here.)
1. The Habitat Cardigan - free crochet pattern and video tutorial
2. The Navajo Blanket Shrug - free crochet pattern and video tutorial
3. The Stonewash Shrug - free crochet pattern and photo tutorial
4. The Dwell Sweater - free crochet pattern and video tutorial


Darlene Krauskopf says
Yes l have enjoyed seeing your precious patterns.Each one is a gem to make except. I have been looking for a poncho with long sleeve ,hoodie with much room. Warmth is most important along with the idea to wash by hand or delicate washing cycle.. It looks like a poncho except with sleeve s inside, with pockets.I know you precious women knit also.l am not intelligent enough to create my own style. I hope you ladies would have some sort of design not too much cable. Hope you are able to help me. Thank you God bless you all
Stephanie Obrien says
Hi, I’m struggling with the pattern slightly, on row 4 it says to add 30 after the cross stitches, so then row 1 of shoulder increase I dc along and should have 94 but I only have 91, have I missed stitches or was I to add a chain three aswell as the 30 ch.
I’ve counted and before the chain 30 I have 64 stitches (or 32 crosses) so it would account for the 30 but the first chain removed the first 3
Thanks in advanced.
Jess @ Make and Do Crew says
Hey Kenja,
The first part of the free pattern is directly above this comment area under the pink header.
Marcia says
hi,
i purchased the pattern about 30 minutes ago, It is not showing up. so that I may download it. please advise.
thanks
Mary says
Row 3 says 2dc in first dc...is that including turning chain? So technically three? If not I keep coming up with only 103 dc (size 2x)
Jess @ Make and Do Crew says
Hey Mary,
Yes, it's two additional dc after the tch. So typically you'd skip the first dc, but to increase you're working 2 dc in that st.
Does that make sense?
Jess
Christen says
Hey Jess, I'm sorry if I am being ignorant but I was wondering why the right side of the back is two rows of decreasing shorter than the left side increase? Thanks for the help.
Jess @ Make and Do Crew says
Hey Christen,
I completely understand why you ask. It's confusing a bit because of just when the official decrease section begins and ends. (The total rows are the same, they're just included in the previous and next sections because of how the striping of the dc rows and Xs work out.) Does that make sense?
Jess
Ralph Terry says
Short answer: The last increase is part of the "MID BACK" and not the shoulder.
My wife had the same concern. When looking at the pattern, we noticed the last increase is equal to the "MID BACK" number. When decreasing, you don't count the "MID BACK" row, just the ones smaller. If you look at the rows increasing that are less than the "MID BACK" number, you'll see they are equal to the decreasing rows. e.g.: for large size the increase is 1=96, 3=98, 5=100, 7=100, 9=102. "MID BACK"1-21 =102. Decreasing 1=100, 3=100, 5=98, 7=96. Comparing increasing rows to decreasing rows, we see that 1=7, 3=5, 5=3, 7=1. Row 9 of the increase = the "MID BACK" count. So, consider the last RS row of the shoulder increasing to be part of the "MID BACK" and not part of the shoulder. I've seen comments about adding extra rows to the decreasing shoulder to make it even but you can see how that would make it lopsided. Hope I've helped because I'm not the crocheter in the family but I enjoy getting involved with my wife's projects when I can. (I am usually limited to being the untangler.)
Anna Smith says
I purchase the pattern for $5 and all I receive was the instructions on what was required to make it. If you could help me I would appreciate it. Thank you. I sent the payment to info@lovecrochet.com on 5-1-18.
Jess @ Make and Do Crew says
Hey Anna,
Thanks for your purchase! The idea with the CAL is that the pattern is updated weekly with the new section of the crochet along. So if you go to your Love Crochet library and download the newest version of the pattern, it'll include part 1. Part 2 will be released Monday, May 14 and you can again find the updated PDF in your library.
Happy crocheting!!
Jess
Dodie says
just saw the video - it was not just above the instructions but almost the last item in the post. phew! thanks!
Dodie says
video please? only photos of back + increase/decrease instructions. thanks for sharing this beautiful jacket. anxious to get started.
Jess @ Make and Do Crew says
Glad you found it, Dodie.
Happy crocheting!
Nancy curyid says
help on the cool blanket you showed with stripes in it and the baby yarn. I'm confused on I can see you have one two three four colors and then white but I don't understand what you're saying when you I understand changing the color be changing to a but when you say repeat Row 3 until it measures I'm confused on that that would only be in my mind making two colors could you please help me
Jess @ Make and Do Crew says
Hey Nancy,
The Mandala (shades of blue/white) yarn used in the blanket is one skein with all those colors included. So you don't actually have to technically "switch colors" in order for the stripes to appear. 🙂 A lot fewer ends to weave in that way too!
If you click the "Mandala" link in the supplies section of the pattern, you can see exactly what this skein of yarn looks like from the side. It's beautiful! The pattern uses two strands of that yarn held together throughout.
Jess