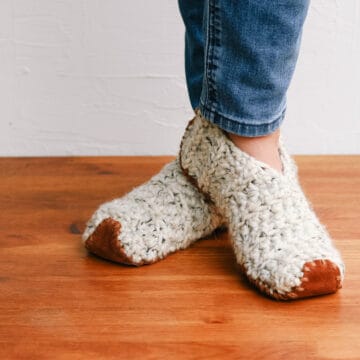
This free crochet slippers pattern will satisfy the modern minimalist in you while also making you feel like a gift giving hero.
This crochet slipper pattern is the perfect gift for teachers, new moms, a friend who is sick and anyone else you want to wrap up in a little bit of love. The free pattern is below or you can purchase the ad-free, printable PDF here.

This crochet slippers pattern is part of an ongoing collaboration with Lion Brand Yarn. This post contains affiliate links.
Tell me if you’ve ever been here. There’s someone you really appreciate–a friend, your kid’s teacher, your grown son who calls you from college every Sunday–and you think:
Gosh, I love to crochet, I wish I could make something for so-and-so that would just show them how much I adore them.
The perfect crochet gift
So you brainstorm. A sweater? Too involved and it may not fit anyhow. An afghan? It might take three years to finish. A cup koozie? Sure, they’re cute, but no one needs another piece of clutter in their kitchen.
And so, in a mess of love and indecision, you don’t make a darn thing.
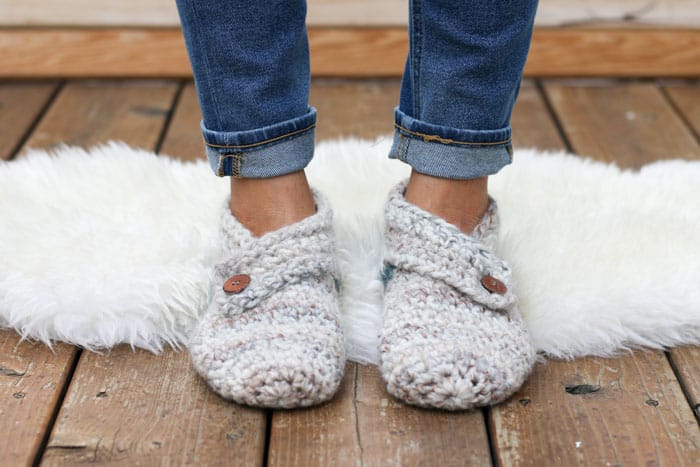
Free crochet slippers pattern for women
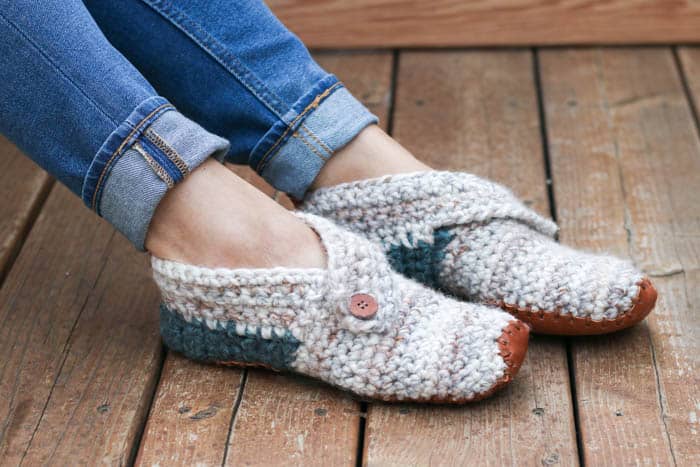
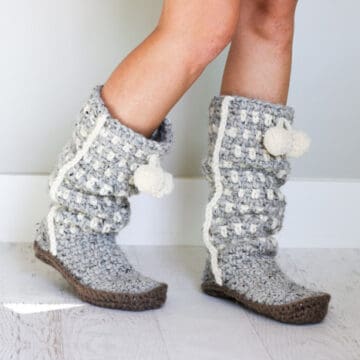
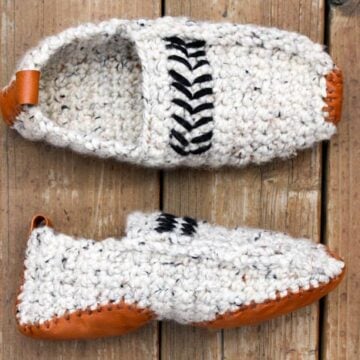
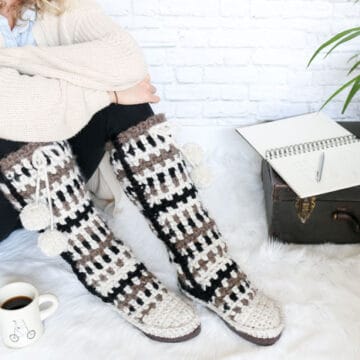
I really hope this project will change that. This free crochet slippers pattern combines just enough cool factor and genuine functionality that you can give a pair to almost anyone and know that your gift will be enjoyed.
The minimalist style can be appreciated by feet young and old and the chunky yarn and leather soles make these house shoes look pretty fancy schmancy.
Yarn
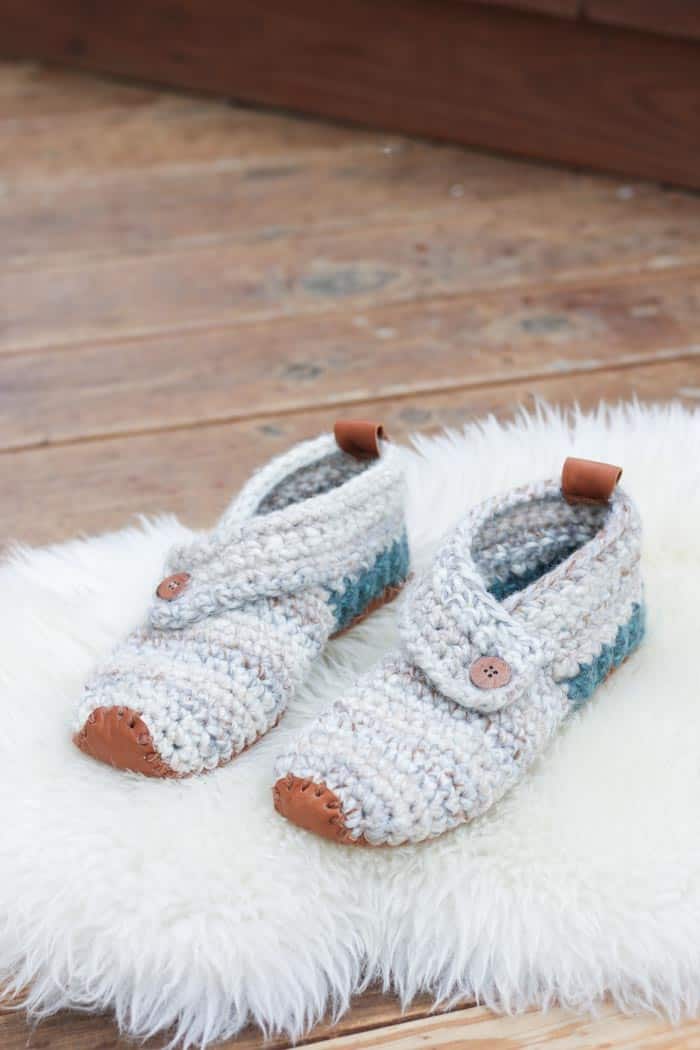
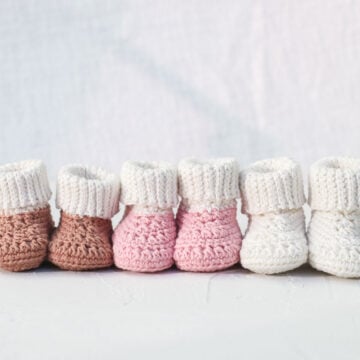
I designed this free crochet slippers pattern with the thought that several pairs of these could be whipped up economically by using a similar color palette.
Each pair uses about one full skein of Lion Brand Wool-Ease Thick & Quick for the main color and about a quarter of a skein in the accent color.
This means that you could pair the accent color with a different main color to create a collection of gifts for all the special ladies in your life. And you’ll be making the most of the yarn you purchase at the same time. Win win!
RELATED: How to Shop Your Stash: The Best Patterns for Using the Yarn You Have
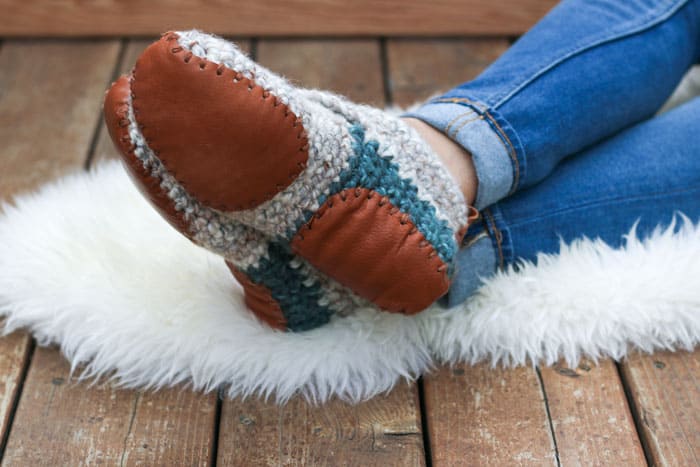
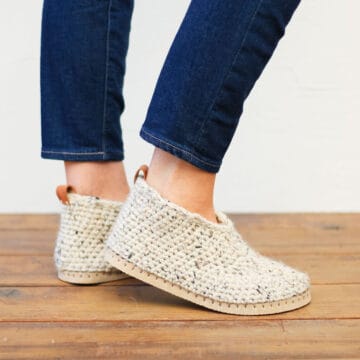
Non-slip leather soles
While the leather soles on these slippers are optional, they really help with the grippy-ness on hardwood floors. Not to mention, I just love the look of leather and yarn together!
For this project, I cut my leather soles from a thrifted leather jacket and I’ve still got plenty of leather left for future projects.
If you decide to use thrifted leather, look for the thickest you can find–a purse or coat could work great.
Crochet slipper sole template
Because I really want you to be able to crank out these slippers as easily as possible, I put together a printable slipper sole template. The template makes it really easy to cut your own leather soles for any size slippers you crochet.
Just enter your email address in the subscription box below and you’ll receive an email with download instructions!
Find Your Next Crochet Slippers Pattern
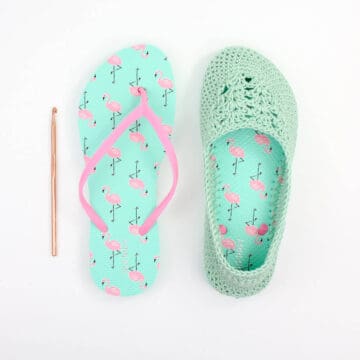
Crochet slipper patterns can be the perfect blend of function, style and speed. Most of these slippers and slipper socks can be crocheted in a weekend or less and rank high in the cozy category. Whether you want to learn how to crochet on flip flop soles or add leather to the bottom of crochet slippers, we’ve got you covered!

See more free crochet slippers & socks patterns →
Pattern inspiration
Thanks to my fellow crochet blogger, Sarah from Repeat Crafter Me, for posting an adorable pair of men’s slipper socks recently that helped show me how a slipper could be constructed in an easy-to-follow way.
Until seeing Sarah’s pattern, I just didn’t know where to start with a chunky slipper pattern, which might seem funny given how many crochet shoes I create. Sarah is a genius at simplifying designs to their most basic elements and I think her skills shine best in her free corner to corner crochet patterns. So charming, aren’t they!?
Related: What’s easier than slippers made from a rectangle?
Sunday Free Crochet Slippers Pattern
Purchase the ad-free, printable PDF here on LoveCrafts or here on Etsy.
Add this pattern to your Ravelry favorites here.
Pin it for later here.
Explanation:
This free crochet slippers pattern will satisfy the modern minimalist in you while also making you feel like a gift giving hero.
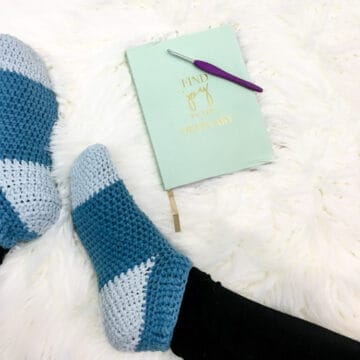
They’re speedy to work up in chunky yarn and require only basic crochet skills including working in the round, single crochet, and slip stitches.
Make a pair for yourself and then outfit the feet of every other cool lady in your life. These are a perfect gift for teachers, new moms, a friend who is sick and anyone else you want to wrap up in a little bit of love.

Supplies + materials
• Lion Brand Wool-Ease Thick & Quick (Weight: 6/super bulky – 106 yds, 6 oz)
– Color A: Fossil 1 (1, 1) skein
– Color B: Blueberry 1 (1, 1) skein (about 25 yards)
• Tapestry needle
• Size K (6.5 mm) crochet hook (please see overall pattern notes)
• Stitch markers or safety pins
• (2) ½” wooden buttons
• Sewing needle and thread to match buttons
• Printed leather sole template from the subscriber Vault (optional)
• Leather for sole—try a thrifted leather jacket or purse! (optional)
• Leather punch or hammer and nail (optional)
• Fishing line to sew leather to slippers (optional)
Sizes:
Women’s shoe sizes ⅚, ⅞, 9/10
This crochet slippers pattern can be easily made to accommodate a bigger shoe size by working additional rows of the heel section.
Gauge:
6 sc = 2”
6.5 sc = 2”
Abbreviations and Glossary
(US Terms)
ch – chain
sc – single crochet
sc2tog – single crochet two together (sc decrease)
sl st – slip stitch
st – stitch
sp – space
RS – right side
WS – wrong side
rep – repeat
Overall Pattern Notes
• Stitches are intended to be worked tightly and you may choose to reduce your hook size to make it easier to crochet the gauge. If in doubt, please make a quick gauge swatch. A pair of size 9/10 slippers use a full skein of Color A.
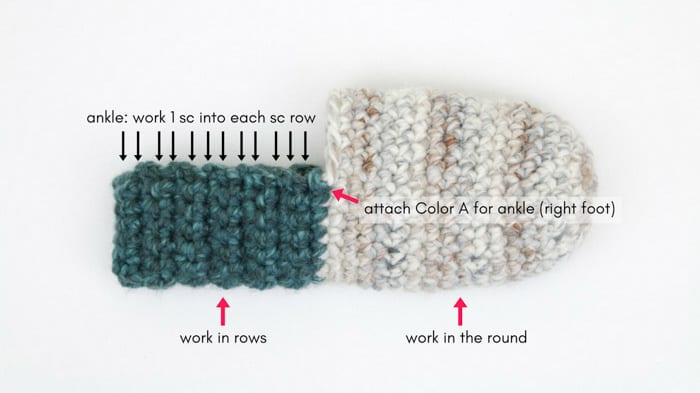
• The toe section is worked first in the round. Next, the heel is worked in rows. The final ankle band with button hole is added last.
• Right and left slippers are worked identically until the ankle section.
• Instructions for size ⅚ are listed, with sizes ⅞ and 9/10 following in parentheses. ⅚ (⅞, 9/10)
Slipper Toe
Notes:
• The toe is worked in the round. Slip stitch to the first stitch of the round to join each round. Do not work into the slip stitch from the previous round when you come back around to it.
Make 2.
Foundation Round: Using Color A, create a magic circle and make 10 sc in the circle. Sl st to first sc of round to join. (10 sc)
Round 1: Ch 1, [1 sc in next sc, 2 sc in next sc] 5 times, sl st to first sc of round to join. (15 sc)
Round 2: Ch 1, [1 sc in each of next 2 sc, 2 sc in next sc] 5 times, sl st to first sc of round to join. (20 sc)
Wanna save this pattern?
Round 3: Ch 1, [1 sc in each of next 4 sc, 2 sc in next sc] 4 times, sl st to first sc of round to join. (24 sc)
Round 4: Ch 1, sc in each sc, sl st to first sc of round to join. (24 sc)
Rep Round 4 10 (11, 11) times.
Fasten off. Cinch magic circle and weave in all ends.
Slipper Heel
Notes:
• This section is worked back and forth in rows between markers. Row 1 is worked into the last round of toe section.
Make 2.
Place stitch markers with 11 stitches between them. Be sure to orient minor sl st “seam” from joining rounds on the toe toward the bottom of slipper so it’s hidden later.
Attach Color B in marked stitch on right-hand side of slipper (assuming toe is oriented away from you). Left-handed crocheters, attach yarn in the marked stitch on left side and reverse mentions of left and right.
Row 1 (RS): Ch 1, sc in marked stitch, sc in each sc between markers, including left marked st; turn. (13)
Be careful not to accidentally work into the sl st from the previous round when working Row 1.
Row 2 (WS): Ch 1, sc in each sc from Row 1; turn. (13)
Rep Row 2 10 (11, 13) times.
Fasten off leaving a 15” tail.
Seaming Heel
Using a tapestry needle and the tail from toe section, seam back of heel using the mattress stitch. Fasten off and weave in any remaining ends.
Ankle Cuff
Notes:
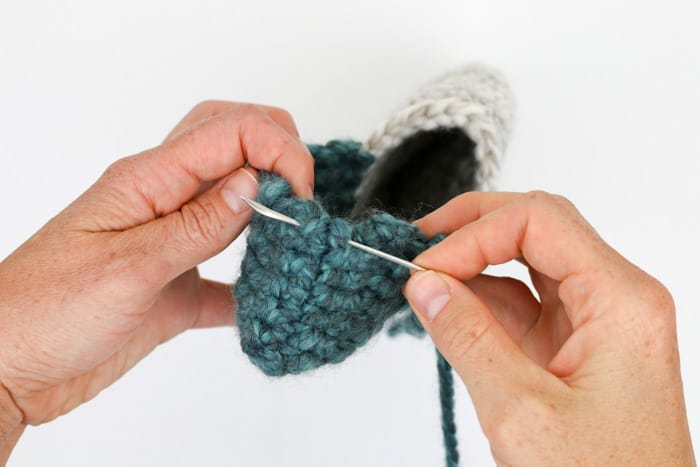
• This section is worked back and forth in rows, with separate instructions for the right and left slipper.
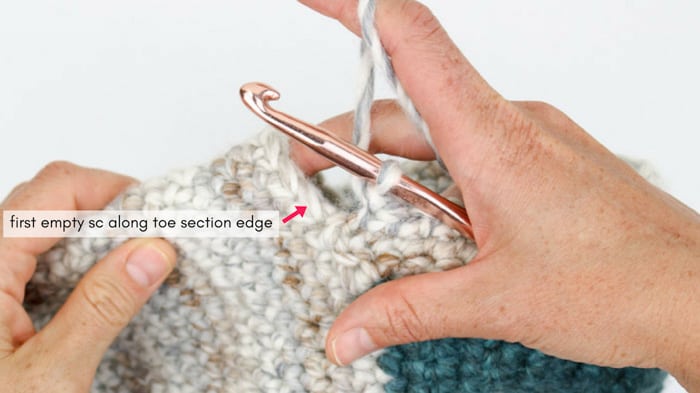
• Row 1 is worked into the heel section at a frequency of one sc stitch placed in each row of sc from working the heel. (See photo at top of pattern.)
• Left-handed crocheters, reverse mentions of left and right.
• See photo below for explanation of “first empty Color A sc stitch along toe edge.”
Right Slipper
Attach Color A on the right side of slipper, in the toe section sc where the toe and heel meet. (See photo at top of pattern.)
Row 1 (RS): Ch 1, sc along heel edge placing 1 sc per row of sc in the heel section; when heel edge ends ch 10 (11, 11); turn.
Row 2 (WS): Ch 1, sk first ch, sc in each ch, sc in each sc around heel to end of row, sl st to first empty Color A sc stitch along toe edge, sl st into next sc along toe section edge; turn.
Row 3 (RS): Ch 1, sk 2 sl sts, sc in each sc; turn.
Row 4 (WS): Ch 1, sc in next sc, ch 1, sk 1 sc, sc in each sc to end of row; sl st to first empty Color A sc stitch along toe edge, sl st into next sc along toe section edge; turn. (Buttonhole created.)
Row 5 (RS): Ch 1, sk 2 sl sts, sc in each st including the ch-1 buttonhole sp; turn.
Row 6 (WS): Ch 1, sc in first sc, sc2tog over next 2-sc, sc in each of next 2-sc, sc2tog over next 2-sc, sc in each sc to end of row, sl st to first empty Color A sc stitch along toe edge.
Fasten off. Weave in ends.


Left Slipper
Attach Color A on the left side of slipper, in the toe section sc where the toe and heel meet. (See photo at top of pattern.)
Row 1 (WS): Ch 1, sc along heel edge placing 1 sc per row of sc in the heel section; when heel edge ends ch 10 (11, 11); turn.
Row 2 (RS): Ch 1, sk first ch, sc in each ch, sc in each sc around heel to end of row, sl st to first empty Color A sc stitch along toe edge, sl st into next sc along toe section edge; turn.
Row 3 (WS): Ch 1, sk 2 sl sts, sc in each sc; turn.
Row 4 (RS): Ch 1, sc in next sc, ch 1, sk 1 sc, sc in each sc to end of row; sl st to first empty Color A sc stitch along toe edge, sl st into next sc along toe section edge; turn. (Buttonhole created.)
Row 5 (WS): Ch 1, sk 2 sl sts, sc in each st including the ch-1 buttonhole sp; turn.
Row 6 (RS): Ch 1, sc in first sc, sc2tog over next 2-sc, sc in each of next 2-sc, sc2tog over next 2-sc, sc in each sc to end of row, sl st to first empty Color A sc stitch along toe edge.
Fasten off. Weave in ends.
Finishing
Attaching Button
With a sewing needle and thread, sew a button to each slipper in the position where the ankle cuff strap meets the toe section.


Adding Leather Soles (optional)
Print the toe and heel pad templates and use them to cut leather pieces for both slippers. (Find leather at craft stores or look for thicker leather jackets and purses at thrift stores.)
Use a leather punch or a nail and hammer to make holes around each leather piece about ⅜” apart. Do not punch holes in the top section of leather than will be at the top of the slipper ankle.
With a tapestry needle and a doubled over piece of yarn that matches your leather, sew soles to slipper bottoms using a whip stitch. I’ve found that even the strongest yarn can wear out pretty quickly when used to secure slipper soles, so you can choose to use a doubled over piece of monofilament (fishing line) instead or in addition.
Put the kettle on, grab a magazine and settle in for a cozy Sunday afternoon at home.
That was so fun! Now what?
Invitation to our Facebook group
Come discuss crocheting slipper patterns and lots of other crochet projects and techniques in our Make & Do Crew Facebook group. Here thousands of helpful crocheters answer each others questions and share their stitches. Come join us here.
More Free Crochet Slippers + Socks Patterns
- 2 Hour Crochet Slippers Pattern – made from rectangles, so easy!
- How to Crochet on Flip Flops Soles – and will they fall apart?
- Unisex Crochet Slippers Pattern – my go-to gift for dads and grandpas
- Crochet Slippers with Leather Soles – modern take on a classic
- Easy Crochet Slipper Socks – a great basic pattern
- Gender Neutral Slipper Socks Pattern – the coziest ever!
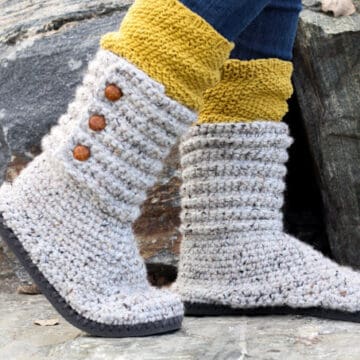
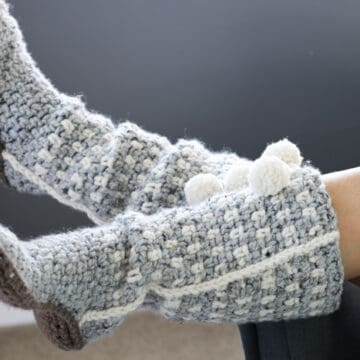
- Tall Crochet Mukluks Slippers Pattern – super comfortable + stylish
If you love making fancy foot flair, you might enjoy these other free crochet patterns from Make & Do Crew:
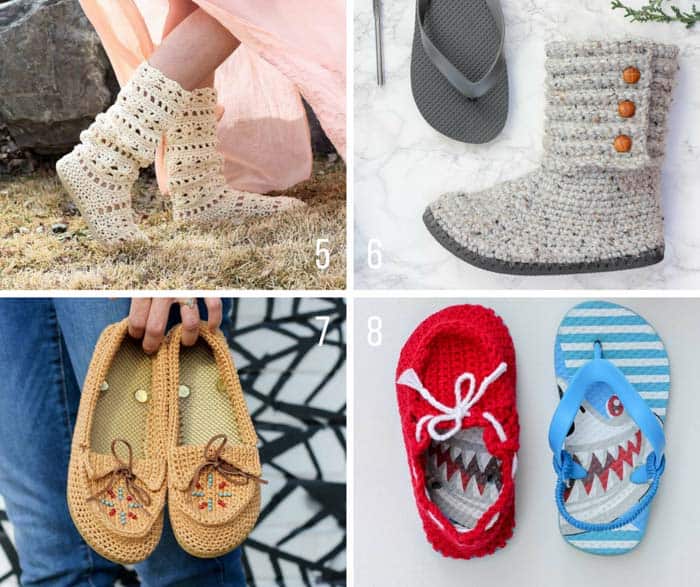
5. Coachella Boots with flip flop soles
6. Cabin Boots with flip flop soles (includes video tutorial!)
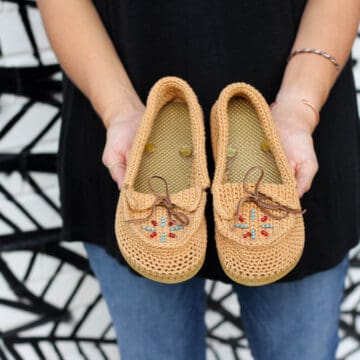
7. Moccasins with flip flop soles (includes video tutorial!)
Lauren Guidotti says
Please please please make a video! I’m so in love with these slippers but as a beginner, really need a video to even make the attempt.
Optimistically hopeful!
Lauren
Jess @ Make and Do Crew says
Thanks for letting me know, Lauren! I’d love for more beginners to be able to try this pattern.
Jess
Courtney says
I am also a beginner. I’m hoping this pattern isn’t too ambitious but I LOVE them so much i have to try. Going to a thrift store soon in search of leather. A video would seal the deal on this project for me. thank you!!
Pamela Hermanson says
Hi Jess, I tried the recommended yarn size 6/bulky, with size N hook. By the time I got to 10 rounds on the toe it looked like they would fit a giant.
Alternate yarn size 5 with a K hook works perfectly.
I guess my question is why the recommended yarn and hook worked up so big?
Thank you. Pamela
Jess @ Make and Do Crew says
Hey Pamela,
I’m glad you found something that worked well for you! You know, the stitches are worked intentionally tight for these slippers to make them warm and cozy, so it’s really just about finding the hook size and tension that allow you to meet the pattern gauge. 🙂
Jess
JoAnn Billitti says
Thanks for a cute slipper pattern! I love it and already made one pair but the hook/gauge seems to be incorrectly stated. I do not crochet loose, but had to use a K hook to make the size 7/8 with the recommended Lion Brand yarn! Even then, they turned out a little large. You might want to double check your recommended hook/gauge.
Jess @ Make and Do Crew says
Hey JoAnn,
Thanks for the feedback. As I mention in the notes section, the stitches are worked intentionally tight to make the slippers extra cosy. The gauge I list in the pattern is what I achieved, but I was making a point of keeping the stitches tight. I’m glad you were able to make it work for yourself with a K. 🙂
Jess
Vanessa says
I too am having the same problem and even with a K hook, I’m still not matching the gauge sample. I had to use a J10 (6.0 mm) hook to get the right gauge! I am not a loose crocheter either. It seems important for this pattern to make a gauge swatch. I am surprised to see the pattern calls for such a large hook (even bigger than what the yarn calls for) and Jess was able to make it so tight! I will report back after I finish to see how the size fits! Beautiful pattern!
Jess @ Make and Do Crew says
Thanks for the feedback, Vanessa. I might adjust the hook size in the pattern. I did crochet deliberately tightly as I explain in the notes, but it’s probably easier to just reduce the hook size. 🙂
Jess
Vanessa says
Well, as much as I really wanted these slippers to work, they were just too large, even with a 6.0 hook?. I got as far as the ankle cuff and kept trying them on, but they were too loose. I ripped them out and may use the yarn for a basket. Maybe a smaller hook would work for a size 7/8, but I’m not sure the super bulky yarn would like a much smaller hook. Yours look so dainty compared to what I ended up with!
Jess @ Make and Do Crew says
Oh boo! I’m sorry to hear that, Vanessa. The stitches def have to be worked tighter than you’d usually do with this type of yarn, but you’re right, that’s what makes them have a nice cozy weave. When I was making mine, I would keep my working yarn pretty tight as it would prevent the loops on my hook from getting too large. Does that make sense?
Cindy says
LOVE these slippers! Going shopping tomorrow AM for the yarn! Perfect Christmas gifts! Would like to see a video too ?
Jess @ Make and Do Crew says
Yay! I love starting new projects!
Happy crocheting, Cindy.
Jess
Divine Debris (Amber) says
These are super duper cute!
Jess @ Make and Do Crew says
Thanks so much, Amber!
Stephanie Lau says
I would LOVE to make a pair of these, Jess! It’s perfect since we have leather left-over from our Star Stitch Purse leather handles too! I love the shape and style of them- your designs are always so modern!
Jess @ Make and Do Crew says
Thanks so much, Stephanie. I’d LOVE to make your Star Stitch Purse. You and Ryan really made some awesome handles for it. They’re just the perfect accent for the beautifully textured stitches!
anna says
Perfect !!!!
Anna
Lori says
A video tutorial for these terrific slippers would be absolutely awesome!!!
Thanks for considering,
Lori
sandra maria faria says
Hi, I’m Sandra.I am brazilian . I really liked the slippers.Very nice.
Jess @ Make and Do Crew says
Hello from Colorado, USA! Thanks so much, Sandra!
Helen says
Love the look of these slippers, but would love to see a video. It would be so helpful!
Jess @ Make and Do Crew says
Hey Helen,
Thanks for letting me know you’d like to see a video!
Jess
Lori Du Verger says
I absolutely love this! Thank you!
Jess @ Make and Do Crew says
I’m so happy to hear that. Thanks, Lori!
Moniq Larue says
I cant crochet but I knit a lot could you make a patern for knitters??? please
Jess @ Make and Do Crew says
Hey Moniq,
Thanks for the idea! I totally understand that. If there’s enough interest, I’ll put together a knit version! 🙂
Jess
Gail says
I would love a knit version for both women and men. Thank you so much
Jess @ Make and Do Crew says
Thanks for the feedback, Gail!
Melissa says
I would also LOVE a knit pattern if the option was still available! I checked the link for the Etsy store & there was none available, though I do understand it’s been a year since that was posted ?♀️